A forum for discussing wooden boats and boat building
You are not logged in.
- Topics: Active | Unanswered
#1251 11 Mar 2024 2:59 am
- Chuck
- Member
- Registered: 24 Nov 2020
- Posts: 141
Re: Waterlust sailing canoe in Norway
Happy Spring, everyone! There have been some good wind days here in Alabama over the last couple of days, but never coupled (yet) with warm and dry weather. Sometime soon there should be a good sailing day!
My next plans for the boat are to do a little sewing on my mainsail to get a better shape (take out the broad seaming on the leech), and build a little plug (for use when sailing) that lies flush with the outside of the hull that I can snap into the Hobie drove clips the closes off the through-hole for the drive. If either (or both) of those things help sharpen up tacking angles, then I will probably back off on my plans to rig a jib.
Guy, I've been thinking about building a hollow mast for awhile -- can you post some pictures? I would really be interested in how you decided to do it! Did you go the birdsmouth method, or some other way??
Offline
#1252 12 Mar 2024 1:33 pm
- MartinC
- Member
- Registered: 3 Apr 2020
- Posts: 353
Re: Waterlust sailing canoe in Norway
Good to hear from you Chuck.
I am sure any shape you can add to the mainsail will help upwind performance enormously, but not sure the blanking off the well will. I had an outboard motor well on my last boat and I did what you are proposing. It stopped water coming into the cockpit when in a seaway which is an advantage but I didn't notice any improvement in upwind performance. Anything you can do to lighten the mast must help with heeling though.
All the best for 2024. Keep us updated on your progress.
Offline
#1253 13 Mar 2024 1:15 pm
- spclark
- Member
- From: "Driftless" Wisconsin USA
- Registered: 19 Mar 2020
- Posts: 478
Re: Waterlust sailing canoe in Norway
Guy, I've been thinking about building a hollow mast for awhile -- can you post some pictures? I would really be interested in how you decided to do it! Did you go the birdsmouth method, or some other way??
I'd like to see pics also Guy, if available. Our Texas partner built his mast 'hollow' out of Douglas Fir I recall. (I've added a couple pics here from those he'd sent me.)
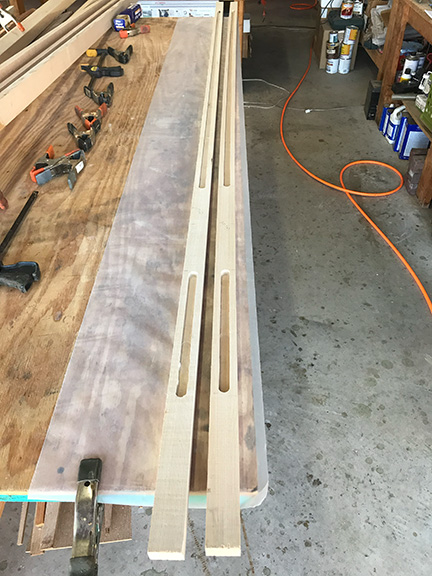
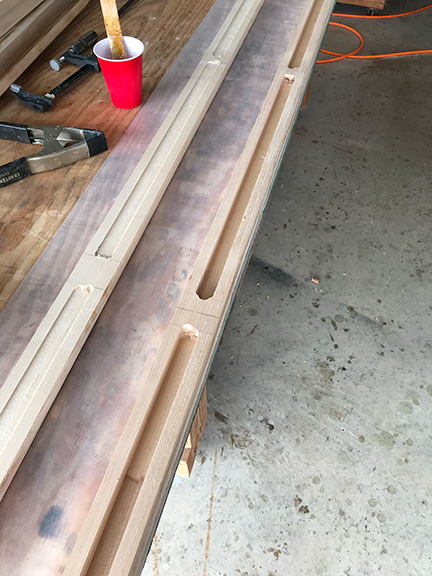
Simply routered out hollows in the planks he then glued together, leaving solid where need be for fasteners eventually. I don't recall asking him what the result weighed, DF being heavier than the Sitka Spruce I used. Forgotten what mine weighs by now but if you wish I'll weigh it when I take my kit down out of winter storage.
Chuck if you're confident in modifying your sail your efforts should be less than what I went through to add weight to your daggerboard as I did. Last year's lack of motivation leaves me still wondering whether the 9 lbs / 4kg hung down beneath my hull will affect healing moment much; physics being in charge, 9# @ -24" ought to be worth maybe ~ 5# half way up my mast? Cutting total weight's a better choice IMHO than adding of course, but we do what we do to 'see what happens' before attempting something else, yes?
(Need to re-up for notice of new posts... I've been missing out on what's been posted again despite the 'Stay subscribed' box being checked off.)
Last edited by spclark (13 Mar 2024 1:23 pm)
Offline
#1254 1 Apr 2024 2:13 pm
- MartinC
- Member
- Registered: 3 Apr 2020
- Posts: 353
Re: Waterlust sailing canoe in Norway
Wheels:- I have been struggling with the challenge of making some wheels which can be fitted and removed when on the water (stored in the front locker) to make launching and recovery easier. I have settled on a design which uses the daggerboard casing to secure the wheels in place. The critical thing was to ensure that the wheels 'floated' just below the water surface at the right inclination. This I did with polystyrene at the top and a small amount of lead at the bottom and the whole assembly is attached to a rope which is dropped down the casing and then fished out with a boathook and attached to the wheels before the wheels are lobbed overboard. Here it is:-
1. Wheels folded to fit in locker.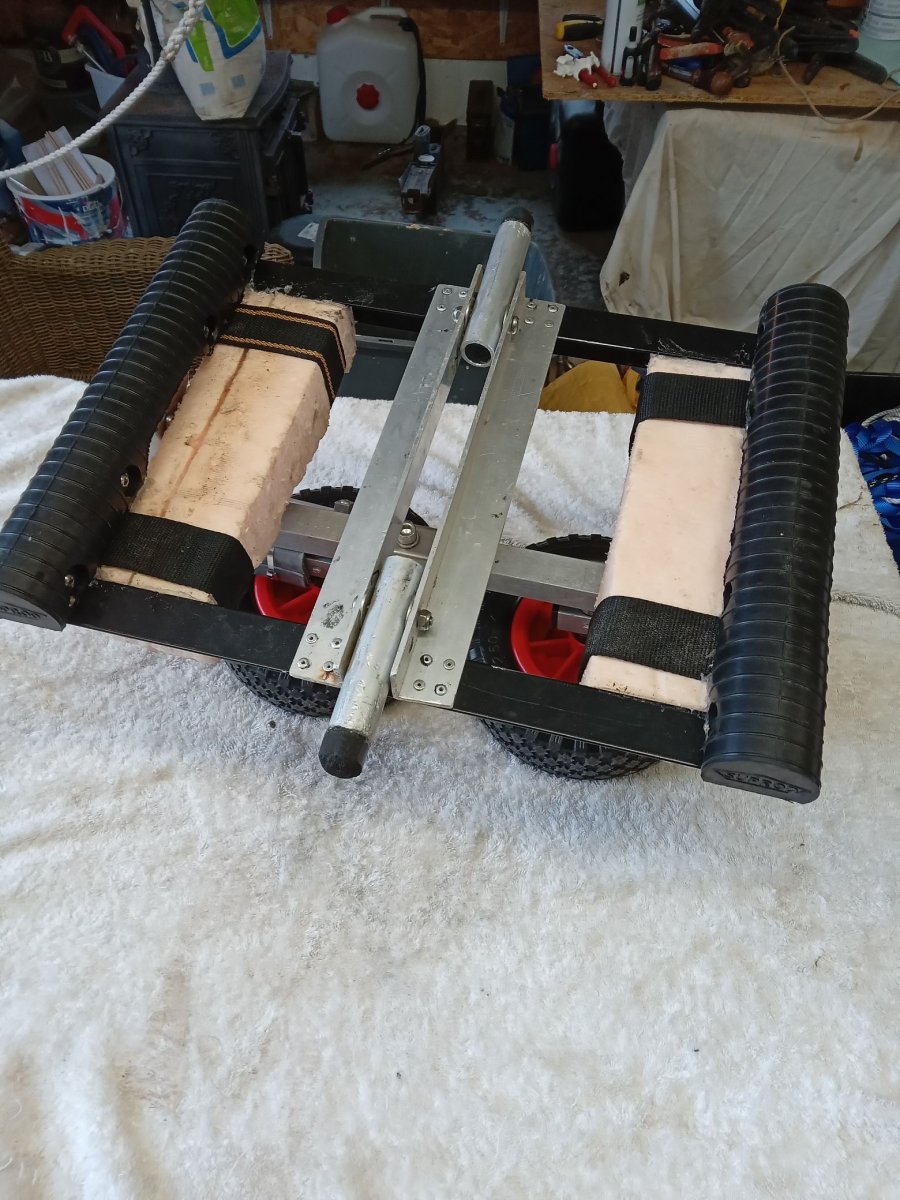
2. Wheels and securring lugs extended.
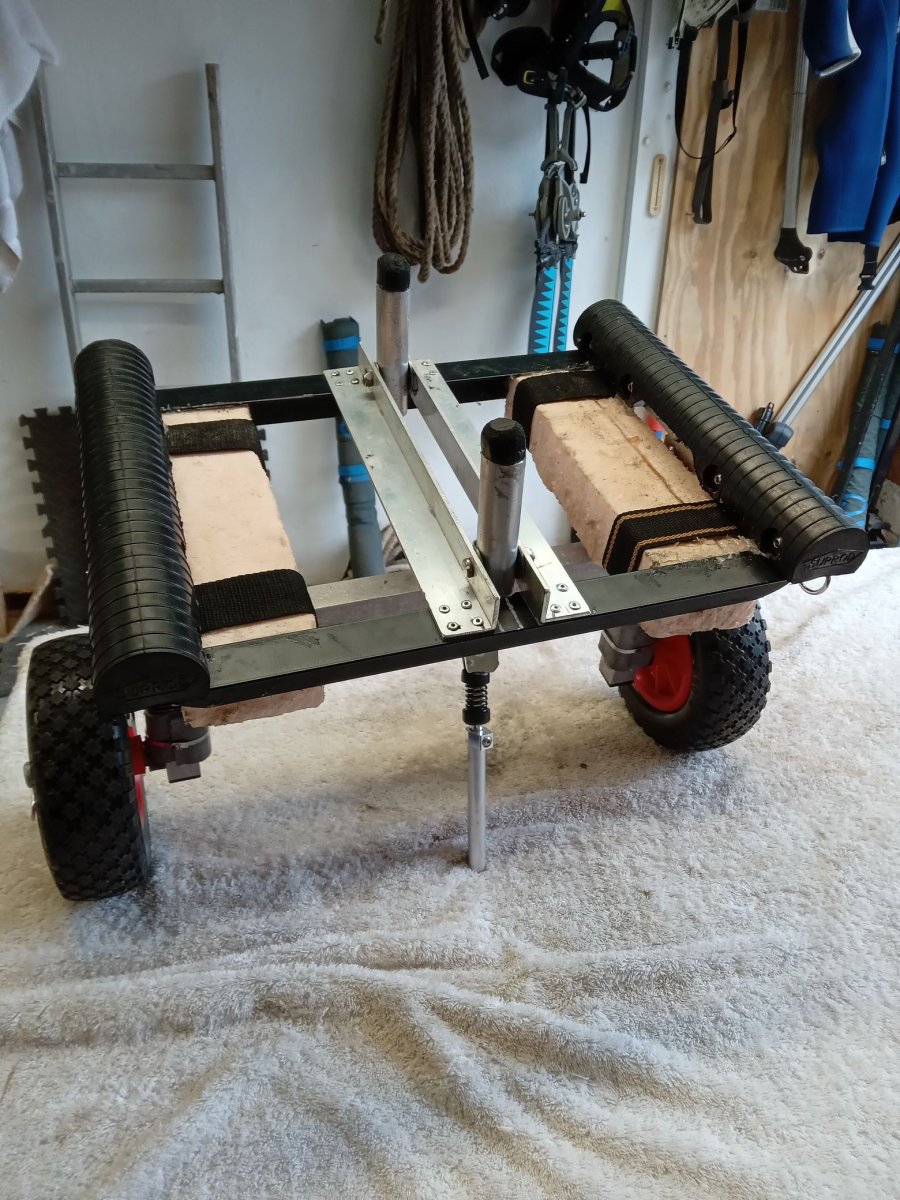
3.Showing rope attachment.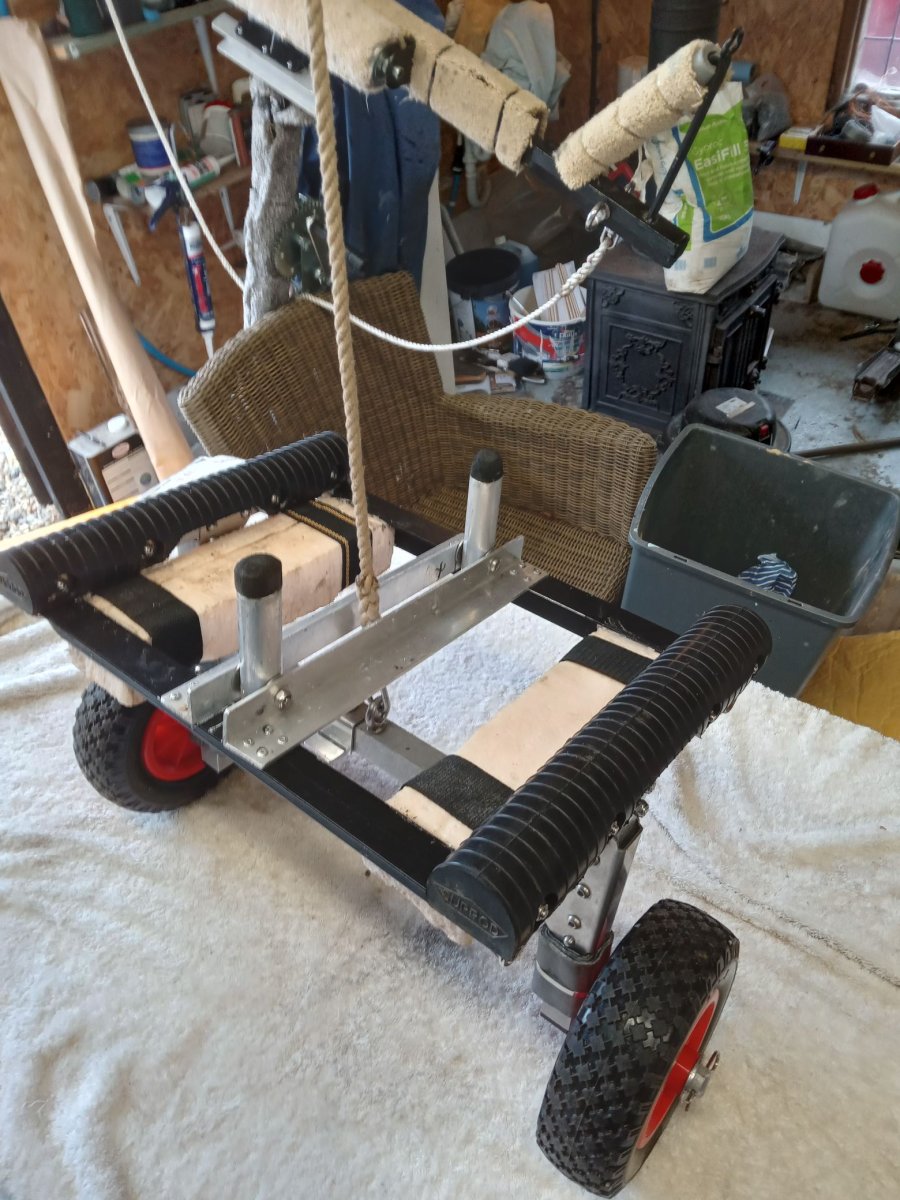
4.Wheels pulled up under boat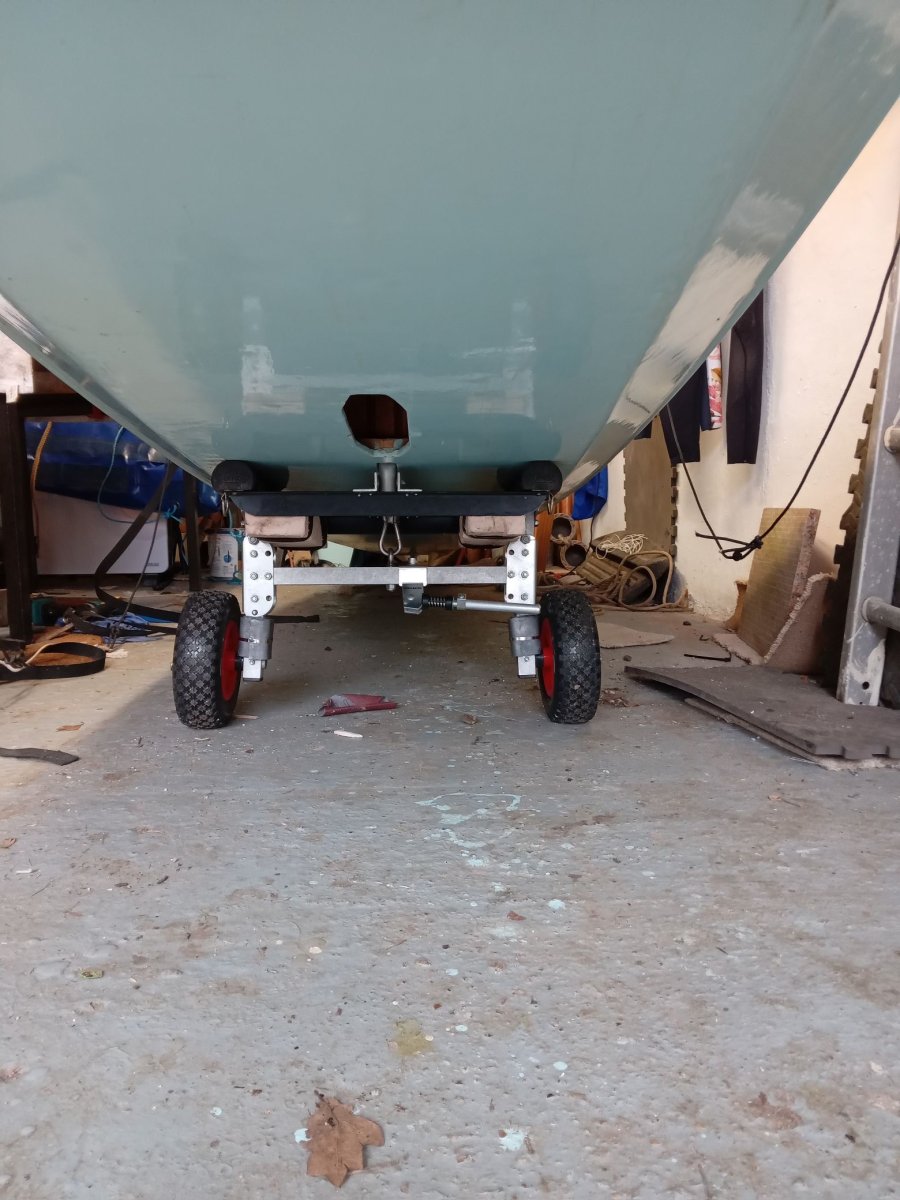
5. Showing inclination of boat when on wheels. A bit stern heavy but with my forward ballast this should be ok.
Not tried it in anger yet, so wish me luck!
Offline
#1255 2 Apr 2024 3:49 pm
- spclark
- Member
- From: "Driftless" Wisconsin USA
- Registered: 19 Mar 2020
- Posts: 478
Re: Waterlust sailing canoe in Norway
Clever!
Contemplating similar need summer before last, I found this device via Google, from NZ:
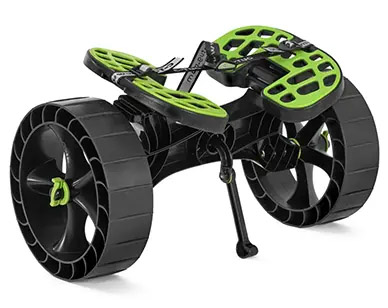
Yet to try it though... still 'NiB' on a shelf in garage, keeping company with Nora Jane under roof.
Unboxed the various parts would fit in forward locker like your fabrication Martin, a necessary capability if one wishes to carry it on-board w/o being hindered by the space it'd take up when assembled.
Website: https://www.railblaza.com/products/c-tu … kz-wheels/
Offline
#1256 3 Apr 2024 7:39 am
- Fyne Boat Kits
- Administrator

- From: Cumbria, UK
- Registered: 22 May 2011
- Posts: 156
- Website
Re: Waterlust sailing canoe in Norway
Also available from Fyne Boat Kits.
Offline
#1257 22 Mar 2025 2:46 pm
- Rhbush
- Member
- From: Florida, U.S.
- Registered: 4 Sep 2024
- Posts: 13
Re: Waterlust sailing canoe in Norway
It looks like most of the activity in this topic is from some time ago. Hoping that a few of the builders are still on here. I am looking for some suggestions for the rudder mounting. I have seen several pictures showing Waterlust builders using a more substantial gudgeon than the one that comes with the kit. I have not been able to locate a source for one that will work. Any help would be greatly appreciated.
Offline
#1258 22 Mar 2025 2:56 pm
- spclark
- Member
- From: "Driftless" Wisconsin USA
- Registered: 19 Mar 2020
- Posts: 478
Re: Waterlust sailing canoe in Norway
I'm still here....
I didn't buy the CLC hardware package so I have no idea what it is you're looking to replace.
I sourced much of my hardware from Duckworks.com, and if you have time to go back into this epic thread there has to be a pic or two of how I worked out how to get everything to play nice together.
It did take some doing, given the pinched insides back at the stern where the fasteners need to be placed. But it works!
How far along are you in your build?
(Earlier this week I finally got up the gumption to list my Waterlust for sale, in the CLC Homebuilt Boat Bazaar.)
Offline
#1259 22 Mar 2025 3:35 pm
- Rhbush
- Member
- From: Florida, U.S.
- Registered: 4 Sep 2024
- Posts: 13
Re: Waterlust sailing canoe in Norway
CLC provides a standard lite duty RaceLite pintle and gudgeon. I will try to attach a picture 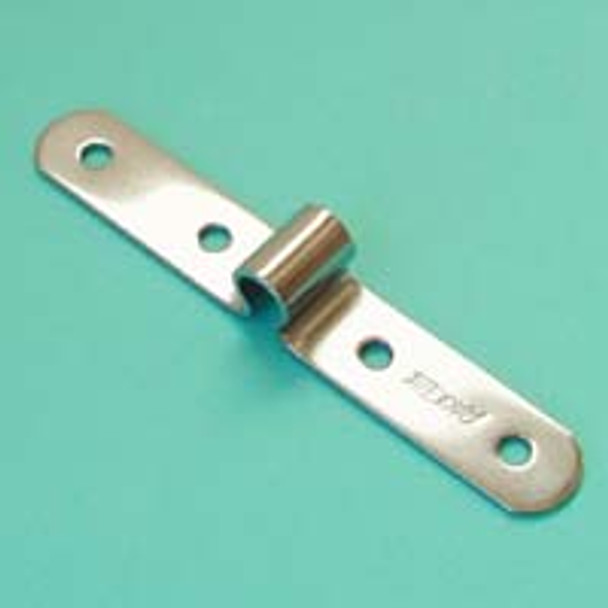
It is really designed to go on a flat transom, but can be "formed" to fit, but it is only about 4" long overall so gives very little length (less than 2") to actually attach to the stern. I did go thru this thread and there is also a picture in the book that I got on Amazon about building the Waterlust. It shows a much longer gudgeon. I just have not been able to find a source for one. Duckworks sells a gudgeon designed for a kayak and it is much longer, however it uses a 1/4" pin but most of the pintles that I have found have a 5/16" pin.
Last edited by Rhbush (22 Mar 2025 3:36 pm)
Offline
#1260 22 Mar 2025 3:43 pm
- spclark
- Member
- From: "Driftless" Wisconsin USA
- Registered: 19 Mar 2020
- Posts: 478
Re: Waterlust sailing canoe in Norway
Yeah, the double-ended canoe design makes for a fussy job of fitting a flat gudgeon. Look back in this thread for posts from MartinC who realized he could add a redesigned skeg that more aptly takes a gudgeon with parallel arms.
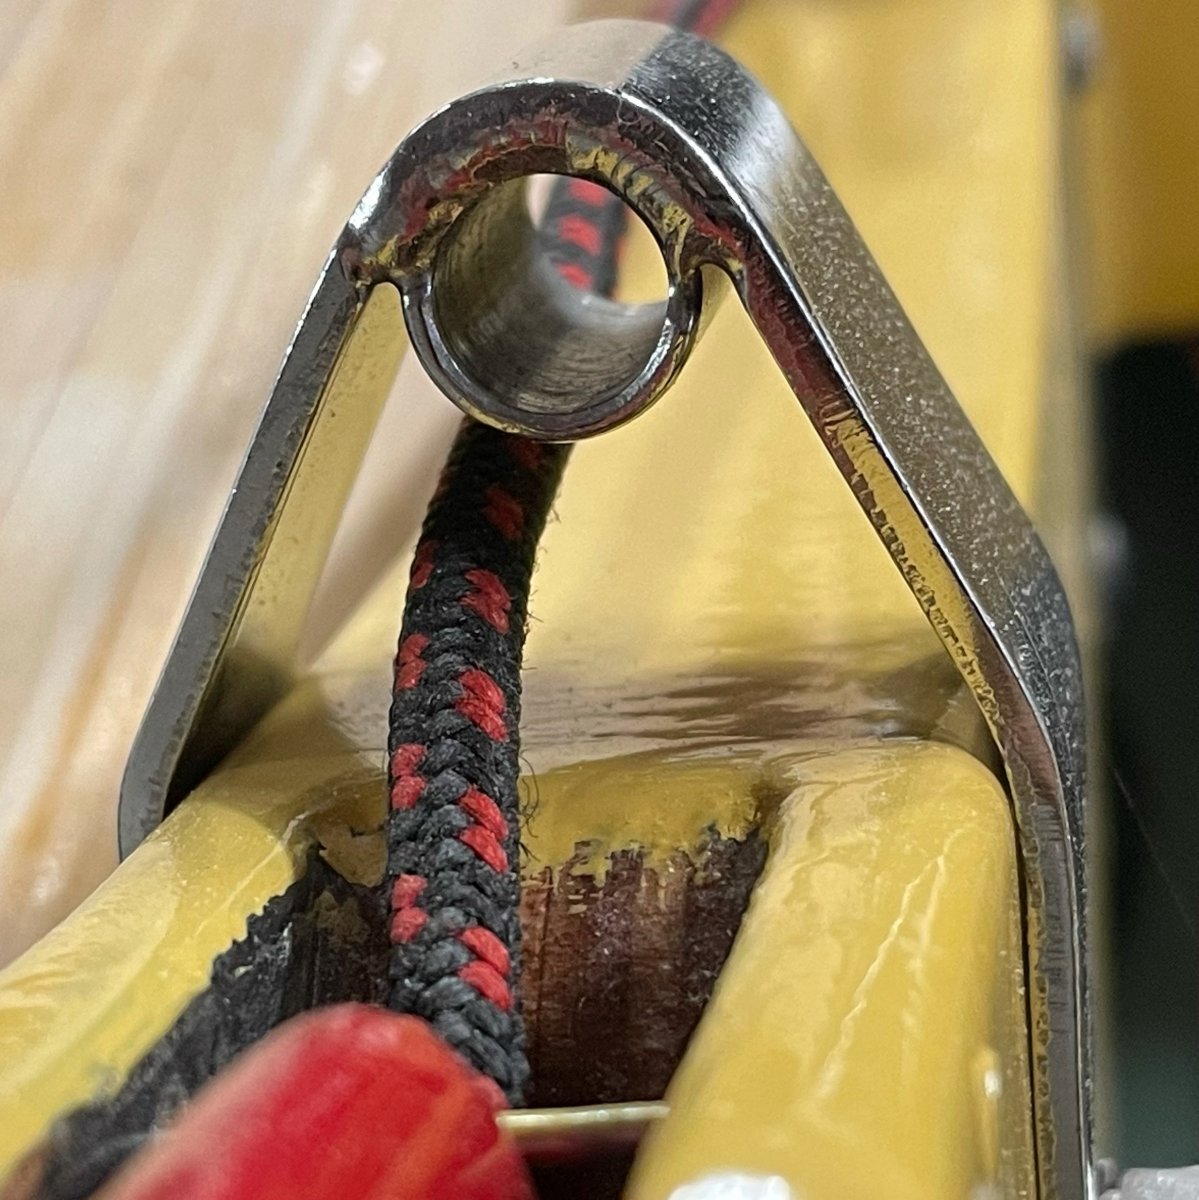
Here are some pics I'd posted that show what I managed:
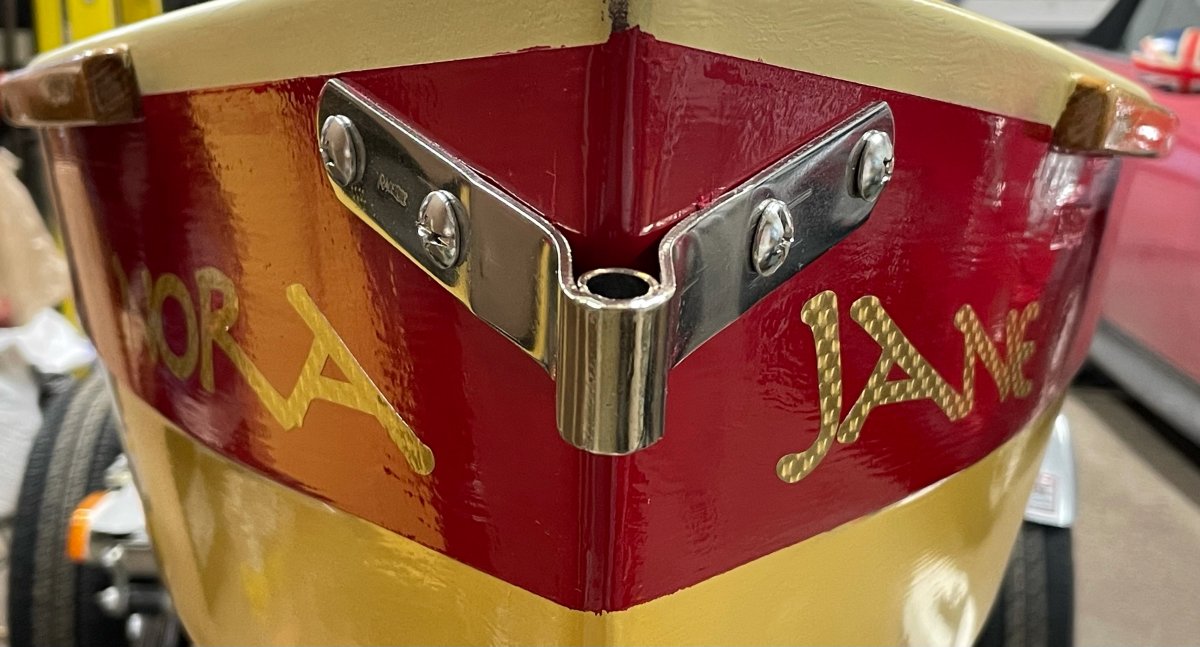
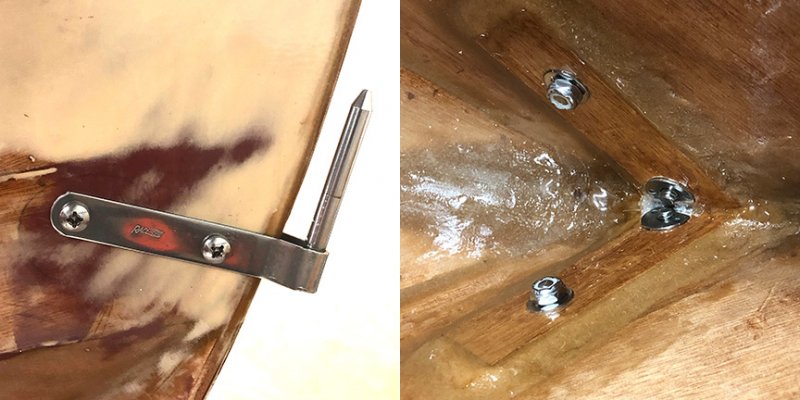

Also here's a drawing Dillon sent on detailing exactly however the Mirage Drive 'shelves' are to be positioned:
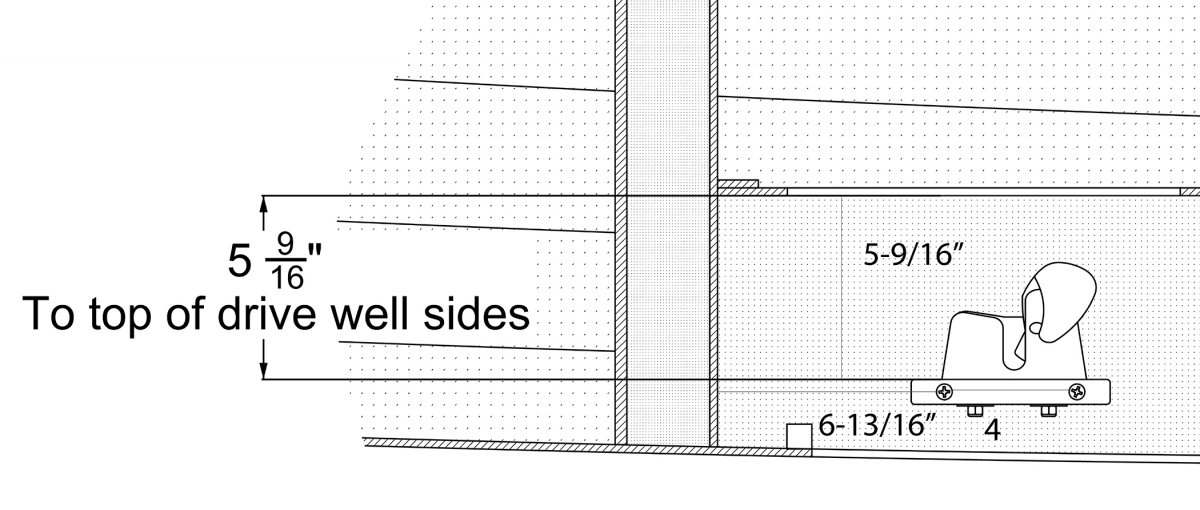
There's a vast wealth of relevant info in this epic thread! Hope what I can add in reference helps you get past any speed bumps!
Offline
#1261 22 Mar 2025 3:45 pm
- Rhbush
- Member
- From: Florida, U.S.
- Registered: 4 Sep 2024
- Posts: 13
Re: Waterlust sailing canoe in Norway
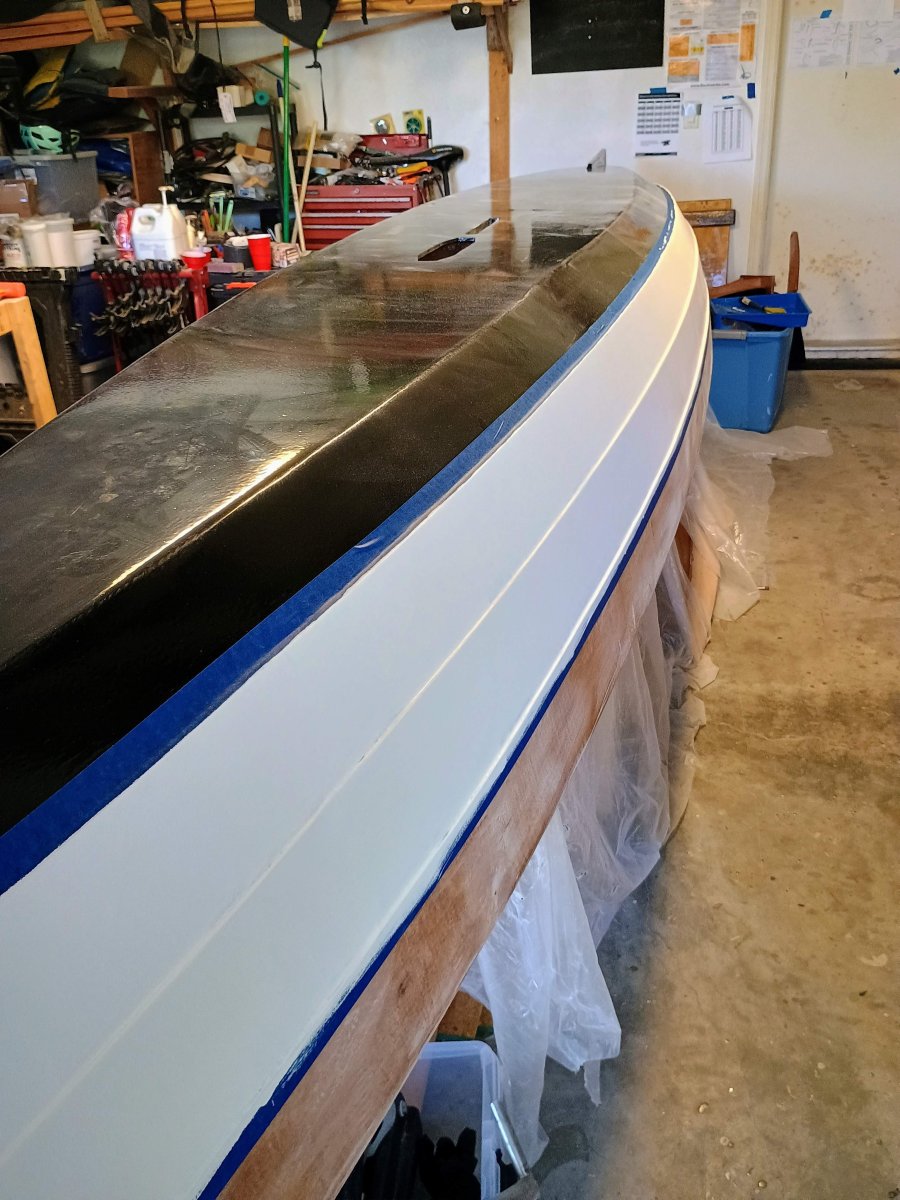
as to how far along, bottom is done, sides painted, ready to flip it back over and attach rub rail and should be ready for a float test in the next week or so. Not rigged yet, but at least will see if it floats.
Offline
#1262 22 Mar 2025 3:48 pm
- spclark
- Member
- From: "Driftless" Wisconsin USA
- Registered: 19 Mar 2020
- Posts: 478
Re: Waterlust sailing canoe in Norway
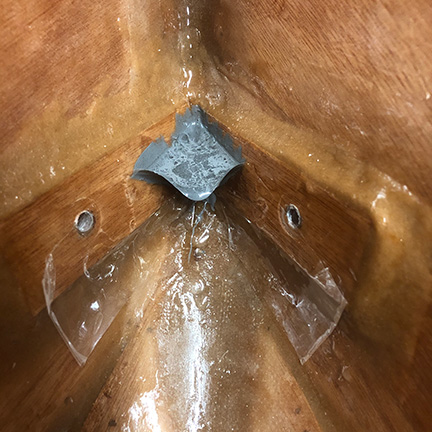
Missed some relevant pics:
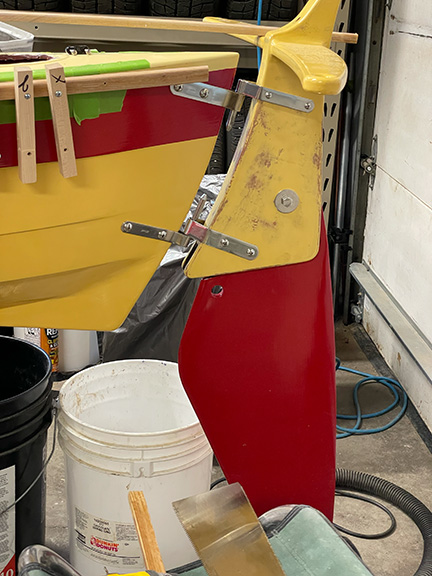
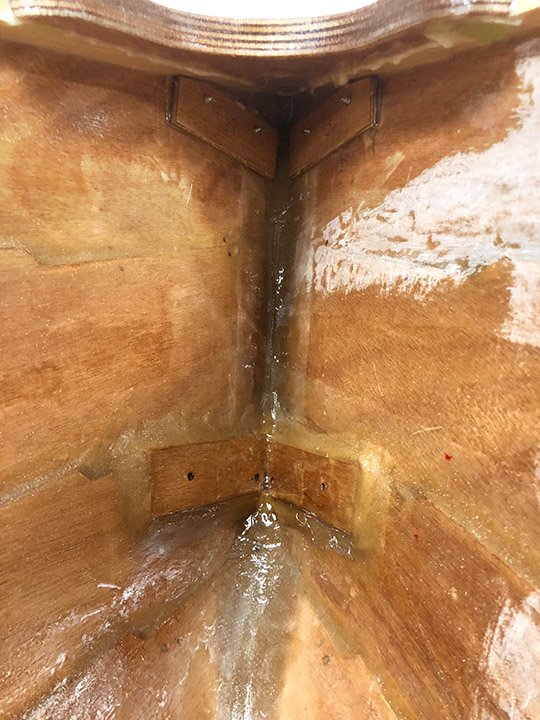
I opted to do a European hardware fit, putting long pintle upside down at bottom, makes getting rudder mounted somewhat easier.
Offline
#1263 22 Mar 2025 3:53 pm
- spclark
- Member
- From: "Driftless" Wisconsin USA
- Registered: 19 Mar 2020
- Posts: 478
Re: Waterlust sailing canoe in Norway
as to how far along, bottom is done, sides painted, ready to flip it back over and attach rub rail and should be ready for a float test in the next week or so. Not rigged yet, but at least will see if it floats.
Excellent! I remember the day I took mine out for its launching well! During the Pandemic it was, on a small pond a few miles distant. No sails, just the Mirage Drive:
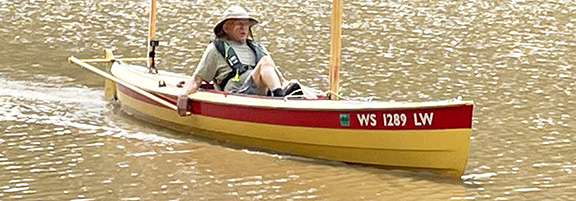
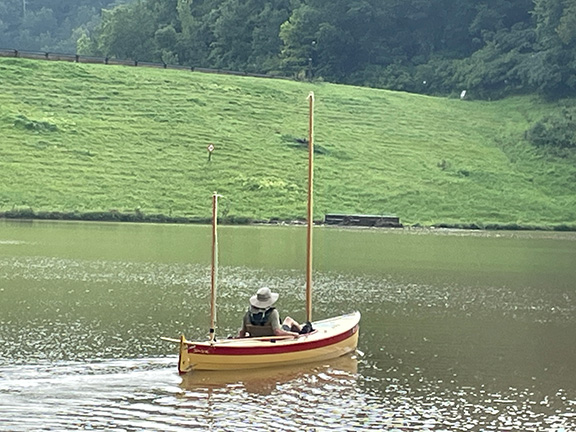
Sails came later. She's for sale 'cause I'm old enough now to be clear about what I can and can't do by myself anymore. At least not safely. Tough growing old when my mental age is stuck around 35-ish but my body's made 76 laps around Sol as of early next month. Guess who wins!
Last edited by spclark (22 Mar 2025 3:54 pm)
Offline
#1264 22 Mar 2025 3:56 pm
- Rhbush
- Member
- From: Florida, U.S.
- Registered: 4 Sep 2024
- Posts: 13
Re: Waterlust sailing canoe in Norway
I like that arrangement. Any idea where you got the hardware, or what brand it is?
Offline
#1265 22 Mar 2025 3:58 pm
- spclark
- Member
- From: "Driftless" Wisconsin USA
- Registered: 19 Mar 2020
- Posts: 478
Re: Waterlust sailing canoe in Norway
Duckworks.com I'm sure:

Did take some reshaping to fit the stern profile though. Takes some heat and a substantial vise so be prepared!
Last edited by spclark (22 Mar 2025 4:02 pm)
Offline
#1266 22 Mar 2025 5:12 pm
- Rhbush
- Member
- From: Florida, U.S.
- Registered: 4 Sep 2024
- Posts: 13
Re: Waterlust sailing canoe in Norway
Awesome. Thanks. Was going to upload a couple of recent build pics, but it says the files are too large. Guess I will need to figure out how to downsize them.
Offline
#1267 22 Mar 2025 6:18 pm
- Rhbush
- Member
- From: Florida, U.S.
- Registered: 4 Sep 2024
- Posts: 13
Re: Waterlust sailing canoe in Norway
Last edited by Rhbush (22 Mar 2025 6:18 pm)
Offline
#1268 22 Mar 2025 6:19 pm
- spclark
- Member
- From: "Driftless" Wisconsin USA
- Registered: 19 Mar 2020
- Posts: 478
Re: Waterlust sailing canoe in Norway
Looking good from where I sit! Carry on!!
(Did that seat come as part of the kit, or something CLC's offering as an add-on?)
Last edited by spclark (22 Mar 2025 6:21 pm)
Offline
#1269 22 Mar 2025 6:23 pm
- Rhbush
- Member
- From: Florida, U.S.
- Registered: 4 Sep 2024
- Posts: 13
Re: Waterlust sailing canoe in Norway
No, I got that from B&B Yacht Designs. They have it as a kit and as plans.
Offline
#1270 22 Mar 2025 7:05 pm
- spclark
- Member
- From: "Driftless" Wisconsin USA
- Registered: 19 Mar 2020
- Posts: 478
Re: Waterlust sailing canoe in Norway
Nice!
I bought an assembled seat thing from CLC but I like the look of what you have there much better. Hope it functions well for you in your new build!
Offline
#1271 4 May 2025 11:36 am
- Rhbush
- Member
- From: Florida, U.S.
- Registered: 4 Sep 2024
- Posts: 13
Re: Waterlust sailing canoe in Norway
I am at the point where I am ready to mount the ama's to the aka. I can not find any detail in the instructions on where the mounting holes are located on either the ama or the aka. The instructions make reference to the inboard and outboard mounting holes when it is talking about centering the aka in the saddles, but nothing about where those holes are to be drilled. Anybody have any insight?
Offline
#1272 4 May 2025 12:19 pm
- spclark
- Member
- From: "Driftless" Wisconsin USA
- Registered: 19 Mar 2020
- Posts: 478
Re: Waterlust sailing canoe in Norway
Yeah, I can maybe help with that.
I built my amas from CLC's printed plans package, still have the plans intact. I'll work out a schematic, based on the long axis from bow to stern, measure 'offsets' for those two hole centers, pass the numbers on to you later today.
You mount your aka yet? Got fastener holes located on the outboard ends of those yet?
When it came time to put everything together I found it helpful to measure the distance from the main hull's bow end out to each of the amas' bows, ensure those two dimensions were equal. If you can do that with one of the holes at the outer ends of your ama and your main hull's bow first, if adjustments are needed at the saddles, that's the time to do it. If not, then you can hang an ama off each outboard aka end then tweak the proper location of the second mounting hole so that those three bow ends are in a proper triangle, with the two sides being equal.
Post some pics of your recent progress, give us a look at how you're progressing!
Last edited by spclark (4 May 2025 12:21 pm)
Offline
#1273 4 May 2025 9:25 pm
- Rhbush
- Member
- From: Florida, U.S.
- Registered: 4 Sep 2024
- Posts: 13
Re: Waterlust sailing canoe in Norway
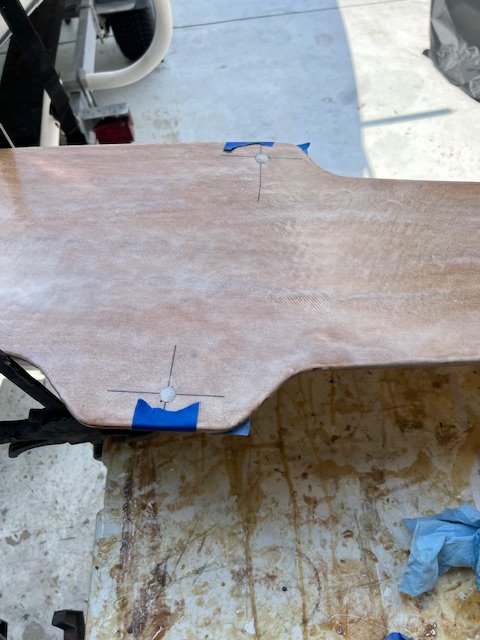
I think I got if figured out.....drilled oversize, filled, almost ready to fill again...
Offline
#1274 4 May 2025 9:28 pm
- Rhbush
- Member
- From: Florida, U.S.
- Registered: 4 Sep 2024
- Posts: 13
Re: Waterlust sailing canoe in Norway
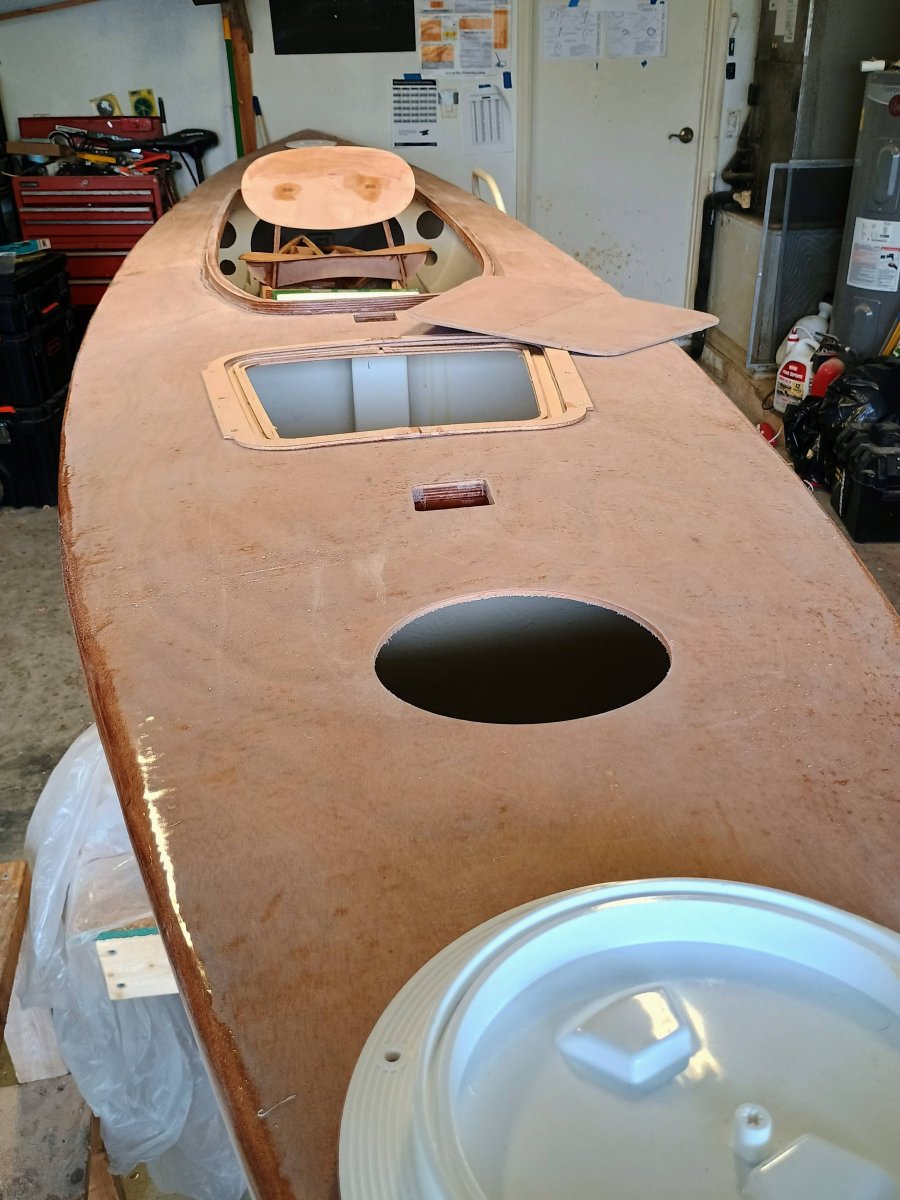
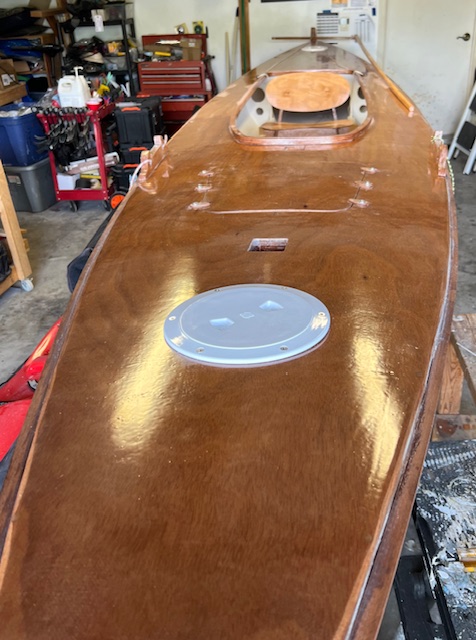
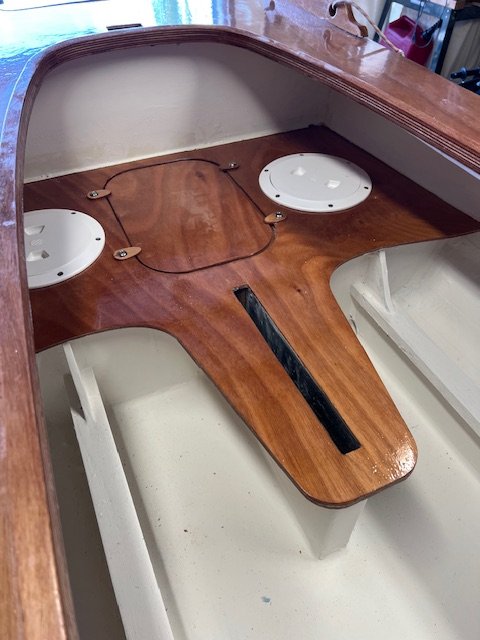
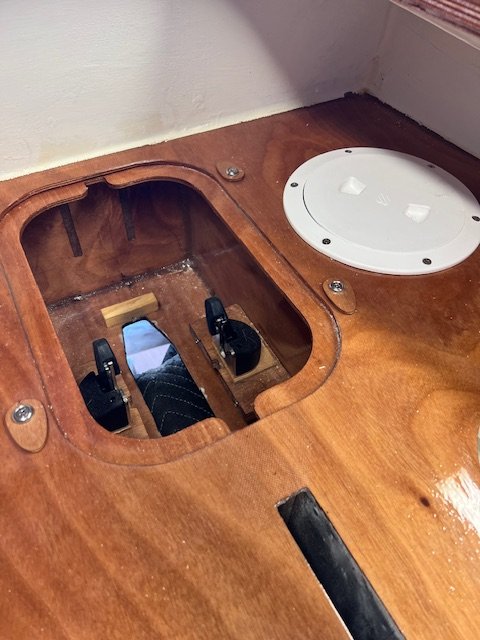
A few pics of the progress....Rudder and tiller done, hobie drive hardware all in
Offline
#1275 4 May 2025 9:29 pm
- Rhbush
- Member
- From: Florida, U.S.
- Registered: 4 Sep 2024
- Posts: 13
Re: Waterlust sailing canoe in Norway
BTW, Thanks spclark for the offer. I think I got it figured out....
Offline