A forum for discussing wooden boats and boat building
You are not logged in.
- Topics: Active | Unanswered
#1 6 Feb 2020 12:30 pm
- Bergen_Guy
- Member
- Registered: 6 Feb 2020
- Posts: 353
Waterlust sailing canoe in Norway
Well, here goes!
The kit is ordered and should be on its way in a few weeks. I will try and post a few updates from time to time here.
This is my first boat build so I am looking forward to learning some new things. I will be working in half of a double garage, during some rather cold parts of the year, so my next stop is to get some warm lamps to make sure that I can cure the puzzle joints in the main hull panels, which will most likely be task nr 1. Oh, yes, and finding lots of cheap clamps for holding the other parts like the shear clamps, stringers etc. together while they cure. I am sure there are some things that I have forgotten, but I am relying on the maxim that 'the work teaches you the work', or as a colleague of mine at work said - ah - so you are approaching this like Pippi Longstockings, I have never done this before, so it can't be that hard!
I don't imagine that this will go super quickly, so I am mentally preparing myself for this taking a while. That will give me a bit of time to come up with the really important things like a name, and a hull colour. I once had the pleasure of sailing on a Rasmusen Yawl, which was initially painted a splendid pale duck egg blue, which I rather liked. The owner later repainted it dark dark blue, but I always had a soft spot for the initial colour scheme. That also isn't far off the colour of the first few hulls made, which I find rather nice. I suppose at the end of the day, the colour may be strongly influenced by what is available in the paint I choose.
I have some experience of canoe sailing from our sailing Klepper, but am also stoking the canoe sailing fire by reading as many of the old classics as I can lay my hands on, '1000 miles in the Canoe Rob Roy', and 'Canoe Travelling, Log of a cruise on the Baltic'.
Guy
Offline
#2 10 Feb 2020 10:57 am
- Ian
- Employee

- Registered: 24 Nov 2014
- Posts: 103
Re: Waterlust sailing canoe in Norway
Welcome to the forum, Guy. I look forward to seeing your progress with the build.
Offline
#3 11 Mar 2020 3:23 pm
- Bergen_Guy
- Member
- Registered: 6 Feb 2020
- Posts: 353
Re: Waterlust sailing canoe in Norway
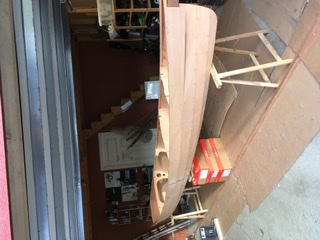
Today the kit arrived! It got a whole lorry to itself, the kit looked a bit small tucked away in the corner
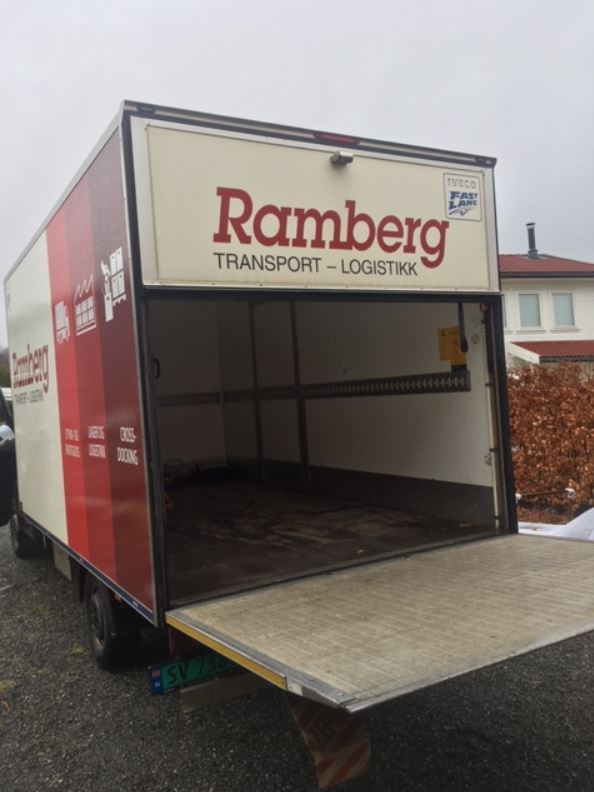
I quickly got them inside out of the rain, five boxes
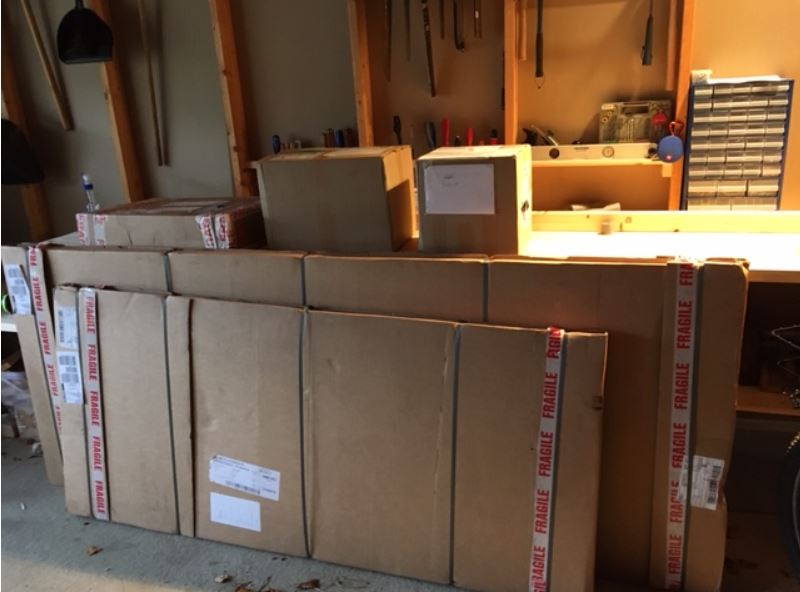
The big boxes with sheets of plywood in are now laid flat on the floor and the box of resin is now inside so it doesn't get cold. Later I will open up and have a look inside.
Sorry the pictures seem to be of strange orientation, not sure why, as even if I save them 'rotated' they seem to end up this way... there must be a trick!
Offline
#4 12 Mar 2020 9:16 am
- Bergen_Guy
- Member
- Registered: 6 Feb 2020
- Posts: 353
Re: Waterlust sailing canoe in Norway
Everything is now out of the boxes, and I am starting to get organized for gluing the hull panels together, they come in three parts, so two puzzle joints per panel. The plans say I should start with the deck, but I might do that later, as once complete it's rather large and I am not sure I have anywhere to store it easily. Hopefully I will get the first joints done later today. It's forecast to be around 4 degrees C today, but hopefully if I mix my epoxy inside, and use a hot air blower and a lamp, I can keep everything warm enough.
Offline
#5 12 Mar 2020 9:42 am
- Bergen_Guy
- Member
- Registered: 6 Feb 2020
- Posts: 353
Re: Waterlust sailing canoe in Norway
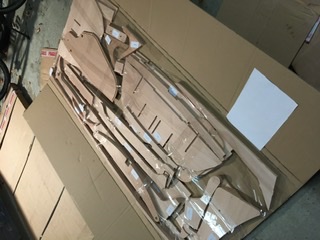
It came packed like this - lots of tape to keep things in place and all well labelled. One or two labels came off with the tape, but I think I managed to spot these and put them back!
Offline
#6 12 Mar 2020 5:51 pm
- Bergen_Guy
- Member
- Registered: 6 Feb 2020
- Posts: 353
Re: Waterlust sailing canoe in Norway
Offline
#7 14 Mar 2020 6:22 pm
- Bergen_Guy
- Member
- Registered: 6 Feb 2020
- Posts: 353
Re: Waterlust sailing canoe in Norway
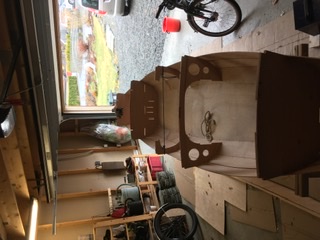
Yesterday’s glueing of the last puzzle joints for the hull went well. So all the hull panels are now in one piece and the hull bottom is glued as well. I have a new favourite tool for tidying up; a cabinet scraper I picked up a few weeks ago after reading online a post from someone who had success with one. Today as well as scraping off excess epoxy, I set up and glued the first of the scarf joints in the shear clamp, rubbing strake and the longitudinal deck support pieces. Also the ‘doublers’ which are re-enforcement pieces for a few of the frames. They are all sitting with the lamp and hot air blower on them, with makeshift cardboard ‘lids’ to try and keep the warm in. It’s about 2 degrees outside, but the combination of pre-warning resin, and parts, and the targeted heat does seem to be working. I guess I am going to have to get cleverer when it comes to things like coating large areas. 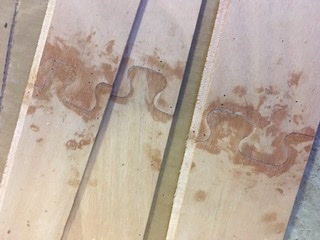
Yesterday's glueing
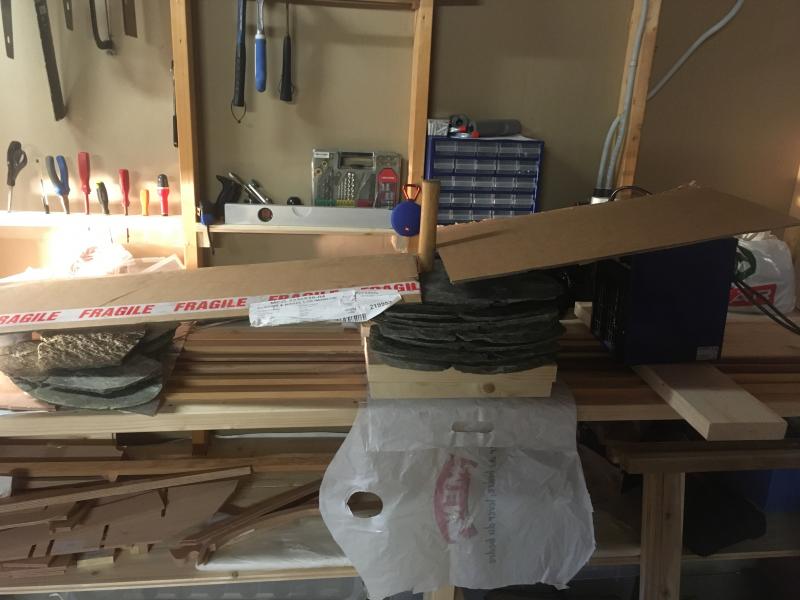
Today’s slightly crazy heating arrangement!
Offline
#8 15 Mar 2020 3:11 pm
- Bergen_Guy
- Member
- Registered: 6 Feb 2020
- Posts: 353
Re: Waterlust sailing canoe in Norway
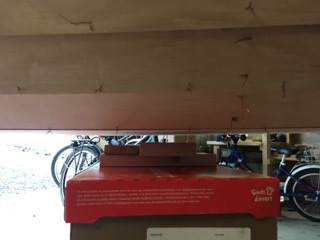
All went mostly ok yesterday. A couple of the scarf joints were not perfectly straight, but I think that won’t be a big problem, as one was a shear clamp, that will be curving anyway. Nothing a plane won’t be able to sort out once it’s glued together. For the remaining scarf joints I have changed tactics today and have moved to the floor, and am doing them’
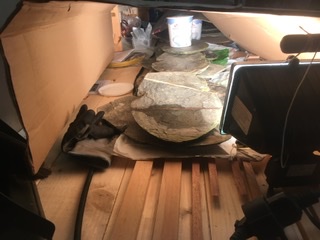
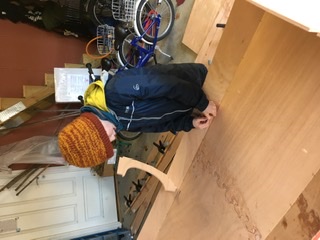
‘ on their side’ and holding them together with drainpipe clamps. I also glued the cockpit combing and some small parts on the mirage drive box. It’s much warmer today, so I am a bit less stressed about getting the hot air set up quite so airtight at yesterday’s cardboard box tunnel!
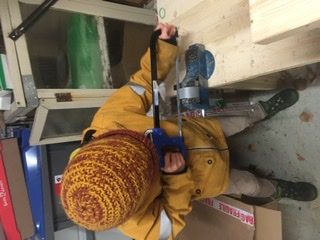
Hannes cutting a slot in a clamp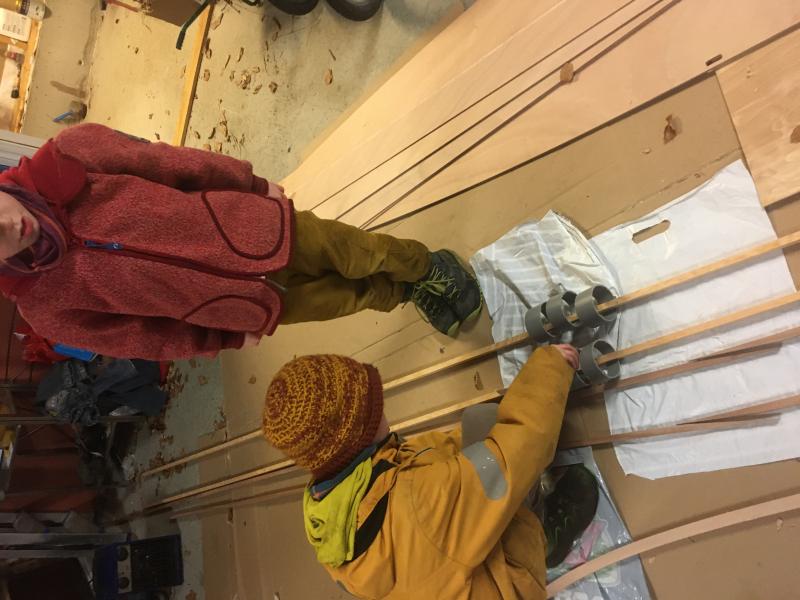
Dry run with clamping the scarf joints
Offline
#9 16 Mar 2020 2:52 pm
- Bergen_Guy
- Member
- Registered: 6 Feb 2020
- Posts: 353
Re: Waterlust sailing canoe in Norway
Yesterday evening, after the scarfe joints had cured, I did a dry run with clamping the shear clamp to 'Panel 4', I found that the home made clamps were not up to the job. So, off to the DIY store this morning and I got hold of a lot of small clamps. I am using all of them, and all the home made ones together, so hopefully that will keep things in place till later on this evening. I managed to build a long tent with the hot air blower at one end, and the bright work lamp at the other to keep things warm. I think that I can probably start to stitch the first panels onto the hull in parallel with making the rest of the center console. I am just debating whether or not to cut out the inspection hatch holes for the Mirage drive or not. I am guessing its a lot easier to do that now rather than later if I ever do decide to fit one, but on the other hand, I have managed with paddles fine so far, and they aren't exactly cheap.
Offline
#10 16 Mar 2020 2:54 pm
- Bergen_Guy
- Member
- Registered: 6 Feb 2020
- Posts: 353
Re: Waterlust sailing canoe in Norway
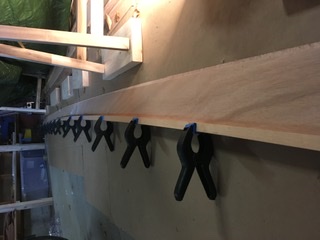
Dry fit of the shear clamp
Offline
#11 17 Mar 2020 11:16 pm
- Bergen_Guy
- Member
- Registered: 6 Feb 2020
- Posts: 353
Re: Waterlust sailing canoe in Norway
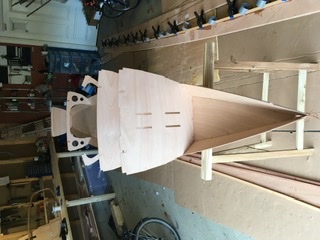
Today, I glued up the second shear clamp, and made a start on stitching the first hull panels together. The instructions say to support the hull in just two places, but it was all far to flexible for that, luckily I had some boxes kicking around that I could use to support the middle till I have a few more panels stitched in!
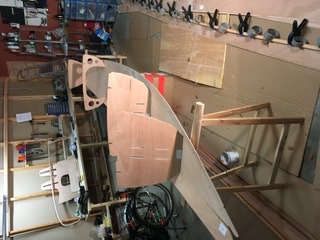
The first bits of boat
A stitch!
Offline
#12 18 Mar 2020 2:22 pm
- Bergen_Guy
- Member
- Registered: 6 Feb 2020
- Posts: 353
Re: Waterlust sailing canoe in Norway
Here are a few more pictures of the frames stitched in.
Kids fingers seem well adapted to stitching!
Offline
#13 18 Mar 2020 8:58 pm
- Bergen_Guy
- Member
- Registered: 6 Feb 2020
- Posts: 353
Re: Waterlust sailing canoe in Norway
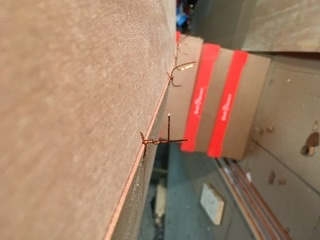
There boys helped a bit today with stitching, so after our home school session, we all needed to get out of the house. So we continued with our social distancing in the garage! Turns out the eldest is actually pretty good with a piece of copper wire. The twins had fun cutting ties, and helped a lot with holding the panels in place while we got the first few stitches in. All seems to be going fine. The middle frame is still rather ‘open’ so I have now tied the two parts together to try and get the middle part of the hull in something like the right place. It’s still a pretty flexible structure for the time being. Hopefully I can get panel four on tomorrow.
You can almost persuade yourself this could one day be a boat!
Right now I am really happy I am not trying to build something larger! That said, I can see how one can end up with this becoming a bit of an addiction, the last few days have been super satisfying, and we are no way near actually having a boat.
I should also say that the precision of the kit is amazing, each tiny hole is perfectly aligned on all the frames and panels and they stitch together so easily.
Offline
#14 19 Mar 2020 11:29 am
- SailorPete
- Member
- Registered: 21 Apr 2018
- Posts: 7
Re: Waterlust sailing canoe in Norway
I've admired the Waterlust for a while and its nice to see the beautiful lines take shape on your build.
Unfortunately, I don't have the room, but am considering squeezing in a Skerry. Meanwhile, I think I'll order the model kit to practice during the London lockdown that will surely happen...
Keep up the progress and the posting. We could all do with some distraction in these difficult times.
Offline
#15 19 Mar 2020 1:51 pm
- spclark
- Member
- From: "Driftless" Wisconsin USA
- Registered: 19 Mar 2020
- Posts: 478
Re: Waterlust sailing canoe in Norway
Good thread Guy! I was having breakfast, checking in at the CLC forum, found your post about this project you're undertaking!
I bought what I believe may have been the very first Waterlust kit the day it premiered back late in 2016. Sat in my garage the first winter, then on the floor of my basement for another 2-1/2 years until everything I felt I needed to have done first had been accomplished, including getting myself into the right frame of mind! My 'build' commenced early in Nov. of last year. It'll be six months in a couple of weeks! Presently I'm detailing her cockpit, which I plan to paint before going on to the deck fitting. Internal compartments that won't see much daylight will be painted also if used for storage.
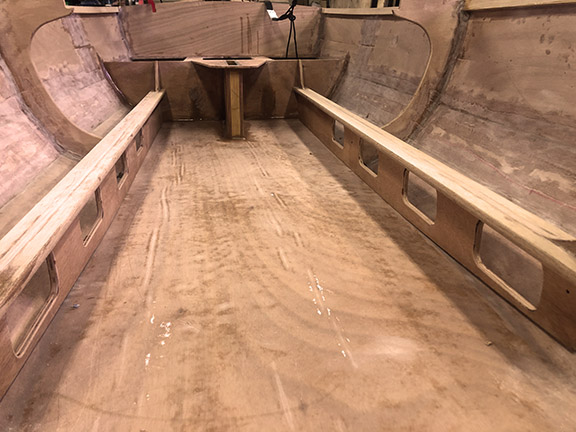
This forum seems more easily accommodating of image uploads so here's my first, showing a minor modification I made to the longitudinal frames with a mind to making toeholds available when hiking out! Added solid mahogany 'stiffeners' also to the tops of those frames to add some stiffness after routing all the holes, as well as to add surface area for where feet will be stuck when the time comes to move to windward!
And yes, with the global health crisis we're facing (and having taken a leave of absence from my part-time hardware store job as of yesterday) I admit some satisfaction over having a project at hand that will distract me some from the voluntary isolation lifestyle I'm not at all used to! Stay well, don't take unnecessary risks with this contagion unless and until we know more about what it is we're confronted with. And be sure to use PPE when you're messing with epoxy and sanding stuff!
Added: Seems there's a learning curve for how images get posted here too... first attempt didn't work, maybe a second will?
Last edited by spclark (19 Mar 2020 2:06 pm)
Offline
#16 19 Mar 2020 1:51 pm
- Bergen_Guy
- Member
- Registered: 6 Feb 2020
- Posts: 353
Re: Waterlust sailing canoe in Norway
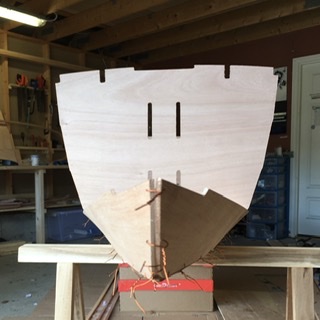
Not so much to report yet today, but as people seem to be watching, here are a few more photos of the panel 3 stitching progress. As the third panel has gone on the pile of panels now seems to be stiffening up quite a lot - so much so that it is now no longer resting on the cardboard box support that I had in the middle of the hull, which is encouraging to say the least!
I must admit that it was the lines of this boat that really did it for me - so I have been really exited to see this thing start to take shape as the stitches go in. I am still mulling over how I will heat this large structure up enough for the epoxy to cure, I suppose I will need some sort of tarp tent hanging from the ceiling with a heater underneath. That will be a fun exercise in its own right!
Stern not quite stitched up yet!
You can see here that the hull no longer rests on the middle support.
Keep healthy and keep positive folks :-)
Offline
#17 19 Mar 2020 2:22 pm
- spclark
- Member
- From: "Driftless" Wisconsin USA
- Registered: 19 Mar 2020
- Posts: 478
Re: Waterlust sailing canoe in Norway
OK that worked!
Here's another from a month ago:
Progress slowed considerably once the hull panels were all stitched up & framed added. The interior takes time and attention to detailing, and as that part of my build was taking place during the coldest part of our winter season here in Wisconsin I wasn't in any hurry.
Before beginning my build I'd insulated and finished the woof and walls of my garage. I get half, my wife gets the other where she keeps her MINI convertible out of the weather. Late in 2018 I added a garage heater, last year switching it from propane fuel back to natural gas.
It's costing me anywhere from US$0.05 to US$0.15/hour to keep the space at 50°F, obviously more when I bump temps up to 60-62°F to work or let epoxy cure. I've been augmenting the space heat with heat lamps too when necessary, as in this next pic where I have the hull inverted (HarkenHoist is handy!) after installing the drive console, 'turning' gravity to help with filleting where I'd have to stand on my head otherwise!
Early on I decided to use MAS fast hardener too, despite the costs. Once in awhile I'll blend fast and slow for a batch for more working time. So far everything's cured nicely, 12-18 hours for fingernail dent-resistant cures.
Offline
#18 19 Mar 2020 7:54 pm
- Bergen_Guy
- Member
- Registered: 6 Feb 2020
- Posts: 353
Re: Waterlust sailing canoe in Norway
I couldn’t resist getting started on panel 4 today, so once home school was out and home office was shut down, I spent a bit more time stitching. I am now getting slightly sore fingers!

Soon I will need to do a bit of ‘actual carpentry’ and cut the shear clamps in the right place! Still a bit more stitching before I get there.
Offline
#19 19 Mar 2020 10:49 pm
- Bergen_Guy
- Member
- Registered: 6 Feb 2020
- Posts: 353
Re: Waterlust sailing canoe in Norway
Hi SP!
Great to see your progress here too, looks like you are a bit ahead of me. I do like your modifications too, that looks really neat, and nicely done too. I think I will stay true to the plans for now though. Maybe I will get more adventurous once a few more steps are done. Let’s see, first things first, the hull is still not stitched. I did make more progress on panel 4 stbd, and the whole structure has stiffened up enormously. Suddenly I can imagine that this might actually work.
More tomorrow I hope!
Offline
#20 19 Mar 2020 11:09 pm
- spclark
- Member
- From: "Driftless" Wisconsin USA
- Registered: 19 Mar 2020
- Posts: 478
Re: Waterlust sailing canoe in Norway
Thanks for your comments Guy! I’m
a bit ahead of you, yes but you’ll catch up!
Those toe-holds were inspired by my experiences trying to add hiking straps to a 14’ stripper scow I built almost 50 years ago. When you need to hike out to shift ‘ballast’ to windward it’s a great feeling having something truly secure to hook your feet - or toes - into!
As for sore fingers? It may be too late but I highly recommend using pliers - of any kind - for twisting up stitches. And for threading them, a long pair of needle-nose pliers goes a long way to improving your efficiency as well as keeping your fingers from growing sore!
Offline
#21 20 Mar 2020 12:53 pm
- spclark
- Member
- From: "Driftless" Wisconsin USA
- Registered: 19 Mar 2020
- Posts: 478
Re: Waterlust sailing canoe in Norway
Another couple comments Guy:
Don’t be too hasty shaping bevels on your sheer clamps.
When time comes to bring them together you need be mindful of how the breasthooks at each end play a role in establishing the design’s curved sheers. I took too much off myself, then while dry-fitting the ‘hooks noticed the curves weren’t there.
Turns out those breasthooks need but a bit of bevel on their sides; the full curves on their sides will force the sheers into the proper shape when everything comes together but it’s all a challenge!
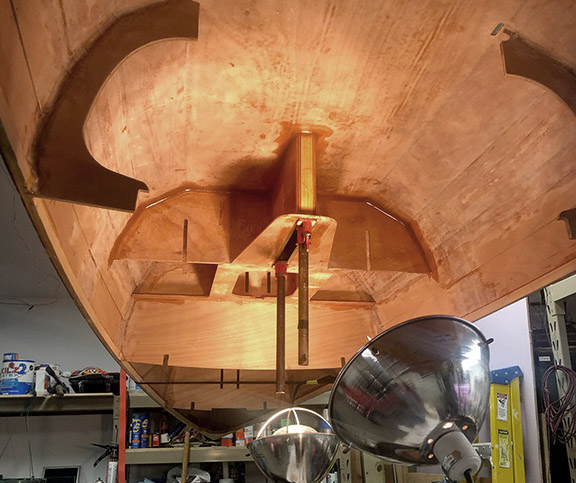
Here’s a pic of what I had to assemble clamp-wise to get mine shaped properly: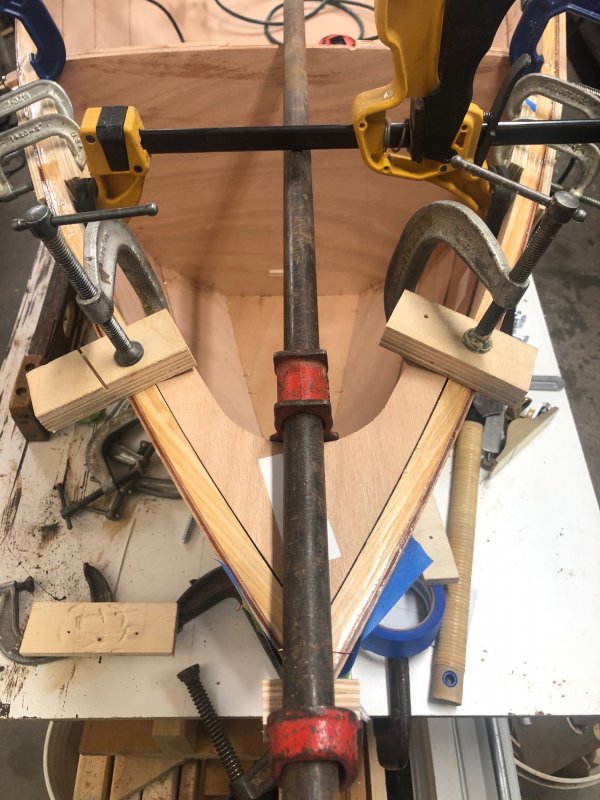
This pic is at the aft end, the sheer curve is more abrupt owing to the closer frame than at the bow but the dry-fitting is necessary as was the clamp-up!
And look carefully too at the shears near that closest frame. I had to reinforce the sheer’s scarfed joints with clamps and scabs to keep them from splitting. Forcing the sheer into the proper shape is pretty stressful until everything gets glued up then cured. Go slow with each step closer to achieving the desired shapes!
Offline
#22 20 Mar 2020 1:16 pm
- Bergen_Guy
- Member
- Registered: 6 Feb 2020
- Posts: 353
Re: Waterlust sailing canoe in Norway
SP - thanks for those tips - I have been wondering a bit how to approach the next steps - so that's really useful guidance. I can see i am going to have to go back to the DIY store to get some more and larger clamps than I currently have! Nothing new here since last night, other than the sun is finally shining, and the bees were buzzing in the crocuses, bring on the spring.
Offline
#23 20 Mar 2020 1:34 pm
- spclark
- Member
- From: "Driftless" Wisconsin USA
- Registered: 19 Mar 2020
- Posts: 478
Re: Waterlust sailing canoe in Norway
Right.
The challenges we face with this not being a full-fledged kit can be a bit daunting. CLC recommends this project to those having prior experience with this style of construction, and I can appreciate how whetting your skill-set (to say nothing about enlarging your tool collection) with a simpler project that comes with a 60+ page manual might smooth one’s progress.
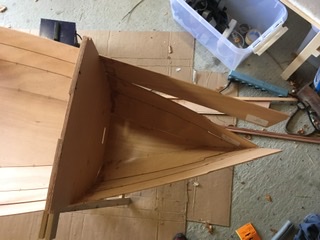
Dillon has been an invaluable source of answers. He clued me into shaping the sheers by carefully fitting the breast hooks after I sent him this pic:
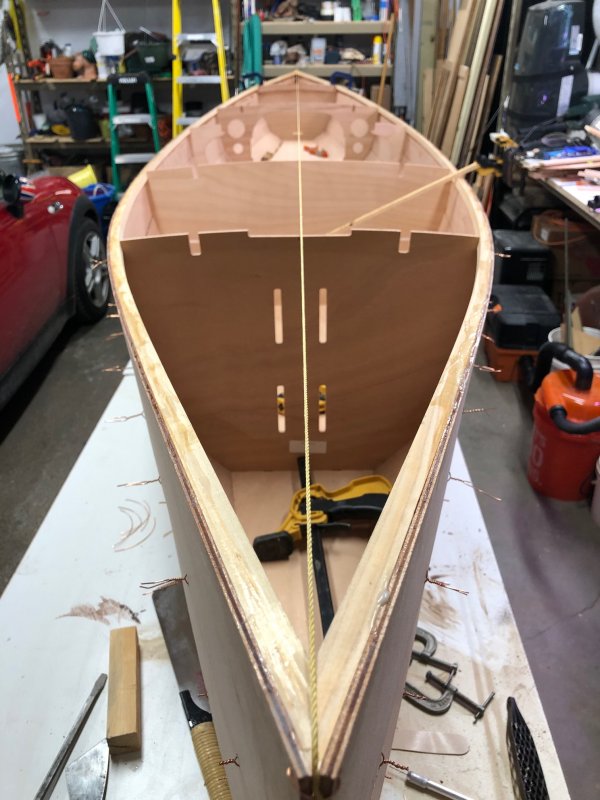
- which is my stem pulled together with just wire after I planed off too much of the clamps. The sheers are too flat, the breast hook forces everything into shape but that all needs considerable help with clamps to make it come together. I can’t imagine trying to do it properly with just thin copper wire stitches.
(Have pic of my stern too at this point; I don’t want to waste storage space here so will e-mail it to any forum
members who ask, if they’ve enabled that preference in their profile here.)
Offline
#24 20 Mar 2020 11:28 pm
- Bergen_Guy
- Member
- Registered: 6 Feb 2020
- Posts: 353
Re: Waterlust sailing canoe in Norway
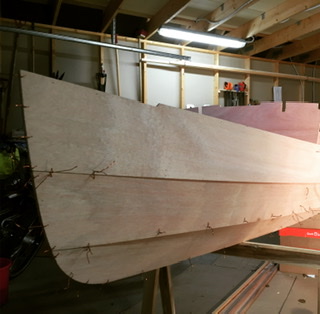
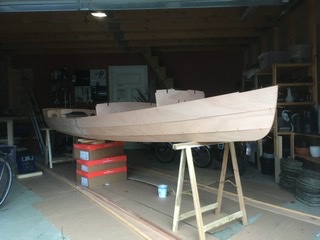
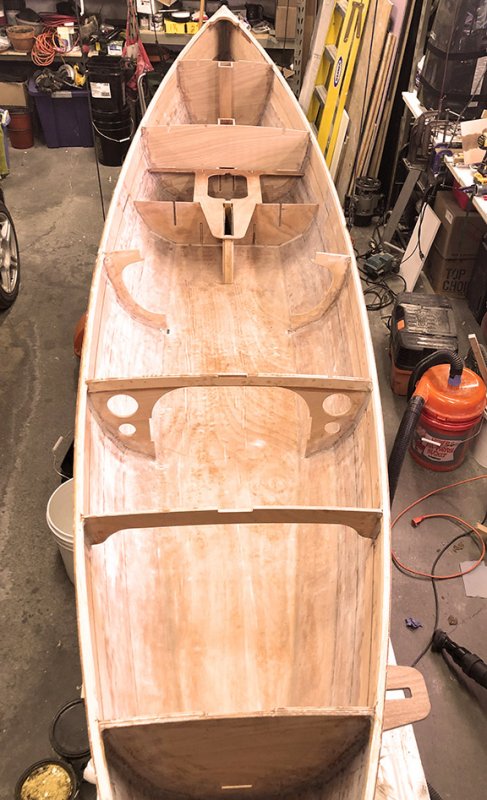
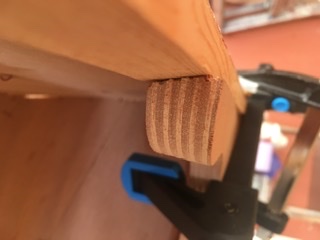
I got the fourth strake on, and cut the shear clamps, so on to getting the whole thing fixed together next! I think I ha e about six inches of copper wire left, so it looks like I was delivered just enough. I didn’t do a great job trimming the shear clamp on my first attempt, and there is a bit of a gap, but I guess once everything is filled with epoxy and wood flour it won’t make much difference. At the bow, which I did second, I did a better job, so at least I am learning!
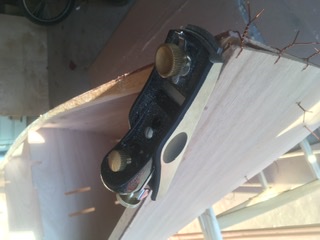
I got myself a block plane, and it seems to be a useful piece of kit!
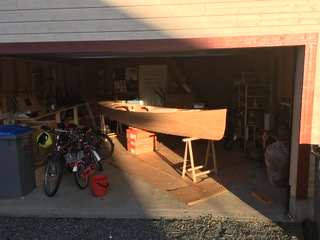
Actually starting to look like a boat, I like the afternoon sun filling the garage. It was almost warm for a bit working there this afternoon!
So next up is breasthooks and getting things ‘tack welded’ into place.
Offline
#25 21 Mar 2020 9:53 pm
- Bergen_Guy
- Member
- Registered: 6 Feb 2020
- Posts: 353
Re: Waterlust sailing canoe in Norway
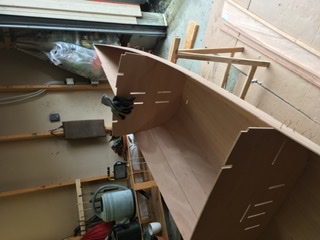
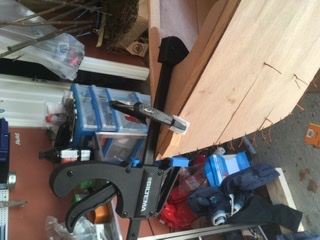
Today I got my hands on a few more clamps, as it looked from the previous posts here that I might need them! Indeed that’s the case! I worked on shaping and dry fitting the breasthooks. I tacked a few off cuts to the outside of the hull so the clamps would not slide off. I think that combination is going to work ok while the epoxy cures. Hopefully I can get onto that tomorrow.
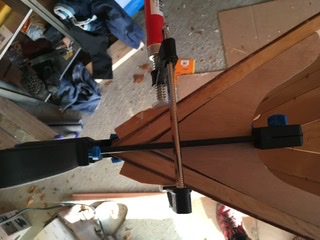
I think I managed to get the bevel about right, with a combination of rasp and plane.
Offline