You are not logged in.
- Topics: Active | Unanswered
Pages: 1
#1 19 Dec 2024 4:46 pm
- p8ete
- Member
- Registered: 19 Dec 2024
- Posts: 9
Nesting Spindrift 10
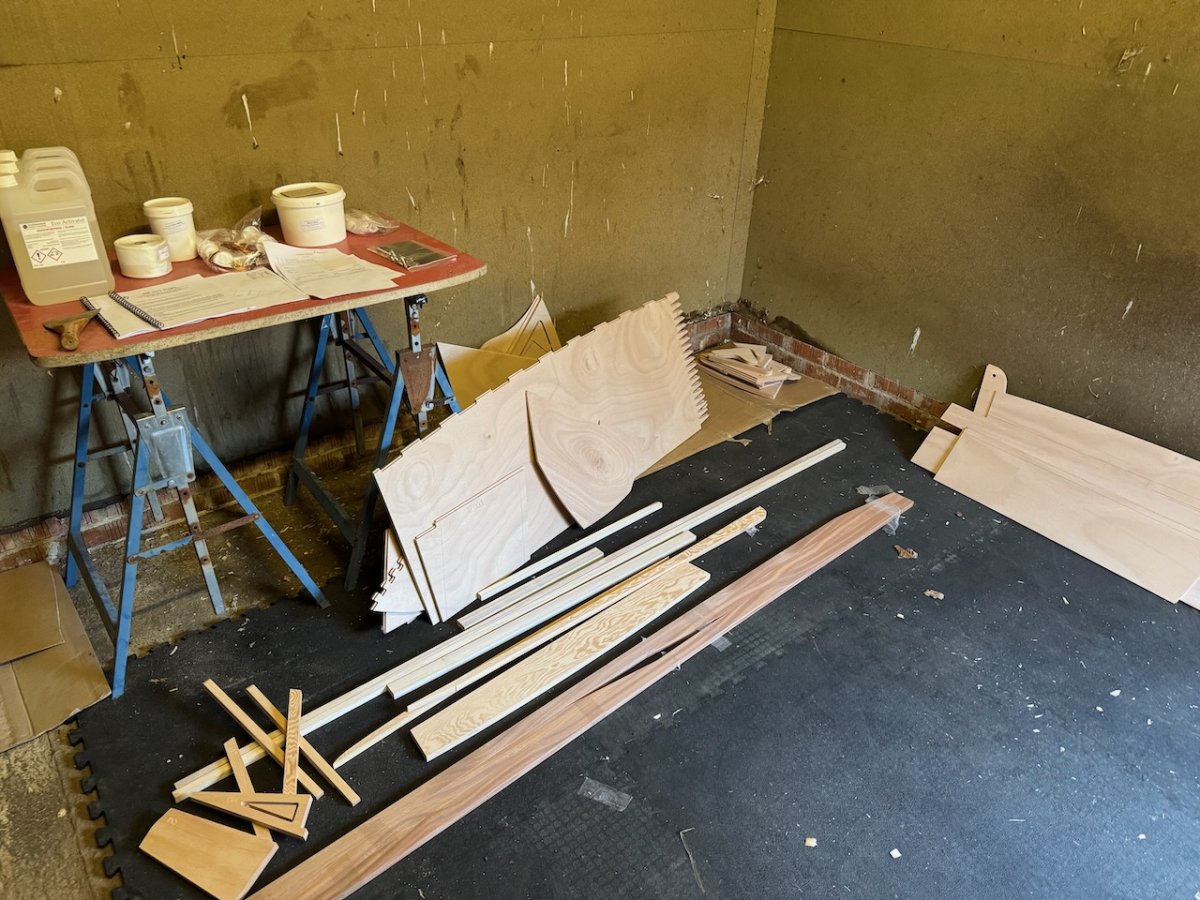
Hi all! Complete beginner and my Spindrift 10 kit has just arrived. Have spent today unpacking and setting up my build area, a disused stable on the family farm!
Waiting for some heat sources to arrive to try and keep the space at 10 degrees or above for the epoxy, have a small electric radiator, an infra red electric patio heater and a terrarium heat matt coming. Hopefully this will suffice.
Tomorrow I will install some more lights to work with and build the frame the boat sits in folded, then will make a start on glueing the hull pieces together.
Offline
#2 5 Jan 2025 10:18 am
- p8ete
- Member
- Registered: 19 Dec 2024
- Posts: 9
Re: Nesting Spindrift 10
Have made some progress but not much over Christmas. I've managed to keep the temp above 10 degrees when it's not too cold but freezing temps outside are unmanageable.
The hull panels are joined and I have glued up the transom and nesting bulkheads.
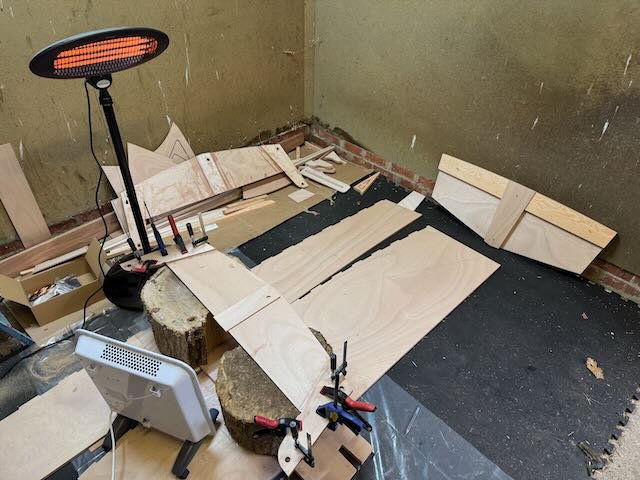
Unfortunately the screws I used to keep the transom in alignment snapped off when I tried to take them out after the glue had set. I'm wondering if they can be filed back and left in or if I need to drill them out?
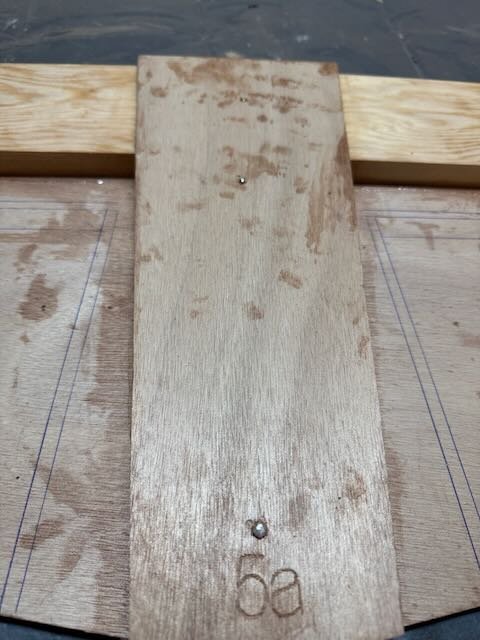
I'm now setting up to glue the butterfly joint together.

Offline
#3 6 Jan 2025 10:28 am
- Ian
- Employee

- Registered: 24 Nov 2014
- Posts: 103
Re: Nesting Spindrift 10
It's safe to leave the broken screws in and file them flat. The wood will be coated with epoxy later so they will be sealed in.
If you have any other screws stuck in with epoxy in future, try heating the screw heads with a soldering iron. It softens the epoxy just enough to allow the screws to turn.
Offline
#4 6 Jan 2025 3:19 pm
- p8ete
- Member
- Registered: 19 Dec 2024
- Posts: 9
Re: Nesting Spindrift 10
Thanks for the tip Ian.
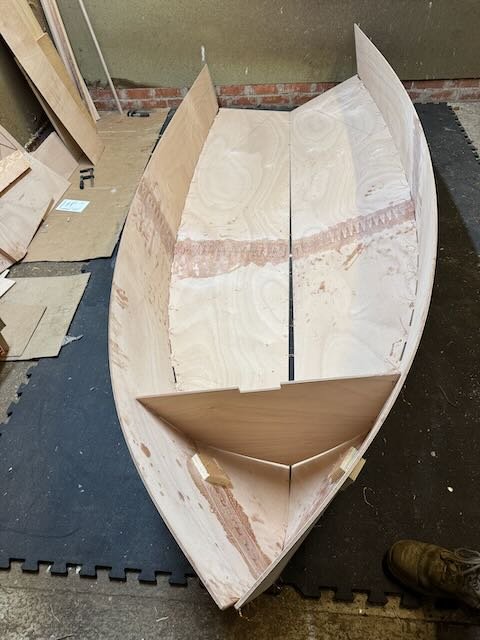
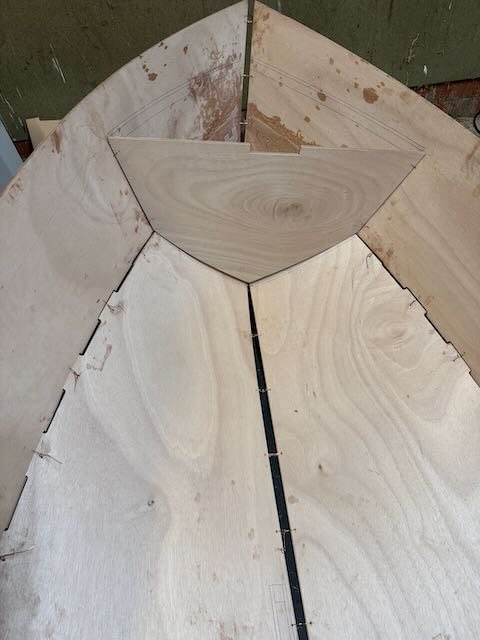
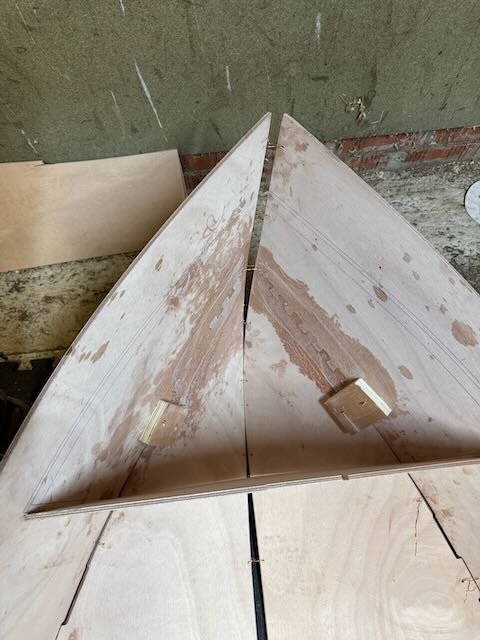
Some good progress today and have 'opened the book'. The guide said to keep the wires loose but maybe I made them too loose as I have big gaps along the centreline toward the bow end.
Unfortunately the copper wire seems quite weak and has snapped a few times when trying to tighten up the gaps.
Also I tried to unfold the boat in the 'cradles' but it kept getting stuck in the keel notches so ended up doing it on the floor and I'll get someone to help me lift it in to the cradles.

Offline
#5 7 Jan 2025 12:54 pm
- p8ete
- Member
- Registered: 19 Dec 2024
- Posts: 9
Re: Nesting Spindrift 10
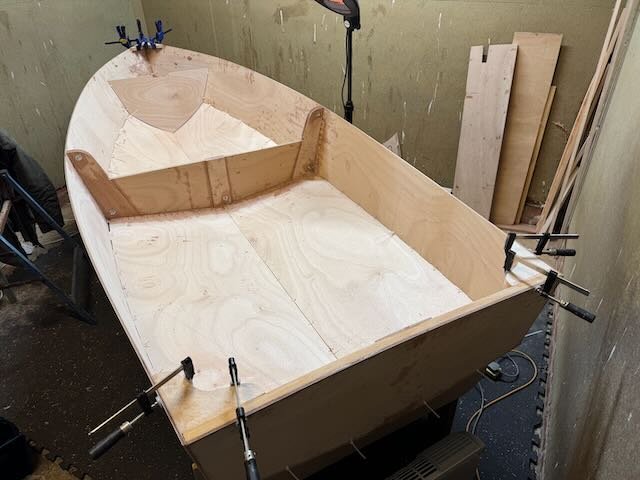
Good progress this morning, I got the boat on to the cradles and installed the nesting bulkheads and transom.
I found the copper wire quite awkward to use and it kept snapping when trying to tighten it so have switched to cable ties instead which I much prefer (except the plastic waste!).

The nesting bulkheads have pushed the chine out quite a lot and I still have quite a gap to close behind the forward bulkhead. I'm wondering whether to accept this gap or trim down the nesting bulkheads?


Offline
#6 7 Jan 2025 6:01 pm
- p8ete
- Member
- Registered: 19 Dec 2024
- Posts: 9
Re: Nesting Spindrift 10
And further good progress this afternoon. Spoke to Phil on the phone for some useful advice, finished tightening everything up and glued in the breasthook, quarter knees and transom.
The breasthook and quarter knees needed bevelling to fit the hull shape which I did with a block plane by eye and was easier than expected.

Offline
#7 10 Jan 2025 11:25 am
- p8ete
- Member
- Registered: 19 Dec 2024
- Posts: 9
Re: Nesting Spindrift 10
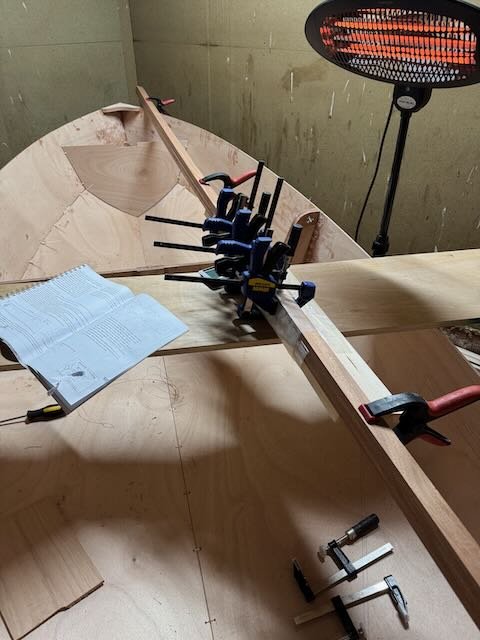
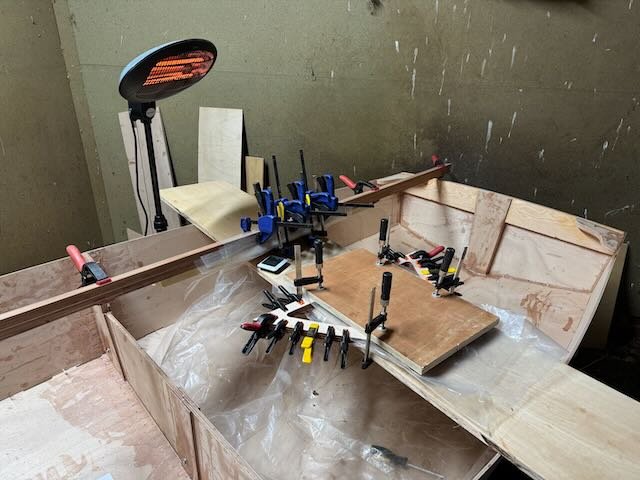
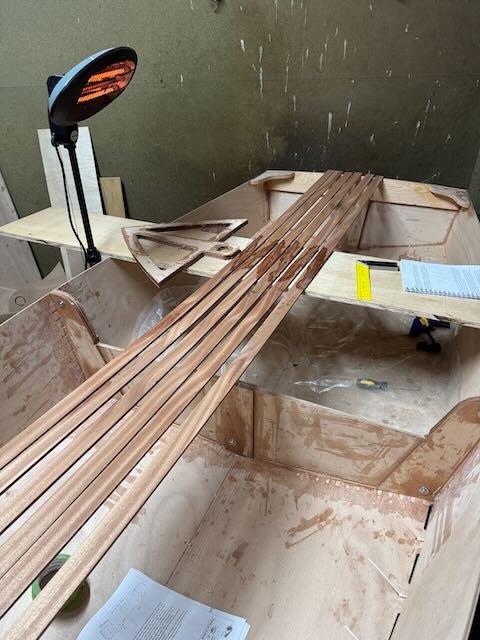
Yesterday I glued the scarfs up on the gunwale pieces. I don't have a flat work top area with enough space to work with the pieces so was scratching my head for a while on how to do this efficiently and keeping everything as straight and flat as possible as possible.
In the end I stacked all the pieces together with the scarf directions alternating and plastic between each layer then clamped everything together and then to an old floorboard. I think it came out ok.
Offline
#8 10 Jan 2025 11:42 am
- p8ete
- Member
- Registered: 19 Dec 2024
- Posts: 9
Re: Nesting Spindrift 10
Hi Phil / Ian, hope you don't mind me asking on the forum but this might be helpful for other builders.
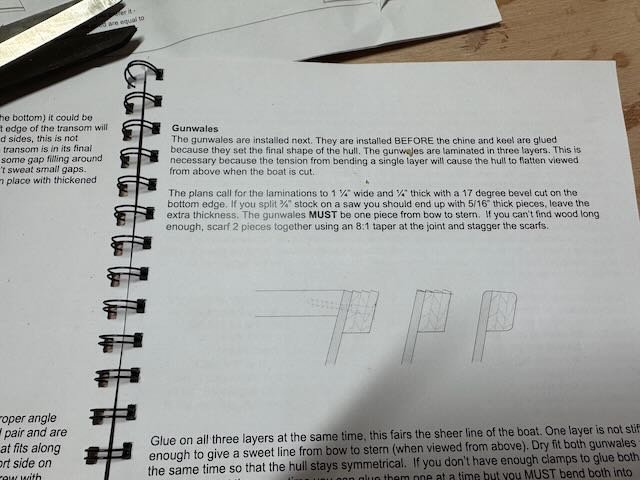
Question on my next step with the build. The plans call for the gunwales to be 30mm wide with a 17degree bevel (see image attached), the strips supplied in the kit are 37mm wide and square.
Given my limited space and tools; no table saw, no work bench big enough, just a hand plane, power plane and saw horses.
Am I best clamping 3 strips together and planing them down by hand before fitting (to create the pieces shown in the second image) or do I fit as is with them slightly raised and staggered from the topsides of the hull and then plane, sand and fair everything by eye once its all glued up?
Thanks,
Pete

Offline
#9 31 Jan 2025 4:48 pm
- p8ete
- Member
- Registered: 19 Dec 2024
- Posts: 9
Re: Nesting Spindrift 10
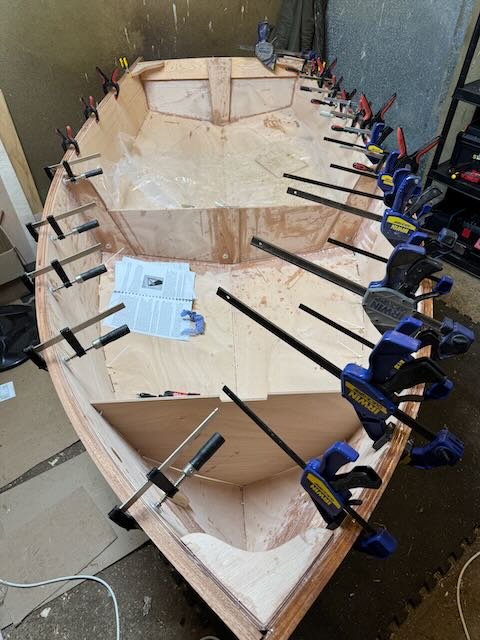
Having spoke to Phil on this we agreed it was best to fit the gunwales as they are with the excess sat above the side of the boat which I have planed down. I think it worked well.

Hi Phil / Ian, hope you don't mind me asking on the forum but this might be helpful for other builders.
Question on my next step with the build. The plans call for the gunwales to be 30mm wide with a 17degree bevel (see image attached), the strips supplied in the kit are 37mm wide and square.
Given my limited space and tools; no table saw, no work bench big enough, just a hand plane, power plane and saw horses.
Am I best clamping 3 strips together and planing them down by hand before fitting (to create the pieces shown in the second image) or do I fit as is with them slightly raised and staggered from the topsides of the hull and then plane, sand and fair everything by eye once its all glued up?
Thanks,
Pete
Offline
#10 31 Jan 2025 4:55 pm
- p8ete
- Member
- Registered: 19 Dec 2024
- Posts: 9
Re: Nesting Spindrift 10
Have been making good progress on and off over the last couple of weeks.
The gunwales are on and I have faired the tops and the sides, I found this quite an enjoyable part of the build.
I have also filleted and taped all the interior seams and decided I would do a first coat of epoxy on the inside as well for no other reason than I wanted it to look shiny! ![]()
I have also tack welded in the frames for the aft seats and glued in the front bulkhead and seat frame. This was quite a fiddly job and took some time to get everything in close enough to its correct position.


Offline
#11 4 Nov 2025 2:20 pm
- it344x
- Member
- Registered: 14 Oct 2025
- Posts: 4
Re: Nesting Spindrift 10
hi Pete,
I am going to go through this process as well - was the response to put them on one at a time?
Am I best clamping 3 strips together and planing them down by hand before fitting (to create the pieces shown in the second image) or do I fit as is with them slightly raised and staggered from the topsides of the hull and then plane, sand and fair everything by eye once its all glued up?
Thanks,
Pete
Offline
#12 4 Nov 2025 4:28 pm
- Phil
- Employee

- Registered: 8 Jun 2011
- Posts: 74
Re: Nesting Spindrift 10
I would put all three on at once after a dry fit so you know the process and have all the clamps in place.
Offline
#13 5 Nov 2025 9:23 am
- it344x
- Member
- Registered: 14 Oct 2025
- Posts: 4
Re: Nesting Spindrift 10
I would put all three on at once after a dry fit so you know the process and have all the clamps in place.
Thanks Phil
Last edited by it344x (5 Nov 2025 9:24 am)
Offline
Pages: 1
