A forum for discussing wooden boats and boat building
You are not logged in.
- Topics: Active | Unanswered
#651 18 May 2021 12:57 pm
- spclark
- Member
- From: "Driftless" Wisconsin USA
- Registered: 19 Mar 2020
- Posts: 478
Re: Waterlust sailing canoe in Norway
SP -- sounds like you have several auxiliary projects taking your attention! It's amazing how many tasks and jobs come from building this boat that are not even hinted at in the manual -- I guess that is part of the fun!
No kidding with any of that Chuck, none whatsoever. Then, besides building a boat, there's the other 'distractions' of living a life in these times, in this country, being (staying!) married, working part-time, maintaining a house and yard... better maybe to drop this particular tangent.
As for manuals? They're a guide, not a Bible in most cases. Much is left up to the reader/builder to bring their former experiences to the tasks being undertaken. Where there's gaps they're expected to expand their knowledge and skills to the extent necessary to satisfy their desire for A Good Job in the end. Yes it can be fun. Can also be frustrating at times. But learning is an on-going endeavor after all, so have at it! Good that we now have Forums (Forae?) like this one, that put up by WoodenBoat magazine (wider-ranging topics), and the one by CLC itself to ask questions and share experiences with others.
Chuck you're doing a fine job of things far as I can tell. Doing a trial fit of your project on your new roof rails is a good idea; I contemplated something similar at about the same point in my build then stopped after doing a test 'weigh-in' with a bathroom scale to get some idea of what my hull assembly weighed at that stage. The resulting number (weight at each end while far end supported as close to the end as possible, add numbers off scale) made me decide to buy the Trailex trailer for transport.
I just turned 72 and consider myself to be pretty fit for my age but the prospect of humping a 78 lb canoe onto the roof rack mounted to my MINI Clubman I felt a bit too much risk to both canoe and my body. Besides that, the overhang would be pretty severe so balance at speed was also a consideration.
I'm certain adding a deck raised that total weight some. Everything added beyond that point adds weight, alters CG, leverage needed to manipulate. Keep that in mind as you progress please.
The trailer has been a project unto itself of course. I made up a custom wood 'bunk' adapter recently to support my Waterlust fore and aft right at frames #2 and #4 with another member between them above the trailer's center frame, directly under and against the hull. Hopefully this all will make launch and recovery somewhat easier than what had come with the trailer.
Oh, and adding wiring to my MINI to power the trailer's lights. Yet another project. Figuring out how the interior panels come off w/o breaking anything so I can run a #10 wire from battery compartment up front back to the trailer light controller module in the boot. Got that done yesterday, left a couple of bruises on my arm from pressures encountered doing uncommonly tight extensions of my hand into rather cramped spaces. But it's done! And the wire's completely hidden!
Texas Jeff reports a wild run back to base on the last day of his Florida 120 adventure last weekend. Flood tide and conflicting winds had him facing waves at eye level; 15+ knot winds against 2.36 knot tide!
Quoted from his message:
"Stats from the cruise:
Total distance 92.1 statute miles
Time under way 19 hours 45 minutes
Average speed 4.7 mph
Max GPS captured speed 9.7
Awesome boat and strong as heck! Some confused waves last day where at my eye level in height!!! Frightening!!!"
So from this I'm thinking these boats are tougher than we might have thought at first, maybe tougher than some of us also!
Last edited by spclark (18 May 2021 1:01 pm)
Offline
#652 18 May 2021 1:18 pm
- MartinC
- Member
- Registered: 3 Apr 2020
- Posts: 353
Re: Waterlust sailing canoe in Norway
Re. Tiller clamp.
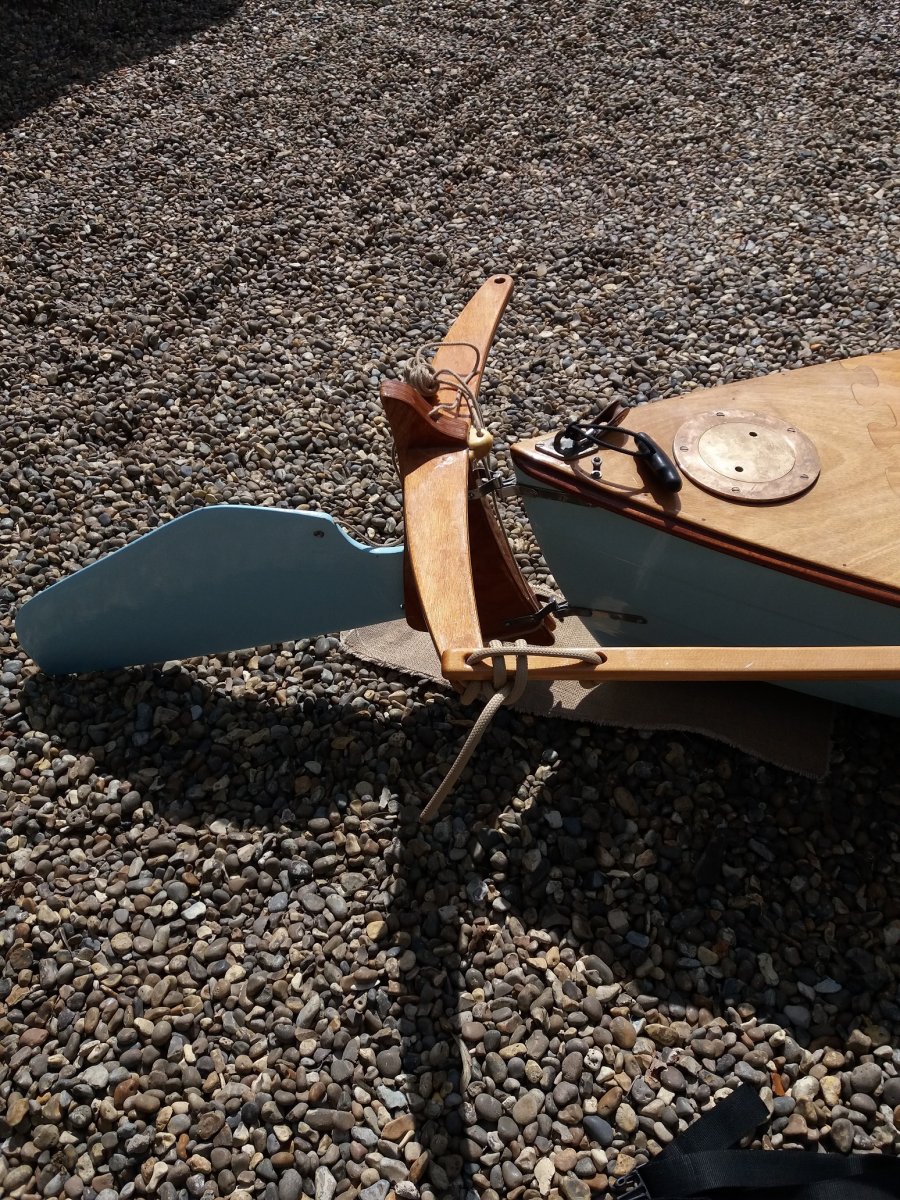
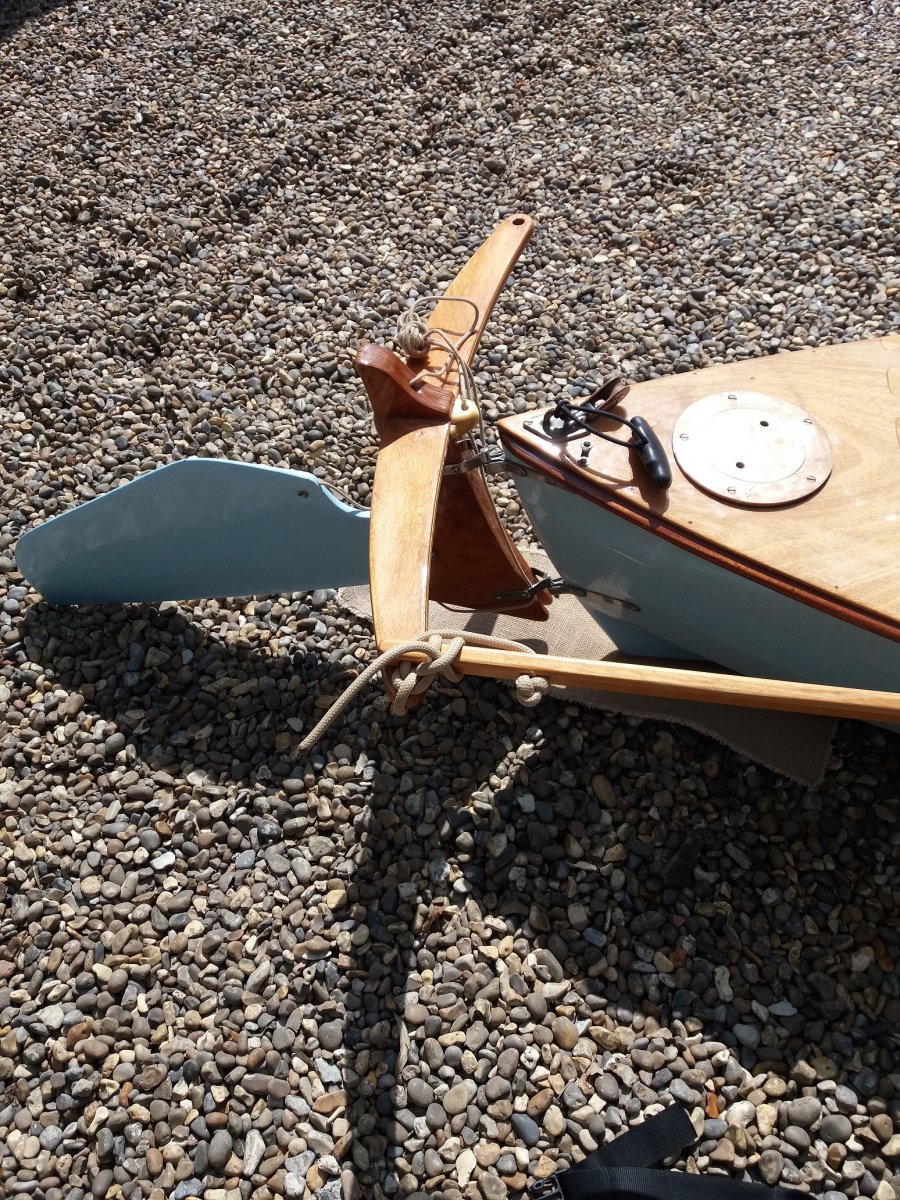
I have fitted this now using the double sided tape it comes with and it seems very satisfactory, although the tiller has to be turned 90 degrees to fit easily. This isn't a problem for me as I use Guy's rope method of fixing the tiller to the rudder yoke which allows it to twist. (If you have a fixed coupling here, it might be a problem). Here is a photo of the clamp in-situ and two showing Guy's clever rope fixing - one in sailing mode and one in clamped mode.
As I have some spare clamps (they come in packs of 8!) I can forward one to anyone who wants one but can't buy one in their country.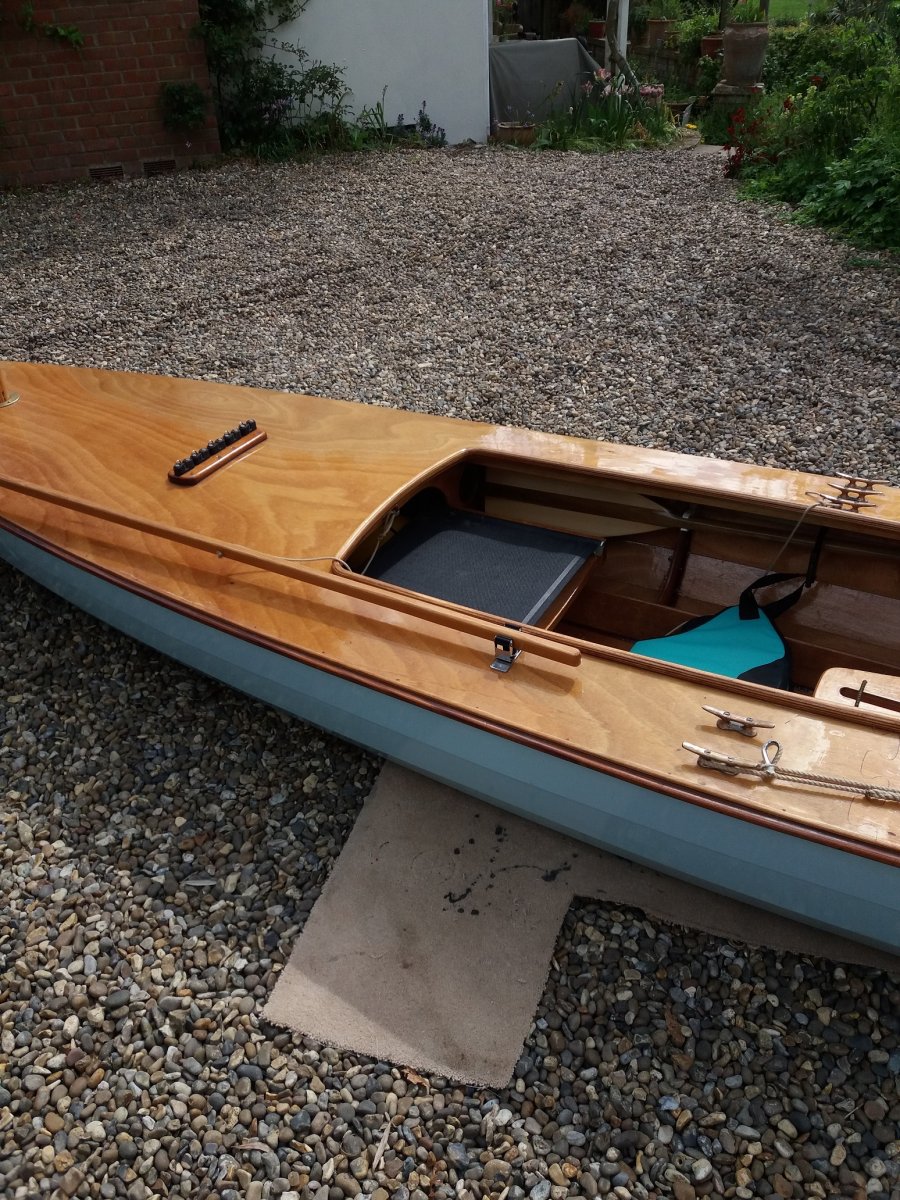
Offline
#653 18 May 2021 2:14 pm
- spclark
- Member
- From: "Driftless" Wisconsin USA
- Registered: 19 Mar 2020
- Posts: 478
Re: Waterlust sailing canoe in Norway
Nice pics Martin, thanks! I'll be getting on to fitting deck hardware soon enough, any and all details about how others have done theirs gets careful review!
(Once again I have to thank the FyneBoats folks for making their forum here so image-friendly. That maxim about 1,000 words doesn't come close to cutting it in this the Internet age.)
Offline
#654 21 May 2021 12:11 pm
- Bergen_Guy
- Member
- Registered: 6 Feb 2020
- Posts: 353
Re: Waterlust sailing canoe in Norway
That's a nice idea Martin - I think I use a similar thing for keeping the sweeping brush on the wall in the utility room! Looks like it should work a treat. I think I drop my tiller extension in the water pretty much every time I go out, often when people are getting in or out, so one less thing to think about would be a good thing.
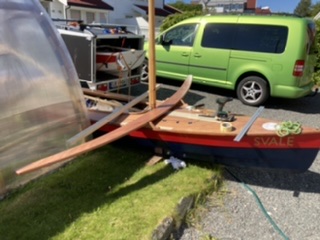
I am just back in from the huge epoxy fest that is bonding the cross beam of the outrigger kit. That's four layers of ply thick, they need un-thickened resin, followed by thickened resin, then stacking up, clamping. The tips are then wedged up 5cm higher than the middle part to give it a gentle camber. It went fine, but I have now got used to thinking ahead, planning how I am going to clamp, planning what will get stuck to what what, when and what needs a covering of plastic so it won't stick. Anyway, It looks ok, so tomorrow I will be able to unclamp it and start on tidying it up.
I saw on instagram a few more photos of our friend from Texas, with the fully rigged boat hauled up on a beach. It looks great, which always helps one get back to the garage with yet another tub of resin in hand!
I have also started with the dynel tape re-enforcements - so far on the bows of the outriggers, as they are not painted yet. They are glued on with epoxy / graphite powder mix, and filled with the same. What resin I had left I have painted down the 'keel' of the outriggers. Figure it will do more good there than hardening in the bottom of a yoghourt pot. I aim to do the main hull at some point too - but that will be a bit more involved as I will need to strip back the paint before I can apply the tape.
I hope you are all enjoying whatever weather the spring is bringing you!
Offline
#655 22 May 2021 2:32 am
- Chuck
- Member
- Registered: 24 Nov 2020
- Posts: 141
Re: Waterlust sailing canoe in Norway
A question for Waterlusters:
Is it an issue to mix different epoxy types? More specifically, would it be a problem to put West system epoxy on top of the standard MAS LV/slow epoxy?
-Chuck
Offline
#656 22 May 2021 9:54 am
- MartinC
- Member
- Registered: 3 Apr 2020
- Posts: 353
Re: Waterlust sailing canoe in Norway
I can't help you with this I am afraid Chuck, as I think it is quite a complicated one. Hopefully, if someone from FBK is reading this, they might be able to advise.
Offline
#657 24 May 2021 10:02 am
- Ian
- Employee

- Registered: 24 Nov 2014
- Posts: 103
Re: Waterlust sailing canoe in Norway
Is it an issue to mix different epoxy types? More specifically, would it be a problem to put West system epoxy on top of the standard MAS LV/slow epoxy?
Applying one type of epoxy over another should be fine, as long as the first is fully cured (and sanded to key-in the surface, as usual).
Offline
#658 24 May 2021 7:40 pm
- spclark
- Member
- From: "Driftless" Wisconsin USA
- Registered: 19 Mar 2020
- Posts: 478
Re: Waterlust sailing canoe in Norway
Chuck wrote:Is it an issue to mix different epoxy types? More specifically, would it be a problem to put West system epoxy on top of the standard MAS LV/slow epoxy?
Applying one type of epoxy over another should be fine, as long as the first is fully cured (and sanded to key-in the surface, as usual).
I agree with Ian. In fact I'll be 'testing' this when I bond my black locust rub strips onto my Waterlust's hull soon. They've been coated with LV resin+slow hardener on the bonding surface. Plan is to use G-Flex to bond them to the hull once I've sanded away the Kirby's enamel that's there now. Held in place with sheet metal screws, once the G-Flex has cured the screws will be removed, their holes opened up then LV+fast hardener coated black locust pegs driven in.
On another topic: weight; you other builders have an idea of what your hull weighs?
Here's a URL that'll bring you a description of a simple method to weigh a boat on a trailer. Needs only a bathroom scale, tape measure, maybe a calculator... and no lifting!
windmillclass.com/static/weigh.html
I'm coming up with 130 lbs / 59 kg for mine in it's current state. No hardware or rigging, or other stuff aboard besides the caned seat I bought from CLC. Not far off what CLC suggests is the hull weight @ 115 lbs / 52.3 kg the way they build 'em.
Presently I'm focusing on getting trailer set up to carry my Waterlust safely, adding lights and wiring to both trailer and my MINI Clubman as required here in the US. No point in finishing the canoe if I then have to hurry getting the other tasks done before I can trailer it to its maiden launch site, eh?
Offline
#659 25 May 2021 3:16 am
- Chuck
- Member
- Registered: 24 Nov 2020
- Posts: 141
Re: Waterlust sailing canoe in Norway
SP et al -
I weighed my hull on a scale a while back and got 68 lbs; but that was without deck or the top panel on the inside hatches. I'm sure it is more now with the deck on and more glue and paint, etc. I thought that the CLC site says that their hull weight is 80 lbs, and 115 fully rigged??
I was very surprised that I went through all the glue sent with the kit and then some. I tried to go lightly everywhere with the epoxy to make as light a hull as possible, but will have gone through 2.75 gal of resin before I am done. I guess a lost a few batches that overheated when I was learning how to make up large mixes for glassing, and sometimes I mis-estimated how much epoxy to mix up and had leftover. But still, I am surprised I have used so much. Also, it is discouraging to run out of glass when trying to cover the deck at the end and having to make do with scraps all over, but I am not the first to have that problem (see the YouTube video of the Waterlust build in Germany).
I've made some decent progress since last time, but still have some way to go (some spars, foils yet). I think I might go easy on the finish coats for now just to get the boat on the water and come back to finish later.
I've learned that the trick of keeping your brush in a plastic bag to keep it from drying out might work for paint, but not for varnish: I had a brush grow all sorts of tiny varnish crystals that I didn't see until I had brushed them all over the spars I was coating. I also had a skin of it form in the can, like the sugar on creme brûlée (using the Interlux Schooner spar varnish).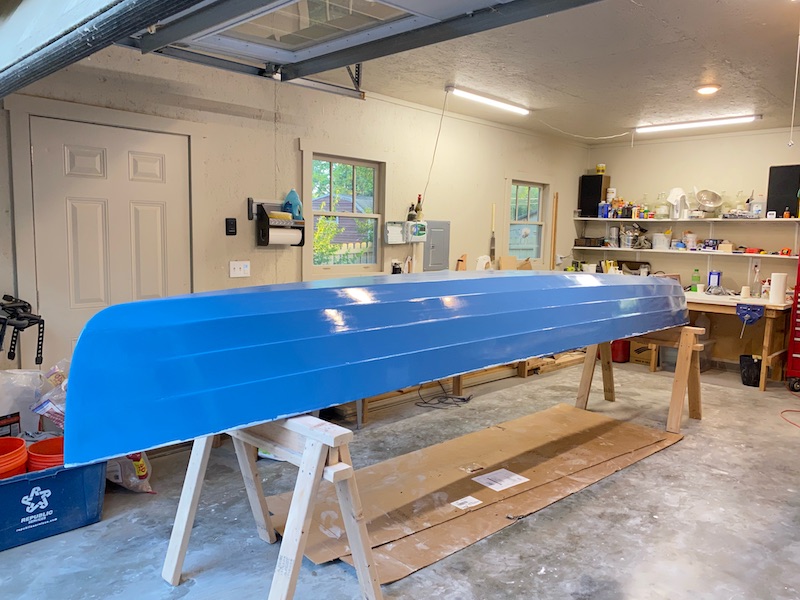
Last edited by Chuck (25 May 2021 3:18 am)
Offline
#660 25 May 2021 3:31 pm
- spclark
- Member
- From: "Driftless" Wisconsin USA
- Registered: 19 Mar 2020
- Posts: 478
Re: Waterlust sailing canoe in Norway
SP et al -
I weighed my hull on a scale a while back and got 68 lbs; but that was without deck or the top panel on the inside hatches. I'm sure it is more now with the deck on and more glue and paint, etc. I thought that the CLC site says that their hull weight is 80 lbs, and 115 fully rigged??

That's what I was referencing, the entry on CLC's Pro Kit web page. And I think my SOP weights during construction were close to yours.
I was very surprised that I went through all the glue sent with the kit and then some.
I'm not!
Early on I bought more 'glass and epoxy as well, as much because I had a hunch I was building 'heavier' than CLC likely strives for as because I was anticipating other projects I could undertake once I became more confident using these materials.
Taking cues from other forums' posts I chose to 'start small' when mixing batches. I think the largest I ever mixed was maybe 32 'pumps' each of resin & hardener when I was 'glassing the hull bottom, or maybe the deck's underside.
Practice by then had me diligently mixing for three minutes then getting the resulting mix onto the work surface quickly! Never had a batch go bad in the cup though I did have one or two 'bags' of filleting mix start to get warm in my hand. From that I learned added thickeners will act as insulation for a mix, causing it to retain heat of reaction hence begin to cure faster than once placed.
You're doing a bang-up job Chuck, we might be launching our respective projects on the very same day soon!
Last edited by spclark (25 May 2021 3:32 pm)
Offline
#661 27 May 2021 8:41 am
- Bergen_Guy
- Member
- Registered: 6 Feb 2020
- Posts: 353
Re: Waterlust sailing canoe in Norway
Hi all!
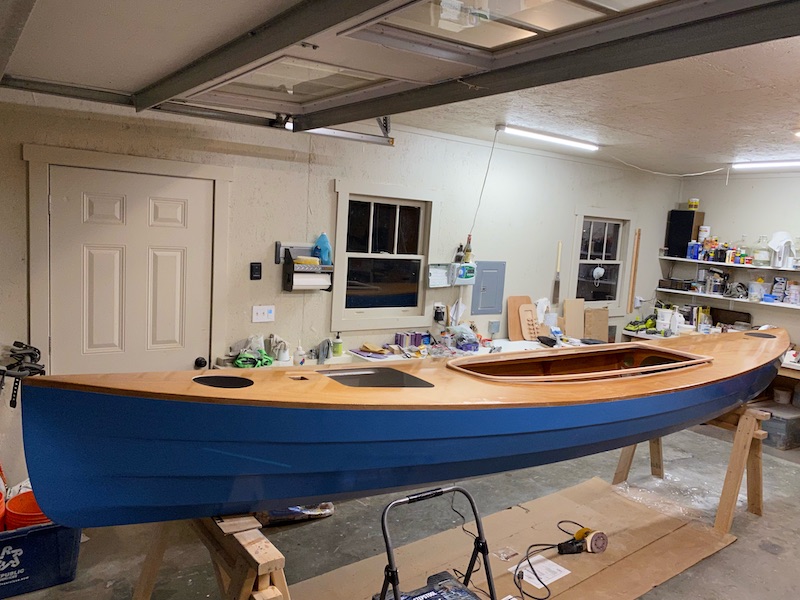
Nice colour Chuck! That's looking good. I must admit I have not got as far as weighing Svale - I am guessing it's a bit heavier than advertised, but so long as it's light enough for me to get her on and off the trailer on my own, that's ok by me
I am looking forward very much to seeing the next waterlust launches from you guys - good luck with the next steps. I borrowed a router a few days ago to round over the edges on the huge 'wing' that is needed for the outriggers. That was worth doing, as it does give a nice neat finish with the roundover. The hulls are being primed, might get one more sanding before I start with the top coat.
I did find out a few days ago that I had messed up making the deck pads used to lash the cross beam to the boat. I made two the same, instead of one left and one right handed. I hadn't really realised that it was possible to to do this. I had put them together one at a time using up excess resin from other jobs, but didn't have them next to each other on the bench when glueing them up. Nothing I couldn't fix with a bit of sawing and a new facing piece to reverse the angle on the inside, but I did feel a bit silly! So if you go the outriggers route, set both out on the bench, and check before you glue them up!
Offline
#662 27 May 2021 6:43 pm
- Bergen_Guy
- Member
- Registered: 6 Feb 2020
- Posts: 353
Re: Waterlust sailing canoe in Norway
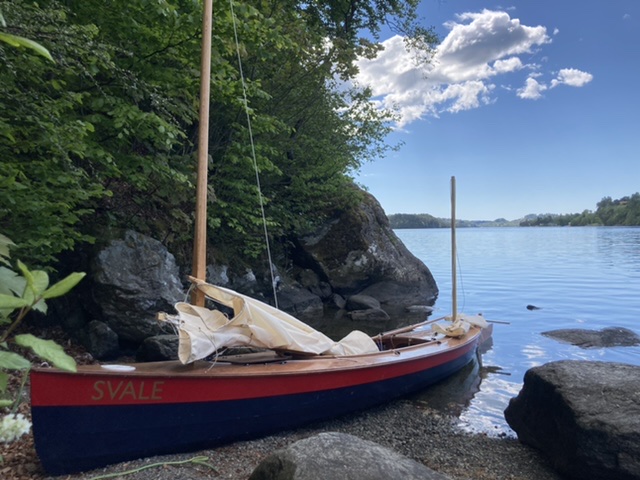
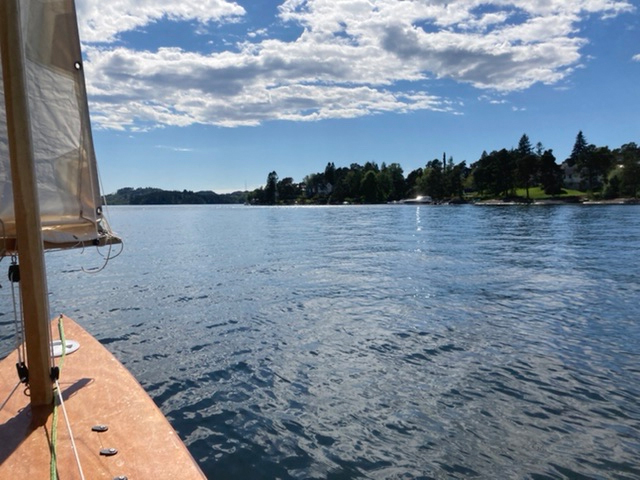
Thought I would share today’s sail! Work had a socialy distanced gathering just over the lake from me, so I sailed there. I had one reef in the main, and was glad of it in the windy parts! The wind gets turned round and round by the high ground, I found the sea sailing from a few weeks ago much easier. Still, with the reef in I never felt overpowered even if I was hiking like a dinghy sailor, with my feet stuffed under the fenders I currently have tied up under the side decks. All in all a good sail!

Offline
#663 28 May 2021 12:25 pm
- spclark
- Member
- From: "Driftless" Wisconsin USA
- Registered: 19 Mar 2020
- Posts: 478
Re: Waterlust sailing canoe in Norway
Nice job GB! I'll be at that stage some day soon enough too!
Curious what your work group might have had to say about your build?
(I fixed your inverted image for yah! You must be using an iPhone!)
Last edited by spclark (28 May 2021 12:35 pm)
Offline
#664 28 May 2021 6:13 pm
- Chuck
- Member
- Registered: 24 Nov 2020
- Posts: 141
Re: Waterlust sailing canoe in Norway
Wow, Guy -- your photo is fantastic. I've always liked the one up on the CLC pages, but I think this one is even better.
Things are still progressing here, although the last little bits seem to be taking ten times as long as expected! Glue, and glass, and coat, and varnish. Rinse and repeat.
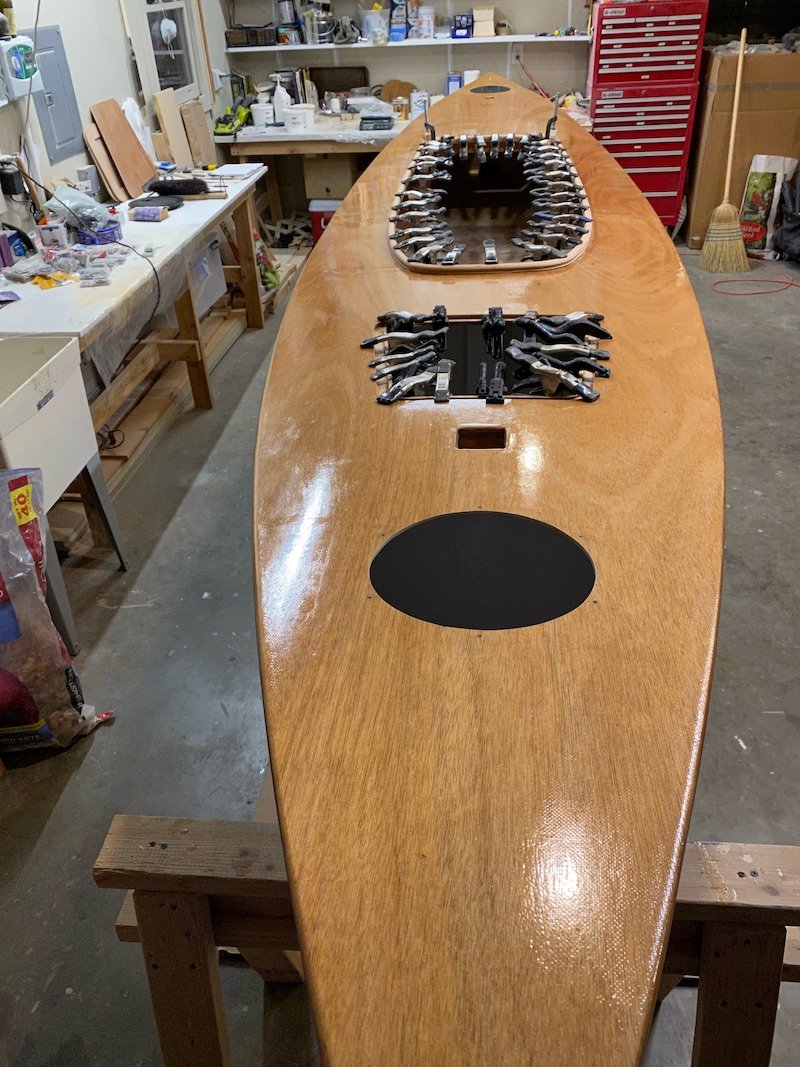
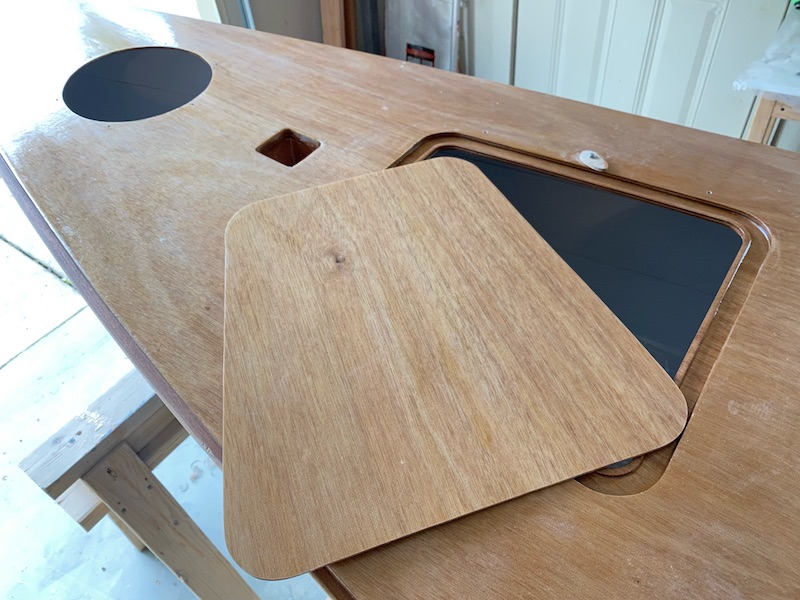
I agree that a router is just about the best thing ever -- for me, too good. I was so eager to round over the coaming that I forget to check twice and ended up starting a 6-inch roundover on the bottom (wrong) edge. Oh well, I hope no one will notice...
One thing the router did allow me to do was to put a groove in the coaming for a possible cockpit cover. I think in theory it might work, but the test will be whether it will stay on while going down the highway.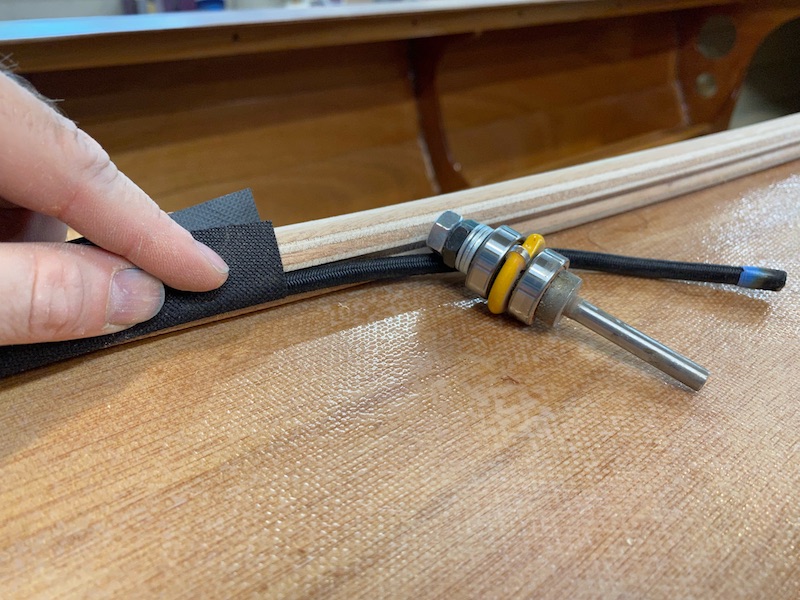
I recently finished fairing the foils and ended up with enough shavings to make a dog bed for a Great Dane. I made a template in aluminum flashing first following the suggestions for parallel-sided foils from Pollock which I found to be really helpful (3t for the daggerboard, and also for the rudder as I got too impatient to re-jigger the code). I'm not sure I matched the template extremely well (and it will also be quite changed when the glass goes on it), but the template was very useful to check that the fairing was uniform all the way down the leading edge.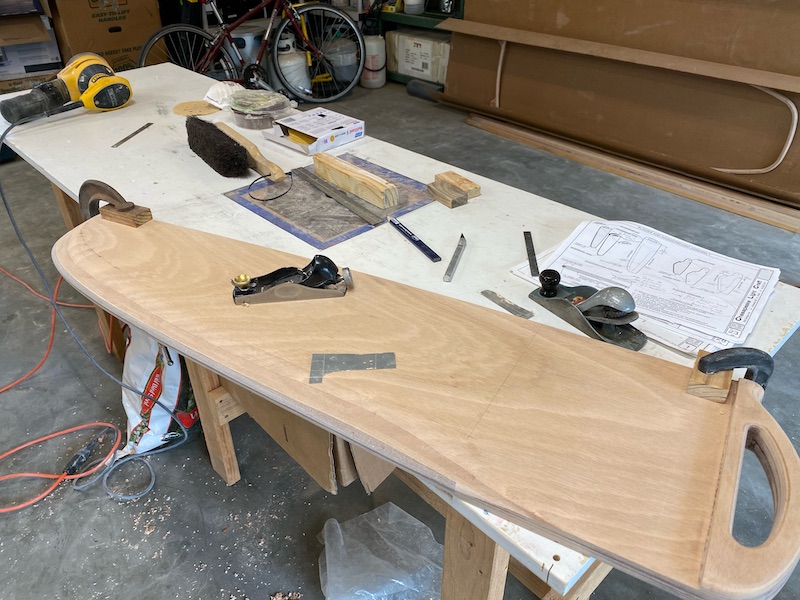
The West epoxy on top of the MAS was no problem. The West is quite a bit stinkier, and costs quite a bit more, so in the future I'll stick with MAS...
Last edited by Chuck (29 May 2021 3:43 am)
Offline
#665 29 May 2021 4:38 pm
- Bergen_Guy
- Member
- Registered: 6 Feb 2020
- Posts: 353
Re: Waterlust sailing canoe in Norway
Nice idea with routing a grove in the coaming, I like that. Tidy work on the foils too. I did mine freehand from builder yard stock as I didn’t buy the sailing kit, but sourced timber locally for mast and spars. The daggerboard was also part of that kit so I had to freestyle a bit there. I must admit the rudder from the kit is nicer than my homegrown daggerboard. Maybe one quiet day I will spend some time making some fancy foils.
Today I turned my attention to fitting the deck cleats to support the wing. A bit of careful measuring and double checking, and they are now bonding to the deck.
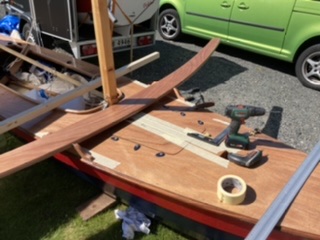
I stared off measuring- then screwed the cleats in position with small screws. Then checked with the wing in position. Realised they were a bit off where they needed to be, moved them, tried again. This time it looked better, so I measured to the tips of the wing from the bow eye. That seemed to match. I then made some location marks on masking tape on the rubbing stake so I could get everything back in place. Then sanded the deck back to the glass (I hope!) and got to work with the resin.
Next up will be re-enforcing bolts, and a bit more fine tuning before I get to work with the varnish.
Meanwhile the outrigger hulls have seen their first coat of blue on the lower panels.
Like you say Chuck, there seems to be an endless stream of small jobs just when you think the end can’t be so far off!
Offline
#666 29 May 2021 4:40 pm
- Bergen_Guy
- Member
- Registered: 6 Feb 2020
- Posts: 353
Re: Waterlust sailing canoe in Norway
SP - thanks for fixing my photo! You are correct - it’s an iPhone- and try as I might I haven’t found a reliable way of guaranteeing they come out upright here!
Offline
#667 31 May 2021 1:34 pm
- spclark
- Member
- From: "Driftless" Wisconsin USA
- Registered: 19 Mar 2020
- Posts: 478
Re: Waterlust sailing canoe in Norway
First way I'd found to do that is to e-mail myself the image first, see how it arrives. If it's not right side up, edit the original by rotating in Photos first one way, then back to upright, then save. E-mail again then save the image received if it's properly upright.
Or do what I did with yours: open it up in Photoshop then rotate, save. It's kind of a 'known issue' here as well as on other forums I've got reason to bother with so you're not alone. Other 'pixel-pusher' apps might be equally effective at this.
I'm really looking forward to hearing what you have to say about how the CLC ama kit affects your Waterlust experiences! Jeff's reports were exciting to read once he got his mounted & out on the water.
I've been working to get my trailer rig set up and my MINI 'adapted' to pull it. Yesterday saw completion of trailer wiring; all the lights work when trailer's plugged into the adapter I wired into my Clubman last week. I've also added a plug for the stern hang-on light out at the end of the hull's overhang (~ 42") off the back of the trailer, just for a little more safety for those following behind. That'll hang off the rudder's lower gudgeon while trailering.
Have an old friend making his annual visit up north (he's from Florida) in a couple of weeks. Taught me how to sail 50 years ago, will be helping with the launch of my Waterlust, if only under Mirage power at the start. It's that close to being ready now, just mount rudder hardware, rig rudder & tiller control line, bond inspection hatches in place, add seal and toggles to hatch... little stuff but it all takes time!
(Just noted this is post #667 on this thread... my post count here is 222 so I may be responsible for one-third of this entire thread ![]()
Last edited by spclark (31 May 2021 1:38 pm)
Offline
#668 2 Jun 2021 5:01 pm
- Bergen_Guy
- Member
- Registered: 6 Feb 2020
- Posts: 353
Re: Waterlust sailing canoe in Norway
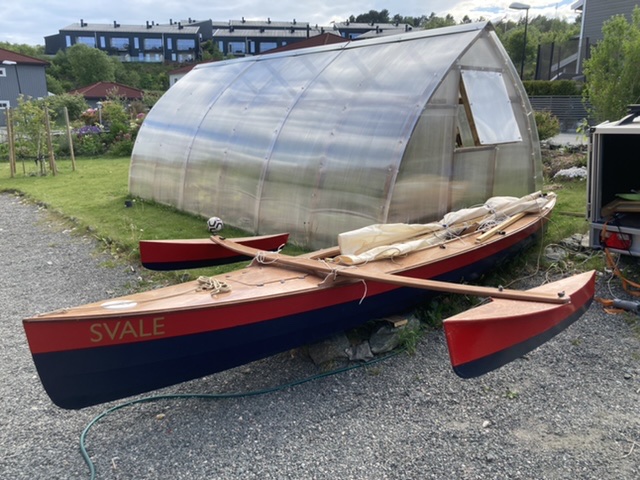
I’d say things are looking promising for the weekend!
Offline
#669 3 Jun 2021 2:04 am
- Chuck
- Member
- Registered: 24 Nov 2020
- Posts: 141
Re: Waterlust sailing canoe in Norway
That looks fantastic, Guy! I'm jealous of those amas.
I've been doing a lot of work on my build lately, and was hoping to launch today, but no luck this afternoon as thunderstorms rolled in...
And so, I'll just put another coat of varnish on the spars: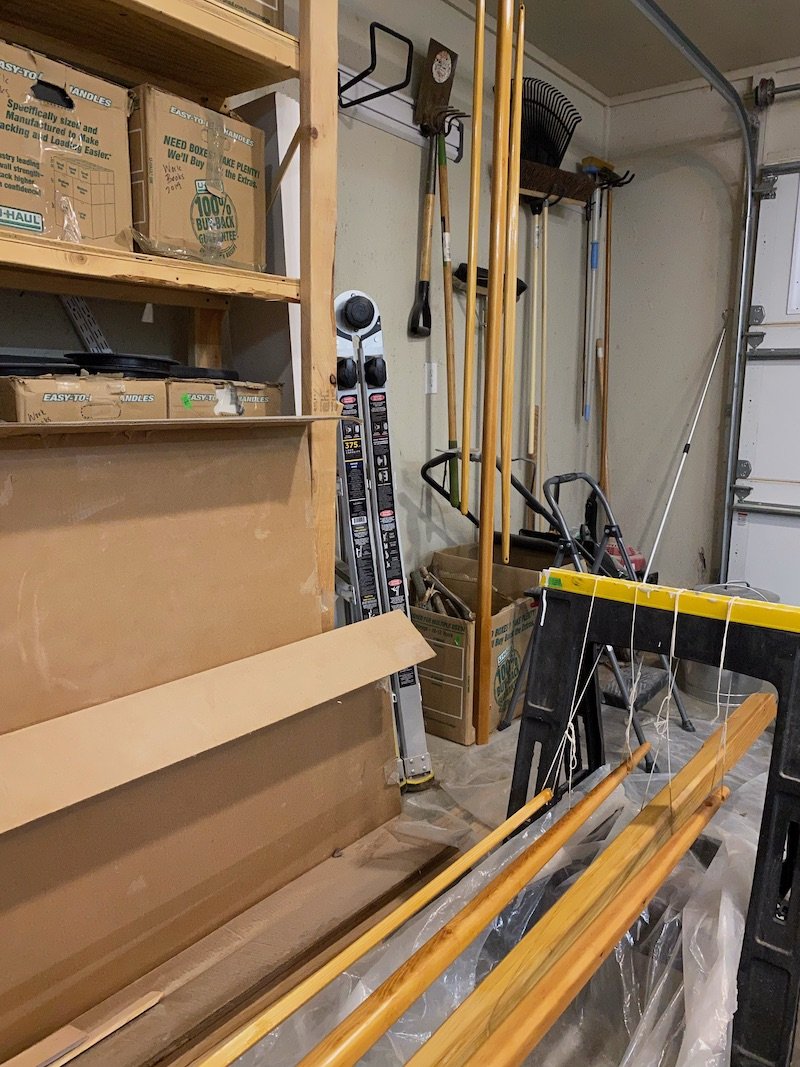
Do any of you have good pictures of your deck hardware? I am curious how you have managed all the blocks for running the rigging, whether you have gone with lashings to the spars or padeyes, how the reefing rigging is done, outhauls, etc...
And, do you find think that one can get away without having backing material under the deck when mounting things like a downhaul cam cleat to the deck?
The manual and the CLC build show a 'tiller tether' clam cleat on the tiller itself with a line running to the rudder yoke; is this just for adjusting the tension on the tiller connection?
Last edited by Chuck (3 Jun 2021 2:10 am)
Offline
#670 3 Jun 2021 3:21 am
- spclark
- Member
- From: "Driftless" Wisconsin USA
- Registered: 19 Mar 2020
- Posts: 478
Re: Waterlust sailing canoe in Norway
Guy you've done an awesome job of it! I can't wait to see your opinion of what the ama packages adds to your experience!
That's equally appropriate for you also Chuck, you're making excellent headway towards getting your project launched! Thanks for those new pics, I'm inspired!
Do any of you have good pictures of your deck hardware?
I'm at the 'ordering' stage for much of mine so pics would be Very Helpful, yes... maybe links to on-line sources too, even if not US-based companies.
Jeff Perkins was kind enough to send me his image library of construction progress on his Waterlust. I've posted a number of those images in prior posts so you might get some hints from those for not only hardware but also how he's set up his lines and lashings. This is a wonderfully long thread we're building here so going back over from near the start is a prodigious undertaking yet I think there's a lot of information there, some of which might serve to guide you and others.
I am curious how you have managed all the blocks for running the rigging, whether you have gone with lashings to the spars or padeyes, how the reefing rigging is done, outhauls, etc...
I think lighter as well as simpler is the mantra for this craft Chuck. Weight aloft only contributes to instability, little else of value for something as challenging as a sailing canoe.
And, do you find think that one can get away without having backing material under the deck when mounting things like a downhaul cam cleat to the deck?
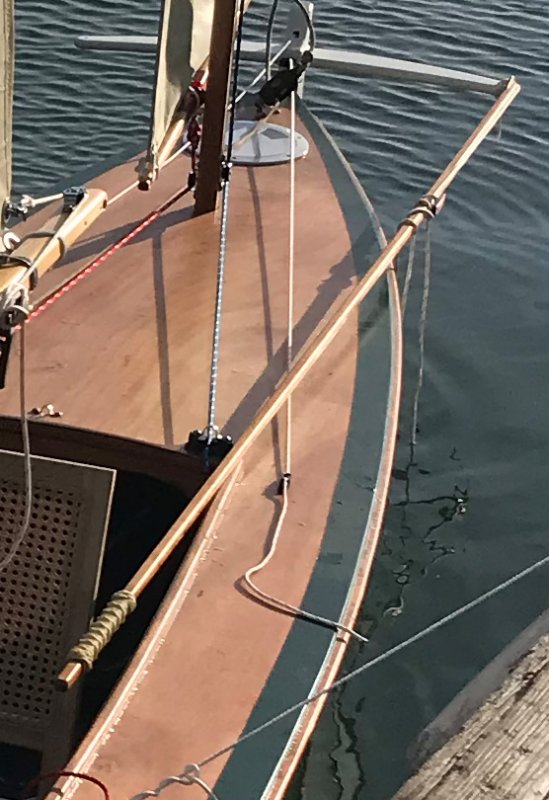
The forward main mast and mizzen pocket are substantially reinforced underneath the deck by the bits of ply supplied for (I suspect) the reasons you're wondering:
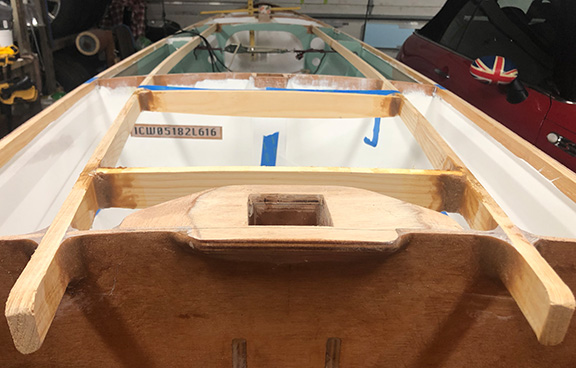
My surmise is that those parts are not only to counter forces imparted against the masts but also to serve as reinforcement for the downhauls necessary with this style of sail rigging. The deck near the rear main mast pocket might benefit from some additional material underneath as well, if perhaps only on the side where a downhaul is to be fixed when using the mainsail alone.
The manual and the CLC build show a 'tiller tether' clam cleat on the tiller itself with a line running to the rudder yoke; is this just for adjusting the tension on the tiller connection?
I've wondered about that also after seeing how Jeff's rigged his:
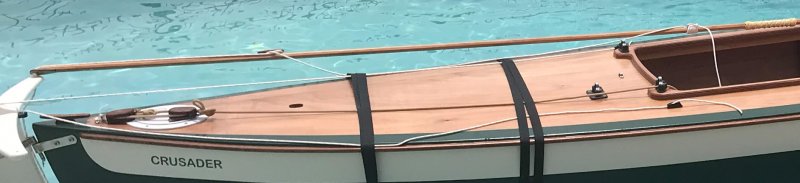
With a potential for the tiller to go adrift at an awkward moment without some means of retrieval, one can quickly appreciate the reasoning behind having a line attached by which it can be 'tethered' for retrieval.
Last edited by spclark (3 Jun 2021 3:46 am)
Offline
#671 3 Jun 2021 8:01 am
- Bergen_Guy
- Member
- Registered: 6 Feb 2020
- Posts: 353
Re: Waterlust sailing canoe in Norway
Chuck! That's looking super - great stuff. It's amazing how much time, and thought has to go into some apparently simple things like placing cleats on the deck! I would definitely want some backing behind the deck. For my main halyard and downhaul cleats on the side decks, I used the longitudinal stringers as backing, measure carefully the stance outboard from the cockpit coaming. I have no fittings on the foredeck at the base of the mast, as I use fittings on the mast itself, partly because the tension in the halyard / downhaul system can end up being very high on a lug rig, and I didn't want to rip anything out of the deck!
As for the tiller cam cleat, that is not adjusted once it's fitted, but the tether, as mentioned by SP is essential, as I found out from bitter experience when I dropped it while trying to beat out of a tight spot! Thankfully the vessels yawl rig came to the rescue, I quickly dropped the main, sheeted the mizzen in, and everything calmed down enough for me to take a careful trip out to the stern to retrieve the tiller extension that was now dangling aft of the rudder yoke!
I will try and do a little video walk round of my hardware set up, which might be quicker than posting loads of photos.
Offline
#672 3 Jun 2021 1:34 pm
- MartinC
- Member
- Registered: 3 Apr 2020
- Posts: 353
Re: Waterlust sailing canoe in Norway
Well done everyone! Some really good progress all round.
I know, Gaia is going to be very different from everyone else's Waterlust and not to everyone's taste, but for what it's worth, I started with all the blocks in the manual and found that it was all much too complicated for such a little rig. (And mine is now even smaller having reduced the mainsail by 50%!).
I now get by without any blocks at all other than a mainsheet one and a mizzen sheet one. I have three horn cleats on one side and 2 on the other side at about the halfway point where I cleat the mainsail downhaul, mainsail halyard, mizzen sheet and fore and aft painters. (Don't forget the painter - it's difficult to sail without it and I have two so I can tie them together supported by the two masts to form a 'ridgepole' for my rain/sun cover!).
On the aft deck, just behind the aft deck seating position, I have 5 camcleats; Rudder uphaul, rudder downhaul, mizzen halyard, mizzen downhaul, spare. The spare is there because I found it impractical to have the mizzen sheet behind the sitting position.
I know this isn't for everyone (or anyone else!), but I sail Gaia on narrow rivers with bridges where the important factor is simplicity both of sail and de-rigging/re-rigging underway. I also like to pedal/sail to windward and not do any hiking out - as I have found it is impractical for a gent of my advanced years to keep bobbing up and down like a young dinghy sailor!
I have a steel daggerboard which increases stability markedly and I am currently experimenting with using the lockers each side of the pedal well as water ballast (Guy's idea) when the wind gets up.
I think that when rigging the boat you have to decide how you are going to sail her. Are you going to pedal with sail auxillary (and sit on the floor) or sail with pedal auxillary (and sit on the deck). In my view you can't do both!
PS Tiller tether is essential as Guy found out, and I think a tiller cleat (as per my earlier post) is also handy.
Once again, well done everyone. Your progress is inspirational!
Offline
#673 3 Jun 2021 4:34 pm
- Bergen_Guy
- Member
- Registered: 6 Feb 2020
- Posts: 353
Re: Waterlust sailing canoe in Norway
A quick look round my deck fittings. I will try and do a better tour of the fully rigged and outriggerd up boat over the weekend for you all!
G
Offline
#674 4 Jun 2021 5:02 am
- Chuck
- Member
- Registered: 24 Nov 2020
- Posts: 141
Re: Waterlust sailing canoe in Norway
Guy, thanks so much for that video! It is extraordinarily helpful to see how others have tackled some of those problems. So many of the photos of Waterlusts out there are meant to illustrate some other point, and I have been busy blowing up pixellated images to see just how the fittings were rigged -- your video is much more clear than that strained process!
I hope to launch my boat this weekend. The last remaining items (that I am aware of!) are the fittings and how to tie the boat down to the top of the car.
Last edited by Chuck (4 Jun 2021 6:47 pm)
Offline
#675 5 Jun 2021 8:33 pm
- Bergen_Guy
- Member
- Registered: 6 Feb 2020
- Posts: 353
Re: Waterlust sailing canoe in Norway
Chuck,
Good luck with your long car journey! I always worry that I haven’t got the straps tight enough, or that something will rub and do damage I won’t see till I get where I am going.
Anyways - I was out sailing today for the first time with the outriggers. Well, a great success, they really add to the boats capabilities. Sadly they also add to the weight and to the rigging time, but that’s life.
I strung together a few videos I took, ( no editing - sorry) so you get an idea of how things came out.
Offline