You are not logged in.
- Topics: Active | Unanswered
#601 20 Jan 2021 1:52 am
- Chuck
- Member
- Registered: 24 Nov 2020
- Posts: 138
Re: Waterlust sailing canoe in Norway
Wow! I'm not sure I have ever seen a lapstrake ama before...
Offline
#602 21 Jan 2021 4:25 pm
- MartinC
- Member
- Registered: 3 Apr 2020
- Posts: 348
Re: Waterlust sailing canoe in Norway
Yes really nice! As well as the lapstrake, I particularly like the curved aka and the delicacy of the design.
How soon before Fyne can sell me a kit?!
Offline
#603 22 Jan 2021 7:18 am
- Bergen_Guy
- Member
- Registered: 6 Feb 2020
- Posts: 353
Re: Waterlust sailing canoe in Norway
I have ordered mine already! I think it's going to be a major step up in the capabilities of these fine small craft, and I agree it looks like Dillon has done a nice job, nicely in keeping with the boat as it already is, but also looks like they have thought through rigging and de-rigging options. I like that the amas will store inside the hull too - that will help a lot for storage and transport.
Now the pressure is on to get the boys pram finished and out of the workspace so I can get started on the outriggers when they get here! Looks like it's going to be quite a fiddly job to do nicely, there are as many steps as making a full sized hull, only smaller. Also there are TWO decks to fit... that was my least favourite job (after fiberglassing the inside of the hull) at least these are smaller and I hope I can do a better job second time around!
here's to a bright "waterlust" 2021!
Last edited by Bergen_Guy (22 Jan 2021 7:19 am)
Offline
#604 24 Feb 2021 8:22 am
- Bergen_Guy
- Member
- Registered: 6 Feb 2020
- Posts: 353
Re: Waterlust sailing canoe in Norway
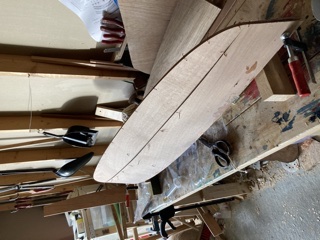
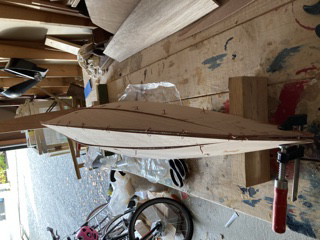
The outriggers kit is here. I have started work, the hulls are stitched and I will move on to filleting inside and out today. On the one hand it’s very straightforward as I am able to work on the workbench, on the other hand they are small, fiddly and light so keeping them still is not as easy as with a ‘full sized’ hull. So far, everything has worked fine, even though I made the silly mistake of measuring the angle of the bevel on the shear clamp before fitting the fore and aft spacers, which add more curve to the hull. Nothing a bit of thickened epoxy could’t sort out! As you can see they are skinny things, but quite deep. Exciting times. I am looking forward to getting them done and fitted.
Offline
#605 25 Feb 2021 12:51 am
- spclark
- Member
- From: "Driftless" Wisconsin USA
- Registered: 19 Mar 2020
- Posts: 478
Re: Waterlust sailing canoe in Norway
Good seeing progress on this Guy! Particularly as I was a strong advocate for CLC & Dilllon M. to put the work into bringing the kit to us.
I know our TX friend Jeff's got the same kit as you and making headway once again after the catastrophic weather events of the past couple of weeks down there.
And even if you've received the e-mail from CLC out today, here's a link that'll bering you a wonderful essay by Clemens Wergin about his Waterlust adventure last June!
https://www.clcboats.com/images/2021/We … Wergin.pdf
Won him the U.K.'s Dinghy Crusing Association Journal's 60th Naylor Noggin Award!
Offline
#606 25 Feb 2021 7:17 am
- MartinC
- Member
- Registered: 3 Apr 2020
- Posts: 348
Re: Waterlust sailing canoe in Norway
Well done Guy! I will follow your progress with great interest, although having spent quite a lot on my reduced rig and heavy steel daggerboard, I am not going to rush to buy the outriggers before trying out my present setup. I do like the look of the outriggers though and will probably order some in the summer, for added sailing flexibility.
I was very interested in Clemens Wergin's article, SP. Many thanks for that. It was interesting that Clemens also felt the Waterlust was rather overpowered and vindicates the decision to go for the outriggers. What a fantastic cruising ground! I thought I knew most of the European rivers/lakes, but I had never heard of the Kleinseenplatte. I can't wait!
By the way, I can highly recommend the Venice Velaraid mentioned in the article to all sail and oar fans, (although probably a bit of a stretch for you SP!), when the world gets back to normal. Sailing in the Venice lagoon with all its history and diversity is a huge privilege and once in a lifetime experience.
Offline
#607 25 Feb 2021 2:41 pm
- spclark
- Member
- From: "Driftless" Wisconsin USA
- Registered: 19 Mar 2020
- Posts: 478
Re: Waterlust sailing canoe in Norway
Yah, trip - with or w/o canoe - to Venice isn't likely gonna happen for me unless I win a lottery, if then. Maybe next lifetime?
I'm taking a different course for a stability add-on. Early on when posts here described issues with stability I contacted Dillon, the results from his efforts at CLC are the kit they're producing. But not knowing when or whether anything would come of my initial efforts I enlisted the interest of a Canadian naval architect, Mike Waters. He's designed some very successful trimarans, one of which is available fro CLC in fact, his W-17. Mike feels a half-size set of the amas off that W-17 design would work well for the Waterlust. His concept has them mounted to a pair of akas that can be folded to bring the amas alongside the main hull, easing transport.
I'm working on a set of these reduced-scale amas currently, with a mind to perhaps using a modified aka according to Dillon's concept rather than a folding pair, at least initially.
Other than that I'm looking forward to warmer weather here in Wisconsin so that I can get my Waterlust hull out of winter storage, onto its trailer & out of the garage, the better to work out details of the rigging & hardware mounting to accommodate masts, spars & sails. Spring's not far off!
Offline
#608 28 Feb 2021 3:49 pm
- Chuck
- Member
- Registered: 24 Nov 2020
- Posts: 138
Re: Waterlust sailing canoe in Norway
Thanks for posting photos of the new Waterlust outriggers kit!
The article on the German Waterlust expedition was also very interesting and I was glad to see more photos of the boat on the water; I always found it a little disappointing that there wasn't more detail on the CLC site on the original Waterlust trip down the Intracoastal Waterway. I keep looking for someone to report sailing one in something like the Everglades challenge (which would certainly be a thorough workout for the boat!) Even though my ambitions will probably not rise to that level, I am curious how the boat would do.
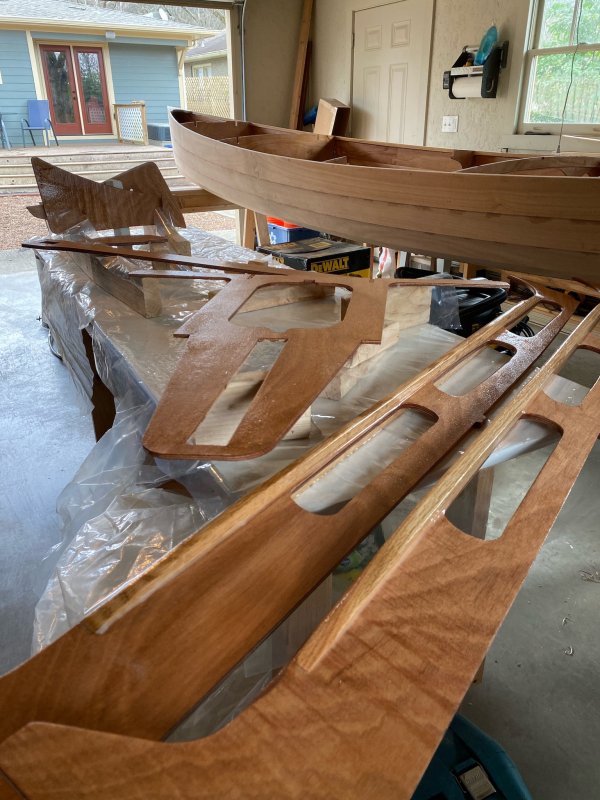
The weather here in Alabama has yielded a few warm days (>20C) lately, and I have begin to do a little more work on the boat (following SP's suggestion for reinforced longitudinals to support a higher seat):
Last edited by Chuck (28 Feb 2021 3:49 pm)
Offline
#609 28 Feb 2021 7:22 pm
- Bergen_Guy
- Member
- Registered: 6 Feb 2020
- Posts: 353
Re: Waterlust sailing canoe in Norway
Great progress Chuck! Your build is looking very neat! Great idea to follow the ‘SP’ mod on the stringers. I would do that too were I starting again. I got a bit of time over the last few days and got the fillets in, and the lap joints filled. I think next up is tidying up and bevelling the shear clamps and coating the inside in resin.
It’s a bit odd making something that is not symmetrical! I really really hope I got everything the right way round!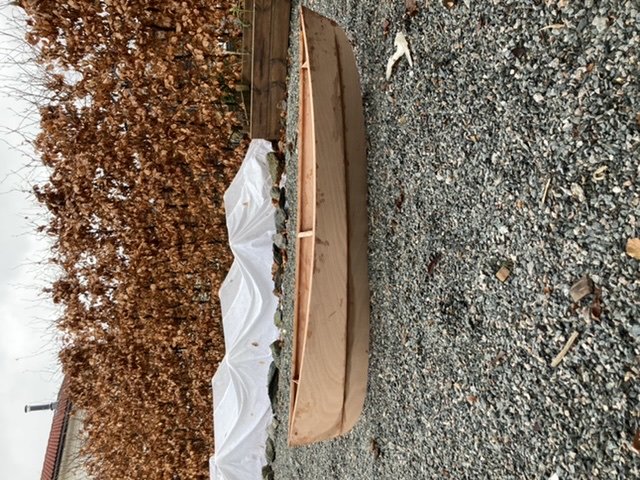
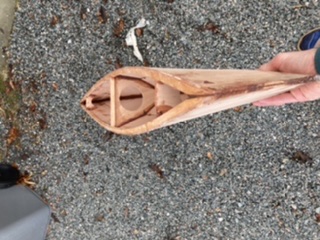
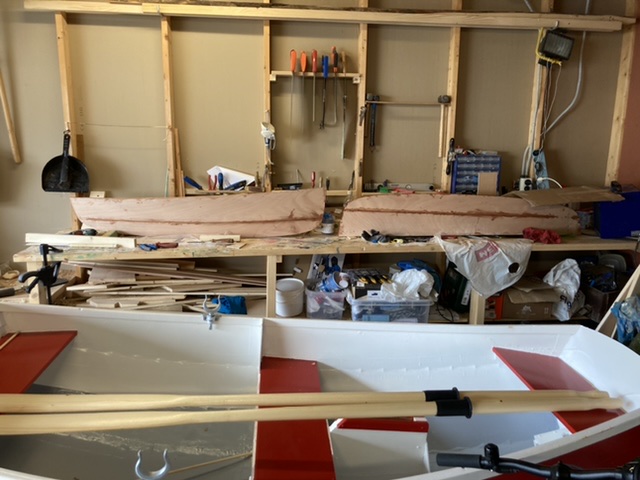
Ah! At last, one photo the right way up! - two soon ready for tidying and internal resin before the decks go on. Those really need to end up on the correct one so that everything attached properly.
Offline
#610 10 Mar 2021 3:36 pm
- Chuck
- Member
- Registered: 24 Nov 2020
- Posts: 138
Re: Waterlust sailing canoe in Norway
Hi All -
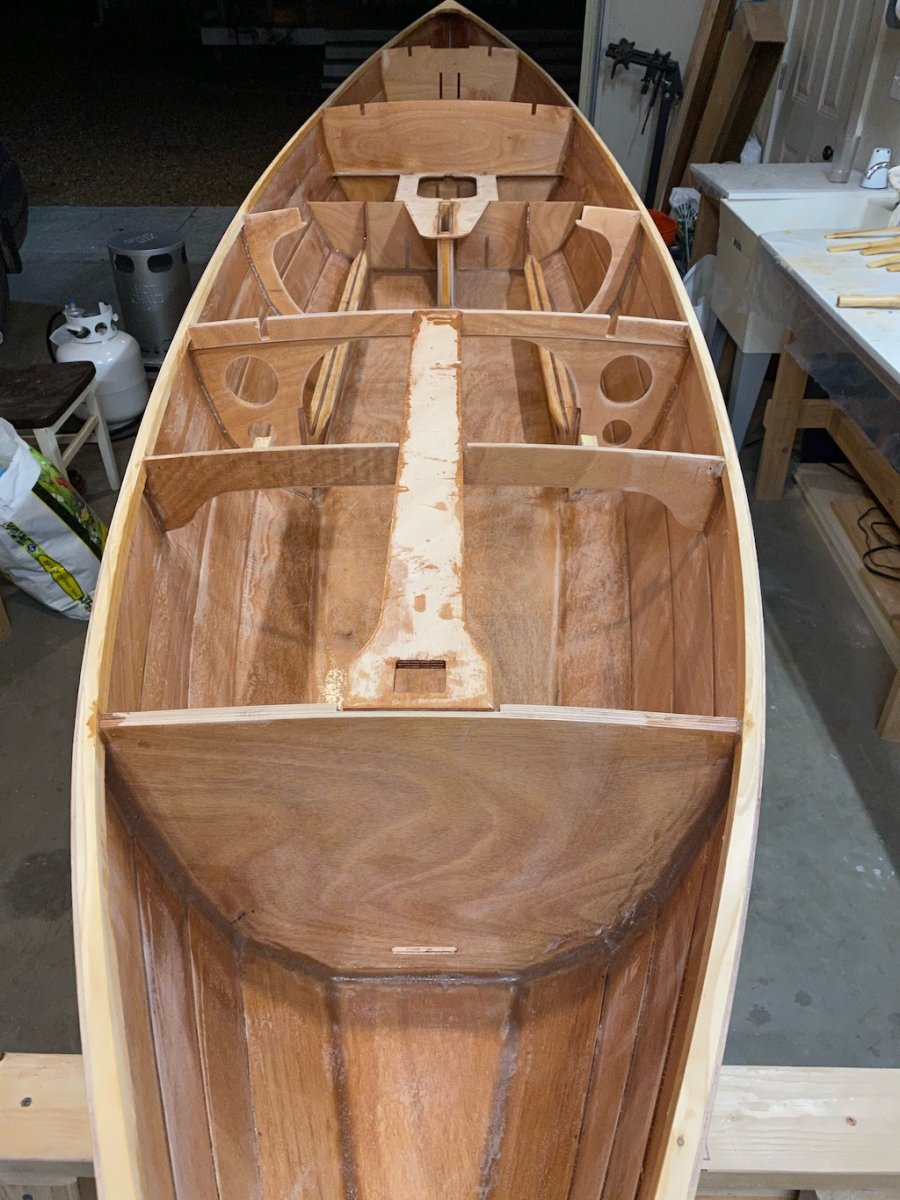
Given the posts earlier in this thread on capsizing and recovering, I have been thinking about additional flotation under the side decks. (see: https://www.bootsbaugarage.ch/hugh/h_essay2_en.htm for some thoughts on this). I've added some holes in the stringers for tie down points there as well as the longitudinals, and have been thinking about lacing in some air bags. Have any of you guys explored down this route?
This is where I am at the moment, getting ready to glass the bottom:
Offline
#611 14 Mar 2021 1:54 pm
- MartinC
- Member
- Registered: 3 Apr 2020
- Posts: 348
Re: Waterlust sailing canoe in Norway
Well done Guy and Chuck with your progress. Both looking really good.
Re. Flotation under side decks. This is really born out of the experience of my capsizing event, rather than anything scientific, but I would guess (and it is a guess!) that there isn't enough space under the deck to fix a big enough flotation bag to support your weight and the weight of the water inside the boat, to allow you to be able to climb in over the side. However, it is certainly worth a try and I would like to be proved wrong!
Let us know how you get on. I will do likewise with my heavier daggerboard as soon as things warm up a bit here.
Offline
#612 14 Mar 2021 6:23 pm
- Bergen_Guy
- Member
- Registered: 6 Feb 2020
- Posts: 353
Re: Waterlust sailing canoe in Norway
Hi Chuck! Nice progress - it’s looking great.
I have tied some fenders up under my side decks but didn’t really feel they made so much difference to stability of the recovered boat, or ease of righting. If I were to make one change, I would consider blocking off access to the area under the aft deck. This would reduce considerably the amount of water you could get in the hull, and reduce the free surface area hugely. The cost would be a hull you might not be able to sleep in (unless your mod was pretty clever) and no ‘easy access’ space back there when you are under way. I find I kick my folding seat under there when the wind picks up and I am just out for a quick sail. In the summer when we went for a three day trip that area was completely full of gear. So had we capsized I think there would have been much less water inside than I found during my tests last year. I am co soldering getting some huge buoyancy bags and filling that space for day sailing, and keeping the easy access for expedition type trips.
I made a bit more progress on the amas, inside is now coated with resin and soon ready to fit the decks. I might paint a bit inside just so it’s easier to see what’s going on in there through a tiny inspection hatch! The bevel needed on the shear clamps is quite extreme- and holding the thing still while using a block plane in the other hand was not easy! I am nearly there though. Slightly scared of putting the decks on the wrong way round so I think there will be a few rounds a labelling things before I mix any resin!
Offline
#613 15 Mar 2021 7:22 am
- MartinC
- Member
- Registered: 3 Apr 2020
- Posts: 348
Re: Waterlust sailing canoe in Norway
When I capsized last summer I had three 1m long (250mm diameter) floatation bags under the aft deck, which almost completely filled the space.
When I had righted the boat, there was relatively little water in it (100mm max at the deepest point). It was easy to right, but my problem was getting back in; as I only had to lean on the deck and the boat flipped over again before I could board.
In view of this, I am not convinced that increasing aft buoyancy will solve this issue. If anything the boat was floating too high in the water.
I think that what is required when boarding from the water is a counter balance ie a heavier daggerboard. But I'll let you know if the 15kgs I have works!
Offline
#614 15 Mar 2021 8:01 am
- Bergen_Guy
- Member
- Registered: 6 Feb 2020
- Posts: 353
Re: Waterlust sailing canoe in Norway
Good point Martin. It’s going to be interesting to see how your new set-up will work! I will probably continue with my plan to convert the side tanks to water ballast. Not sure if I will get that or the outriggers done first. Will report back once I have some more progress.
Offline
#615 16 Mar 2021 8:55 am
- MartinC
- Member
- Registered: 3 Apr 2020
- Posts: 348
Re: Waterlust sailing canoe in Norway
Thanks Guy. I am really keen to hear how you get on with both your projects. I feel sure your water ballast idea will help solve the 'boarding when capsized' issue. Well done for 'blazing the trail' once again!
Offline
#616 18 Mar 2021 7:35 am
- Bergen_Guy
- Member
- Registered: 6 Feb 2020
- Posts: 353
Re: Waterlust sailing canoe in Norway
A quick progress update - I have now fitted the decks to the amas - a slightly terrifying thing to do as everything is asymmetric and it is possible to put them on the wrong way round. I really hope I got this one right, as they will not be coming off in a hurry! Next up is a few small parts to re-enforce some areas where the deck overhangs the hull, a bit of filleting and then they get glassed pretty much all over. Fitting the decks was infinitely easier than on the main hull and the combination of masking tape and a few trusty slate tiles was quite sufficient to hold the decks in place. The biggest problem I have is that they are so small and light, and have no straight lines, so keeping them still while working on them, or glueing things is not so easy. I have taken to propping them up from each side with large objects like full paint tins etc. Next operations should be straightforward, the glassing will take a bit of prep, mostly related to holding them still while I work on them! I have worked in parallel, doing the same operation on each hull in the same work session and that seems to have worked for me.
Offline
#617 23 Mar 2021 7:46 am
- Bergen_Guy
- Member
- Registered: 6 Feb 2020
- Posts: 353
Re: Waterlust sailing canoe in Norway
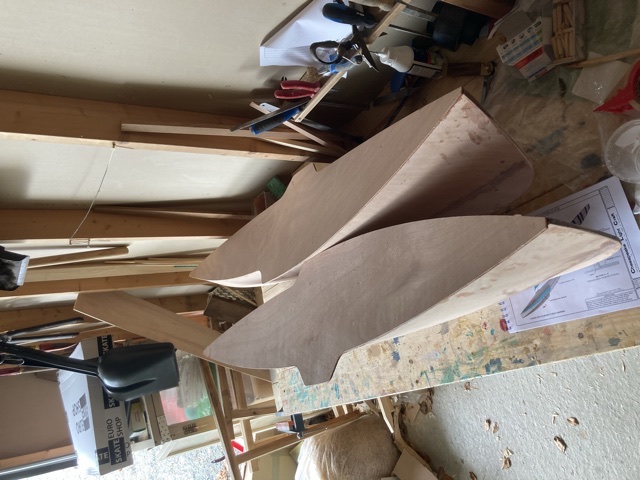
Decks are on and I have started fiberglassing.
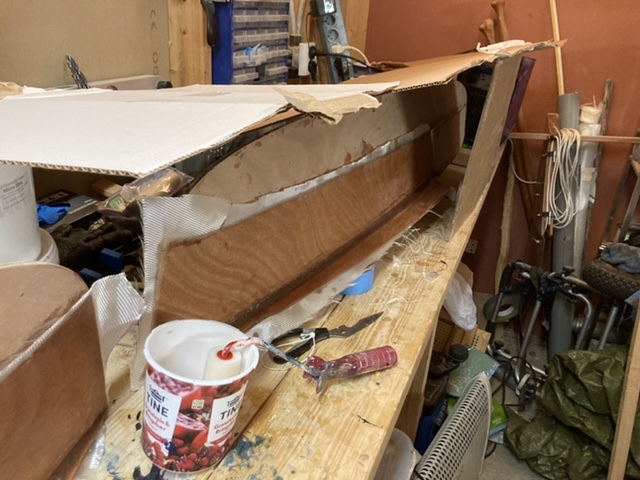
Cardboard boxes are to channel warm air from the heater! It’s still cool in the garage...
No big issues, decks fit better than those for the main hull, where we all had fun pulling the sides of the hull in, no such problem here. A few more glassing sessions and we should be good. I will also put a strip of dynel and graphite thickened epoxy at the bows of the outriggers. I will also retro fit dynel and graphite strips on the bow and skeg of the main hull for improved abrasion resistance.
Last edited by Bergen_Guy (23 Mar 2021 7:49 am)
Offline
#618 23 Mar 2021 12:24 pm
- MartinC
- Member
- Registered: 3 Apr 2020
- Posts: 348
Re: Waterlust sailing canoe in Norway
I think the reinforcement of the bows and skeg is a very good idea. I found that even with very limited use last season, my skeg took a battering, so I ended up retro-fitting a brass protection strip. I would recommend all builders to do this (or dynel & graphite) from new.
Offline
#619 23 Mar 2021 5:03 pm
- spclark
- Member
- From: "Driftless" Wisconsin USA
- Registered: 19 Mar 2020
- Posts: 478
Re: Waterlust sailing canoe in Norway
Great updates posted since I last stopped by (and since I last received any notice of updates that'd been posted!)!
Our Texas owner-builder's far along with his CLC kit build, suggests he'll be out on the water this w/e with his 'training wheel' package ready and fitted! I can't wait to hear what his opinions are of what this addition adds to the Waterlust experience, and that also applies to you others whether you've gone the ama route or some other tack!
I've stalled on my progress, figure my time's better spent on some projects here at home while others endeavor to get their kits assembled & tested. If in fact the CLC kit does what I hope it should I may go the same route (I bought the plans a few days after they were published) rather than an entirely different tangent based on another designer's work.
Anyway, Jeff's kindly given his OK for me to post the images he sent me this morning:
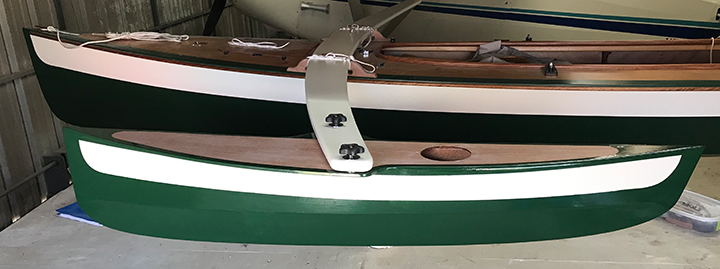
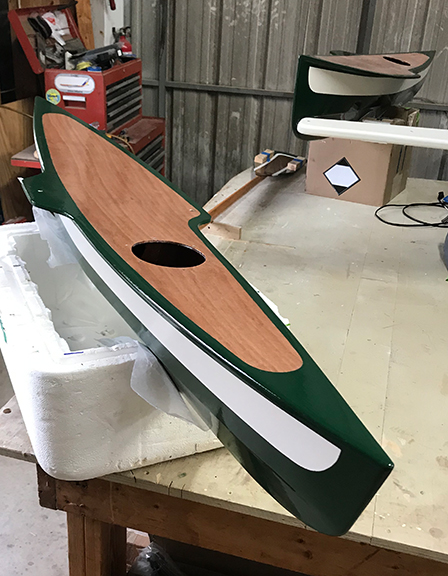
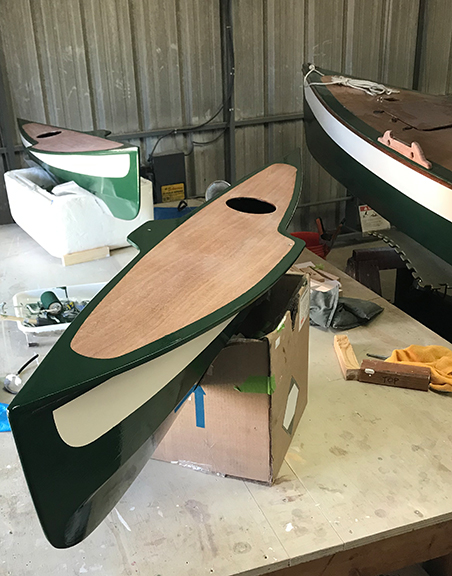
(Interesting change to the behavior of the file uploader I note today. No need to 'submit' then add a code segment, it happens automatically once the target image's been selected. Sure wish CLC's forum were as 'user-friendly....)
Offline
#620 25 Mar 2021 8:15 am
- Bergen_Guy
- Member
- Registered: 6 Feb 2020
- Posts: 353
Re: Waterlust sailing canoe in Norway
Oh - that does look good! Always inspiring to see people's progress. I am still deep in fiberglassing these hulls - it's going fine. I notice that our Texan has made some nice 'hull holders' from boxes - I can see that it's maybe worth doing the same when you start out making the outrigger hulls!
One more step of glassing for me before I start the fill coats, and move towards putting the aka together.
Offline
#621 28 Mar 2021 2:55 pm
- spclark
- Member
- From: "Driftless" Wisconsin USA
- Registered: 19 Mar 2020
- Posts: 478
Re: Waterlust sailing canoe in Norway
Jeff (in TX) got his act together yesterday, took his partner along to get some pics of his first excursion with the ama kit done & fitted to his Waterlust:
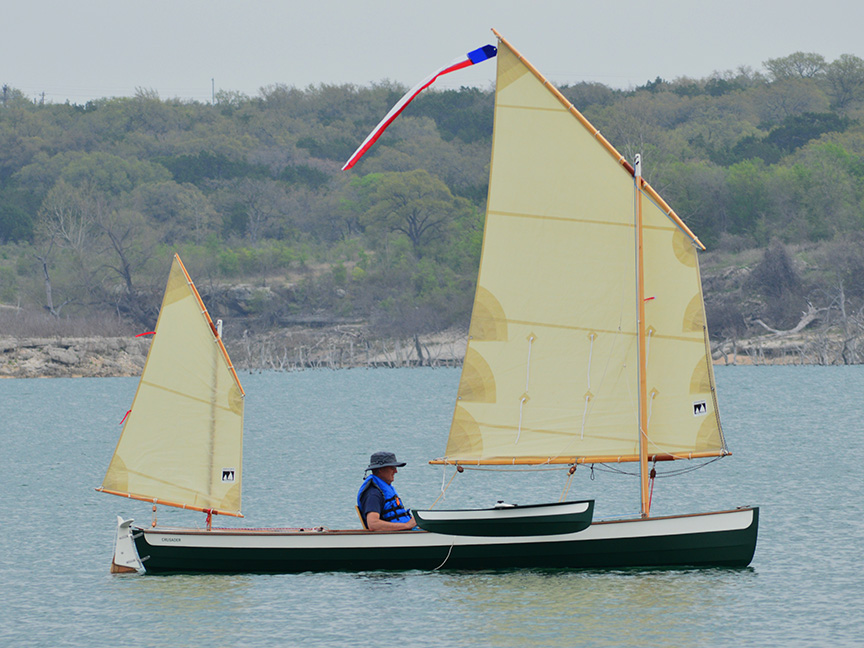
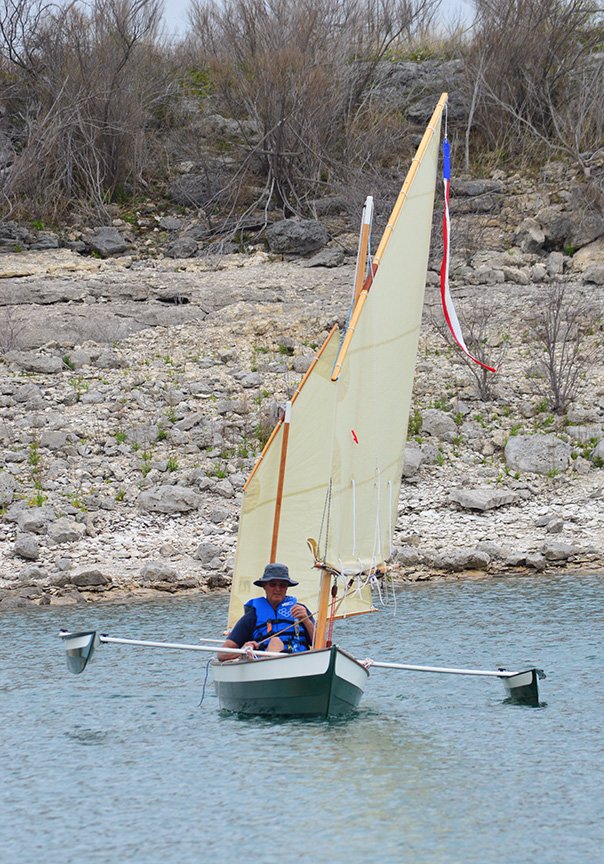
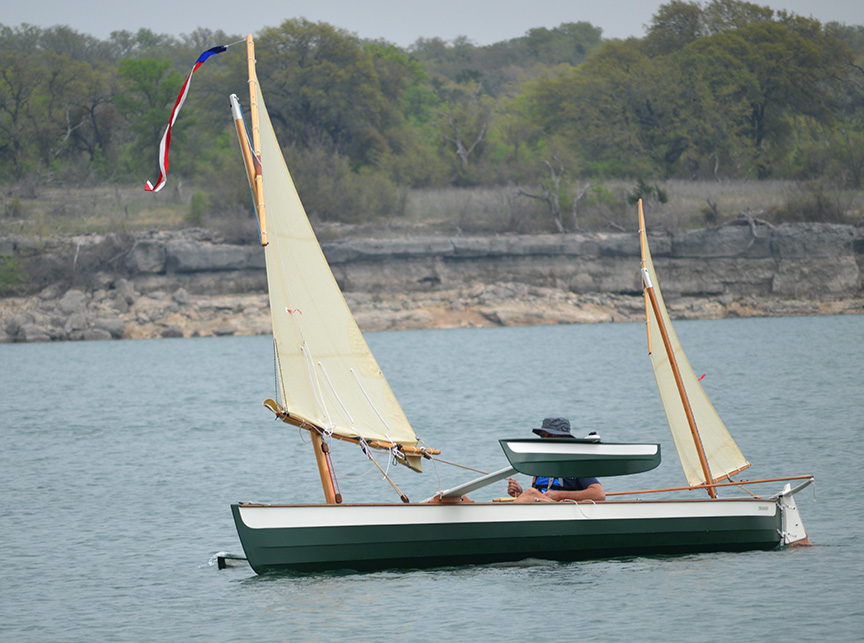
Here are some of his comments, shared here (with permission!) from the texts he sent me:
"The boat is very stable quite comfortable. The Amas push back as the heal develops. The flexibility of the Aka is interesting as it flexes in pitch as it enters the water and follows the swell flexing the Aka. Some small amount of flex in roll.
Now you can pay attention to fine tuning the sails, etc and not have to be very prepared to tend to heal.
I started with one reef then shook it out later. Moved forward to reach and untie the cringles, very stable. GPS showed 5.1 MPH in light 10 knot wind.
Lots of components for a small sailing canoe but it is really fun! I believe Dillion really did this right!!!"
So there you have it!
When you others get your kits launched please take a moment to share your experiences here.
Offline
#622 29 Mar 2021 12:57 am
- Chuck
- Member
- Registered: 24 Nov 2020
- Posts: 138
Re: Waterlust sailing canoe in Norway
Thanks for posting these, SP! It's very helpful to see some photos of the boat sailing.
I've gotten all the epoxy on both the inside and outside of my boat and am on to putting on the skeg and the rudder fittings next, and then prepping the inside for paint before putting on the deck, hopefully next weekend. I hope I don't run out of epoxy! I have about 3 inches of resin left in the gallon jug, and still need to coat boat sides of the deck and the foils, attach hatch sills and coaming, fillet various things, etc. Of mild interest: it took 32 pumps of epoxy to put the second light coat on the outside of the entire hull.
Offline
#623 29 Mar 2021 9:24 am
- Bergen_Guy
- Member
- Registered: 6 Feb 2020
- Posts: 353
Re: Waterlust sailing canoe in Norway
Hi All,
Thanks for sharing those photos and the comment SP - looks great! I can't wait to get mine finished. Still a bit to go for me, but I am chugging along, but parallel projects are not helping!
Chuck - that doesn't sound like you have so much resin left - check to see how easy it is to get more. if it's not too long to get it delivered, or pick it up, then you can just order more a day or two before you run out. I managed to build my kit with the volume of resin provided, but I could easily have done another fill coat on the hull, and then it would have been a bit tight I suspect.
Offline
#624 31 Mar 2021 4:57 am
- MartinC
- Member
- Registered: 3 Apr 2020
- Posts: 348
Re: Waterlust sailing canoe in Norway
Many thanks for posting these SP. Please thank Geff. He's made a lovely job!
I am very interested in the performance of the setup. In the final photo it looks like the downwind Ama is very close to being submerged. If this happens, (or if a wave hits it) do you think it will dig in and cause the boat pivot around it thereby preventing the boat from rounding up into the wind?
I would be really interested to read about everyone's ongoing sailing experience with this.
Offline
#625 17 Apr 2021 1:08 pm
- spclark
- Member
- From: "Driftless" Wisconsin USA
- Registered: 19 Mar 2020
- Posts: 478
Re: Waterlust sailing canoe in Norway
In the final photo it looks like the downwind Ama is very close to being submerged. If this happens, (or if a wave hits it) do you think it will dig in and cause the boat pivot around it thereby preventing the boat from rounding up into the wind.
Jeff made a comment that at about 5.5 mph he "buried the lee ama with water against the aka with no effect other than slightly slowing" so there's that.
What's referred to as 'pitch-poling' I think is a worst case result of burying an ama, seen horrific videos of such with catamarans & foilers. With this design I think (hope!) the tendency is vastly reduced by the lower hull speeds it's capable of as well as the design itself being balanced well.
Obviously the more of them there are out there the better the chances there will be to explore this aspect. I too will be watching this thread as well as those on the CLC forum over here.
I'm getting back up to speed with my project now as weather warms. Gardening tasks compete for 'free' time and I expect to have to wake up the lawn mower this weekend also, if only for a topping off.
Woke my hull last w/e from it's winter slumber suspended in my garage, got the trailer assembled enough to serve as a working platform for what's left to do -
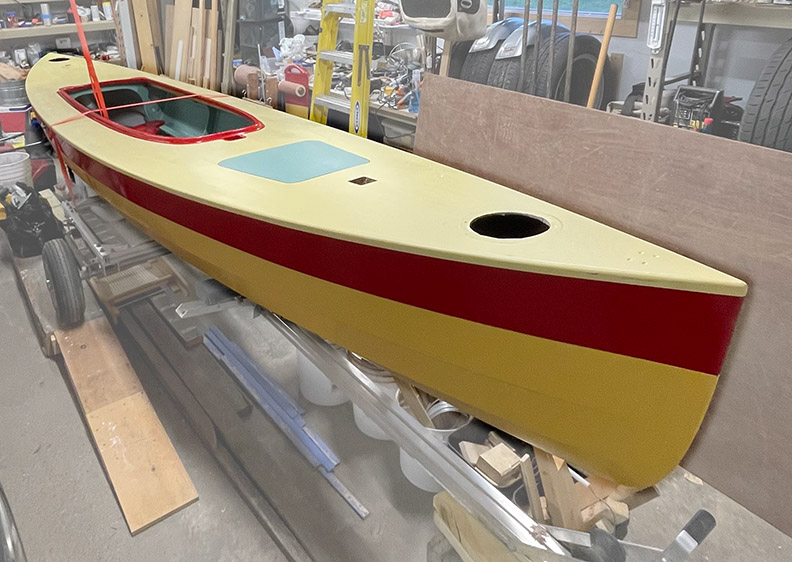
- which isn't all that much before I can get her launched, at least under Mirage drive power. Hitch receiver got mounted to my MINI last spring, wiring adapter's still unboxed. Sail rig's gonna be awhile yet but being able to mount masts with the trailer and hull out on my driveway will give me a better idea of how running rigging and associated hardware's best placed.
May post questions about choice of hardware bits as it's been 40+ years since I went shopping last for camcleats & sheaves... the manual has a schedule of course but lacks details over what'd be most suitable given all the choices there are out there now.
Offline
