A forum for discussing wooden boats and boat building
You are not logged in.
- Topics: Active | Unanswered
Pages: 1
#1 7 Feb 2021 3:48 pm
- Oceanrower
- Member
- From: Guildford, Surrey
- Registered: 23 Dec 2020
- Posts: 8
Shearwater 17 from plans
Hi all.
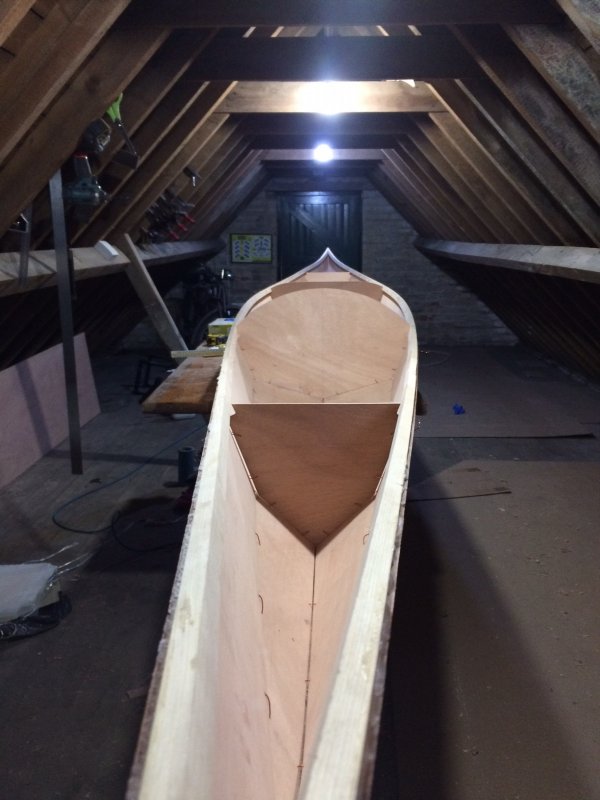
I've just started a Shearwater 17 hybrid build. Big day today, I've gone three dimensional...
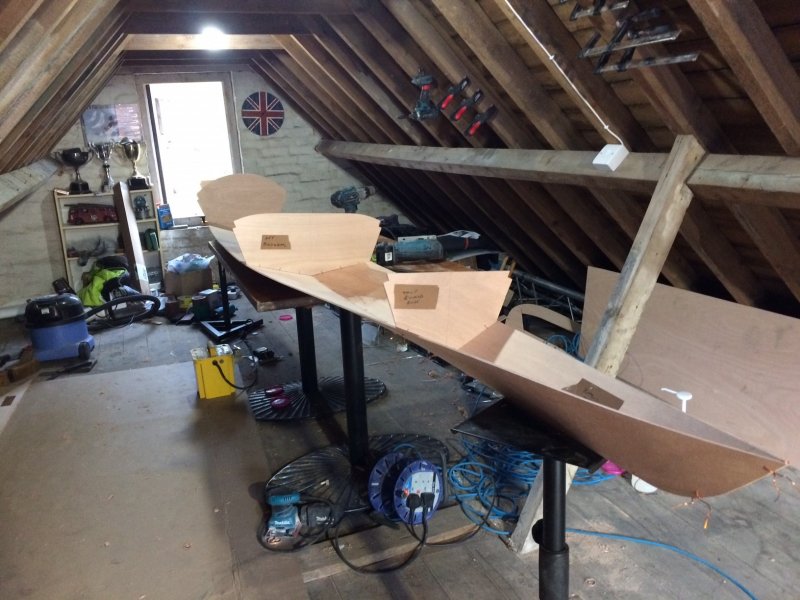
As you can see, space is a tad tight! It could make for an interesting (and slow!) build.
Offline
#2 8 Feb 2021 9:54 am
- Paul
- Employee

- From: Gatebeck Cumbria
- Registered: 4 Aug 2011
- Posts: 134
Re: Shearwater 17 from plans
It is looking very good.
It looks as though you have used packing for your labels. If so, I recommend that you remove the tape once the panel is in position: the glue that remains when tape is removed after being stuck down for a long time is very difficult to clean off and some brown tapes stain the wood.
Offline
#3 8 Feb 2021 10:15 am
- Oceanrower
- Member
- From: Guildford, Surrey
- Registered: 23 Dec 2020
- Posts: 8
Re: Shearwater 17 from plans
Good call. Thanks for that.
Fortunately they were all on the inside (and I still managed to put one joint on the wrong side!) but now I know which bit is which, I’ll get them off today.
Offline
#4 8 Feb 2021 6:03 pm
- teejay
- Member
- Registered: 26 Oct 2020
- Posts: 66
Re: Shearwater 17 from plans
Good to see another build under way.
Space and warmth really help - and in going for a bit more warmth with a tent inside my garage I've sacrificed some space and it's definitely slowing progress - still it will get warmer given the time it's taking me and that should make life easier.
All the best
Tim
Offline
#5 10 Feb 2021 9:37 am
- Curlew
- Member
- From: nr Skipton, N Yorks
- Registered: 8 May 2020
- Posts: 51
Re: Shearwater 17 from plans
Have fun. Hope my post about building a Shearwater 16 last year is useful.
Bruce
Offline
#6 12 Feb 2021 4:38 pm
- Oceanrower
- Member
- From: Guildford, Surrey
- Registered: 23 Dec 2020
- Posts: 8
Re: Shearwater 17 from plans
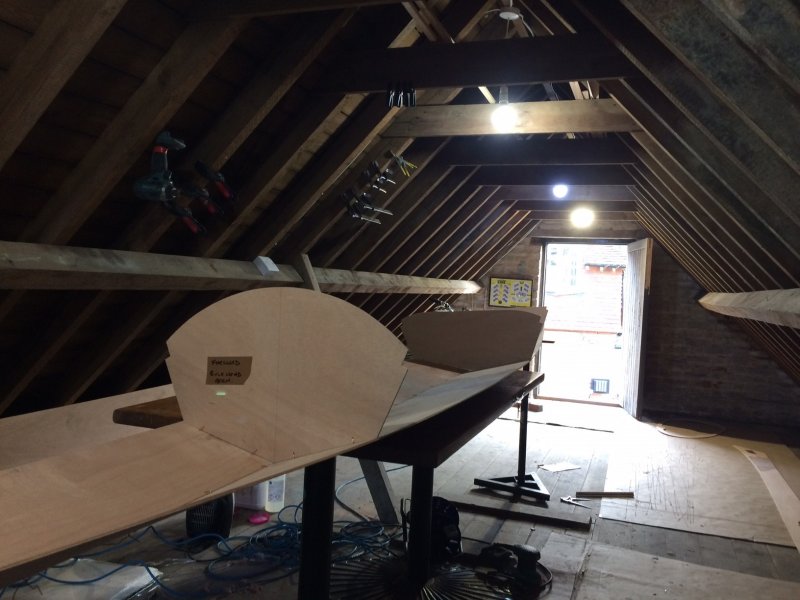
After several days of sub zero temperatures, finally the resin on the sheerclamps hardened enough to get the side panels on. Took almost 4 days to go off! Starting to get the shape now.
I don't know if it was the cold but I just could not get the sheerclamps to bend up enough at the stern so they got treated to a series of partial cuts with the jigsaw to help them along...
More freezing weather forecast so a few hours tomorrow pulling everything into shape and tightening the wires then I'll have to wait a few days before I can start tack glueing her...
Offline
#7 12 Feb 2021 4:50 pm
- teejay
- Member
- Registered: 26 Oct 2020
- Posts: 66
Re: Shearwater 17 from plans
Well done for making any progress - fortunately there's warmer weather due next week and I'm hoping to get on a bit better once that's kicked in.
Once you start using the resin for larger areas it's well worth reading the advice on "outgassing"/air bubbles on the forum - and here - https://www.pecepoxy.co.uk/info/epoxy-use/ - and also - keep the resin warm! Apologies if you know all this - but a few of us have learned the hard way.
All the best.
Offline
#8 12 Feb 2021 5:29 pm
- Oceanrower
- Member
- From: Guildford, Surrey
- Registered: 23 Dec 2020
- Posts: 8
Re: Shearwater 17 from plans
No. I know none of this! First time, so all I’ve learned has been from youtube!
I’ve started taking the resin home with me. It’s the only way I can make it useable!
I am currently toying with the idea of filleting and taping the bow and stern section inside and moving straight on to the deck stripping without bothering to glass the cockpit and hull exterior. I can then do them in a month or two when it warms up.
My main concern is the hull might lose its shape in the meantime. I’m trying to persuade myself the 17 deck formers should take care of that...
Can anyone tell me if that’s a really bad idea?
Last edited by Oceanrower (12 Feb 2021 5:51 pm)
Offline
#9 13 Feb 2021 1:44 pm
- Curlew
- Member
- From: nr Skipton, N Yorks
- Registered: 8 May 2020
- Posts: 51
Re: Shearwater 17 from plans
Cannot stress too much the importance of temperature and reading the link above and other posts here and elsewhere. It is not just the epoxy that must be warm. When you do other tasks, for example glassing, the wood itself needs to have been warm (say 25 deg) for a good while (ie overnight) so you don't get outgassing, and also so the epoxy flows on nicely. Generally it then can cool down whilst it fully cures. This means you need to warm the whole workspace not just the epoxy mix.
Once the seams are tacked the hull is basically fixed in shape so it definitely shouldn't alter once the seams are fully filletted and taped. I cannot immediately see why you could not defer the hull glassing until after the deck has been formed but I suppose one issue is making sure when you are working on the deck you don't accidentally damage the hull panels with tools or on the trestles. Once glassed it is very tough.
There is a forum entry about my Shearwater 16 build with what i learned etc. Worth a read perhaps. Cannot beat Jason Eke's videos of the same build too.
Offline
#10 13 Feb 2021 5:11 pm
- Curlew
- Member
- From: nr Skipton, N Yorks
- Registered: 8 May 2020
- Posts: 51
Re: Shearwater 17 from plans
One other thing just occurred to me. The temporary forms need some sort of glue to fix them (hot glue is suggested in the instructions). If the surface has a coat of epoxy then it is easy to remove this at a later date and any residual can be quickly chipped away. If the interior wood was 'bare' it would not be as easy-and it would perhaps affect the later application of the epoxy layer over any residual.
Bruce
Offline
#11 18 Feb 2021 3:09 pm
- Oceanrower
- Member
- From: Guildford, Surrey
- Registered: 23 Dec 2020
- Posts: 8
Re: Shearwater 17 from plans
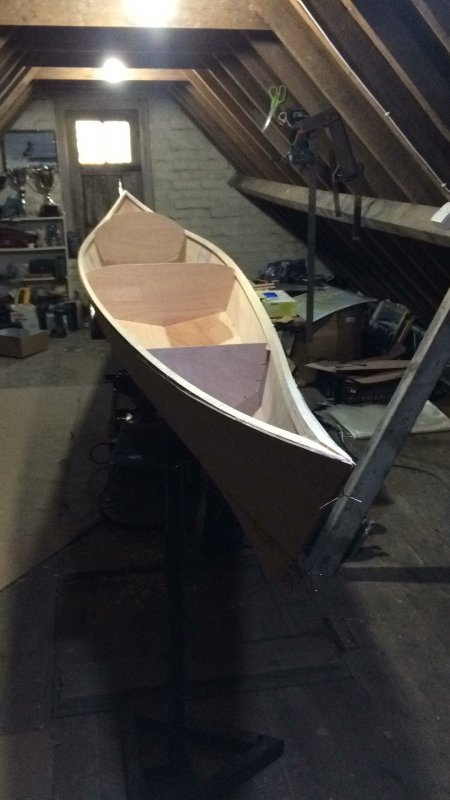
After a small upturn in the temperature, building continues...
I've managed to tack weld the hull, remove the stitches and fillet and tape the bow and stern compartments.
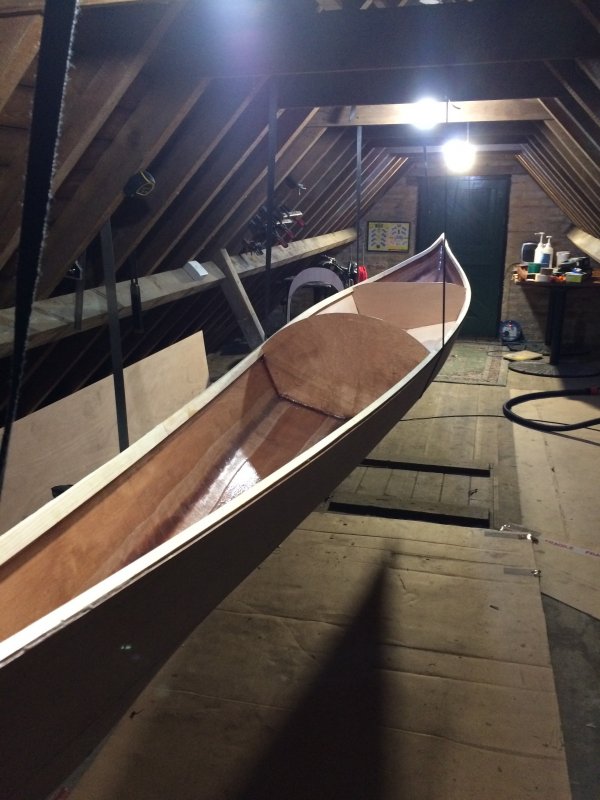
Unfortunately not the straightest of taping but try as I did, I couldn't get the damn things to line up!
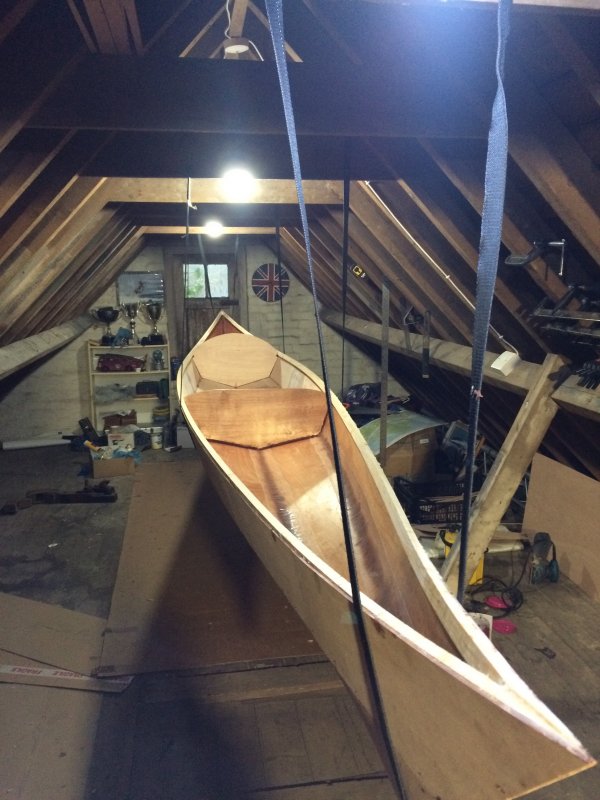
Also (and this is the real progress!) I managed to get rid of the kitchen table and two speaker stands that I was desperately trying to balance the thing on and hang some slings from the rafters. At last I can walk round the entire thing! (I did say space was tight...)
I've decided that the outer of the hull, sanding, fairing and glassing, will have to wait for warmer weather. Similar with the cockpit. I can't risk trying to fibreglass the whole thing with the temperature fluctuations I'm getting at the moment so next step will be to cut and install the deck formers ready for stripping the topsides.
This also has the added bonus of putting off my delusion that the hull will be good enough to varnish rather than paint. Ignorance is bliss...
Offline
#12 18 Feb 2021 3:14 pm
- Oceanrower
- Member
- From: Guildford, Surrey
- Registered: 23 Dec 2020
- Posts: 8
Re: Shearwater 17 from plans
Mr. Curlew, thanks for your suggestion re the hot glue on bare wood. Good call. I think I'll put a band of epoxy wherever the deck formers fall in the cockpit and sand it off afterwards.
In a moment of insanity I decided to carbon fibre this area rather than glass so any cosmetic details should be hidden.
I've never used carbon fibre before but why let a little thing like that stop me? I've never used fibreglass before either!
Offline
#13 21 Feb 2021 5:22 pm
- Curlew
- Member
- From: nr Skipton, N Yorks
- Registered: 8 May 2020
- Posts: 51
Re: Shearwater 17 from plans
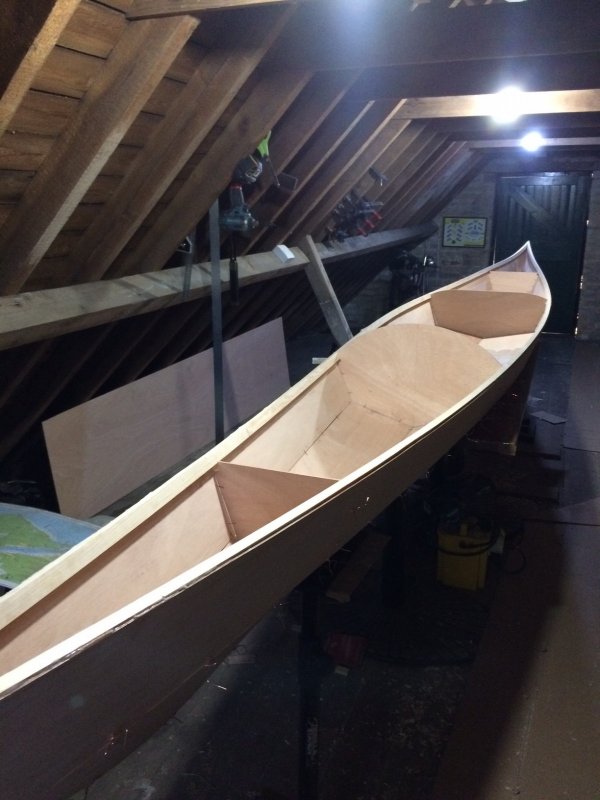
One suggestion looking at your pictures
Try to bevel the sheerclamp so the outer edge so it comes right down to the top of the hull panel. It is easier to at least do some of this before you fix the forms I think as they get in the way of the plane.
The problem if you don't so this is that the outermost strips will leave a gap above the hull panel. This becomes obvious when the deck is being finished. Because you will plane back a fair bit of overlap you will suddenly see a groove that needs filling.
I realise you might be fully aware but just not done this yet!
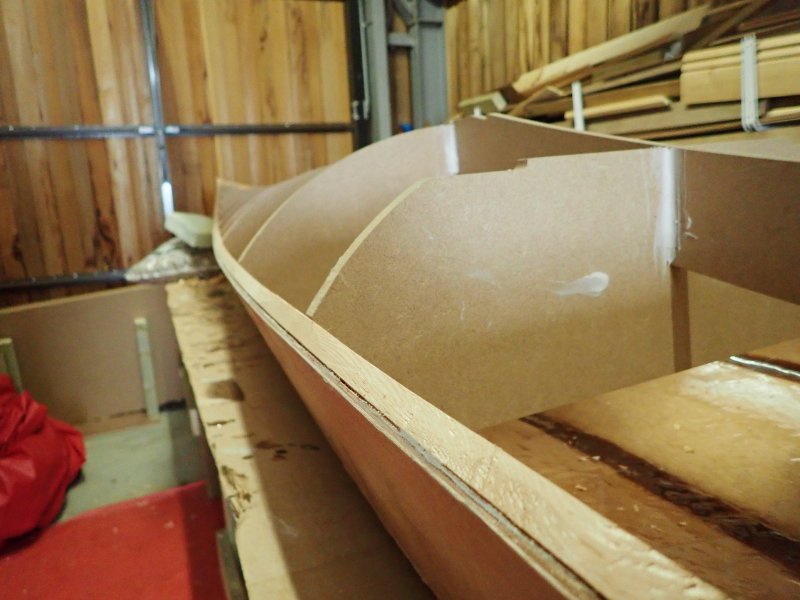
Picture may help?
Last edited by Curlew (21 Feb 2021 5:22 pm)
Offline
Pages: 1