A forum for discussing wooden boats and boat building
You are not logged in.
- Topics: Active | Unanswered
Pages: 1
#1 26 Jul 2020 8:55 pm
- SteveM
- Member
- Registered: 2 Jul 2020
- Posts: 9
Building a Goat Island Skiff
Last time I spoke with the guys at Fyne Boat Kits they suggested I should write a build log - there aren't many GIS kits in the UK so this might help others in future. As I started in February this is a bit of "story so far" but I will try to update further progess weekly.
I ordered my kit in January - having studied the build manual for a few weeks before Christmas. I chose the GIS for several reasons, but the background is this: i have a Swallow Yachts Bay Raider which I've used for several small boat events, but one of those events is in NL (Dorestad Raid) and is on inland waterways with lots of bridges - the BR20 is a nice boat for open waters, but the mast-down/mast-up time is slow and it's hard work to row. I wanted a boat better suited to the Dorestad Raid and which I could solo sail at home. I had seen another GIS on the raid and been impressed by its look and sailing capability. and further research just confirmed my impressions. I also fancied a build-from-kit rather than buy a finished boat.
So when the kit arrived in Feb I opened the boxes and promptly went on holiday... ah well. Started properly 3rd week of Feb.

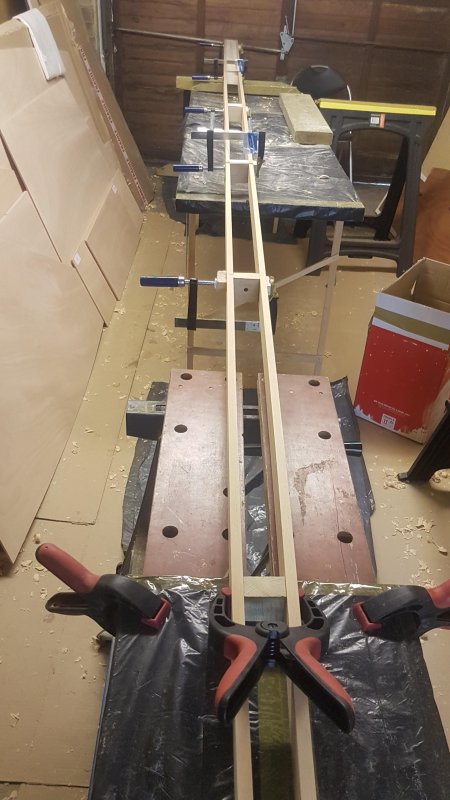
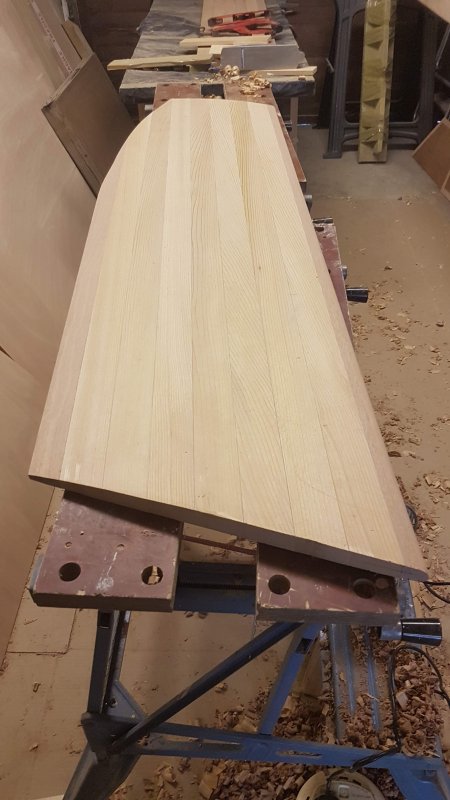
I've been building in my garage and realised before I started that once I had the hull built there would be no room to work on the mast, spars, rudder and centreboard - so although the GIS build instructions have you build the hull first I did it in reverse: spars first, hollow mast, rudder & centreboard foils; then the hull starting with bulkheads and working towards a 3D hull. The fine weather in April really helped as I could work outdoors a lot of the time.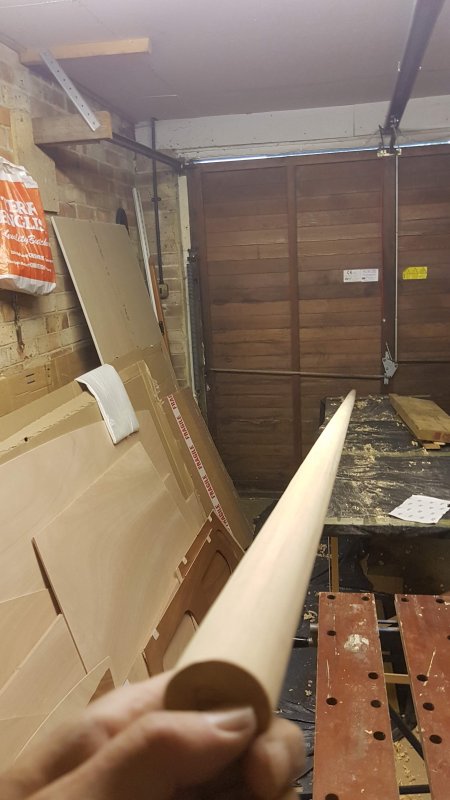

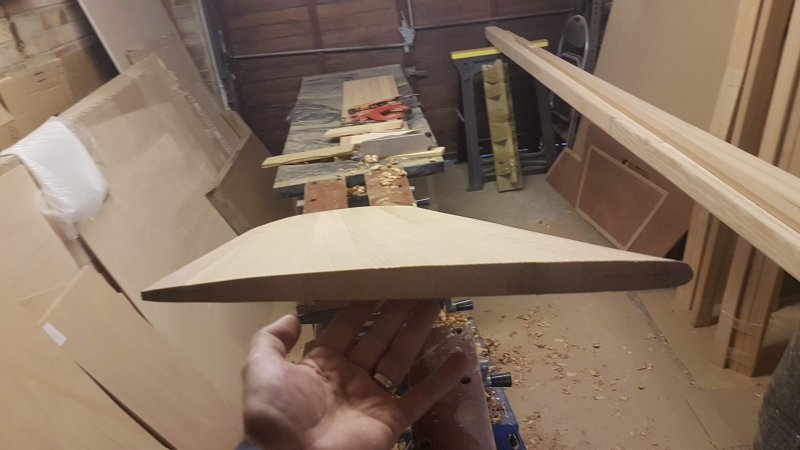
Glassing the centreboard and rudder is interesting - the guide suggests suspending using a couple of nails driven in temporarily, but doesn't go into detail. I found a YouTube video of someone doing it and realised that I needed some string loops to hang the nails from -worked pretty well in the end.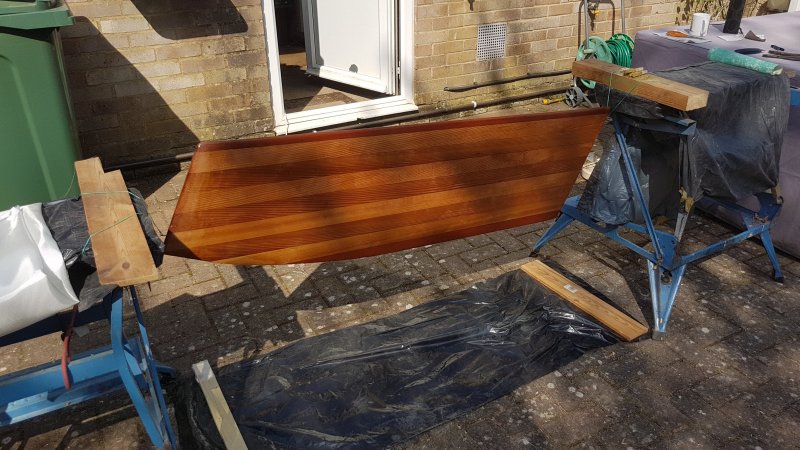

Then making the centrecase and on to joining the flat panels and scarf-joining long timber for gunwales etc.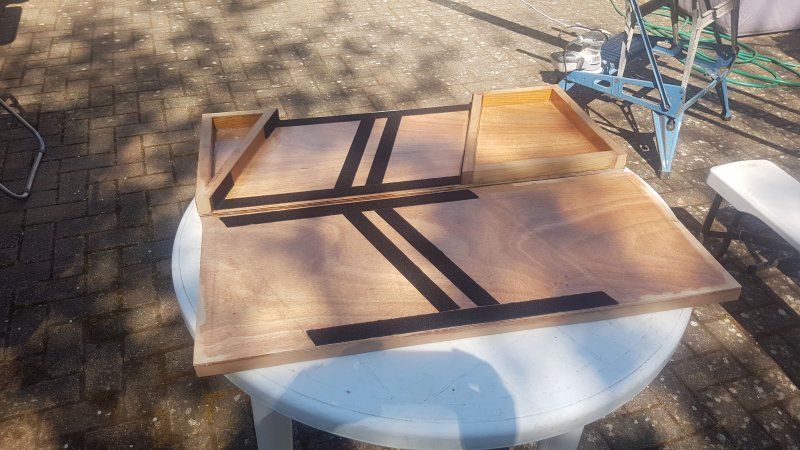


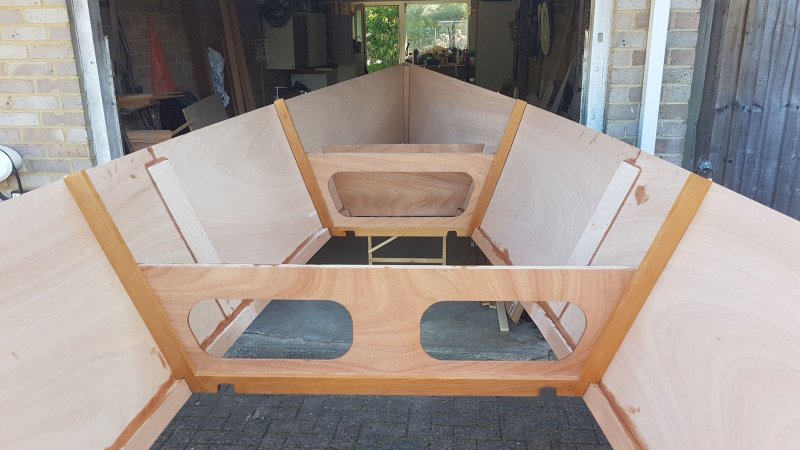
3D was achieved on 20th May.

More soon....
Last edited by SteveM (26 Jul 2020 10:22 pm)
Offline
#2 26 Jul 2020 9:37 pm
- SteveM
- Member
- Registered: 2 Jul 2020
- Posts: 9
Re: Building a Goat Island Skiff
After going 3D, next was turning upside down and fixing on the bottom. Dry fix first with gyprock screws, then I lifted & glued one end, screwed it down and lifted & glued the other end to make sure it stayed aligned. Rather than wait for the epoxy to fully harden I then turned it right-way up again and on to the delicate task of cutting the slot for the centrecase (nail biting! much careful measuring) and gluing the centrecase on. After that cutting and gluing the mast step & partner before gluing that in place.


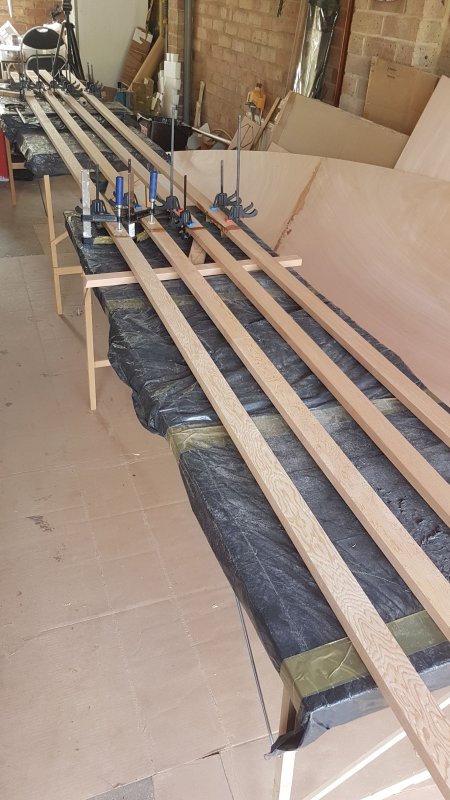
Then gluing the gunwale (had to be bevelled first - much planing!). All the long timber parts had to be scarf-joined; I joined the gunwale, inwale and gunwale-capping all at once (long parts again - had to be done before the 3D hull, as explained on the earlier post). At the same time I was putting seat support stringers in fore and aft.

The inwale spacers are fiddly - cutting lots of 70mm blocks to be smoothed and sanded with some different sizes so that they would fit to/round the frame tops; also a longer one to be used to fix the rowlock sockets. To sand the curves I made a cylindrical block by stapling sandpaper onto a solidified foam roller that had been used for epoxy. Sanding was pretty tedious but worthwhile to get the shape.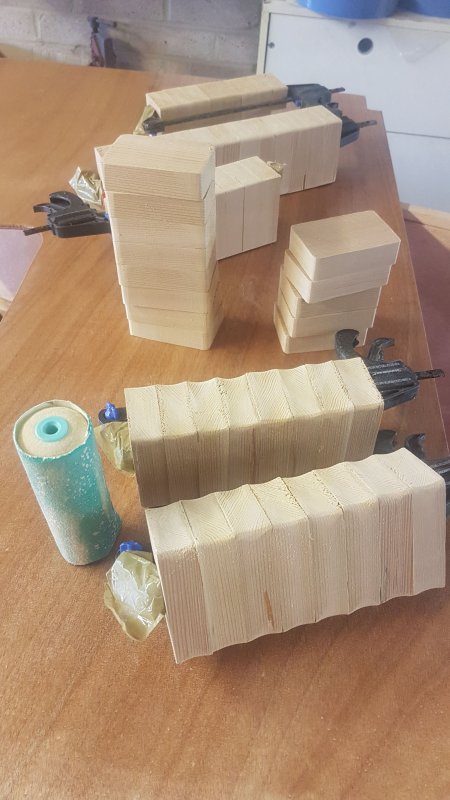
Along the way there were tank-tops/seats to cut to size. The kit panels are oversize so that they can be cut to the actual hull shape. I made that a bit difficult for myself by missing a few words in the text: 'do not glue these on yet' in relation the the arms on the bulkhead frames - I was working from the diagram and had already glued them on first. It meant some very careful measuring and cutting to fit the forward and aft tank tops. Done in the end but could have made it easier if I'd read the instructions more carefully
All the panels have to be epoxy coated (3 coats) - in theory wet-on-wet but the timing is difficult. While the epoxy gets tacky the foam roller starts to set so I've generally done 2 coats wet-on-wet, then sanded when it's set next day, then done the third coat - seems to work pretty well. It will all be varnished at the end so the epoxy finish only needs to be good, not perfect.
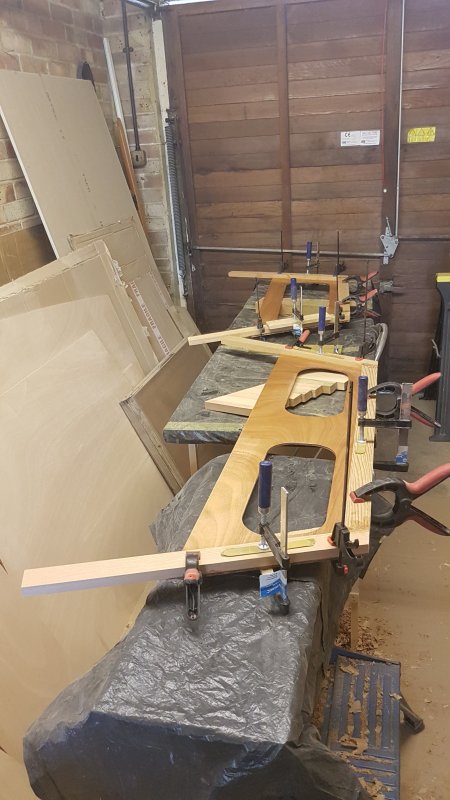
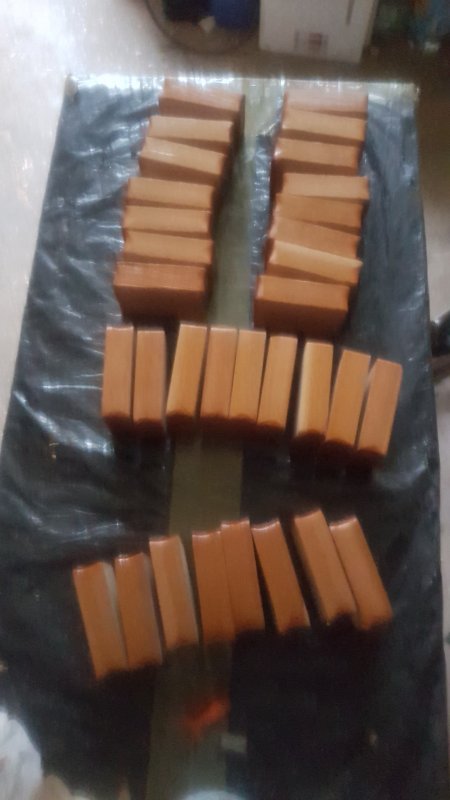
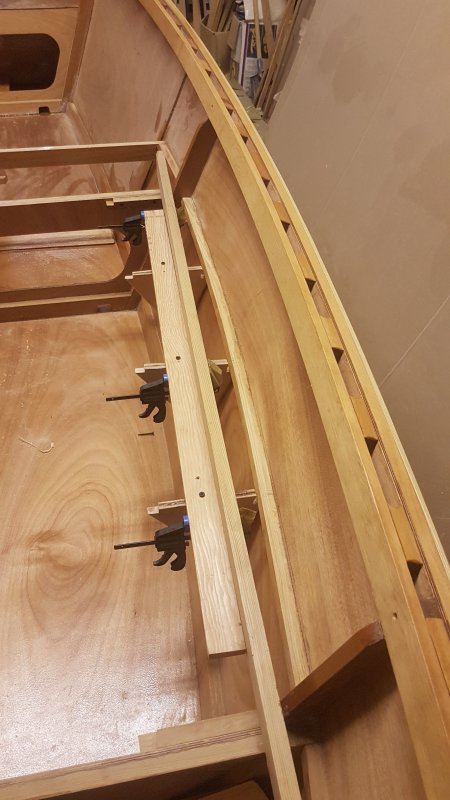
Last week I glued on all the spacers - which had to be done in four sessions as I only had enough clamps for 16 at a time (there are 31 on each side of the boat!) and then the inwales. Now it really looks like a boat! I have to keep reminding myself that there's quite a lot still to do.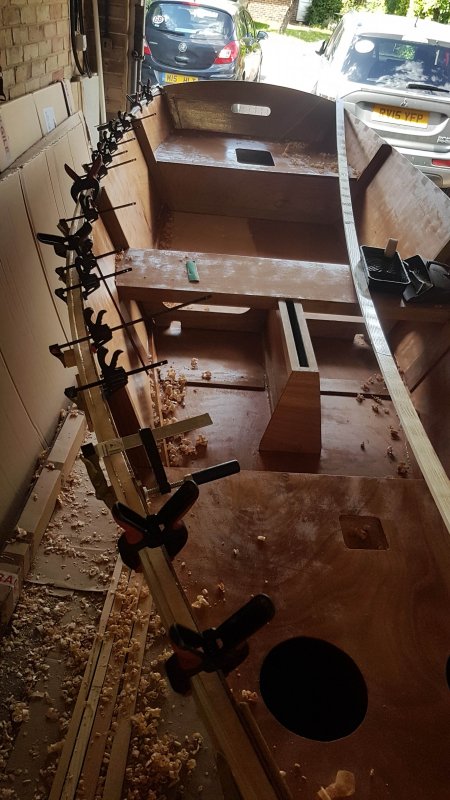
Last edited by SteveM (26 Jul 2020 10:28 pm)
Offline
#3 9 Aug 2020 9:58 pm
- SteveM
- Member
- Registered: 2 Jul 2020
- Posts: 9
Re: Building a Goat Island Skiff
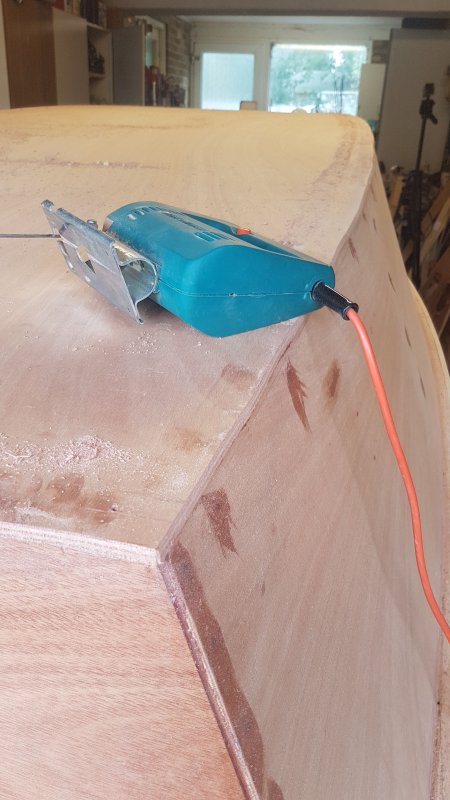
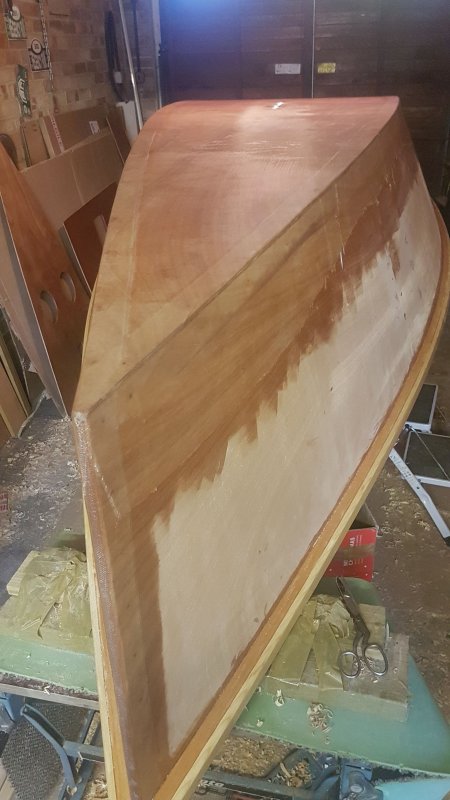
Well, two weeks have passed. Having fixed the gunwales and inwales I turned the boat over ready to trim the excess ply from the bottom and plane the gunwale.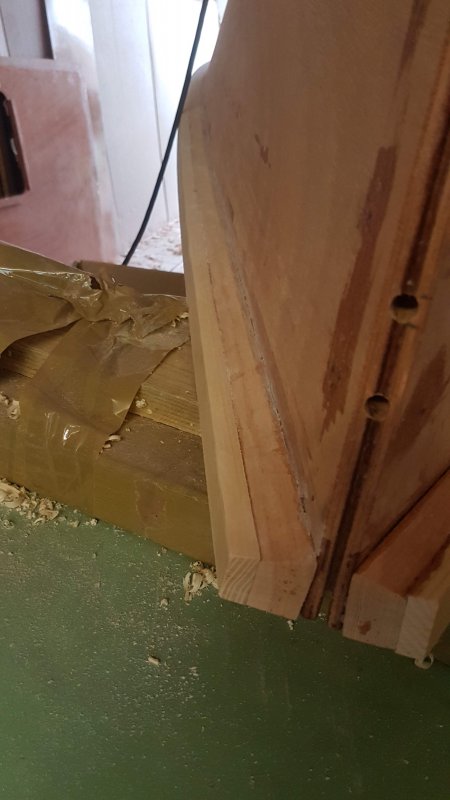
The outer hardwood strip is too close to the hull to allow use of power plane so it's all hand planing.
To trim the ply I wanted to use a power saw to take most of the excess off before planing and sanding. I made a marking jig using an example I saw online - really useful, and with the saw set at an angle it trimmed nicely.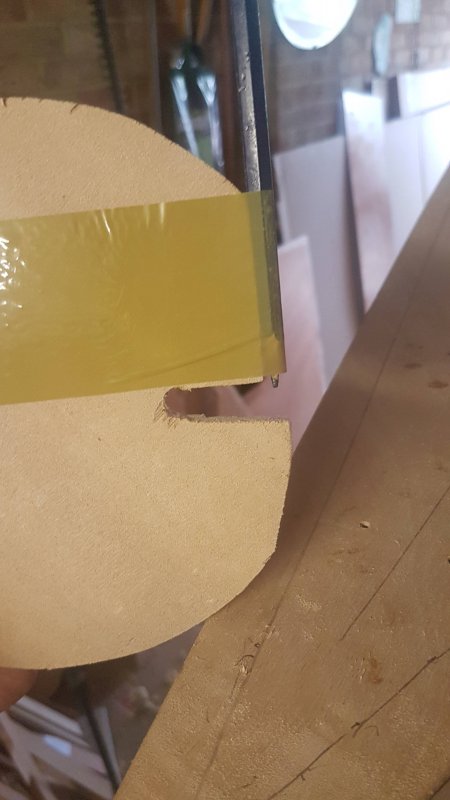
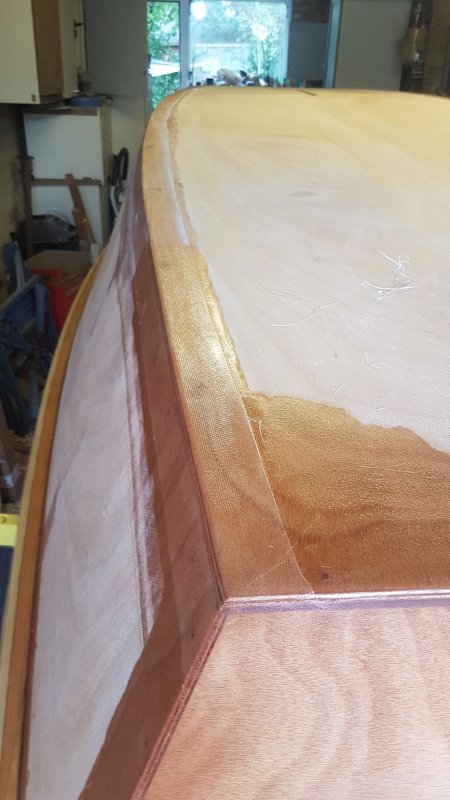
Then on to glass-taping the chine seams etc.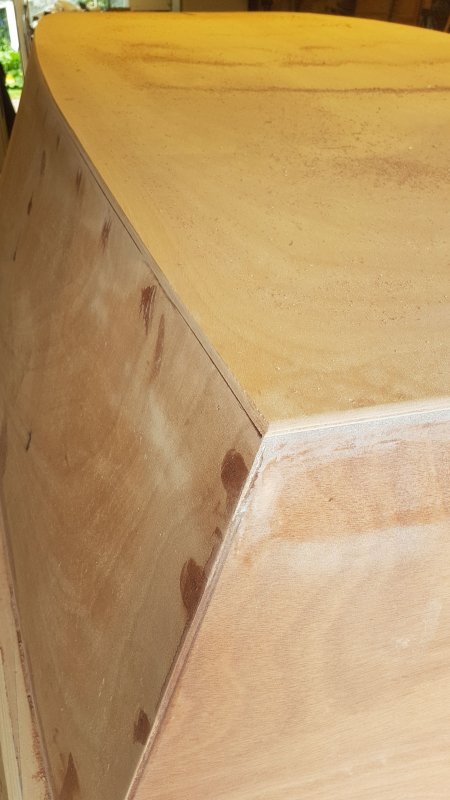
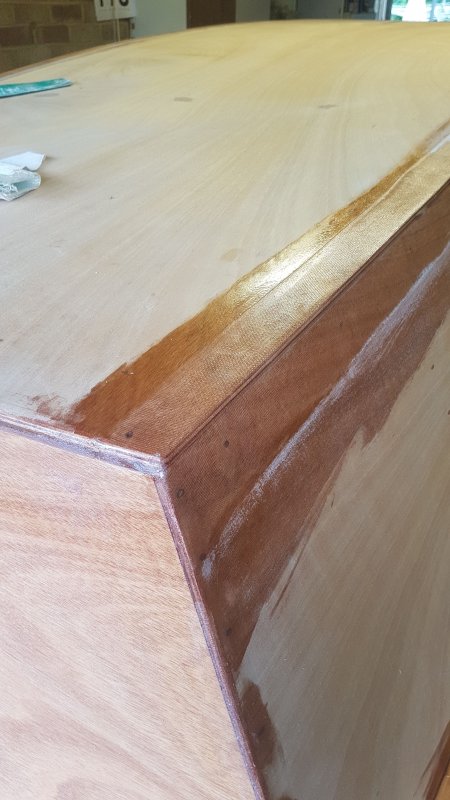
A complication was that my original batch of epoxy was running out, so I ordered some more - and it looked different!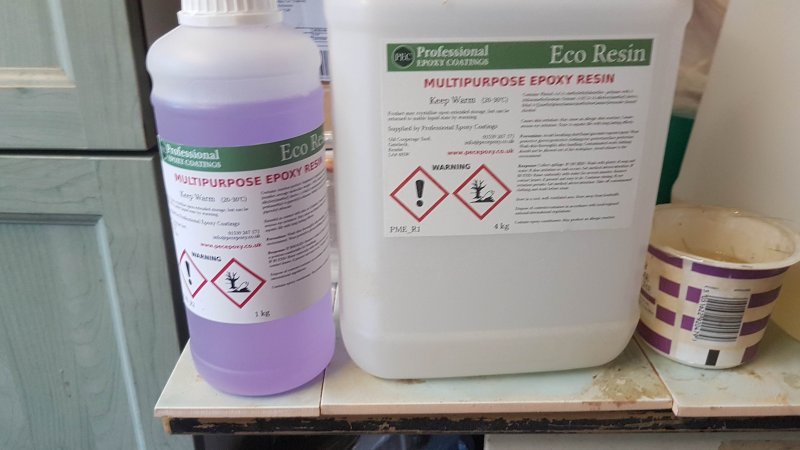
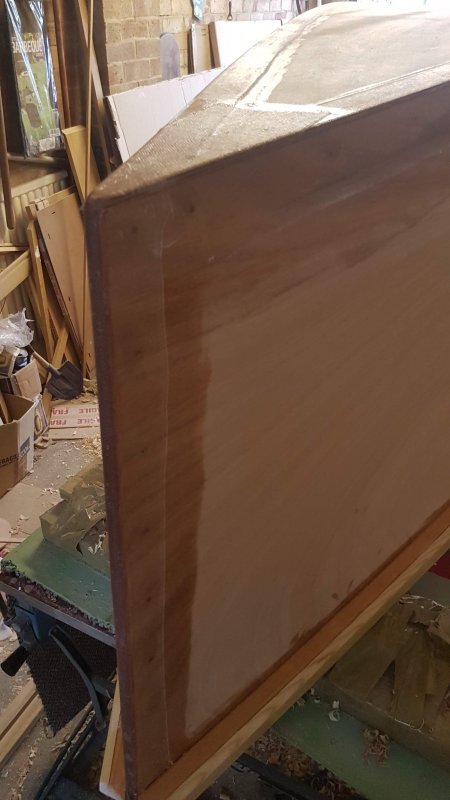
A call to FBK confirmed my fears - not only is it different but you can't mix them, the activator is different too and it's more sensitive to getting the mix just right. My plan was to glass the bottom as I may sail in places with gravelly beaches so that needs doing as one job. There wasn't enough original epoxy so no choice but to use the new batch and weigh the quantities. To make life more interesting it sets up much slower than the old stuff - in some ways helpful in this hot weather, but disconcerting. I've been used to the mix going hard in 3-4 hours - the new stuff was still tacky after 5 hours! thankfully it did harden by next morning but it means less opportunity to do two coats in one day. Eventually the bottom was covered.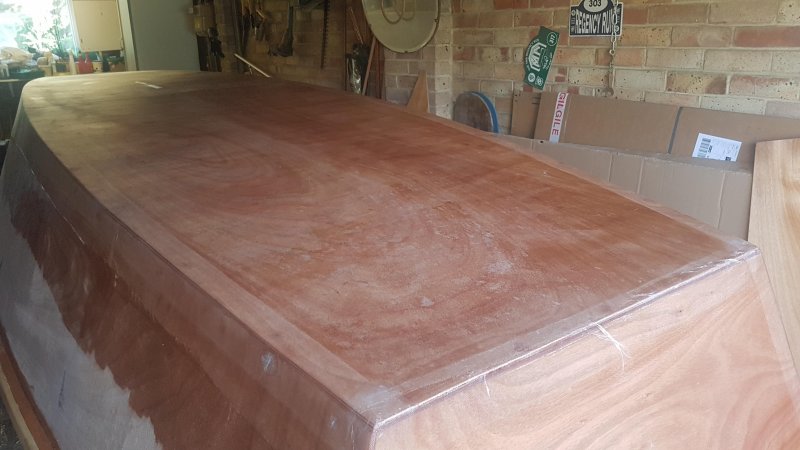
Final job was to add the hardwood rails (no pics I'm afraid) before turning over again
Today was starting to fit the knees - much trimming and sanding, and I've decided to remake the stern knees as I'm not happy with the first attempt. Thankfully I have wood to spare!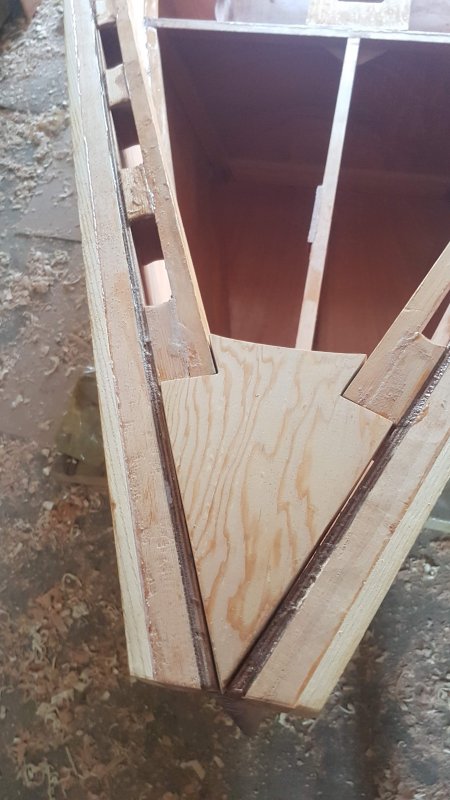
Last edited by SteveM (9 Aug 2020 10:02 pm)
Offline
#4 27 Aug 2020 11:26 am
- SteveM
- Member
- Registered: 2 Jul 2020
- Posts: 9
Re: Building a Goat Island Skiff
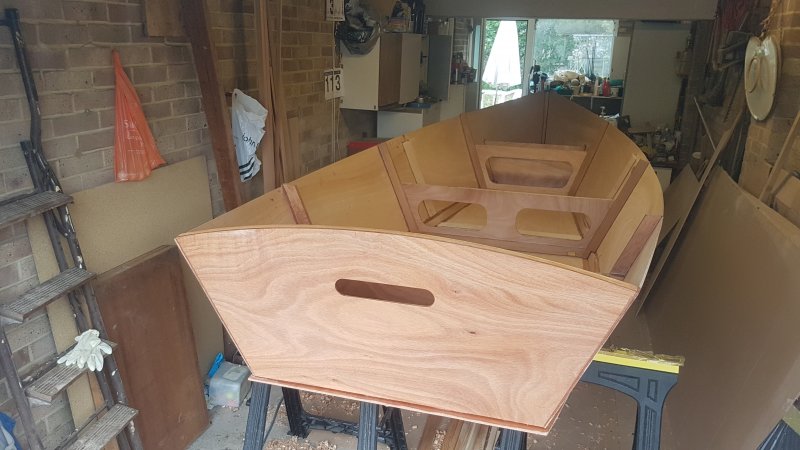
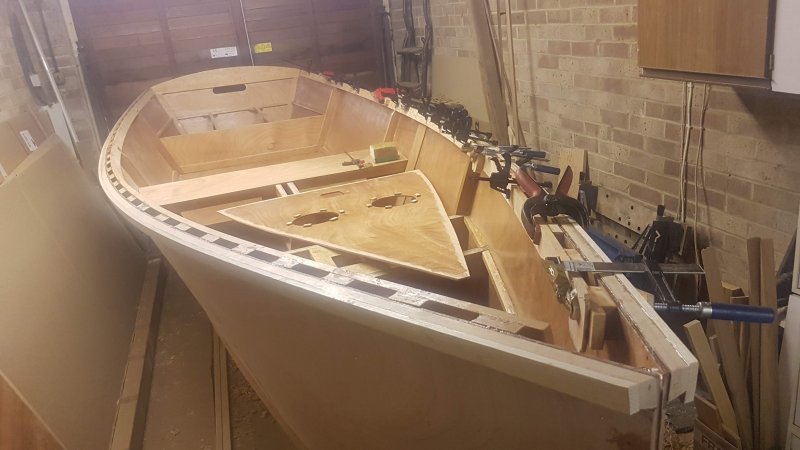
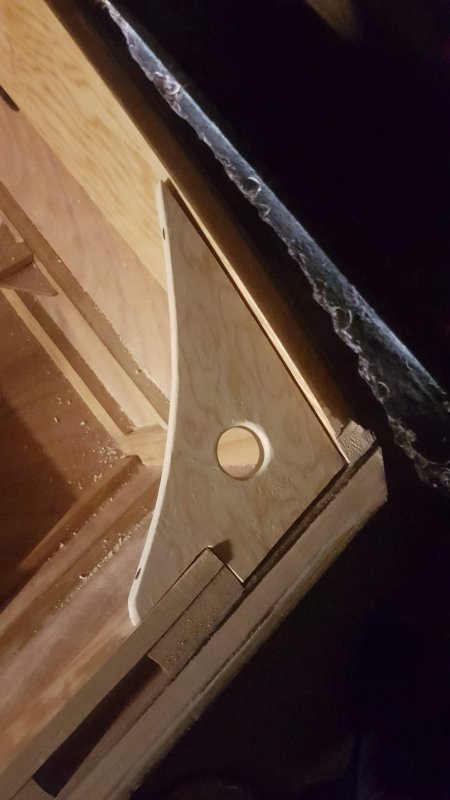
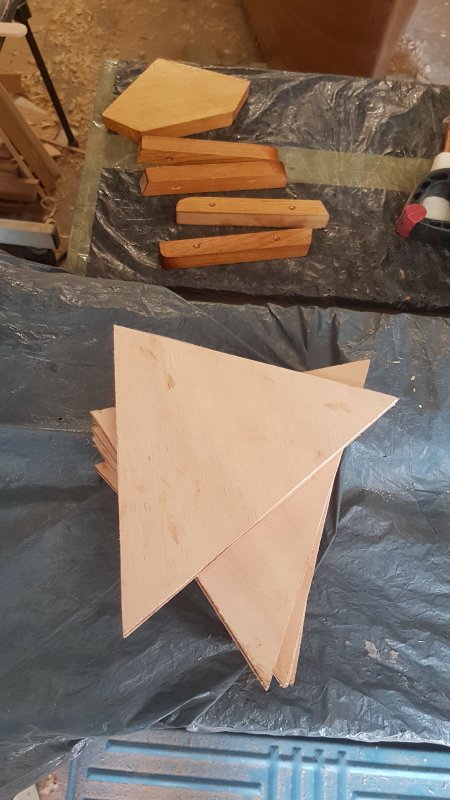
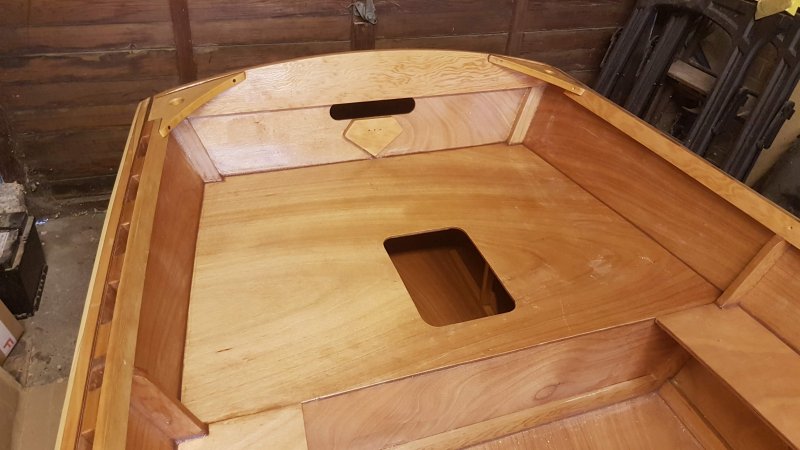
The past couple of weeks have consisted of finishing details: knees, planing down the gunwales/inwales to the ply edge, making and fitting a bow capping piece. These are the stern knees - I decided I like curves more than straight edges (there are lots of different GIS knees to inspire!) so cut a card template for each side to get the shape I wanted. Needless to say there is small variation between the two sides, being hand-built, so two templates were needed. Then out with the power jigsaw to cut the rough blanks before finishing.

After cutting I also decided a centre hole in each would both look nice and be practical - you can never have too any places to tie a rope on a boat! so holes were cut and smoothed.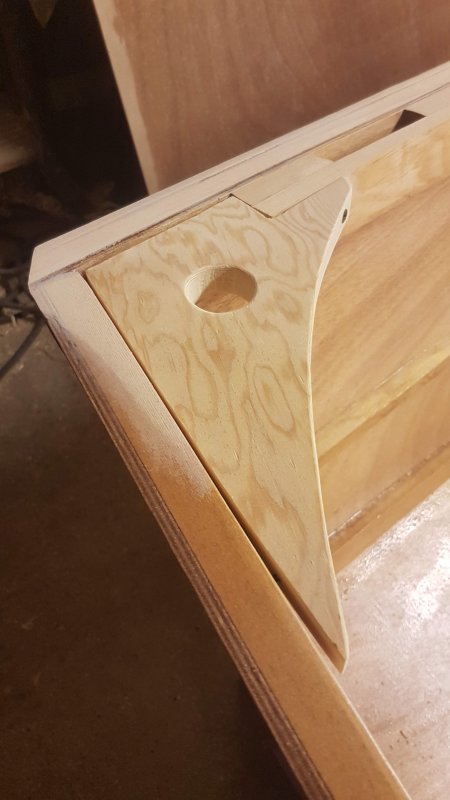
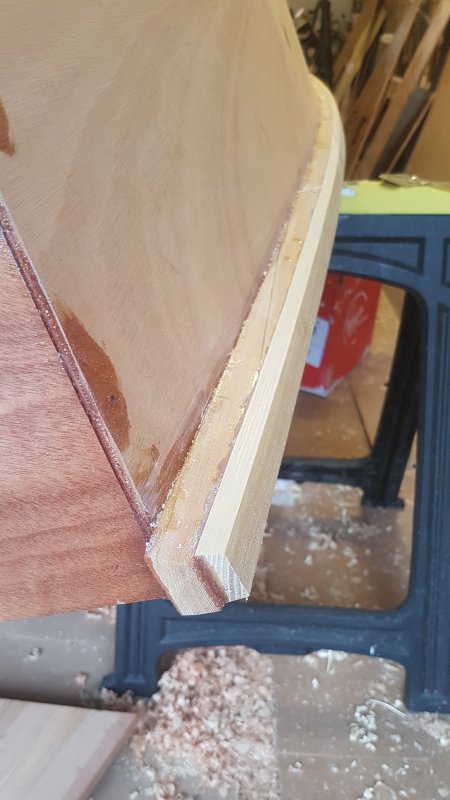
Next was planing the gunwales/inwales. I was able to borrow a power plane from a friend which took some of the effort out, but it's a careful process as the power plane can cut an unwanted groove if you don't keep it moving and the cutting width is less than the full width of gunwale and inwale so it needs many light strokes removing only a fraction of a millimetre each time. I'm pleased with the end result but I did finish with the sander towards the end rather than risk planing off the edge.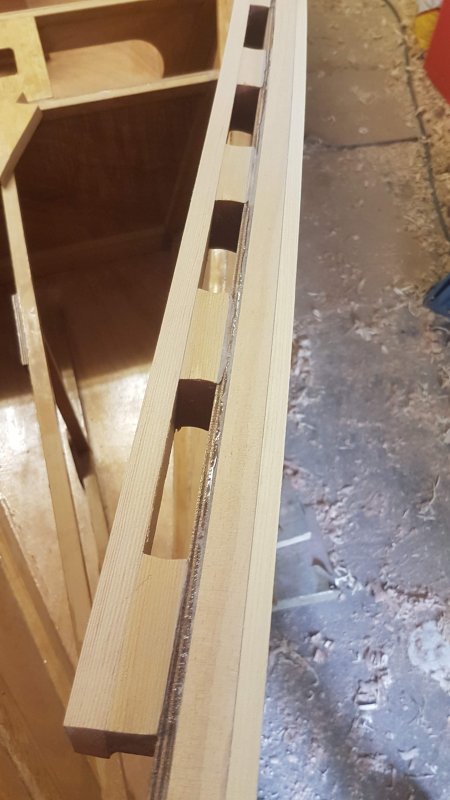
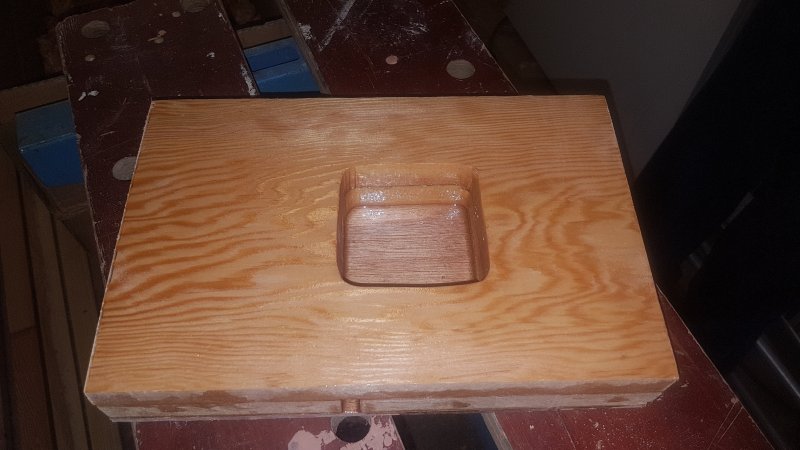
The bow capping is a detail left to the builder - the manual simply says 'cap the bow' and again there are many different examples out there. I opted to glue together 3 layers of the hardwood used on the gunwale capping to be shaped and fitted - I figure that this is the first part of the boat to arrive so being hard is necessary! After gluing it needed to be cut and shaped to match the profile of the gunwale before epoxy coating and gluing in place.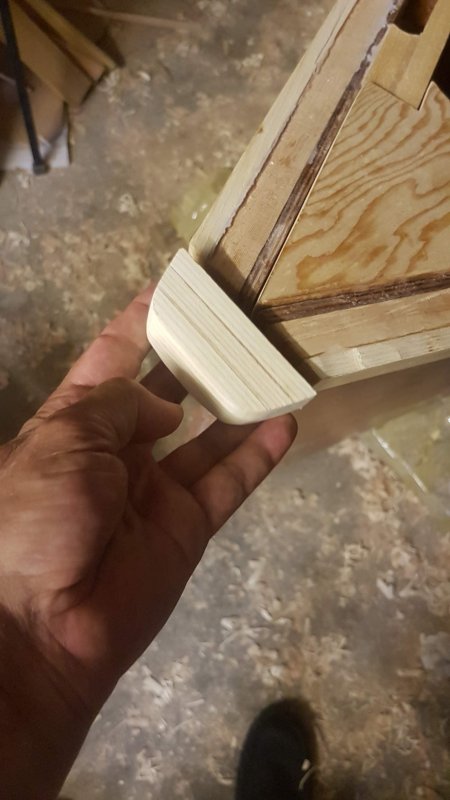
The end result, with the bow knee also in place and sanded down, looks pleasing. Some epoxy and varnish needed to finish it, but progressing well.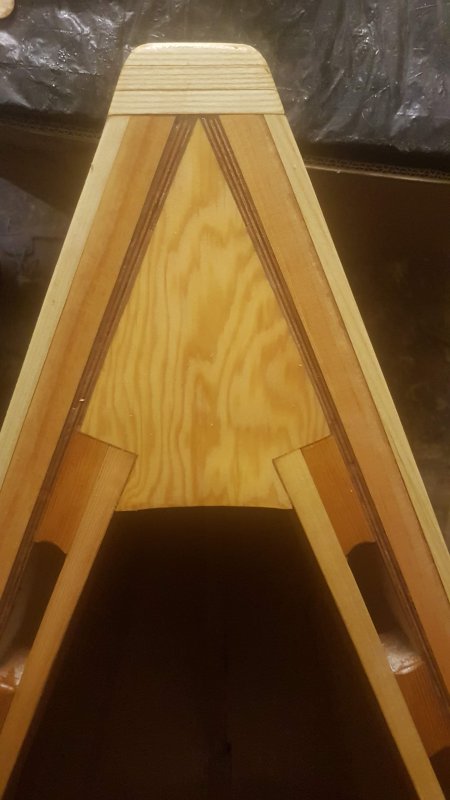
Offline
#5 27 Aug 2020 11:43 am
- SteveM
- Member
- Registered: 2 Jul 2020
- Posts: 9
Re: Building a Goat Island Skiff
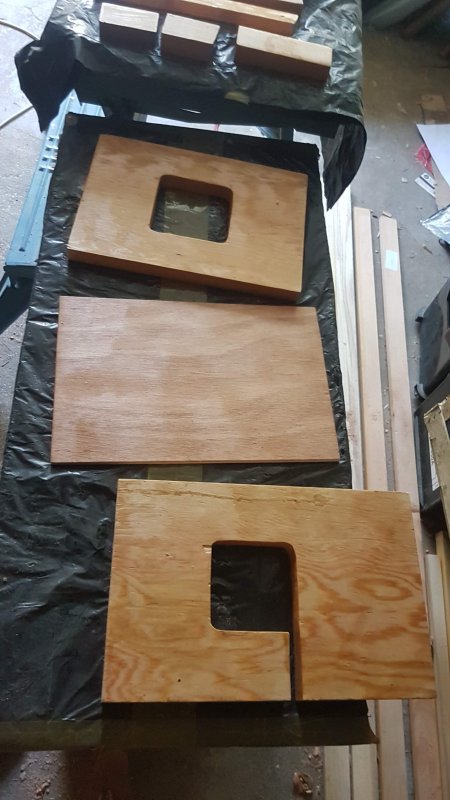
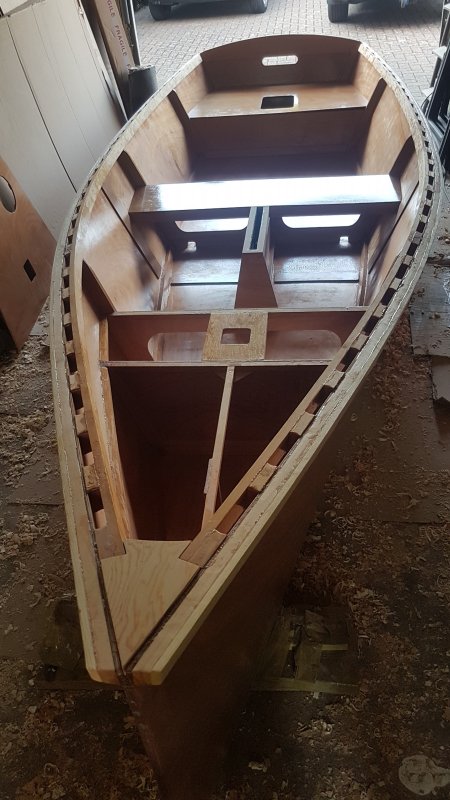
While working on the build I have seen many examples of finished boats. A small number have added side benches to the design. I know Michael is justifiably proud of the open interior of the GIS, but I'm no longer as agile as I used to be and sitting on the floor when not on the gunwale doesn't appeal. As a result I decided I would add narrow side benches. That required me to do some design/planning myself. I decided that 20cm width and following the curve of the hull would provide what I wanted, but as it's only 6mm ply it would need some stiffening and supports. In the end I decided to reinforce the edge of the bench with another layer of ply and make 3 triangular supports of 2 thicknesses for each side, as well as the end and hull support cleats. I worked out that a half-sheet of 6mm play would be enough and ordered that from Fyne Boat Kits when I got the paint and varnish I will need.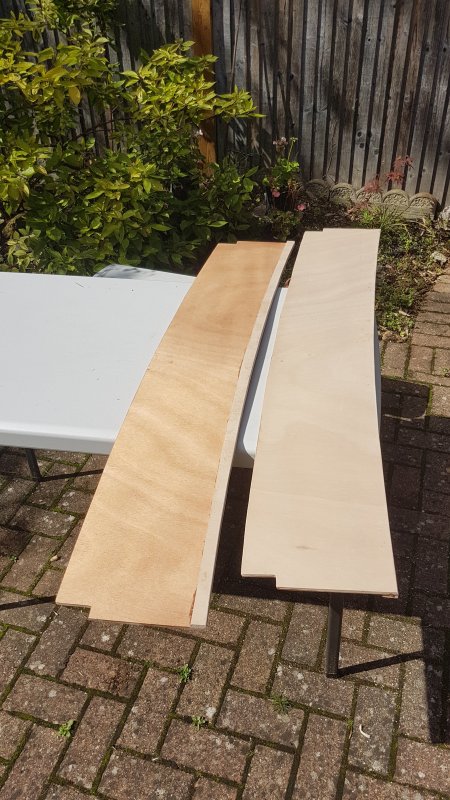
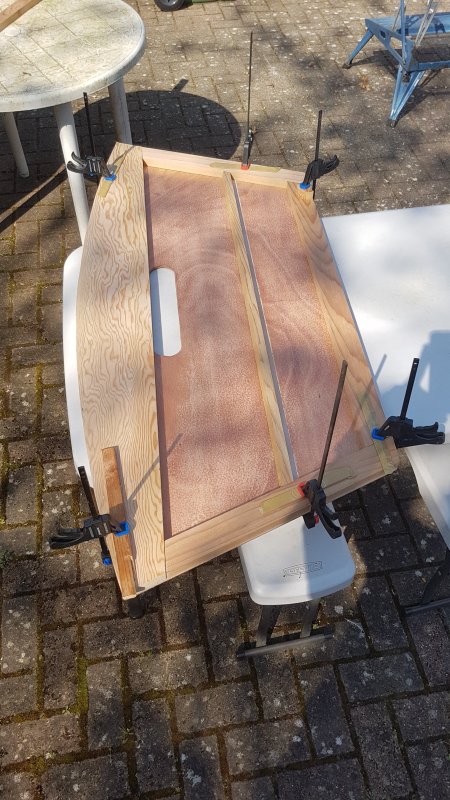
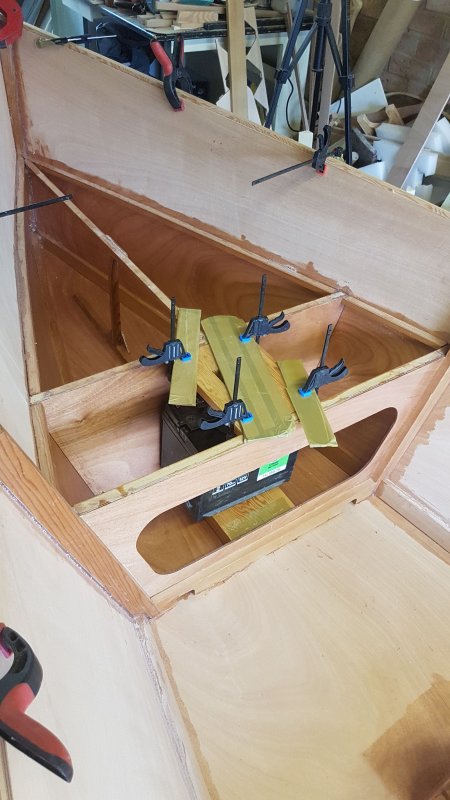
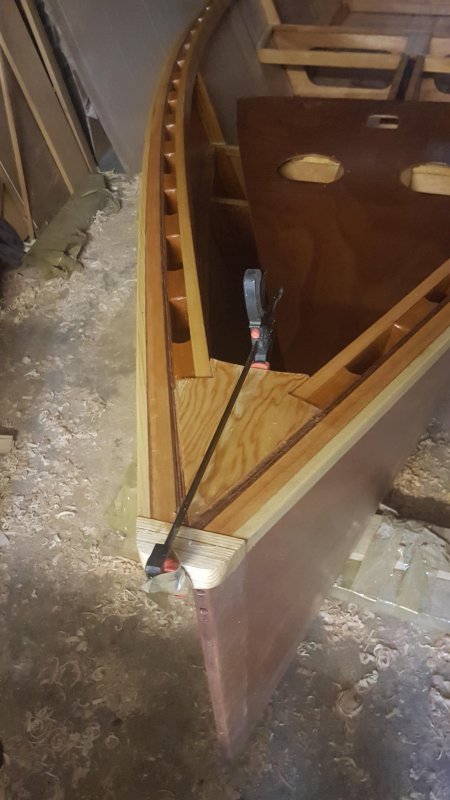
The next challenge was how to hold the triangles in place while gluing. I had some offcuts from the gunwale timber that I didn't mind drilling for screws so opted to use them and clamp to some longer bits of timber to 'hang' the triangles from. This allowed a dry fit to check the shapes and fit to the hull before gluing in place.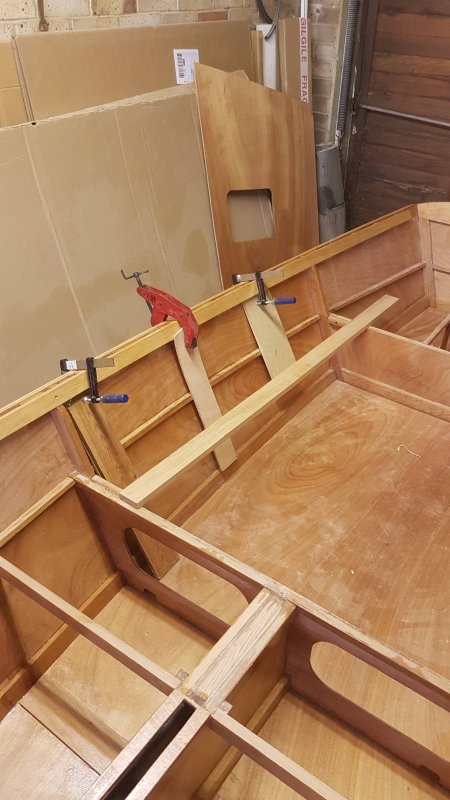
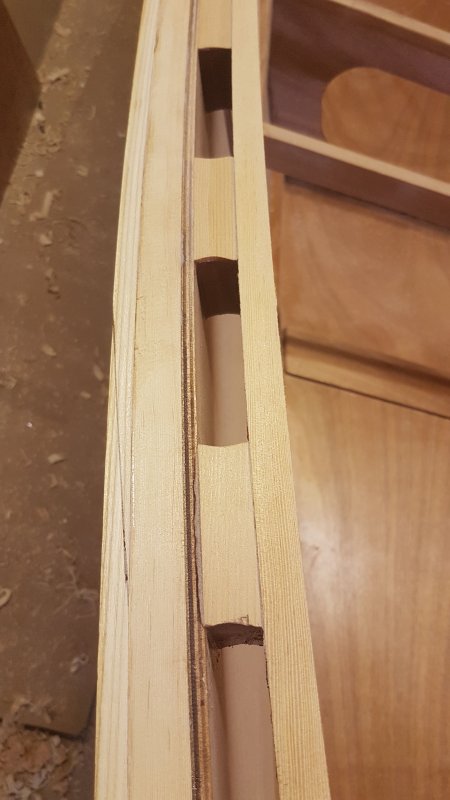
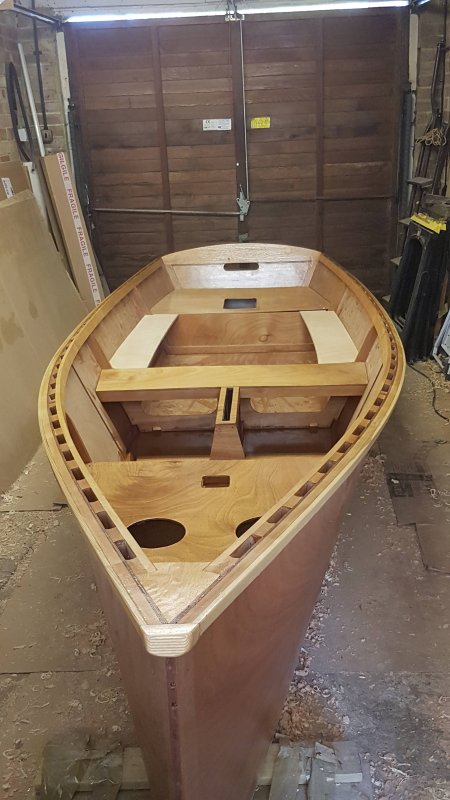
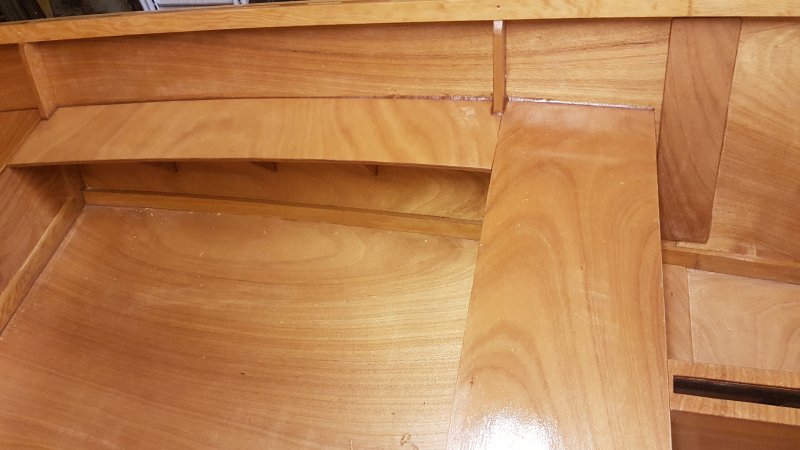
End result with the supports removed - ready to epoxy coat.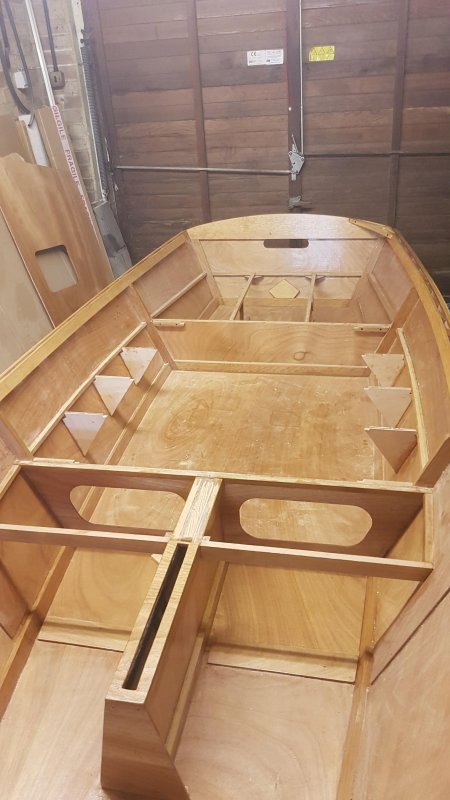
How the finished benches should look - the undersides have been epoxied but not the tops in this pic.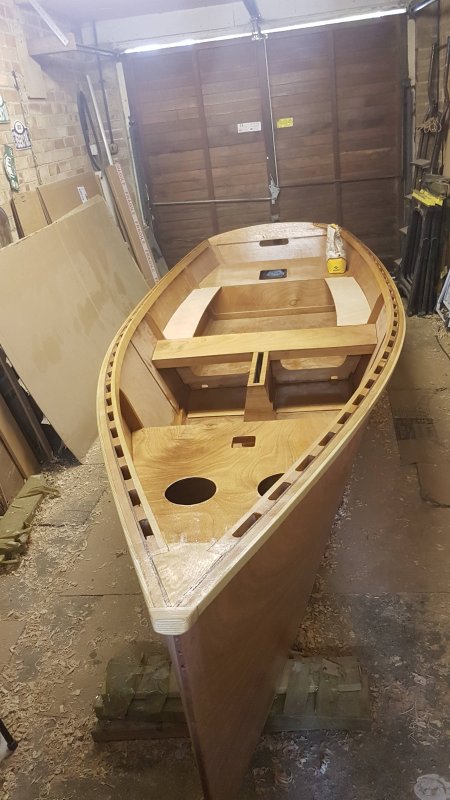
I'm happy with the result - the narrow benches keep the cockpit as open as possible while providing seating for the helm. Once epoxied and varnished they will match the rest of the hull nicely.
Last edited by SteveM (27 Aug 2020 12:04 pm)
Offline
#6 27 Aug 2020 11:59 am
- SteveM
- Member
- Registered: 2 Jul 2020
- Posts: 9
Re: Building a Goat Island Skiff
One more important step: fitting the rudder gudgeons to the rudder stock and drilling for the hull fittings. Careful measuring required - I glued some offcut timber to reinforce the bottom fitting, and will cut another for the upper one. 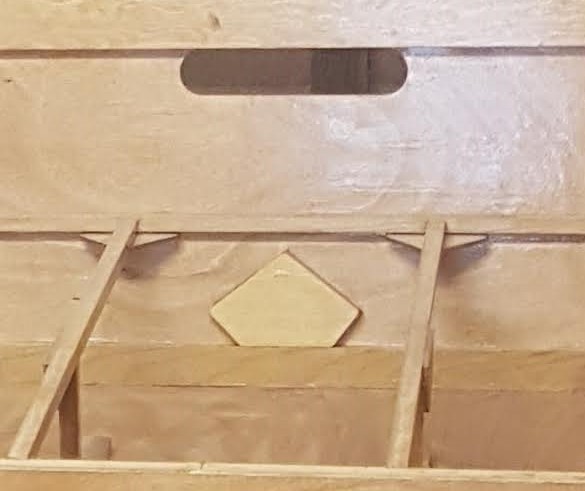
The centre line markings have all been removed by now, so measuring and marking on some masking tape helped me get the position of the holes to drill.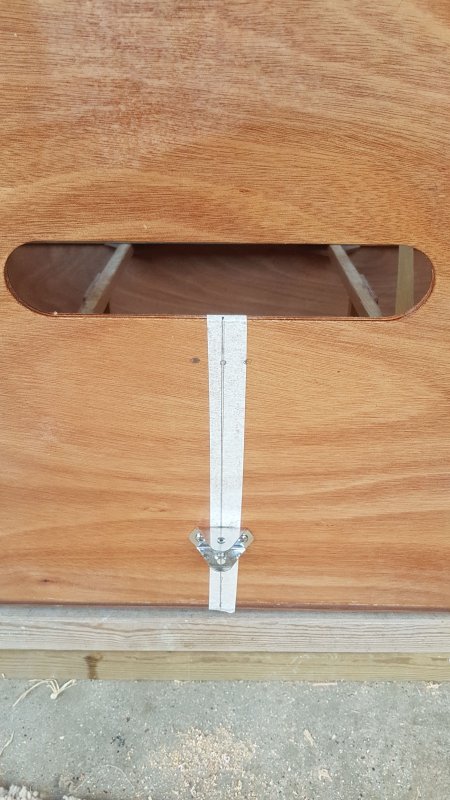
In parallel with all this I've been varnishing the parts that will be hard to reach one I glue down the seat tops. This is contrary to what the build instructions say, but I want to be sure I've varnished over the epoxy and I don't think I could reach all the area around the mast step & partner with the top glued in place. Likewise the mid-bench will make it hard to varnish behind bulkhead three. So those areas are now varnished (no photos). I now have a week's family holiday so the rest of the finishing will have to wait a few days.
Last edited by SteveM (27 Aug 2020 12:06 pm)
Offline
#7 27 Oct 2020 3:49 pm
- SteveM
- Member
- Registered: 2 Jul 2020
- Posts: 9
Re: Building a Goat Island Skiff
This is a bit a catch up as I finished the build in late September.
Next step after August Bank Holiday was to get on with gluing the seat tops in place. This requiried every heavy object I could find to weight them down! plus clamps to make sure the mast partner area had no gaps.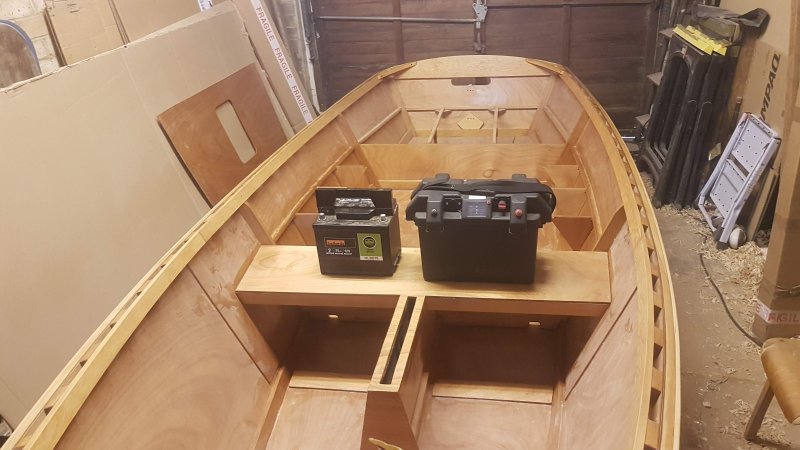

I did the mid seat and bow seat/tank-top first, then the side benches and finally the rear seat/tank-top.
While waiting for the epoxy to cure I did a test fit of the rudder stock. This confirmed what I thought: the steel rod supplied to make the pivot is seriously over-length (more than twice what's needed) so some cutting would be needed. I also had to think about how to keep the resulting pin secure when in place. 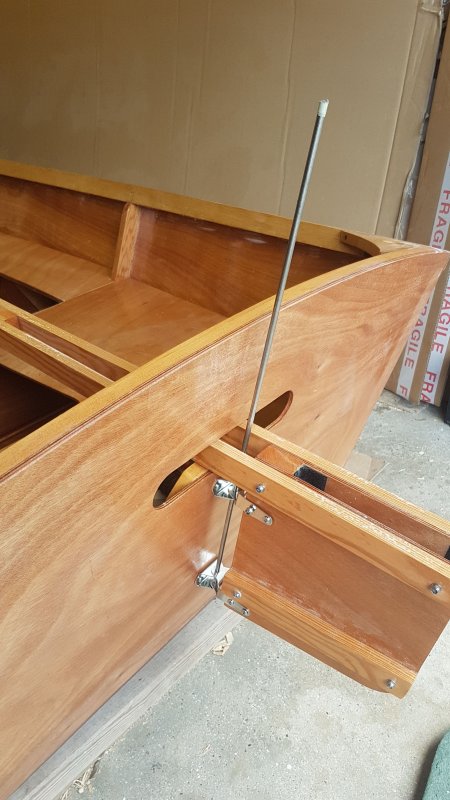
I asked for advice on the Facebook GIS group - an excellent source - and got several suggestions, including part-cutting and bending over the rod to make a 'handle'. In the end I decided I didn't reckon my chances of doing that well and opted to drill and fit R-clips. That did necessitate buying some extra-hard 2mm drill bits to drill the stainless steel and I also decided to make a wooden knob to glue on to the top as a handle and taper the bottom end to make insertion easier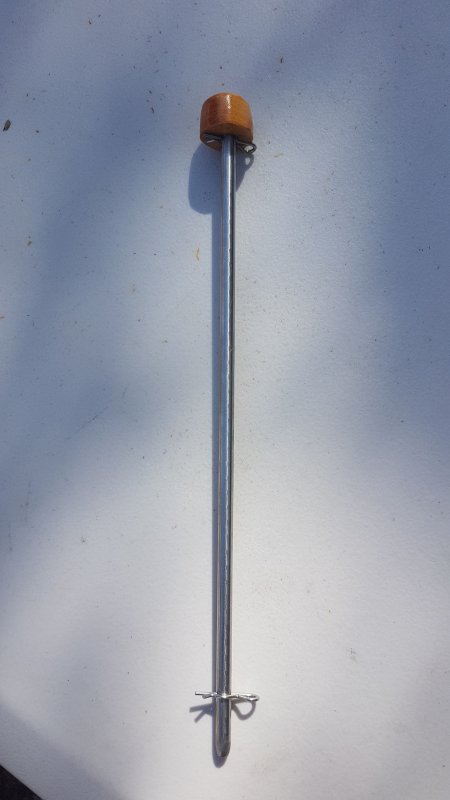

This is the finished article.
With all the seat tops in place and epoxy fillets added it was time to turn over and start painting the bottom while the epoxy fully cured. I carefully applied masking tape and got on with priming, checking for fairness, sanding & filling, more primer (repeat) - 3 coats in all before I was ready for topcoat. 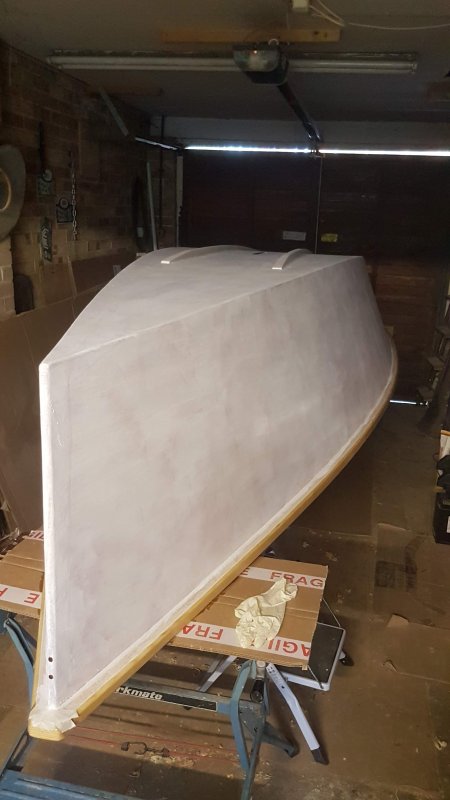
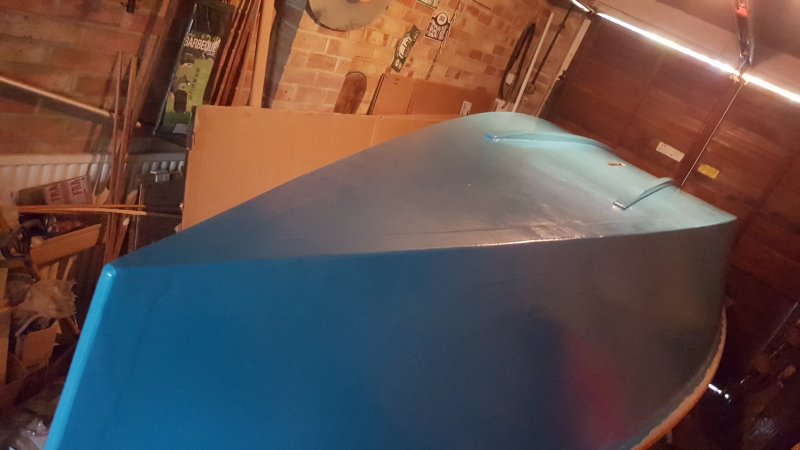
I did the first topcoat with brush - it took about 4 hours and more than a third of the can! And I wasn't pleased with the finish at all. Gloss really shows up all imperfections, so even though I though I'd done a good job with primer it fell short of what I wanted. I was not trying for perfection - a good "10 foot finish" would be good enough - but this was a long way off that. After more sanding and filling I decided to try a foam roller to apply the second coat. This was much better: an even coat and used half as much paint as with the brush. With a bit of light sanding between coats and some extra attention to a couple of problem areas I was able to get a decent finish. Four coats in all, with a bit more on the problem areas.
Time to turn right-way up again. Just before that I remembered one important thing: I had not checked that the centreboard fitted OK through the centrecase and slot (remember my garage workshop space is very limited). The only way to test fit was to push the board up from under the upturned boat - so I tried it... and it stuck! On examination the slot I had cut was about 1-2mm too narrow in the middle part. Cue rapid work with chisel & sandpaper and some coats of epoxy on the exposed ply edges.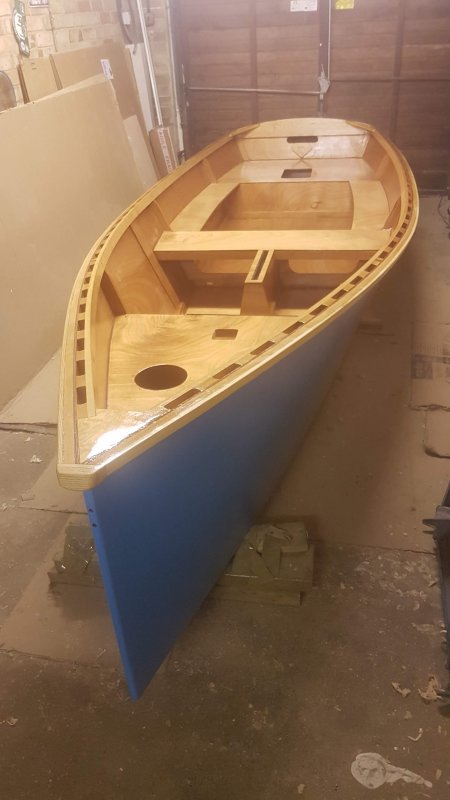
Then with the boat rightway up again it was on with final sanding and varnishing.
By this time I was nearly ready for the trailer I had ordered and had been scheduled for mid-September. Unfortunately the supplier had a hold up with galvanising that put back completion by 2 weeks. OK, so on the bright side that gave me a bit longer to work on the varnishing (and more sanding and varnishing) until I had a finish I was happy with.
I collected the trailer on 1st October and on 2nd October had the boat out of the garage on the trailer with the help of 3 friends. 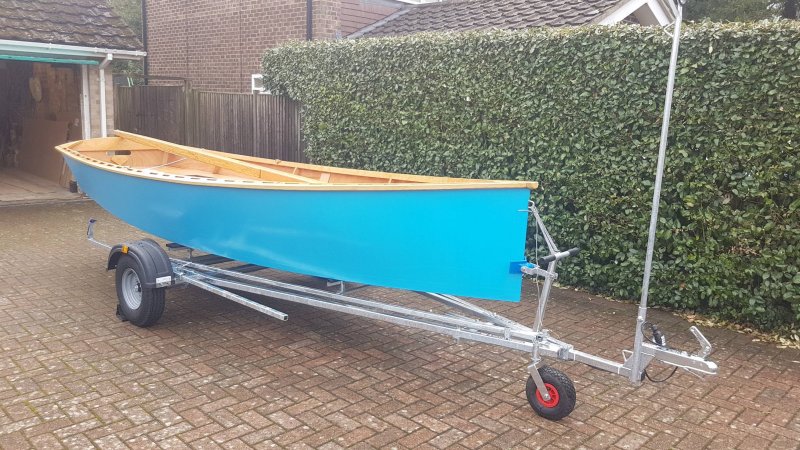
Next important test: does the mast fit? all the parts had been checked before assembly and each one had been OK, but the mast couldn't be tested in the hull inside the garage. No surprise that it jammed when I tried it. Though each part was OK they were not perfectly aligned and again 1-2mm needed to come off, or a bit more to make it comfortable to insert and remove. So more work with the jigsaw, file and sandpaper and out with epoxy and varnish to protect the wood. Just as well that the weather wasn't good or I'd have been very unhappy at the extra delay. Still after all this time it was important to get final details right. 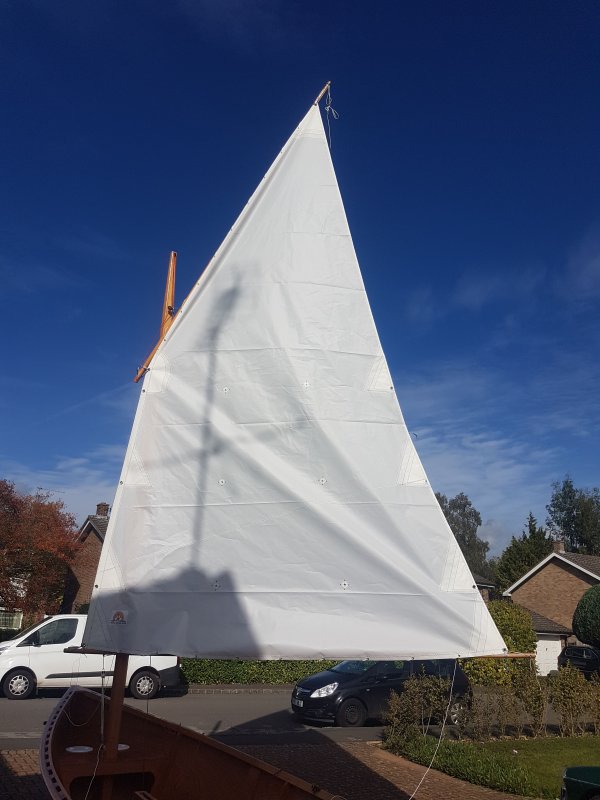
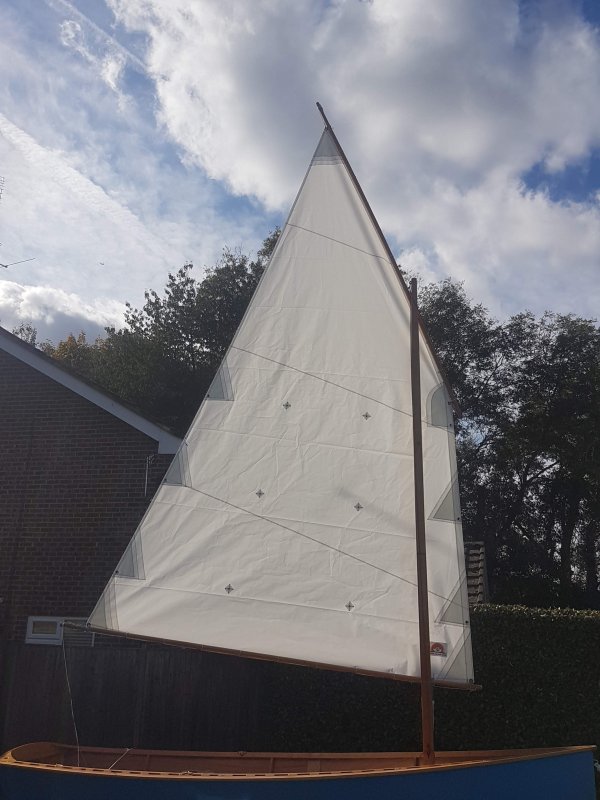
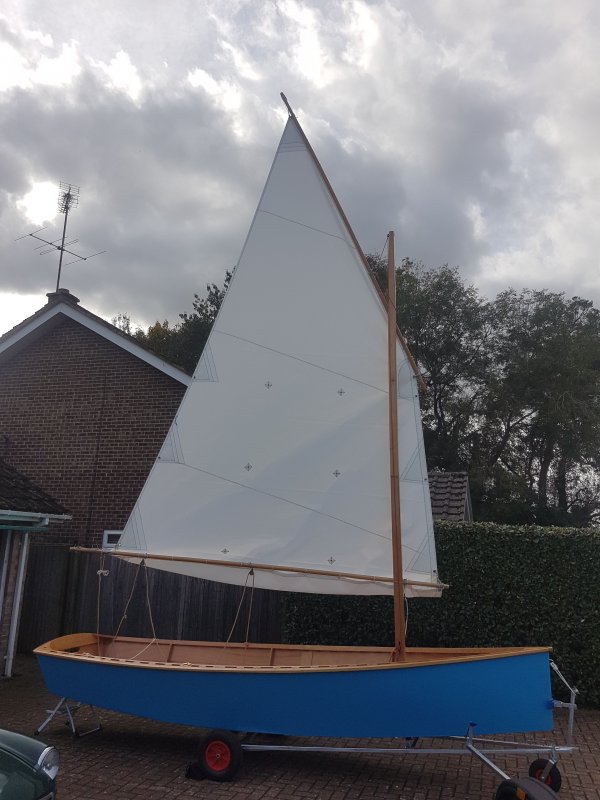
I took advantage of one nice day during that time to "land sail" and get the rigging set up with the sail hoisted. Very useful as some of the lashings had to be adjusted. Then mast down again and the last coat of varnish on the partner where I'd had to enlarge it.
I had several potential launch days lined up but as each one approached the weather worsened. Finally the "least awful" day of Sunday 11th October arrived and I set off to meet friends at the sailing club for the inaugural sail.

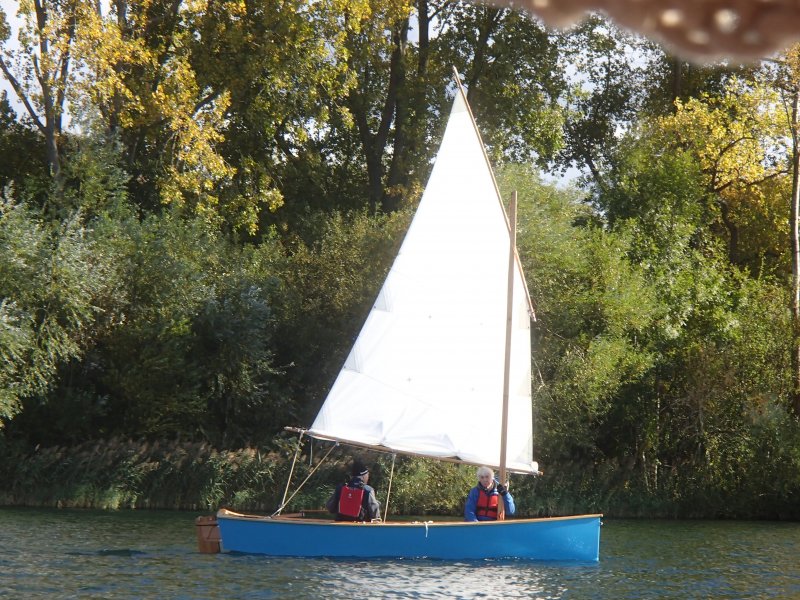
You can probably tell it was a very cold day, a brisk north wind and a bit gusty. Launch went OK (no leaks!) and we started with a row out to check conditions before hoisting sail with one reef in and having a short outing.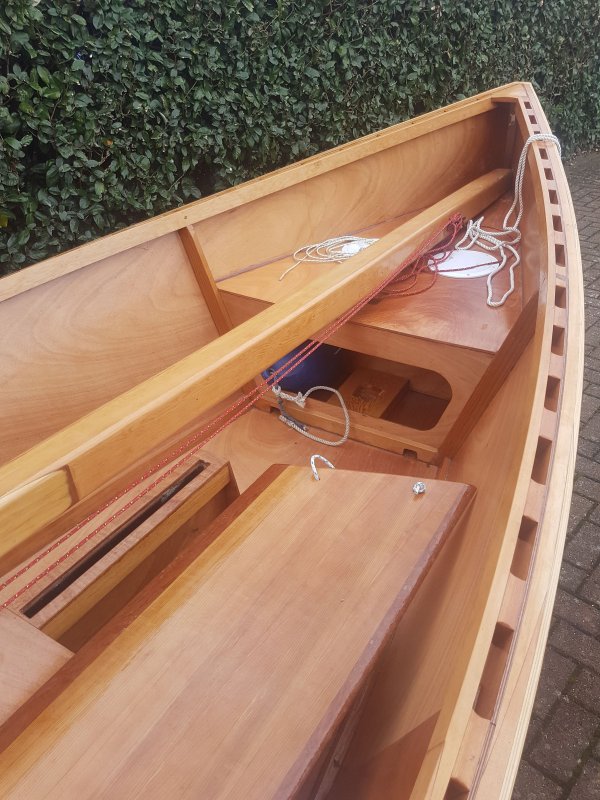

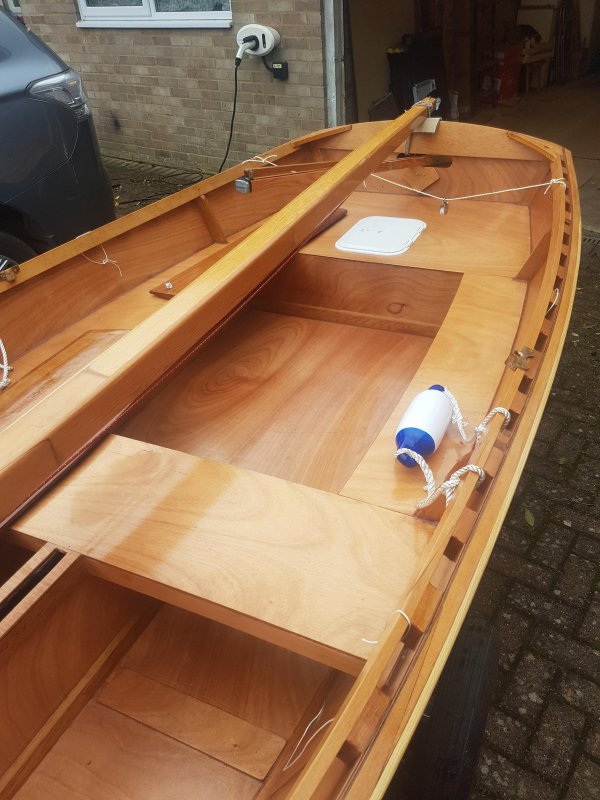
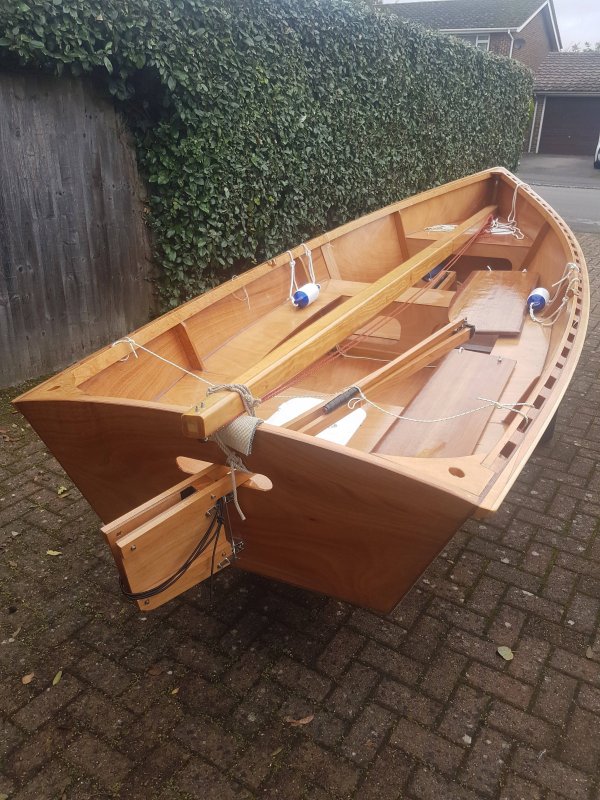
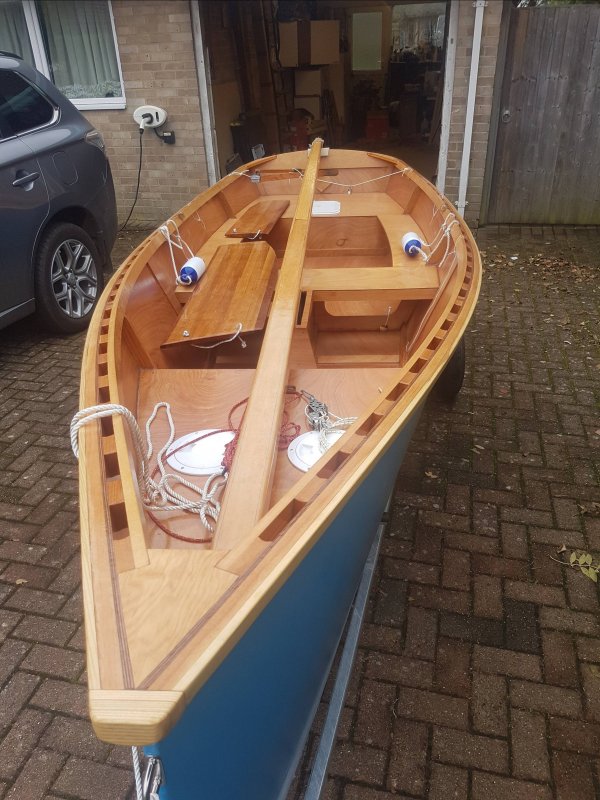
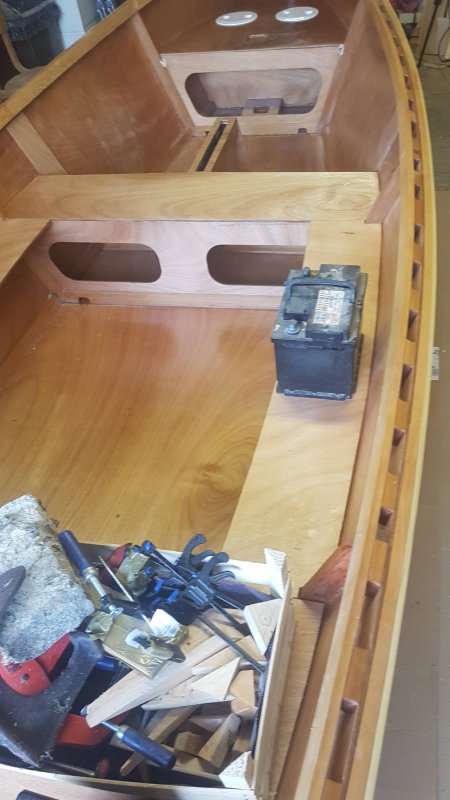
These are a few photos taken subsequently showing the interior, centreboard, rudder and mast. All in all I'm very pleased with the end result and looking forward to next spring.
Last edited by SteveM (27 Oct 2020 4:52 pm)
Offline
#8 27 Oct 2020 3:55 pm
- spclark
- Member
- From: "Driftless" Wisconsin USA
- Registered: 19 Mar 2020
- Posts: 478
Re: Building a Goat Island Skiff
Yes, glossy finishes demand some pretty rigorous care in application technique! I'm somewhat behind you with my Waterlust expedition canoe build but your words ring true to my experience getting the final coats of marine enamel onto the hull this past weekend.
I'm satisfied with the '10-foot' results I got with roller & foam brush (for 'tipping' off the rolled-on stuff before leaving it to set up) and now looking forward to spring '21 when I've finished all the other stuff & can get her onto the trailer then out onto some water.
Good job I might add with your GIS! May you have many pleasant adventures together!
Offline
#9 27 Oct 2020 4:59 pm
- SteveM
- Member
- Registered: 2 Jul 2020
- Posts: 9
Re: Building a Goat Island Skiff
Thanks! Yes, the roller and tipping out worked well - I too used disposable foam brushes for that, forgot to mention.
I got through a pile of foam rollers over the whole project, many more than the build manual suggested - but I think the ones I was able to source are a different kind to those envisaged.
Glad to hear you're on track for a Spring '21 finish, lets hope we all have some good sailing weather then!
Offline
Pages: 1