You are not logged in.
- Topics: Active | Unanswered
#326 11 Jun 2020 2:43 pm
- Bergen_Guy
- Member
- Registered: 6 Feb 2020
- Posts: 353
Re: Waterlust sailing canoe in Norway
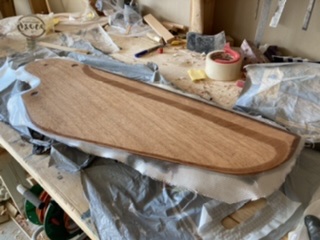
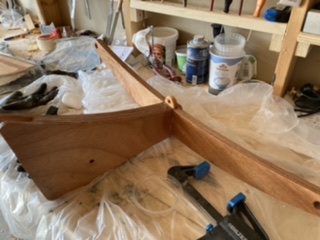
Glassing the rudder blade flat is working well. I also made a bit of a discovery while trawling through the website of Arwen Marine in France - they use rollers for spreading resin on glass, I gave it a try and I must say it worked well for me, give it a try! Cleaner less strictly fingers for one, and pressing down the odd bubble worked better than with a squeegee. Also got a second coat of resin on the stock.
Offline
#327 11 Jun 2020 2:51 pm
- MartinC
- Member
- Registered: 3 Apr 2020
- Posts: 348
Re: Waterlust sailing canoe in Norway
Nice work Guy.
Have you thought how to varnish the inside of the rudder casing? I am at that stage and wondering whether to bother as you can't get to it to sand it. I suppose it won't take any harm unvarnished - the inside of the centreboard casing isn't.
Still trying to learn about paint! How many primer and top coats did you apply to the hull?
Offline
#328 11 Jun 2020 6:40 pm
- Bergen_Guy
- Member
- Registered: 6 Feb 2020
- Posts: 353
Re: Waterlust sailing canoe in Norway
Good question - I only spotted that problem once I had got everything epoxied. Fortunately I did coat it with resin before I glued it. I might try using a radiator brush! On the hull I used 2 coats of primer and 2 coats of blue topcoat, but three coats of red as it wasn’t quite so solid a colour.
Offline
#329 12 Jun 2020 9:25 am
- Ian
- Employee

- Registered: 24 Nov 2014
- Posts: 103
Re: Waterlust sailing canoe in Norway
The main job of the varnish -- apart from making it look pretty -- is to protect the epoxy from ultraviolet, so the inside of the rudder and centreboard cases don't usually need varnishing, as long as the wood is sealed with epoxy.
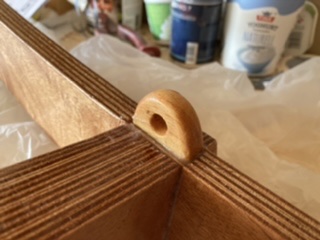
Oh, and I think that fairlead is probably Douglas Fir. It's hard to tell from the photos but Ash is white-ish and Douglas is more honey-coloured with a contrasting grain. Availability (and quality) of timber species are different on opposite sides of the pond, so some of the timber we use is different from what CLC use.
Offline
#330 19 Jun 2020 9:16 pm
- MartinC
- Member
- Registered: 3 Apr 2020
- Posts: 348
Re: Waterlust sailing canoe in Norway
Hi SP.
A while ago you mentioned that you had quite a number of photos of a Waterlust completed by a chap in Florida. I would be really interested to see his layout of deck hardware for both the main and mizzen if you have any photos which show this. I was wondering if you have only the Yawl rig (which I have), if it is necessary to have the fairleads numbered 3 and 9 on the build sheet 26?
Offline
#331 19 Jun 2020 10:44 pm
- spclark
- Member
- From: "Driftless" Wisconsin USA
- Registered: 19 Mar 2020
- Posts: 478
Re: Waterlust sailing canoe in Norway
Gimme awhile to get into those files Martin, I just got off work & will look through them all for the details you’re asking about. Should be able to post what I find by (your) lunchtime tomorrow.
Offline
#332 20 Jun 2020 10:49 am
- MartinC
- Member
- Registered: 3 Apr 2020
- Posts: 348
Re: Waterlust sailing canoe in Norway
Whilst waiting for paint to dry, I came across this following up on Guy's earlier post of a drawing of Baden Powell's boat 'Nautilus'. You can see the genesis of the sailing canoe which I feel the beautiful Waterlust is a worthy incarnation.
https://sailcraftblog.wordpress.com/2016/05/25/1019/
Offline
#333 20 Jun 2020 2:06 pm
- spclark
- Member
- From: "Driftless" Wisconsin USA
- Registered: 19 Mar 2020
- Posts: 478
Re: Waterlust sailing canoe in Norway
Somewhere years ago I stumbled upon a pamphlet put out by the American Canoe Association about sailing canoes and their history. Price when new was all of US $.20, so it's been awhile since it came out. I'm working on getting it digitized into a shareable format but I still have some work to do! Don;t hold your breath.... Here's one pf the pages showing various iterations on the theme:

- where you might get an idea of what Dillon may have based his Waterlust design upon.
Offline
#334 20 Jun 2020 2:21 pm
- spclark
- Member
- From: "Driftless" Wisconsin USA
- Registered: 19 Mar 2020
- Posts: 478
Re: Waterlust sailing canoe in Norway
Anyway, back on this morning's track: here's a 'few' images selected from the numerous large files our other Waterlust compatriot in Austin TX sent me a few weeks ago showing details of his rigging prowess:
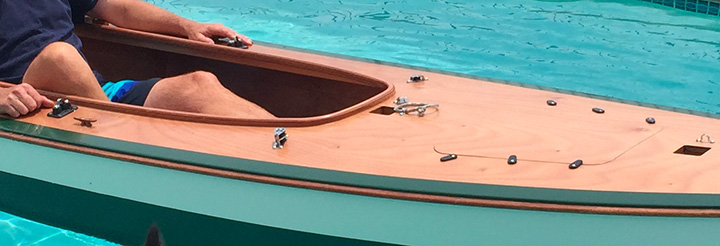
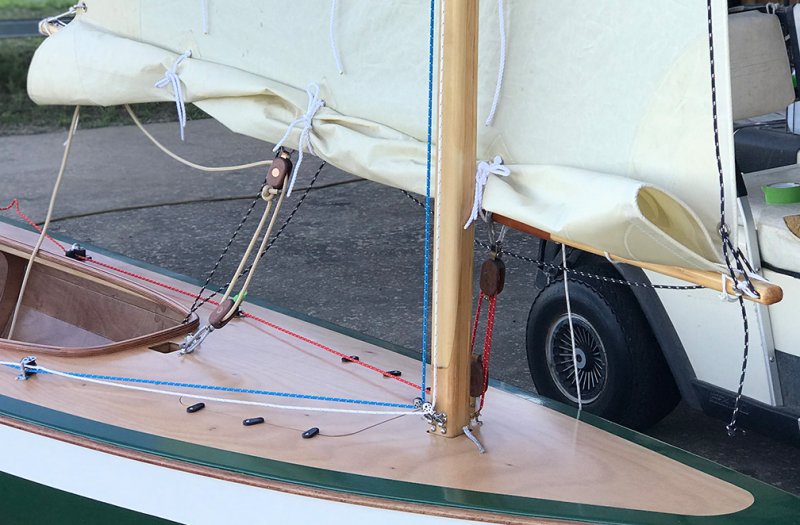
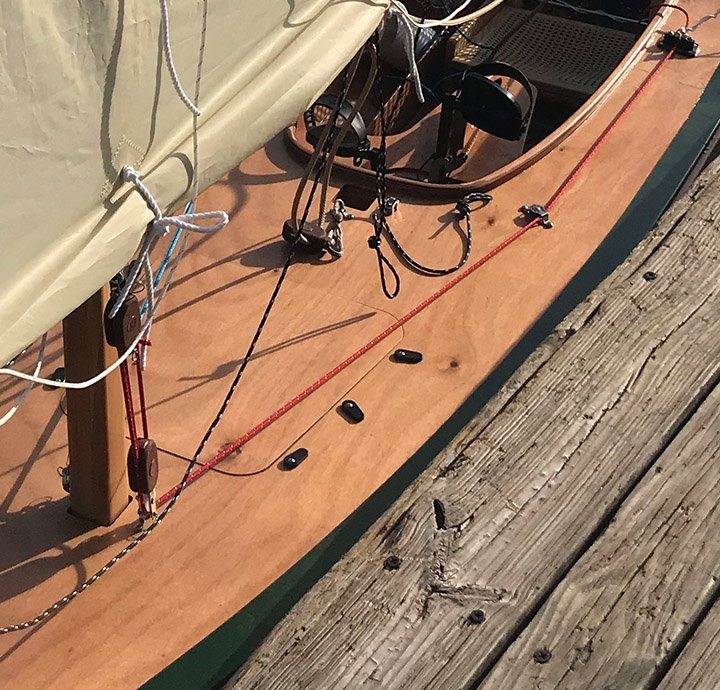

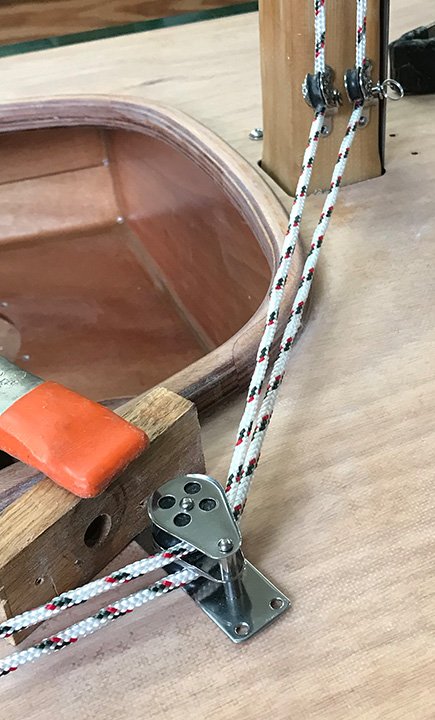
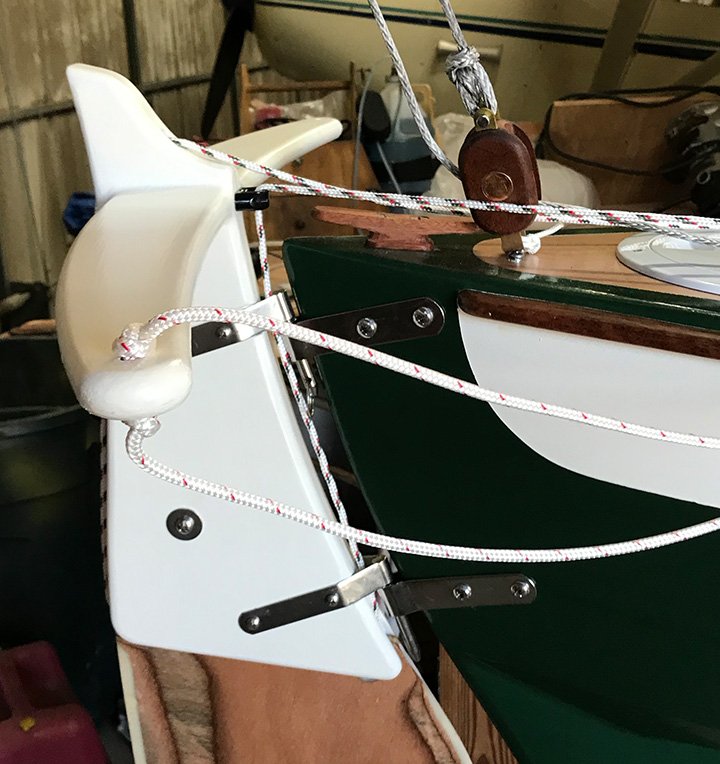
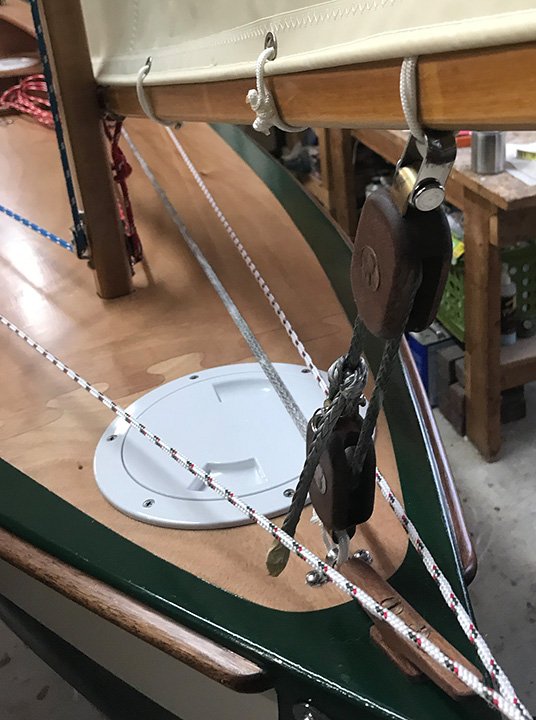
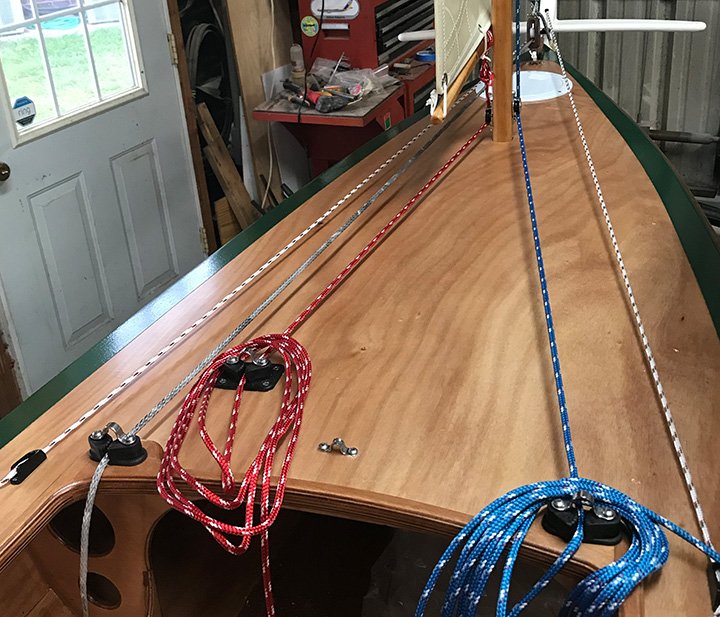
And to your question Martin, I think a good reason to add those fairleads 3 & 9 - even if you have no plans to use the aft mainmast pocket - would be to keep the mainsail's control lines away from the cockpit as shown here:
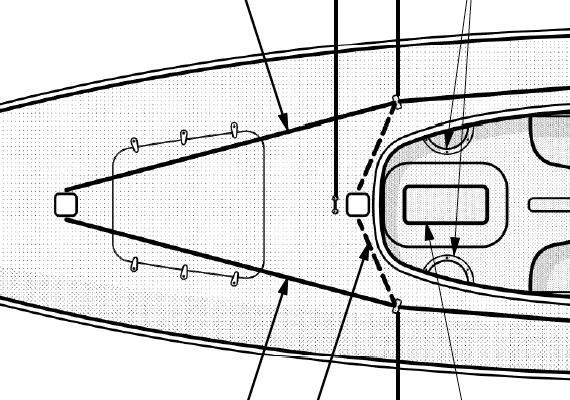
Note too where Jeff opted to mount blocks instead of fairleads at those positions. Given his longer history of sailing experiences (compared to mine!) I'm inclined to do the same.
(Glad I am for the forum host's here giving us ample storage space for uploading images! Even with all I've posted to this thread I'm just at 15% with that last one! Room for more!)
Last edited by spclark (20 Jun 2020 2:29 pm)
Offline
#335 20 Jun 2020 4:05 pm
- MartinC
- Member
- Registered: 3 Apr 2020
- Posts: 348
Re: Waterlust sailing canoe in Norway
That's really interesting SP. Thank you very much. I can tell at a glance that there are several variations from Dillonn's suggested layout. I shall study it with great care. (I may be back with more questions!).
Offline
#336 20 Jun 2020 4:31 pm
- spclark
- Member
- From: "Driftless" Wisconsin USA
- Registered: 19 Mar 2020
- Posts: 478
Re: Waterlust sailing canoe in Norway
I can tell at a glance that there are several variations from Dillonn's suggested layout.
Well... it is, after all, one of CLC's "Pro Kits" after all. So there's gonna be some areas left up to the builder for customization I'd guess, just the nature of the beast when it comes to details. Part of the fun of the doing!
Like with me adding material eventually to accept fasteners for oarlocks. To my mind that's just a good idea for when the time comes I find I want to put oars to mine, my thinking being that trying to paddle one of these in the conventional sense may be a tricky proposition given the ample freeboard and partial deck around the cockpit. It's a longer reach, with a bit of stretch involved, getting to the water that a conventional open canoeist doesn't have to deal with.
These are 'personal' watercraft, not one-designs' built to a rigid set of specifications.
And I'll do my best to answer your questions but you have to understand I'm kind of a newbie to these things myself and may not be the best source for reliable answers. That would be Dillon himself I trust.
Offline
#337 21 Jun 2020 5:14 pm
- MartinC
- Member
- Registered: 3 Apr 2020
- Posts: 348
Re: Waterlust sailing canoe in Norway
I can make out the rationale behind most of this layout and it all makes good sense, but I can't understand what the substantial rope on one side of the tiller yoke is or what the dark blue and white flecked rope is which is tied in a loose bowline through the front of the boom. Any ideas?
Offline
#338 21 Jun 2020 7:14 pm
- spclark
- Member
- From: "Driftless" Wisconsin USA
- Registered: 19 Mar 2020
- Posts: 478
Re: Waterlust sailing canoe in Norway
That "substantial rope on one side of the tiller yoke" I believe is Jeff's tiller's 'safety' line, led forward along the tiller extension to a cleat then back to the deck where it can be reached in the event the tiller takes a dunking:

And that dark blue / white-flecked line is a means to bring the main's reef tack's to the boom from back in the cockpit; this image (with inset showing cleats for both ends) should give a clearer view of how it's rigged:
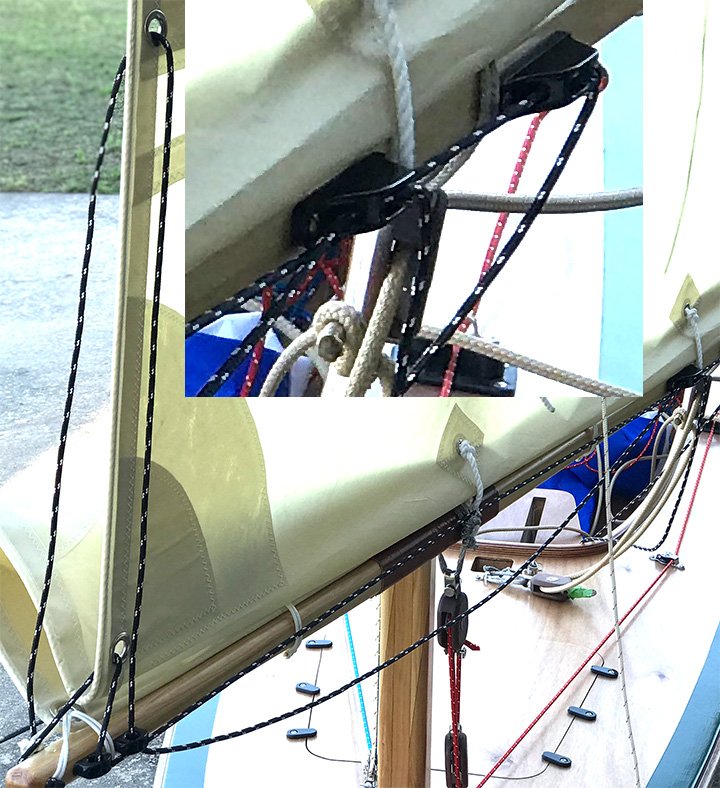
(Please forgive my 'odd' sail terminology! It's been nearly 45 years since I was last actually confronted with calling things by their proper names while on a sailboat! Given time and exposure I'll get it closer to right the next time I trust!)
If my explanations prove errant, let me know & I'll post your questions on to Jeff.
Offline
#339 22 Jun 2020 5:59 am
- MartinC
- Member
- Registered: 3 Apr 2020
- Posts: 348
Re: Waterlust sailing canoe in Norway
Got it! That all makes perferct sense. Many thanks SP.
I should have worked it out as I had this arrangement on my last boat! Reefing lines do clutter it up a lot and there is a lot to get tangled and snagged. I think I'll start without them. I can't imagine a situation where I will need to reef underway. It will always be easier to drop or scandalise the sail and make for the shore to reef.....or simply tie up the sail and peddle home.
Crusader is rigged perfectly as a scaled down big yacht. I am wondering though if, as the sail areas are so small (especially the mizzen) there is a need for quite so much hardware and rope. I may be wrong but I will be experimenting in a few weeks and will post my results if anyone's interested.
Offline
#340 22 Jun 2020 12:33 pm
- spclark
- Member
- From: "Driftless" Wisconsin USA
- Registered: 19 Mar 2020
- Posts: 478
Re: Waterlust sailing canoe in Norway
Well I’LL be interested Martin! I may not get to rigging mine for sailing this season, but when the time comes all those fittings & ropes will be approached with caution & much thought! Only what’s necessary!
Offline
#341 22 Jun 2020 12:54 pm
- Bergen_Guy
- Member
- Registered: 6 Feb 2020
- Posts: 353
Re: Waterlust sailing canoe in Norway
I will certainly be interested to hear if you manage to 'scale down' the rigging at all Martin. As you say, the sail area is not huge, maybe some simplifications can be made.
Offline
#342 22 Jun 2020 1:06 pm
- spclark
- Member
- From: "Driftless" Wisconsin USA
- Registered: 19 Mar 2020
- Posts: 478
Re: Waterlust sailing canoe in Norway
My plan [at least for now] is to focus on getting some experience with how this design trims once launched, how the rudder affects direction, how the tiller extension handles, what kind of windage the hull alone has, before I go & add the main mast & sail for a first go at wind-power. Jumping feet-first into main + mizzen I’m thinking might be a big mistake.
Offline
#343 28 Jun 2020 7:42 pm
- Bergen_Guy
- Member
- Registered: 6 Feb 2020
- Posts: 353
Re: Waterlust sailing canoe in Norway
Well, over the last week or so I have been working on the centreboard, that’s now roughly the right shape and covered in glass. As it’s made of solid wood strips glued together, and i don’t own a router, it doesn’t have an epoxy leading edge, so I guess that will need some care. It was also too tight to get any glass round the bend. Maybe I need a strip cut on the bias for that - I have read it goes better round right bends. I will leave it as it is for now and see how it wears. The rudder blade and stock is also getting varnished at the moment. Not so exciting, but it’s all looking fine. Actually the rudder blade probably has the best glass job on it of the whole boat. I don’t know if that’s because it’s small, or because I have learned something over the last few months.
More excitingly, today I made a start on the spars. Starting with the smallest first. Mizzen gaff and boom. I finally invested in some power tools for this job, as I am starting with bits and pieces I picked up at the sawmill a few weeks ago. I used a jigsaw to rip the timber to the right dimensions and then an electric planer to smooth it down. After that I used the block plane to round over the edges before sanding it all down. I have one spar almost there and the other roughed out. Supper happy with the process and result so far looks encouraging.
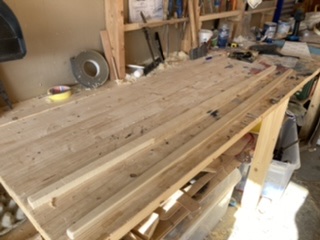
Here you see the workbench after sweeping away all the sawdust and wood shavings!
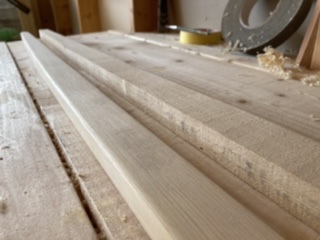
A close up of the two spars, the front one nearly finished, after sanding with 120 grit. A the back that’s after sawing, and hasn’t yet seen the plane!
All in all, pretty straightforward, if time consuming to get the right wood and tools collected together. I will probably finish the spars with the oil finish the locals seem to use a lot here deksolje I think it’s called.
Offline
#344 28 Jun 2020 10:55 pm
- spclark
- Member
- From: "Driftless" Wisconsin USA
- Registered: 19 Mar 2020
- Posts: 478
Re: Waterlust sailing canoe in Norway
Paint progress here, working to get cockpit ‘finished’ before adding deck stringers then bonding the deck. Also working on hardware for mounting rudder -
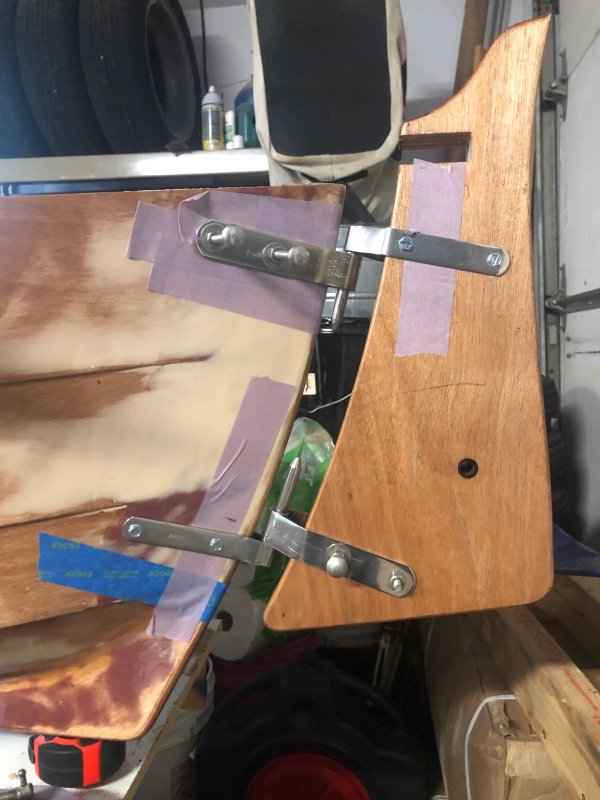
- and finishing rudder, its cassette, and daggerboard: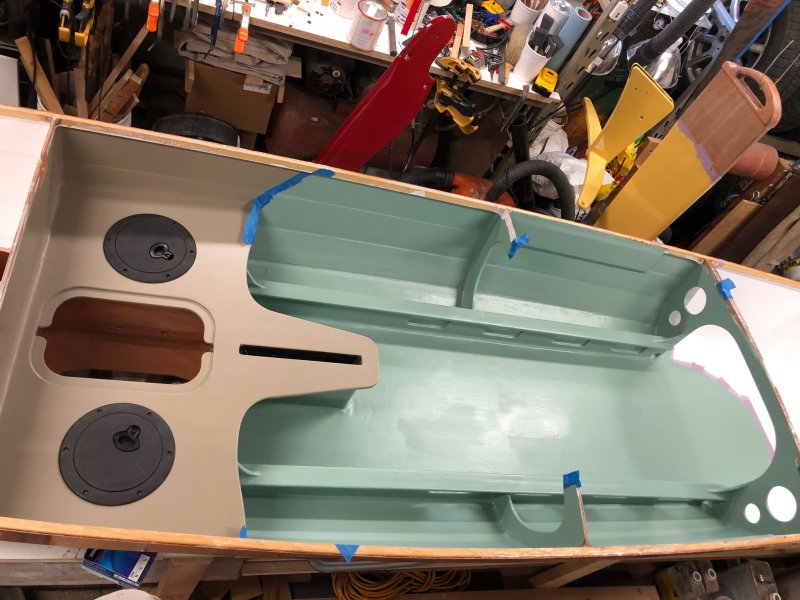
Cockpit got first coat of Kirby’s luster yesterday, will wet-sand tomorrow then add second coat. Rudder’s the Kirby’s gloss red I plan to use on hull’s fourth panel, daggerboard and cassette their gloss classic yellow that’ll also go onto the rest of the hull.
Turned hot & humid here now so I’m painting & sanding mornings & evenings when it’s cooler, while doing work on spars in basement. Every day’s progress, no matter how minor, brings me a day closer to her launching!
Offline
#345 29 Jun 2020 5:30 am
- MartinC
- Member
- Registered: 3 Apr 2020
- Posts: 348
Re: Waterlust sailing canoe in Norway
Well done both!
I am in deck varnishing mode here, so there's not much to photograph. Final coats are going on today and tomorrow and then it is on with the deck fittings and I'm done!
Offline
#346 29 Jun 2020 8:58 am
- Bergen_Guy
- Member
- Registered: 6 Feb 2020
- Posts: 353
Re: Waterlust sailing canoe in Norway
Did you choose colours for the hull yet Martin?
Offline
#347 29 Jun 2020 1:15 pm
#348 29 Jun 2020 1:58 pm
- Bergen_Guy
- Member
- Registered: 6 Feb 2020
- Posts: 353
Re: Waterlust sailing canoe in Norway
That is looking fantastic! Nice work, and a great colour too. I think the first thing I went on the water was a mirror dinghy too - called Puff (as in the magic dragon) it was white.
Last edited by Bergen_Guy (29 Jun 2020 1:59 pm)
Offline
#349 5 Jul 2020 2:30 am
- spclark
- Member
- From: "Driftless" Wisconsin USA
- Registered: 19 Mar 2020
- Posts: 478
Re: Waterlust sailing canoe in Norway
May I query the three of you (Guy, the two Martins) about your preference, thoughts about three-strand vs. braid?
I see in Jeff Perkins' photos ample evidence of contemporary braided polyester line, with a bit of three-strand here & there.
I used braid almost five decades ago on that stripper scow I built then learned to sail with... before it became unrepairable.
Approaching the question of what to order up for my Waterlust build I'm leaning towards a synthetic three-strand that has the look of traditional rope without the hemp/manila tendency to rot over time. I've e-mailed the vendor (RWrope.com) here in the US asking for a sample I can hold onto, maybe practice splicing eyes with, see how the stuff feels.
My preference for this latest build is for low-maintenance but with a traditional look (despite my preference for stainless steel over bronze, mostly for ease of selection and cost) making this tan three-strand my current favorite.
Last edited by spclark (5 Jul 2020 2:31 am)
Offline
#350 5 Jul 2020 6:11 am
- MartinC
- Member
- Registered: 3 Apr 2020
- Posts: 348
Re: Waterlust sailing canoe in Norway
Hi SP.
I am with you 100% on the hemp 'lookalike' rope. I think it really suits the traditional look of the boat and I will be using it. My only reservation in respect of the three strand is for the sheets where I think you need something kinder on the hands. I am thinking of using this for the main sheet https://shop.classicmarine.co.uk/24-pla … f-8mm.html and the 6mm version for the mizzen sheet.
Hope the build is going well. I am now onto the fitting of the deck fittings where much time and a lot of head scratching is going on, as I want to get it right first time and with two of us onboard I really want to simplify the number of ropes going into the cockpit and the number of fittings on the deck. When I have worked out what works for us I will post it here as it might be useful to others interested in a more basic setup.
Offline

