A forum for discussing wooden boats and boat building
You are not logged in.
- Topics: Active | Unanswered
#26 22 Mar 2020 2:18 pm
- Bergen_Guy
- Member
- Registered: 6 Feb 2020
- Posts: 353
Re: Waterlust sailing canoe in Norway
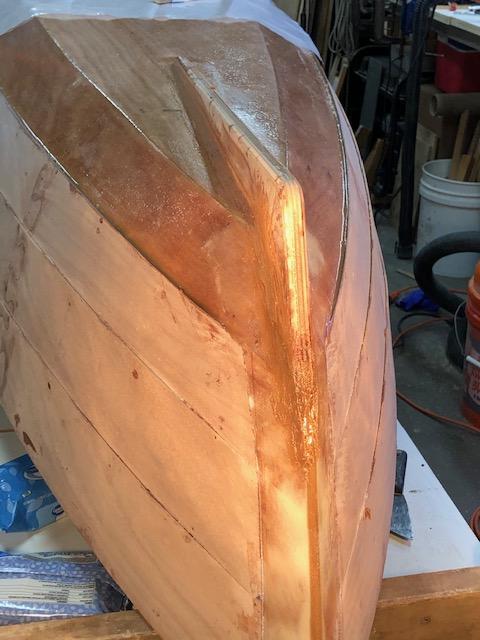
Today I put the filets into the stems, glassed over them, and fitted the breasthooks. It’s pretty cold again, but fortunately these are reasonably small areas, although there is a lot of resin in there. I guessed the amount of resin about right in the stern, but underestimated the bow by quite a bit, so had to go back inside to my resin station quite a few times during the process.

Offline
#27 23 Mar 2020 5:26 pm
- Bergen_Guy
- Member
- Registered: 6 Feb 2020
- Posts: 353
Re: Waterlust sailing canoe in Norway
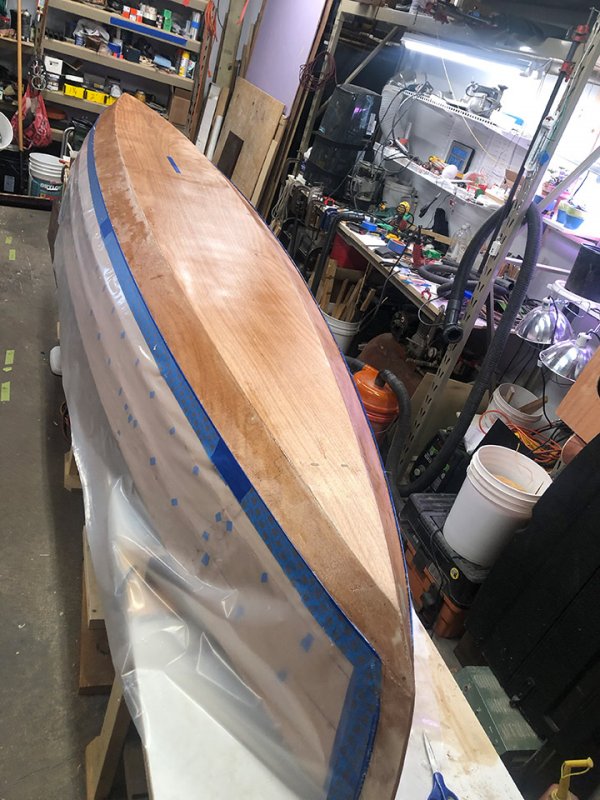
Not so much to show today, it’s been back to home office, home school and music practice today. I have however managed to “tack weld” the frames to the hull, so that lot is all curing. I also took the clamps off the stems after yesterday’s epoxy bonanza- and that is all looking fine. Very solid, not as pretty as some I have seen, but it’s my first go and that it holds together is more important, all this will be hidden away inside various watertight compartments, so I won’t get points for beauty. I do suspect that at some point I will get rammed into something hard, and then I will simply be happy there was a lot of epoxy in the ends!
Below is the bow after taking the clamps off,
And above, some tack welds!
Last edited by Bergen_Guy (23 Mar 2020 5:26 pm)
Offline
#28 24 Mar 2020 4:40 pm
- Bergen_Guy
- Member
- Registered: 6 Feb 2020
- Posts: 353
Re: Waterlust sailing canoe in Norway
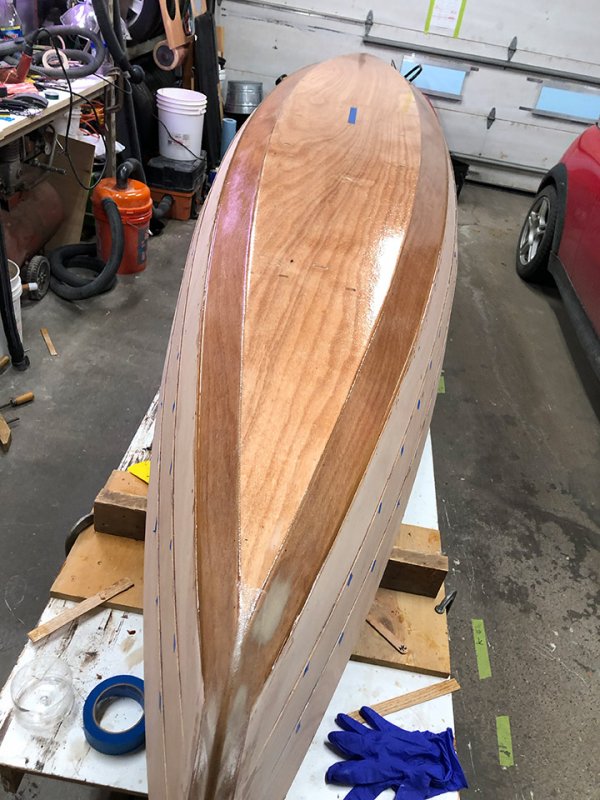
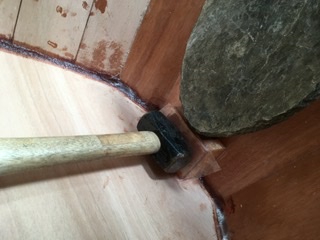
Not so much to show today; but the boys and I turned the boat, checked that it was level and did the tack welds. On the lower panels the tack welds were easier to do as there was a decent opening between the panels. Towards to top panel though, where the panels have a similar angle (both nearly vertical) then I ended up with more of a micro-fillet than a set of spots. Yesterday I found out that the fan heater has a thermal cut off, for which I am very grateful. I had it set up under a tent, and the whole lot got a bit hot. I was working in the garage at the time and wondered why the fan had stopped. When I opened the ‘tent’ up it was clear! Fortunately no damage done, and a lesson learned. The work lamp on the other hand seems to be a pretty reliable source of heat and hasn’t come close to overheating. Let’s see if these spot welds are strong enough tomorrow. I will try and get some stitches out of the stem this evening, probably with the help of a lighter to heat them up. Will I manage without setting the whole thing on fire?? Only time will tell, if I don’t post here any more, you know the answer!!
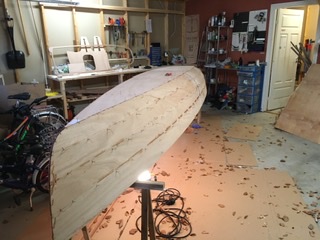
Upside down 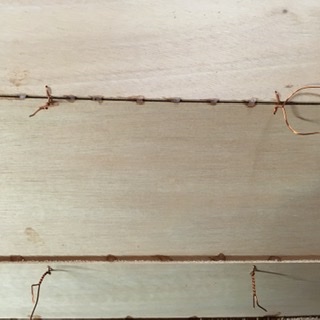
Tacks and stitches
Offline
#29 25 Mar 2020 9:07 am
- Paul
- Employee

- From: Gatebeck Cumbria
- Registered: 4 Aug 2011
- Posts: 134
Re: Waterlust sailing canoe in Norway
Your boat is looking very good and you are doing well despite the cold weather.
If it isn’t too late, try heating the wires with a soldering iron and then pulling them out with pliers: it is much safer.
Offline
#30 25 Mar 2020 1:14 pm
- Bergen_Guy
- Member
- Registered: 6 Feb 2020
- Posts: 353
Re: Waterlust sailing canoe in Norway
Thanks for the tip Paul, i will give that a try on those that remain embedded . I ended up snipping them flush and filing them flat, and no I didn't burn the garage down, but I did give up pretty quickly with the naked flame option!
Offline
#31 25 Mar 2020 6:35 pm
- Bergen_Guy
- Member
- Registered: 6 Feb 2020
- Posts: 353
Re: Waterlust sailing canoe in Norway
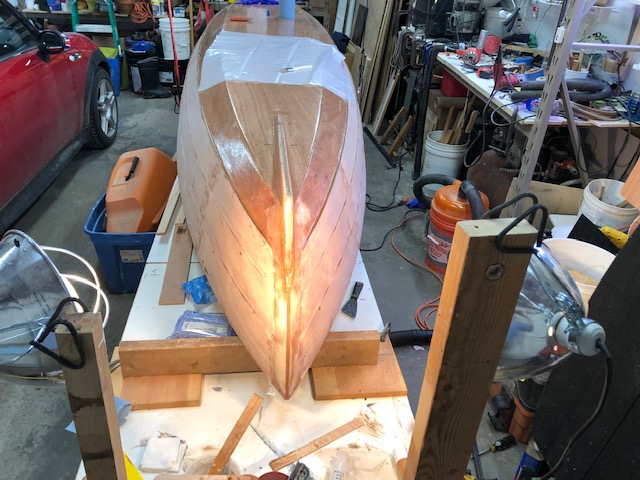
Now the stitches are out, or filed flush with the hull where I didn’t manage to get them out. That was a big pile of copper wire! The soldering iron tip worked well on most stitches, but a few I couldn’t loosen, so they will stay put. I managed to turn the boat back upright on my own, it’s really very light at the moment. I am very pleased to see that the structure now holds itself together and is looking more boat and less porcupine than yesterday!
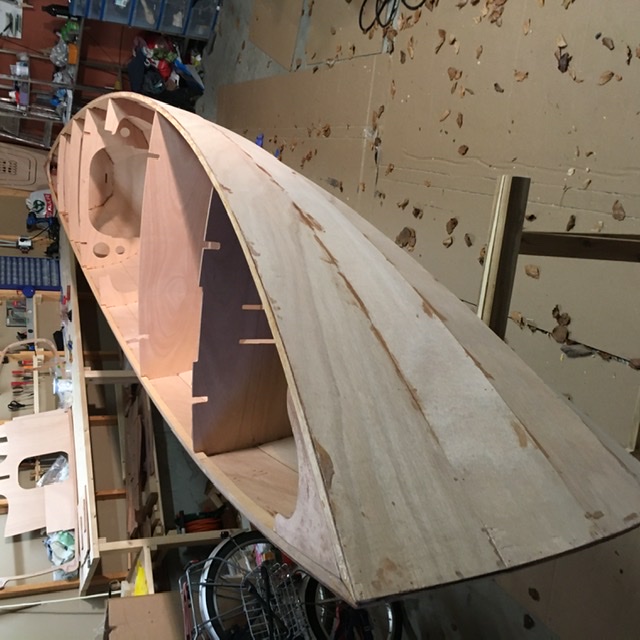
The hull now shawn if it’s spikes!
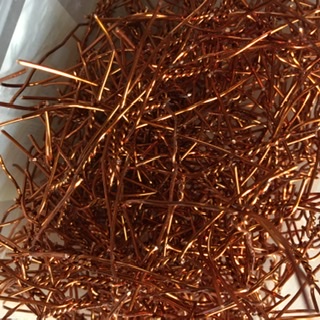
Dead stitches!
Offline
#32 26 Mar 2020 9:34 pm
- spclark
- Member
- From: "Driftless" Wisconsin USA
- Registered: 19 Mar 2020
- Posts: 478
Re: Waterlust sailing canoe in Norway
Yeah I have a similar pile of copper bits I coulda pictured here. Part of the package deal I guess! Too bad recyclers where I am won't accept any copper smaller than 14 AWG size, about 0.080" dia., maybe 2mm?
You're making great progress! Glad you & the kids are having a fine time of it! I'm working solo, it'll have been four months a week from this Sunday that I started putting my kit together.
Glad my tip from Dillon about fitting the breasthooks paid off for you! Yes they're supplied in their final shape save for the bevel the sides need to match the sheer clamps. Keeping their shape is an important step towards getting the sheers at bow & stern to form the designed-in shape, but they take four hands and a winch to get 'em fitted while the epoxy cures!
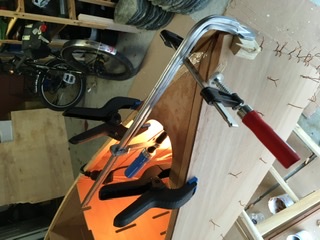
Tuesday I got hull ready for fiberglass (see pic) then spent yesterday epoxying fiberglass cloth onto stem, stern & bottom. Added one filler coat of unthickend epoxy before capping my day's efforts off with putting the thickened fillet into the lap joint between panels 1 & 2.
The tip about using a denatured alcohol-wetted gloved finger to smooth fillets is a REAL TIMESAVER:
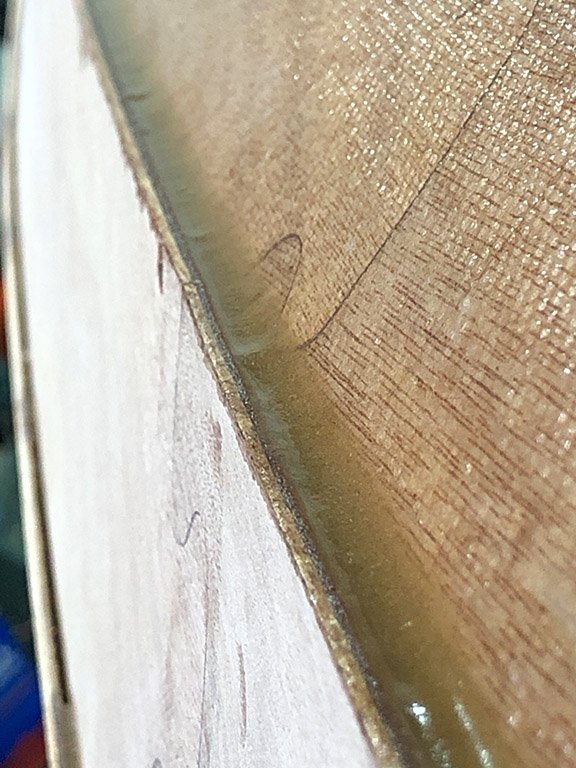
What's sold here in the USA as denatured alcohol is essentially almost pure ethanol with a bit of methanol added to discourage consumption as well as avoid the taxes imposed on consumable alcoholic spirits. I don't know what you might have there that's similar, but I know what's sold as camp stove liquid fuel sometimes is the same thing. Problem is there's another fuel sold as "white gas" which is too flammable and I can't recommend that besides it probably won't work as well. Rubbing alcohol is supposed to work too but I have yet to try it. This technique SAVES a LOT of sanding!
Offline
#33 26 Mar 2020 11:51 pm
- Bergen_Guy
- Member
- Registered: 6 Feb 2020
- Posts: 353
Re: Waterlust sailing canoe in Norway
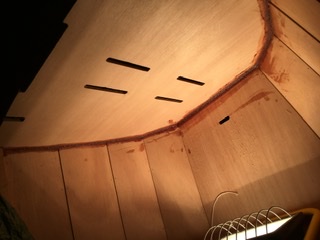
Well - that was probably the least enjoyable bit of building this so far. Filleting the frames was no problem, well the first ones weren’t so neat, but they got better. But boy, glassing the inside of the hull was a thankless task of sticky everything with added fibreglass stringy bits getting stuck to everything. The end result is acceptable. The bow and stern tanks fortunately won’t be seen by anyone once the deck is on. I hope I don’t have to do that again for a while and I will need some more gloves tomorrow!
Filets- fun!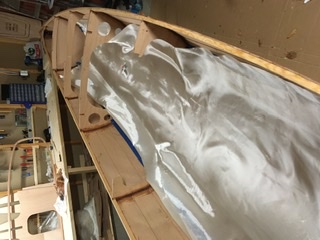
Fibreglass - less fun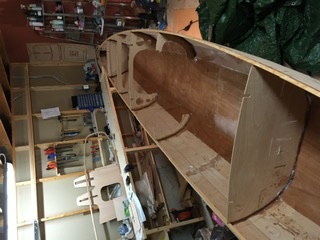
Finished - fortunately...
Offline
#34 26 Mar 2020 11:53 pm
- Bergen_Guy
- Member
- Registered: 6 Feb 2020
- Posts: 353
Re: Waterlust sailing canoe in Norway
Hey! Thanks for even more useful tips - and your glassing and filet is looking really neat, well done!
Offline
#35 27 Mar 2020 12:34 am
- spclark
- Member
- From: "Driftless" Wisconsin USA
- Registered: 19 Mar 2020
- Posts: 478
Re: Waterlust sailing canoe in Norway
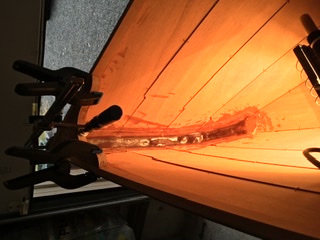
Oh yeah, most arduous step I encountered too!
How I approached doing mine. Took me a day.
Offline
#36 27 Mar 2020 7:23 pm
- spclark
- Member
- From: "Driftless" Wisconsin USA
- Registered: 19 Mar 2020
- Posts: 478
Re: Waterlust sailing canoe in Norway
Looks good from here!
As long as sheers @ stem & stern have taken on their intended shape and you can fill whatever gaps there might be between breasthooks and sheer clamps, it ought to be 100% serviceable!
I just finished mounting the skeg on mine. As you said, using heat lamp(s) when necessary is a great idea. Here I’m using two to warm the area where cello-fill thickened epoxy’s been used to bond skeg to stern, so that it cures fast enough to resist any tendency to sag away. Wood-flour thickened fillets then fair the skeg into the hull better, which also benefit from accellerated cure time. I’ll smooth those fillets in a few minutes with alcohol-wetted gloved fingertips, save sanding later once it’s all cured up!
Offline
#37 27 Mar 2020 10:29 pm
- Bergen_Guy
- Member
- Registered: 6 Feb 2020
- Posts: 353
Re: Waterlust sailing canoe in Norway
You are progressing well! I am really enjoying seeing what I have to look forward to in the coming weeks!
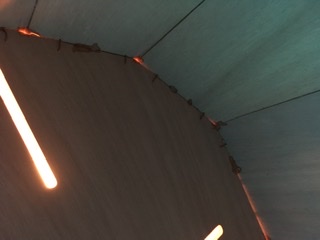
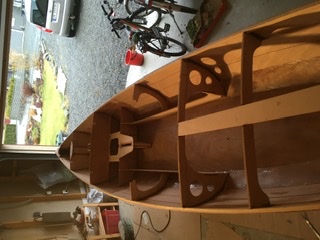
There is not so much to report from Norway today, I had a quiet day after last nights efforts. I took a good look around and found a bit of everything, some parts worked really nicely, some are not quite saturated, a few spots appear to have lifted and are not actually stuck to anything, but these are just little spots here and there, so I am not too stressed. The worst looking stuff will be well hidden away in dark corners. I realise that the mark of quality is that the even these dark and never seen corners are finished with the same care and have the same finish as everywhere that can be seen. This is my first go, and I am going for ‘won’t sink’ as a mark of success; I can work on doing better later in the build or who knows maybe on another boat?!
I skipped over some of the small parts earlier, so now I am getting those ready now.
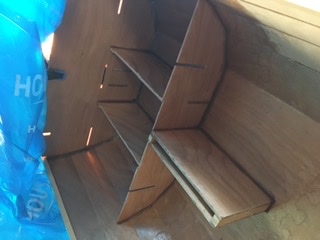
A view of the hull from aft - from this distance everything looks fine!
Tomorrow looks sunny so might try and escape the confines of home with the gang tomorrow - and with any luck get the centre console parts ready.
Offline
#38 27 Mar 2020 11:29 pm
- spclark
- Member
- From: "Driftless" Wisconsin USA
- Registered: 19 Mar 2020
- Posts: 478
Re: Waterlust sailing canoe in Norway
I’ll back off with the pictures, I don’t want to spoil your voyage of discovery! You have any questions you think I may be able to answer, post ‘em here. I’ll get word of it, get back to you to carry on.
We had sun here too today, briefly. Was supposed to be cloudy all day (like the old Western song) but then it changed. 54F’s nice too, been mostly 35-40 for a week. Rain & storms coming, glad I have a warm(ish), dry garage to work in!
Offline
#39 28 Mar 2020 7:39 am
- Bergen_Guy
- Member
- Registered: 6 Feb 2020
- Posts: 353
Re: Waterlust sailing canoe in Norway
Oh no! Don’t stop posting pictures- I really meant it when I said I like seeing what’s coming up ahead! Although there is a super fast time lapse video on the web of one of these being built - your photos really help too :-)
Offline
#40 28 Mar 2020 7:09 pm
- Bergen_Guy
- Member
- Registered: 6 Feb 2020
- Posts: 353
Re: Waterlust sailing canoe in Norway
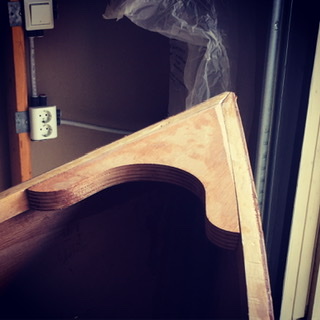
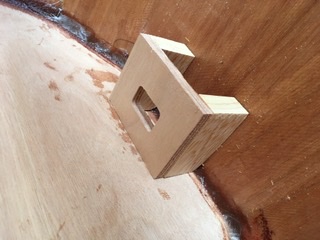
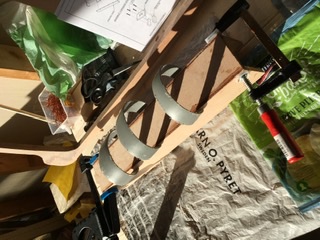
A good day today. I managed to get a few things started first thing before we all went out for a walk, and then managed a good stint in the garage later in the afternoon. Daggerboard case got gladsed, and the first parts of the centre console got joined together. I also started work on the last steps. Interestingly I am glad I didn’t start earlier, as a dry fit showed that they needed a bit of shaping to allow for the fillets joining the frames to the hull. So I made sure everything would fit before glueing it all together. The mizzen step I ended up just glueing directly in place. The instructions call for four silicone bronze screws. Not the sort of thing I can pick up in the local hardware store, so I will have to hunt around a bit to see where I can source those. I had another thought about the order in which things happen, if I were doing this again, I would have cut the fibreglass sheet after joining the two panel 1 pieces to the bottom. That would have been easier than when the rest of the hull is in place and the cloth was constantly falling in on itself. Just a thought if you haven’t started your waterlust project!
Fillet means the mast step needs a bit of shaping. Easier to do before it’s all glued up!
Block plane did most of the work
Rear step I ended up just making ‘in place’
All glued up with some real clamps and some drainpipe specials!
All in all a good day.
Offline
#41 29 Mar 2020 1:07 pm
- MartinG
- Member
- Registered: 29 Mar 2020
- Posts: 6
Re: Waterlust sailing canoe in Norway
Silicon bronze screws are available at seaware.co.uk here in the UK. They send to other countries at cost.
Unfortunately they closed for the time being on Friday because of the Coronavirus crisis. Worth noting for future reference though.
Looking good by the way!
Cheers
Martin
Offline
#42 29 Mar 2020 2:23 pm
- spclark
- Member
- From: "Driftless" Wisconsin USA
- Registered: 19 Mar 2020
- Posts: 478
Re: Waterlust sailing canoe in Norway
I bought a few extra SB screws from CLC awhile back, I'd send you the six you'll need if it weren't for the likely delay we'd see them endure having to go through Customs any time soon.
My thinking about why they're suggested is that the mizzen step isn't mechanically 'tabbed' into the hull structure as with the two mast pockets ahead of the cockpit. If you're thorough with your epoxy filleting I doubt enough force might be generated by the mizzen to dislodge the step without the mast itself failing first. I'm no marine engineer but I'd have to believe unless you were to keep your Waterlust in salt water year-in, year-out, using stainless steel screws ought to be 'good enough'.
Same goes for the two SB screws called for securing the skeg. Surface area of the epoxy fillets along both sides, plus any bond strength of the epoxy bonding in between the skeg and the hull, certainly ought to be enough to keep it in place through "H*ll & high water". A couple of #10 screws set 15mm into a piece of plywood 7cm long don't provide a heck of a lot of shear strength.
And as for continuing to post pictures of my build's progress? Yes, I will, as best I can. Yet I don't want to hijack your thread here either, so any more will be spaced out rather than several to a post.
Last edited by spclark (29 Mar 2020 2:23 pm)
Offline
#43 29 Mar 2020 5:25 pm
- Bergen_Guy
- Member
- Registered: 6 Feb 2020
- Posts: 353
Re: Waterlust sailing canoe in Norway
Thanks Guys! they must also exist here in Norway - just need to find out where!
I went a bit off piste with the build schedule today. I dry fitted all the centre console parts in the boat, as I couldn’t find a satisfactory way of getting everything aligned on the bench. There was again a bit of shaping here and there to get everything to fit around the filet joints. I am using ( but have not bonded) the console flange to make sure that the centre board case is square. I have (I think!) covered all the places where wet epoxy might seep out with packing tape. So I hope that tomorrow I can take the flange off, and start to cover all the other parts with un-thickened epoxy, and that the centre board case is square.
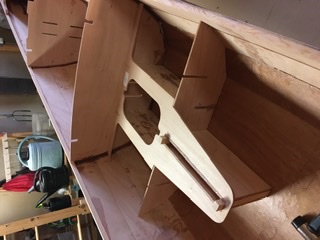
Dry fitted; a few gaps here and there called for a support under the hull just beneath the frame so that I could press the console down towards the hull. I also put some of the stitches in to keep it where it should be.
A hot house special should get this off to a good start. I also coated the mast steps inside with epoxy. They can go in tomorrow.
Last edited by Bergen_Guy (29 Mar 2020 5:51 pm)
Offline
#44 29 Mar 2020 7:25 pm
- spclark
- Member
- From: "Driftless" Wisconsin USA
- Registered: 19 Mar 2020
- Posts: 478
Re: Waterlust sailing canoe in Norway
Working on panel lap joints today.
Here's a brief video I shot yesterday -
- when I was adding the fillets, shows how I approached this.
(Apologies for not thinking about turning my iPhone sideways before I started! Will endeavor to do that if I return later with more....)
Offline
#45 29 Mar 2020 8:13 pm
- Bergen_Guy
- Member
- Registered: 6 Feb 2020
- Posts: 353
Re: Waterlust sailing canoe in Norway
Brilliant! That’s a really nice little video :-)
Offline
#46 29 Mar 2020 9:41 pm
- spclark
- Member
- From: "Driftless" Wisconsin USA
- Registered: 19 Mar 2020
- Posts: 478
Re: Waterlust sailing canoe in Norway
Glad you could view it, hope it helps you with your project!
With the image-posting issues over on CLC’s Forum (there’s a link there too, which actually WORKS!) I thought it best to duplicate the link here also.
(In fact I may ‘steal’ image links from here to put up there once in awhile. Hopefully Fyne won’t mind as anything will still be about CLC-related products they supply to Europe....)
Offline
#47 30 Mar 2020 3:31 pm
- Bergen_Guy
- Member
- Registered: 6 Feb 2020
- Posts: 353
Re: Waterlust sailing canoe in Norway
Back to home office and school today, so not much to show yet today. Just took the clamps off yesterday’s construction and started costing the inside of it it’s epoxy before fitting the flange. If I am clever I will get that done and the fillets there and on the mast steps in later on this evening!
And here is the under hull support I put in place - mostly made from my grain boxes (baking is one of my other things)
Last edited by Bergen_Guy (30 Mar 2020 3:33 pm)
Offline
#48 30 Mar 2020 7:43 pm
- Bergen_Guy
- Member
- Registered: 6 Feb 2020
- Posts: 353
Re: Waterlust sailing canoe in Norway
Got the fillets in!
Offline
#49 31 Mar 2020 9:29 pm
- Bergen_Guy
- Member
- Registered: 6 Feb 2020
- Posts: 353
Re: Waterlust sailing canoe in Norway
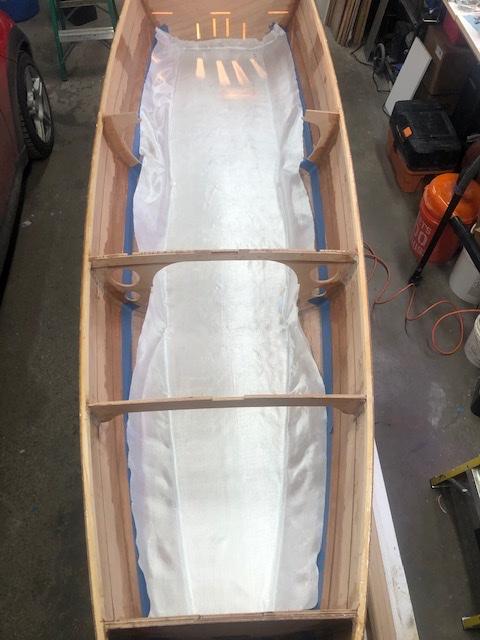
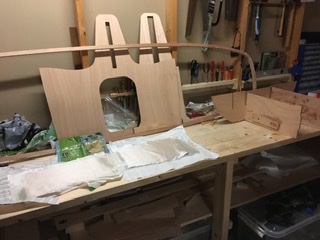
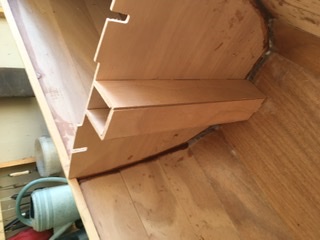
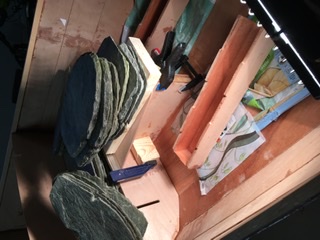
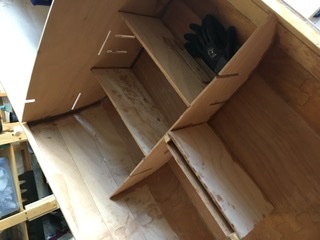
Today I fitted some of the small parts to the interior. The console flange, longitudinals mast step cap and the rear deck stiffener. I had hoped to get some of the fillets in, but all I have had time and energy for was some thickened epoxy on the contact surfaces, and as you can see in the photos, quite a lot of slate roofing tiles to keep everything in place. At this stage progress isn’t very dramatic, but Hannes my eldest did say today that he could see lots more details in the boat than when we first stitched the hull together. Good to know he is paying a bit of attention!

I knew there was a reason I hadn’t got round to making the flower bed border that we got those slates for!!
Last edited by Bergen_Guy (31 Mar 2020 9:29 pm)
Offline
#50 1 Apr 2020 10:11 am
- Bergen_Guy
- Member
- Registered: 6 Feb 2020
- Posts: 353
Re: Waterlust sailing canoe in Norway
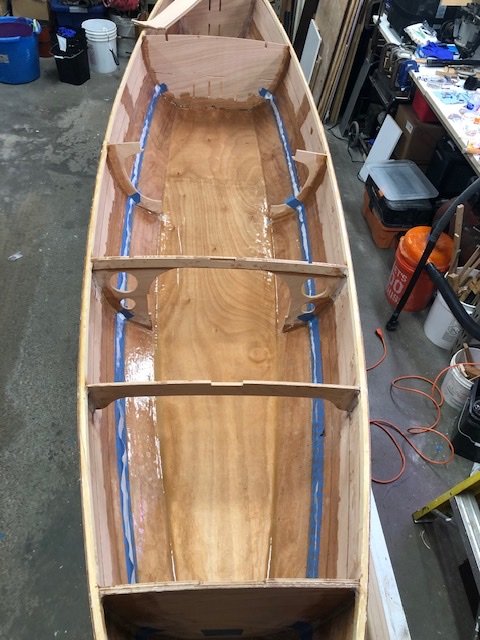
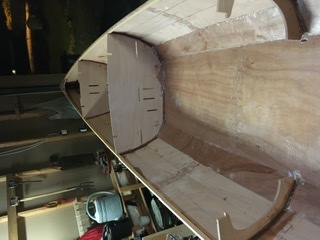
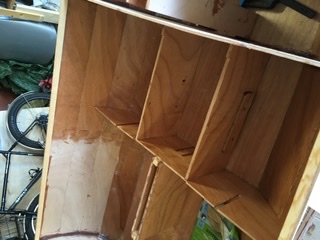
This epoxy really is amazing stuff... I know I have now joined quite a few bits together so far, but it’s amazing how solid the structure is just the next day... Here are a few shots of inside the boat now I have taken the clamps and slates off. I have found that the plastic bags we sometimes get frozen rolls in are really good at not sticking to epoxy, so I use them between things I don’t want to get stuck together.

I think today I have some fillets to put in around the new interior parts, and then some sanding of the inside before I start on coating the interior surfaces in their two coats of epoxy.
Last edited by Bergen_Guy (1 Apr 2020 10:48 am)
Offline