A forum for discussing wooden boats and boat building
You are not logged in.
- Topics: Active | Unanswered
#1 15 May 2019 3:48 pm
- Ian
- Employee

- Registered: 24 Nov 2014
- Posts: 103
Replacing plastic hatch rims with wooden ones (Petrel SG kayak)
After a few years, the plastic hatch rims on my kayak have cracked and split. I always found they leaked a bit anyway (underneath the rim, not through the opening), so I decided to have a go at making some wooden rims that would fit the same rubber hatch covers. The plywood rims will be a permanent part of the hull structure, so I know they will be completely waterproof. What I wasn't sure of when I began was whether the covers would seal properly over these custom-made rims.
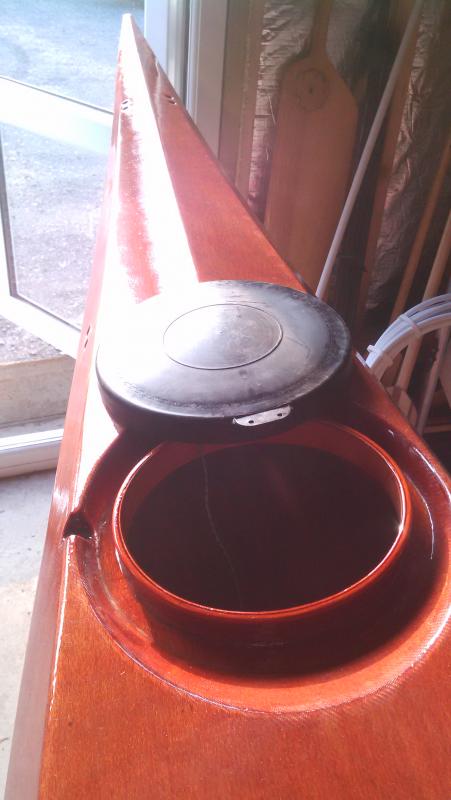
Here are the original black plastic rims, for reference. They are glued onto the deck and they have a rounded lip on the top edge, which the rubber covers grip.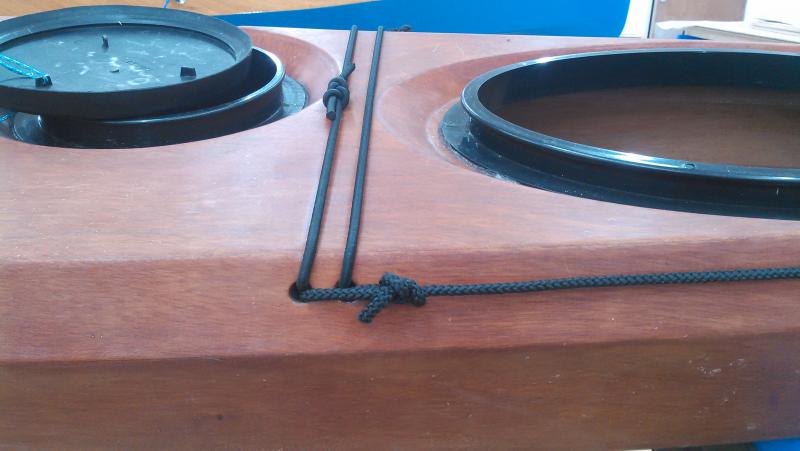
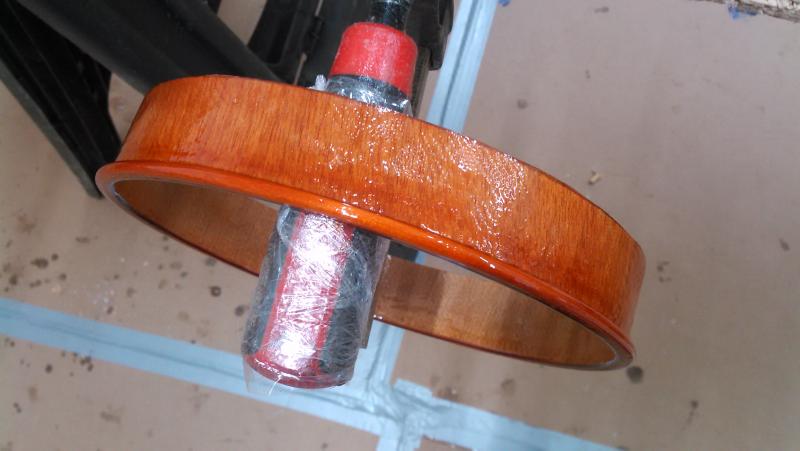
And here's a sneak preview of one of the completed wooden hatch rims during varnishing: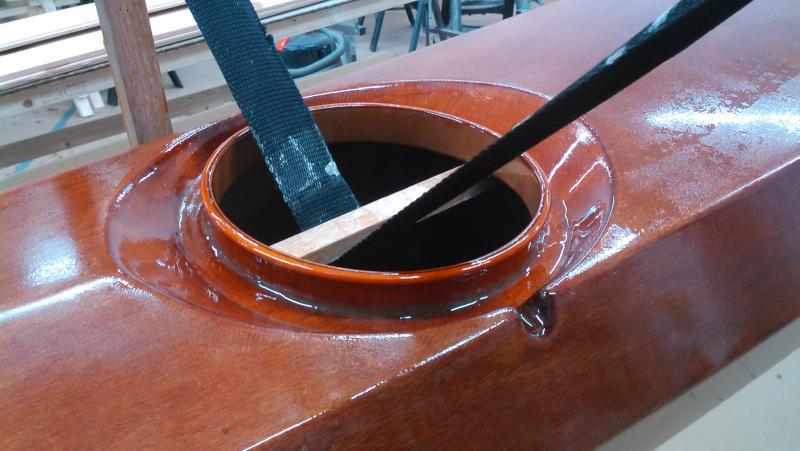
Offline
#2 15 May 2019 6:30 pm
- DerekD
- Member
- Registered: 12 Aug 2013
- Posts: 33
Re: Replacing plastic hatch rims with wooden ones (Petrel SG kayak)
Your wooden replacements look great. Did you have to steam the circles into shape?
Offline
#3 16 May 2019 10:45 am
- Ian
- Employee
- Registered: 24 Nov 2014
- Posts: 103
Re: Replacing plastic hatch rims with wooden ones (Petrel SG kayak)
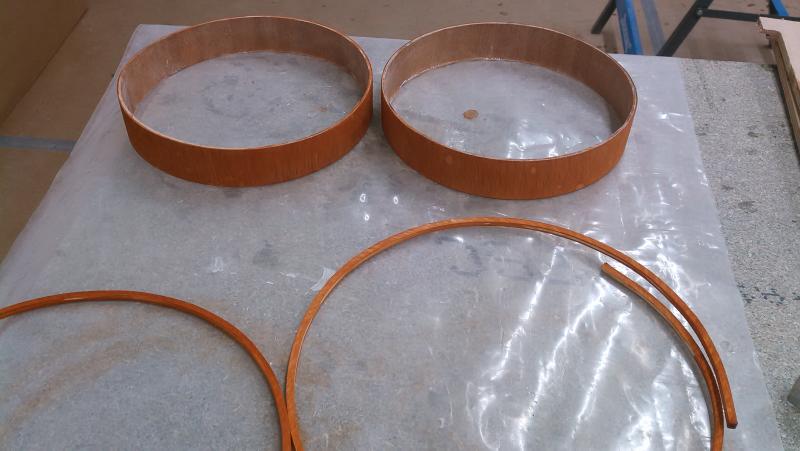
I made the wooden rims out of 3mm plywood and a strip of Alaskan Yellow cedar for the rounded lip. I was able to bend the plywood without much trouble but the cedar certainly needed steaming.
The 3mm plywood bends much more easily across the sheet than along the length of the sheet, because of the different grain direction of each layer, so I cut my strips of plywood across the sheet.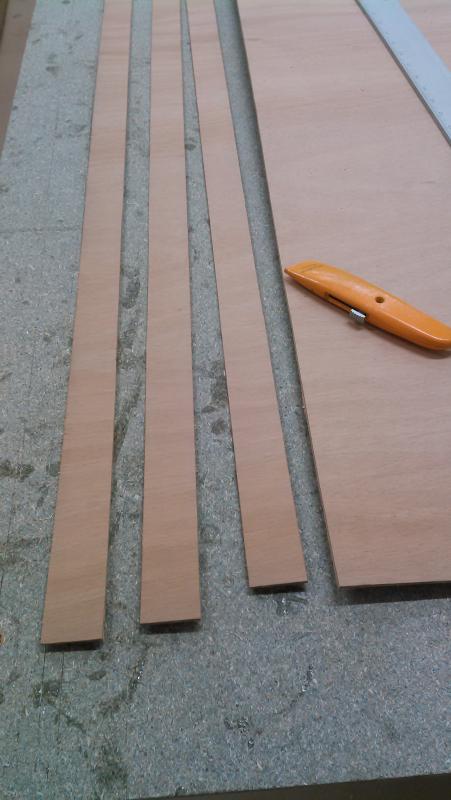
I made a mould to shape the circular rims, although later I found it isn't really necessary. It is just a couple of scraps of plywood with circular holes cut to exactly the right size on our laser cutter.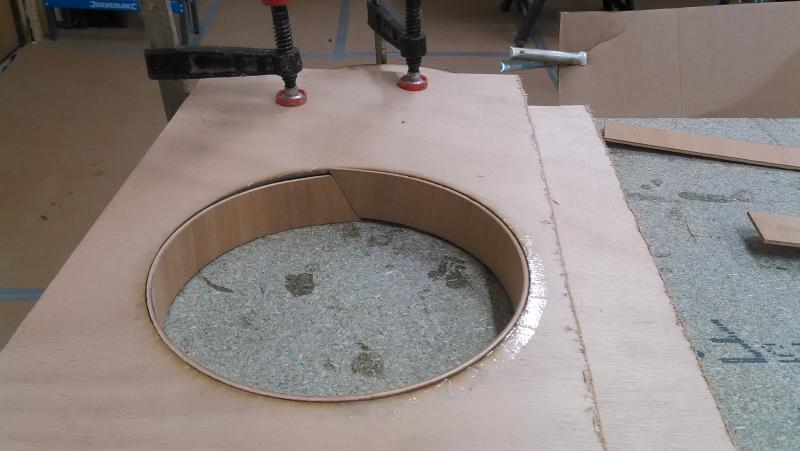
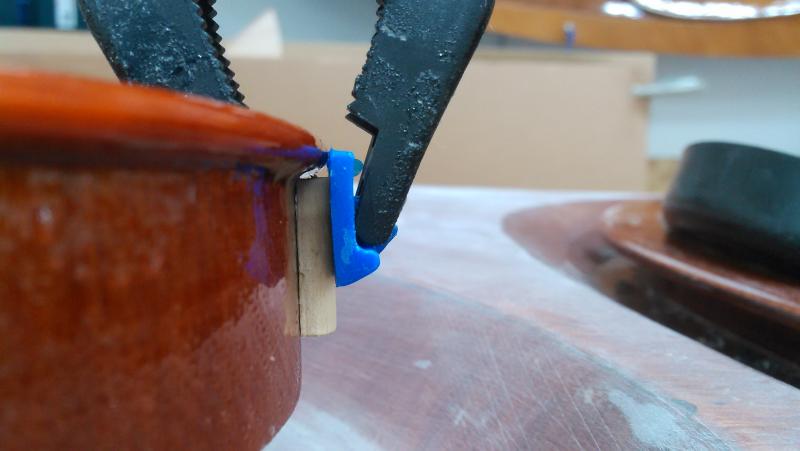
However, when I tried gluing the joint using the mould, it resulted in a slight kink at the joint, as you can see in the photo below.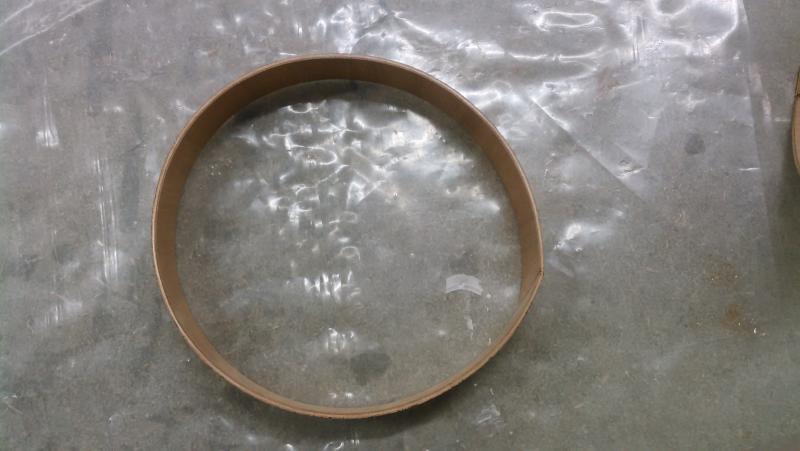
Clamping the plywood flat to the bench either side of the joint to glue it resulted in a smooth curve once the epoxy was cured, but I still used the mould to make sure it stayed perfectly circular while I glassed the inside for strength.
Offline
#4 16 May 2019 10:58 am
- Ian
- Employee
- Registered: 24 Nov 2014
- Posts: 103
Re: Replacing plastic hatch rims with wooden ones (Petrel SG kayak)
I steamed the cedar by putting it in a piece of plastic pipe and pouring some boiling water in. I left it for a couple of hours before taking it out and carefully bending it around the inside of the plywood hoop and leaving it to dry. It is only 5mm by 5mm, so it was quite fragile and needed supporting by the plywood hoop at this stage.
Once the cedar was dry, I could remove it from the hoop. It relaxed a little, but could easily be bent back to the tight curve required. I stained the cedar and the outside of the plywood using the same bottle of stain I used on my kayak.
For strength and stiffness, I glassed the outside of the plywood as well. The plywood was still slightly flexible, but since I had already glassed the inside it held its shape without needing the mould.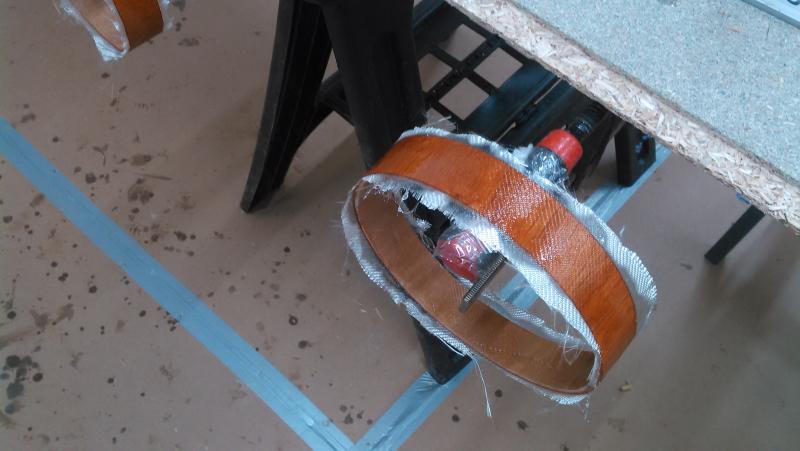
Offline
#5 17 May 2019 2:53 pm
- Ian
- Employee
- Registered: 24 Nov 2014
- Posts: 103
Re: Replacing plastic hatch rims with wooden ones (Petrel SG kayak)
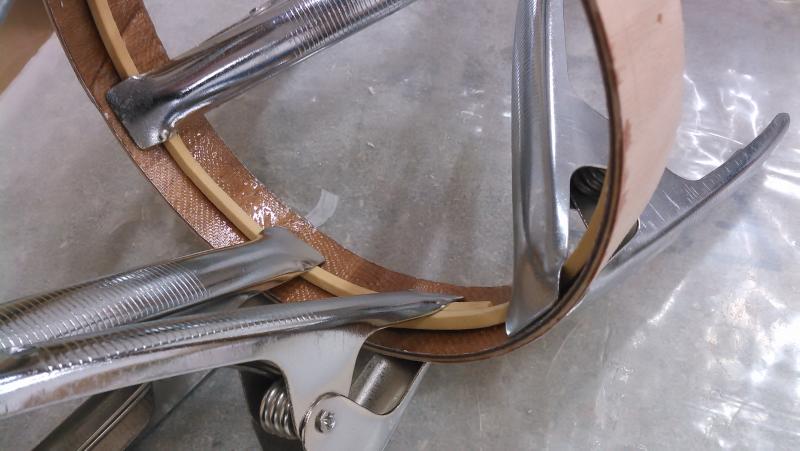
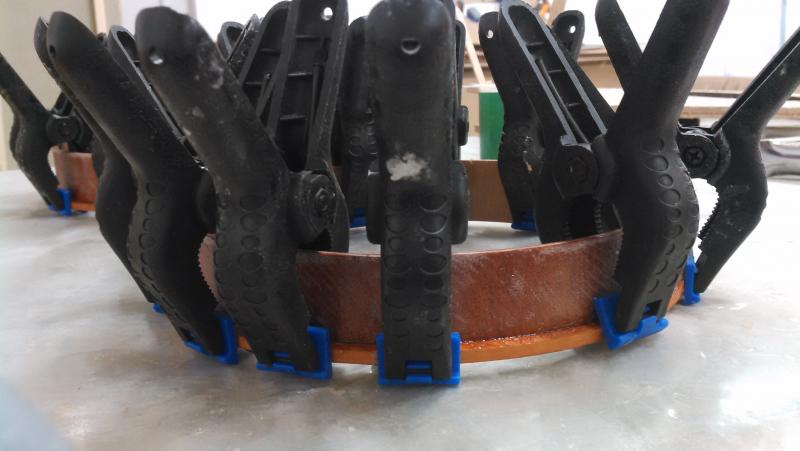
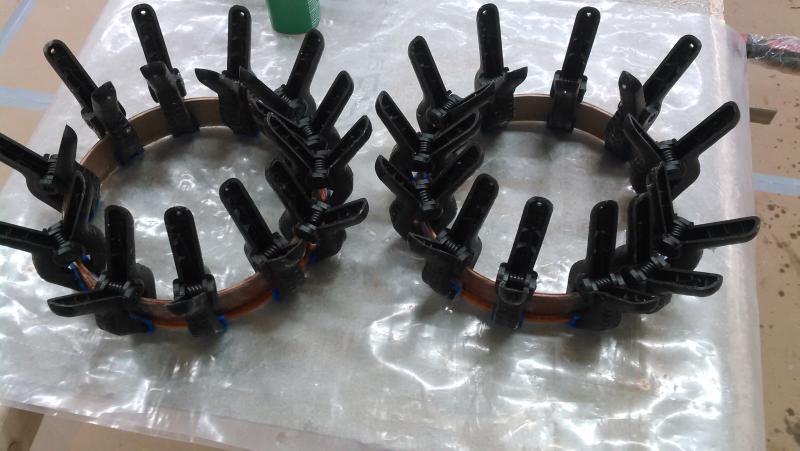
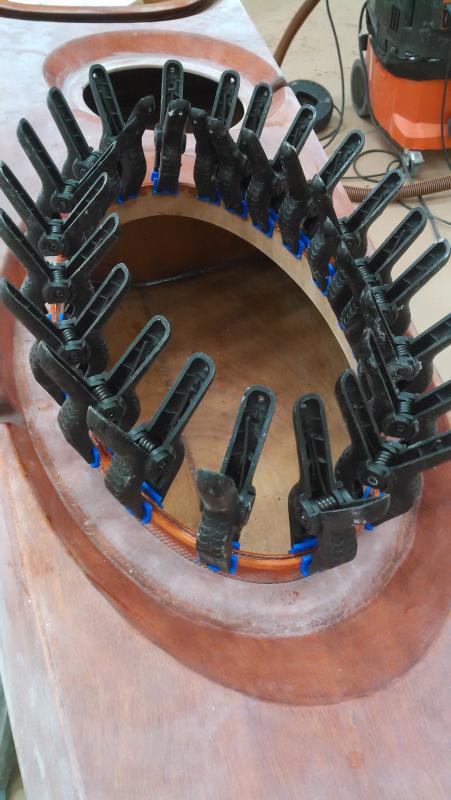
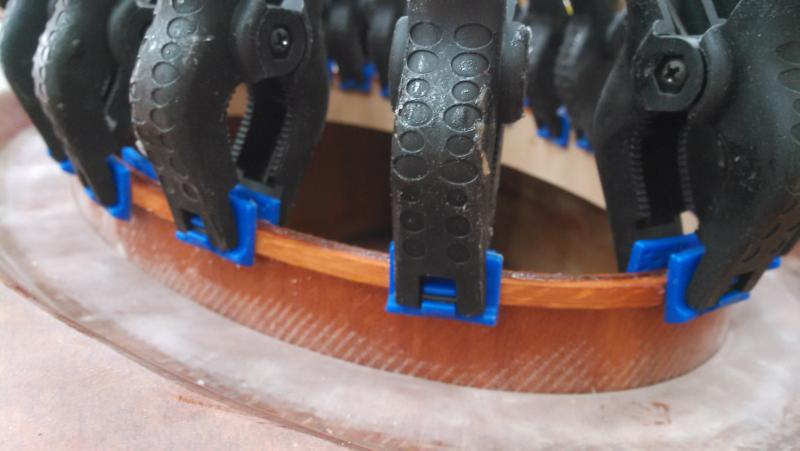
My next task was to glue the cedar to the outside of the plywood to create a lip along one edge. After carefully trimming the cedar to the correct length, I glued it in place with thickened epoxy and held it with lots of little spring clamps.
Afterwards, I rounded over the lip, which I had left square for ease of clamping, taking care to keep the profile smooth and consistent all the way round. I also rounded the inside edge of the plywood slightly, because I don't like sharp edges anywhere.
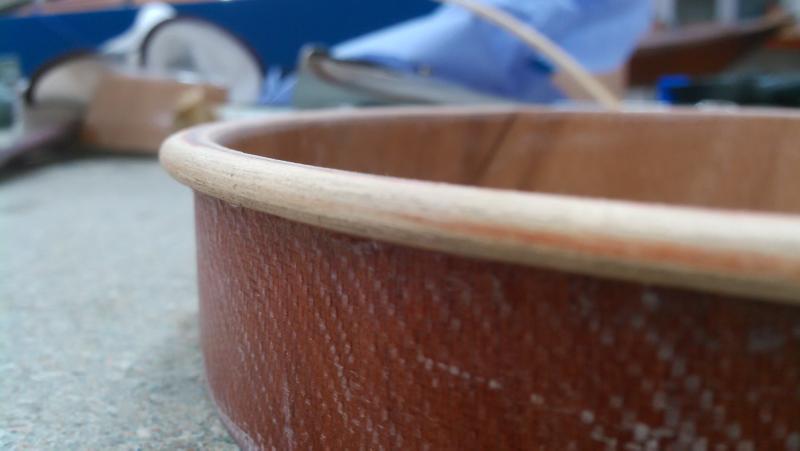
After re-staining the parts that I had sanded, I gave the cedar a coat of epoxy to seal it.
At this stage, I tested the seal with the hatch cover by submerging it. After half an hour, only a few drops of water had leaked through, which is probably as good as the original hatch rims and certainly a good result. If my boat is ever upside-down in the water for more than half an hour, I'll have bigger problems than shipping a few drops of water.
Now that I was satisfied with the circular hatch rims, it was time to repeat the process for the aft hatch, which is oval.
Offline
#6 17 May 2019 3:43 pm
- Ian
- Employee
- Registered: 24 Nov 2014
- Posts: 103
Re: Replacing plastic hatch rims with wooden ones (Petrel SG kayak)
I had to speed up the process at this stage, because we had a fully-booked course starting the following week so I wouldn't be able to use the classroom to work on my boat. My boat needed revarnishing too, so I needed to sand the whole thing, install the new hatches and give it a few coats of varnish in less than a week of evenings. I still needed to work out how to remove the old plastic hatch rims which were glued into my boat and I still needed to make the new aft hatch before I could install it. Making the circular hatch rims had taken longer than that, because of epoxy cure times at each stage.
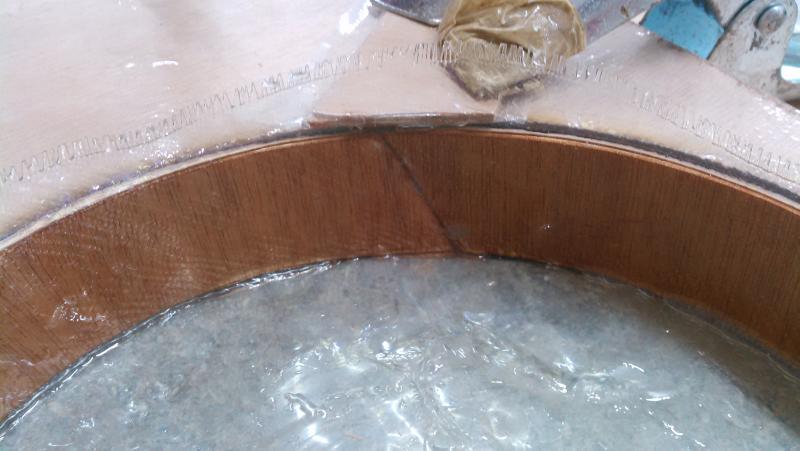
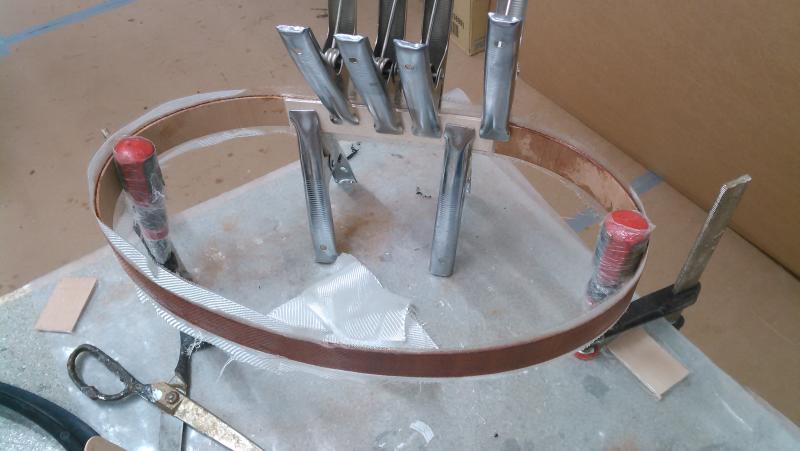
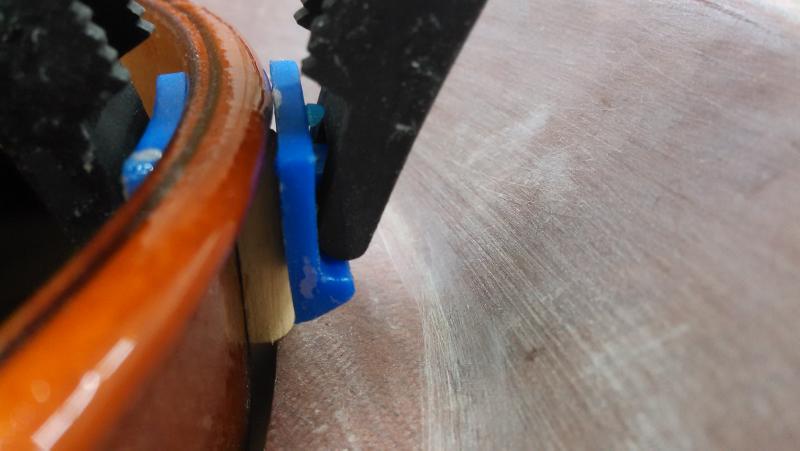
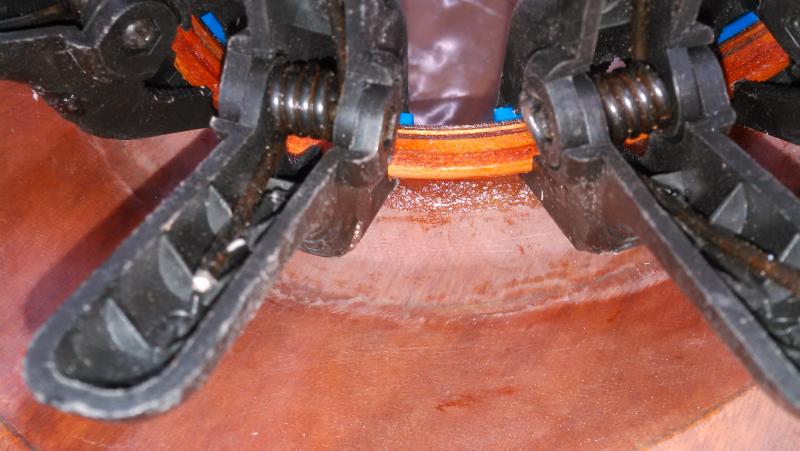
To speed things up a little, I came up with this method of glassing the outside of the plywood at the same time as I was gluing the joint. The joint is sandwiched between two offcuts of plywood, covered in plastic packing tape to stop the epoxy sticking to them. It was fiddly to clamp it up like this with the wet fibreglass in the sandwich too, but it saved a lot of time. Instead of using a mould, I simply fixed two F-clamps the right distance apart and placed the hoop over their handles (covered in plastic cling-film to prevent sticking). They stretched the hoop to approximately the right oval shape and it was still flexible enough to conform to the right shape afterwards -- note that I hadn't glassed the inside at this stage.
While the epoxy was curing, I worked out how to remove the old hatch rims. Where the rims had split, I was able to drive a sharpened stick underneath. I was then able to peel off the rim starting from the split. That left me with some lovely black glue to scrape away, since that part of the deck would now be visible under varnish. When I peeled away the plastic rim, I found there was some water trapped underneath, which goes to show that was where it was leaking.
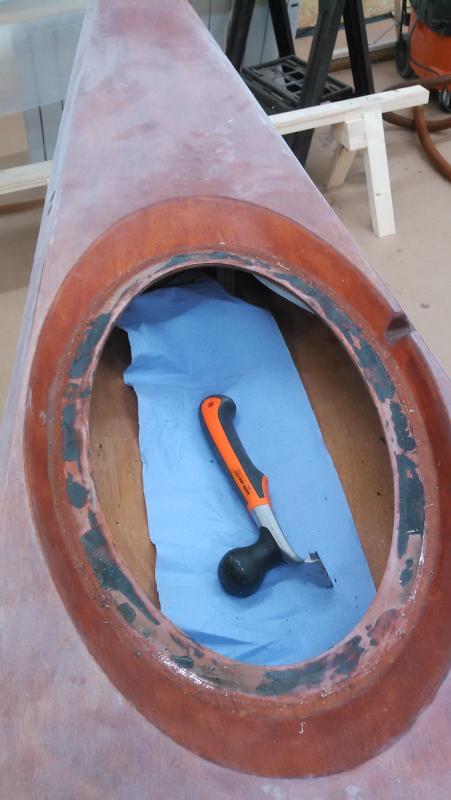
Now that the old hatch rim was removed, I could use the deck itself as a mould for the new one while I glued the cedar on.
Offline
#7 17 May 2019 4:02 pm
- Ian
- Employee
- Registered: 24 Nov 2014
- Posts: 103
Re: Replacing plastic hatch rims with wooden ones (Petrel SG kayak)
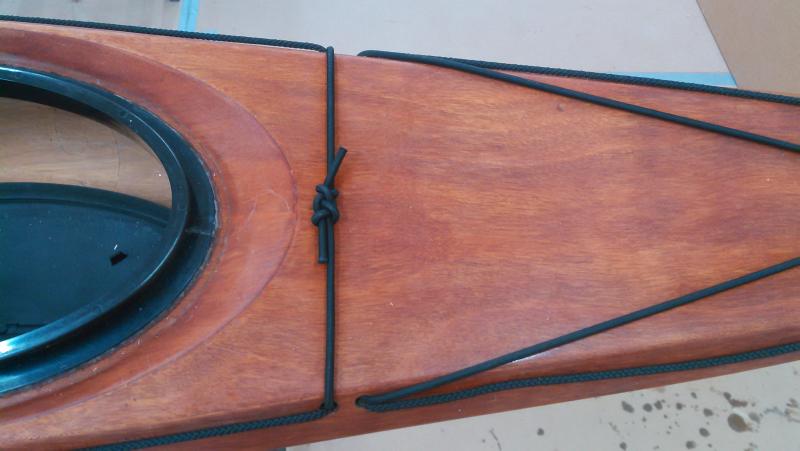
I glassed the inside of the oval hatch rim and left it to cure while I finally glued the circular hatches into the boat.
To make sure they were level, I clamped a few precisely-measured offcuts of cedar under the lip to set the height correctly around the rim.
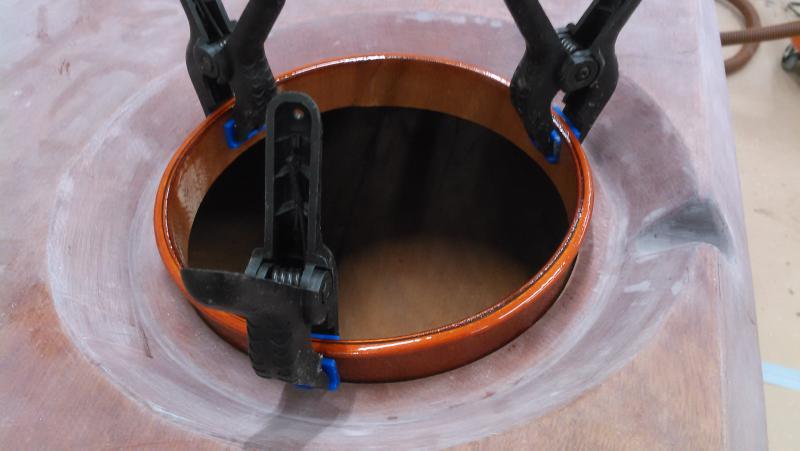
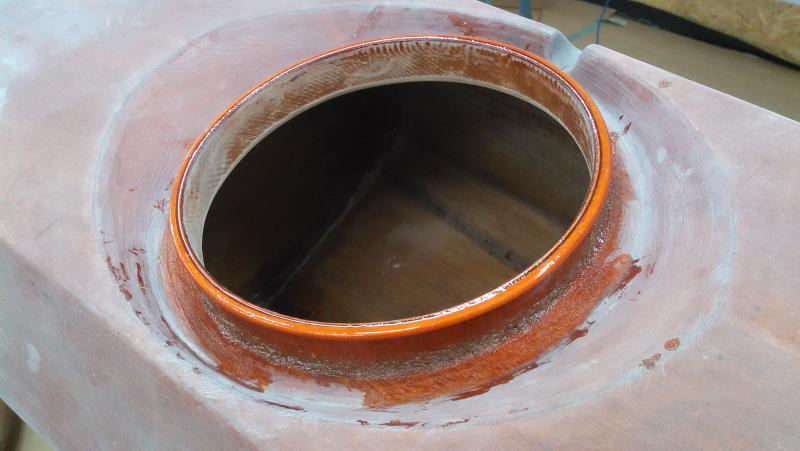
I glued them in place, removed the spacers, then ran an epoxy fillet around the outside. I also rounded the bottom edge on the inside and sealed it with epoxy, to remove the sharp edge.

Offline
#8 17 May 2019 5:26 pm
- Ian
- Employee
- Registered: 24 Nov 2014
- Posts: 103
Re: Replacing plastic hatch rims with wooden ones (Petrel SG kayak)
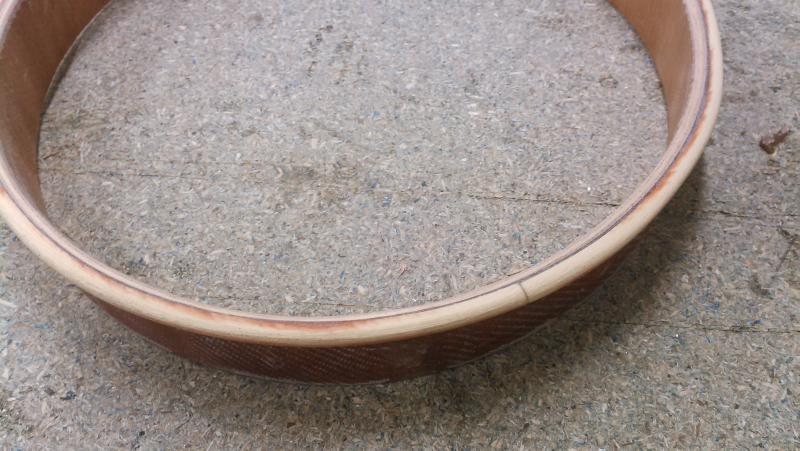
There was one more thing to do to the aft hatch. The lip on the oval hatch is twice as deep as the lip on the circular hatches -- fortunately, I realised this just before starting to round over the cedar I had glued on. I simply laminated a second strip of cedar over the first.

After rounding, re-staining and epoxy coating, then some more sanding, it was ready for varnishing.
Offline
#9 17 May 2019 6:00 pm
- Ian
- Employee
- Registered: 24 Nov 2014
- Posts: 103
Re: Replacing plastic hatch rims with wooden ones (Petrel SG kayak)
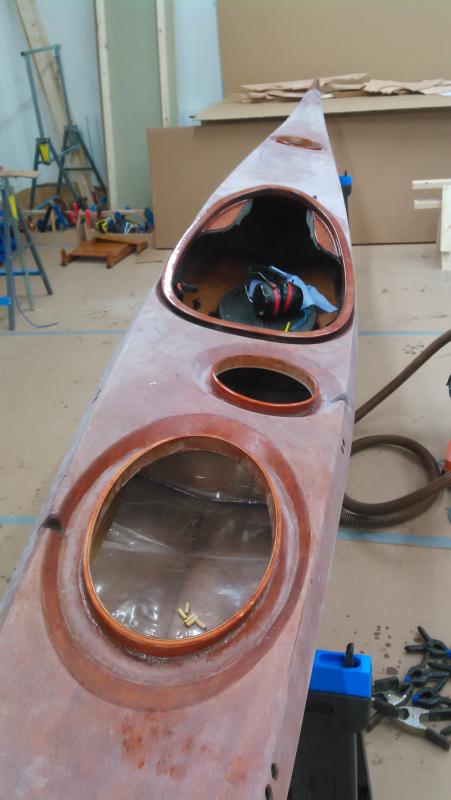
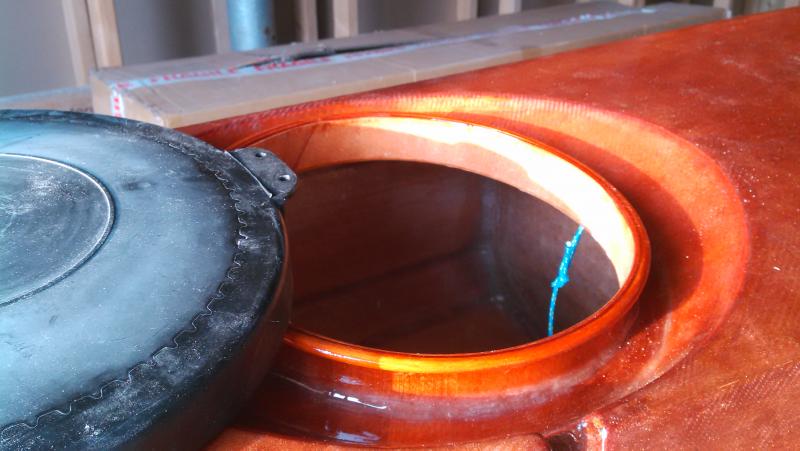
The finished article:
It's almost a shame to put the covers on.
It was time for some real-world testing:
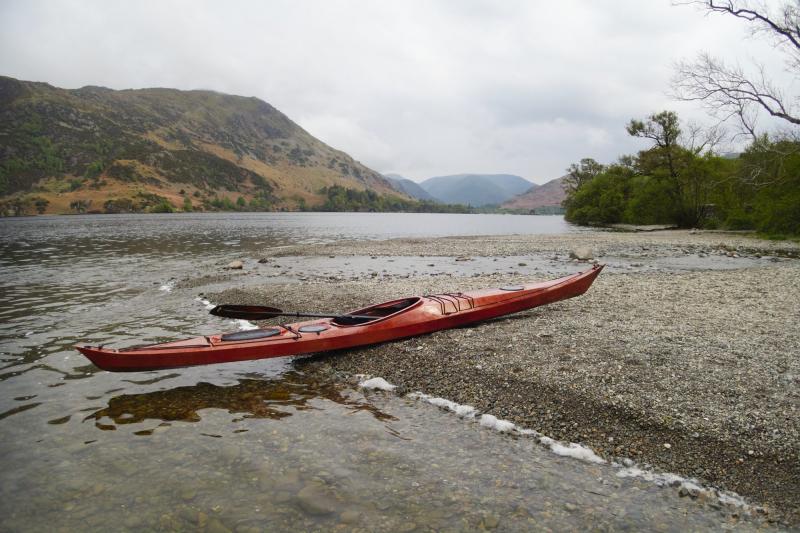
Location: Ullswater
Result: not a single drop of water inside the hatches.
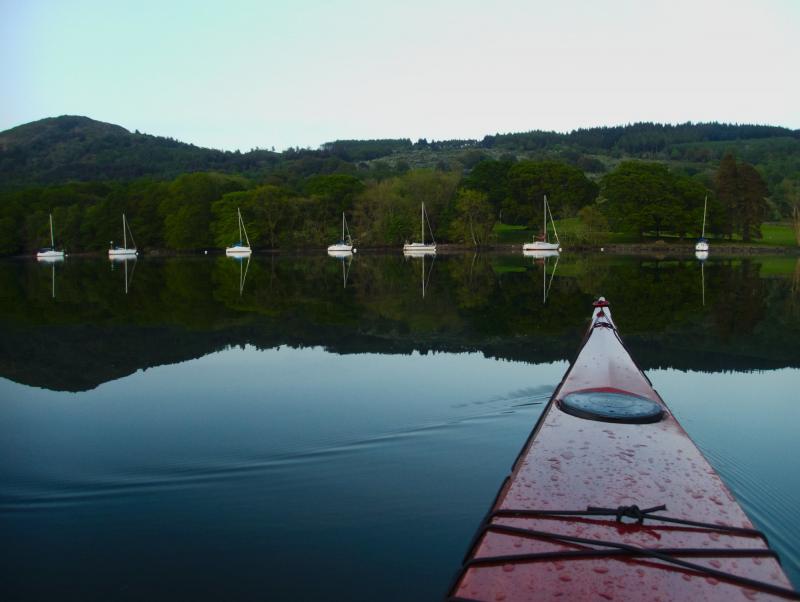
Location: Windermere
Result: not a single drop of water inside the hatches.
I call that a success!
Offline