A forum for discussing wooden boats and boat building
You are not logged in.
- Topics: Active | Unanswered
#1 13 Oct 2016 10:22 pm
- CrimeaRiver
- Member
- Registered: 3 Oct 2016
- Posts: 18
North Easter dory build from plans.
By way of introduction I should say that, amongst other things, I'm a regular and enthusiastic winter mountaineer up here in the Scottish Highlands, so it goes without saying that masochism runs deep in me!
Building from plans is not too dissimilar (...though drier and warmer) since masochistic tendencies are required to wrangle two and a quarter full sheets of scarfed and glued up & cured 6mm plywood, to say nothing of repetitive long cuts in very expensive materials. Anyone considering building from plans needs to consider this in addition to having sufficient space to assemble your plywood 'raw materials' and cut them into a kit of parts. Rather like banging your head against a wall, it's good when it stops!
The NE dory is an itch I've been meaning to scratch for a while now. I remember coming across a video on YouTube called 'Boatymoon', which is about a boat trip in a NE dory along the Maine Island Trail in Penobscot Bay on the NE coast of the USA. It's great viewing and inspired visions of doing something similar in very sheltered parts of the North West coast of Scotland, not very far from where I live.
A plan was hatched....
So, a build from plans or a pre-cut kit? Cost had something to do with the decision but I also quite liked the idea of starting with a pile of plywood sheets plus timber and turning it into a boat. A selection of the right tools also meant I could accurately cut out the parts and without too much drama.
Having built a Kaholo 12' 6" paddleboard I understood the processes involved in creating scarf joints but wondered if I could improve on just using various different planes on a staggered stack of plywood. Online I came across a scarf joint jig that utilised a big circular saw and ended up building something similar. Unfortunately, it didn't give me the accuracy I'd hoped for so with that in the bin it was back to the the block plane et al.
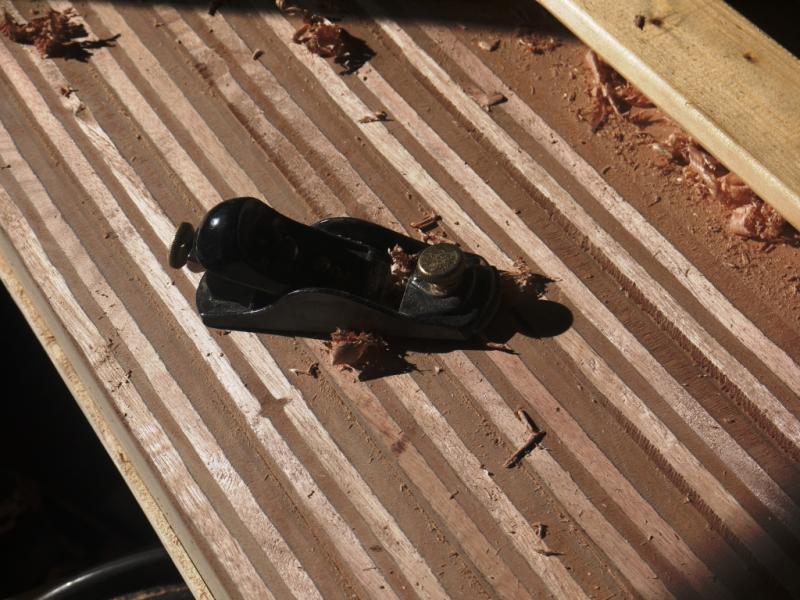
The scarfs turned out great. The photo above is of a stack of 6mm Bruynzeel Marine ply that was attacked first with an electric planer to remove the bulk of the stock then finessed with a block plane.
Top tips for producing scarf joints:-
* Pencil mark the top of the cut on each sheet and stagger the plywood sheets accordingly.
* Put the stack of sheets on a flat, supportive work bench/table then clamp or weight the stack down close to where you're planing. If your work bench/table isn't perfectly flat and really firm at the 'business end' then the quality of your scarf joints will suffer.
*Plane the ply to leave a fine feather edge on the bottom edge of the sheet. Actually, scarfing (is that a verb?) was quite simple once set up and really satisfying to carry out.
* A very sharp plane helps enormously, plus the wherewithal to sharpen the blade. I must have sharpened the blade of the block plane about 3 times during scarf joint production on the 6mm ply?
I used epoxy plus a silica filler as an adhesive which I guess is pretty standard practice in the boat-building world. Had a go with 'Gorilla' glue (PU) - the foamy stuff that likes to stick to your fingers for two weeks - for the scarf joints on the Kaholo SUP. The 'Gorilla' glue worked OK on the SUP but is much messier to apply than epoxy.
I was keen not to over-compress the scarf joint immediately after gluing up in order to leave a small amount of epoxy in the middle of the scarf 'sandwich'. Too much weight or clamping force would have squeezed most of the epoxy out and I guess weakened the joint. Spending a little more time endeavouring to get a feather edge when planing meant I gained nice flat joints without underlap (requiring filling) or overlap (requiring sanding). Only needed a relatively light sanding to remove the surface smudge of squeezed-out epoxy. (Each joint was masked top and bottom across the plywood sheet surface with wide parcel tape prior to gluing to enable a faster and better clean up).
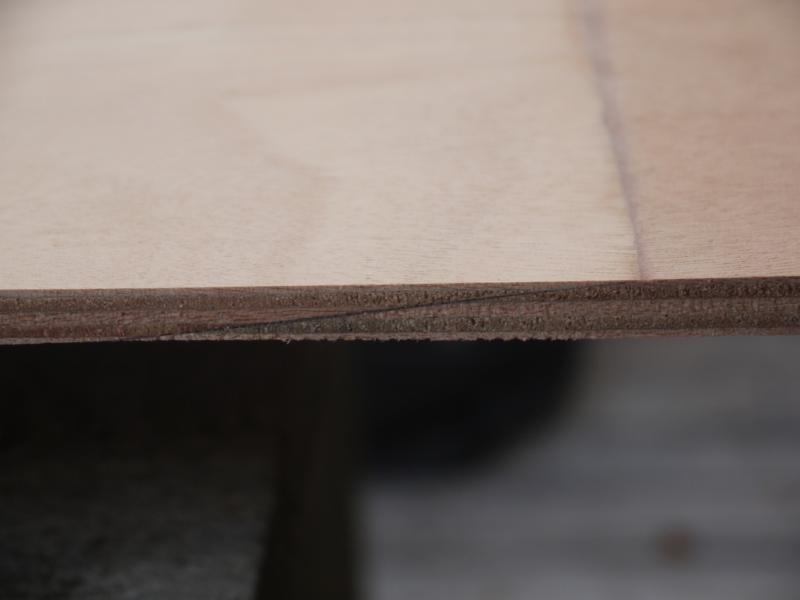
(Below) OK, two and a quarter sheets of 6mm ply scarf-jointed end on end, glued up and cured:-
Health warning: Moving two 18' long sheets of 6mm ply is a nightmare. Two people were needed to move the first one but I managed to wrestle the second one unaided. (Yes, I am a gorilla).
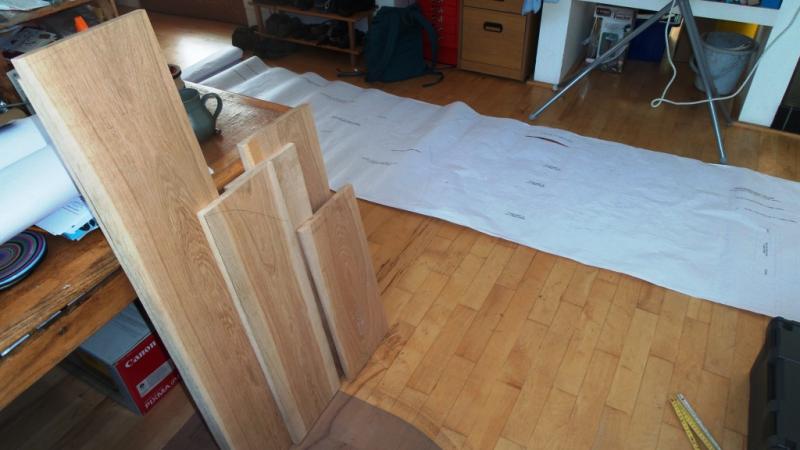
(Below) During the recent dry weather I lofted the outlines of the components outdoors with one of these:
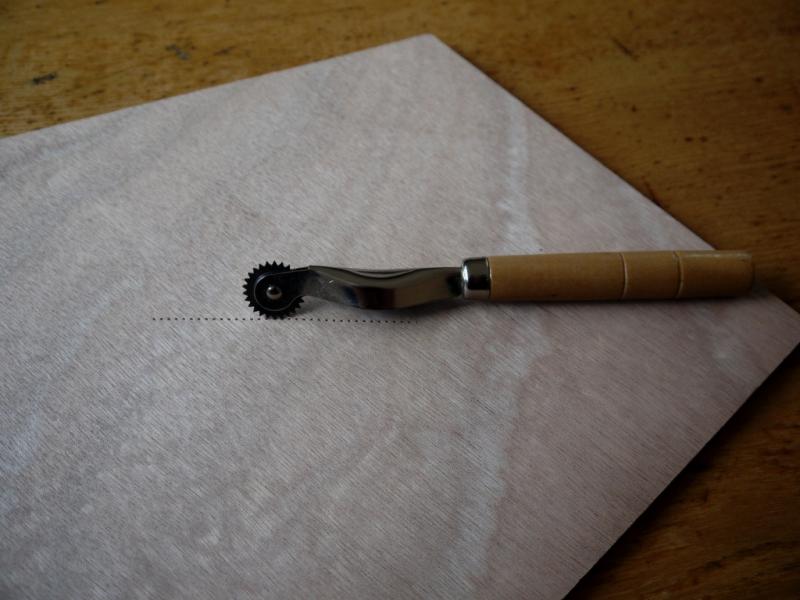
Dress-makers use them for much the same purpose and it seemed a more accurate and faster technique than scoring holes with an awl followed by the laborious joining of the dots. Bought one on eBay for about £3(?)
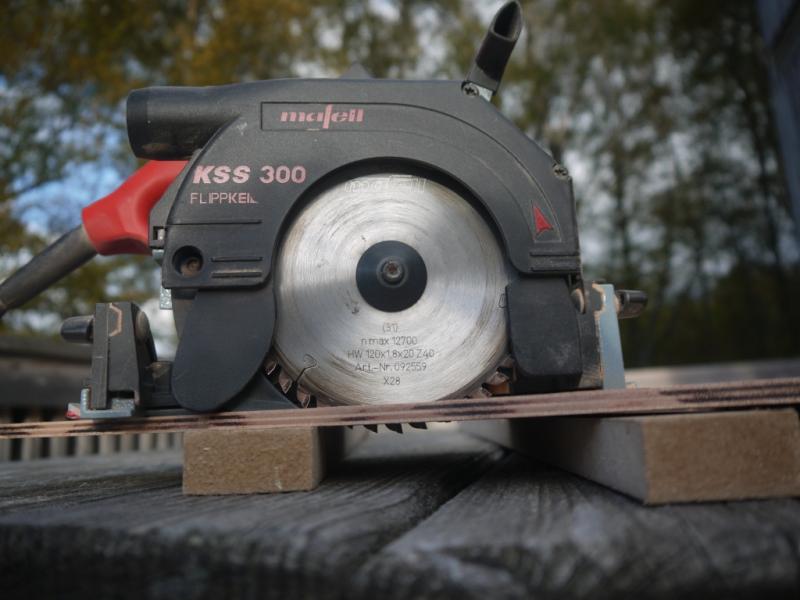
The supplied build manual offers spot on advice for making long cuts in plywood: can't fault it. A circular saw with a small blade makes short (and accurate) work of very long curving cuts.
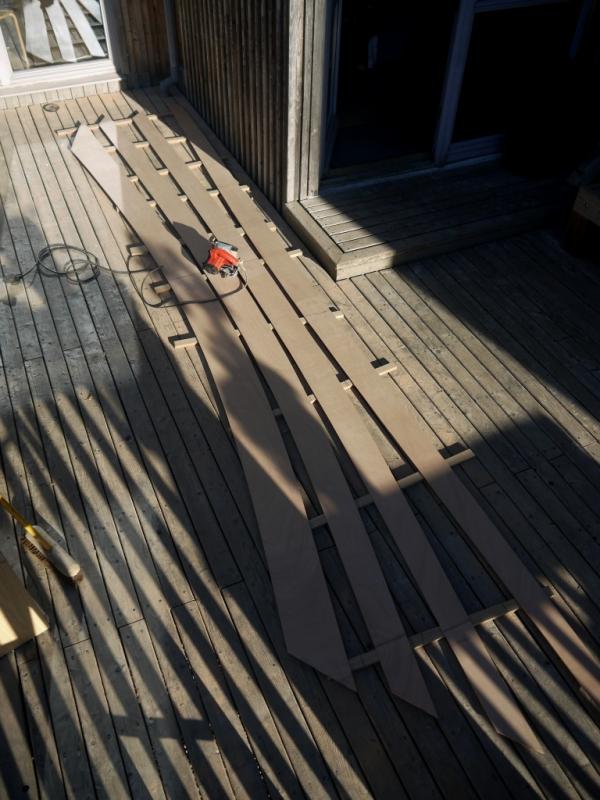
(Below) The trick is to set the blade so there's only a cm or so of blade projecting down through the plywood:-
(Below) With the blade sticking down beneath the ply it's essential to have 'sacrificial' strips laid on your work surface:-
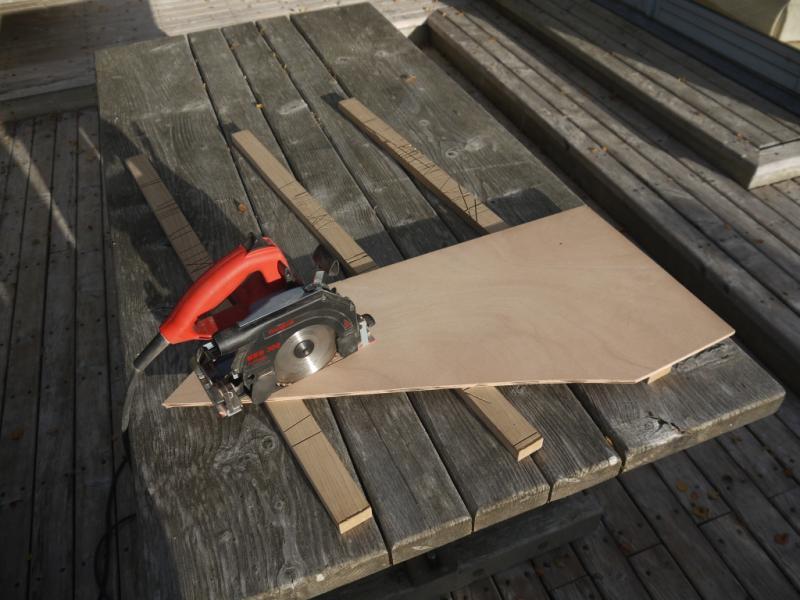
(Below) Long curving cuts with this technique are easy to achieve and fast to execute:-
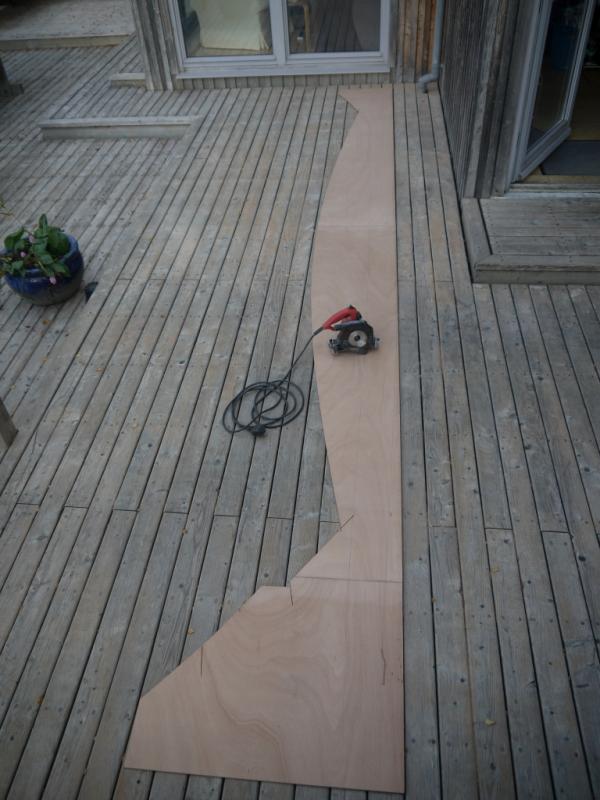
Making similar cuts with a jig saw on such long unwieldy sheets would be nigh on impossible.
(Below) There's a surprising number of arrow-straight cuts to make on some of the ancillary components of the build and a plunge saw with dedicated track made very accurate cuts in short order:-
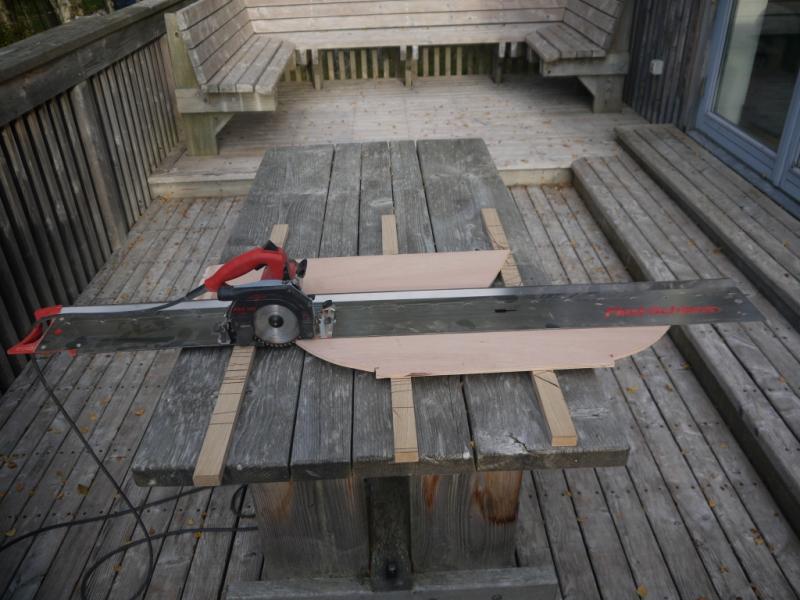
(Below) Cutting out all 8 of the long longitudinal members of the hull took about an hour:-
The edges of each part of the rapidly emerging 'kit' needed a brief clean up with a block plane to get the outlines spot on.
I was initially worried about the overall accuracy of lofting plans then cutting but so far the results have been excellent - at least that's the way it seemed when laying the fettled components back onto the full size paper plans.
My next jobs are to buy some Siberian Larch for the spars and gunwhales, seats etc. and laminate-up components like the spars, bulkheads, transom, centre board, tiller etc before laying down tools for the winter. My workshop/garage houses a car during the winter months so I'll be without full workshop capability until the end of April after which the kit, I hope, will suddenly jump up into the shape of a dory!
Last edited by CrimeaRiver (13 Oct 2016 11:06 pm)
Recidivist wooden surfboard builder!
Built a Kaholo 12' 6" SUP from plans
Built a NE Dory from plans
Offline
#2 14 Oct 2016 3:50 pm
- DerekD
- Member
- Registered: 12 Aug 2013
- Posts: 33
Re: North Easter dory build from plans.
I always find it interesting from the build progress logs how different builders employ a variety of methods to achieve the same end.
I don't think I've seen full 8*4 sheets scarfed together for a project and I can't imagine trying to move 18' * 4' boards without something giving ..... either a joint or a back! Impressive.
I certainly wouldn't have liked to try it for the 18'+ planks needed for my Lutra Laker. I was fortunate to obtain a plank layout diagram from no less than Dave Nichols himself which allowed me to take a less ambitious route and cut the 8*4s into narrower strips for scarfing together before cutting to shape.
Long narrow planks were tricky and fragile enough for me
Offline
#3 7 Dec 2016 7:30 pm
- CrimeaRiver
- Member
- Registered: 3 Oct 2016
- Posts: 18
Re: North Easter dory build from plans.
Having had to cede the garage to the car for the winter months I thought I'd update progress before the year's end.
Cutting out the bulkheads and reinforcers didn't present to many challenges although laminating them together was a tad messy. However, after an initial wet clean up and a very light sand when the epoxy had cured they looked OK:-
The transom and foils followed. The keen-eyed will notice the absence of a sculling 'loop' (nomenclature?) on the transom. I decided this was a bit of an anachronism and, since I'm almost certainly never going to use it, deleted it when lofting the transom shape.
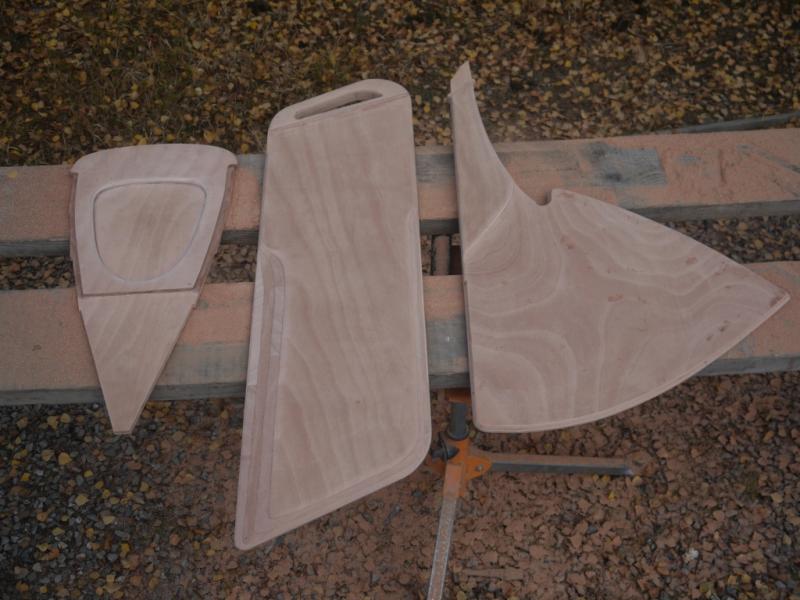
Sanding the trailing and bottom edge of the centreboard needed a bit of prep and a steady hand. Definitely recommend marking up the boundary of the area to sand down. Without this as a guide you'll end up with a wandering and unpleasing chamfer/bevel. The best approach when sanding was to maintain nice parallel laminations as I progressed down through the plywood. A good random orbit sander with 40, later 80 grit abrasive discs did the job.
Read on the CLC forum that some NE Dory owners suffer rudder vibration above certain boat speeds caused by a 'coarse' trailing edge on the rudder. John Harris suggested a modification to mitigate this issue, which is a simple feathering of the rudder - similar in look to the centreboard. The sanding didn't take too long, though again it's important to keep the plywood laminations parallel when sanding if aesthetics concern you.
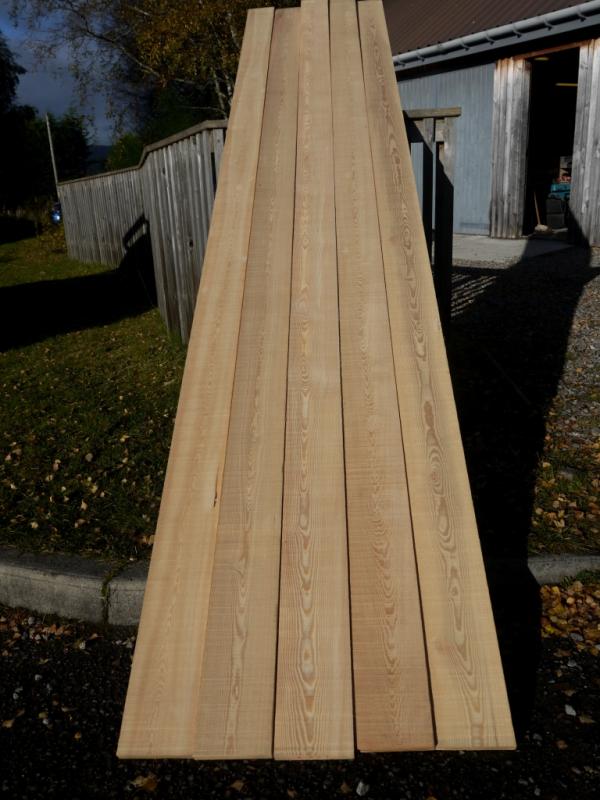
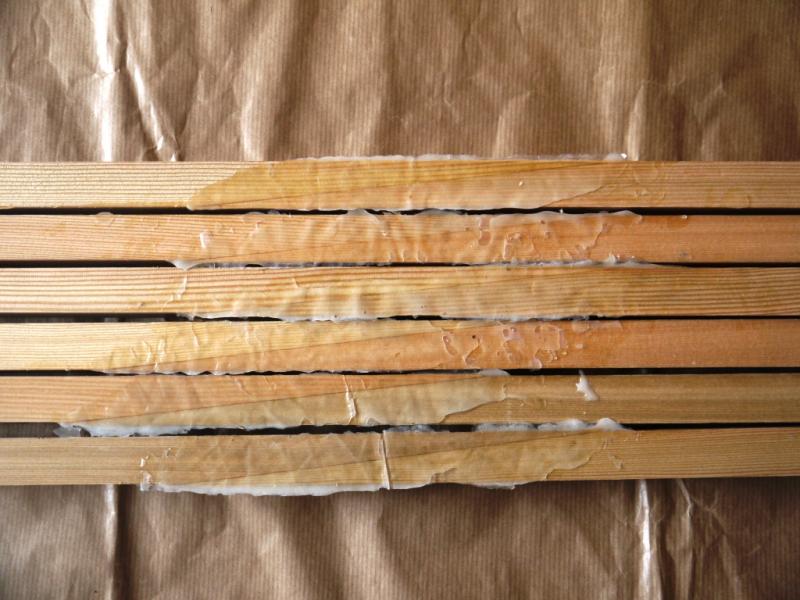
Totting up the amount of wood required for the boat's rails stopped me in my tracks particularly as I had decided on fitting broken inwales as well. Solid timber is also required for a few other critical components so the overall amount of wood needed mounts up pretty quickly when drawing up a materials list. I'm using Siberian larch for the rails, spars and sundry other parts, plus a little local oak (more about that in later postings). Managed to source some SILA Grade A+ 'off the saw' larch from my local timber and cladding merchant, 'Russwood' in Newtonmore, which just a few miles from where I live. Their stuff is unfailingly excellent, the boards being almost defect-free.
After thicknessing and ripping some of the boards into strips it was time to have a go at scarfing them together into 18' lengths. I'd quite enjoyed scarfing the plywood sheets (but not carting them around!) so commenced work on the strips with some enthusiasm. After a long head-scratch I came to the conclusion that the only reasonable way of quickly achieving 1:10 scarf joints in relatively narrow section timber was to make a jig and cut them on my pull over cross-cut saw.
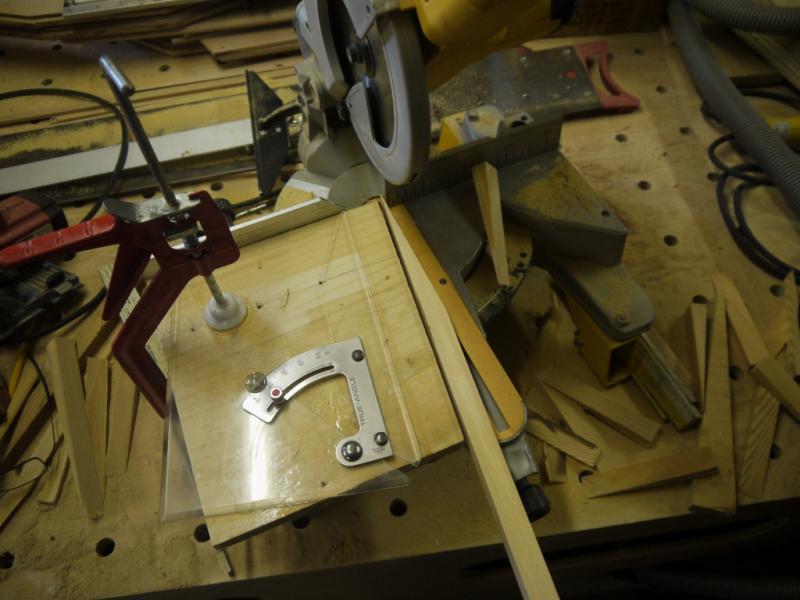
The HSE would most definitely frown on this technique! The jig was easy to make. One edge is cut to 6 degrees (...from hazy memory..) and it's then clamped to the table of the saw. The strips are then manoeuvred lengthways and firmly held before the cut is made. A sharp blade and steady nerve are required to achieve the desired result. Don't attempt this method if you lack both of these! Results were good though and after a rather nervy couple of attempts I dispatched all the cuts in just a few minutes.
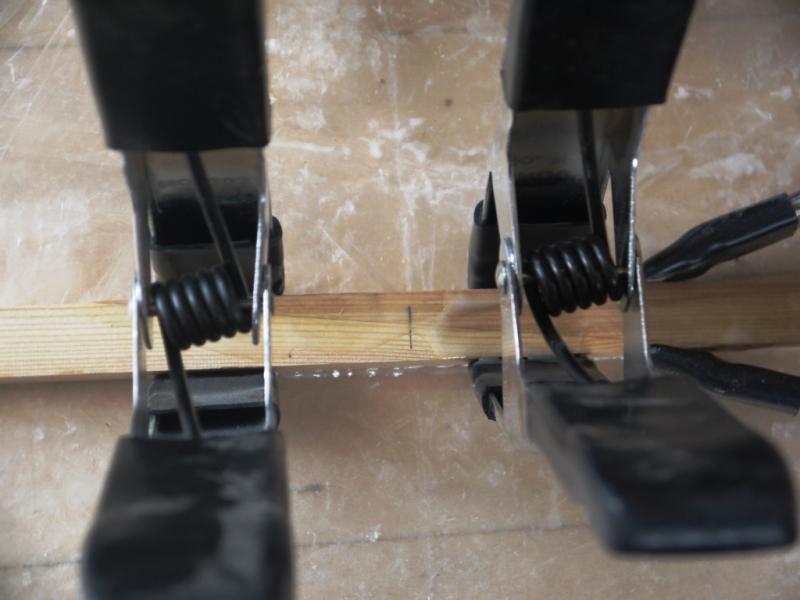
In order to prevent the scarf joints wandering about after clamping I index marked each half of every joint so that I could see if there'd been any slippage after clamping and make adjustments accordingly.

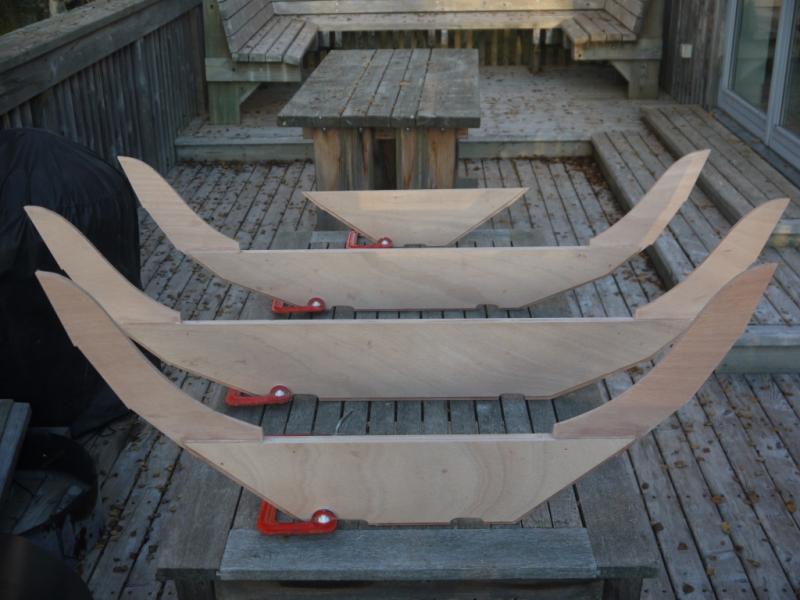
One or two needed a minor tweak after gluing but most were fine. Indexing allowing me to avoid underlap and overlap which can be difficult to spot when the joint is slathered in wet epoxy:-
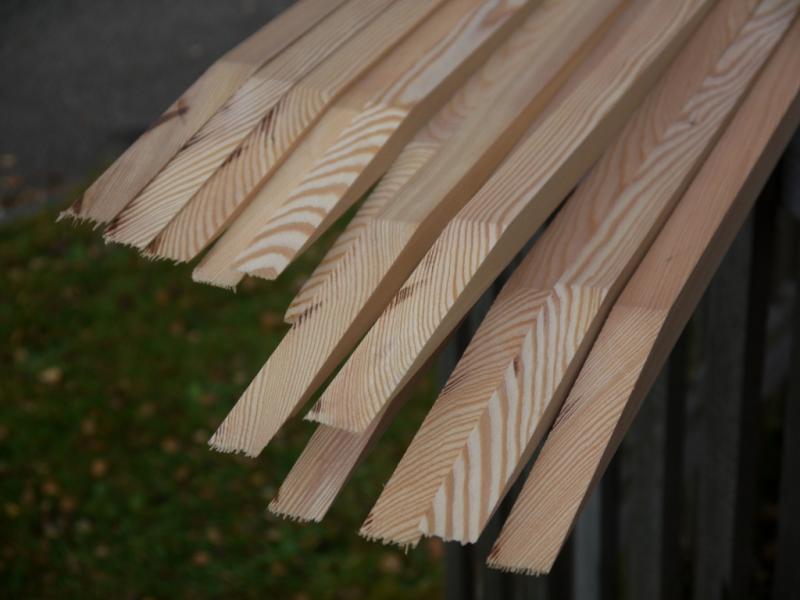
Overall results were pretty pleasing and they'll look even better when sanded:-
The spars came next. The only difficulty here was having enough heated space (at this time of year) to layout, glue-up and clamp spars that are 3m+ in length so move indoors for this part of the proceedings.
Had an utterly clamptastic time here!

After curing the laminated 'blanks' morphed into beautiful spars after a little thicknessing, tapering, rounding over with a router then a final sand:-
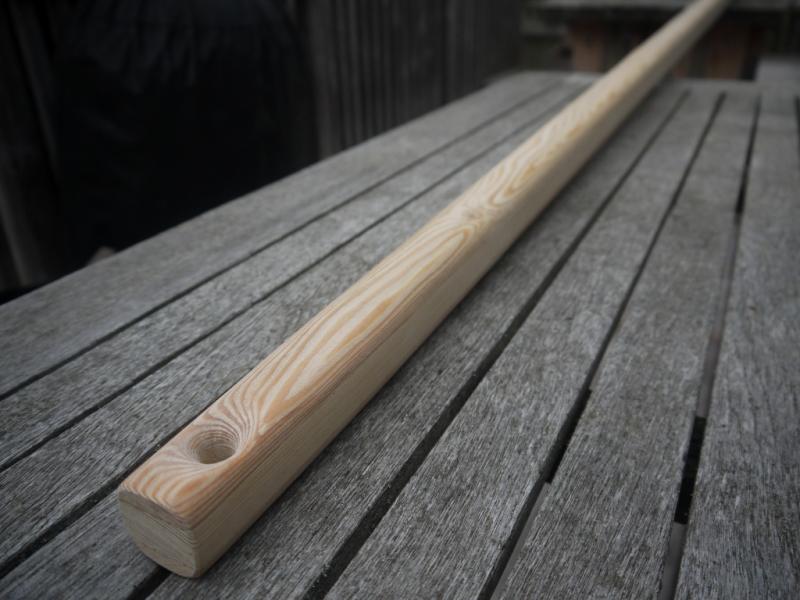
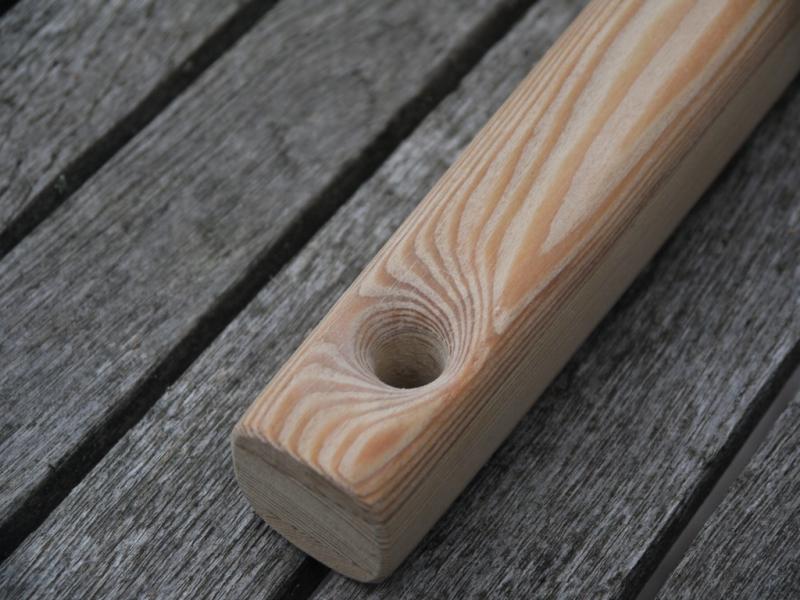
The hole for the halyard at the top of the mast needs a bit of care and detailing to get right. The build manual was really helpful here - a rounding-over router bit producing a very clean finish.
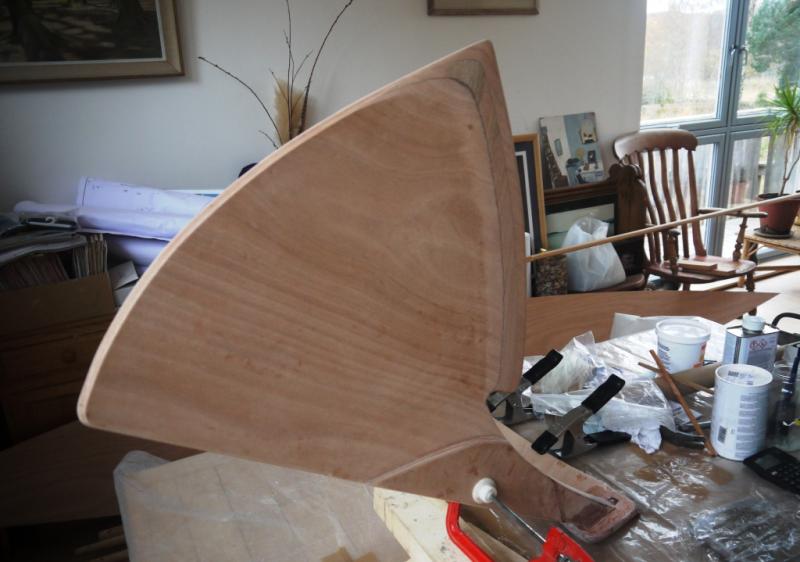
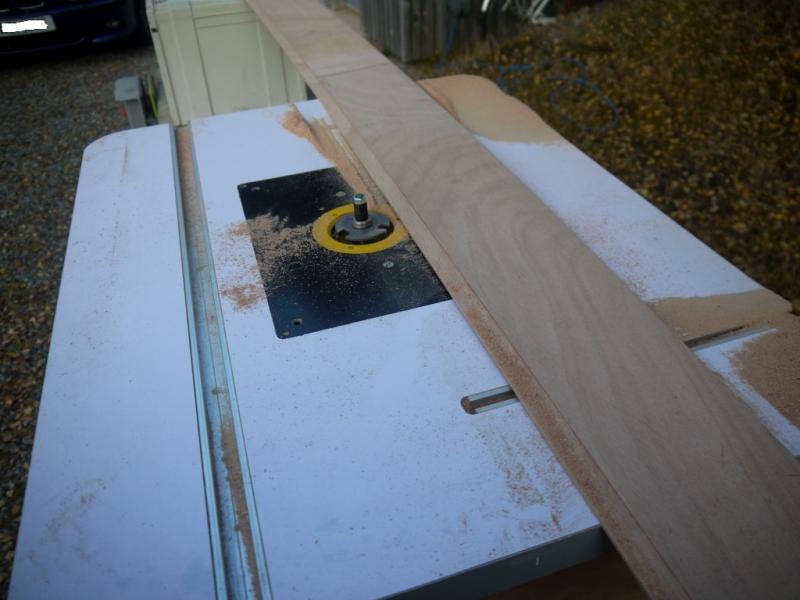
One definite disadvantage of building from plans is having to overcome the problem of cutting rebates in the boat's hull panels. The rebates run the entire length of several very long, curved and bendy panels which are not the sort of things you can cut with a few hand tools otherwise you'll bodge a job that requires real accuracy.
I hummed and hawed (a lot) about how I was going to do this. The manual suggests using a router with a rebate bit but the size of the rebates means the router bit would be very large indeed, probably at the outer limits of what's safe to use in a 1/2" hand-held 2000 watt router. In the end, and after discussion with the very helpful people at Wealden Tool company, I used a 4mm thick groover bit (60mm diameter + a TB910 bearing) which produced a perfect 19mm wide rebate, 3mm deep. Worked like a dream too and so much cheaper than a massive dedicated rebate bit!
HSE would also have a view on my router technique! However, if was really was a case of 'needs must'. (Although the photo shows the rebate facing up, it was actually cut face down of course.)
Next instalment will probably be some time after Easter 2017.
Last edited by CrimeaRiver (8 Dec 2016 10:29 am)
Recidivist wooden surfboard builder!
Built a Kaholo 12' 6" SUP from plans
Built a NE Dory from plans
Offline
#4 9 May 2017 8:57 pm
- CrimeaRiver
- Member
- Registered: 3 Oct 2016
- Posts: 18
Re: North Easter dory build from plans.
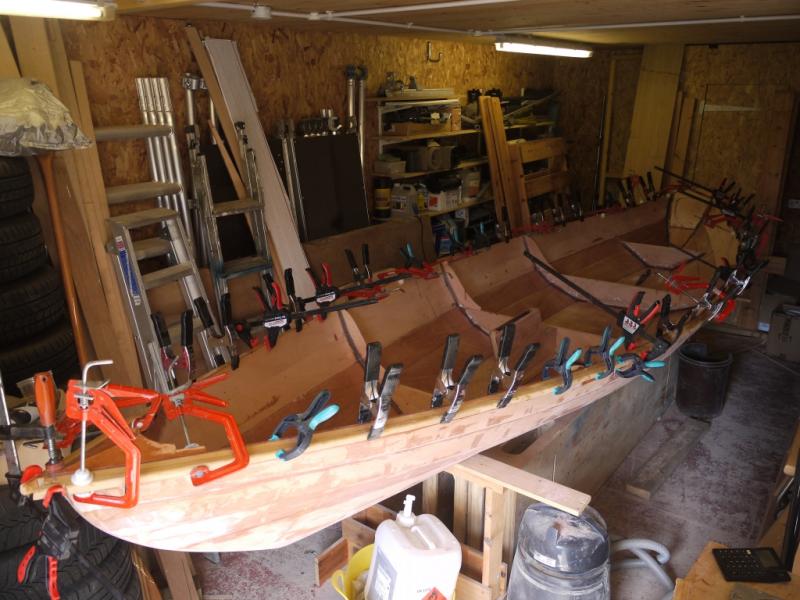
The good weather means a little more progress on the build. The 'kit of parts' is starting to take a definite boat shape!
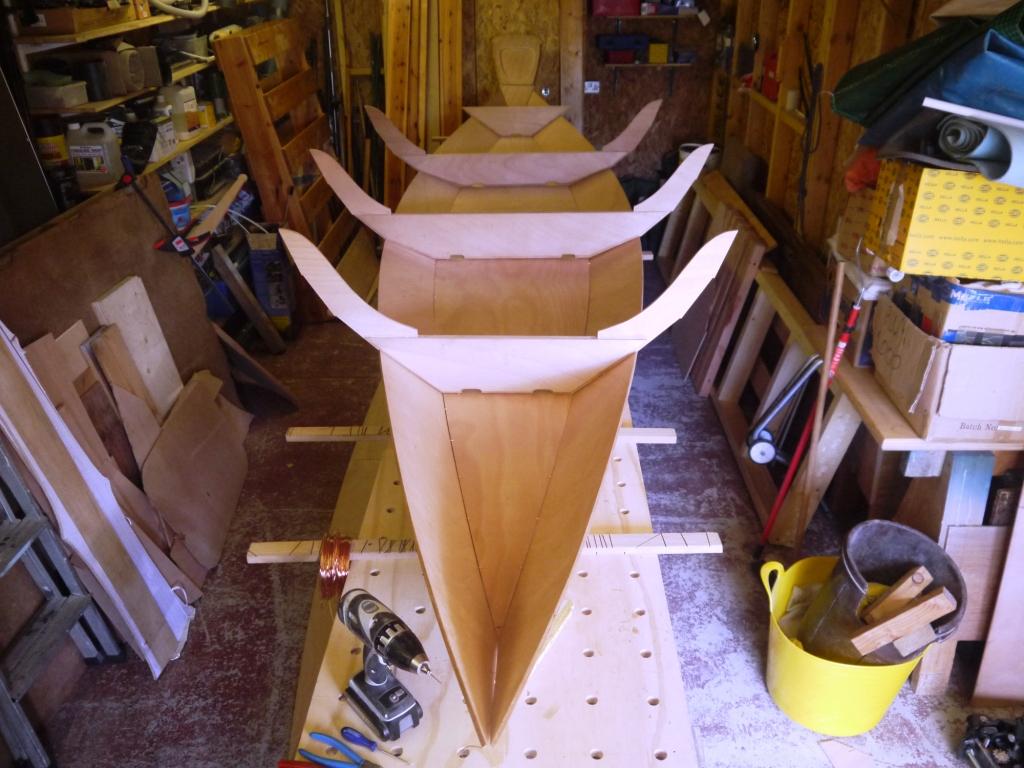
(Above) The first planks are pretty simple to attach to the bottom panel of the boat with the copper wire 'stitches'. The fun starts when the upper planks (panels) go on.....
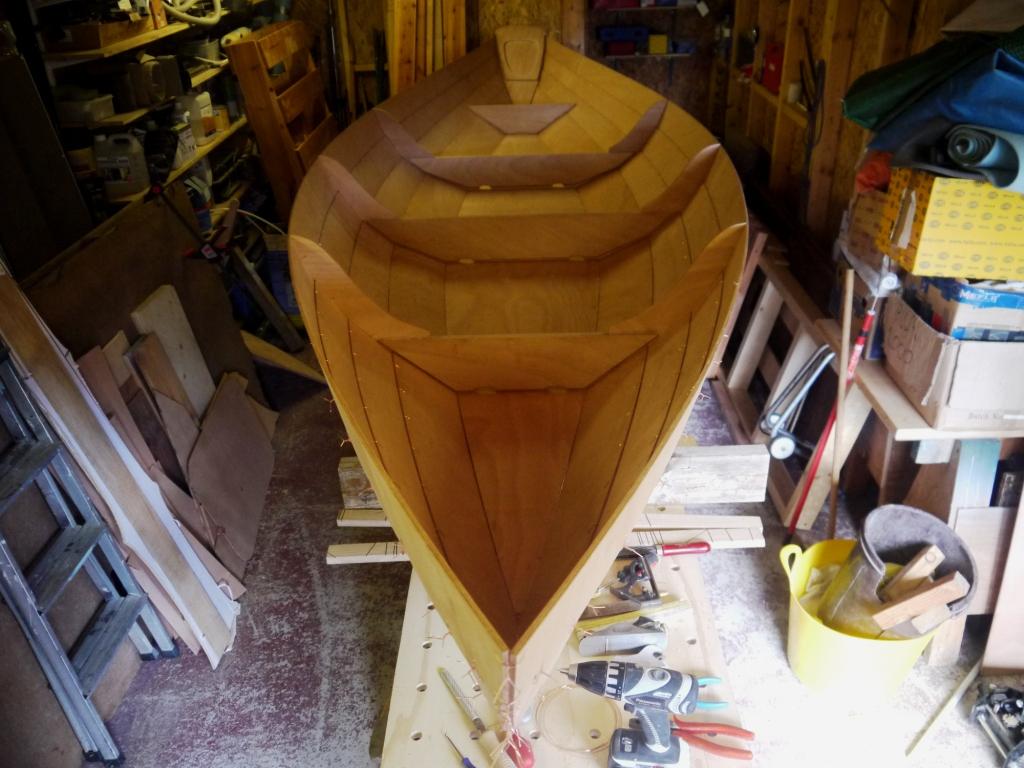
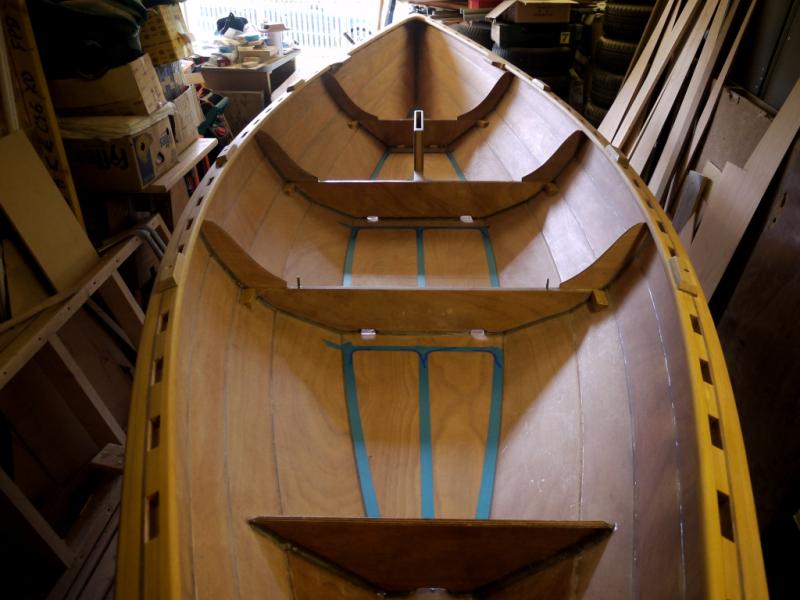
(Above) A boat! The rebated panels are a snug fit (thankfully) and can be stitched on by a lone builder if a little creativity is used to support each long wobbly panel as single stitches are applied. Once you get the knack it's pretty simple but there was a little foul language at the outset! The transom required some wrangling but it too eventually submitted to copper wire stitching.
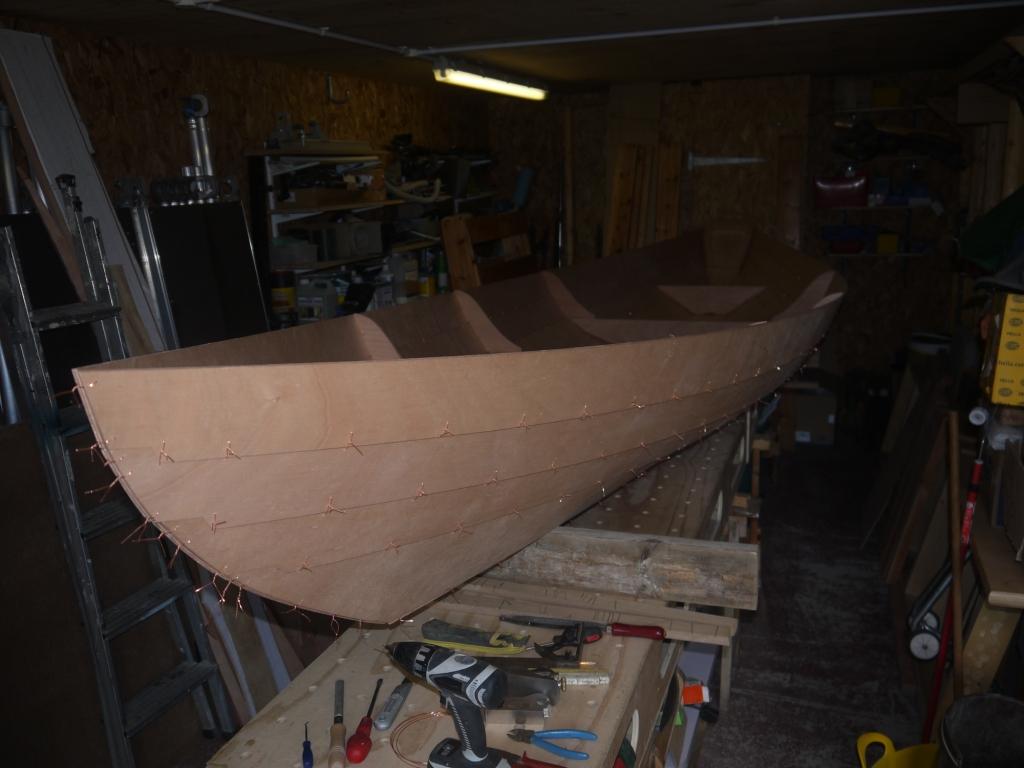
(Above) There's a lot of wire stitches! A not very good shot of the whole boat but it does show up the density/frequency of wire stitches required on the front quarter of the bow. Stitching can be quite hard on the fingers and light leather gloves might help.
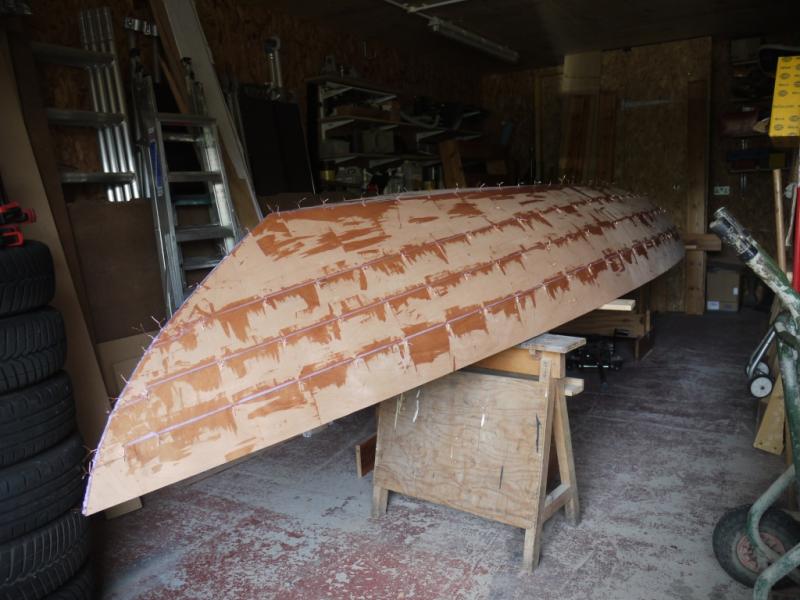
Next job is to flip the boat and put epoxy into the lapstrake joints, followed by multiple epoxy fillets to the inside of the boat.
Recidivist wooden surfboard builder!
Built a Kaholo 12' 6" SUP from plans
Built a NE Dory from plans
Offline
#5 19 Jun 2017 10:39 pm
- CrimeaRiver
- Member
- Registered: 3 Oct 2016
- Posts: 18
Re: North Easter dory build from plans.
Progress slowed due to essential car maintenance requirements + getting involved in my son's garage building project.
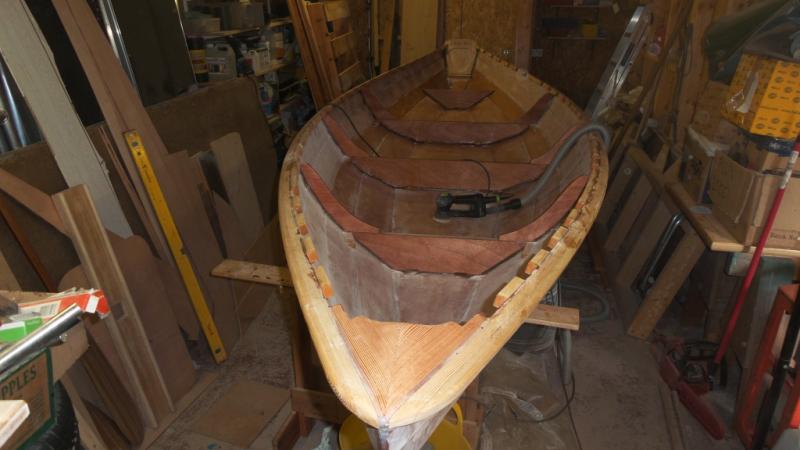
The lapstrake fillets went in pretty quickly though much more care is required if a laborious clean-up of the hardened epoxy is to be avoided. Definitely worth taking your time here and cleaning up the epoxy immediately after filling the lapstrake joints.
(Above) Epoxy fillets in the lapstrake joints.The build manual instructs you to leave epoxy clear of the wire 'stitches'. Clipping and removing the copper wires later was pretty simple, any that did catch a bit of epoxy were eased out after applying a soldering iron to the copper wire immediately prior to pulling.
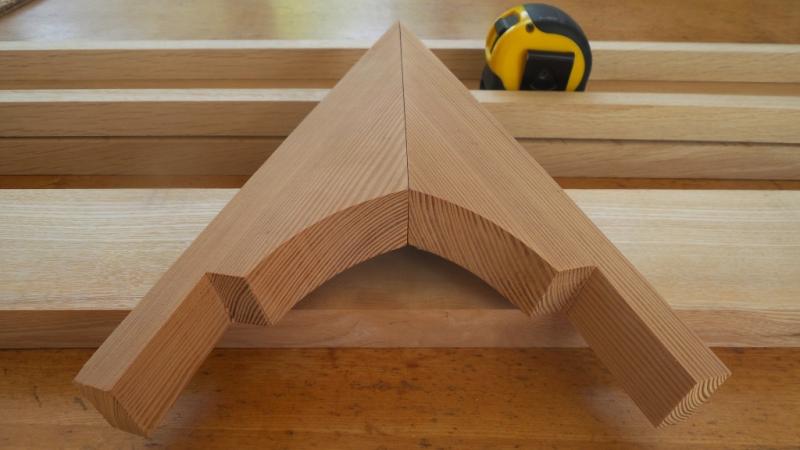
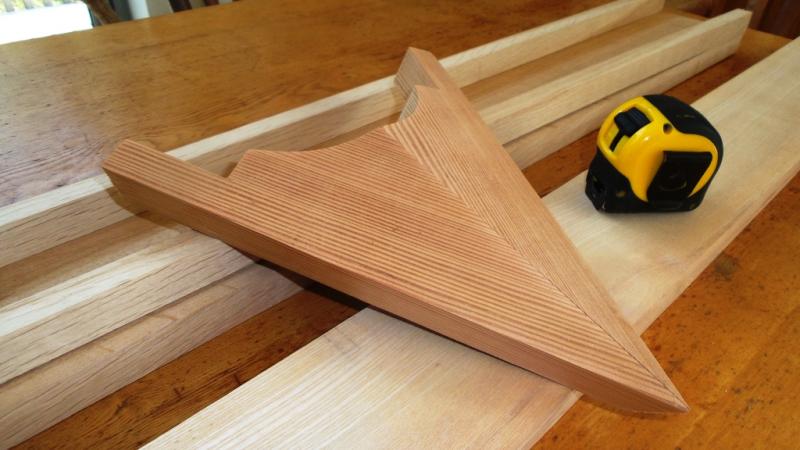
A bit of creative joinery next! I've decided on broken inwales and this entails some careful measuring and cutting of the breasthook components.
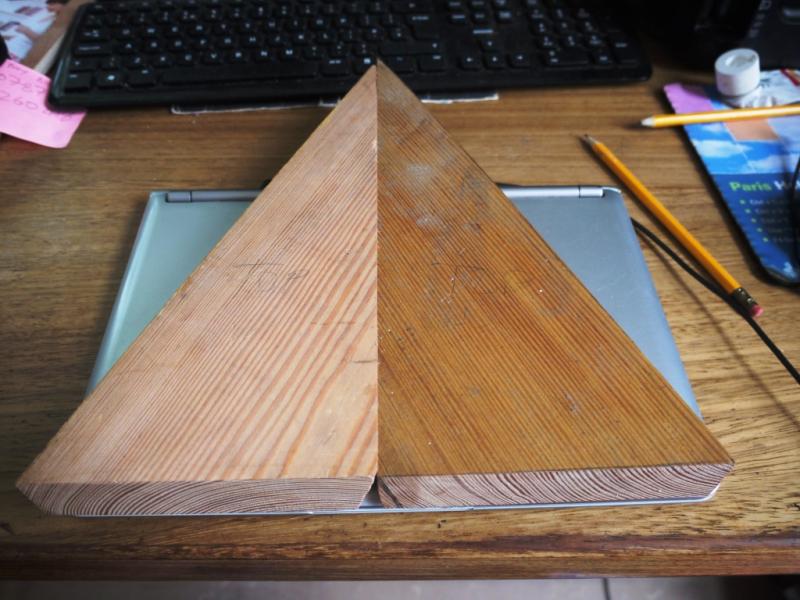
(Above) Had some fine old (proper) pitch pine from a church pew I managed to secure when St. Columba's church, Rothiemurchus was converted into the Cairngorm Mountain Rescue Team's new HQ some years ago. The church was built in 1886 and this N.American softwood is, I think, 'first growth'.
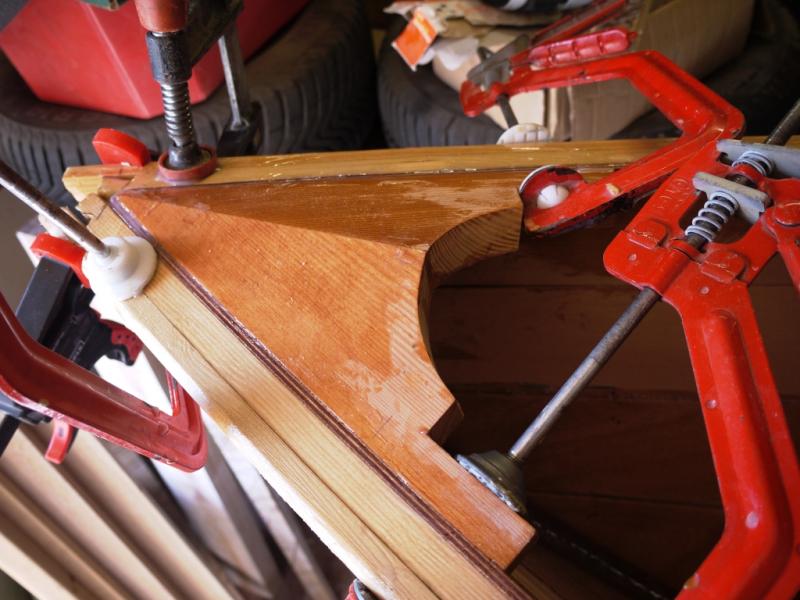
(Above) Here it is installed, shown after the rails were glued into place. Should look good after final shaping, sanding and finished with epoxy and varnish. (The rails are Siberian Larch)
(Above) Another clampfest! The rails are fiddly for the solo builder since when coated in epoxy they can squirm around somewhat alarmingly. There are 4 rails and they cannot be 'gang' glued together, only one lamination at a time per side. I found that the clamps can be safely removed 48hrs later, after the epoxy has properly cured.
Waiting for the epoxy to go off means there's time to attend to other components.
(Above) Sourced some local oak from a cabinetmaker friend of mine which will be utilised for the seats. It's a little heavier than most softwoods but I think it'll look pretty good once fully installed and finished. Boards marked up and ready for cutting/shaping.
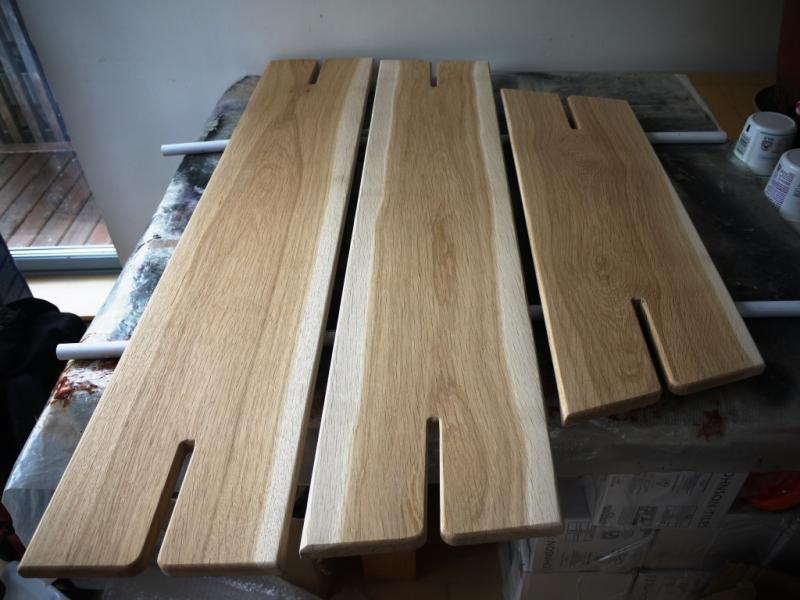
(Aove) 3 main thwart seats now ready for epoxy...and the inevitable sanding.
Sanding has been a real feature of this build. I warn you, it goes on and on...and on & on. A random orbit sander and plenty of decent abrasive discs are a must if you want a half decent finish.

(Above) Triple components for the rear seat. Some might not but I quite like the burr in the centre section of the seat.
Next up is a layer of glassfibre cloth & epoxy to the bottom part of the exterior of the hull.
Recidivist wooden surfboard builder!
Built a Kaholo 12' 6" SUP from plans
Built a NE Dory from plans
Offline
#6 7 Sep 2017 10:24 pm
- CrimeaRiver
- Member
- Registered: 3 Oct 2016
- Posts: 18
Re: North Easter dory build from plans.
Progress on the build has been slow but there have been some developments.
(Above) Spacer blocks for the broken inwales expoxied in place ready to receive the finishing inside rails.
Honestly, if I were to repeat this build I would not install broken inwales. They're just too much work for what, after all, is just an aesthetic 'boaty' flourish. The spacers are a difficult detail that makes sanding the upper part of the inside of the hull finicky. It's really difficult preventing tiny runs of epoxy from that area that you only notice the next day when the stuff has set up rock hard.....hence more sanding. Of course they look great when finally finished (see below) but you will suffer for your art!
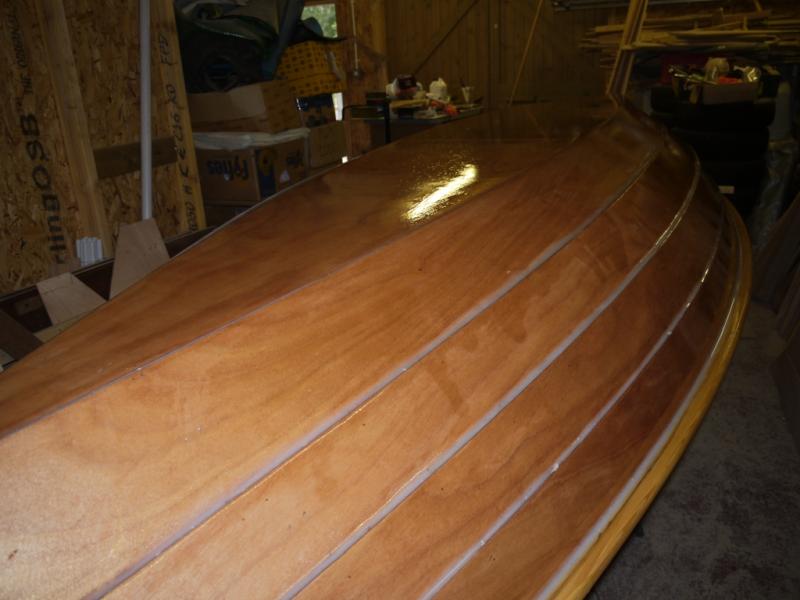
(Above) The hull exterior and interior have been fibreglassed and prepped for paint and varnish.
Mixing epoxy and applying it to large areas has had its challenges. I found it best to mix up epoxy/hardener in 500/600cc batches when filling the weave of the fibreglass cloth and thereafter coating the hull inside and out. Larger batches tend to start stiffening up in the mixing pot so I've found it best to decant the mix into disposable miniature paint roller tray inserts. This seemed to slow down the exothermic reaction and resultant gelling of the epoxy. Putting the epoxy on in thin layers using a very short bristle roller then tipped off with a paint brush gave fewer runs and a relatively smooth finish.......but you do need more coats to achieve a decent depth of epoxy. However, it's much easier to roll on/tip off wet epoxy that it is to sand down rock hard rough/bumpy epoxy with innumerable runs....
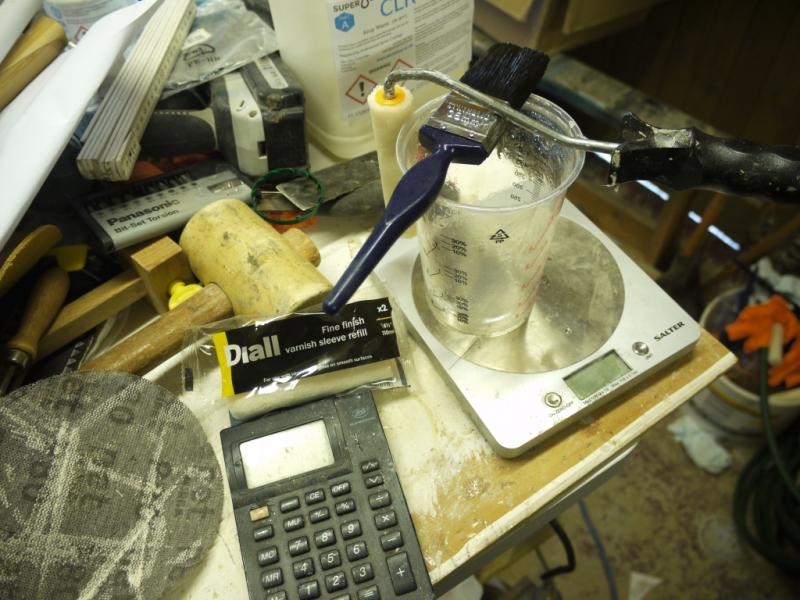
(Above) Decided to weigh components using digital scales when mixing batches of epoxy. Unless you're using the pump system, measuring by volume in indexed measuring cups seems to lead to under/over use of hardener or resin. A decent digital scale is just a few £s.
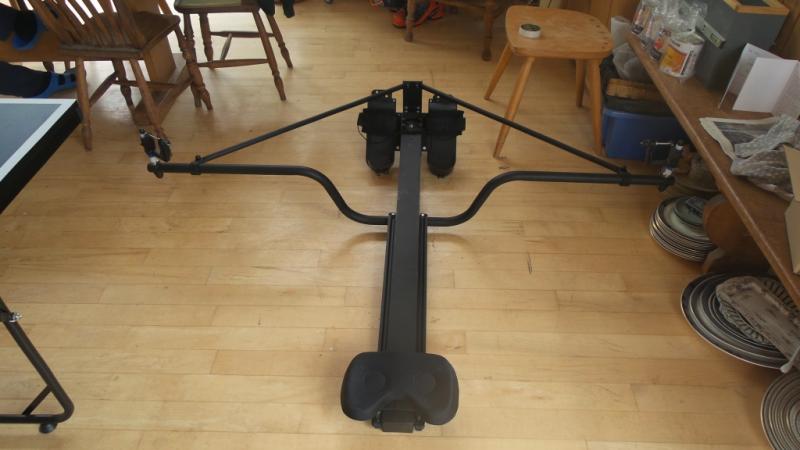
(Above) Got a little diverted from the main build due to buying one of these for the boat. This drop in rowing unit requires the use of proper sculling oars and instead of spending £1000 on new wooden ones from Collars I decided I was going to make my own. Bought plans for a pair of hollow oars from Angus Rowboats and though a relatively simple design they do require a fair amount of work one way or another. In order to maintain lightness I decided to use Sitka Spruce for the structural elements since this is an extremely light but quite strong wood.The helpful chaps at Fyne Boats had a huge stick of really good Sitka Spruce but it was way more that I would need for a single pair of oars and managed to track some down at Robbins Timber in Bristol.
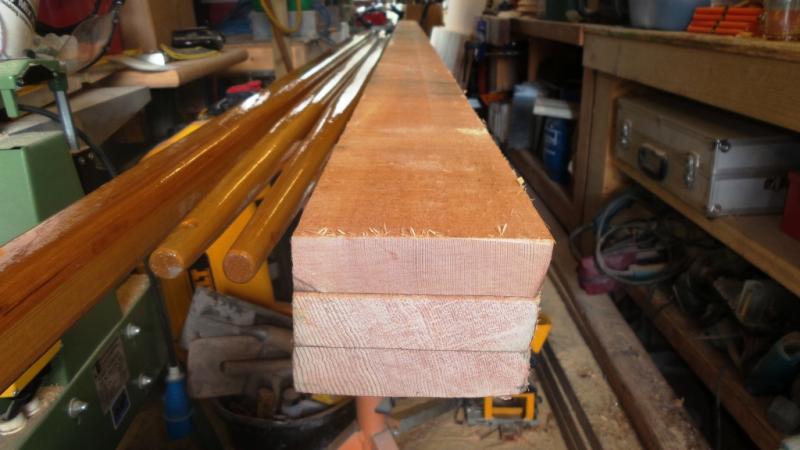
(Above) The Sitka Spruce boards. Very difficult to track down good quality N. American timber (from Alaska and the Pacific North West) which is clear, straight and defect-free for making oars. The Robbins Timber sourced boards above were the best sticks of timber I have ever come across. Tight vertical grain, arrow-straight and flawless. The three 100 x 25 x 3200mm boards were comfortably more than £50....each.....delivered so I guess you get what you pay for.
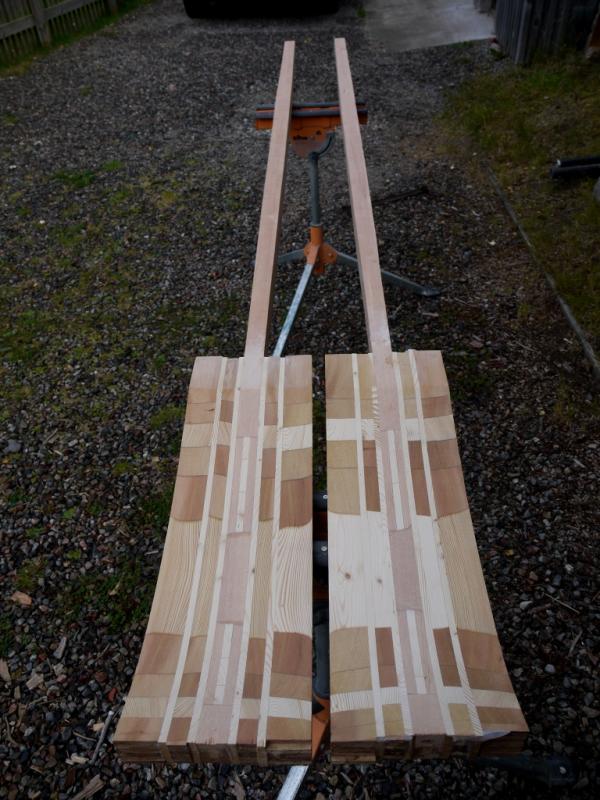
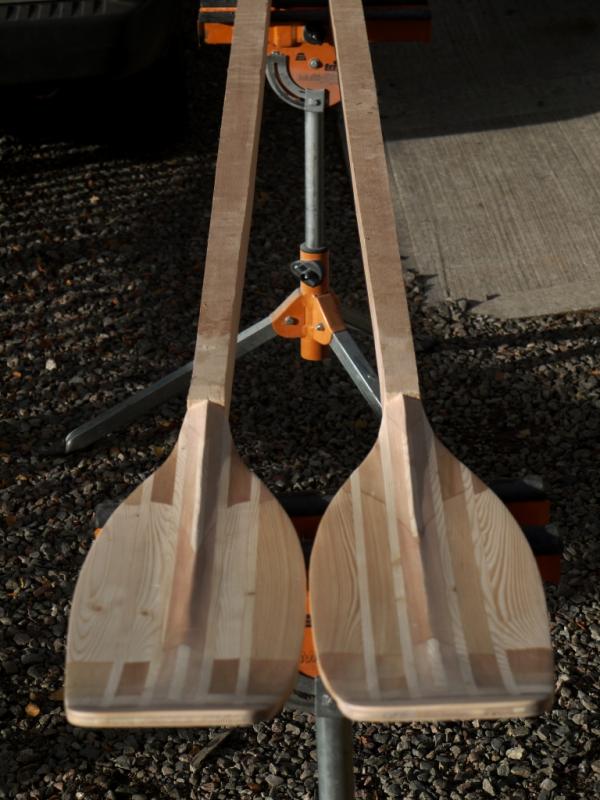
(Above) The blades were laminated up from whatever else I had lying around the workshop - some Western Red Cedar, Siberian Larch, a little whitewood and a few scraps of Sitka Spruce. Jury's still out on the aesthetics!
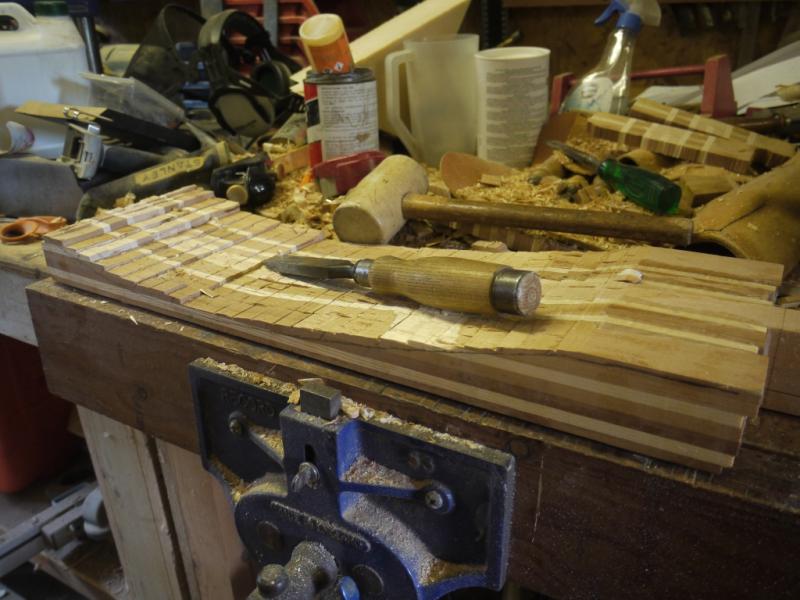
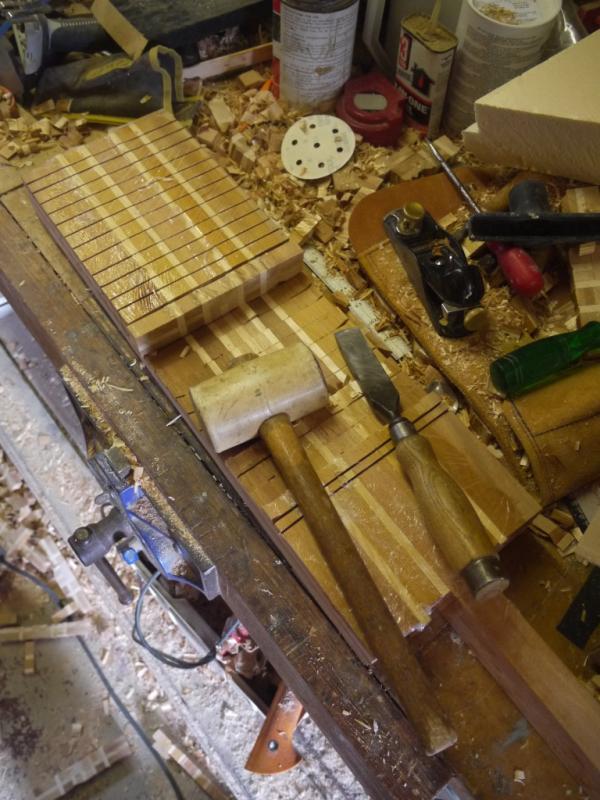
(Above) Quite a lot of very, very careful (read as: buttock-clenching) sawing then some gorilla-chiselling out of the waste required to achieve the basic scalloped blade shape.
(Above) Sanding reveals more of the 'harlequin' blade design. (Still not sure about the look!)
(Above) Part of the reverse side of the blade now shaped. When complete it will be the traditional 'macon' shape. (To be continued in future posts.)
Back to the main part of the build. I've done a lot of sanding. A lot. It seems to go on forever. I'm pretty sure I've spent more time sanding than on all the other parts of the build put together. (Only slight hyperbole). Told Phil at Fyne Boats that if I'd known there was this amount of sanding I might not have started the build!
(Above) With the help of two different random orbit sanders and more sanding discs than I can count I finally got the boat sufficiently ready to paint the hull. The colour is an Epifanes 'Pale Grey', although it looks white on camera. Broken inwales, mast step brackets and rowlock blocks fully installed and coated in protective epoxy. Progress! (The long stick in the photo is the tiller extension which is made up from Siberian Larch and a little local oak.)
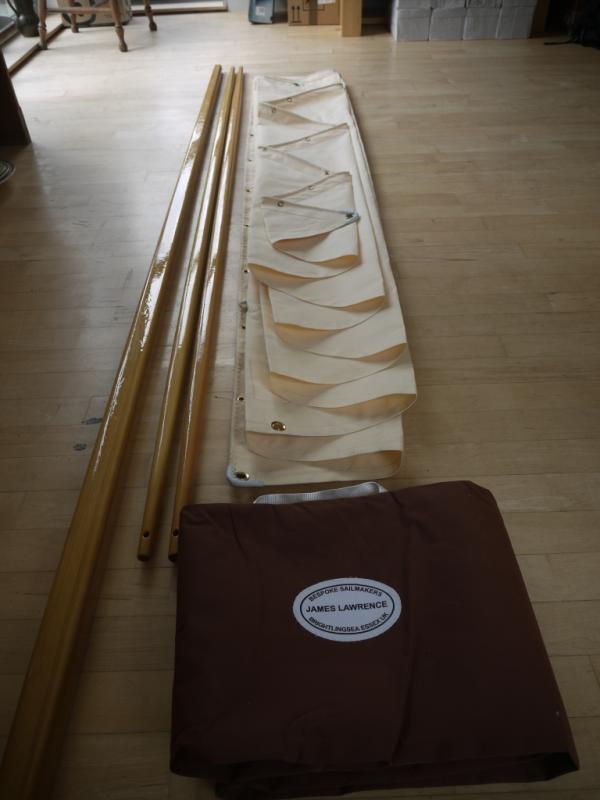
(Above) The sail arrived. After much humming and hawing - mainly due to the bewildering array of different sail cloth choices available - I settled on 'Clipper Canvas' in a cream colour. It's a modern relatively light weight fabric but with a traditional 'hand' (feel) a bit like old sailing canvas, and was made up into a sail by an old-school sailmaker. Quite a few nice traditional touches evident in the making of the sail, too. Absolutely delighted with it and surprisingly well priced as well.
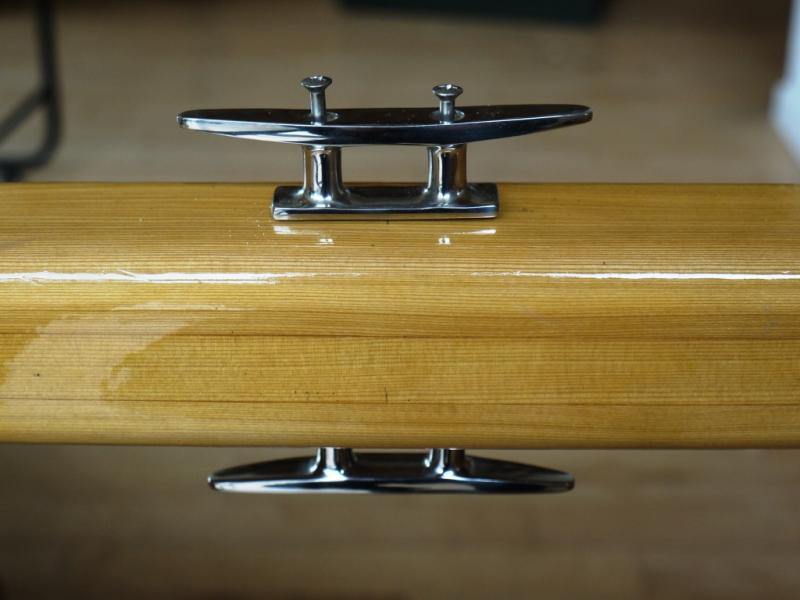
(Above) Appropriate time for fixing the polished stainless steel cleats to the mast. The boat's not ready to sail yet though.
(Above) With the inside of the hull ready for varnish (....sanding again..) thought it would be prudent to put an anti-slip finish on the floor. Read somewhere that crushed walnut shells encapsulated in varnish works pretty well so masked the floor up to receive a little early varnish followed by the crushed walnut shells.
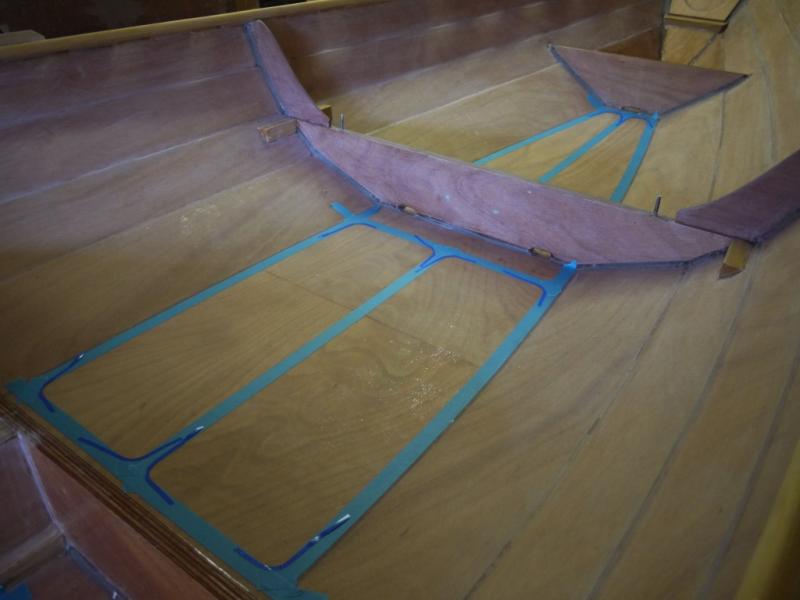
(Above) The rounded corners required a different sort of thin masking tape made of vinyl. Regular masking tape couldn't cope with those tight radii.
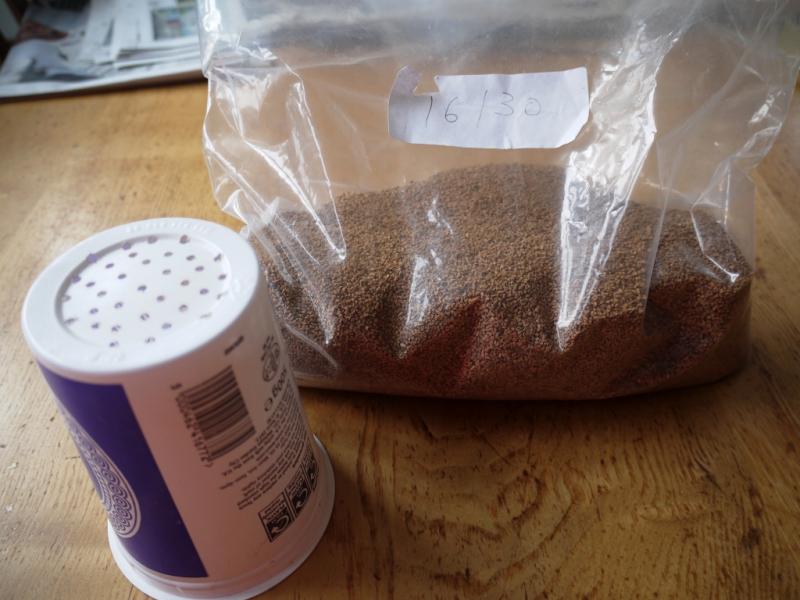
(Above) The crushed walnut shells are usually used in media blasting but apparently work well in this planned application. They're cheap and readily available on eBay - I bought 1 kilo which was about the right amount to cover the floor with a grain size of about 1mm, or 16/30 gauge. An old yogurt pot - in true old Blue Peter style! - is perforated with a lot of 3mm holes and used as a shaker when spreading the grains on to the wet varnish.

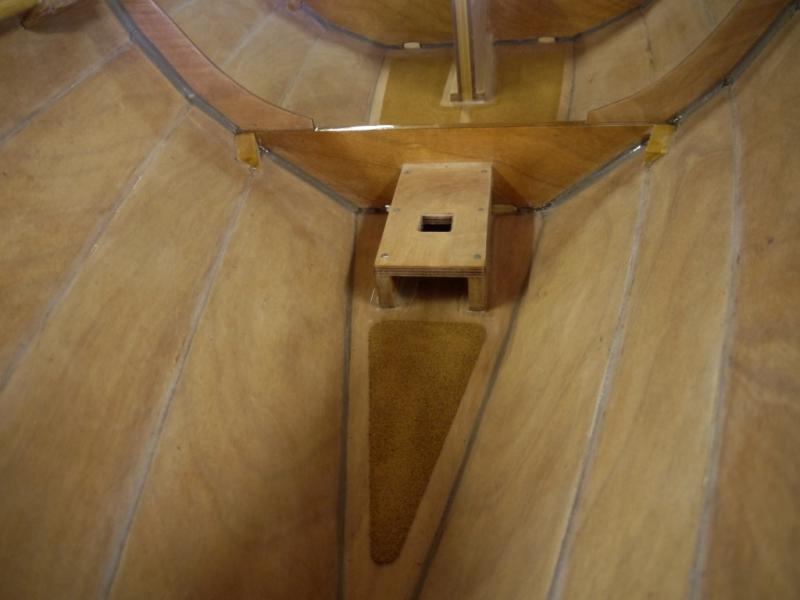
(Above) After the varnish is applied to the delineated area, a good measure of the crushed walnut shells are liberally sprinkled on to the fresh varnish. Any that are not immediately captured in the varnish will be removed later with a shop vacuum cleaner when the varnish has gone hard. (I reckon about 50% of the grains will be removed with a few passes of the vacuum cleaner.)
(Above) The masking tape is removed a couple of hours later before the varnish has begun to go off so as to leave a nice clean edge.
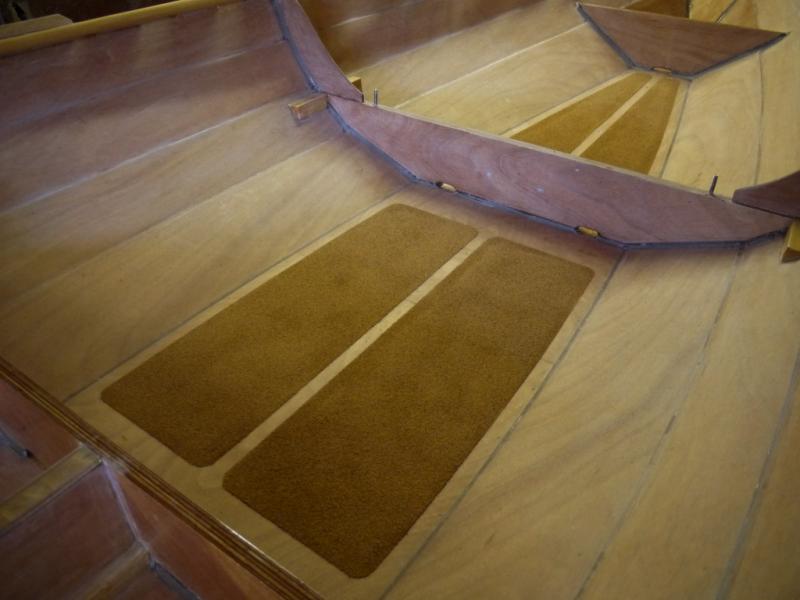
(Above) I carefully vacuumed off the excess residue of loose grains from outside the masked off area immediately after removing the masking tape. Once the varnish has gone hard the excess surface grains can be removed and a thinned coat of varnish applied to fully encapsulate the grains. Several additional coats will also be required.
Hoping to finish all the varnishing within the next week before I go away on holiday for a couple of weeks.
Last edited by CrimeaRiver (8 Sep 2017 9:55 am)
Recidivist wooden surfboard builder!
Built a Kaholo 12' 6" SUP from plans
Built a NE Dory from plans
Offline
#7 4 Nov 2017 6:38 pm
- CrimeaRiver
- Member
- Registered: 3 Oct 2016
- Posts: 18
Re: North Easter dory build from plans.
It's just over a year since I started this build and I'm delighted - and not a little relieved - to say that my NE dory is just about complete. Looking back I wildly underestimated quite a few things:
* time required to build the boat from scratch, that is a pile of plywood sheets and Siberian larch boards instead of a pre-cut kit.
* the time spent sanding. You spend a lot of time sanding. Way more than I would ever have envisaged.
* the number of sanding discs required
* the amount epoxy resin needed, even though I thought I was pretty sparing when putting it on.
* ditto varnish
Some of the above is possibly because of the 'extras' on my boat. I guess the spars, foils, broken inwales and other sundry boaty mods required to make it into a lug sail iteration of the basic rowing boat, all account for additional work and finishing.
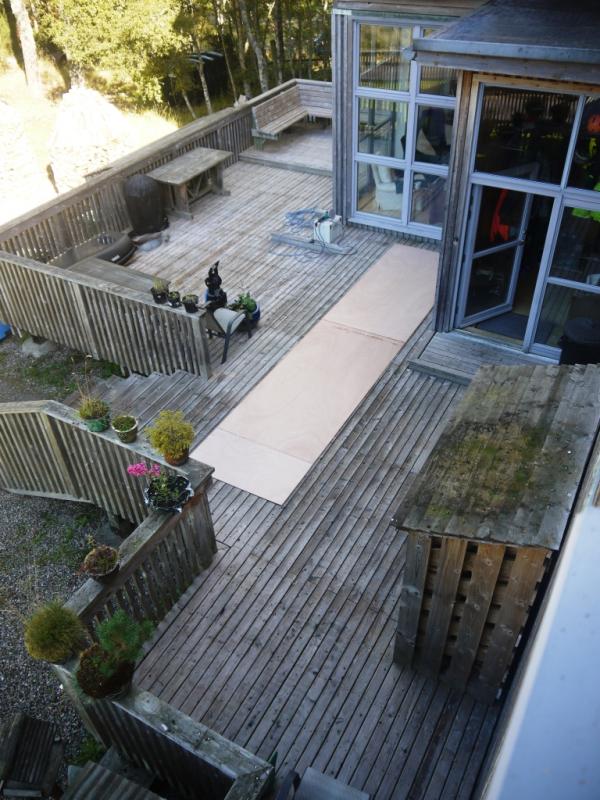
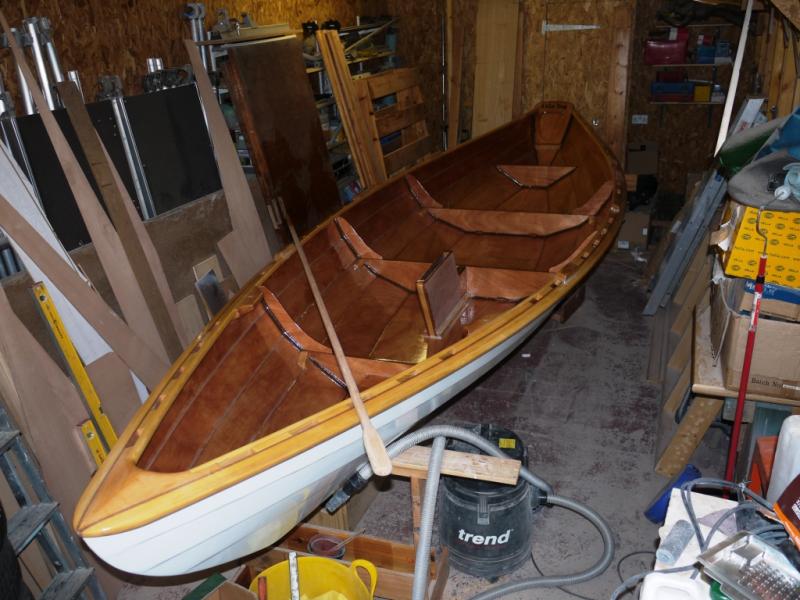
Anyway, it's done save for some very minor fettling. The boat saw daylight for the first time today when we moved it out of the garage/workshop onto the deck where it will sit for the winter. A boat cover has been ordered which will keep the worst of the Scottish Highlands winter off it. I've a plan to design some ventilation for it so that condensation is kept to a minimum once it is under wraps. (The garage/workshop is where a car hibernates for the winter - its need for shelter is rather more pressing than the boat's).
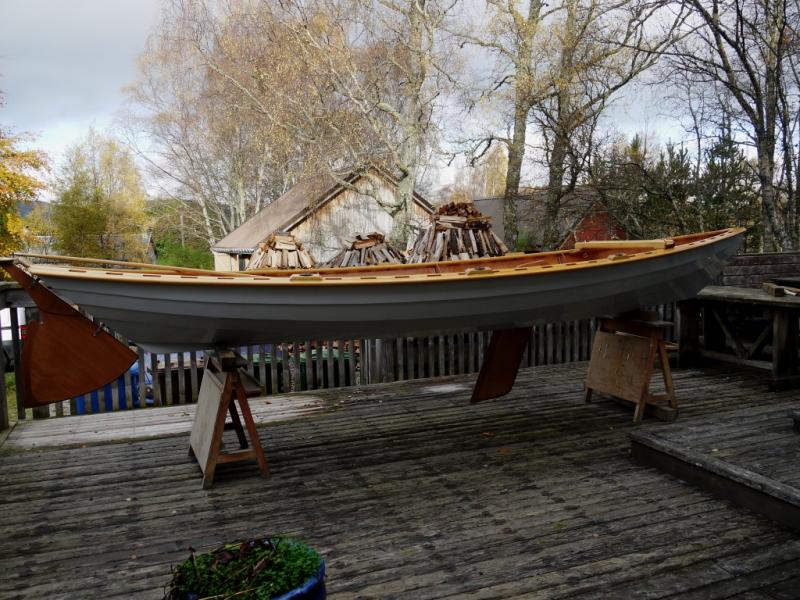
(Above) Rudder and tiller fitted for display purposes only!
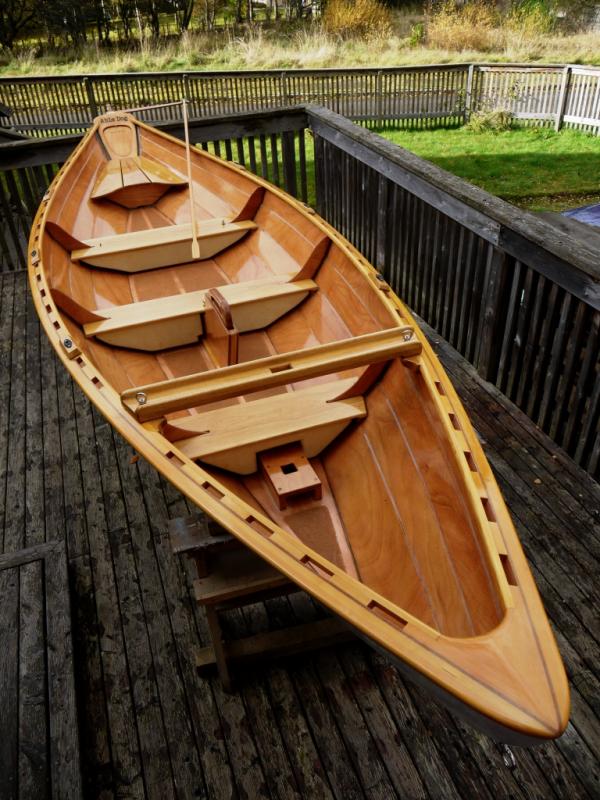
(Above) Very pleased with the overall finish!

(Above) The reverse view. The boat's name is a nod to my Dad who was a USAF flyer in Korea and Vietnam: Google will explain.
The built-in buoyancy underneath the seats worked out OK. It's extruded polystyrene insulation and can be got from some builders' merchants (it's hidden but - as per the design - there's some beneath the rear seat, too).
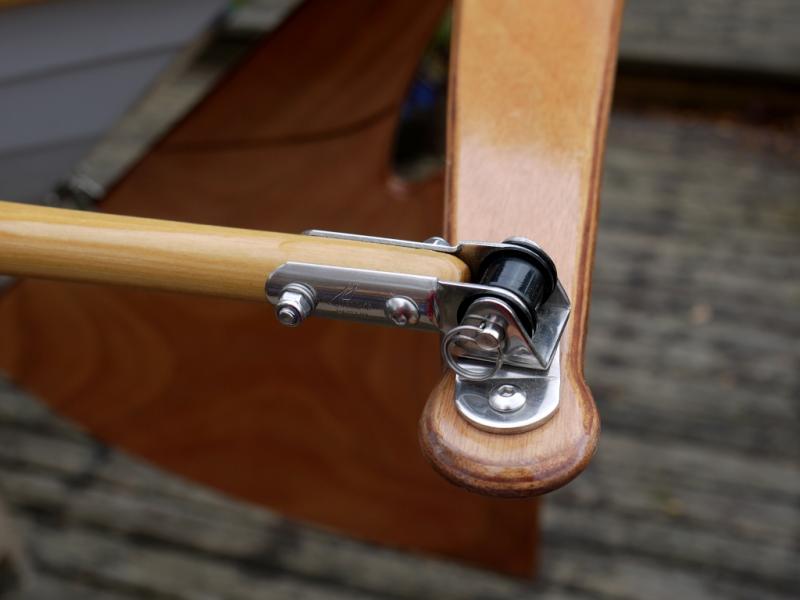
(Above) The tiller extension swivel, or universal joint. The manual suggests using a bit of knotted cord and a cleat to hold the tiller extension to the tiller arm. Have to say I was a bit uncertain of how much slack would develop in that sort of rig so decided on this set up instead. Not cheap though!
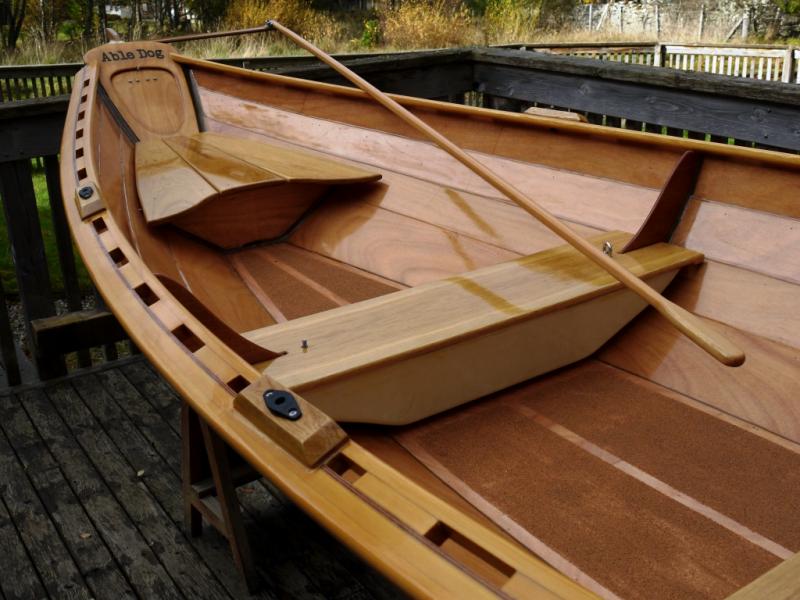
(Above) The oarlocks are an Australian brand. They're from a small independent designer/manufacturer called Gaco Oarlocks. I researched oarlocks (aka rowlocks) quite carefully since I wanted relatively quiet and robust units. The Gaco ones have been well reviewed in the American boating world so thought I'd give them a go. The black inserts are visible in the photo.
Anti-slip finish worked out OK though if I were to do it again I'd use half as much of the crushed walnuts.
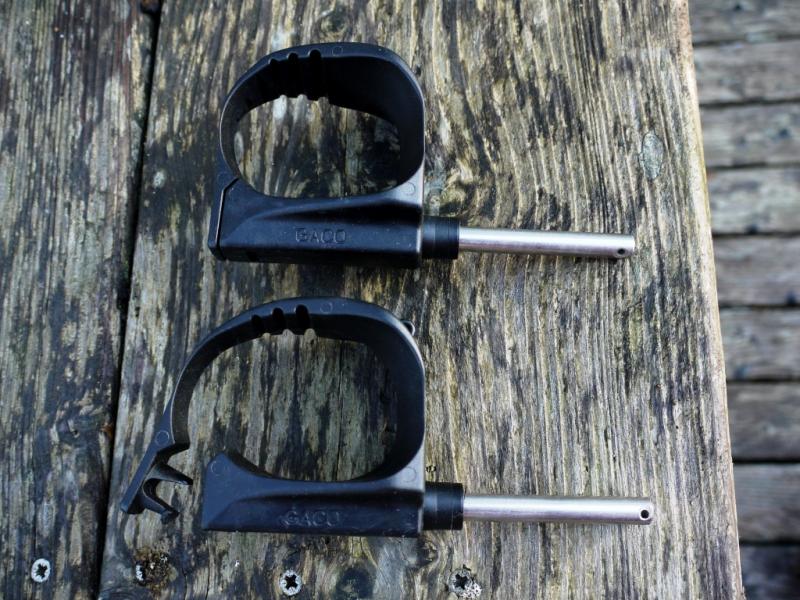
(Above) The oarlocks. They're designed to clip onto the oars and remain on but can be removed by unlocking the clip mechanism. Made of high density nylon they have a very good quality feel. The rod is stainless steel and a good fit into the gunwhale-mounted insert. A circlip can be fitted to the bottom of the stainless rod to ensure the oars don't disappear overboard.
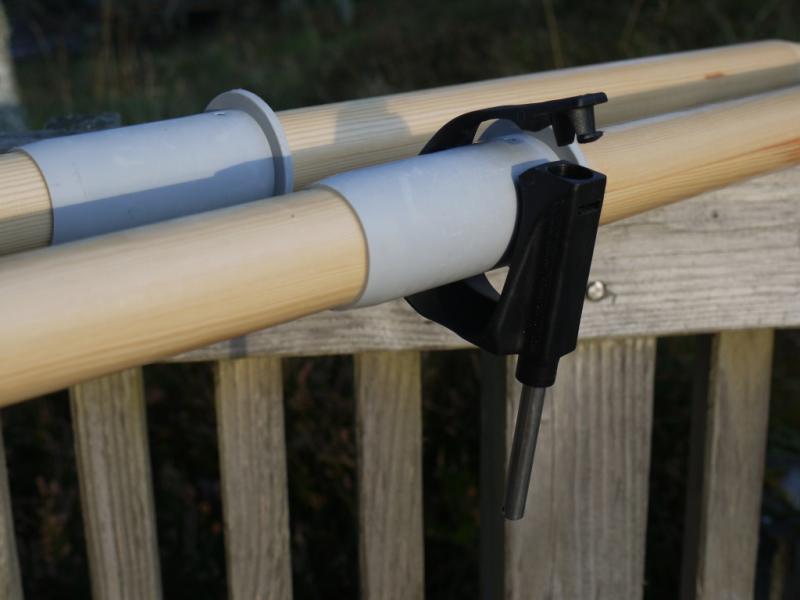
(Above) Fits on the oar thus.....
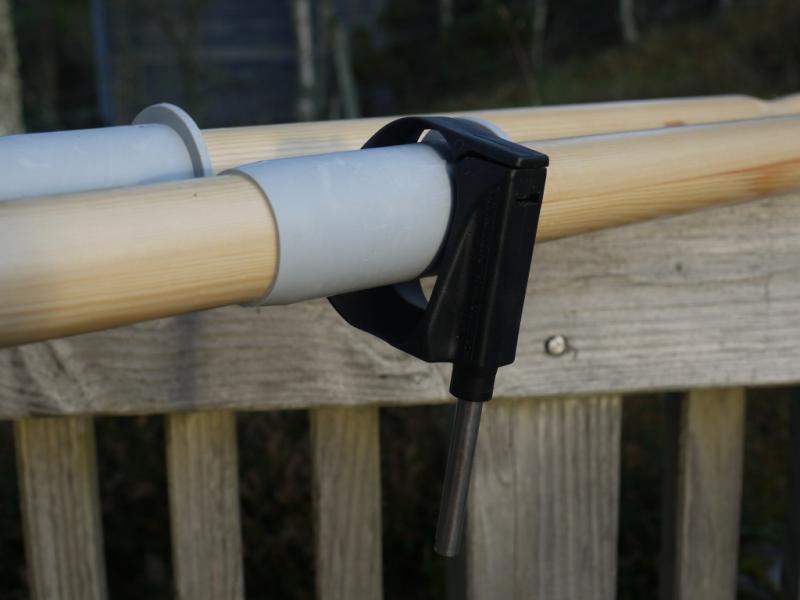
(Above) .....and locks down very simply.
The guy who designed, developed and manufactures the Gaco oarlock is a long distance rower himself and he assured me that his product outperforms all other traditional oarlocks in any metric you care to name! We shall see. He's definitely a bit of a maverick: he disclosed in an email message to me that he was planning on rowing singlehanded across the Bass Strait between Australia and Tasmania - the home of sudden wild storms & a well known graveyard of many a bigger sailing vessel. Rather him than me!
When I bought the oarlocks they had to come direct from Australia since he didn't at the time have a UK distributor. (The air mail cost for such a small order was nearly as much as the oarlocks themselves).
Perhaps Fyne Boats might be interested in stocking some?
Just about to finish off the hollow rowing sculls and will post about those in the next instalment.
Last edited by CrimeaRiver (5 Aug 2023 10:29 am)
Recidivist wooden surfboard builder!
Built a Kaholo 12' 6" SUP from plans
Built a NE Dory from plans
Offline
#8 5 Nov 2017 11:07 am
- Yambo
- Member
- Registered: 17 Jul 2014
- Posts: 36
Re: North Easter dory build from plans.
Boat looks fantastic, well done!
I look forward to seeing her on the water.
Offline
#9 13 Dec 2017 11:12 pm
- CrimeaRiver
- Member
- Registered: 3 Oct 2016
- Posts: 18
Re: North Easter dory build from plans.
Slow progress on the sculling oars but am nearly there!
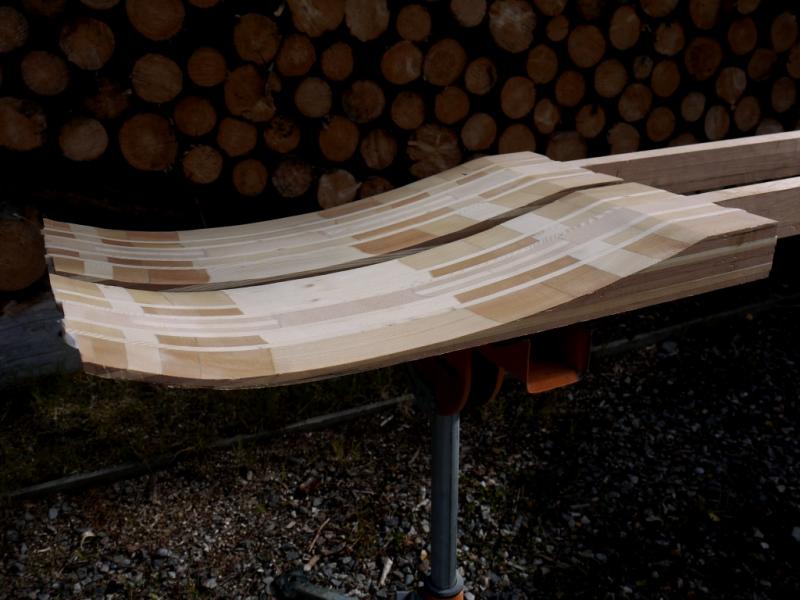
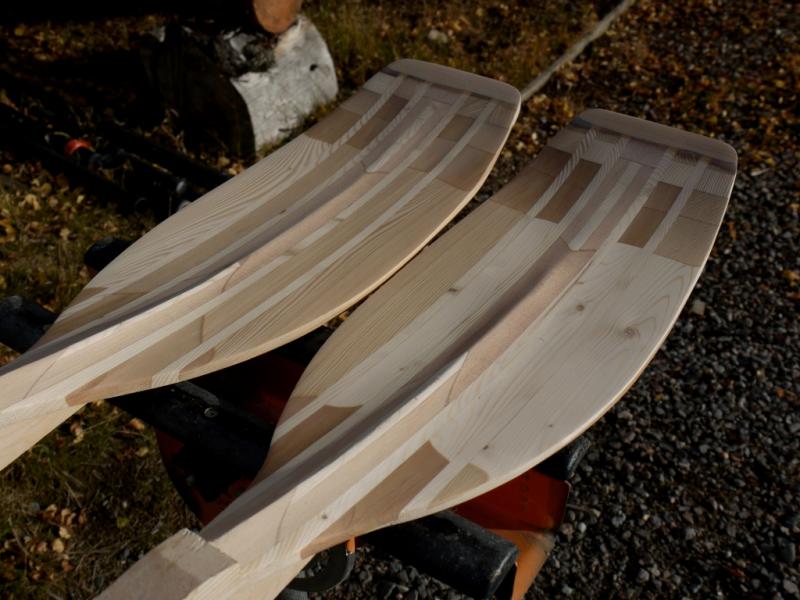
The ugly-duckling oar blanks steadily morphed into beautiful Swanns (sic): below
(Above) A more graceful and curvacious blade shape now but the hollow shafts here still rectangular in section and requiring careful stock removal.
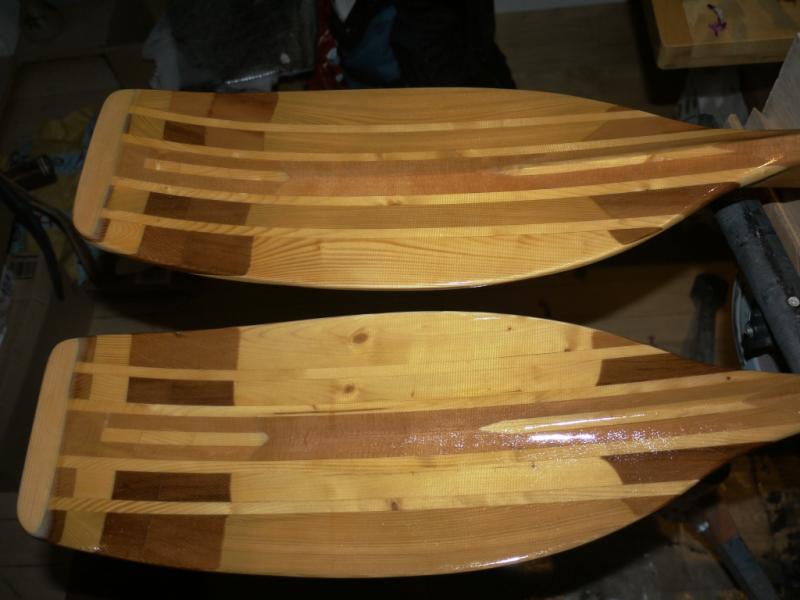
(Above) There's also a lot of careful carving necessary to achieve the desired shape, followed by some gentle sanding with fine abrasives. The harlequin blade design turned out OK, I think.
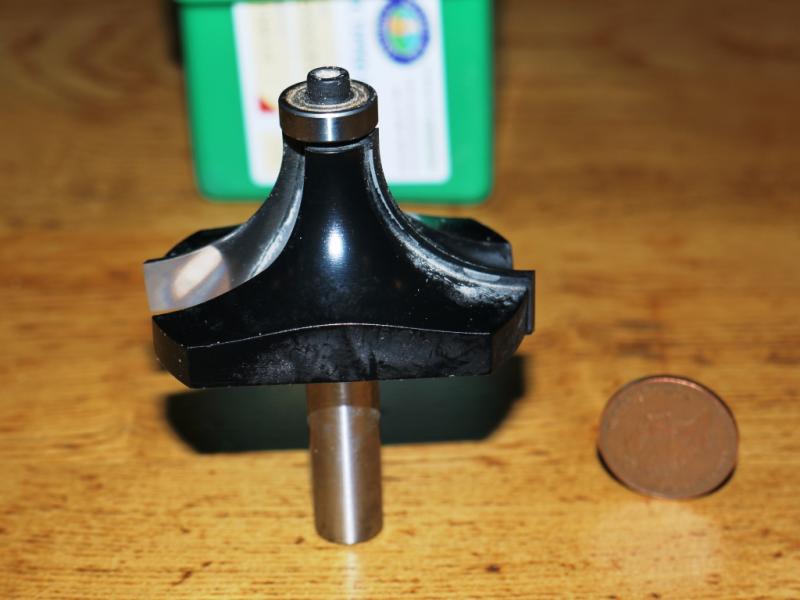
(Above) The shafts required the use of this beast to reduce the boxy section down into a graceful shaft. That's a 25.4mm radius ovolo/round over bit (with bearing) next to a 2 pence piece. 'Brave' pills would have been useful even with the 65mm diameter bit spinning at a modest 12k revs!

(Above) The blades get a layer of fibre glass and epoxy resin on each side to beef up their strength and durabilty. It's just possible to spot the weave of the fibreglass cloth in the photo. Each oar is just shy of 3m long & the overall weight of each is 5lbs.
Final sanding and varnishing will be sometime soon, after which they'll sit in the workshop until May when I hope my distinguished rowing relative will come and shake down the drop-in rowing unit. sculling oars and boat (Yes, I'm looking at you, Polly!)
Last edited by CrimeaRiver (4 Jan 2018 8:20 pm)
Recidivist wooden surfboard builder!
Built a Kaholo 12' 6" SUP from plans
Built a NE Dory from plans
Offline
#10 31 May 2019 9:44 am
- Nilesh579
- New Member
- Registered: 31 May 2019
- Posts: 1
Re: North Easter dory build from plans.
Those were great pictures!!
Offline