A forum for discussing wooden boats and boat building
You are not logged in.
- Topics: Active | Unanswered
#1 6 Dec 2011 7:22 pm
- Jackanory
- Member
- Registered: 6 Dec 2011
- Posts: 13
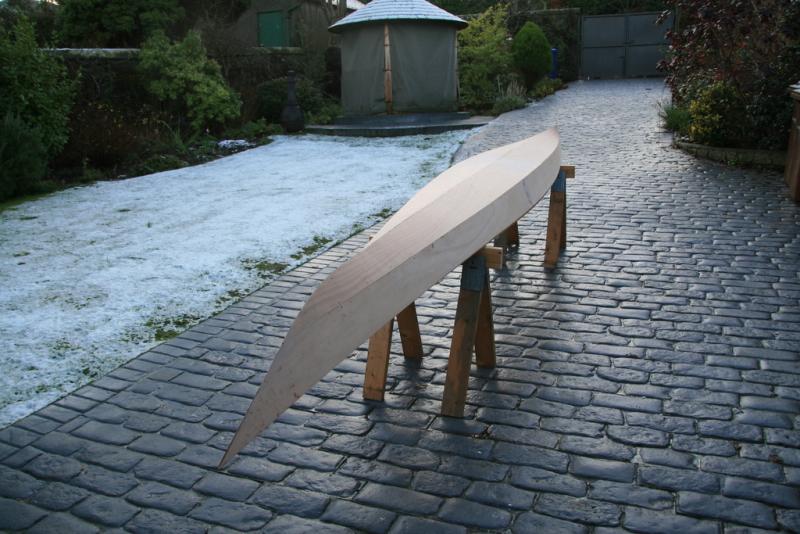
Shearwater Hybrid 17 Work in progress
A new builder on a steep learning curve. I started about a month ago and have been very grateful for the e-mail and telephone advice from Fyne Boats. Having never been in a kayak I'm starting back to front. A few photographs taken today.
Some of the things I have learnt so far, though, from what I have read on this forum I risk teaching others to suck eggs;
Sand paper glued to an icing knife makes a wonderful flexible file for improving bevels after loose wiring
You can make your own fillable mastic tubes from plastic pipe, a cut down plastic funnel and duct tape for tidier filleting
You can't have too many clamps to fix the shear clamp
and that trick, with a soldering iron to help remove any wire that has been epoxied, really works.
So does the hairdryer on a join you want to redo because it's less than perfect
What amazing and forgiving stuff epoxy is.
It's snow bad so far!
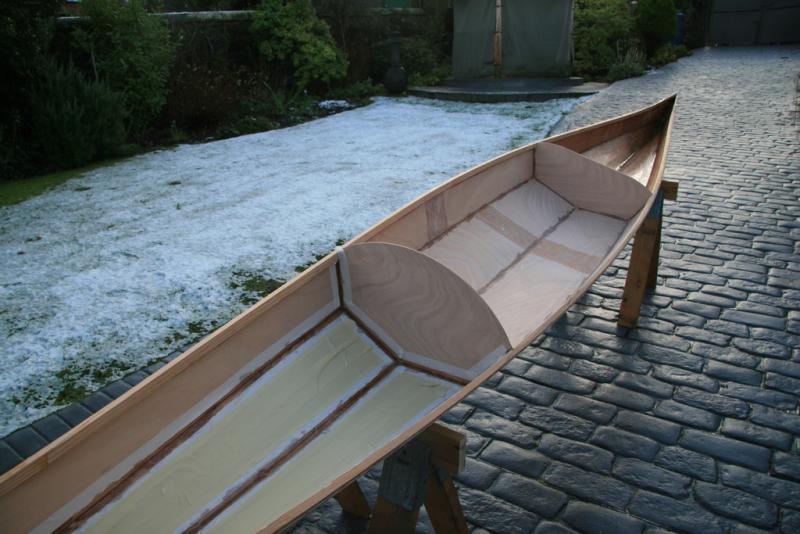
One compartment at a time! Rather overdoing the masking tape. But 10 minutes taping avoids all that sanding and there will be plenty of that to do later!
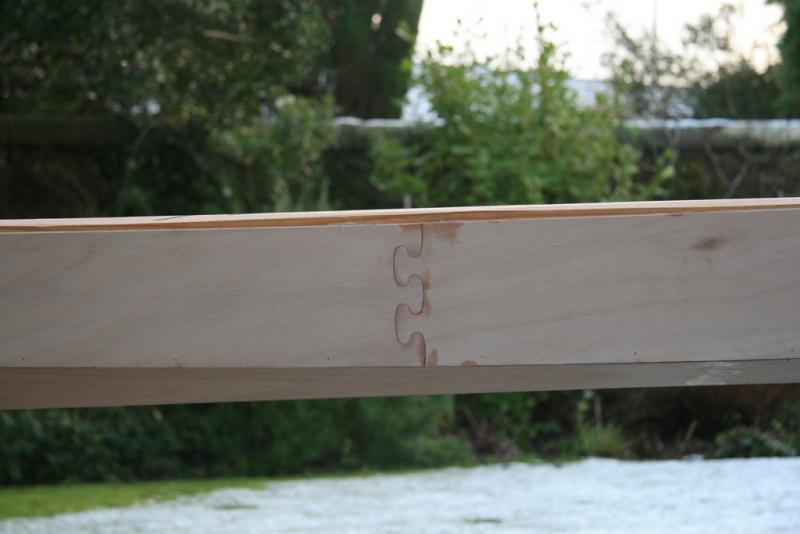
One of those pesky puzzle joints
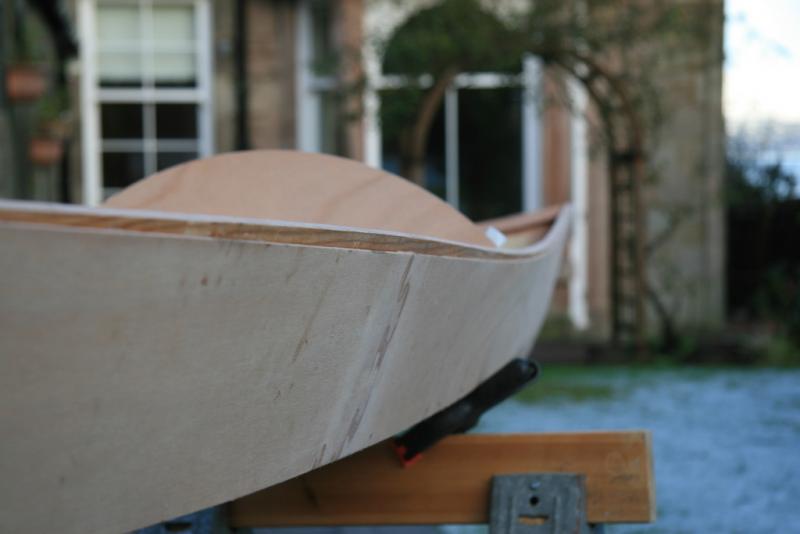
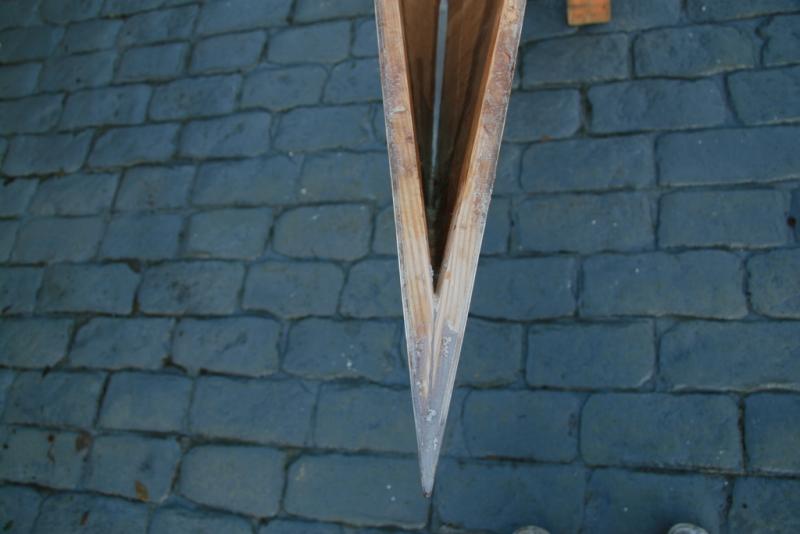
Varying "Show" of shear clamp
Offline
#2 6 Dec 2011 9:24 pm
- beaker
- Member
- Registered: 9 Oct 2011
- Posts: 81
Re: Shearwater Hybrid 17 Work in progress
ooooh, looks very nice. I'll be watching with interest, as I'v got a Shearwater Hybrid sport to do (when I've finished doing the kitchen floor).
How did the shearclamps lay down over the tape over the puzzle joints? I presume you just load up a little extra epoxy over it?
Offline
#3 7 Dec 2011 12:27 am
- Jackanory
- Member
- Registered: 6 Dec 2011
- Posts: 13
Re: Shearwater Hybrid 17 Work in progress
I just ignored them. I guess a bit more was squeezed out on top of the tape.
Offline
#4 7 Dec 2011 8:15 am
- Richard
- Member
- From: East Sussex
- Registered: 7 Jun 2011
- Posts: 75
Re: Shearwater Hybrid 17 Work in progress
It is great to have photographic proof that a boat can be built in the snow and a good looking one as well. well done.
Your point about the masking tape is worth repeating -sanding is no fun and I think it should be in the kit. But don't forget to remove the tape within an hour of making the fillets otherwise it is impossible to get off. I write from experience!
Canoe & Kayak Owner
Offline
#5 7 Dec 2011 6:27 pm
- Jackanory
- Member
- Registered: 6 Dec 2011
- Posts: 13
Re: Shearwater Hybrid 17 Work in progress
Good advice. I learnt the hard way too!
As others have said provided you keep things warmed up local to the bit you are working on the epoxy seems to cure in spite of the inclement weather. I have an electric heater below the kayak and a couple of work lights above. And no I'm not working outside!
Offline
#6 11 May 2014 2:32 pm
- Jackanory
- Member
- Registered: 6 Dec 2011
- Posts: 13
Re: Shearwater Hybrid 17 Work in progress
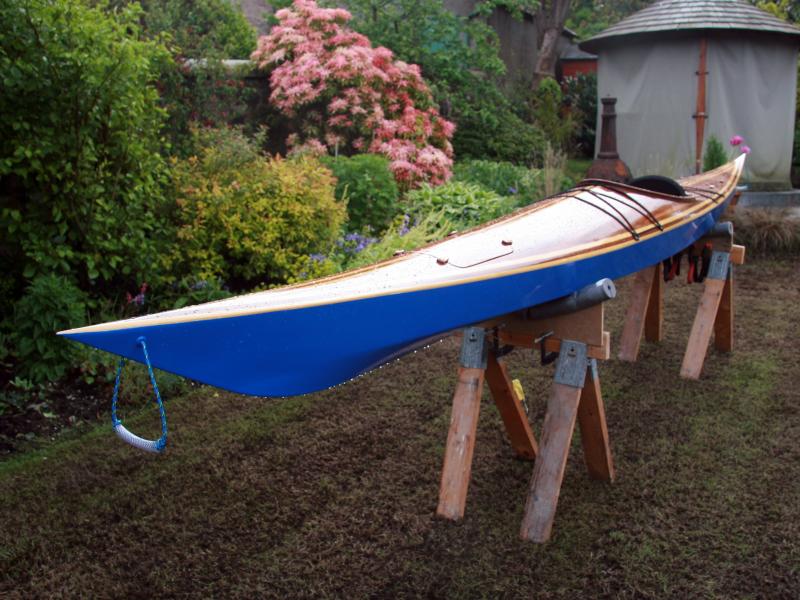
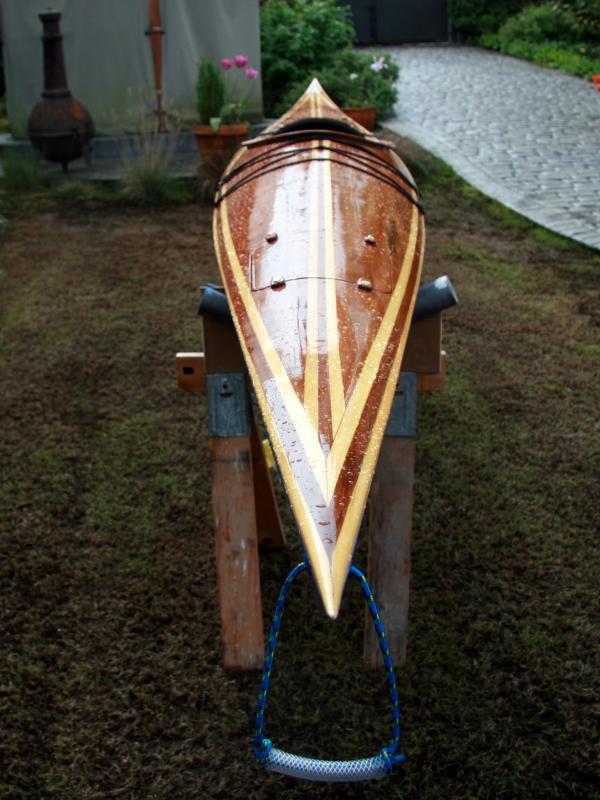
Just finished at long last. 21/2 years! Life gets in the way. Here she is after her maiden trip, my first build and my first trip in a kayak. It took me three duckings to manage to sit in but once achieved she floated and away I went. A great day! I have enjoyed the build so much I am wondering what to do next. A tender I think for my other boat. I hope I have learned enough to complete a bit quicker next time! I am posting to encourage others who may have an unfinished gem gathering dust in the garage.
Offline
#7 11 May 2014 2:36 pm
- Jackanory
- Member
- Registered: 6 Dec 2011
- Posts: 13
Re: Shearwater Hybrid 17 Work in progress
Offline
#8 11 May 2014 9:31 pm
- beaker
- Member
- Registered: 9 Oct 2011
- Posts: 81
Re: Shearwater Hybrid 17 Work in progress
Congratulations on the finish. Lovely work, you'll have lots of fun to come paddling it.
Offline
#9 16 Jul 2014 5:11 pm
- Jackanory
- Member
- Registered: 6 Dec 2011
- Posts: 13
Re: Shearwater Hybrid 17 Work in progress
I am enjoying learning to paddle, a new skill. The Shearwater is much admired at the local boat club where all the other kayaks are plastic or GRP. Almost without exception the complimentary comments are followed by a "but there are no deck lines" This is seen as a negative safety feature for which I have no answer except that I don't want to drill any more holes in the hull. I am thinking about leading a line round the deck through the carrying eyes fore and aft using the existing bungee cord loops which are already secured with through deck bolts. What do others think?
Offline
#10 16 Jul 2014 6:25 pm
- Rainbow
- Member
- From: East Devon
- Registered: 29 Sep 2012
- Posts: 75
Re: Shearwater Hybrid 17 Work in progress
On my Guillemot build, I wish I had thought about the deck rigging before joining the deck and hull. Now it is difficult to gain access to the narrow sections to attach bolts for webbing loops and make the holes watertight. I plan to do a similar thing to what you propose. A line through the carrying eyes and crossing back over the deck to the loops used for attaching the bungee cords. However I have drilled extra holes where I can have access to provide as much support for the rope as possible.
There is a discussion on the CLC website: http://www.clcboats.com/forum/clcforum/ … 16568.html
Offline
#11 17 Jul 2014 10:05 am
- Richard
- Member
- From: East Sussex
- Registered: 7 Jun 2011
- Posts: 75
Re: Shearwater Hybrid 17 Work in progress
Here is another trick that might be worth pursuing.
Drill the hole needed for the fitting. Pass a long length of wire through the hole and push it until it reaches the hatch hole. Thread a captive nut on the wire with a washer behind it. Pull the wire back through the hole until the nut is attached under the hole. Cut the wire and insert a bolt.
It would be a good idea to use epoxy to cover the bare wood and it may be possible to get a blob of thick epoxy on the nut before pulling it up to the underside of the deck.
See here: captive nuts
Canoe & Kayak Owner
Offline
#12 2 Apr 2017 6:36 pm
- Jackanory
- Member
- Registered: 6 Dec 2011
- Posts: 13
Re: Shearwater Hybrid 17 Work in progress
I have previously discussed adding a perimeter safety line to my Shearwater. I have finally managed with 16 maroske tunnels. It was possible but not particularly easy after completing the build with the kayak slung upside down and the holes all placed within reach of the hatches and cockpit. Ideally I should have liked one at each end but I got around this using a constriction knot which has the double advantage of keeping the Bows Bumpers from falling off. I ordered the kit from Fyne Boats (there is product description under accessories) but instead of using the plastic tube and rope provided I used glue sticks coated with releasing wax. Some were difficult to remove finally being achieved by inserting screws into the flush cut end of the glue sticks and pulling hard with mole grips. The reason why I did not use rope and plastic tubing was that only small amounts are provided and I wanted to make the fittings all at the same time. Of the 16 a couple had small leaks which have been sorted with a smear of thickened epoxy. Ideally I would have made the fittings during the build when the deck was off the hull. If I had to do them again I would make sure that there was a bit more clearance of the material above the deck. Some were a little short and it was fiddly to add epoxy to the edges of the holes. The boats had been varnished with two part Perfection plus and I did not make a particular effort to sand back to raw epoxy.
Last edited by Jackanory (2 Apr 2017 6:49 pm)
Offline
#13 2 Apr 2017 7:03 pm
- Jackanory
- Member
- Registered: 6 Dec 2011
- Posts: 13
Re: Shearwater Hybrid 17 Work in progress
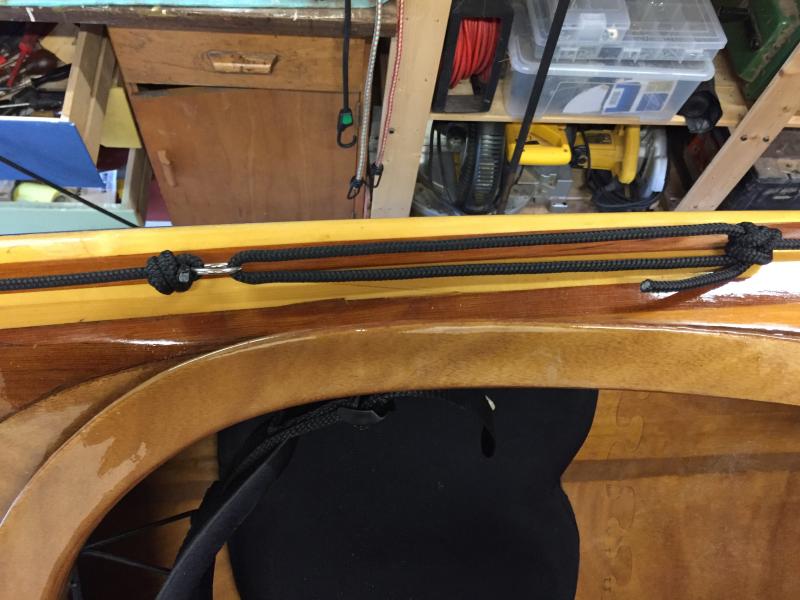
Peripheral line tensioned using Midshipmans Hitch aka Tautline Hitch

Bungee array

Example of one of the Maroske Fittings
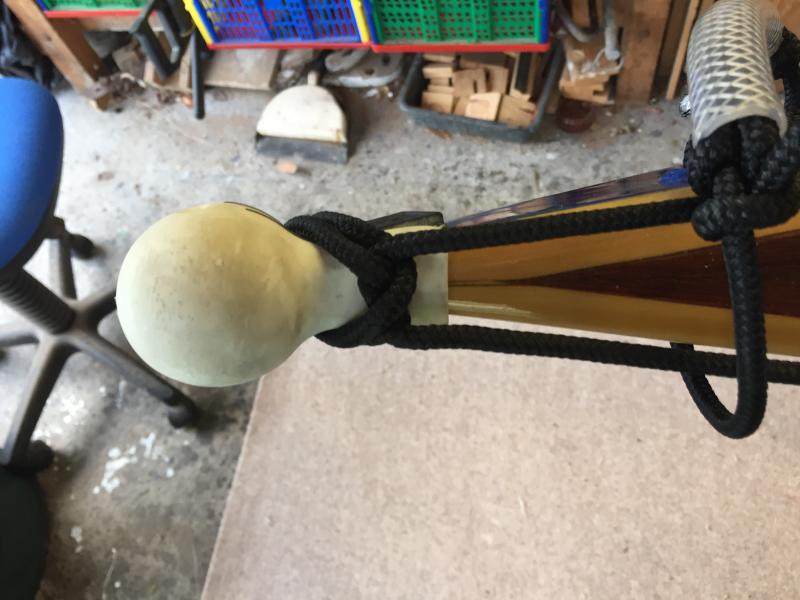
Constrictor Knot and Bow Bumper
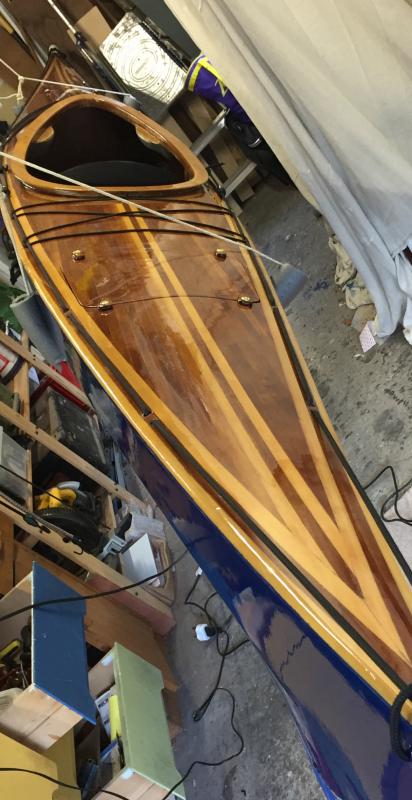
General view of rear deck
Offline