You are not logged in.
- Topics: Active | Unanswered
#26 4 Jan 2021 9:57 pm
- Simpsonboater
- Member
- Registered: 26 Jun 2020
- Posts: 29
Re: Building a 12' Wood Duck Hybrid
Brave of you and well done! I wished if gone for the pre-coat of epoxy before the glass to stop the outgassing on the interior of my wherry.
Will be a great looking craft once complete. Lots of sanding to come though!
Offline
#27 6 Jan 2021 9:35 am
- Curlew
- Member
- From: nr Skipton, N Yorks
- Registered: 8 May 2020
- Posts: 51
Re: Building a 12' Wood Duck Hybrid
Good progress for sure. It has hardly risen above freezing here for a good week or so so it must have taken some effort to get everything warm for a good while before starting.
A few small bubbles and a bit of outgassing made my mind up to paint the hull too-although I must admit I think I prefer the appearance of a painted hull with a strip deck anyway. If you have some bubbles to sand off and patch don't be too alarmed, it is easy to do. Even after thorough final sanding you'll probably have the odd irregularity but since you are painting the hull you will use a filler and the fairly high build primer. My final result was very smooth indeed.
It is good to have done your first big glass stage. You'll get better at it!
Bruce
Offline
#28 13 Jan 2021 3:52 pm
- teejay
- Member
- Registered: 26 Oct 2020
- Posts: 66
Re: Building a 12' Wood Duck Hybrid
Thanks for the encouragement!
The filling of the bubbles was fairly straightforward - and - having decided to paint the hull I also went for an extra layer of sheeting on the keel line to protect that a bit more as I'll be using it on some pretty rough beaches.
Now - I've got a lot of sanding to do - however it's a very warming activity in these cold days - so that's a plus. In truth I had hoped to be a bit farther on by now but with the lockdown extending ad infinitum why not the build too?
Tim
Offline
#29 16 Jan 2021 6:10 pm
- teejay
- Member
- Registered: 26 Oct 2020
- Posts: 66
Re: Building a 12' Wood Duck Hybrid
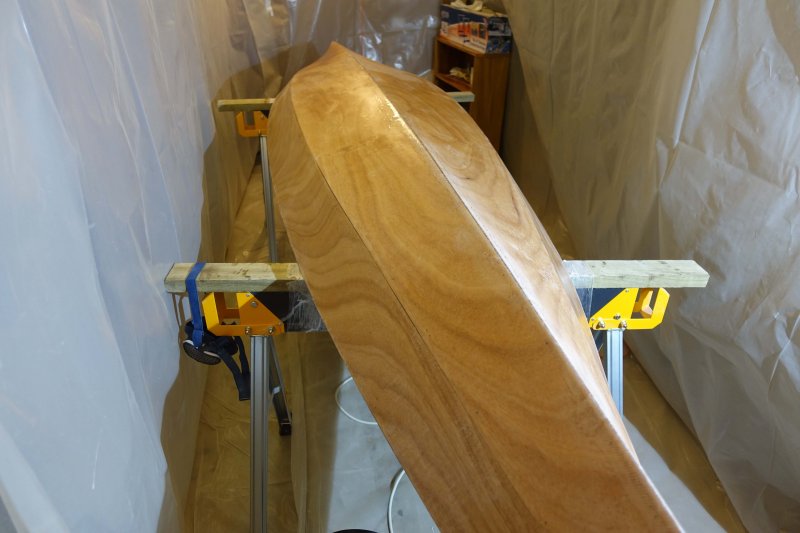
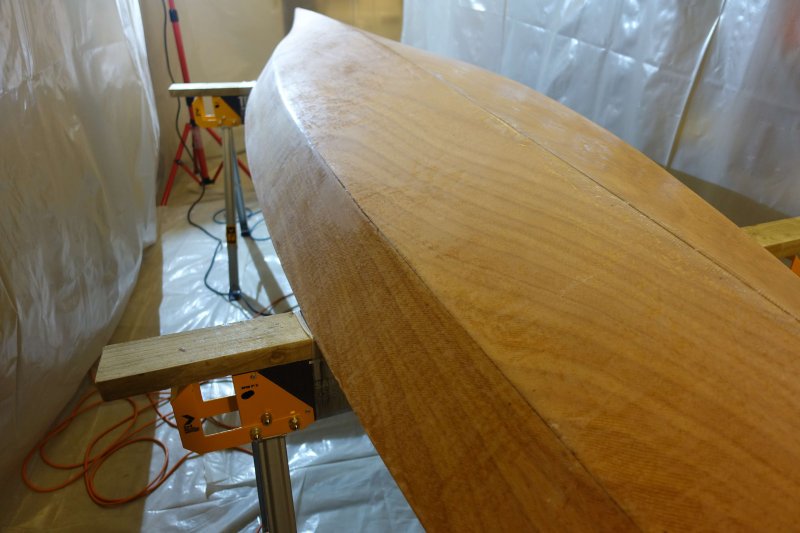
A few days of sanding later and I'm a bit happier - another coat of epoxy is required to fill in the weave of the sheet especially on the side panels but overall the hull is a lot smoother. The random orbital sander I purchased has been a real help and the dust mask a necessity - and an old hoover cast out of house and home worth its weight in gold.
Now to wait for a warmer day for a hopefully final coat of epoxy - and remember not to think it's varnish - it's a lot thicker and it doesn't flow into itself - so I need to work at keeping it even and smooth.
Offline
#30 18 Jan 2021 11:01 am
- Curlew
- Member
- From: nr Skipton, N Yorks
- Registered: 8 May 2020
- Posts: 51
Re: Building a 12' Wood Duck Hybrid
Looking good. It is generally better to have a couple of nice thin (ie warm) coats of epoxy rather than an uneven one. You wil now when the weave has gone of course. Thick epoxy also adds significant weight if that is an issue that worries you. If you still intend to paint it remember the primer does also have a bit of build and will slightly smooth the surface.
That nicely sanded even grey haze takes a while but you will get there in the end.
Incidentally your ply panels have a nice grain pattern. Mine were rather less interesting (another reason for painting).
Offline
#31 18 Jan 2021 4:01 pm
- teejay
- Member
- Registered: 26 Oct 2020
- Posts: 66
Re: Building a 12' Wood Duck Hybrid
Thanks Bruce
I'll have another close look at things before painting - the grain is impressive on the panels so it would be nice to be able to varnish them - or keep them partially varnished - there's time to consider options as lots of work to do before then.
Tim
Offline
#32 30 Jan 2021 4:30 pm
- teejay
- Member
- Registered: 26 Oct 2020
- Posts: 66
Re: Building a 12' Wood Duck Hybrid
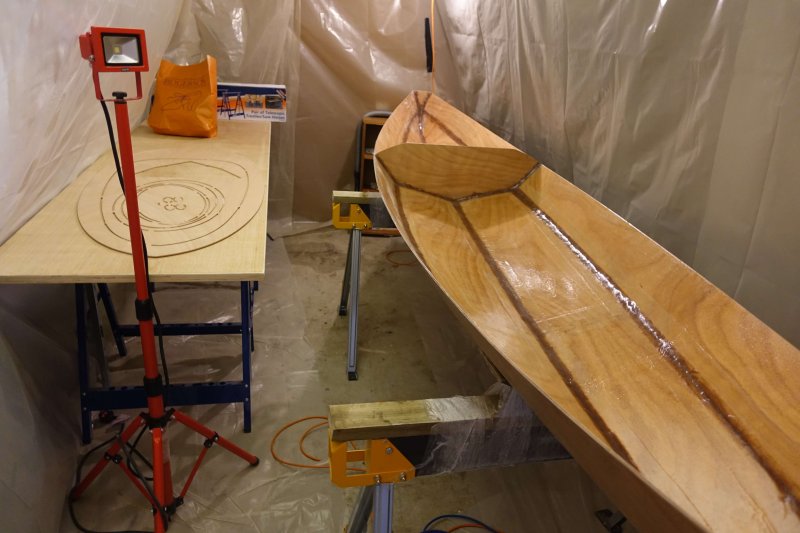
I've decided to leave the finishing off the hull until the weather shows more promising signs of warming up.
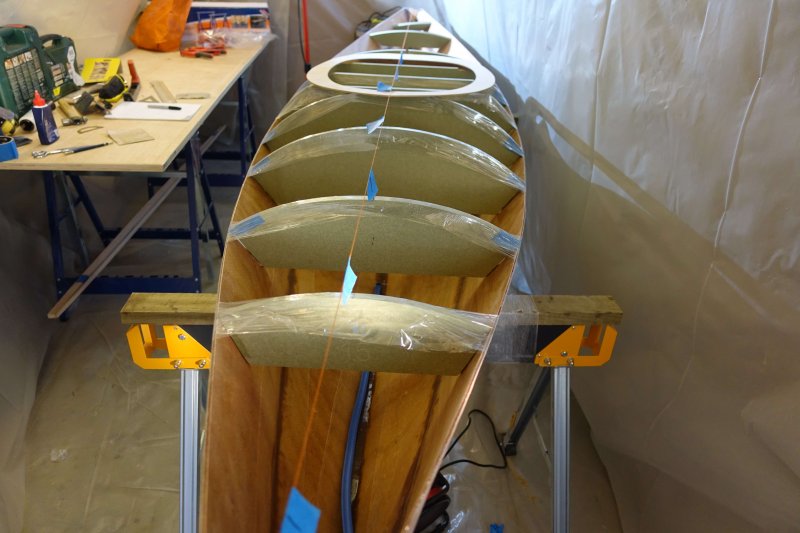
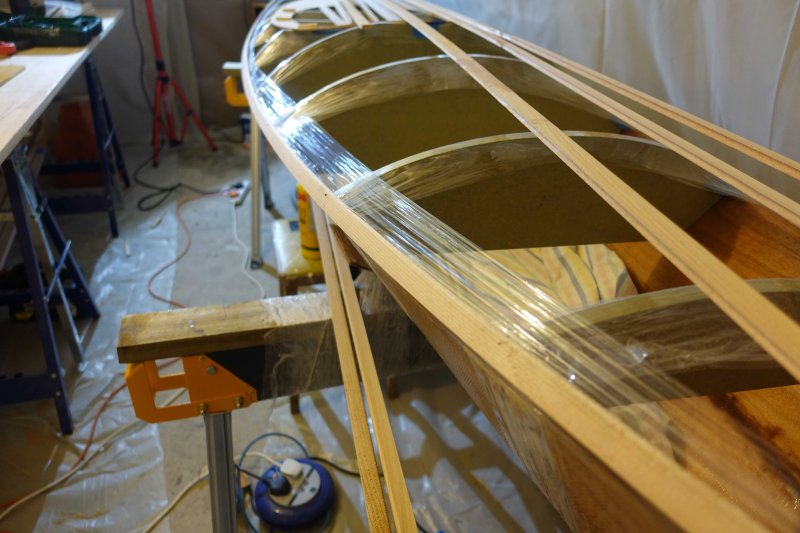
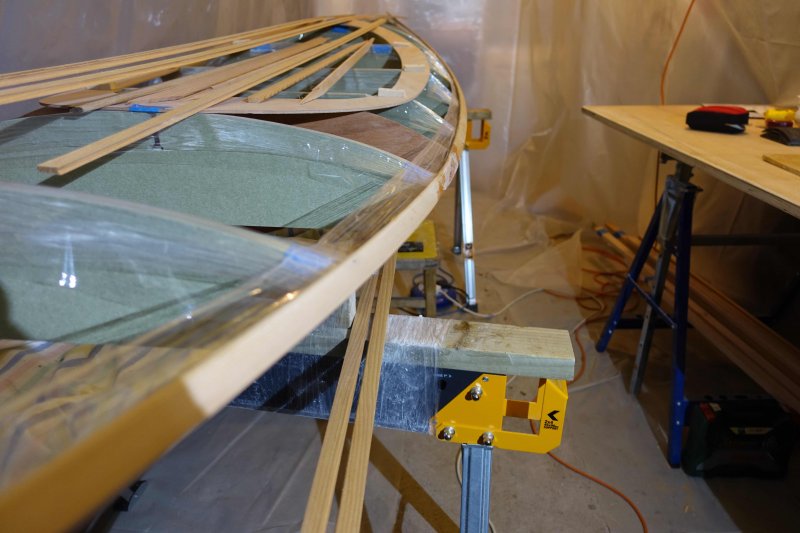
It's been fun to have a change of activity but fitting the deck forms has not been as straightforward as a first reading of the manual suggests. There's been a lot of careful measuring and adjustment but I seem to be making okay progress and using masking tape and/or cling film tape does help to hold the forms in place. It took a bit of time and reference to other build logs to work out the front of the apron rests on the form at 4.5 feet - anyway the build is definitely keeping me going.
Offline
#33 8 Feb 2021 5:31 pm
- teejay
- Member
- Registered: 26 Oct 2020
- Posts: 66
Re: Building a 12' Wood Duck Hybrid
I thought I had got to the stage where I was ready to start attaching the strips onto the forms.
Sadly not - my hope that I could fashion a joint between the 2 strips needed to run the whole length of the deck in situ was quickly dashed as the twist and curve required makes that a non-starter.
So back to the drawing board - and to making more space within the tent for making up the full-length strips.
Undoubtedly the build would be easier with more room and in warmer conditions - but the problem solving is part of the joy of it all (I think..)
Tim
Offline
#34 10 Feb 2021 8:35 am
- Curlew
- Member
- From: nr Skipton, N Yorks
- Registered: 8 May 2020
- Posts: 51
Re: Building a 12' Wood Duck Hybrid
Just think, it will be done just as the lakes thaw....
Are you joining the ends with PVA? Not too temp dependent. But you do need a long room!
I'm enjoying your updates.
Bruce
Offline
#35 20 Feb 2021 4:13 pm
- teejay
- Member
- Registered: 26 Oct 2020
- Posts: 66
Re: Building a 12' Wood Duck Hybrid
One step forwards - another back!
I've spent the week sorting out the scarf joints - today was my first chance to see if they worked. They're awkward to get neat - especially as my Japanese saw isn't the longest making the cuts a bit more difficult than they could be with a longer blade - but they work as detailed in the manual.
So - I managed to get a strip in place but then the forms started breaking away from the hull - I evidently don't/didn't have them attached firmly enough to the hull - so progress has yet again ground to a halt while I wait for the extra glue to cure so that the forms stay in place.
On a good note - the temperature is well up and it's making life a lot easier. I have this surreal dream of getting rid of the tent and opening the garage door - well not yet but more space and warmth would be very welcome.
Offline
#36 28 Feb 2021 5:30 pm
- teejay
- Member
- Registered: 26 Oct 2020
- Posts: 66
Re: Building a 12' Wood Duck Hybrid
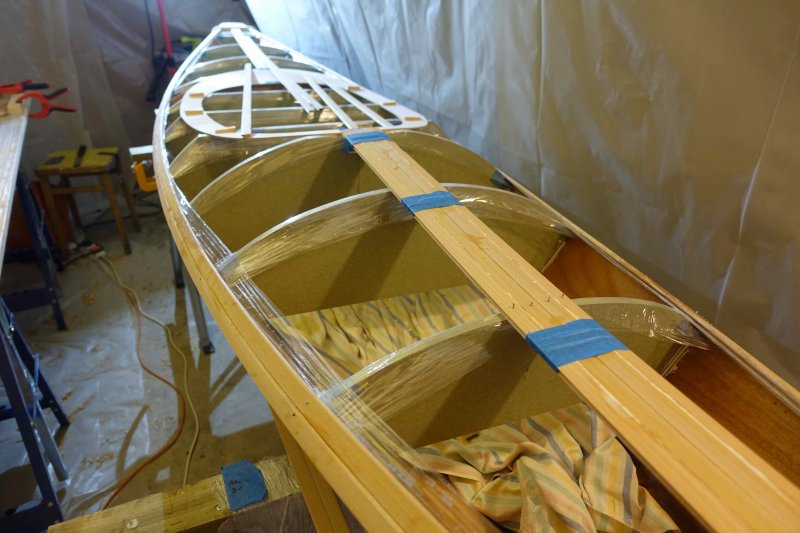
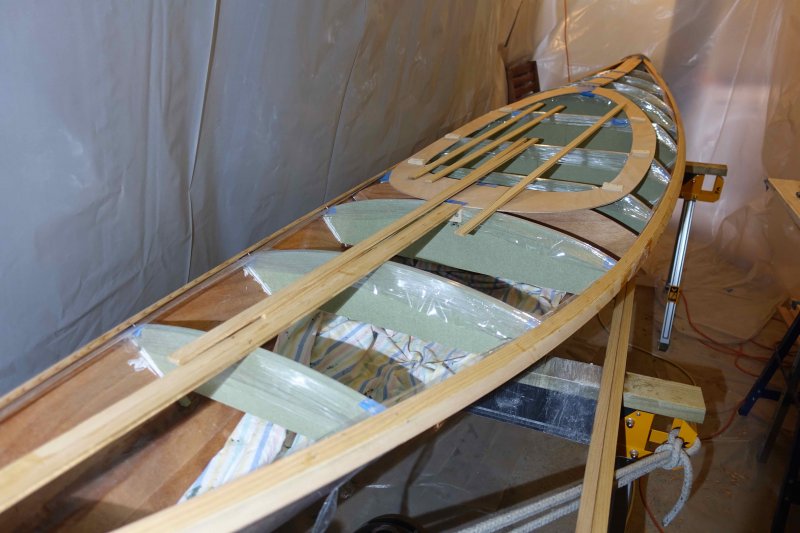
I've been making progress this last week - and dealing with lots of problem-solving and a fair bit of crossing fingers that it will all work out okay in the end. I can't help feeling my deck looks a lot rougher than others I see on the forum but it does seem to be coming together - if I'll be doing a lot of sanding once I've got the deck fixed in place another few stages along from where I am presently.
Apart from the concern about how it'll all turn out - partly due to this being all new to me - I am enjoying the decking - there's lots to work through and slotting another piece into place is very satisfying.
I'm getting through screeds of masking tape and using straps or rope to help with holding the strips in situ while the glue hardens. I also added a couple of scrap pieces of wood on the form on which the end of the apron rests to take the kingplank as I couldn't see how else I could hold it level/slightly proud of the apron as instructed.
Hopefully the weather will allow for continued progress...
Offline
#37 1 Mar 2021 6:42 am
- Curlew
- Member
- From: nr Skipton, N Yorks
- Registered: 8 May 2020
- Posts: 51
Re: Building a 12' Wood Duck Hybrid
The deck will have uneven bits, not least because the strips are not perfectly machined. You will actually plane the deck surface smooth before sanding, which is less scary than it sounds provided your plane is very sharp, and is a very satisfying job
Have you been looking at the Jason Eke videos of him making one of these? I will post a link if you need.They are very helpful.
It all looks good to me. I started my kit almost a year ago and the sun shone for months.Hope you get the same.
Offline
#38 1 Mar 2021 11:31 am
- teejay
- Member
- Registered: 26 Oct 2020
- Posts: 66
Re: Building a 12' Wood Duck Hybrid
Thanks Bruce
I've been watching Jason Eke's videos and they and all the advice and tips on the forum are really helpful - and are an integral part of taking my time - and enjoying the problem-solving
- although maybe I need to borrow Jason's guitar player to soothe me through the awkward bits!
Tim
Offline
#39 2 Mar 2021 6:32 am
- Curlew
- Member
- From: nr Skipton, N Yorks
- Registered: 8 May 2020
- Posts: 51
Re: Building a 12' Wood Duck Hybrid
Ha!
He is very calming, and does also make things look very easy.
Offline
#40 2 Mar 2021 10:21 am
- Jmac58
- Member
- Registered: 7 May 2020
- Posts: 77
Re: Building a 12' Wood Duck Hybrid
Hi Tim. jmac58 here (James!). Just been catching up on your blog. Your boat is looking good! I had much the same problems with the forms and getting the first few strips in place was a nightmare with all the twist and no sheer clamp. I made some clamps to hold each strip in place which helped. I don't think MDF is the best material for the forms (next time I would make my own using plywood) as it failed to hold the strips in place at the tight points. Bruce is right, when you finally rub down the deck it all evens out and will look great! My deck looked very rough too but came out OK. I have just bought Nick Shade's book on strip building a kayak as thinking of building another! Keep at it Tim and good luck. Best. J
Offline
#41 2 Mar 2021 4:45 pm
- teejay
- Member
- Registered: 26 Oct 2020
- Posts: 66
Re: Building a 12' Wood Duck Hybrid
Thanks James
One more full length strip completed this afternoon - one more to go - and I'll aim for a smooth fit this time - practise makes perfect! I'm learning lots as I go along - I can see why you want to build another - as, although there's occasional desperate moments when the strips seem to have evolved a life of their own, there's also a real joy when I see it starting to come together.
I'm using a lot of pins, as I'm really struggling for space and they're small and handy to keep the gyrating strips in place, and then lots of tape to ensure a tight fit between the strips. The MDF isn't great at holding the pins but - so far - good enough while I get the tape and clamps in place.
Good to hear there's lots of rubbing down and smoothing off to come - hopefully I'll be able to get outside to do a lot of that - the tent has been integral to the build but that would be a lot of dust to contend with ![]()
All the best
Tim
Offline
#42 7 Mar 2021 4:43 pm
- teejay
- Member
- Registered: 26 Oct 2020
- Posts: 66
Re: Building a 12' Wood Duck Hybrid
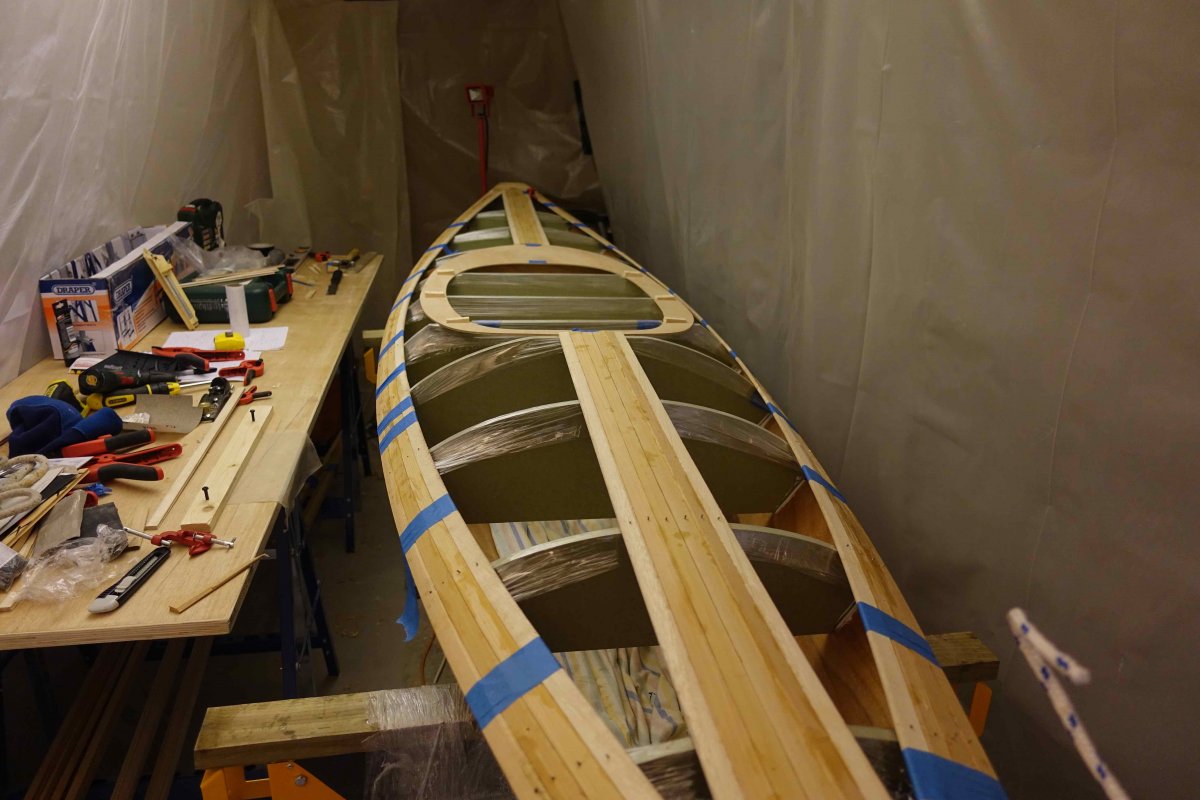
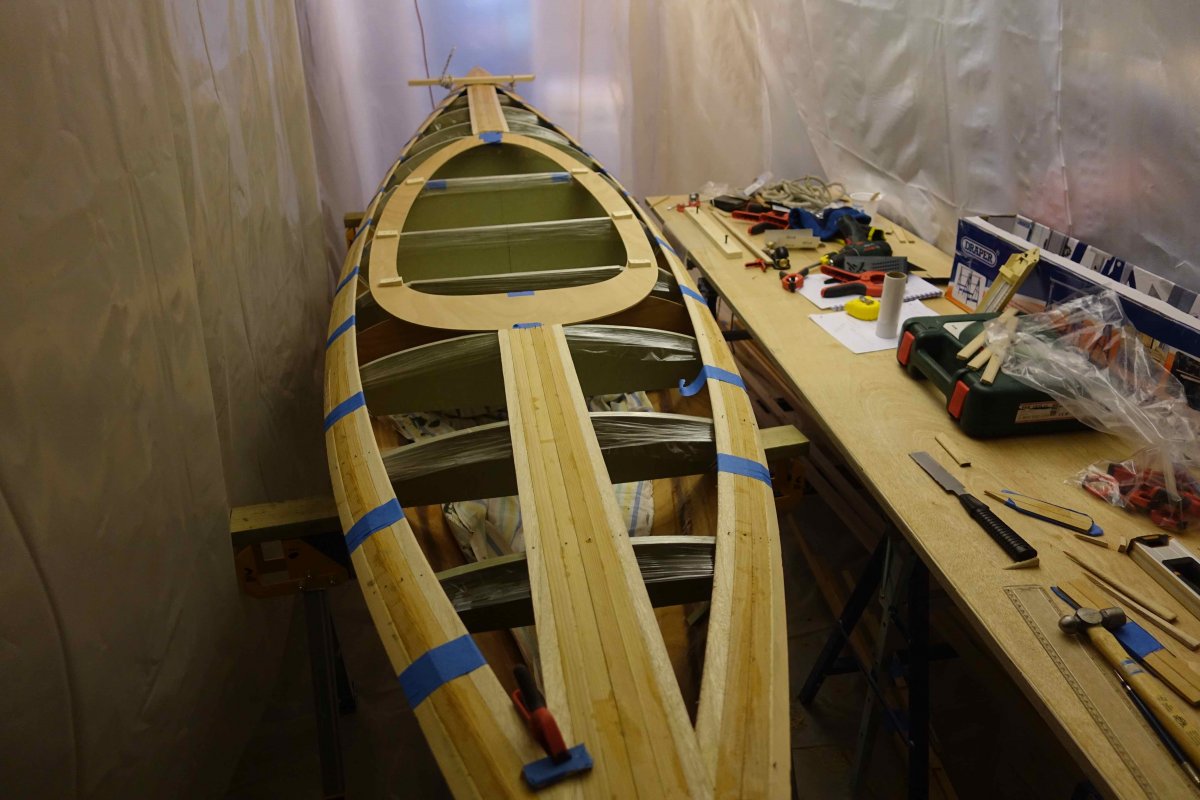
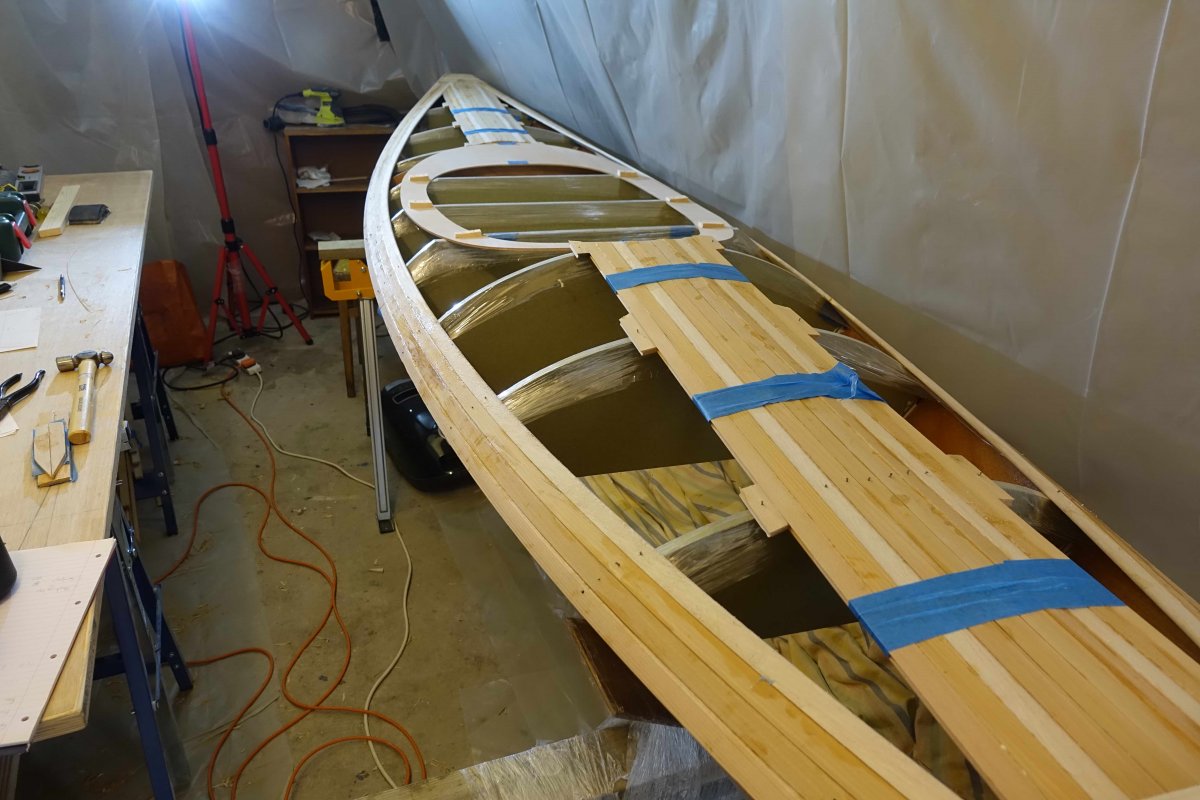
Steady progress this week - having got 4 strips along the sides I'm now gradually building up the deck and enjoying getting into a bit of a productive groove. I'm still concerned about some unevenness but will go with it and enjoy my boat's uniqueness!
I've not attached the apron to the strips so far - but this does need doing - I've been put off by the curve of the deck/strips and the fact that the apron isn't curved (vertically) - but I guess this all comes good with the smoothing/faring/sanding?
Offline
#43 18 Mar 2021 5:59 pm
- teejay
- Member
- Registered: 26 Oct 2020
- Posts: 66
Re: Building a 12' Wood Duck Hybrid
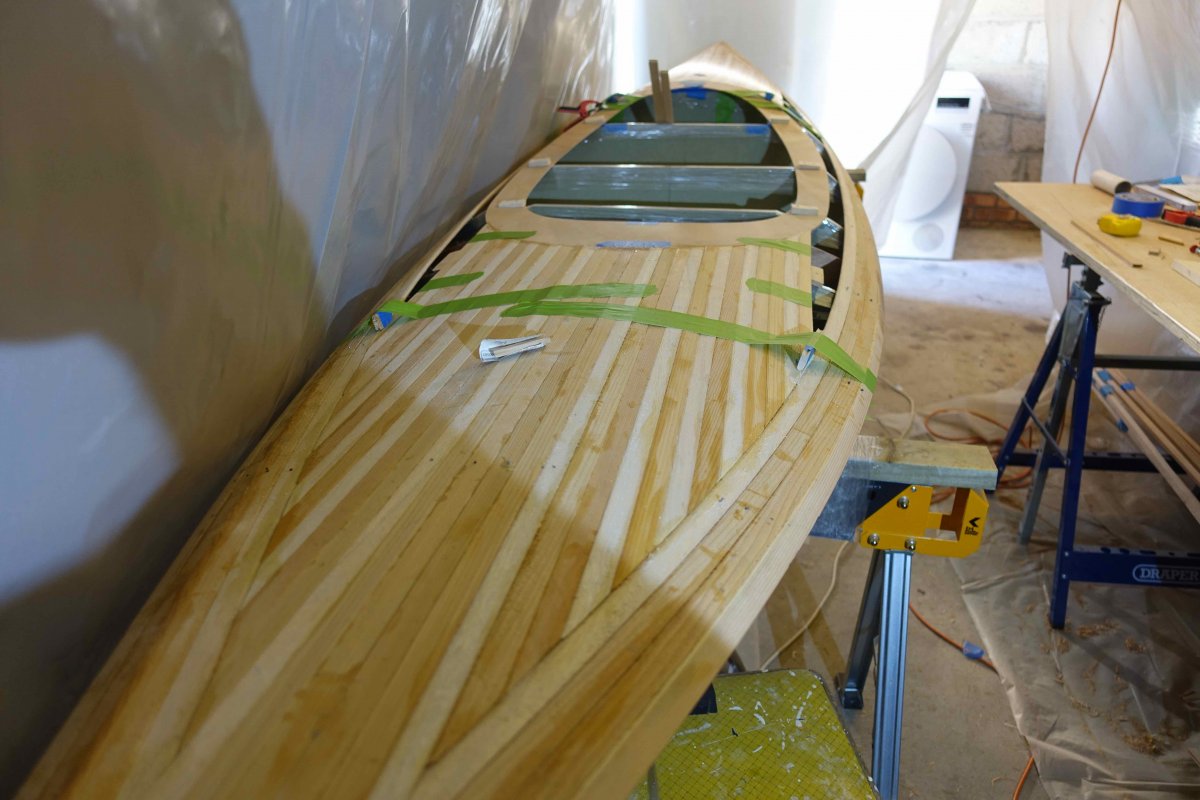
Making progress - and a couple of warm days has made me plan to dismantle the tent which will give me a lot more room - and allow me to separate the deck and the hull as I'll then be able to open the main garage door.
The strips are getting tighter and neater as I go along - the history of the build will be there for me to see and others to ignore!
The advice in the manual and on the videos is good for the strips but the apron is a pest and having read James' (JMac58) blog once again I'm glad I've secured it at this stage - but not easy. I've had to realign and raise the front third of the apron slightly as I was having to put too much twist into the strips at the front of the boat which was looking increasingly messy. However I'm also watching the rear of the apron as this will need to bind to the bulkhead. It would be good if the manual had a bit more specific advice on this aspect of the build but I do seem to be getting there - and the problem-solving is a big part of the fun.
The green masking tape marketed as Frogtape is fabby - really sticky and great for holding strips in place and helping to align them with the apron and with the other strips.
Tim
Offline
#44 31 Mar 2021 4:56 pm
- teejay
- Member
- Registered: 26 Oct 2020
- Posts: 66
Re: Building a 12' Wood Duck Hybrid
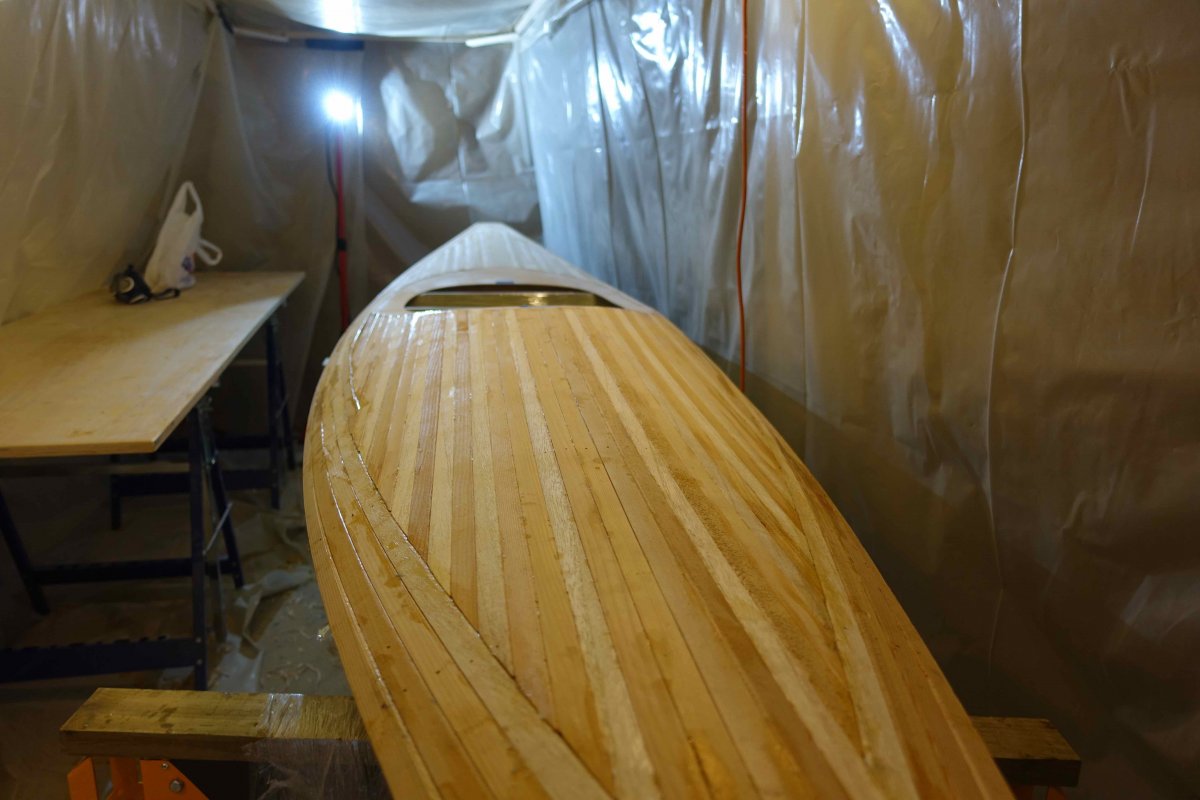
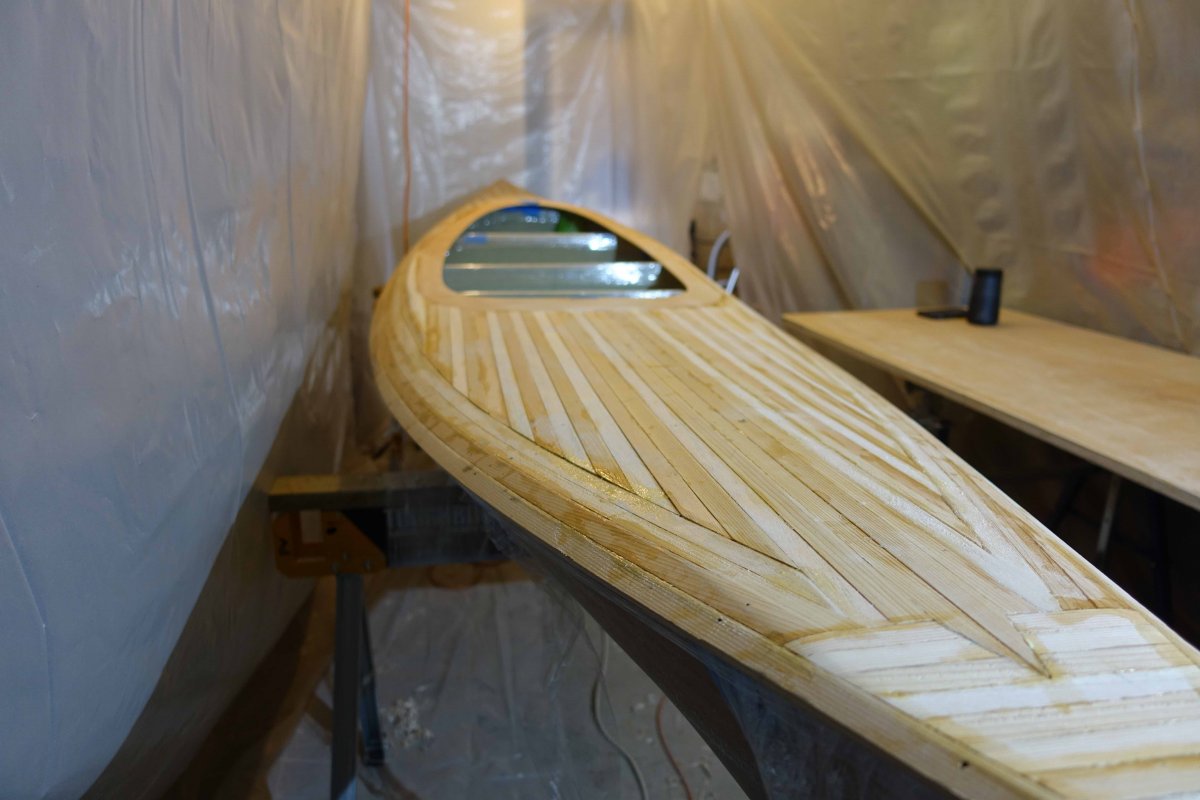
The deck is complete! The last few strips are tricky - to say the least and I had to remake my "whisky strip" when it cracked on placing it - so I felt somewhat fraught on the day I placed it but coming back to it and having done a little smoothing and sanding to make sure the deck is okay - I'm now feeling pleased - and relieved.
Today's task was pulling out the pins I had used to secure a few of the strips and getting ready to dismantle the "tent". The tent has been invaluable in helping to maintain a reasonable temperature for the glue/resin to set but I now need to be able to open the garage door to separate the deck and hull - so I hope the drop in temperature today is short-lived.
Offline
#45 1 Apr 2021 1:31 pm
- Curlew
- Member
- From: nr Skipton, N Yorks
- Registered: 8 May 2020
- Posts: 51
Re: Building a 12' Wood Duck Hybrid
Great stuff. I like the unusual end design.
There is a lot of sanding to do now so being outside will be a bonus for dust purposes if you have space to set up outside.
Bruce
Offline
#46 2 Apr 2021 4:35 pm
- teejay
- Member
- Registered: 26 Oct 2020
- Posts: 66
Re: Building a 12' Wood Duck Hybrid
Thanks Bruce
The end design evolved somewhat when I realised belatedly that a scarf joint significantly shortens the resulting strip(!) - leaving me with a strip that was otherwise going to go to waste - and I had thought to make a feature of the stern given it's slightly unusual for a canoe to have a stern.
Not exactly a quarter deck - or a poop deck for that matter but it was fun to do.
I'm looking forward to the sanding (outside) as the little bit I've done so far is transformative and makes a huge difference.
Tim
Offline
#47 12 Apr 2021 5:24 pm
- Jmac58
- Member
- Registered: 7 May 2020
- Posts: 77
Re: Building a 12' Wood Duck Hybrid
Good work Tim. It looks great! I like the stern design...unique! As Bruce mentioned during my build, the sanding really is transformative and makes all the effort worthwhile. I think I spent more time glassing and rubbing down than I did building the boat and its not so much fun so beware! Keep at it Tim and best. J
Offline
#48 16 Apr 2021 2:57 pm
- teejay
- Member
- Registered: 26 Oct 2020
- Posts: 66
Re: Building a 12' Wood Duck Hybrid
Thanks James
I realise the sanding to come will be a big job but I can now get the boat outside which will make it easier and less oppressive than being in a tent in a garage with very little room to move in.
In the meantime I've been working away at making sure the cradle for the deck fits well - to prevent any twist occurring while I stabilise and epoxy it + I'll need it again once I come to paint the hull as I'll need the boat upside down for that.
Also - because the tent has gone - the weather has turned cold again! However there's been enough to do with sanding the underside of the deck off and getting rid of the forms and (most of) the glue drips from inside the hull.
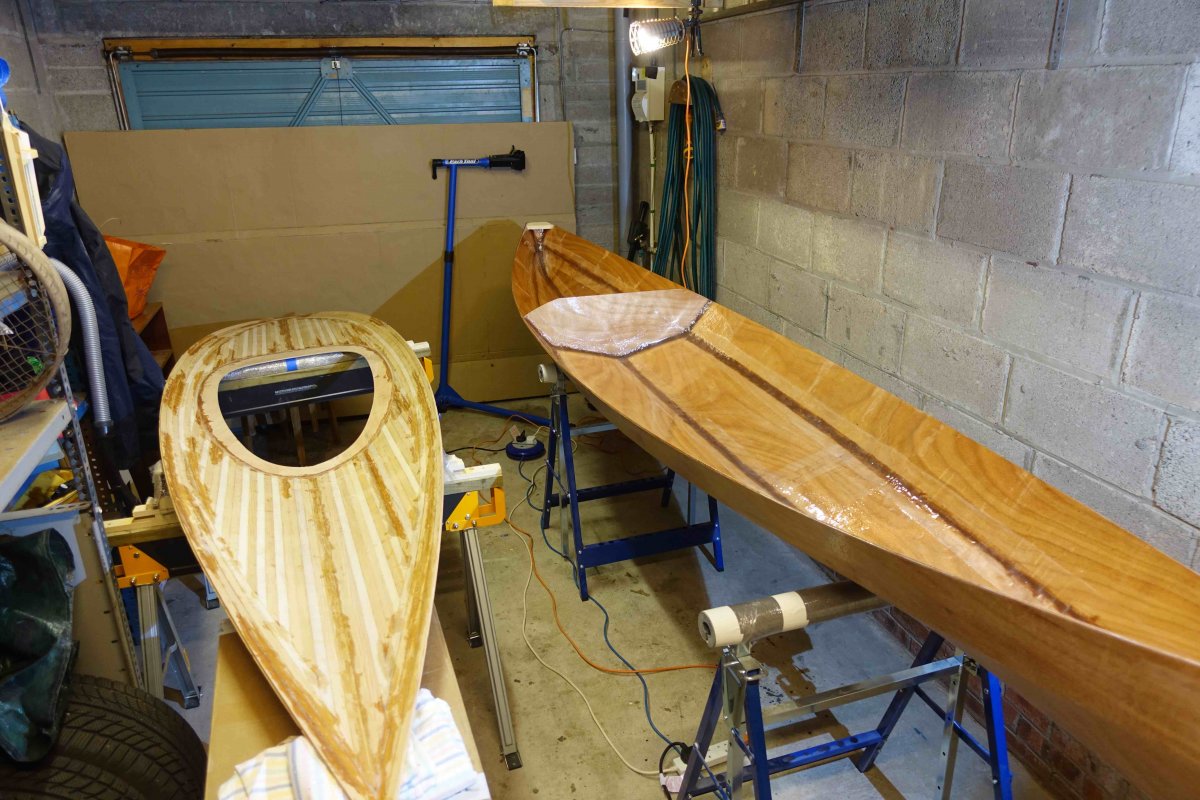
Today I managed some epoxy work - filling in the gaps between the strips (more obvious with the deck turned over) + the last coat of epoxy in the hull - a job postponed from the colder weather - and with a warm garage and warm epoxy = a relatively straightforward job. Next stage is to finish off the underside of the deck with smoothing it off again and then the epoxy and fabric - watching the forecast carefully!
Offline
#49 21 Apr 2021 3:06 pm
- teejay
- Member
- Registered: 26 Oct 2020
- Posts: 66
Re: Building a 12' Wood Duck Hybrid
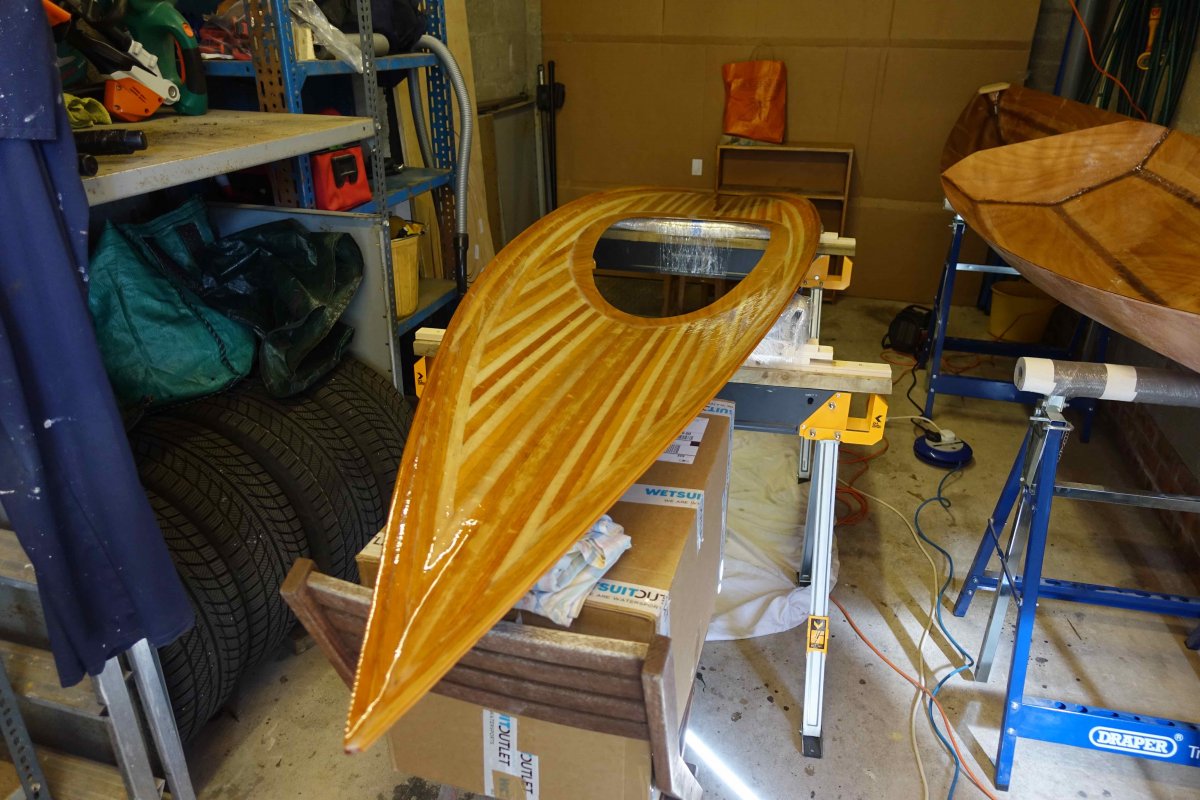
Progress a whole lot easier with the warmer weather (meaning that "outgassing" is significantly less of an issue) and just having more room + with the heat mat I can ensure the epoxy is well up to temperature and smooth and easy to apply.
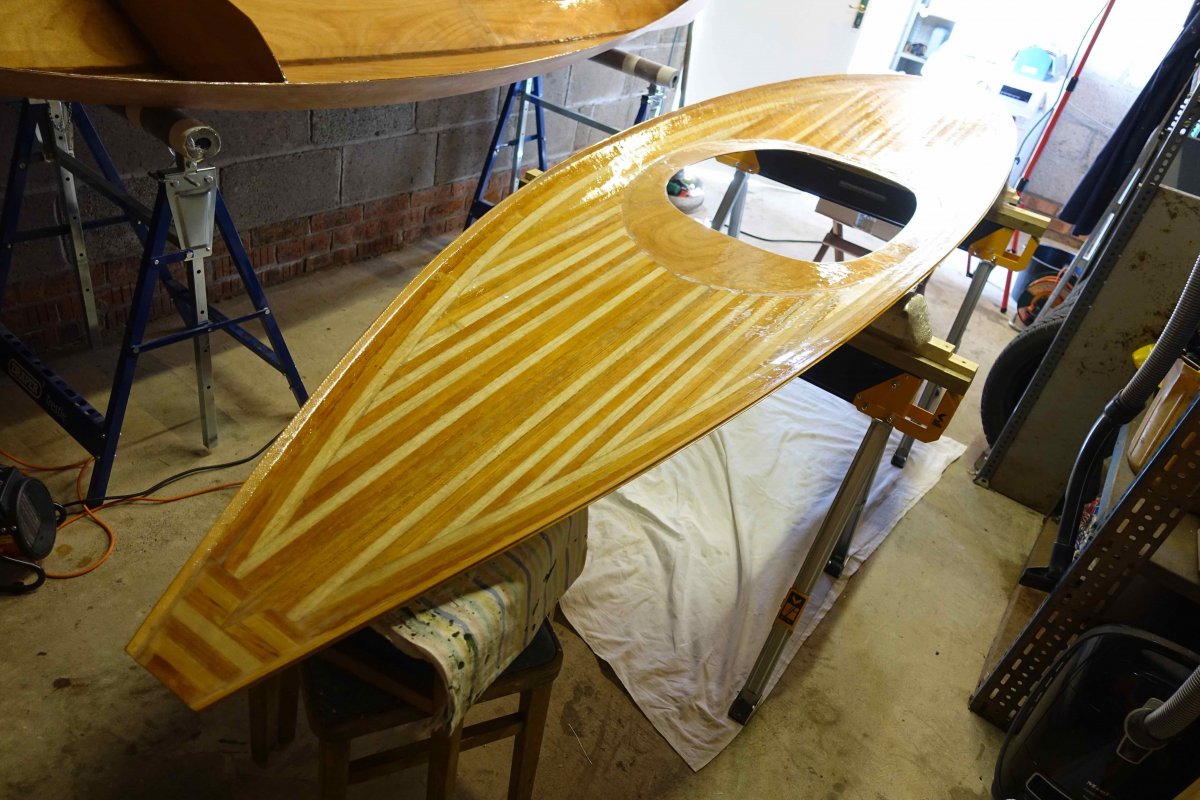
So - the underside of the deck is now epoxied and I'm working up my courage to cut out the hatch opening - more new skills with a borrowed jigsaw coming up to keep me busy.
Really looking forward to working on the deck - if I might regret saying that as I sand away - but the depth of colour in the cedar strips with the epoxy on is rather fun.
Offline
#50 26 Apr 2021 10:08 am
- teejay
- Member
- Registered: 26 Oct 2020
- Posts: 66
Re: Building a 12' Wood Duck Hybrid
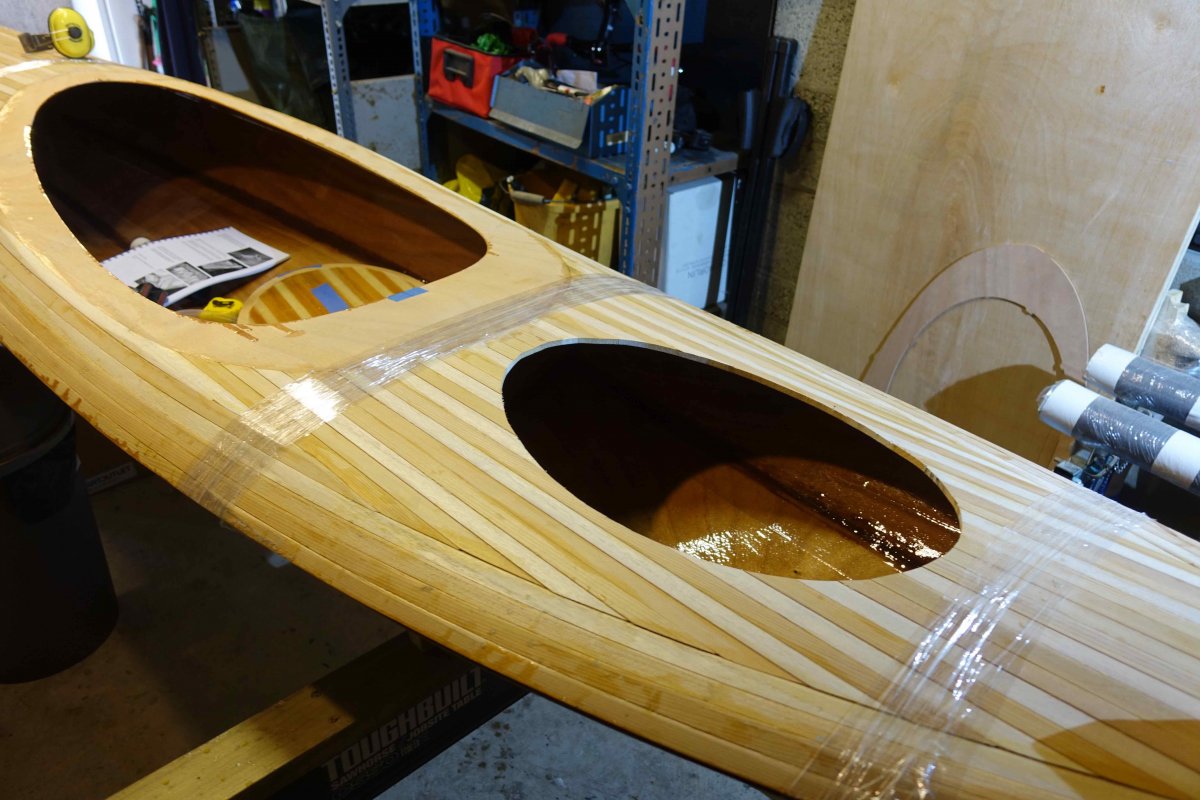
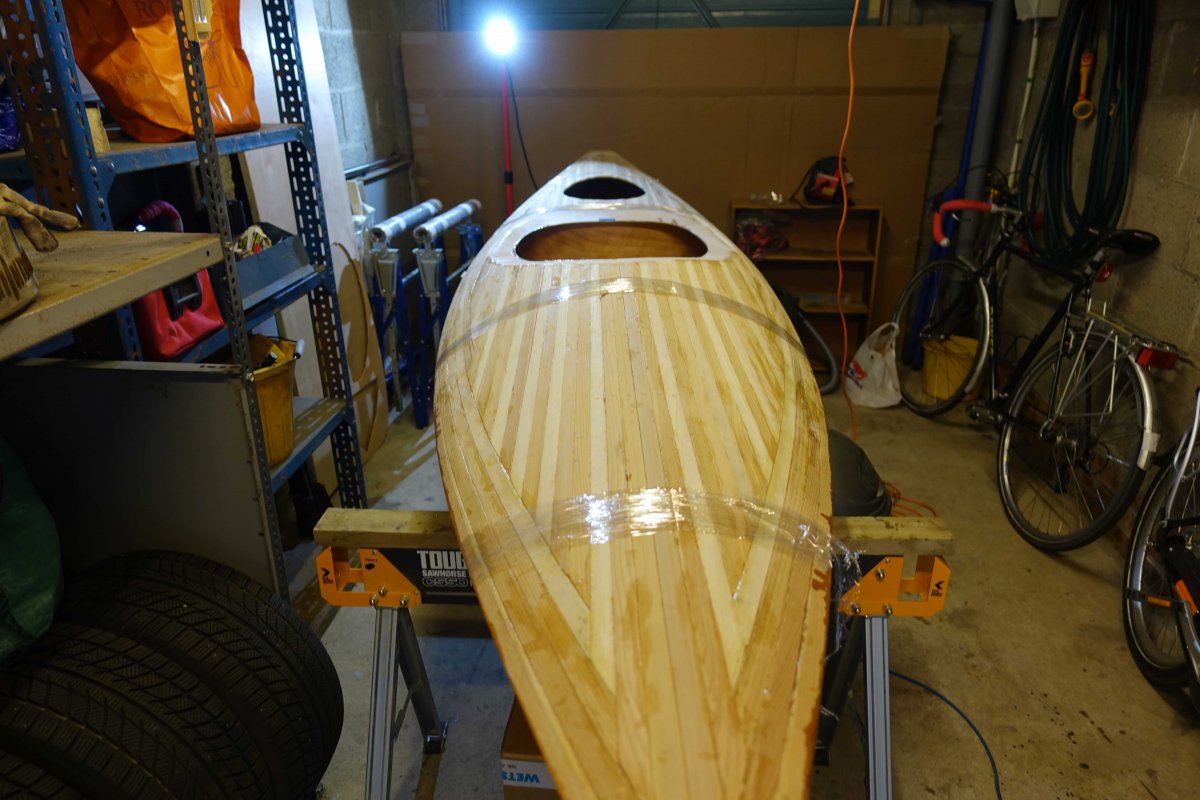
There are times building this kayak when the instructions are hard to follow - they advise soaking the wood (to help bend the panels into shape) - then to set it alight (very selectively to help remove the copper wire) - now I found myself having spent weeks constructing my deck and being told to carve a huge hole in it!
The good thing is the instructions at these times are really helpful and the hole is now cut and the advice was spot on - a borrowed jigsaw (I've never used one before - didn't help the adrenaline levels) fitted with a new metal cutting blade made a good job of cutting out the hatch cover. Now to get the deck fixed to the hull.
Offline
