A forum for discussing wooden boats and boat building
You are not logged in.
- Topics: Active | Unanswered
#1 29 Sep 2012 10:07 am
- Rainbow
- Member
- From: East Devon
- Registered: 29 Sep 2012
- Posts: 75
Guillemot build
For many years I have had a hankering to build a boat. During internet browsing and research, I came across the kayaks of Nick Schade. I purchased his "The Strip Built Sea Kayak" and I was hooked. However time constraints and other priorities put off the day when I could start. Happy to say though I finally invested in a kit for the Guillemot from Fyne Boat Kits. The following is a catch up of the build since I received my kit at the end of May 2012.
Last edited by Rainbow (27 Nov 2012 1:02 pm)
Offline
#2 29 Sep 2012 10:26 am
- Rainbow
- Member
- From: East Devon
- Registered: 29 Sep 2012
- Posts: 75
Re: Guillemot build
I've never kayaked and never built a kayak previously so everything is new to me. I'd read Nick's book several times and I do recommend reading right through the book at least once as it can help to do things in particular ways to help save work later on in the build. Having said that, I did have to ponder over some things and made mistakes as I progressed. I'm sure all builders go through their share of problems and to be honest finding the solutions I find to be quite a satisfying experience.
The kit comes with Nick's book and it is this that you follow to build the kit. There are some other generic building tips in the kit. The first stage is building the strongback. The kit came with a number of MDF strips and I had my first mistake. I assumed (moral: never assume!!) that the kit strongback would be the correct length. I followed the diagram in the book but had one 8 foot piece of MDF left over and two sides seemingly 2 inches short.
Last edited by Rainbow (27 Mar 2013 9:41 pm)
Offline
#3 29 Sep 2012 10:40 am
- Rainbow
- Member
- From: East Devon
- Registered: 29 Sep 2012
- Posts: 75
Re: Guillemot build
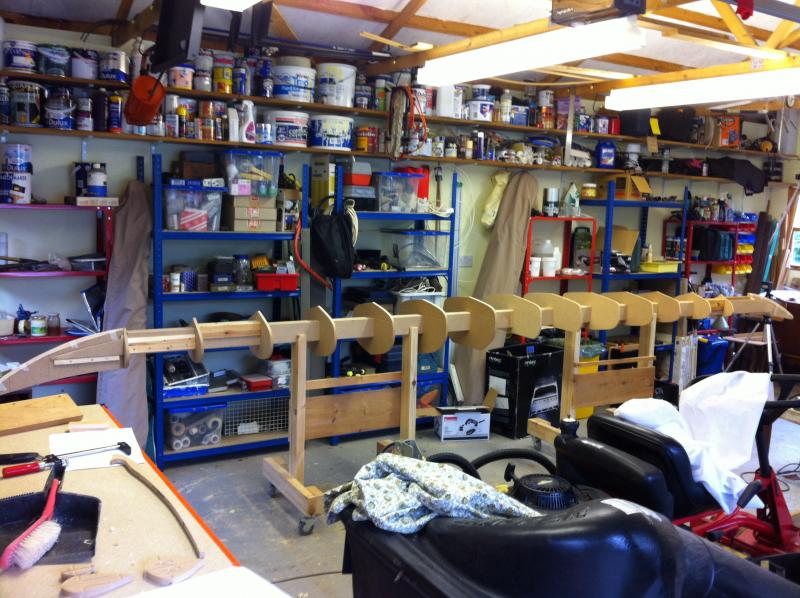
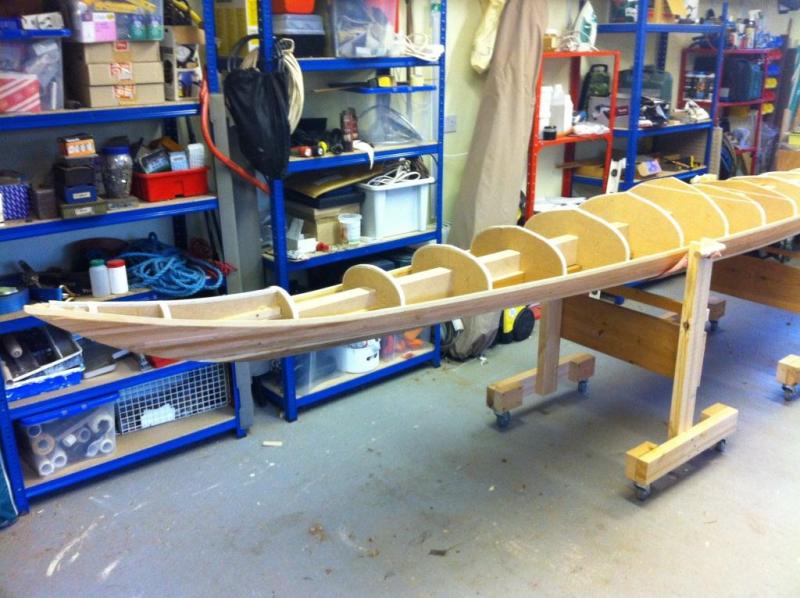
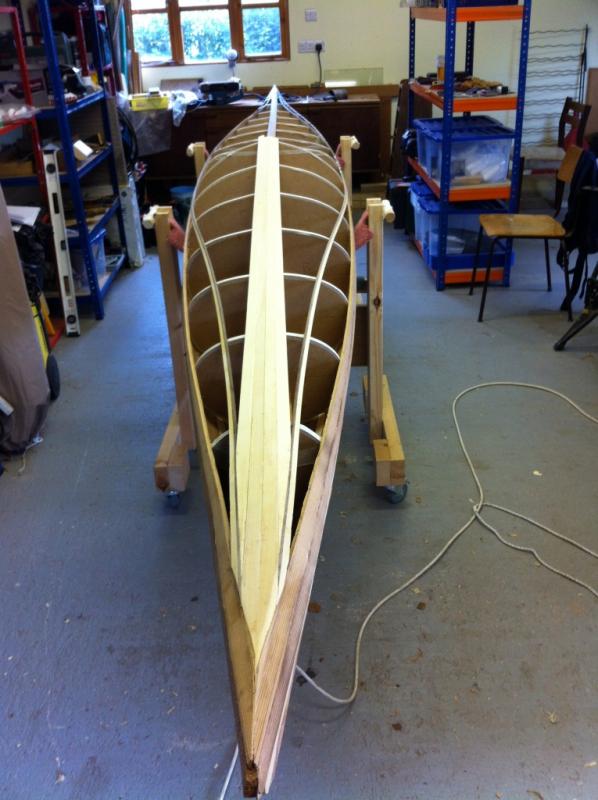
Forms on the strongback. It took a while for me to realise that I had actually built the strongback too long. I had to take the forms off, trim back and reshape the strongback ends.
I built the stands as specified in the book. I put wheels on so I can easily move the kayak around the garage or outside later for sanding. Axminster Tools have a good set that lock the movement and rotation. I had some 1" planks and used those as spacers between the forms. That adds quite a bit of weight and later it looked like there was a small amount of sag in the middle of the strong back.
I have used pine as the end stem pieces, which can be seen taped to the frame, thinned down to the correct width using a power planer.
Last edited by Rainbow (19 Oct 2013 12:15 am)
Offline
#4 29 Sep 2012 10:52 am
- Rainbow
- Member
- From: East Devon
- Registered: 29 Sep 2012
- Posts: 75
Re: Guillemot build
Moving swiftly on. Stripping the hull. I initially tried using an old Black and Decker heat gun originally used for paint stripping to help bend the wood where needed. I didn't really find this very successful. I tried using an old iron directly on the strips, wetting the wood and coaxing the strips but I found that even less successful.
I'm not using staples. Just a hot glue gun, masking tape and pieces of 1/4 inch plywood with a slot the width of the cedar strips to temporarily secure the strips in place while the wood glue sets.
Last edited by Rainbow (19 Oct 2013 12:17 am)
Offline
#5 29 Sep 2012 11:00 am
- Rainbow
- Member
- From: East Devon
- Registered: 29 Sep 2012
- Posts: 75
Re: Guillemot build
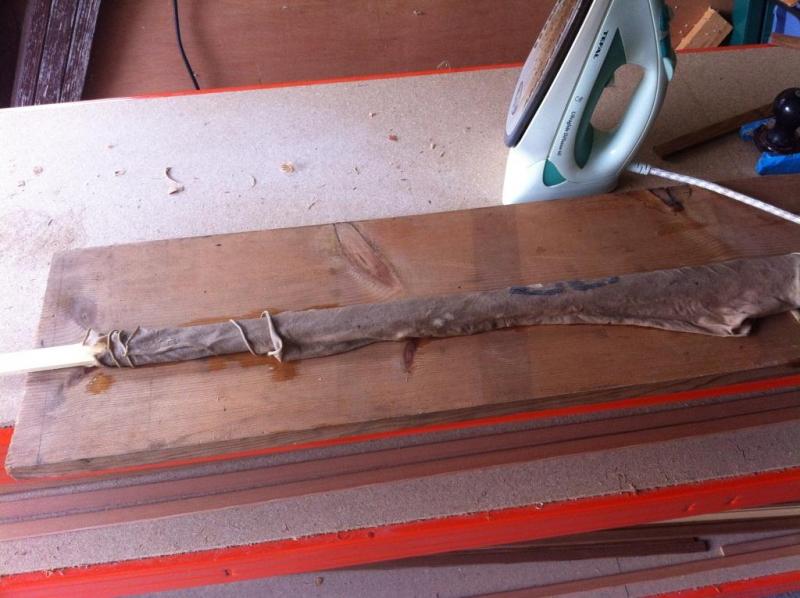
This is the way I found to be most satisfactory for bending the strips. Wrap a cotton cloth around the strip. Use an iron on steam setting. Saturate the cloth with water. Then iron the cloth on both sides. You may need to do this more than once. I found that several wrappings would help to prevent damage to the strip when bending over a bar. Care and gentle progression of the bend still needs to happen. This does swell the wood which can make the fit between the cove and bead strips difficult, so it sometimes needs to be dried out. Ironing the wood without the cloth or gentle use of the hot air gun can accelerate this.
The base of the iron gets pretty dirty - probably not wise to use a good iron.
Last edited by Rainbow (30 Sep 2012 11:40 pm)
Offline
#6 29 Sep 2012 11:07 am
- Rainbow
- Member
- From: East Devon
- Registered: 29 Sep 2012
- Posts: 75
Re: Guillemot build

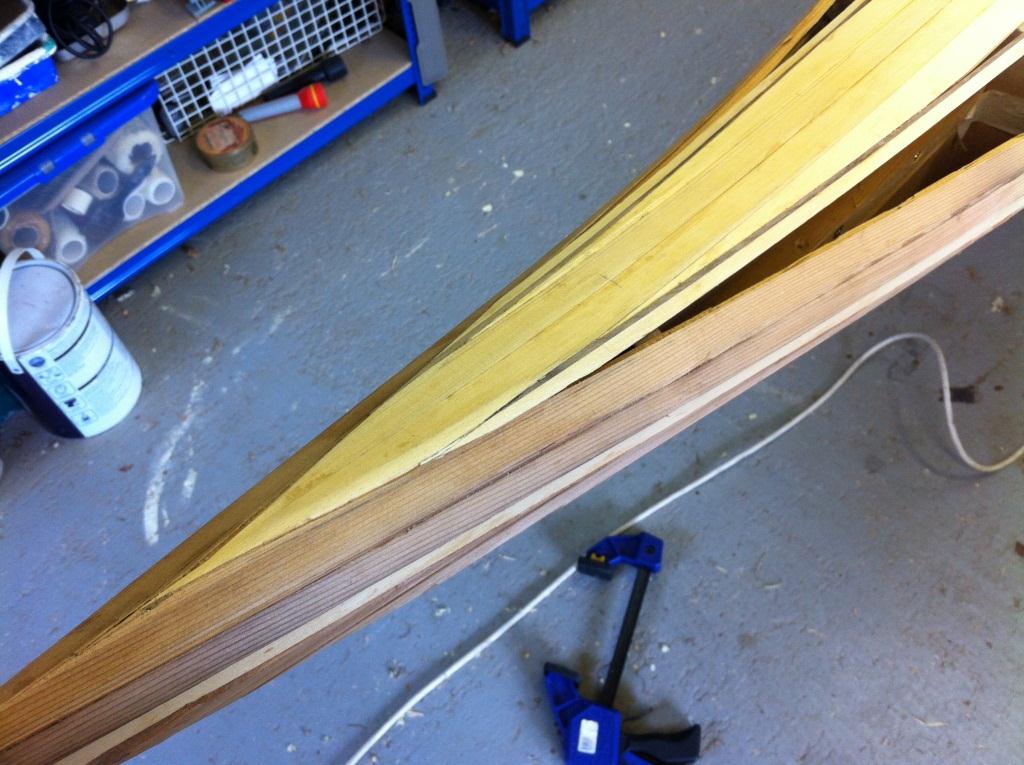
Here is an example of the kind of twist that can be achieved fairly quickly using the iron/cloth method. I think the advantage of the cloth is that it helps to generate a lot of steam and it keeps the temperature up while the iron moves elsewhere.
Last edited by Rainbow (1 Jan 2013 8:15 am)
Offline
#7 29 Sep 2012 11:11 am
- Rainbow
- Member
- From: East Devon
- Registered: 29 Sep 2012
- Posts: 75
Re: Guillemot build
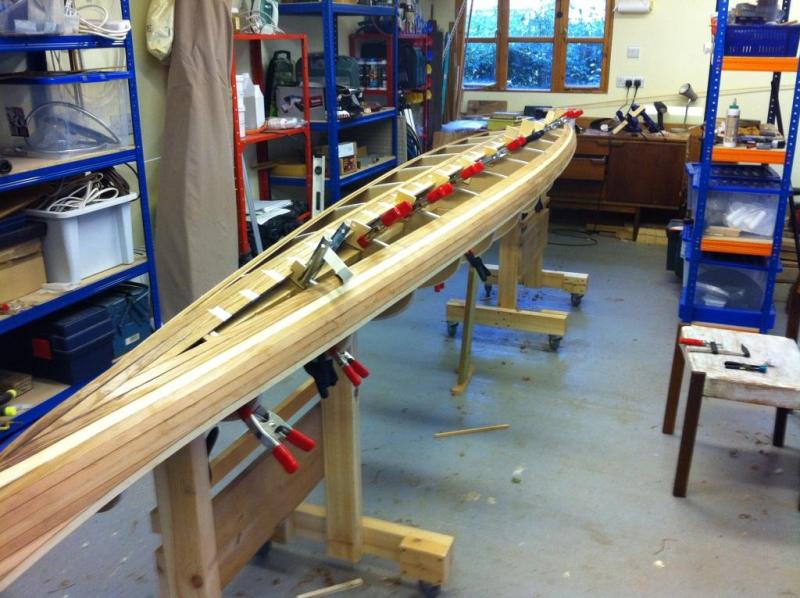
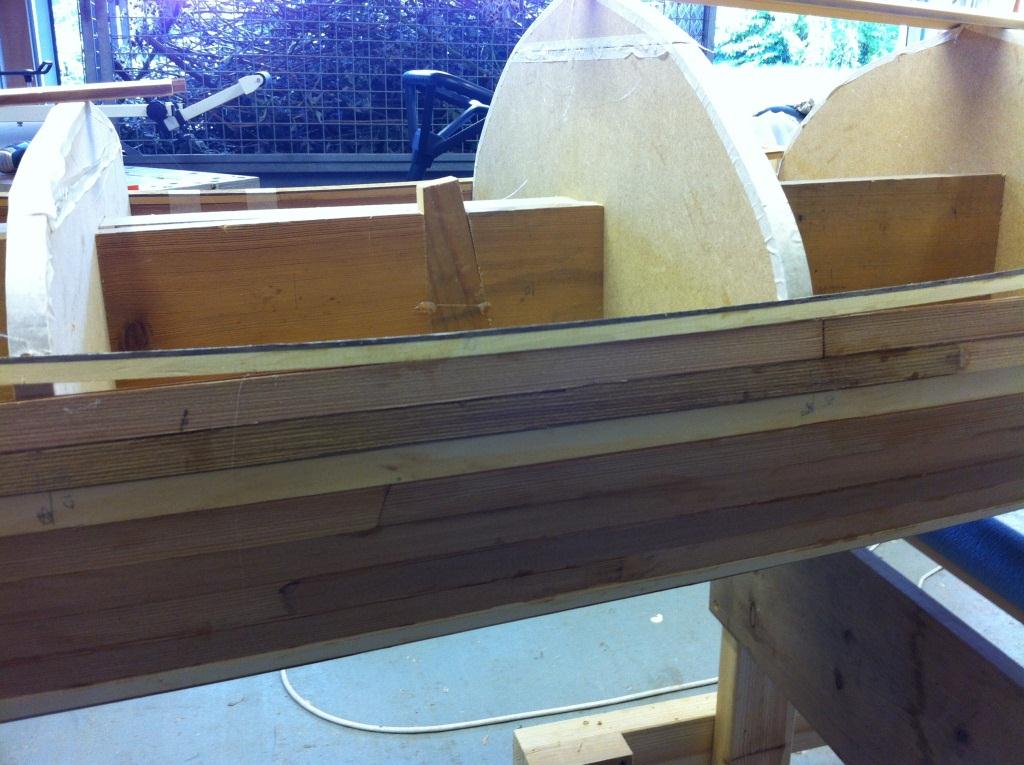
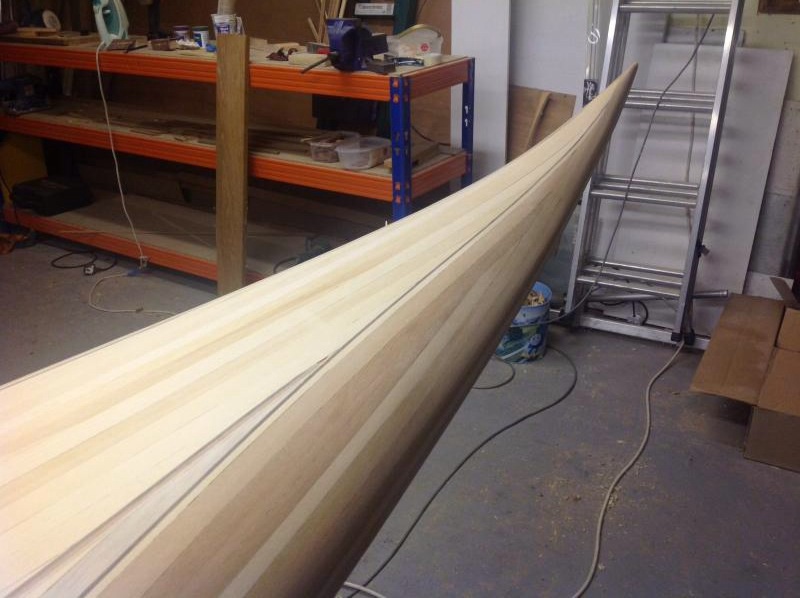
Getting close to finishing the hull. The final strip is resting on the hull. Fitting this took lots of looping around trial fitting, and planing off the thinnest of slices.
Last edited by Rainbow (19 Jun 2015 6:40 am)
Offline
#8 29 Sep 2012 11:21 am
- Rainbow
- Member
- From: East Devon
- Registered: 29 Sep 2012
- Posts: 75
Re: Guillemot build
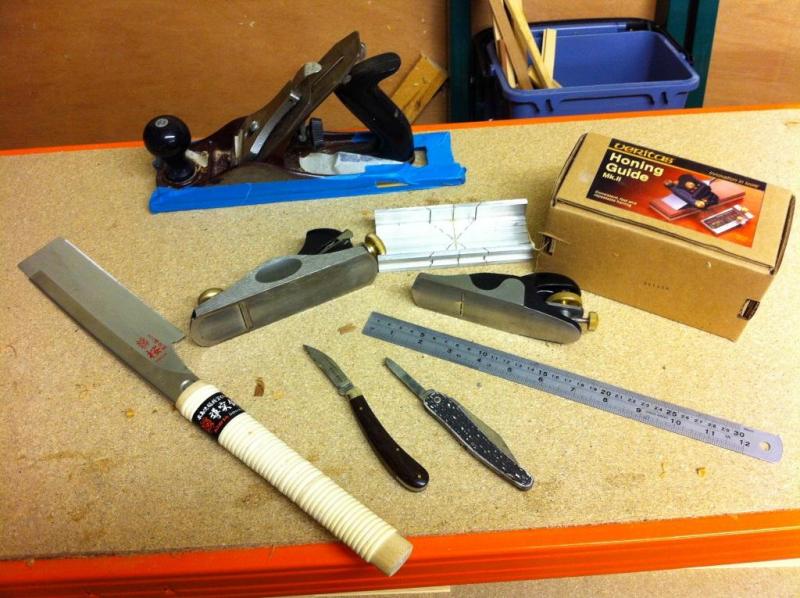
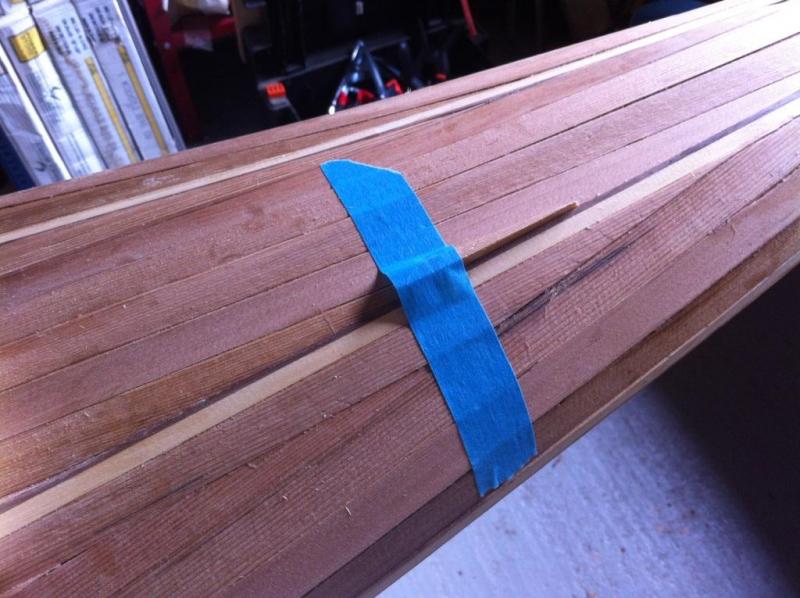
For the benefit of anybody reading this post who is thinking of taking on a strip method boat build I thought I'd share what I have found to be the most useful tools.
A variety of planes. The one with the blue tape has two strips of wood secured to raise up the cutting edge. I use this to trim off the cove or the bead where necessary.
The smallest plane is a Veritas Apron plane. This is a really excellent tool, it is expensive but is really well engineered. It is small and light in the hand and adjusts easily and accurately. The Veritas honing guide in combination with sharpening stones is excellent for getting a really keen edge on the plane blades.
The japanese saw cuts very finely. Again expensive but very useful.
Very sharp penknives and a twelve inch steel rule for marking the trimming lines.
Not shown is a small belt sander which is useful for making scarf joints.
Last edited by Rainbow (7 Oct 2013 12:50 pm)
Offline
#9 29 Sep 2012 11:23 am
- Rainbow
- Member
- From: East Devon
- Registered: 29 Sep 2012
- Posts: 75
Re: Guillemot build
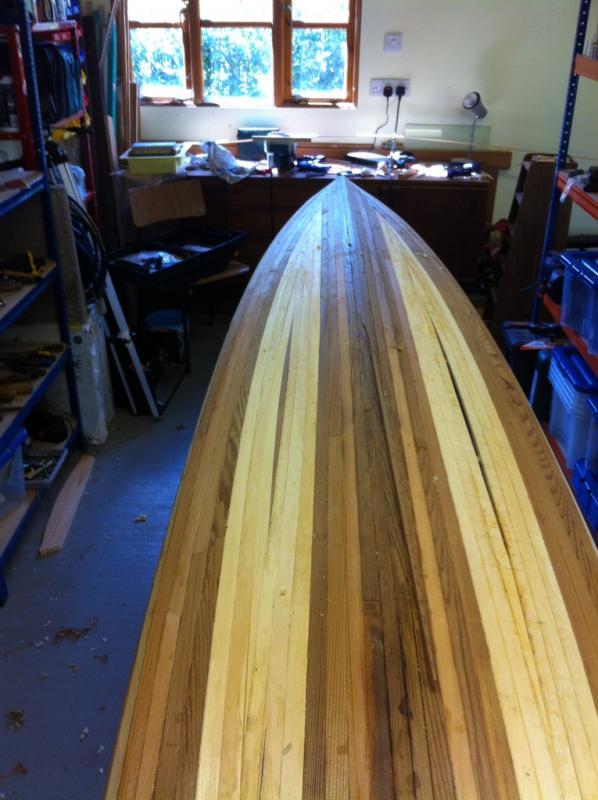
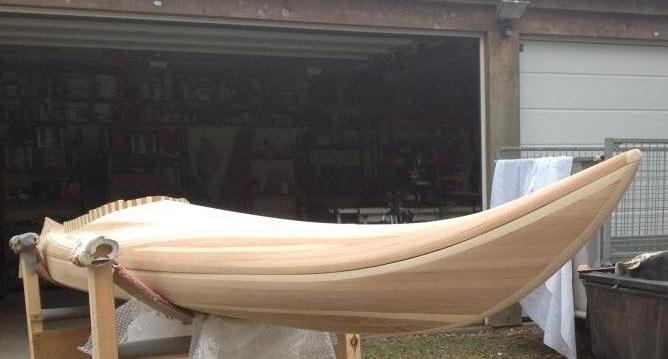
Hull finished and the boat is flipped over. I made slings out of carpet and turned the stands at 90 degrees.
Offline
#10 29 Sep 2012 11:27 am
- Rainbow
- Member
- From: East Devon
- Registered: 29 Sep 2012
- Posts: 75
Re: Guillemot build
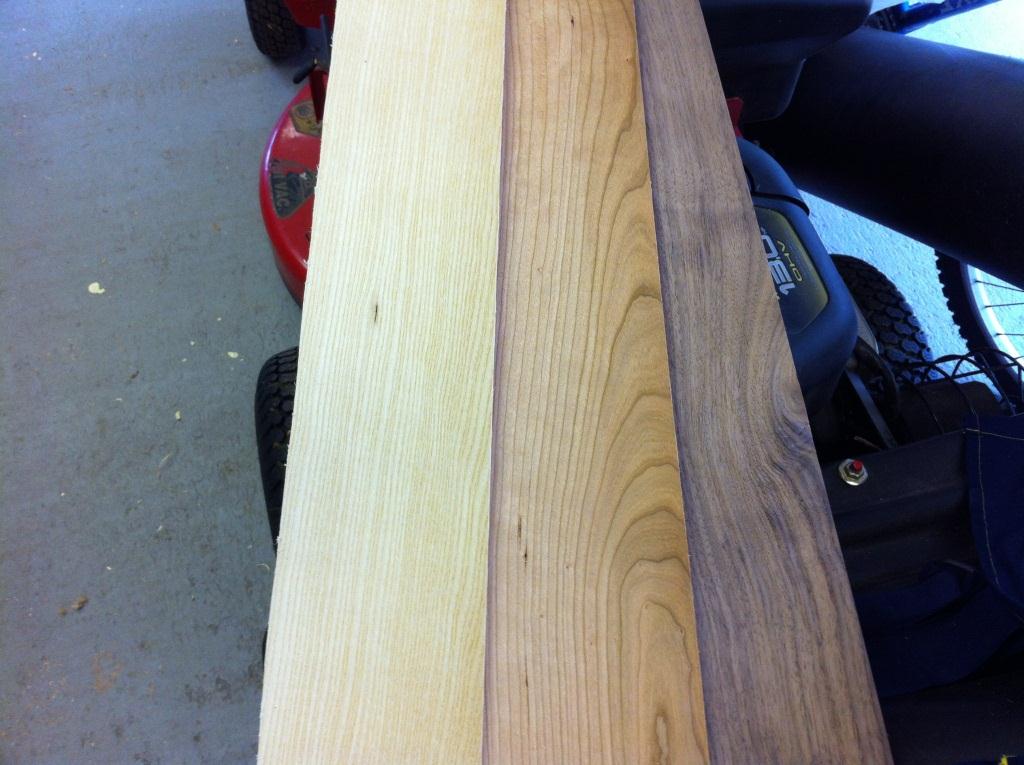
I wanted to have detail lines running the length of the boat. I bought some structural veneers in ash, american cherry and walnut.
Offline
#11 29 Sep 2012 11:30 am
- Rainbow
- Member
- From: East Devon
- Registered: 29 Sep 2012
- Posts: 75
Re: Guillemot build
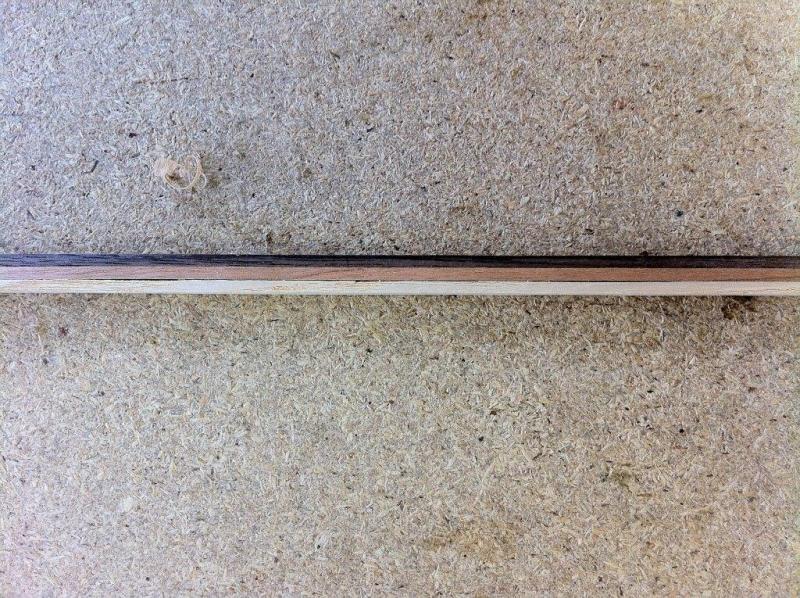
Here is a detail strip that I made by cutting one strip each of the cherry, ash and walnut, glueing together and planing down.
Last edited by Rainbow (30 Dec 2013 11:53 am)
Offline
#12 29 Sep 2012 11:33 am
- Rainbow
- Member
- From: East Devon
- Registered: 29 Sep 2012
- Posts: 75
Re: Guillemot build
I also made long strips of yellow cedar and walnut. These run the length of the boat. Here laid out on the forms with the first few yellow cedar infill strips.
Last edited by Rainbow (24 Jan 2014 1:51 am)
Offline
#13 29 Sep 2012 11:35 am
- Rainbow
- Member
- From: East Devon
- Registered: 29 Sep 2012
- Posts: 75
Re: Guillemot build
Detail of the cedar/walnut combination strip.
Offline
#14 29 Sep 2012 11:39 am
- Rainbow
- Member
- From: East Devon
- Registered: 29 Sep 2012
- Posts: 75
Re: Guillemot build
You cannot see it but, at the middle of the boat, I've used a small piece of bead, cut from scrap, placed just at the point where the detail strip touches to provide a better key for the glue.
Last edited by Rainbow (30 Dec 2013 11:57 am)
Offline
#15 29 Sep 2012 11:43 am
- Rainbow
- Member
- From: East Devon
- Registered: 29 Sep 2012
- Posts: 75
Re: Guillemot build
One of the strips sunk too low. I'm building it up with a piece of scrap.
After planing down you can just see the join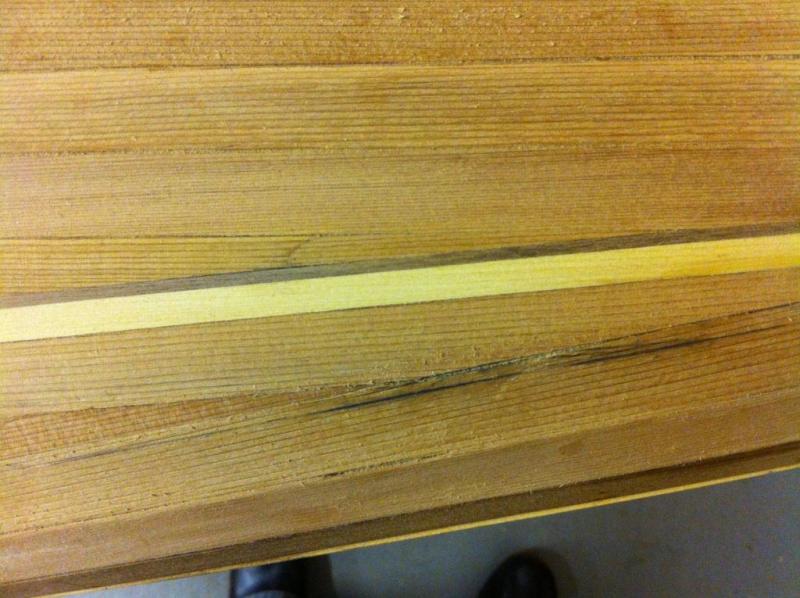
Not such a good result on a white piece. I'm hoping this will improve when I start to sand.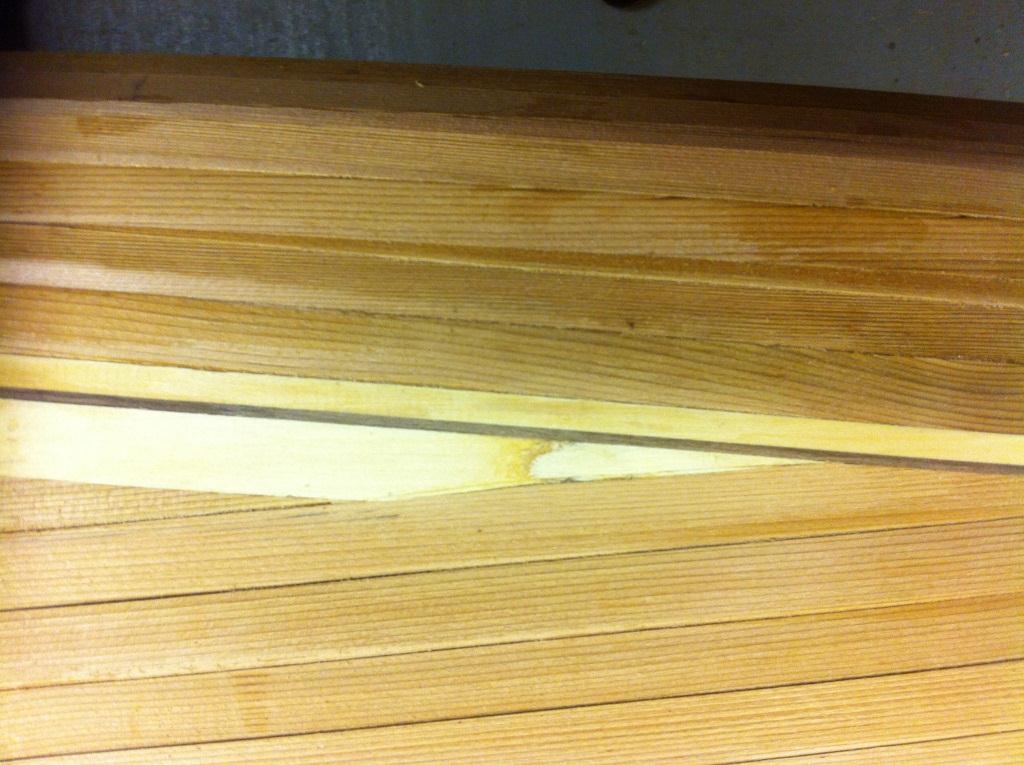
Last edited by Rainbow (10 Sep 2013 6:40 pm)
Offline
#16 29 Sep 2012 11:46 am
- Rainbow
- Member
- From: East Devon
- Registered: 29 Sep 2012
- Posts: 75
Re: Guillemot build
The walnut/ash/cherry detail strip now in place.
Offline
#17 29 Sep 2012 11:49 am
- Rainbow
- Member
- From: East Devon
- Registered: 29 Sep 2012
- Posts: 75
Re: Guillemot build
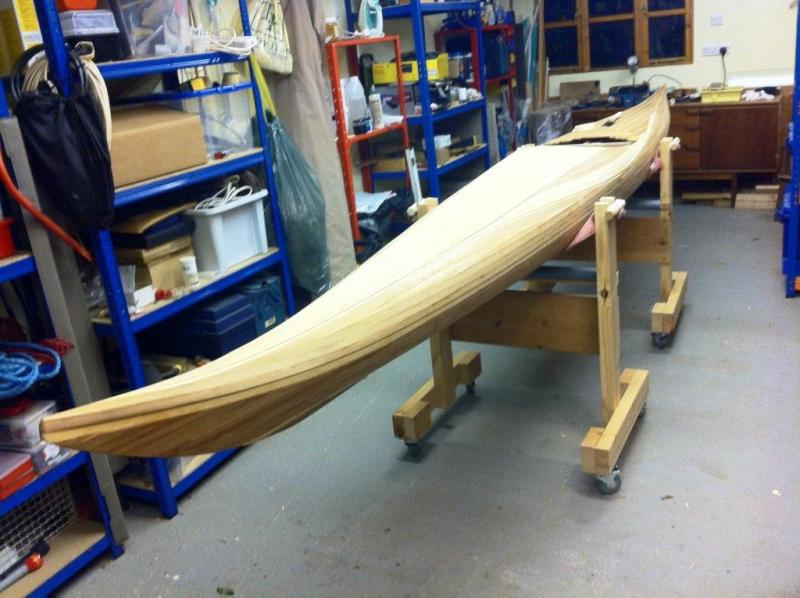
Almost at the stage where the cockpit is ready to cut out.
Last edited by Rainbow (16 Jan 2014 11:40 pm)
Offline
#18 29 Sep 2012 11:53 am
- Rainbow
- Member
- From: East Devon
- Registered: 29 Sep 2012
- Posts: 75
Re: Guillemot build
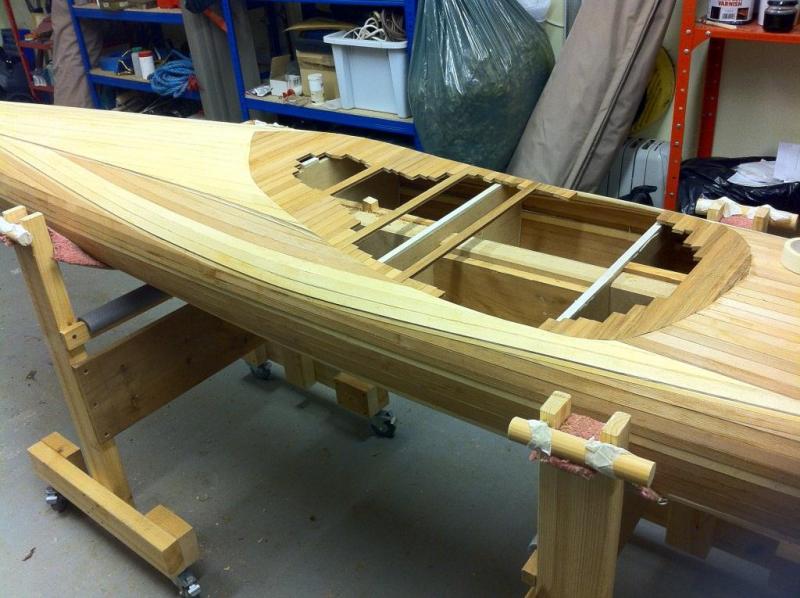
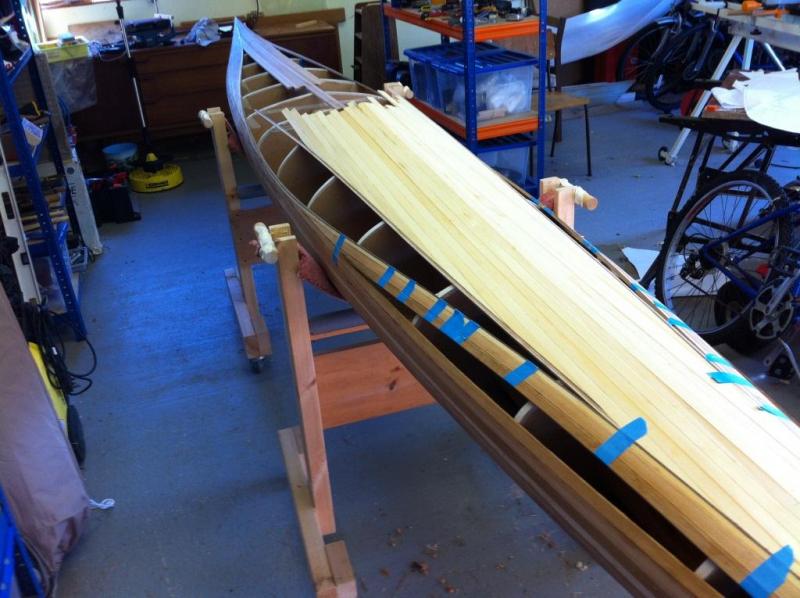
The outer profile has been cut and cross strips are being laid. The final cockpit profile will then be cut out, to which the coaming will be glued. I've been getting concerned about the amount of wood left. My stripping patterns have been revised several times as my designs have needed more of a particular colour than I have left. It looks like I'll just have enough to finish the cockpit and the cheek plates.
Last edited by Rainbow (8 Jan 2014 1:49 am)
Offline
#19 29 Sep 2012 11:29 pm
- beaker
- Member
- Registered: 9 Oct 2011
- Posts: 81
Re: Guillemot build
Oh that is a very shapely boat! I'm looking forward to seeing the sanded planks.
Offline
#20 30 Sep 2012 10:38 pm
- Rainbow
- Member
- From: East Devon
- Registered: 29 Sep 2012
- Posts: 75
Re: Guillemot build
Beaker, I am very pleased with the shape of the boat and I too am looking forward to starting the sanding.
I've just finished constructing the cockpit coaming. I've left some strips extended to form knee braces as suggested in the building notes supplied with the kit.
Next stage is to add hardwood stem pieces and then it's into planing and sanding. I did sand the cockpit cross strips before I installed the coaming and pleasingly, some of the wood I thought was pretty ugly has been transformed and is showing some lovely grain patterns.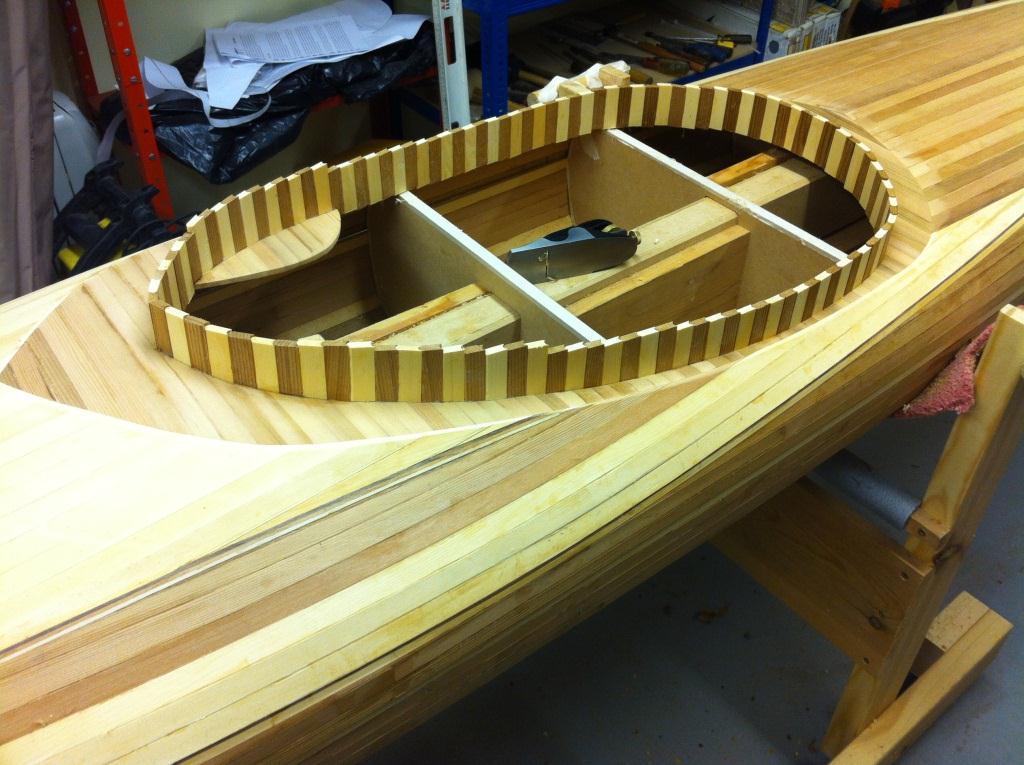
Last edited by Rainbow (30 Sep 2012 11:05 pm)
Offline
#21 1 Oct 2012 10:11 pm
- fairplay
- Member
- Registered: 16 Jun 2011
- Posts: 109
Re: Guillemot build
...very nice!!...
'...so, how many kayaks do you really need?...' - '...one more!...'
Offline
#22 2 Oct 2012 4:51 pm
- Paul
- Employee

- From: Gatebeck Cumbria
- Registered: 4 Aug 2011
- Posts: 134
Re: Guillemot build
Rainbow you have produced a beautiful pattern on your boat. With luck you have not run out of wood but if so please get in touch with us.
Offline
#23 3 Oct 2012 9:34 am
- Rainbow
- Member
- From: East Devon
- Registered: 29 Sep 2012
- Posts: 75
Re: Guillemot build
Thanks Paul, I will but I think things are looking ok. The stripping pattern is not what I originally intended but I am very happy the way it has turned out. It is difficult to know how much a pile of wood strips will cover, especially if you are trying to avoid joins! Mulling over what colour wood, matching grain patterns etc. is all part of the fun and satisfaction of working with wood.
Offline
#24 4 Oct 2012 8:45 pm
- Rainbow
- Member
- From: East Devon
- Registered: 29 Sep 2012
- Posts: 75
Re: Guillemot build
Starting to laminate the hardwood stem pieces. I'm using 5 strips of ash veneer which is 2.4 mm thick.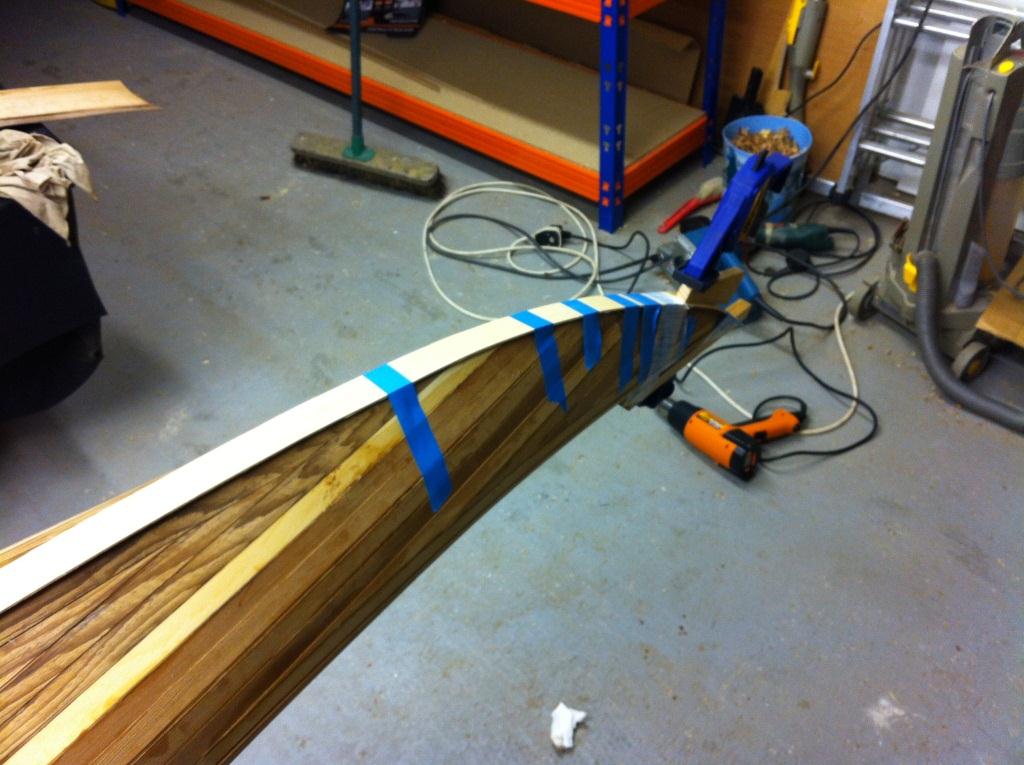
Here the last piece is clamped up on the stern.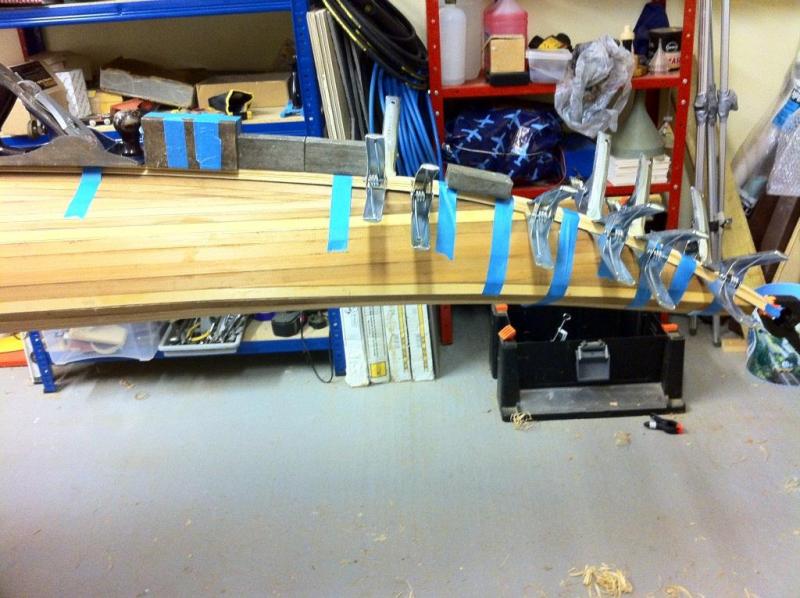
And here is the stern after planing down to roughly match the profile of the sides. I've been getting some tear out of the grain even though the plane is very sharp. It doesn't matter which direction I try planing. I guess I laminated the strips with the grain in different directions. I will be using the sander sooner than anticipated to get around this. The sharp edge will need to be sanded down to a softer radius prior to fibreglassing.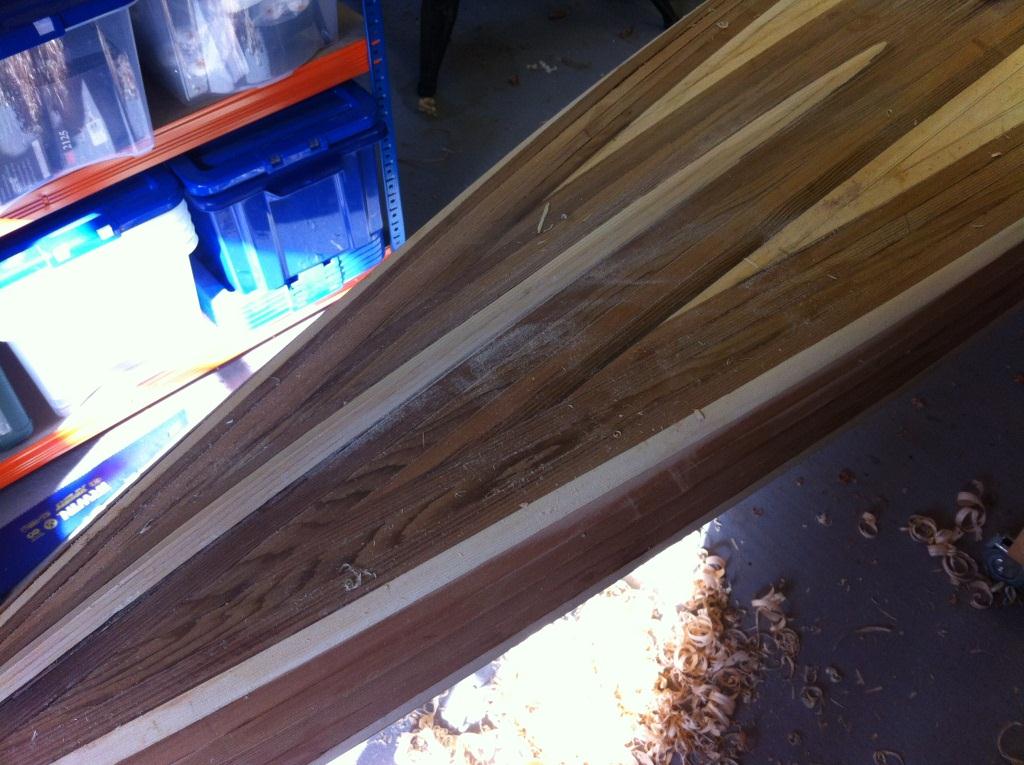
Last edited by Rainbow (4 Oct 2012 10:35 pm)
Offline
#25 8 Nov 2012 8:00 pm
- Rainbow
- Member
- From: East Devon
- Registered: 29 Sep 2012
- Posts: 75
Re: Guillemot build
Currently in the middle of the sanding phases and she is scrubbing up well. I thought I'd post a couple of pictures to show the progress. I did a little planing first but I found the white cedar to be prone to tear out and switched to a belt sander loaded with 60 grit. A little scary but it is very effective if used carefully. I was filling whenever any small gaps appeared but after each sanding pass over the boat other small gaps would appear. I've decided therefore to leave the filling until right after the overall sanding with the finer grits and then sand gently by hand.
As well as ash stem strips on the hull, I've added ash tips to the deck.
Last edited by Rainbow (11 Dec 2013 1:03 am)
Offline