You are not logged in.
- Topics: Active | Unanswered
Pages: 1
#1 12 Jun 2012 6:34 am
- Fyne Boat Kits
- Administrator

- From: Cumbria, UK
- Registered: 22 May 2011
- Posts: 156
- Website
Chesapeake

Offline
#2 12 Jun 2012 6:37 am
- Richard
- Member
- From: East Sussex
- Registered: 7 Jun 2011
- Posts: 75
Re: Chesapeake
Morning who ever you are. Are you phil or paul
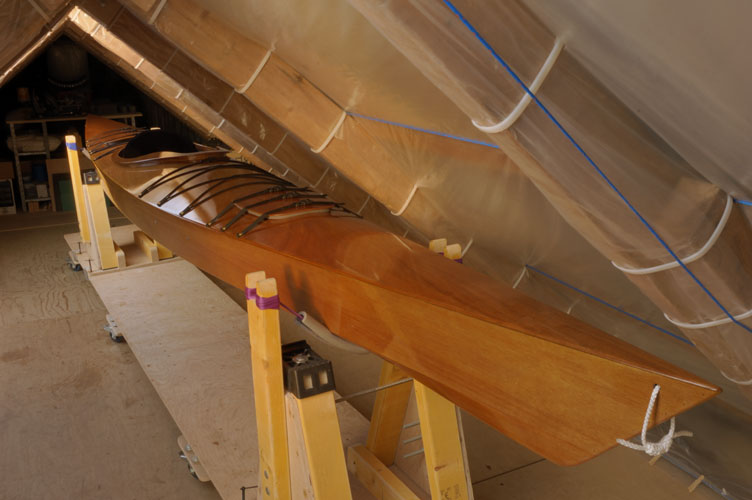
What a fantastic finish and a gorgeous boat
Canoe & Kayak Owner
Offline
#3 12 Jun 2012 6:40 am
- Fyne Boat Kits
- Administrator

- From: Cumbria, UK
- Registered: 22 May 2011
- Posts: 156
- Website
Re: Chesapeake
I am the night shift and not either of them.
The boat was built by a customer who sent in the photograph. It took him a while to get that finish but it looks faultless.
Offline
#4 12 Jun 2012 6:42 am
- Richard
- Member
- From: East Sussex
- Registered: 7 Jun 2011
- Posts: 75
Re: Chesapeake
faultless
Canoe & Kayak Owner
Offline
#5 13 Jun 2012 1:30 pm
- WillCurwen
- Member
- Registered: 13 Jun 2012
- Posts: 7
Re: Chesapeake
Hi Richard, thank you for the compliments on my build.
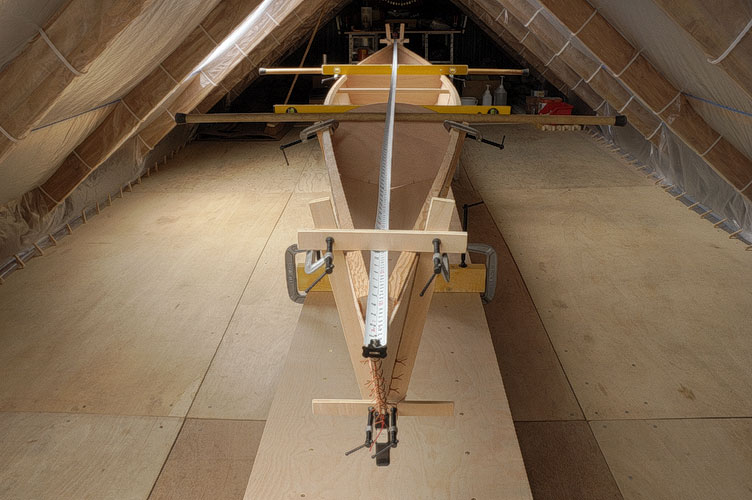
It was well worth all the effort involved due to the quality of the design by John Harris, who in my opinion got it right when he translated the classic skin on frame Greenland kayak into plywood and epoxy. I went to considerable lengths to get the fairing completely symmetrical on the hull.

Offline
#6 13 Jun 2012 3:44 pm
- Dinky Doris
- Member
- From: Wales
- Registered: 25 Aug 2011
- Posts: 23
Re: Chesapeake
A great picture showing perfect symmetry.
What is the secret for getting such a good finish? Well done, Will
DD
Offline
#7 13 Jun 2012 5:45 pm
- WillCurwen
- Member
- Registered: 13 Jun 2012
- Posts: 7
Re: Chesapeake
Hi Dinky Doris
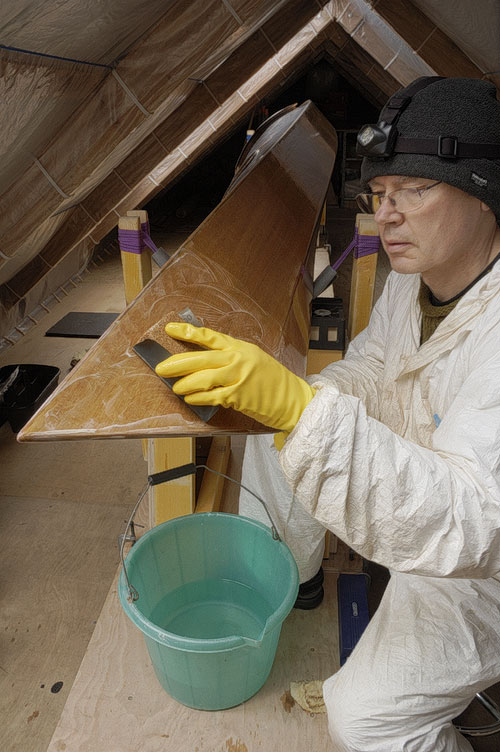
The secret (if it is a secret!) is to sand with wet and dry paper between coats and use plenty of water. I start with 400grit and after the 5th coat, I use 1200grit. That's right - 6 coats!

Offline
#8 14 Jun 2012 6:04 am
- Richard
- Member
- From: East Sussex
- Registered: 7 Jun 2011
- Posts: 75
Re: Chesapeake
That is dedication. starting with a smooth surface is best but do you brush or use a roller?
Canoe & Kayak Owner
Offline
#9 15 Jun 2012 7:38 pm
- WillCurwen
- Member
- Registered: 13 Jun 2012
- Posts: 7
Re: Chesapeake
I use a foam brush and as little varnish as possible. It is quite easy to get six coats out of a one litre tin of varnish
Offline
#10 19 Jun 2012 8:10 am
- fairplay
- Member
- Registered: 16 Jun 2011
- Posts: 109
Re: Chesapeake
...this really looks very nice!...
...do i see correctly that you did the shear-planning before committing to the shape (by applying epoxy)?...
...on the Pax 18 i built last year i put on 5 layers of varnish using (borrowed) professional spray-tools - and used less than half a tin for the whole job on that boat...
Last edited by fairplay (19 Jun 2012 8:12 am)
'...so, how many kayaks do you really need?...' - '...one more!...'
Offline
#11 19 Jun 2012 4:35 pm
- WillCurwen
- Member
- Registered: 13 Jun 2012
- Posts: 7
Re: Chesapeake
Hi fairplay, if I understand your question correctly, my answer is that I used a block plane to plane the sheer clamp rails as the very last job before installing the deck panels. I remember it taking several days of patient eyework before I was finally satisfied with the bevelled sweep between bow and stern ...... well worth the effort.
Offline
#12 19 Jun 2012 4:40 pm
- fairplay
- Member
- Registered: 16 Jun 2011
- Posts: 109
Re: Chesapeake
...hey WillCurwen, thank you for the quick reply!...
...ah! - ok...as i still saw the wires in the stern-parts in the photo in post #5 i thought that you did the work on the sheer-clamp-rails before glueing the boat at all...also the bulkheads (if they are bulkheads that is ![]() ) seem not to be glued by then...
) seem not to be glued by then...
'...so, how many kayaks do you really need?...' - '...one more!...'
Offline
#13 7 Aug 2012 9:56 am
- WillCurwen
- Member
- Registered: 13 Jun 2012
- Posts: 7
Re: Chesapeake

Here is a picture of my finished build just a few minutes away from being launched on Cam Loch here in Sutherland UK. This was a couple of weeks ago. Since then, I have been out on the water assessing how the kayak functions as a design, and I am really impressed. Whatever the water or the weather, the kayak seems to know from one moment to the next exactly what to do and how to perform - effortlessly.
Last edited by WillCurwen (7 Aug 2012 9:57 am)
Offline
#14 8 Aug 2012 7:32 am
- Richard
- Member
- From: East Sussex
- Registered: 7 Jun 2011
- Posts: 75
Re: Chesapeake
just spotted the link brilliant and thank you
Canoe & Kayak Owner
Offline
#15 19 Apr 2013 3:50 pm
- waterwing
- Member
- Registered: 19 Apr 2013
- Posts: 10
Re: Chesapeake
Thanks for this - I am trying to get one as good looking as yours.
Offline
#16 17 May 2013 10:22 am
- WillCurwen
- Member
- Registered: 13 Jun 2012
- Posts: 7
Re: Chesapeake
waterwing,
Take your time to let the varnish harden off before wet sanding between coats. Dilute the varnish just a tad with clean white spirit so that it flows properly, and put it on as thin a coat as is possible. Less is best. If you really want a good finish before you start, then more likely this is what you will end up with. A good finish is a lot easier to repair or refurbish too.
Offline
Pages: 1
