A forum for discussing wooden boats and boat building
You are not logged in.
- Topics: Active | Unanswered
Pages: 1
#1 8 Nov 2025 11:42 am
- cillian64
- Member
- Registered: 6 Nov 2025
- Posts: 8
Canadian Canoe build
Hello world. This winter I'm building the Canadian canoe from the kit, I'm documenting my progress in the hope that it will be helpful or encouraging to others. This might prove to be "interesting" given my garage is only 5.5m long and the finished canoe is 4.75m, but we'll see. This has the side-benefit of preventing me from procrastinating as the canoe will take up most of the garage so I can't really work on any other projects once I've gotten started. My goal is to be on the water when spring comes.
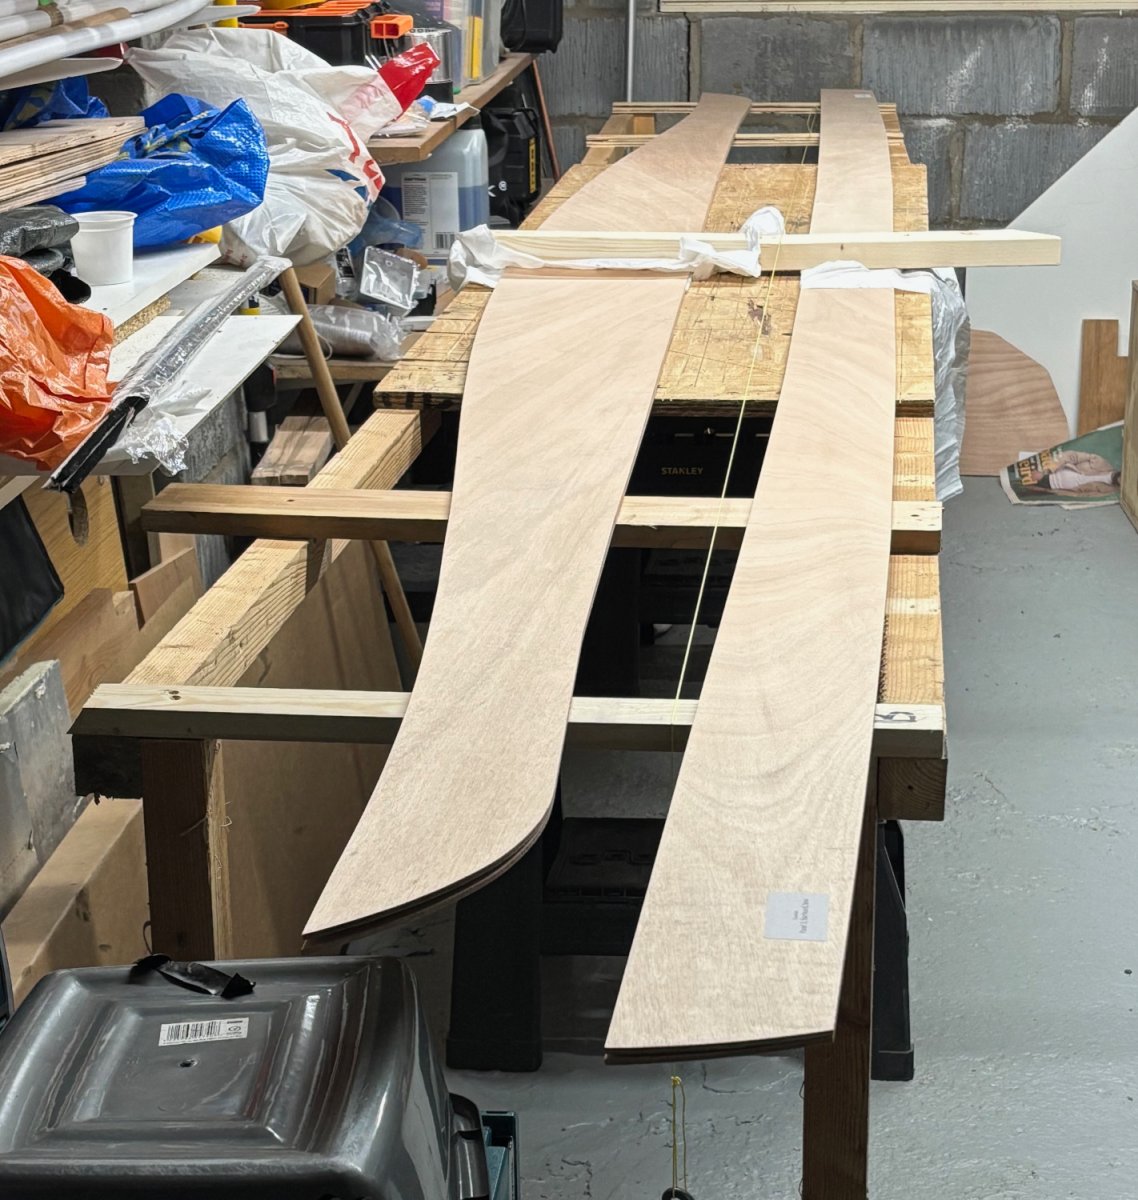
Everything arrived well-packaged and intact. I was initially feeling very confident as I've done a reasonable bit of woodworking before, but that quickly faded as I unpacked the box of very long, bendy pieces of wood.

Before getting going with the epoxy, I had a couple of side projects to complete. First, an extra-long workbench for gluing the puzzle joints. My normal portable workbench is two Stanley junior saw-horses (which have slots for 2x4s), with a piece of sacrificial 18mm shuttering ply screwed to the top. I extended this to about 4m long with some scrap wood I had lying around.

Next up, a hot-box for storing the epoxy. I'm not going to be able to keep my detached garage-workshop much warmer than about 10C in winter, so I thought I'd at least keep the epoxy warm. I made a small box out of spare ply scraps, insulated it with some PIR sheets and foil insulation, and added 2x 14W PTC reptile heating pads and an STC-1000 thermostat. I also added a zigbee temperature sensor, partly out of curiosity and partly because I don't really trust the thermostat. So far it seems to be working great!


Hopefully back later this weekend once I get the puzzle joints glued up.
Offline
#2 13 Nov 2025 10:00 am
- cillian64
- Member
- Registered: 6 Nov 2025
- Posts: 8
Re: Canadian Canoe build
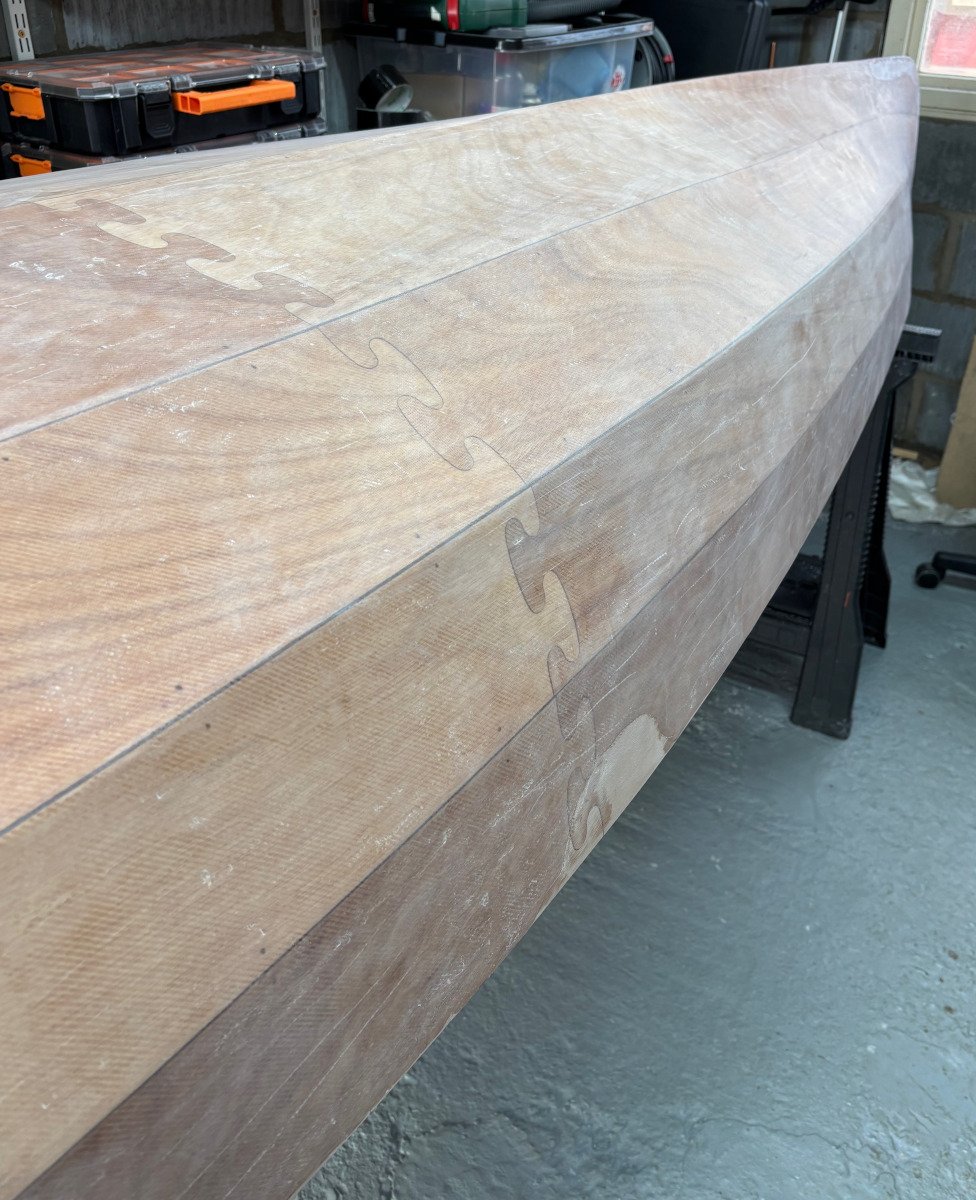
I spent a while cleaning up the puzzle joints and ended up giving a quick sand round all the ply pieces to knock off the splinters. There were also a few tabs left from the CNC cutting, I found a small block plane a very satisfying way to remove those.
Aligning the joints, I was surprised how much movement there was overall despite the joints themselves feeling pretty tight. Checking alignment against the plans is definitely not optional. This is one place where my improvised workbench-with-end-extensions made things quite a bit harder than they needed to be - I'd recommend setting up a solid workbench the full length of the pieces if at all possible. I think I got away with a string-line and some careful sighting.
The epoxy is messier and trickier than I expected. Previously I've only used standard 5-minute epoxy, this stuff is a lot runnier (at least before thickening).
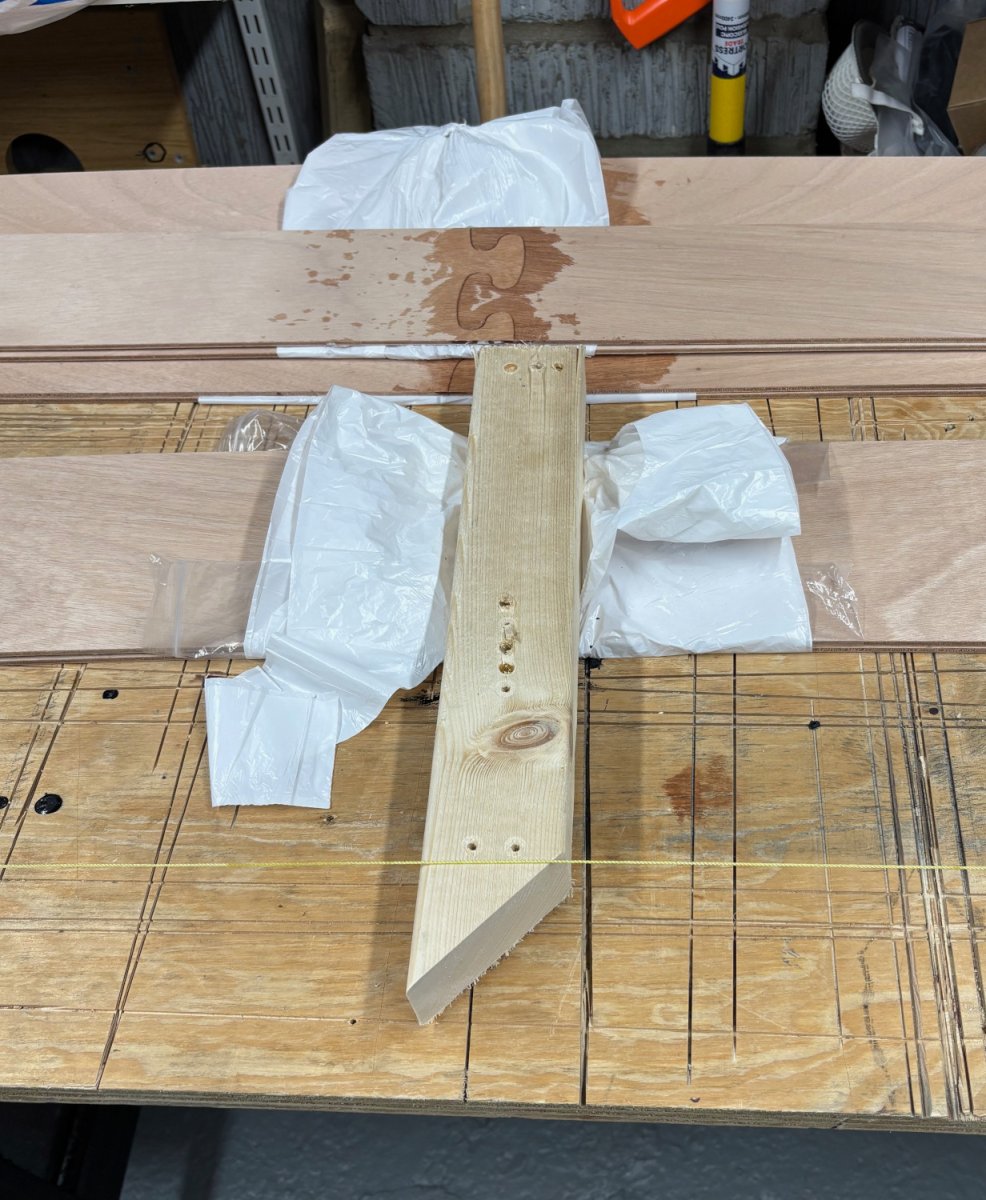
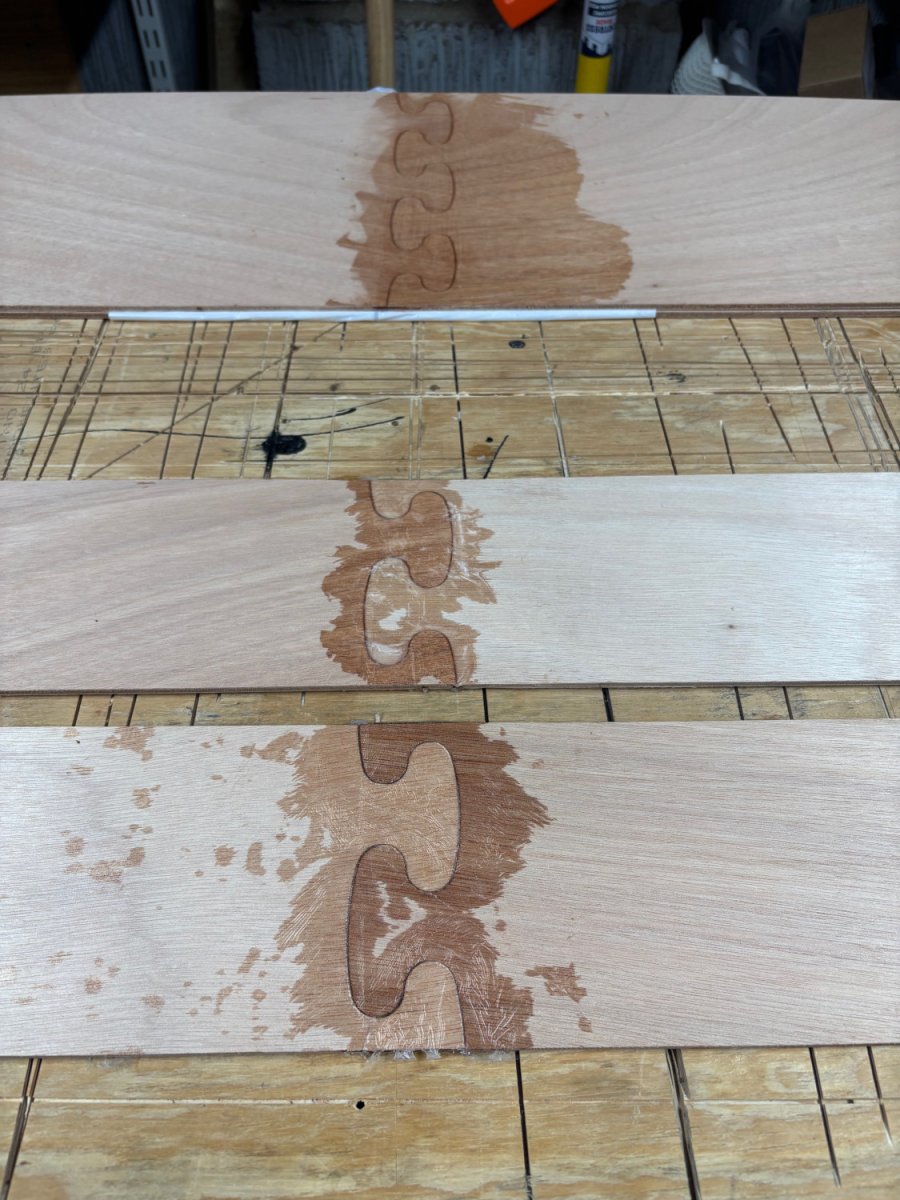
I'm pretty happy with how the joints have turned out. Some sanding required, but there aren't any voids or big protruding globs. The heated box seems to have done its job as the epoxy was rock hard in less than 24 hours despite the garage being pretty cold
Offline
#3 21 Nov 2025 5:35 pm
- cillian64
- Member
- Registered: 6 Nov 2025
- Posts: 8
Re: Canadian Canoe build
I'd been wavering over whether to glue together the gunwale/inwale pieces or wait until they were required as I'm rather short on storage space for long things. But, I decided it would be better to glue them while I still had my long flat workbench available. It took me a while to figure out the purpose of each length of ash - I had been expecting three equal pieces for each gunwale, but actually they were each two long pieces and one much shorter piece. Also, the peices for all four of the rails (port/starboard, gunwale/inwale) are identical as far as I can tell.
This is where I learned a rather important lesson: Just because your workspace is long enough to fit the finished boat, it's not necessarily long enough to fit the intermediate pieces. The gunwales follow a curve around the finished boat so are rather longer than it when they are straight (the build manual says 5.5m, versus 4.75m for the canoe. My garage is about 5.4m long). I decided to glue the two long pieces and leave off the short piece (this results in something like 5m) for now. Once I have the hull together I can work out what length I actually need - I'm hoping the 5.5m is somewhat oversized, and if not I'll have to do some of it outside or with the doors open. Hanging the rails from the ceiling worked very well to store them for now.
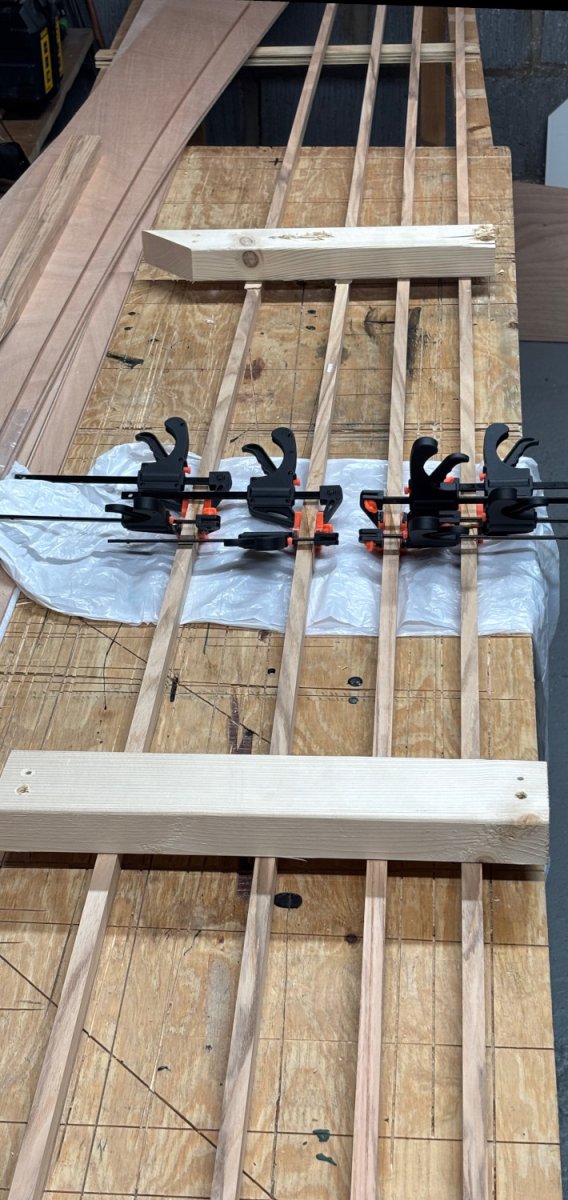
Anyway, gluing the rails went smoothly, I found it very useful to use two cauls to constrain the rails in one axis and stop the joints slipping lengthways when I clamp them - the rails are bendy enough to open the joint for glue and clamp it closed again. I bought a large number of very cheap clamps from aliexpress: they are surprisingly small and not especially strong, but ideal for this sort of thing.
Once those dried, I had to clean up the puzzle joints. A mouse-style detail sander (with dust extraction!) made relatively quick work of this. I thought I was using 120-grit paper but actually it was 80-grit. I'm not sure I'd recommend this but I think I got away with it - helpfully the marine ply doesn't seem to have the super thin veneers you get on most ply these days.

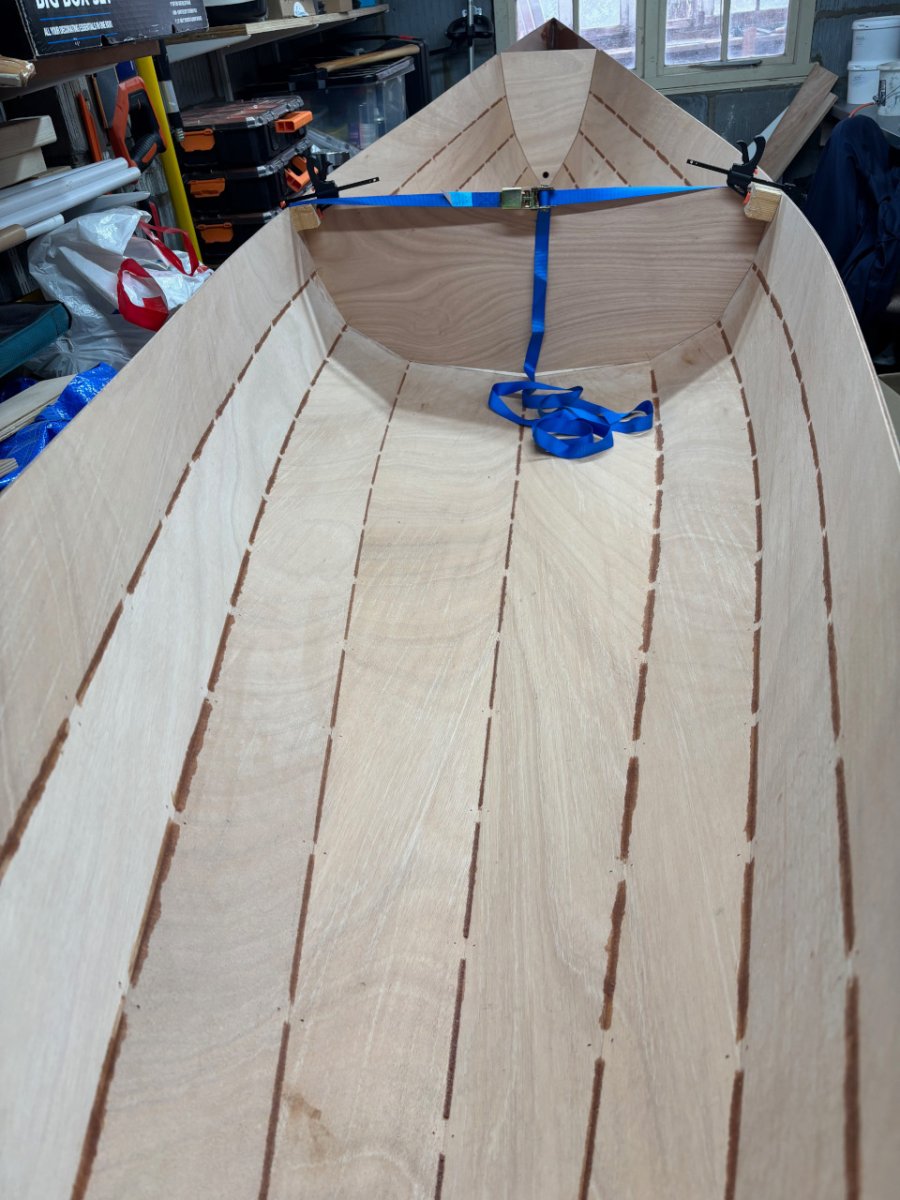
And then on to assembling and wiring the hull. My assistant was sadly busy (and didn't fancy the pretty cold garage) so I ended up doing this all solo. It was a little tricky but I was helped by my cramped space (the shelves stopped pieces flopping too far) and it went pretty well in the end. I deviated from the instructions by starting with a tie on each end and one in the middle then filling in the rest, rather than working along from one end - again, I seem to have gotten away with it. Here it is pre-bulkheads looking rather kayak-like:
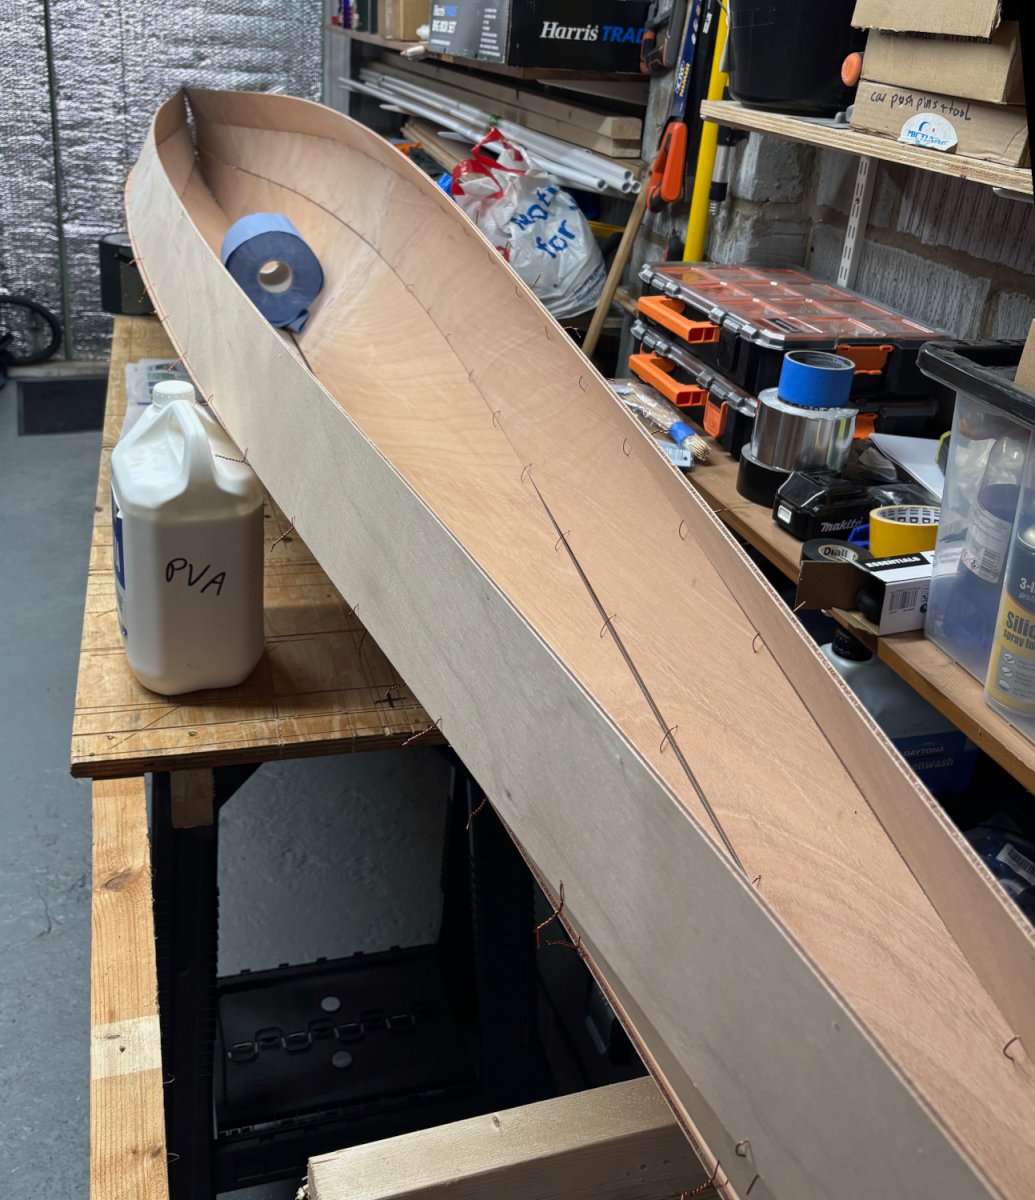
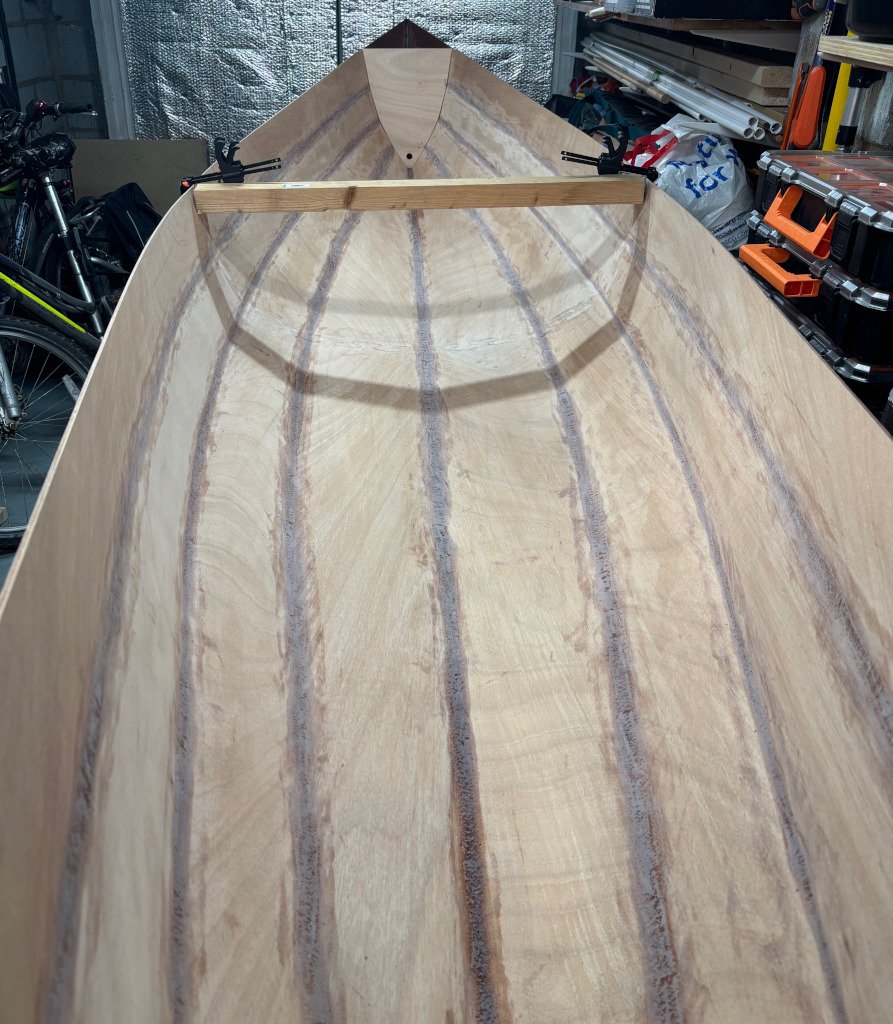
And after I wedged in the bulkheads it suddenly popped into a much more canoe-like shape. I was pretty pleased with my trick of using 4 clamps and 2 blocks of wood to hold the central bulkhead in place, but now I look at the photo I realise I'd probably be better off adding a strap (like in the photos in the build manual) to hold the sides tight against the bulkhead.
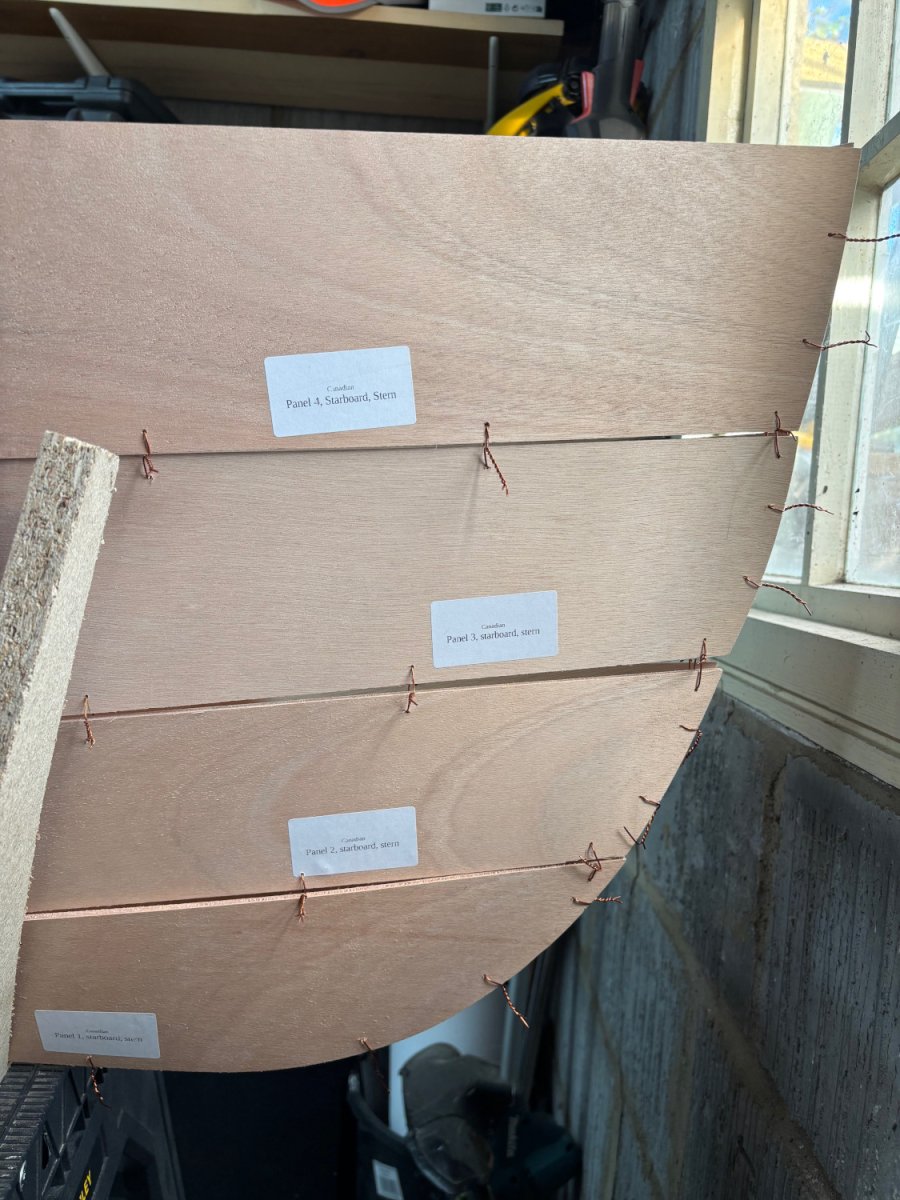
I've started wiring in the end-bulkheads and trying to fine-tune the shape and tighten ties. So far this is being very tricky - the side pieces really want to slip past each other and overlap at the joints. More experimentation is required (I'm all ears if anyone has tips for this stage).

Offline
#4 25 Nov 2025 8:10 am
- Paul
- Employee

- From: Gatebeck Cumbria
- Registered: 4 Aug 2011
- Posts: 134
Re: Canadian Canoe build
It is difficult to tell from the picture how the boat is supported but it should be supported only near the ends at this stage: this makes it easier to fit the panels together since they will be fall into the correct place.
The ties do not need to be tightened until the panels are in the correct place. Tightening just one loop will prevent the panel moving down its entire length. Pull the panels so that they are together before tightening the loop: using the wire to pull the panels together will damage the wood.
Please don’t be tempted to cut any panel. The panels are cut to size and do fit together.
Offline
#5 1 Dec 2025 9:12 pm
- cillian64
- Member
- Registered: 6 Nov 2025
- Posts: 8
Re: Canadian Canoe build
It is difficult to tell from the picture how the boat is supported but it should be supported only near the ends at this stage: this makes it easier to fit the panels together since they will be fall into the correct place.
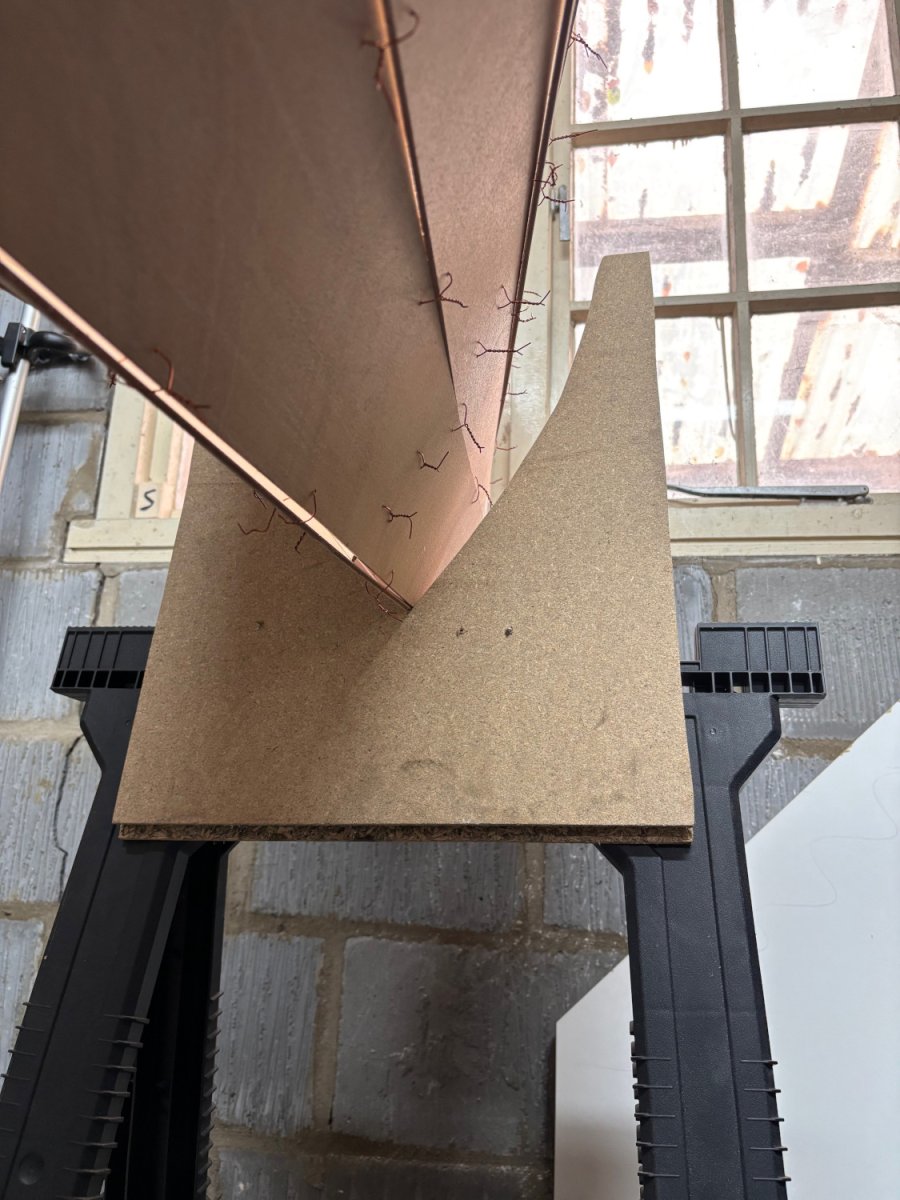
You're right that in those photos the canoe was still sitting on the flat bench. I've since changed to supporting at the ends with two saw-horses, this does seem to have improved things. To get it to stand up straight I cut some vee-shaped pieces of chipboard and screwed them to the sawhorses
I've been round the ties a few times and the panels have mostly come together. I thought I'd left the ties loose enough when attaching them initially, but actually as the shape of the canoe changed several of them had pulled tight and were distorting the shape. I'd advise future builders that getting the shape correct is trickier than it sounds, I was assuming it would be quite straightforward but actually a lot of patience and back-and-forth is needed.
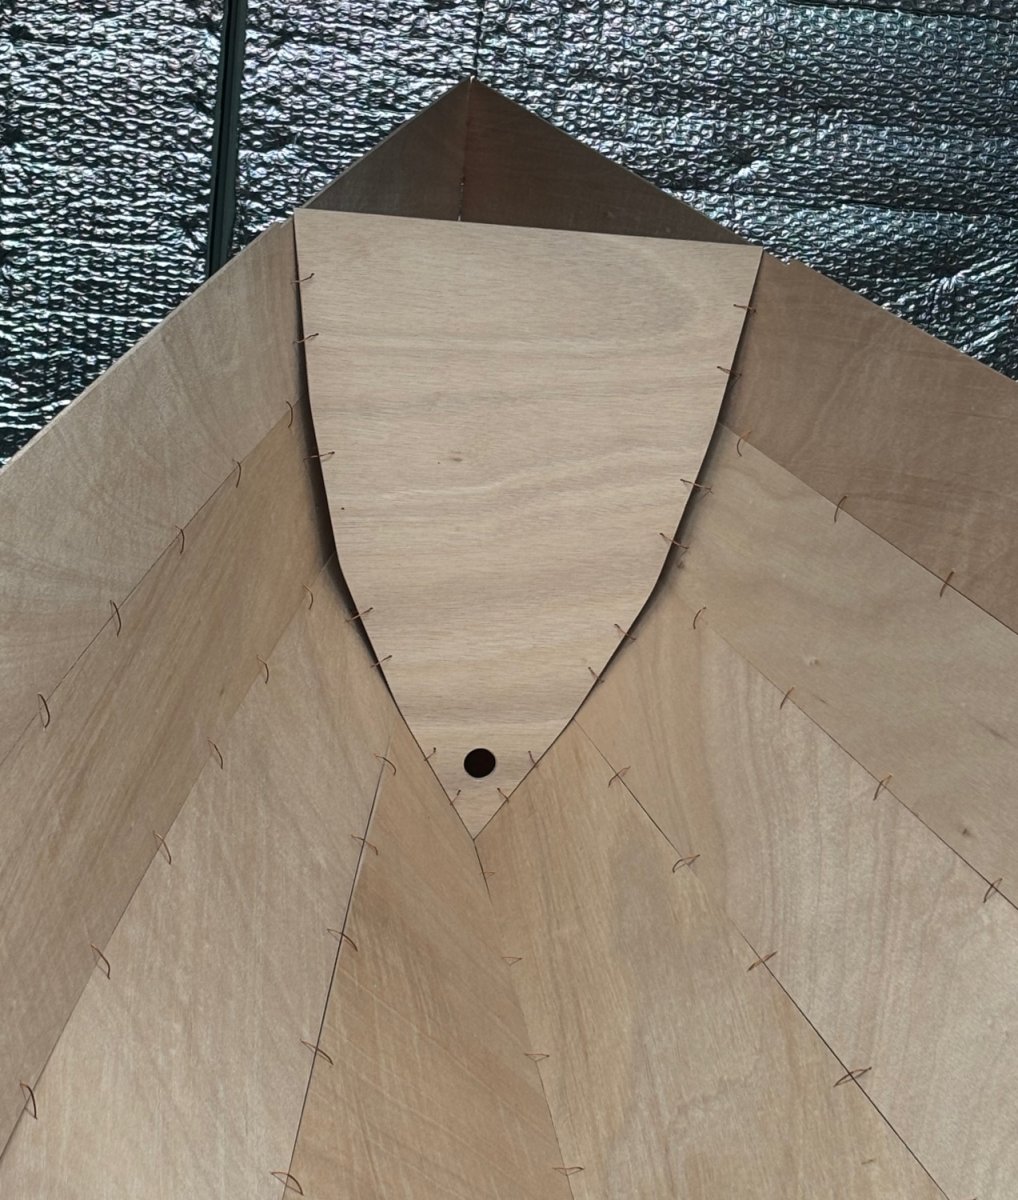
I've still got some pretty large (maybe 6mm at most) gaps near the bow and stern which are strongly resisting closing up, but I'm hopeful I can get these sorted with some more fiddling.
I do have another question about the permanent bulkheads. As I've installed them they have pretty significant gaps to how the hull seems to want to sit. Is it normal that tightening up the bulkhead ties will significantly pull in the sides of the hull, or have I done something wrong here? I have measured the top of the bulkheads as 40mm from the step in the top panel, but it wasn't entirely clear how they should be angled (so I arbitrarily made them vertical). I don't mind cutting the ties and making some more holes if I've gotten the positioning wrong here.
Offline
#6 2 Dec 2025 5:36 pm
- Phil
- Employee

- Registered: 8 Jun 2011
- Posts: 74
Re: Canadian Canoe build
Hello Cillian64,
Firstly, everything is broadly looking as it should, well done! What you need to do now is put a slight angle on the bulkheads. They should be angled ever so slightly towards the ends of the boat. This way they will sit flush with the top of panel 4. You may well need to tighten the wires up in the middle of the bulkheads to pull in the side panels. Before you do, double-check your measurements to make sure the bulkhead is not twisted and sits perpendicular to the keel line.
Once you have done that you will need to go round and systematically tighten up your wires. When you do this, push the wood together with one hand and then with the other pull then twist the wires. If you tighten then like a tourniquet the wires will snap.
You will find that you will need to add in some more wires at panel 1 near the bow. This is where the wood is having to turn from vertical to horizontal, and it's quite usual to put in extra wires here to get the join between panels 1 and 2 better aligned.
I hope this helps!
Offline
#7 30 Jan 2026 12:47 pm
- cillian64
- Member
- Registered: 6 Nov 2025
- Posts: 8
Re: Canadian Canoe build
It's been a bit of a while, and the garage is quite a bit less welcoming in this cold, but I've made some progress. I'm pleased that the epoxy has been setting perfectly well despite the garage being generally about 10 degrees - with the epoxy pre-heated to about 25-28 degrees, it goes pretty gummy about 45 minutes after mixing and is consistently rock hard by the next day. For now I'm mixing just 29g (20+9) at a time in yoghurt pots because that's how much I can get through before it goes too gummy. The pumps are convenient but I like using a set of digital scales so I can mix up smaller quantities than a full pump.
I managed to get the panels to all pull together very well in the end. Some extra ties did help near the bow and stern, and it helped to leave the ties on the bulkheads very loose and only tighten them up once the main body shape was finished and its ties tightened. I gave the bow and stern a pretty generous fillet along with the fibre-glass tape (I figure these will get more impacts than any other part of the boat). I also used some masking tape on top to hold closed the remaining gaps at the bow and stern. The fibreglass at the bow and stern seems impossible to do neatly, so I'm very glad these will be hidden by the bulkheads.
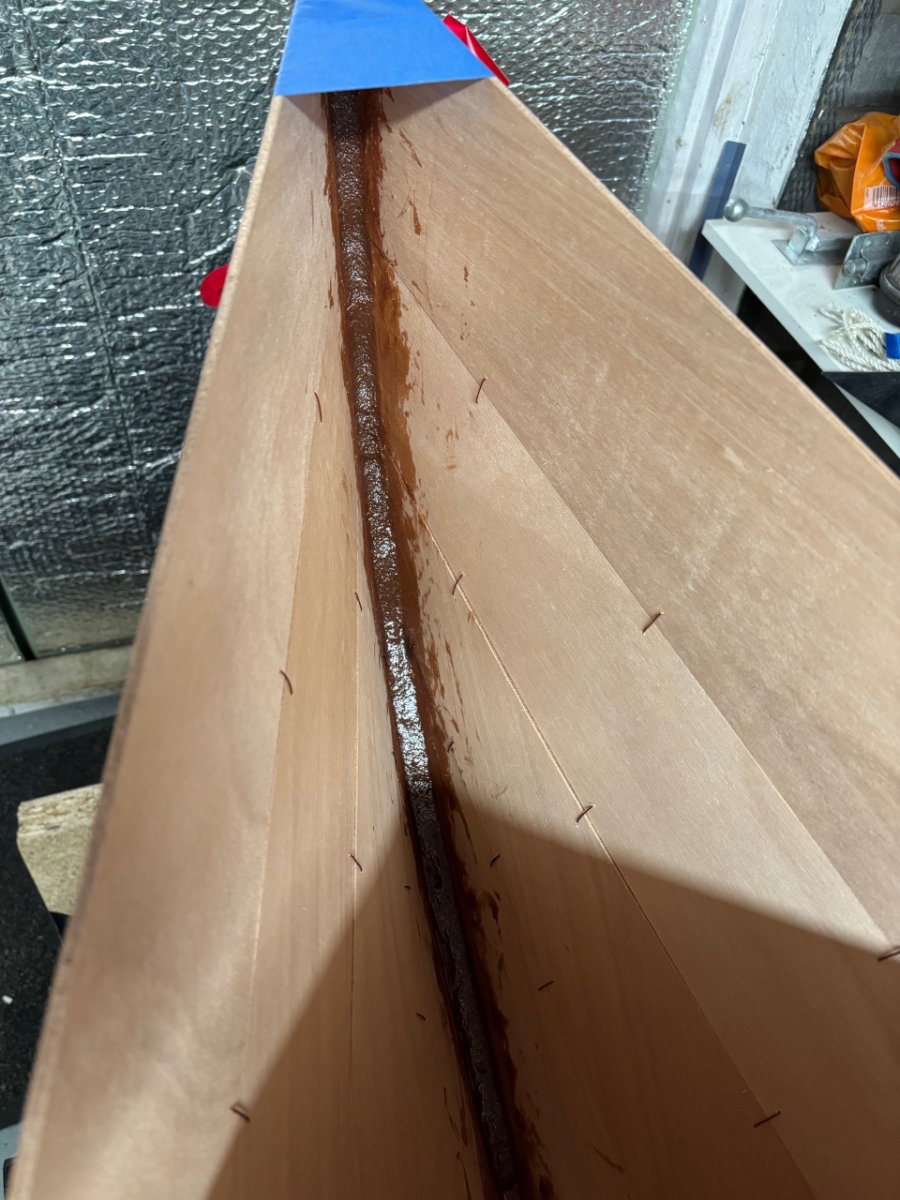

And then tabbed all the inside between the wire ties. I did use masking tape to help keep things neat, even though this will all be covered by the interior fillets later.
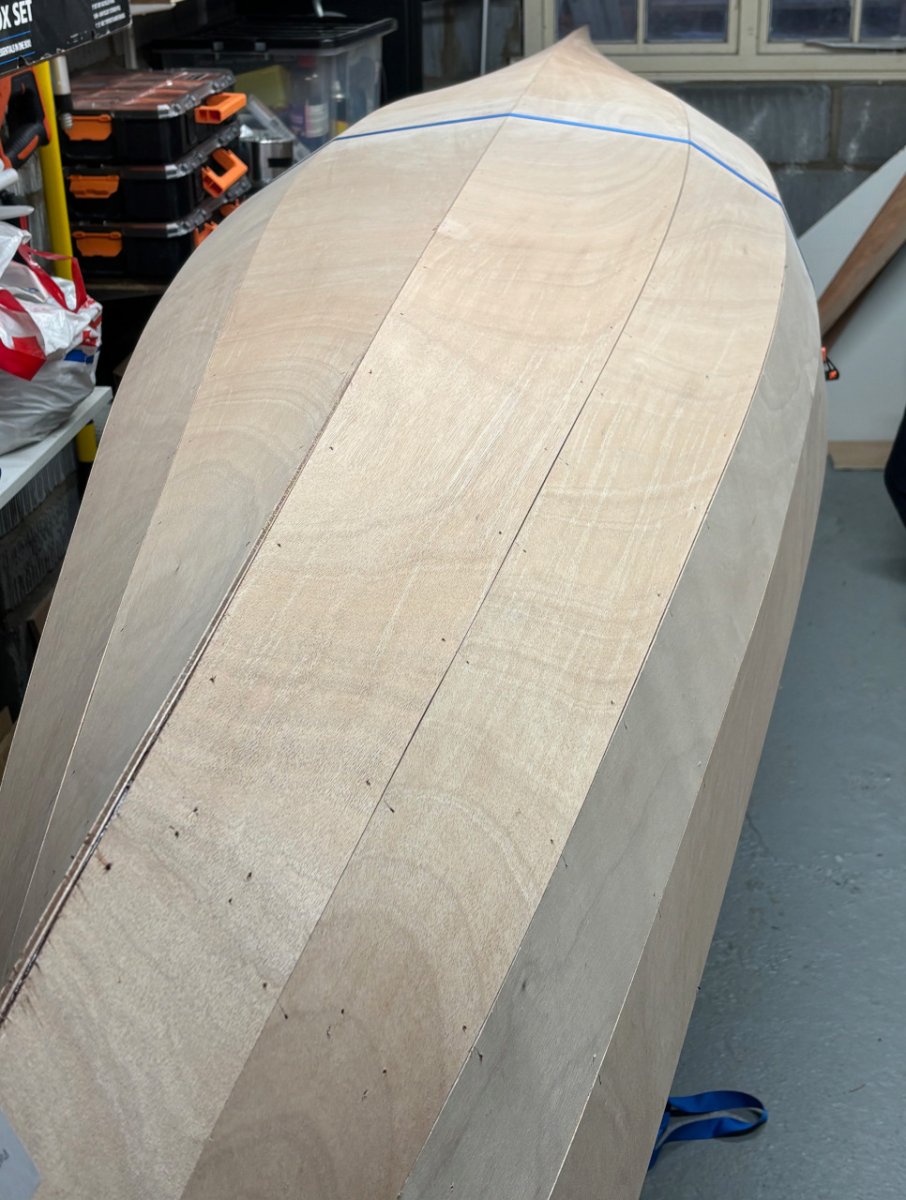
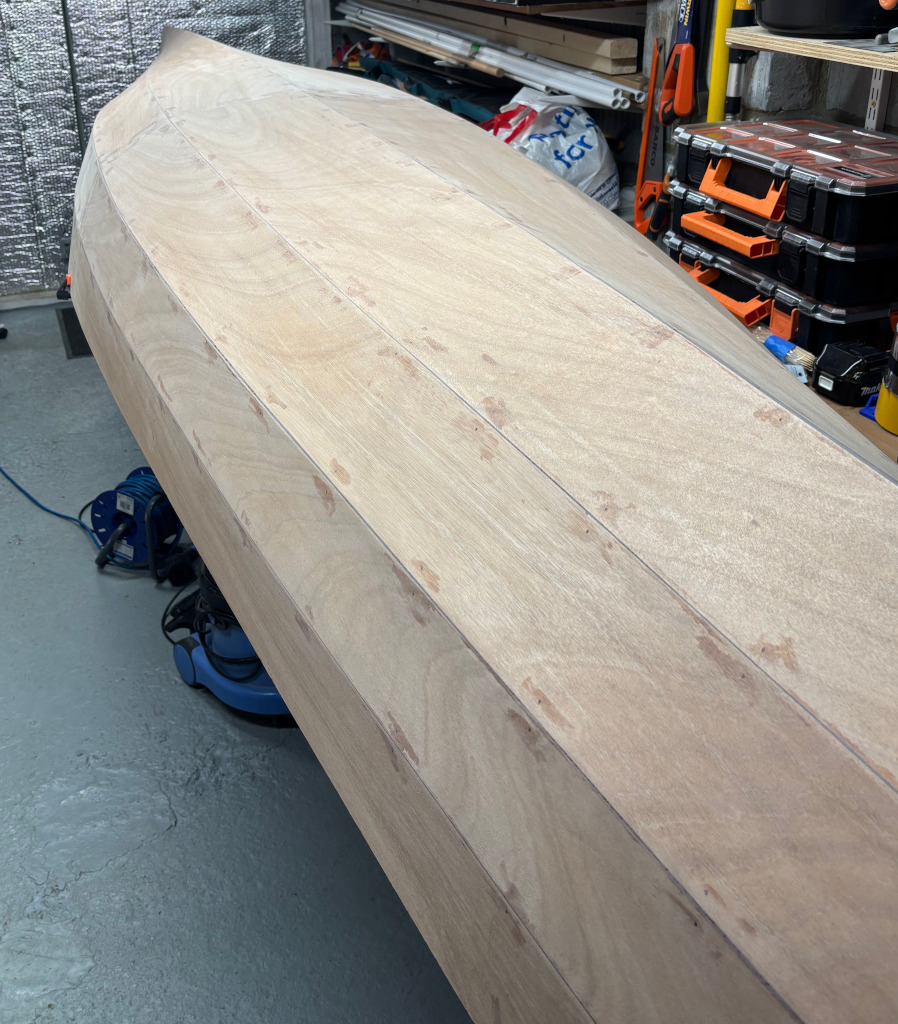
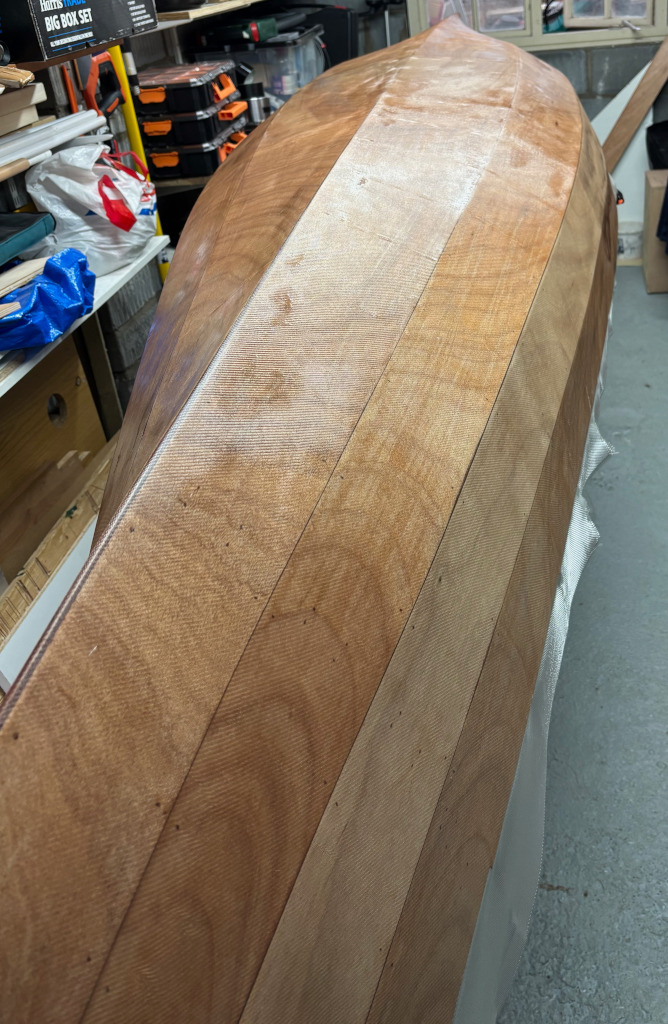
Despite pretty small tabs (only a few mm wide and probably under 1mm thick) on the inside only, the canoe held together perfectly well with the ties cut and doesn't seem nearly as delicate as I expected it to be at this stage. Here it is flipped over - amazing how you get such smooth graceful curves from flat pieces of wood!
I again went with masking tape (the 25mm width was fine, I like 3m scotchblue) to keep things neat. I've gotten through quite a few rolls but it was definitely worth it.
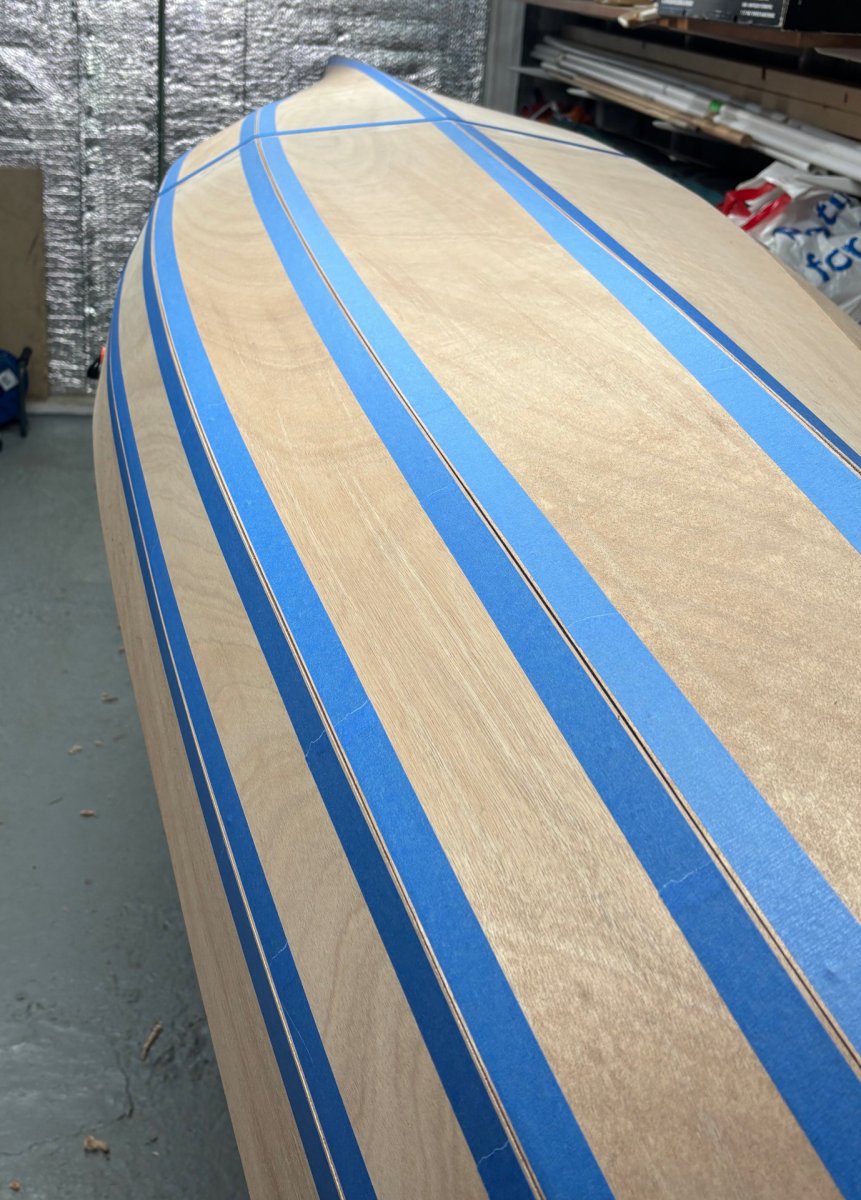
And here's where we're at now. All the exterior joints are filled and all the holes are plugged from the outside (I took off the strap and did the central ones after this photo). Now ready to get it flipped back over, sand the interior tabs, and start on the interior fillets.
I'm quite surprised that, so far, my limited space isn't being too much of a problem. Even though I can only access one side at a time it's pretty easy to shuffle the saw-horses around to get to the other side, and once the epoxy tabs had cured it was easily strong enough for two people to carry out of the garage to turn around.
Offline
#8 1 Feb 2026 12:16 pm
- sailingfree
- Member
- From: Wareham, Dorset
- Registered: 15 Feb 2022
- Posts: 35
- Website
Re: Canadian Canoe build
Hi, progress is looking good, its never that easy when its cold in the garage. I decided to buy a couple of 2KW heaters from Machine Mart (which you can see one of them bottom left) which after 30 minutes brings the temperature up to a comfy 12C from the 7C I had this morning.
As for working in a cramped space, I've found that building a simple frame using some cheap studs with the workhorses and putting wheels on that makes it a lot easier to move around. I'm building a 16foot boat in my standard UK garage and there's just enough room for me to get past it at one end. The solid frame and wheels makes it easy to move from side to side, get the boat outside if I need to get at stuff in the garage, and it means there's no danger of things getting knocked out of shape, or worse having your saw horses fall over when you are shuffling things around. At the end of the build, this breaks down and the studs get used for other DIY projects, or your next boat. Oh, didn't they warn you there's always a next boat ![]()
I also used some 18mm ply as a base which is useful as a small bench/shelf for all the tools and other things that get used.
Pete
Last edited by sailingfree (1 Feb 2026 12:26 pm)
Offline
#9 6 Mar 2026 4:37 pm
- cillian64
- Member
- Registered: 6 Nov 2025
- Posts: 8
Re: Canadian Canoe build
Hi Pete, thanks for the tips, that wheeled base looks like a good idea. I've got no shortage of random wood around so I might make one!
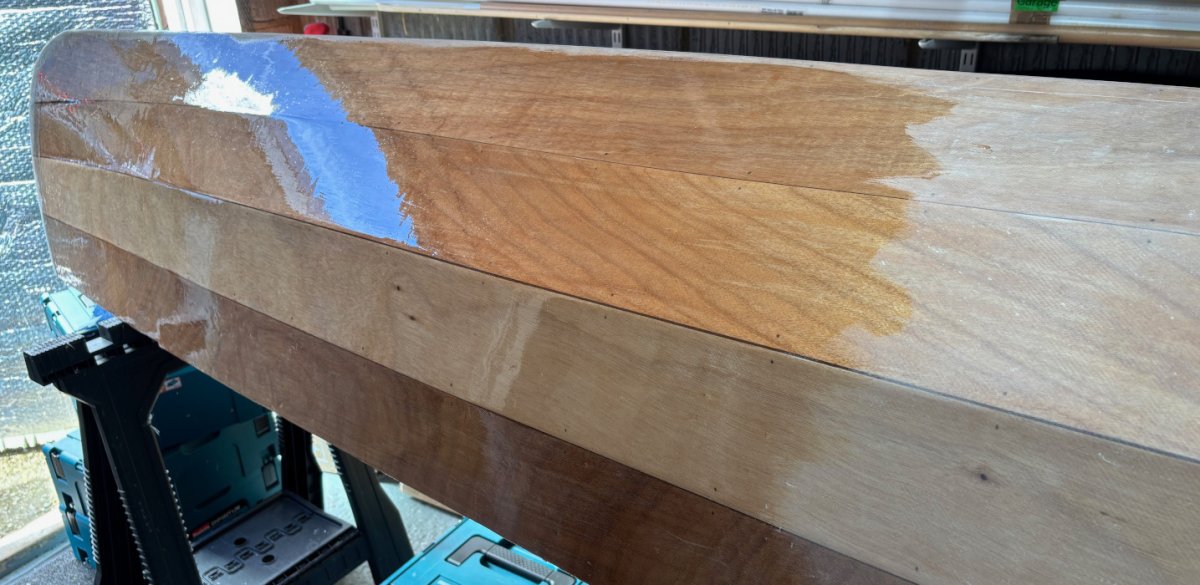
Once again I hadn't realised how long it's been since I last posted. I'm still chugging along with the build, so there's quite a bit of progress to report. I filleted the inside joints (this was a lot nicer and easier than I expected. Highly recommend the filleting tools FBK sells, and I discovered you can tilt the tool to give an even larger radius), gave the inside and outside fillets a couple of weeks to fully cure, and then sanded the whole lot down smooth. It was pretty easy to sand a nice radius on the keel and other outside joints which I think is probably important for the glass to lie nicely.
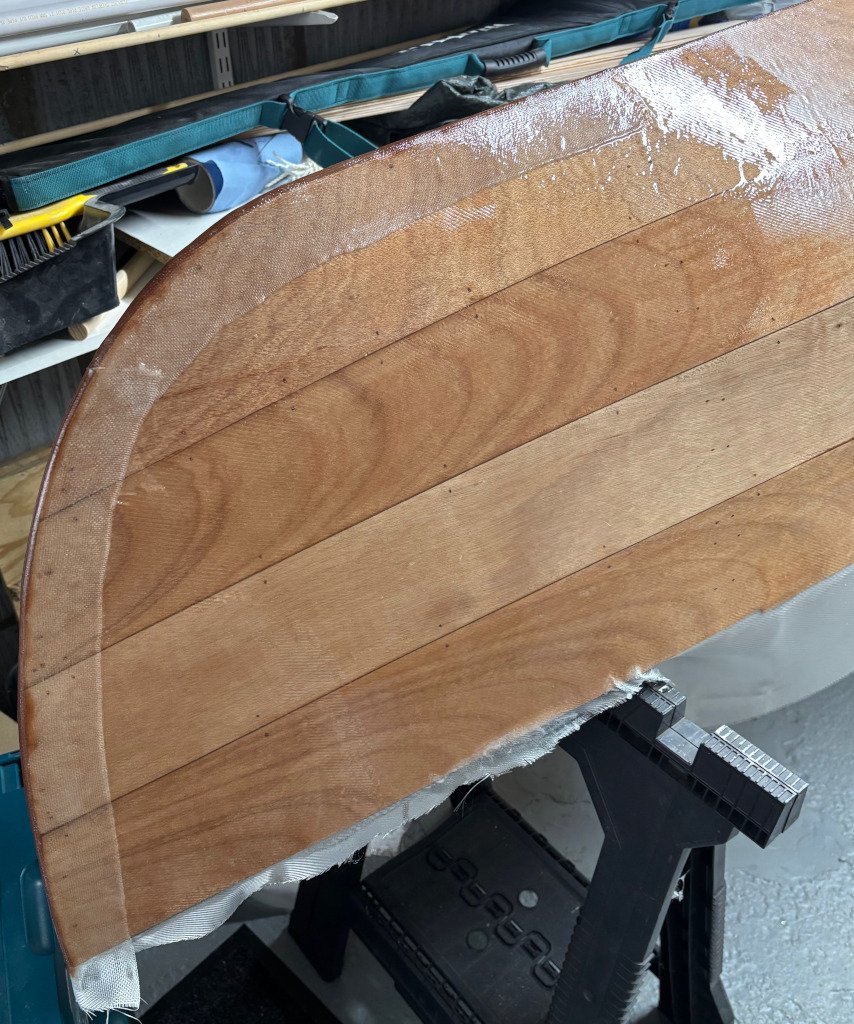
I discovered that the glass sheet provided for the inside was a bit too short to reach between the bulkheads so I proceeded to glass the outside of the canoe first (FBK have since posted me some extra glass to make up the gap - thanks!). This wasn't too tricky but did take a *lot* longer than I expected, I wasn't taking my time but for me it was definitely an all-day job to get two coats of epoxy on the glass (with a few hours gap for it to tack up) and keel-tape. I'm very glad I decided to do the fillets separately to the glassing, even though it meant some extra sanding.
The end result turned out okay but not perfect, so I think I'm going to paint the outside. In particular the glass tape used on the keel hasn't really disappeared in the same way the glass sheets do. I also should have been much more generous with the thickened epoxy under the glass tape, as I ended up with a few gaps in places.
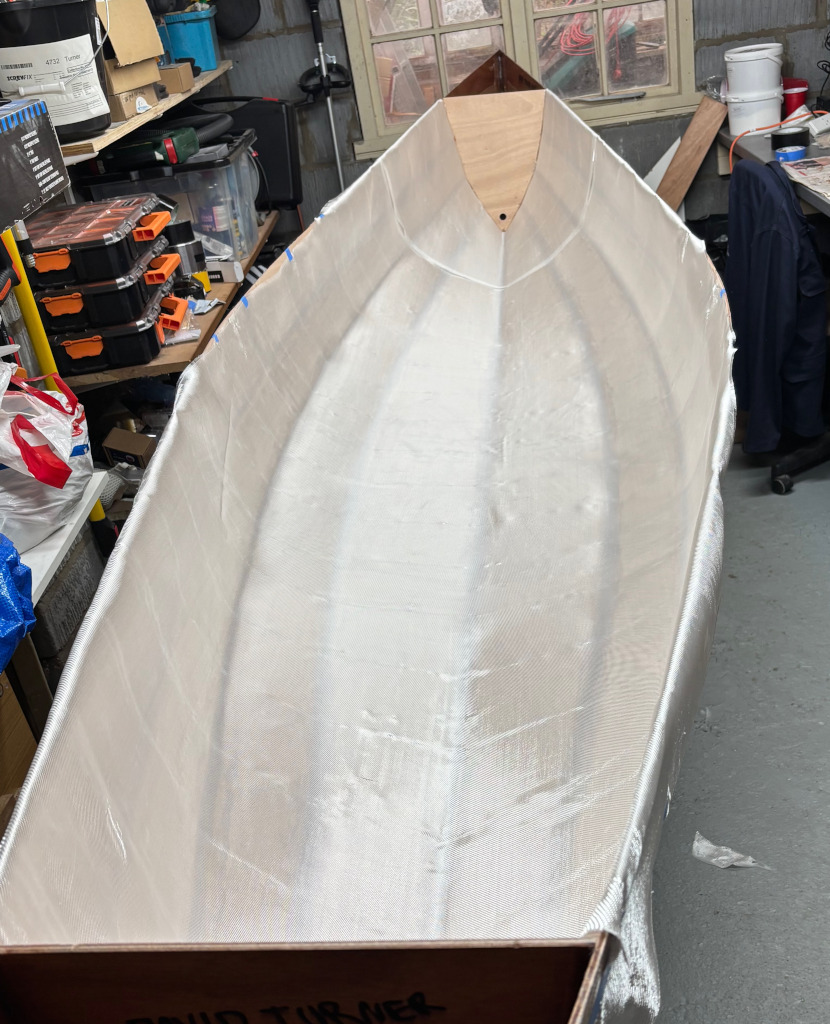
The latest job I've just finished is prepping the inside for glassing. I decided to do this the day before actually epoxying so I can really take my time to get the glass sitting well and not have quite so much to do on epoxy-day. One thing I didn't fully appreciate from the instructions is just how useful it is to stroke your glass! Once the glass sheet is roughly in place you can spend quite a while firmly stroking the fabric and this makes a massive difference in helping it lie well on the surface. This also really helps to remove any creases from how the glass was packed. This doesn't work at all with grippy gloves on so I had to use bare hands.
Offline
#10 4 May 2026 11:02 am
- cillian64
- Member
- Registered: 6 Nov 2025
- Posts: 8
Re: Canadian Canoe build
It looks like this build is going to be carrying on somewhat longer than I intended! I thought the glass+epoxy application on the inside and outside had gone rather well and I was very happy with how the end result looked, but sadly the second coat of epoxy has failed to adhere properly over a lot of the inside and outside of the canoe. I've been fastidious about mixing ratios and time, pre-warmed the epoxy, and don't have any sources of contamination like a fuel heater or air compressor, so my best guess is it's either due to condensation or amine blush. Humidity reached 70-80% due to me breathing and the temperature falling and it seems like amine blush can be a problem even when re-coating on the same day. From now on I'll be getting the garage properly warm and dry for any epoxy work and I'd advise extreme care if you choose to do epoxying in a cool humid space.
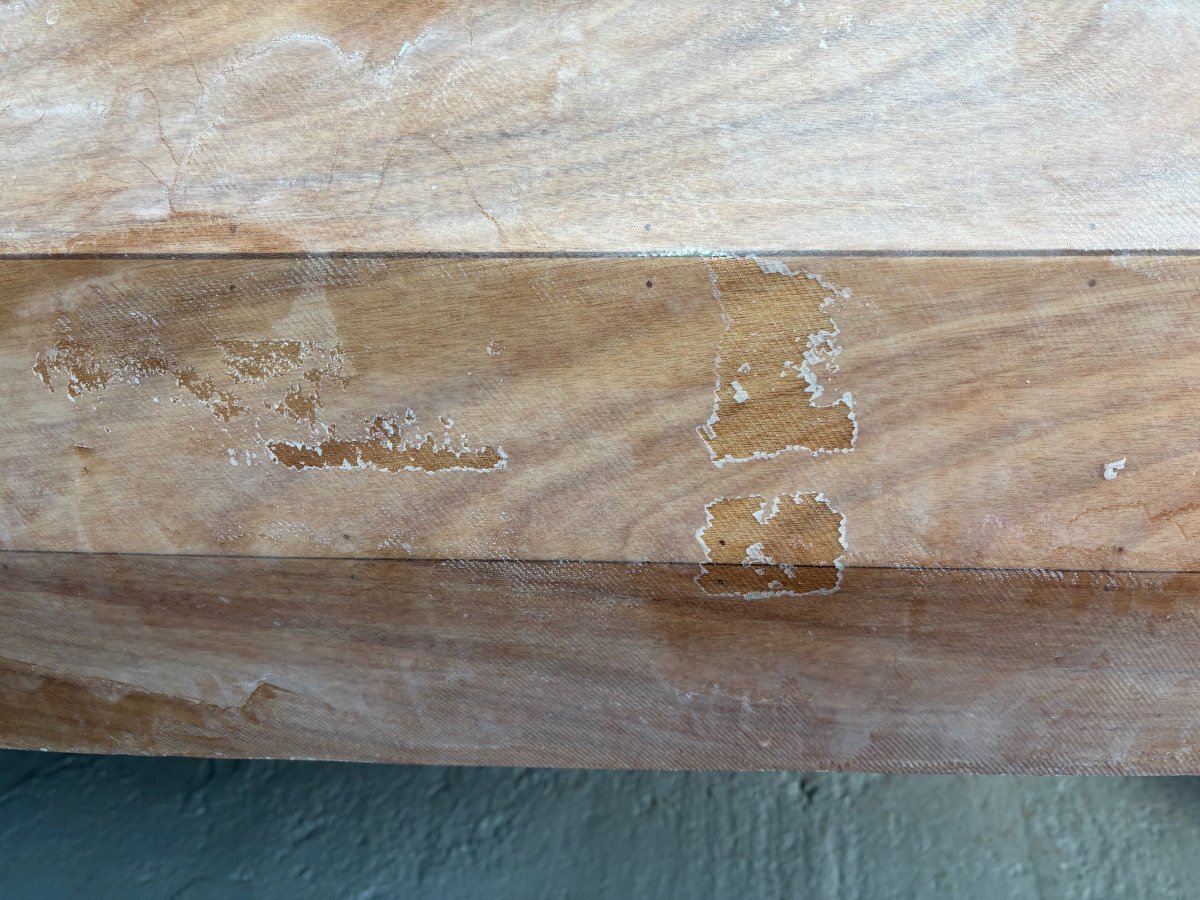
Scraping off the flakey coat of epoxy was very annoying but wasn't quite as awful as I initially expected. First, I stuck and removed pieces of tape all over the hull to work out how bad the problem was in different areas. For removal, the best method I found was using a sharp 12mm wood chisel bevel-up: the first coat of epoxy and glass were rock solid and very well stuck so the chisel doesn't tend to dig in too much. In a lot of areas the epoxy basically fell off in sheets of 1-5cm. In some areas I could remove the epoxy very slowly (a few mm at a time) but it seemed relatively well stuck so I've decided to leave it. Overall it's taken me a few full days to do this by myself.
After scraping, I gave the whole hull a sand with 120-grit using my new random orbit sander (with vacuum dust extraction!). Having scraped off most of the top coat of epoxy, what remains is a surface textured due to the weave of the glass. It's impossible to fully sand into the valleys without also removing quite a lot of the glass so I went with a compromise where there are still some shiny spots in the valleys but most of the surface is scuffed. Time will tell whether this was the right choice. With fresh 120-grit sanding discs it's very easy to sand straight through to the bare wood so care is needed here.
Finally it was back to adding another coat of epoxy in a very warm, dry garage on a sunny day. This seems to have stuck okay and the result is shiny. There's no way I'm doing another round of scraping so I've crossed my fingers and haven't done any more tape adhesion tests.
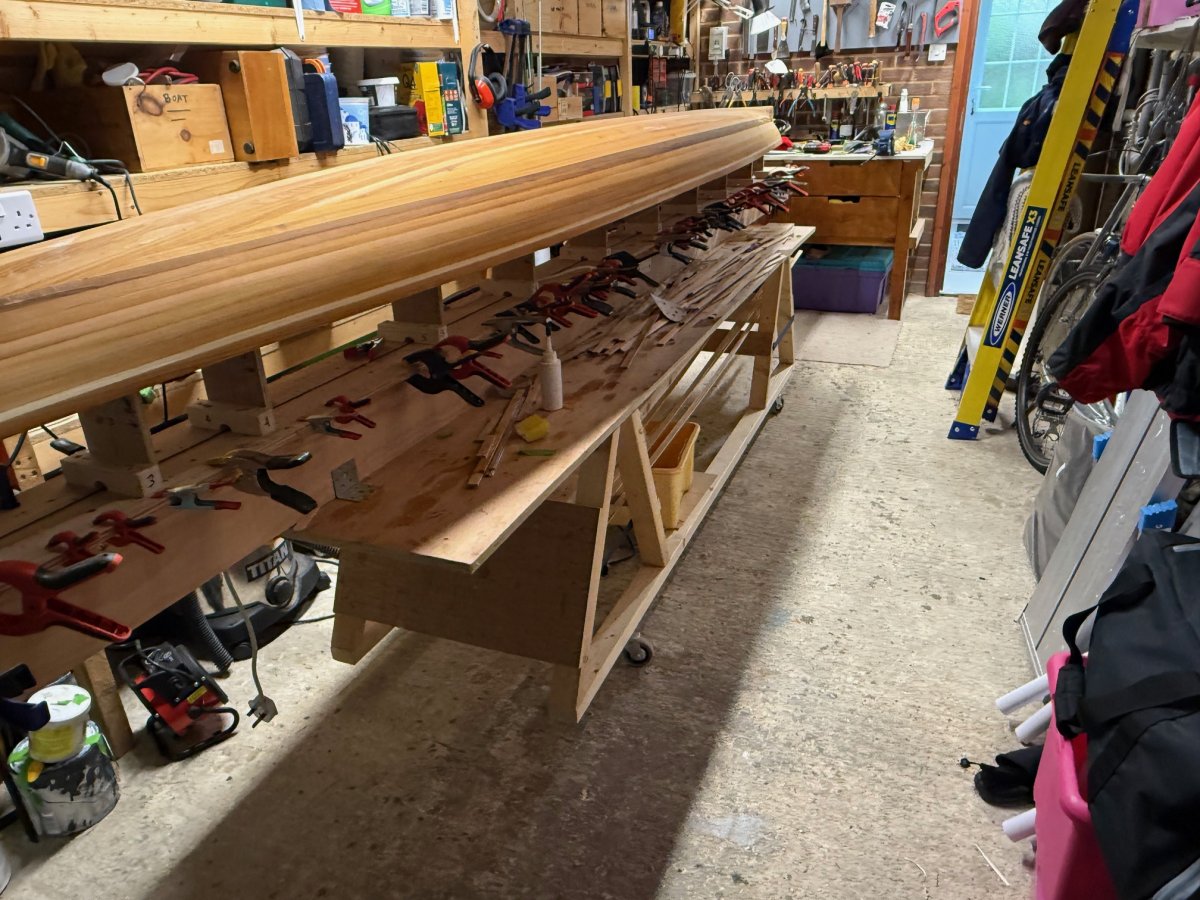
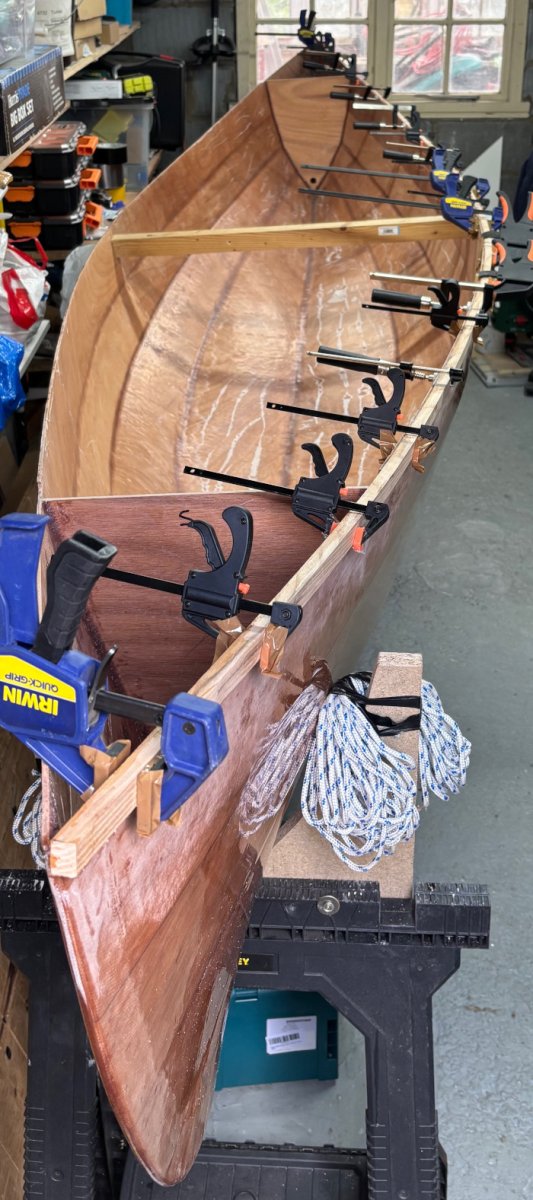
Shown here is gluing on one of the outer rails (before I finished scraping/sanding the inside). Instead of screwing the rail from the inside in the bulkheads (as directed in the instructions) I decided to just use a large number of clamps and do one rail at a time. This was fine to do solo but I do recommend a few dry runs as it is a little tricky. Note the temporary thwart - instead of messing around with extra rope/clamps I decided to just drill two extra holes in the hull and screw this in place (with plywood pads on the outside to stop the screw-head mangling the surface), and I'll fill the holes later on. Holes filled with the brown thickened epoxy just look like knots so I think this will look fine.
Offline
#11 17 May 2026 8:16 pm
- cillian64
- Member
- Registered: 6 Nov 2025
- Posts: 8
Re: Canadian Canoe build
Just a quick update this weekend (various other projects ongoing which are a bit more urgent right now). The outer rubrails are on, I've put another coat of epoxy inside the bulkheads and lids, I've started working out a plan for the internal broken inwales, and I've just received some big orders with my paint, varnish, and seats. I decided to buy Nova Craft-branded web seats - they are extremely sturdy, very nice looking, pre-varnished, and just the right size for this canoe (the seat rails are oversized and you cut them down to width).
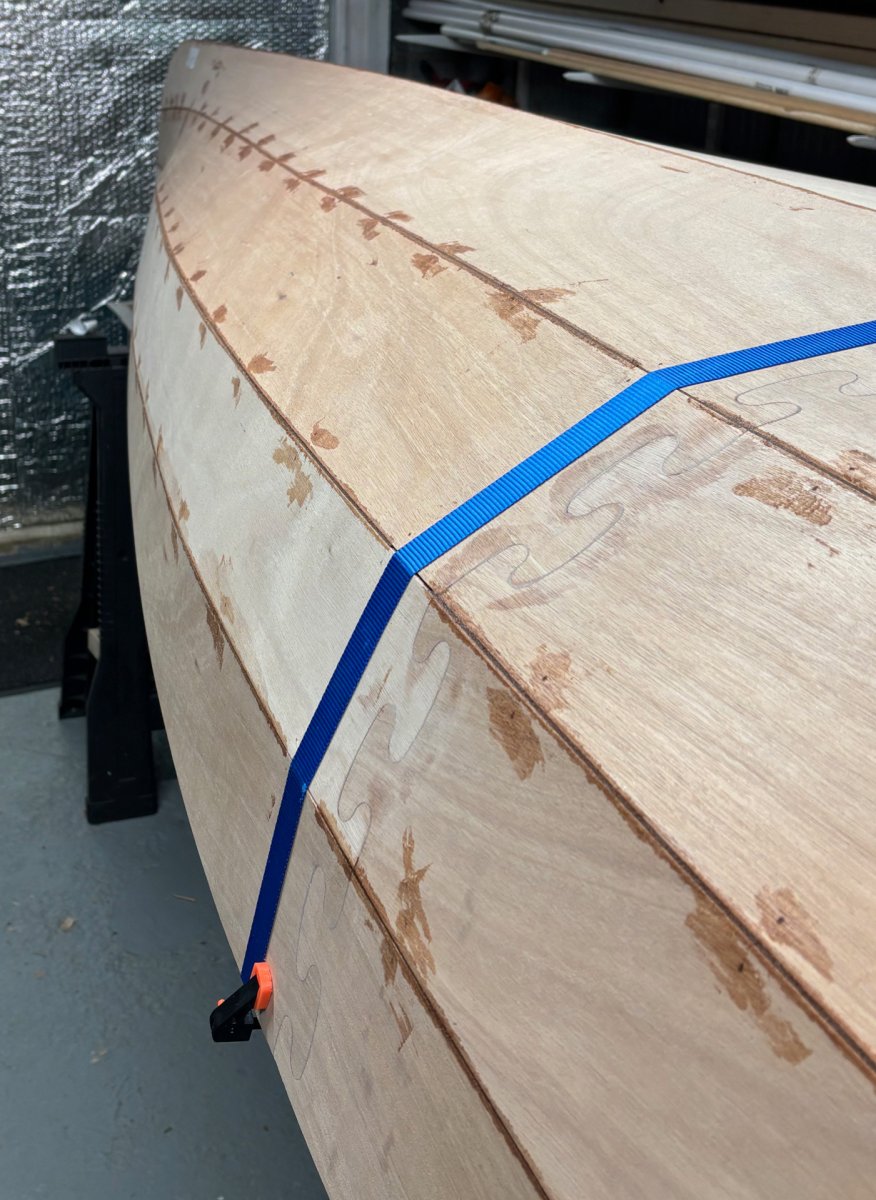
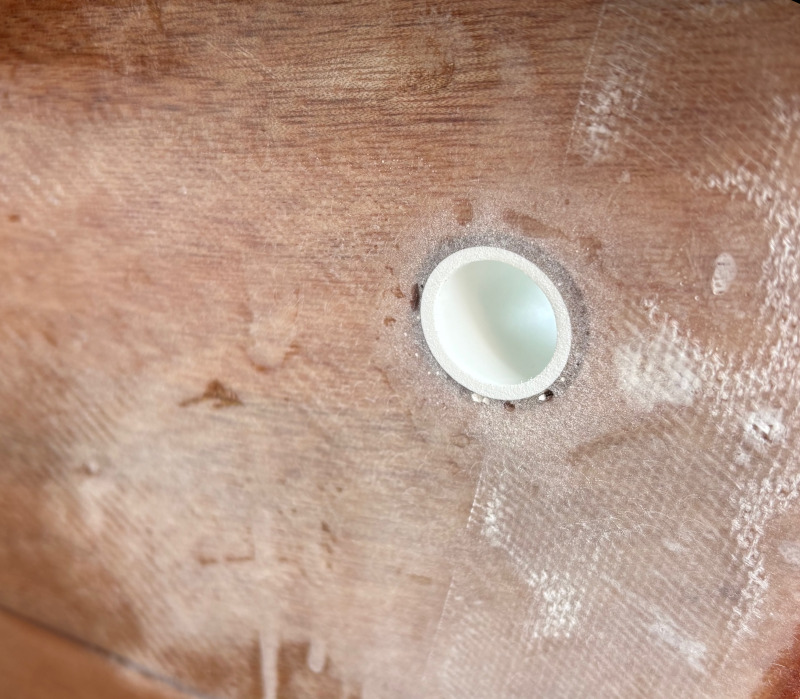
One thing I have finished is attachments for the bow and stern painters (mooring ropes). I need these to be very sturdy as they're responsible for stopping the canoe see-saw-ing when transporting on a roof-rack. After some reading around and consulting FBK support I decided to go with holes drilled through the bow/stern. To keep the end tanks waterproof I added grommets made from some 20mm plastic electrical conduit I had lying around. First I drilled the holes out with a 22mm hole-saw (a very cheap one which went through the fibreglass and epoxy no problem). I sanded the conduit a little (for epoxy grip/adhesion) then glued it in place with a lot of thickened epoxy and some glass inside for good measure.
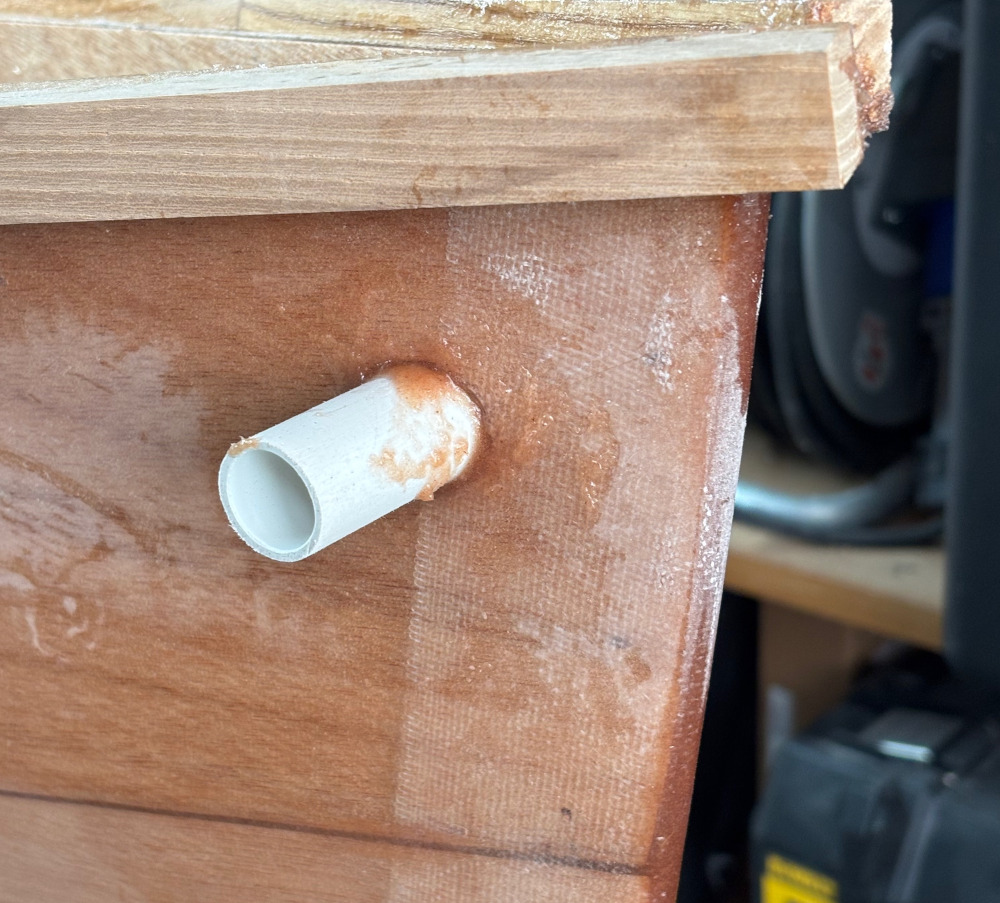
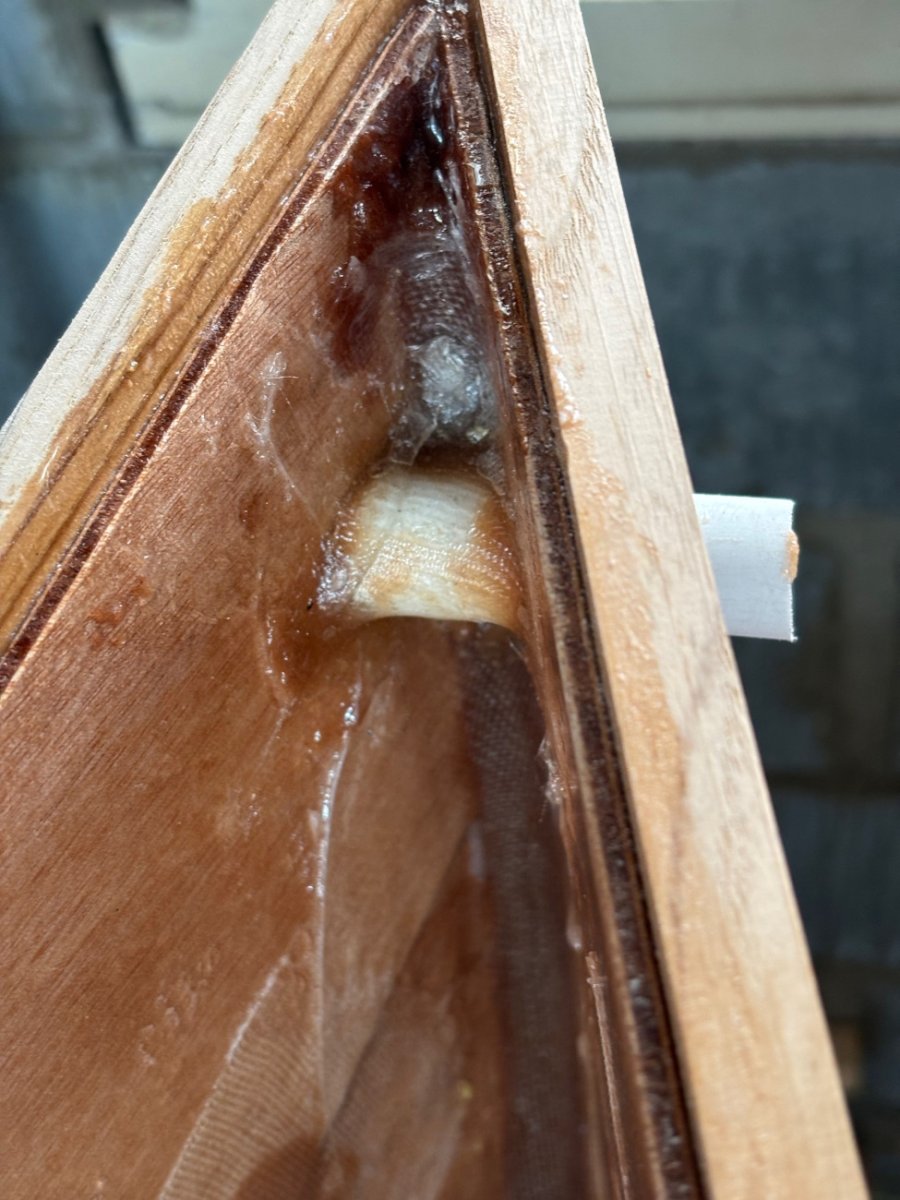
Then once all that had fully cured I cut off most of the excess conduit with a hacksaw (one of those mini ones where the blade points out like a jabsaw) and sanded it smooth. A few bits still need some more epoxy but I think the end result will look great once the outside is painted.
Offline
Pages: 1