You are not logged in.
- Topics: Active | Unanswered
#26 29 May 2022 1:01 pm
- spclark
- Member
- From: "Driftless" Wisconsin USA
- Registered: 19 Mar 2020
- Posts: 478
Re: Another wood Duck 12 hybrid build
I thought the resins they supplied were relatively immune.
Those sold as 'blush-free' mostly are, yet the nature of most epoxy chemistry is such that, given high humidity conditions, the hardener bits will react to present high humidity quicker than to the available resin bits it's meant to bond to.
Ambient temps on the low side of sugggested proper range will make this even more likely.
Lately all I've used is the LV product supplied by the folks who make and sell the MAS line of epoxy products here in the USA. Have had no issues save one time on a small item: used their fast hardener, temps were below 60°F, humidity close to 60% for the brief period of cure of initial coating that, after a second coat, showed evidence of blush present when the second coat 'puddled' quite badly.
This was fairly soon after I'd begun my Waterlust canoe's kit assembly, I was using some marine ply not supplied in the kit, had attempted to add second coat after a day's cure time for the first w/o having to wash or sand.
Sailingfree I'm curious what brand of epoxy you're using?
Offline
#27 29 May 2022 8:48 pm
- sailingfree
- Member
- From: Wareham, Dorset
- Registered: 15 Feb 2022
- Posts: 35
- Website
Re: Another wood Duck 12 hybrid build
Hi Stephen, thanks for your thoughts. The epoxy I'm using is Professional Epoxy Coatings as supplied by Fyne Boats. It's also possible the epoxy or hardener has absorbed a little moisture by being stored in a warm water bath for several weeks. Anyway, all the other coatings worked and I'm now a little wiser about using the stuff.
Pete
Offline
#28 29 May 2022 9:32 pm
- spclark
- Member
- From: "Driftless" Wisconsin USA
- Registered: 19 Mar 2020
- Posts: 478
Re: Another wood Duck 12 hybrid build
I can understand why you store your stuff that way yet I'm wary of such a practice. Mine's stored in original containers in free air in my basement. Temps there ranges between 13 - 21°C much of the year. Admittedly I keep resin in a small room with a space heater that I can use to bring the room's temp up to 95°C quite rapidly, thus warming the resin to a workable viscosity before mixing up a batch. MAS folks and CLC recommend storage up off a concrete floor as otherwise the resin can tend to crystalize from lower temps. A warm water bath here is recommended for melting any crystals before use.
Hardener's the susceptible one where water's involved, typically being alkaline in nature. You may want to consider keeping just your resin in a 'permanent' water bath if you subsequently have similar issues again.
Offline
#29 4 Jun 2022 5:51 pm
- sailingfree
- Member
- From: Wareham, Dorset
- Registered: 15 Feb 2022
- Posts: 35
- Website
Re: Another wood Duck 12 hybrid build
The finish line is now in sight!
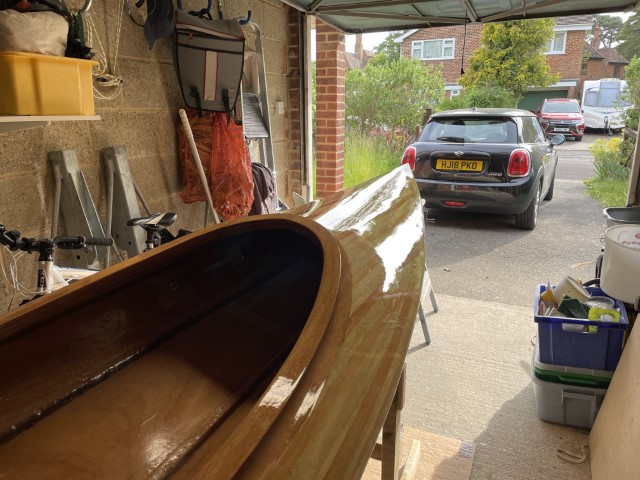
End pours made, the stern was quite foamy as I used some old epoxy I had and that turned out to be a fast setter, and the bow OK using the PEC kit epoxy and keeping the bow end wet so it didn't get too hot.
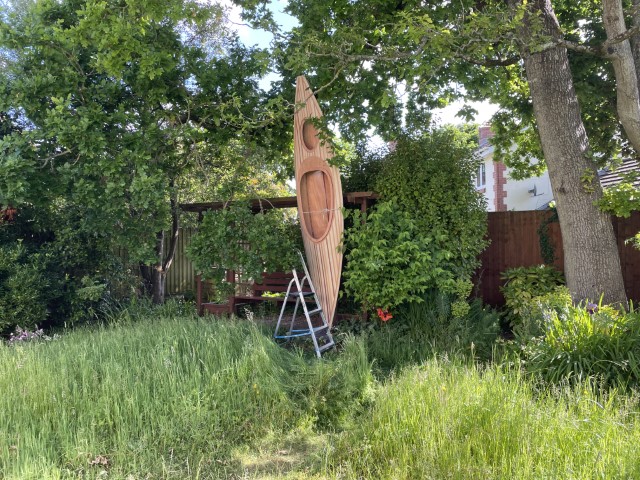
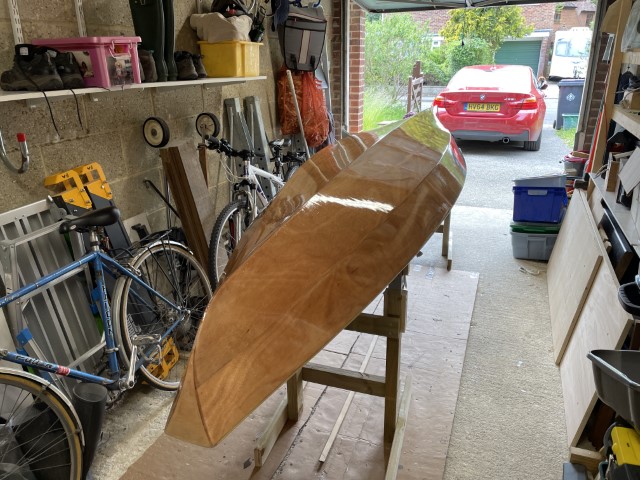
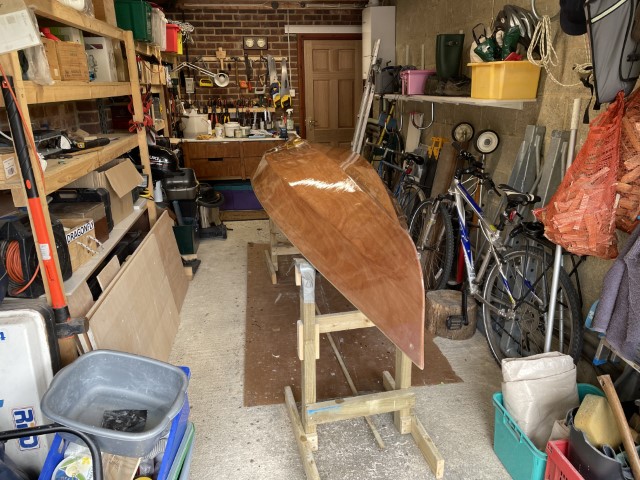
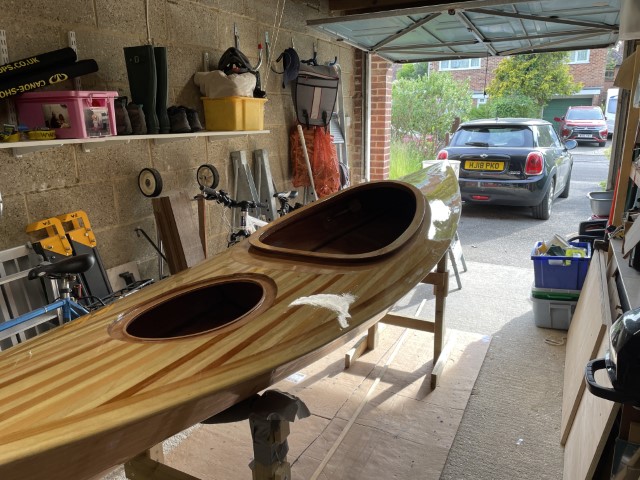
Then yet more sanding and cleaning and time for the varnish. I applied 4 coats of varnish to the boat. It looks really shiny and fairly flat. I'm not an expert at this, though I've varnished furniture I've made and a couple of yacht interiors, but I'm happy with the overall result.
I used Epifanes High Gloss which has an excellent reputation for long life. The main downside, like a lot of paints and varnishes today it uses unpleasant solvents, and it takes a good 24 hours to become cured enough to sand, so progress was a bit slow. I used foam brushes which can be dropped in the bin at the end of the coat and for sanding wet and dry paper to keep the dust down. I also use Mirka Mirlon hand sanding pads to denib between the final coats which are like really tough pan scourers and come in several grades.
Just a selection of the hull and deck before the final fitting out.
Offline
#30 4 Jun 2022 6:34 pm
- spclark
- Member
- From: "Driftless" Wisconsin USA
- Registered: 19 Mar 2020
- Posts: 478
Re: Another wood Duck 12 hybrid build
Nice job SF! Looks very professional! Can’t wait to read about your journeys in this splendid craft!
(We have 3M Scotchbrite here in the US; my guess is that it’s functionally equivalent to that Mirka Mirlon abrasive. I’m a big fan of it for scuffing cured epoxy before recoating, particularly where fiberglass cloth only has one not-quite-enough filler coat applied. The Scotchbrite follows the weave texture nicely w/o breaking through to the cloth itself.)
Offline
#31 5 Jun 2022 8:14 pm
- teejay
- Member
- Registered: 26 Oct 2020
- Posts: 66
Re: Another wood Duck 12 hybrid build
Lovely!
You've timed your build really well so you can enjoy some summer outings - that deck will look great cutting through the water.
All the best with the last stages.
Offline
#32 14 Jun 2022 11:46 am
- sailingfree
- Member
- From: Wareham, Dorset
- Registered: 15 Feb 2022
- Posts: 35
- Website
Re: Another wood Duck 12 hybrid build
Hooray! Finally finished and ready for launching!
A final varnish coat and keeping in mind that perfect can be the enemy of good, I stopped at that point and fitted the deck fittings, hatch toggles and other sundry bits. The bow has a hole through the end pour for the handle as I don't like screwing fittings into boat decks with wood screws - I've been tipped out of dinghies when the fittings have ripped out when the wood inevitably gets wet and softens. The stern handle fitting is bolted with a large plywood backing plate and large stainless plate for good measure. I also fitted bow and stern buoyancy bags and tied them in to the footrest at the front, and eyelets on the hatch cover bolts in the stern. The hatch cover bolt holes are drill-fill-drill to minimise the risk of getting the deck wood wet when they wear a little.
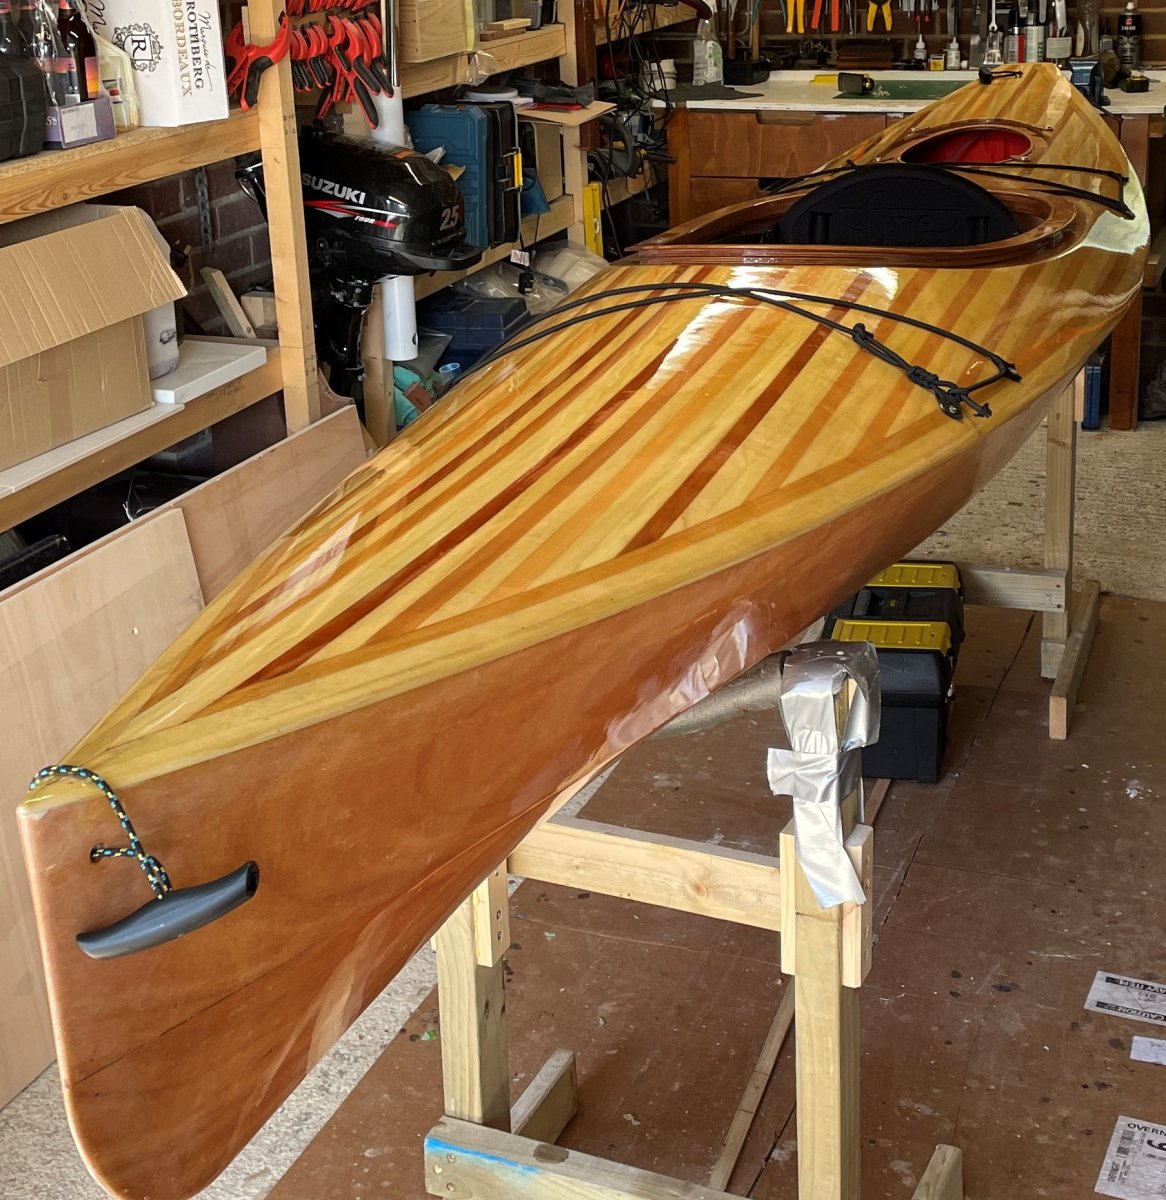
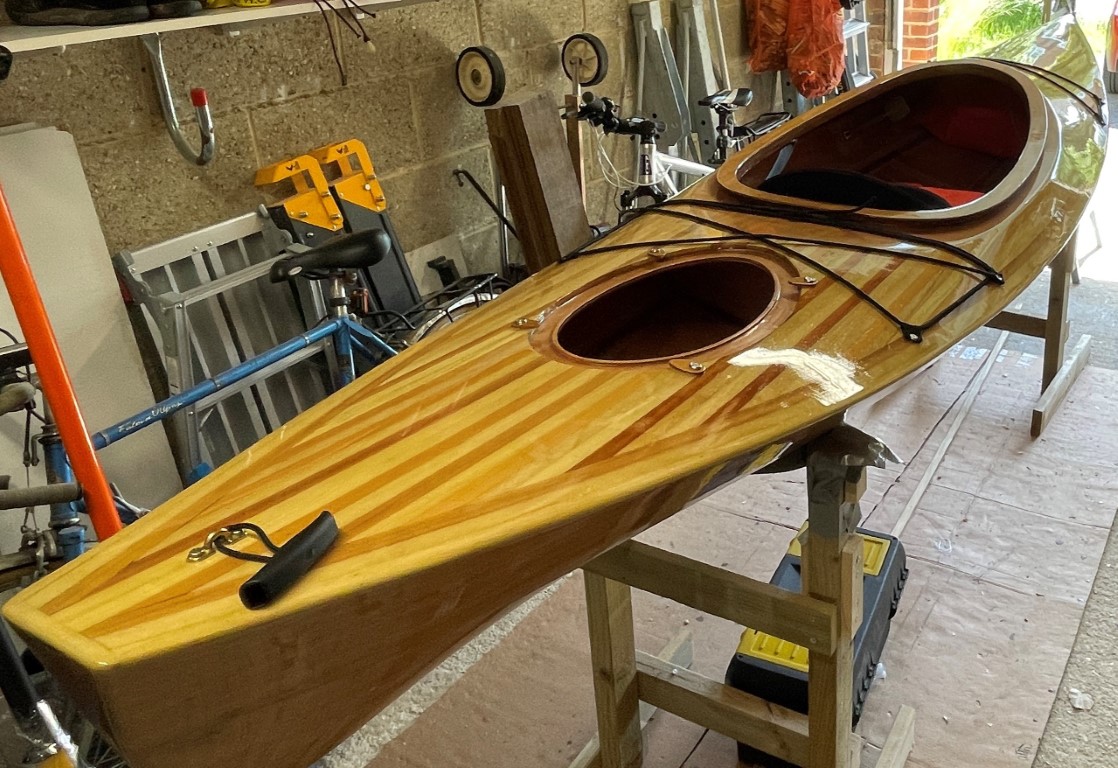
Finally its summer after the recent windy weather (great for big boats, but not for a small kayak's maiden voyage). Today was calm so an early start was made and we put it in the Wareham river before it got too busy.
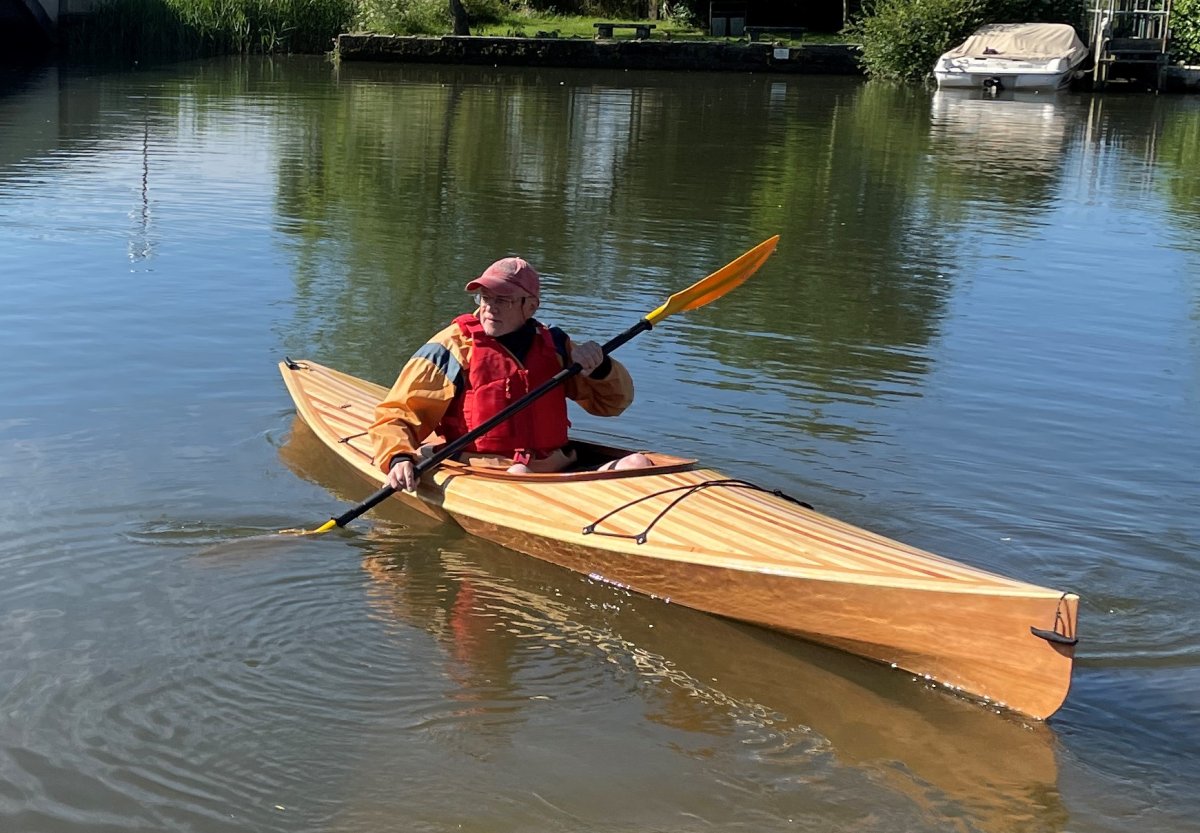
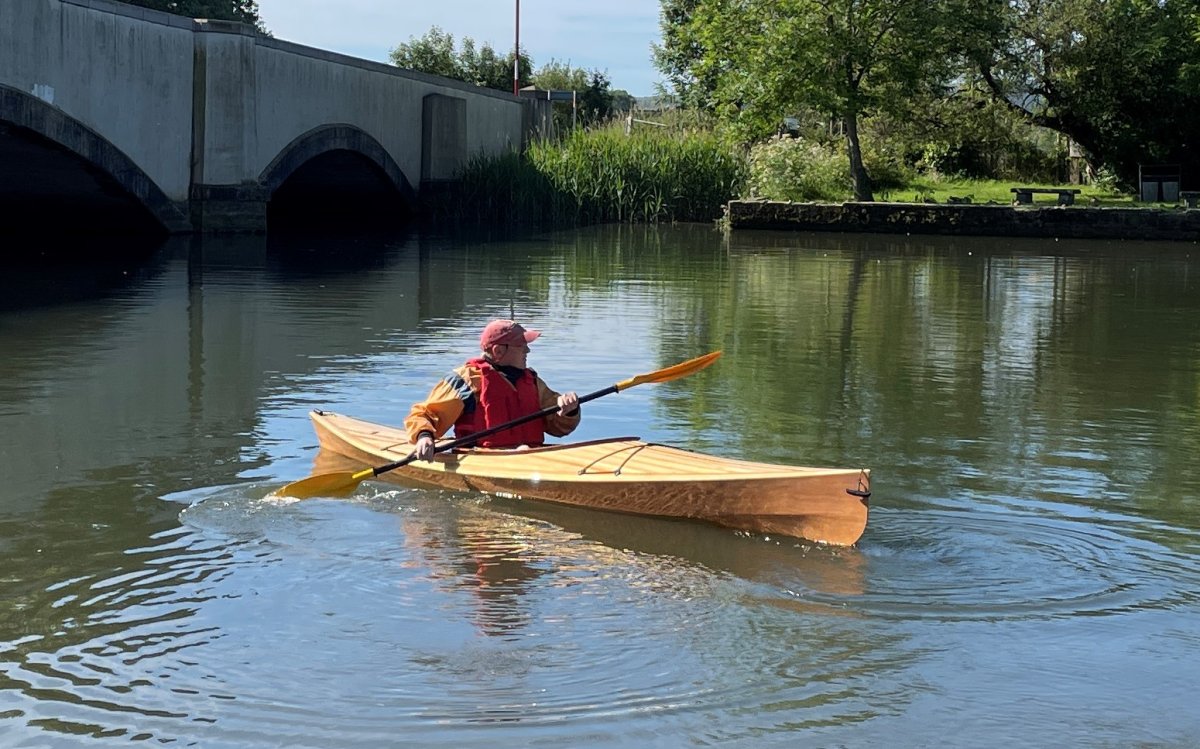
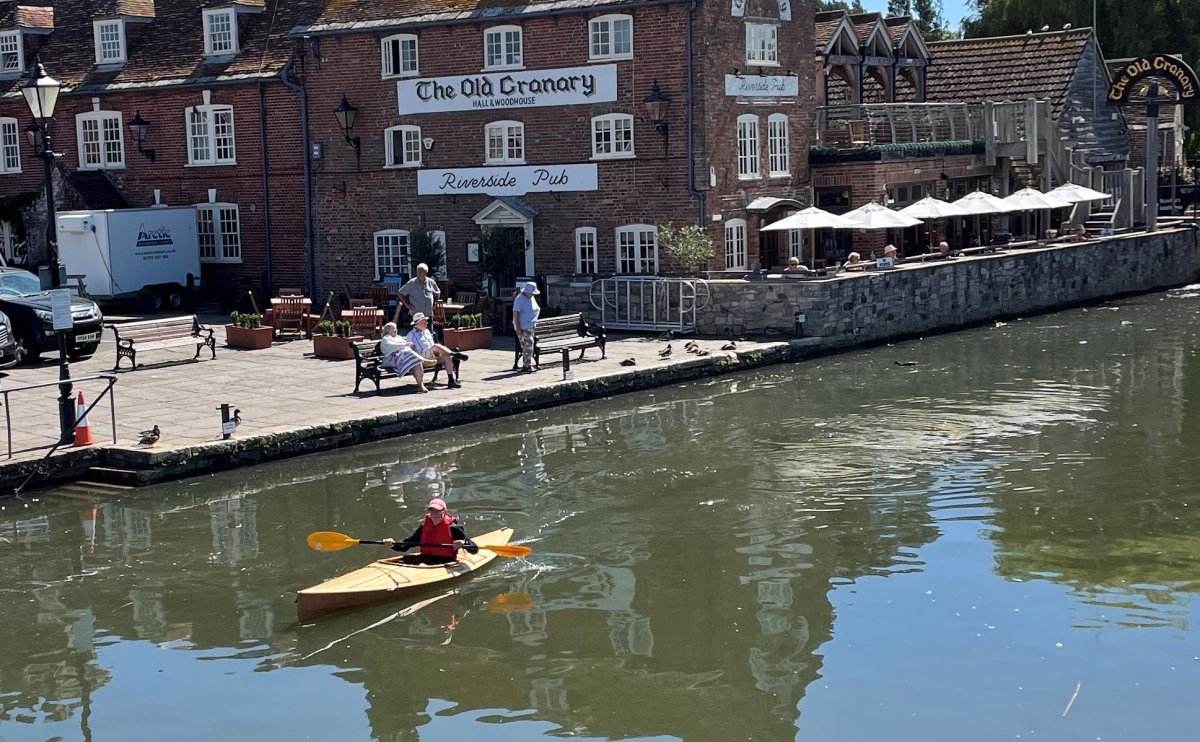
Its fantastic to be paddling at last and the early start meant I also got a waterside seat for the reed warblers, a heron and some early dragonflies. I'm very happy with the end result, it's satisfying to paddle, stable and and the admiring comments all come together together to make this a really worthwhile project.
Offline
#33 14 Jun 2022 4:21 pm
- teejay
- Member
- Registered: 26 Oct 2020
- Posts: 66
Re: Another wood Duck 12 hybrid build
Well done - what a great boat! It's been fun reading about your build - here's wishing you lots of enjoyment from using it - Tim
Offline
