A forum for discussing wooden boats and boat building
You are not logged in.
- Topics: Active | Unanswered
#1 21 Feb 2022 9:46 pm
- sailingfree
- Member
- From: Wareham, Dorset
- Registered: 15 Feb 2022
- Posts: 35
- Website
Another wood Duck 12 hybrid build
This is my first go at building a stitch and glue boat, and my first kayak, so really looking forward to getting this together and on the water when spring finally arrives. I've been sailing big boats for years, but I have wanted to build something myself for a long time. Recently I stopped full time work running a software company, so I now have some free time to devote to this exciting project. I've only got a standard garage, full of the standard junk so space-wise the 12 foot wood duck looked like the ideal choice, and since there are lots of helpful videos, blogs, and other resources I felt this would not be a huge leap into the unknown. The hybrid deck looks like really appealing, so that what I went for. I'm fairly practical, but sometimes impatient and have been known to get the 'measure twice, cut once' mantra backwards.
The folk at Fyne Boats were helpful and reassuring when I ordered the kit and it arrived just over a week later, nicely packed, and everything intact. Thanks everyone at Fyne Boats!.
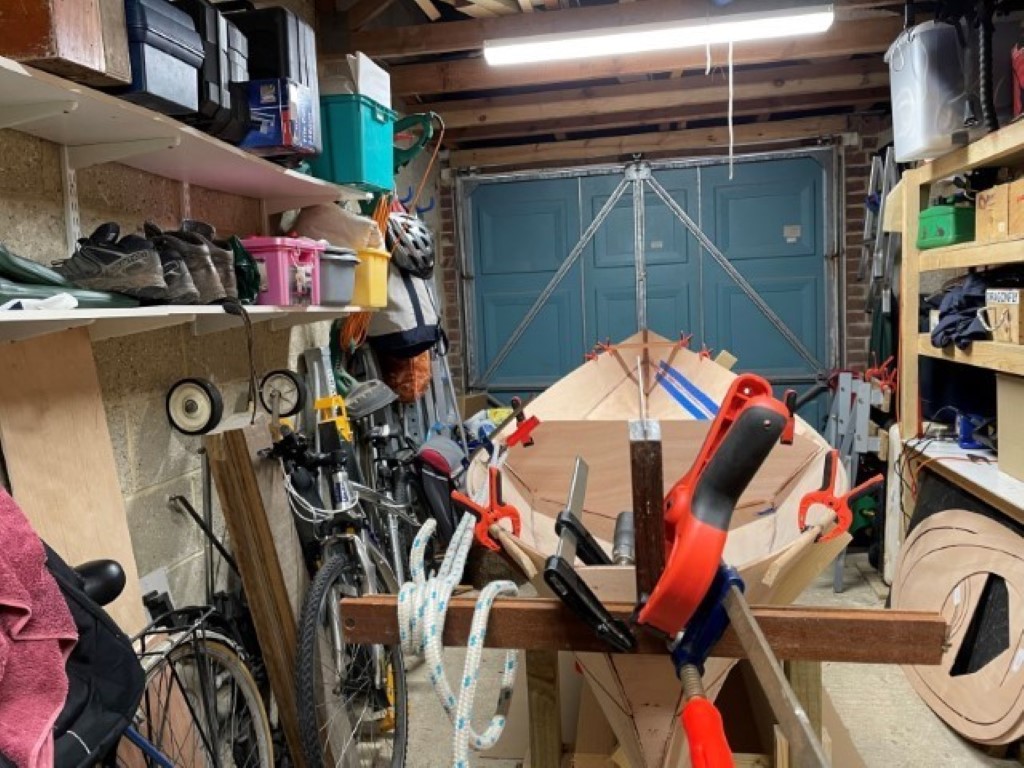
The first task was of course to knock together some saw horses and a temporary bench covered in polythene. I'm hoping that here on the south coast of the UK I can get away without heating the garage, I don't plan on doing any major epoxy work unless its over 10C though. First job was to glue the puzzle joints, which didn't turn out too bad, though I think if I ever do this again I'll do it in two stages and clamp the joints with thickened epoxy first to make sure the joints are perfectly flat. As it is I've got a little sanding to do on the outside to make the puzzle joints absolutely flat, hoping this will not make the joints too visible.
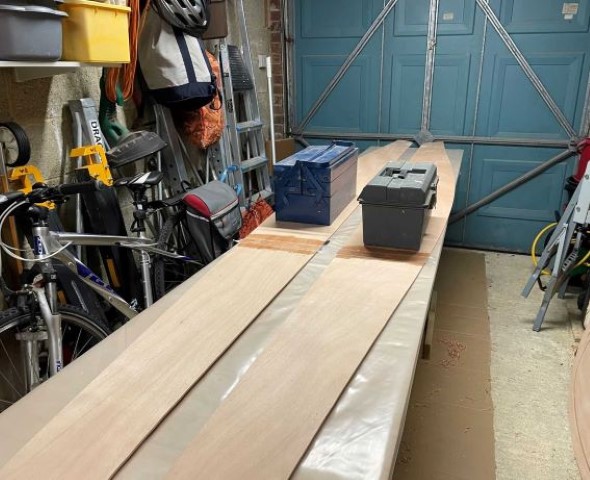
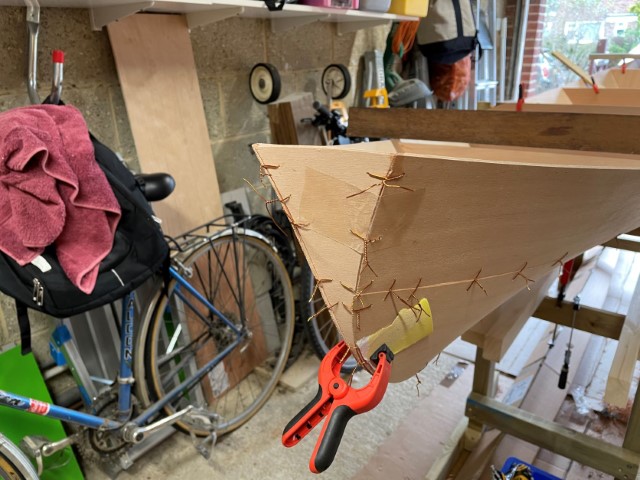
My only real doubts at this stage were the transom fitting, a common point having read the blogs and comments. In the end Fyne Boats were reassuring and other comments helped me press ahead. The transom fitted well enough - I took the comment about not needing aerospace tolerances in the manual as a guide here - and the whole hull came together satisfyingly quickly.
Offline
#2 22 Feb 2022 5:38 pm
- teejay
- Member
- Registered: 26 Oct 2020
- Posts: 66
Re: Another wood Duck 12 hybrid build
Your last picture of the transom nicely aligned looks great. Your comments about waiting for decent weather/temperatures before using the epoxy are spot on and far more sensible than my efforts trying to build during a Scottish winter! Even so, make sure the epoxy is well warmed - terrarium pads help but a bucket of hot water really helps to get it nice and runny (mine used to "crystallise" into a thick whitish sludge if it got cool - not good!).
All the best - looking forward to hearing and seeing more.
Tim
Offline
#3 25 Feb 2022 7:34 pm
- sailingfree
- Member
- From: Wareham, Dorset
- Registered: 15 Feb 2022
- Posts: 35
- Website
Re: Another wood Duck 12 hybrid build
Thanks for the tips Tim.
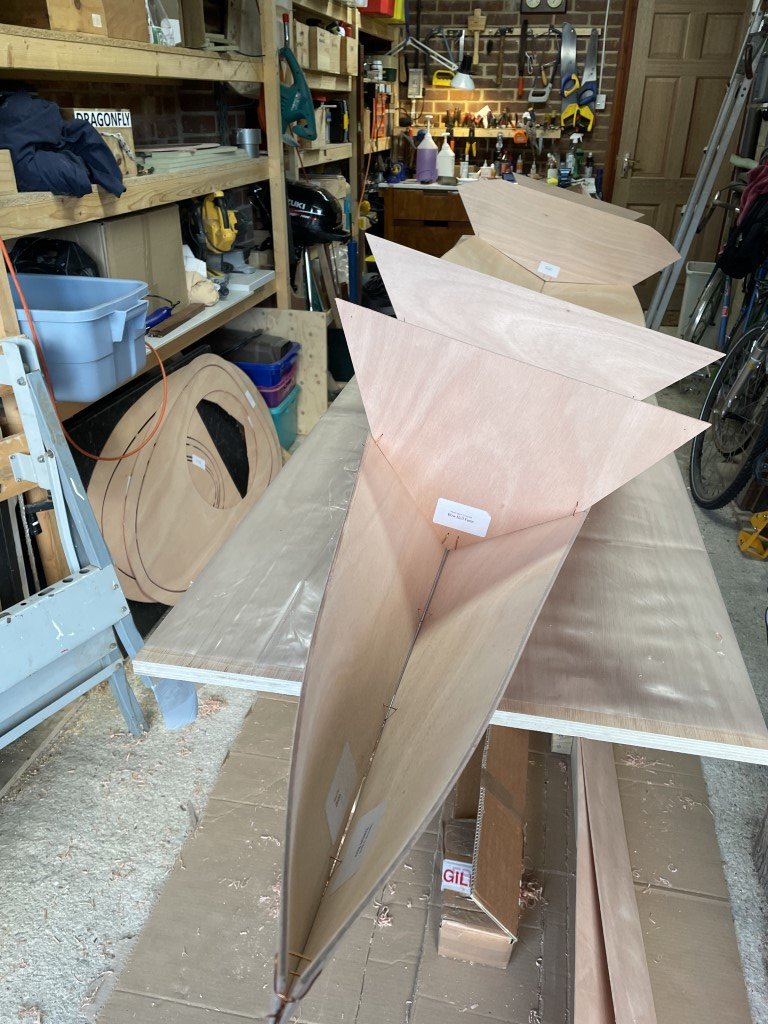
The only very small error cropped up when I was installing the temporary forms. The bow and stern forms were mislabeled, not a problem and very obvious from the fits.

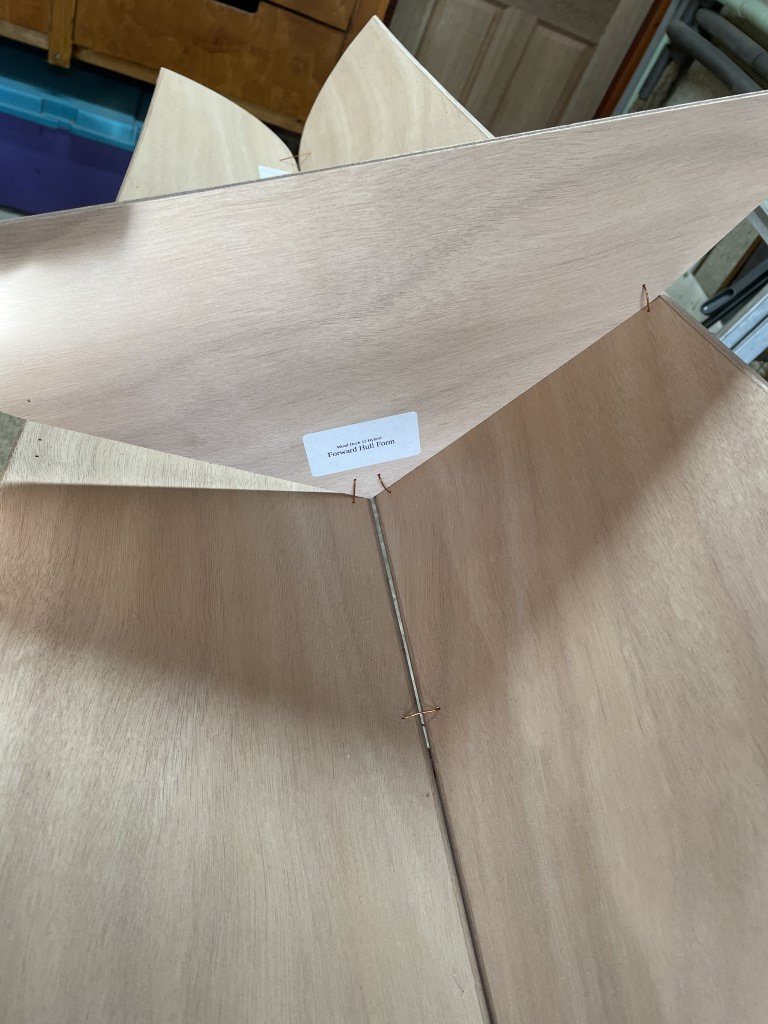
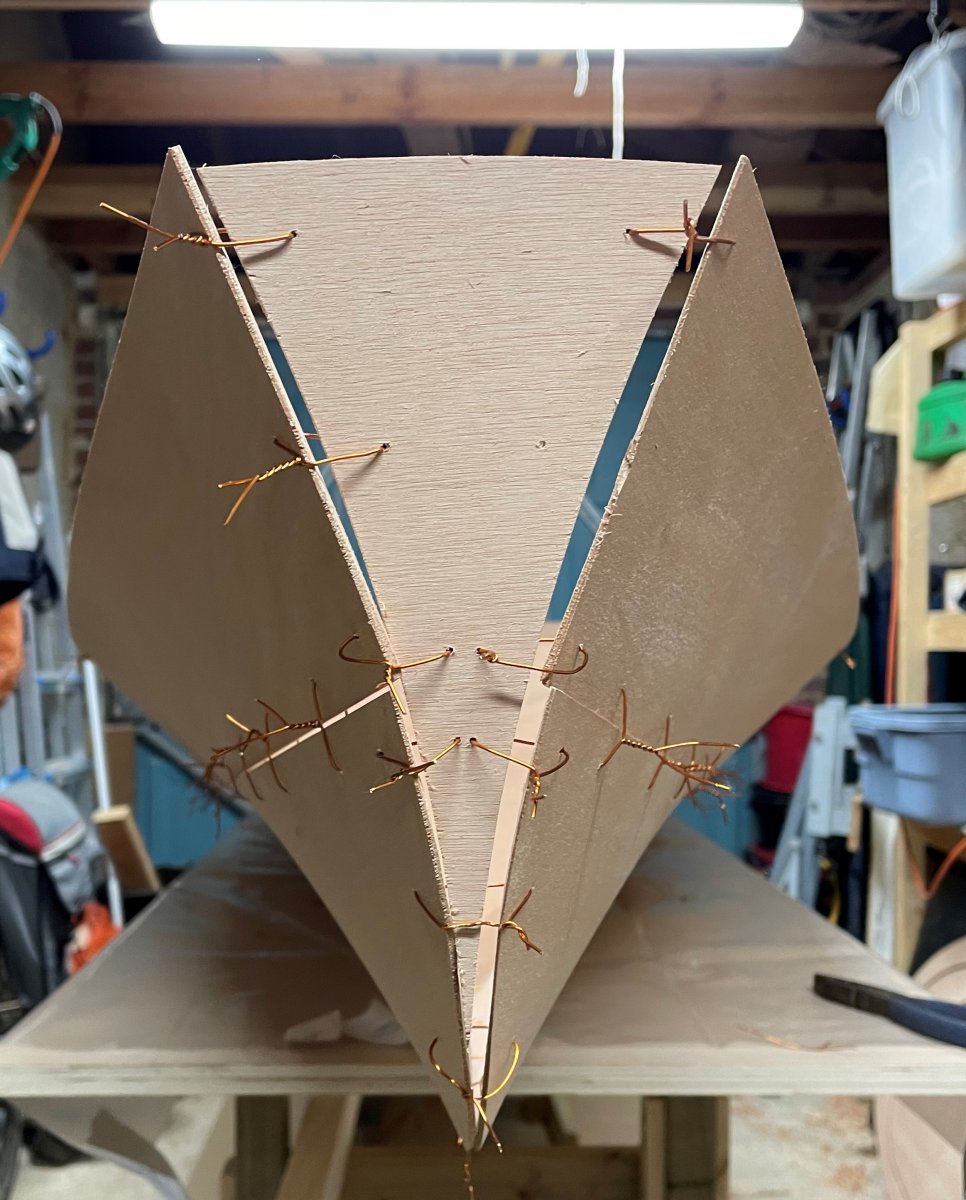
Some of the floppy bits bits starting to look like a boat already.
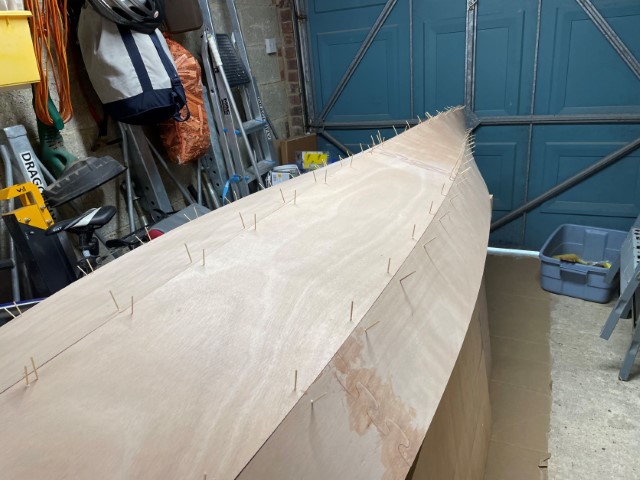
I then removed most of the wires and decided to fill the holes with wooden cocktail sticks as discussed on several S&G forums, glued in with D4 glue. I hope that will help with the hull finish. Time will tell whether they actually take up the same colour as the epoxied hull.
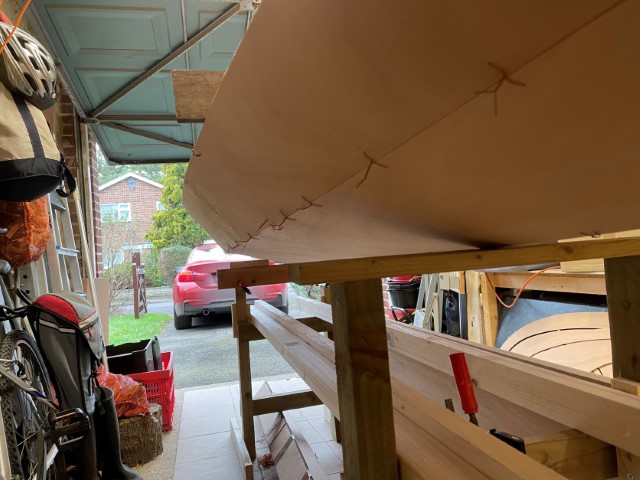
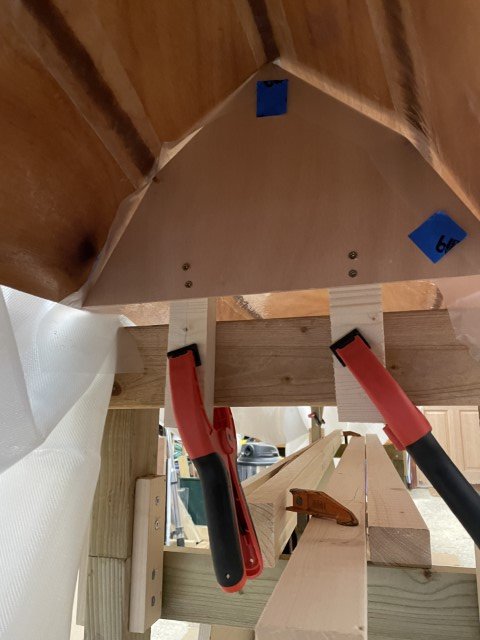
After the 'spot weld' phase and with the epoxy fillets in the transom area nice and hard and the wiring removed, I felt the transom might not be quite square which bothered me a bit. Lining up a woodworking square on the transom showed it was off, not much and probably no one else would notice, but I knew it would bug me. So I used a lever clamped to the transom and a Spanish windlass to straighten it out. I then applied some gentle heat from a 300W heat gun I use for heat shrink tubing to soften the epoxy until the transom was square and let it cool and set hard again.
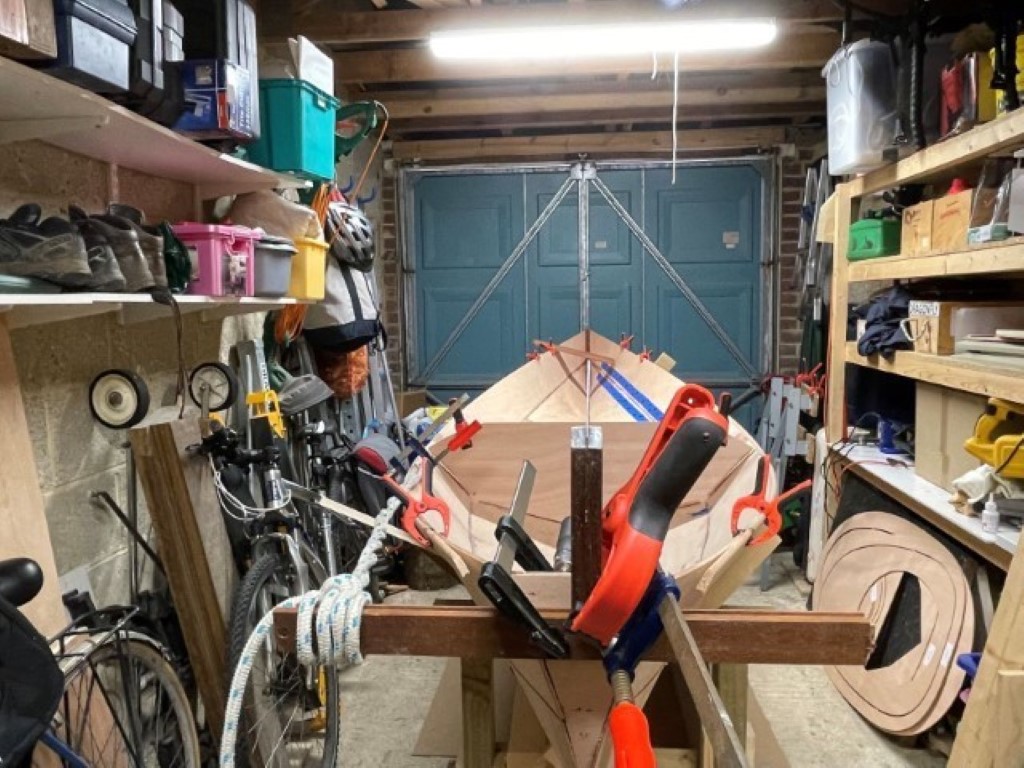
And after it had all cooled and the windlass removed it looks pretty spot on.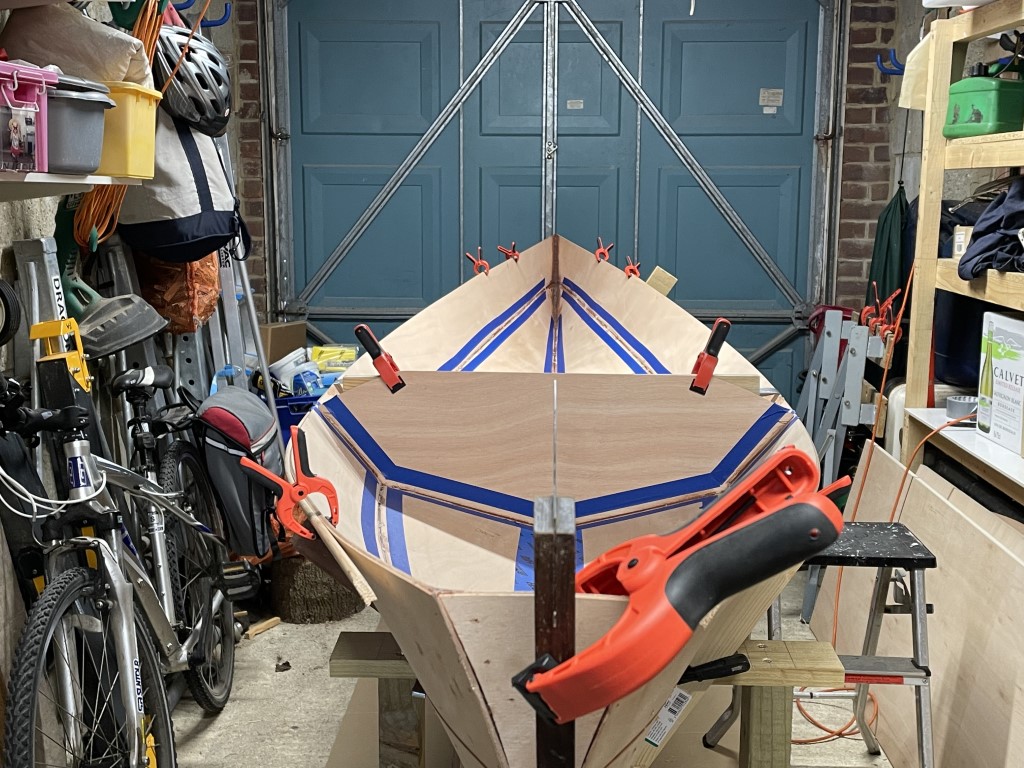
I decided to use masking tape to keep the fillets in their place. At this stage I didn't feel it was worth the time to get these absolutely spot on, but at least it keeps thinks a bit cleaner.
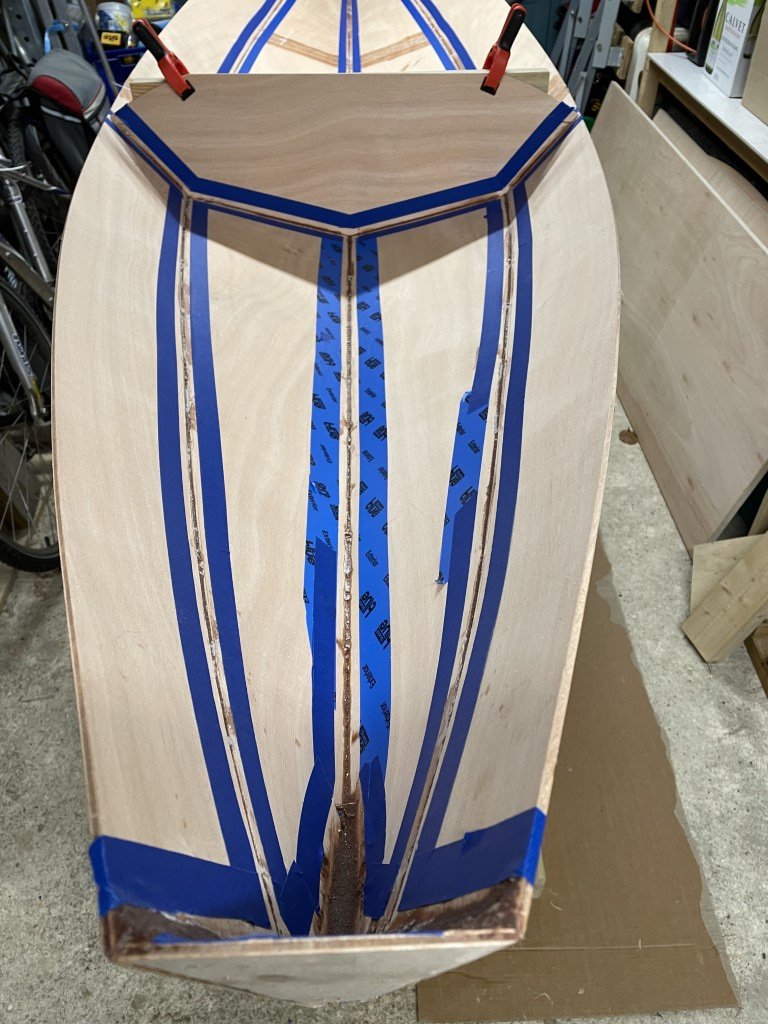
Didn't turn out too bad.
Thanks for all the comments and advice about keeping the epoxy warm, I put it in a bowl of hot water for an hour before I use it, and I also decided to warm the wood with a small fan heater before I squeezed the fillets out. It's 11C today and the epoxy is curing fine.
Offline
#4 28 Feb 2022 7:15 am
- Curlew
- Member
- From: nr Skipton, N Yorks
- Registered: 8 May 2020
- Posts: 51
Re: Another wood Duck 12 hybrid build
A great start, all very neat.
With regard to epoxy when it comes to more than the fillets it is really important to warm the garage (and therefore the wood) as much as you can for a good while before applying. Overnight is good. Just warming the resin doesn't really work and if you warm the kit after applying then you will get bubbles from outgassing.
Fillets will be OK but a thin layer over glass really needs a stable temp of 18C or ideally a bit more.
Your garage looks small enough to be able to warm it up fairly easily.
Have fun, and use this place if you get stuck.
Bruce
Last edited by Curlew (28 Feb 2022 7:16 am)
Offline
#5 15 Mar 2022 4:32 pm
- sailingfree
- Member
- From: Wareham, Dorset
- Registered: 15 Feb 2022
- Posts: 35
- Website
Re: Another wood Duck 12 hybrid build
Thanks Bruce, all very helpful.
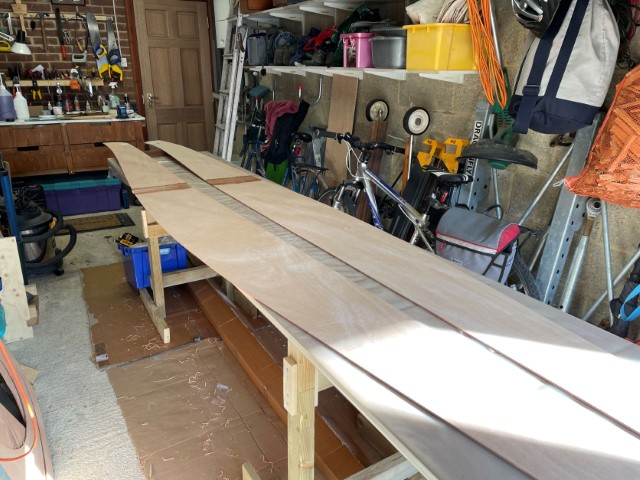
I managed to find some time to get the hull smoothed out, sanded and ready for the glass. Mostly by hand, except for where there were obvious bumps and where the ends of the side decks didn't quite flow into the bottom panels. For this I used a random orbital sander with some 60 grit and made everything nice and smooth. Everything else was hand sanded using 60, 120 then 240 grit. There are a few minor scratches I think, but since this is the bottom of a boat, mainly hidden from view in the water and its not a piece of fine furniture I think its going to be fine. I'm hoping after the glass it'll be OK to finish bright, but we'll see about that.
One thing I did find was that the toothpicks I used were actually a lot harder than the plywood and care needed to be taken to get them flat and not take the top veneer off at the same time. They were actually bamboo, not 'real' hardwood, so that's probably the reason.
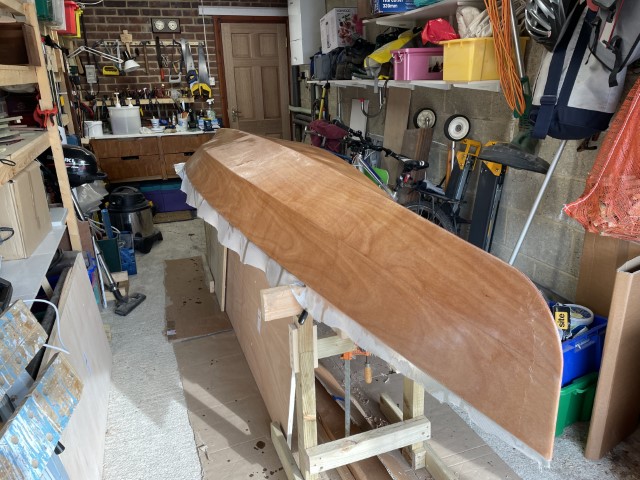
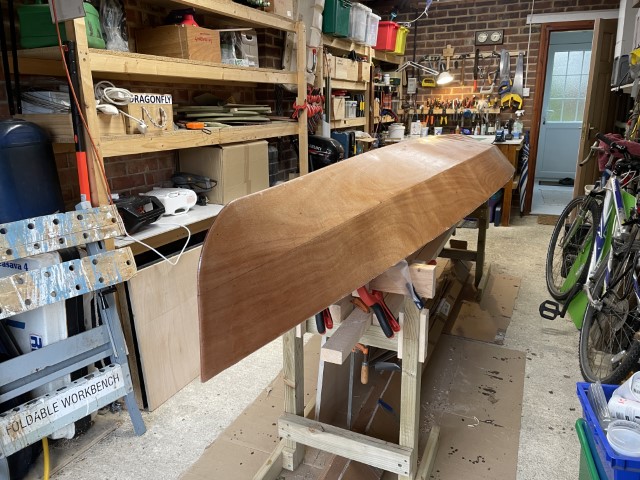
Here's a couple of pictures of the nice smooth hull.
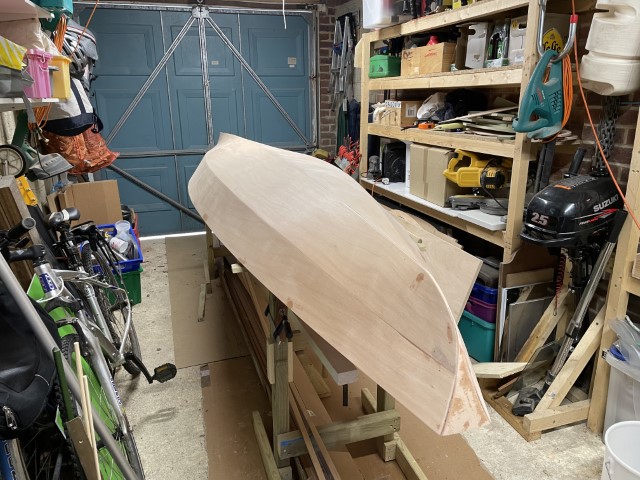

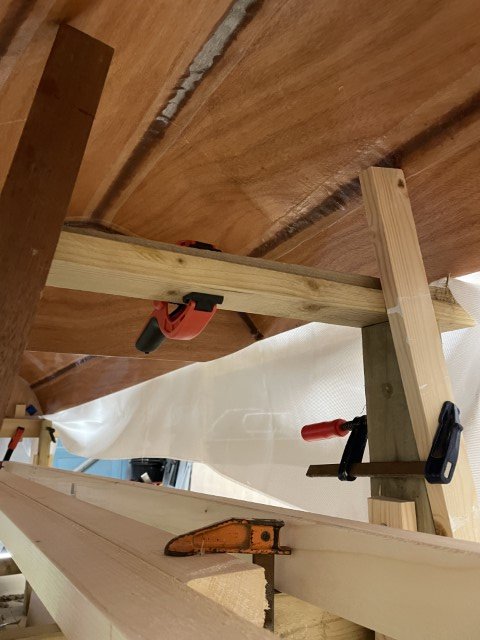
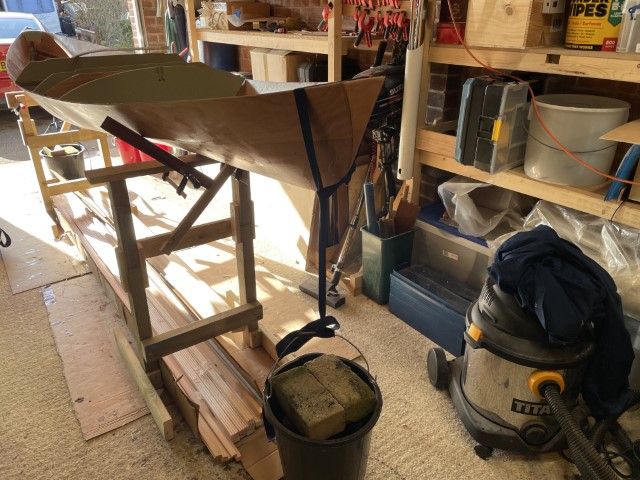
After sanding I mounted the hull so the sides were above the supports using scraps of wood at the stern and the bow temporary former. Hopefully that will stop me glueing the boat to the support stands.
Offline
#6 16 Mar 2022 12:50 pm
- sailingfree
- Member
- From: Wareham, Dorset
- Registered: 15 Feb 2022
- Posts: 35
- Website
Re: Another wood Duck 12 hybrid build
Well, there's no more putting it off I guess, time to glass the hull. With all the great advice and comments on this forum, as well as the excellent videos from Nick Schade for inspiration, I set about getting the workspace ready. I really wanted to try and get this done without bubbles, creases or getting myself stuck to the garage floor.
The ambient temperature was forecast to be around 12C yesterday afternoon, so I setup a fan heater in the morning, sealed all the big gaps by the door and by early afternoon the body of the garage and the wood was around 18C. The roof space was a toasty 20C
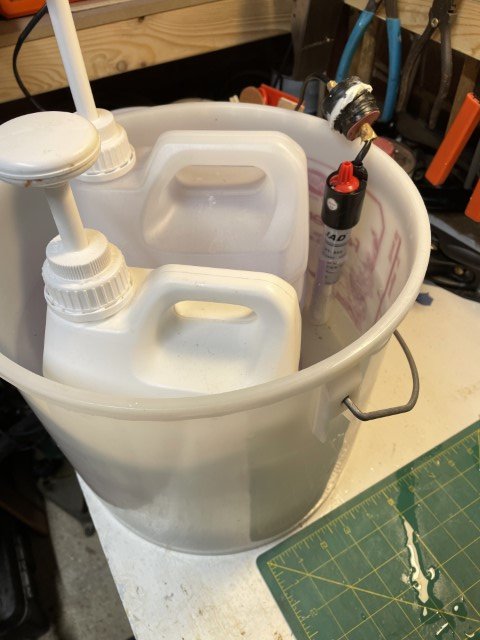
To warm the epoxy I used an old plastic wine making bucket, warm water and my beer making heater - well actually a fish tank heater - to get the epoxy and hardener up to 25C. This worked a treat, the epoxy was easy to work with and flowed really nicely. Like many others I also use a cheap set of electronic scales to get the right mixture, the pumps are handy, but sometimes an air pocket can upset the ratios a bit. They also allow me to accurately mix up very small amounts for touch ups and a few other jobs.
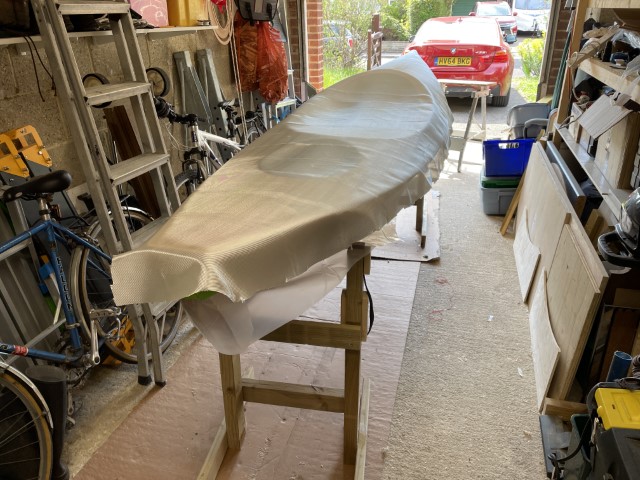
I spread the glass before lunch so it would have time to get to the same temperature and hopefully smooth out a bit.
A wallpaper brush was great for de-creasing the cloth, though the folds in the cloth never really went away. If I ever do this again I'll try and get a roll of cloth.
One last look at Nick's video where he glasses the Petrel Play and I then set about the task, squeegee, brush and lots of epoxy.
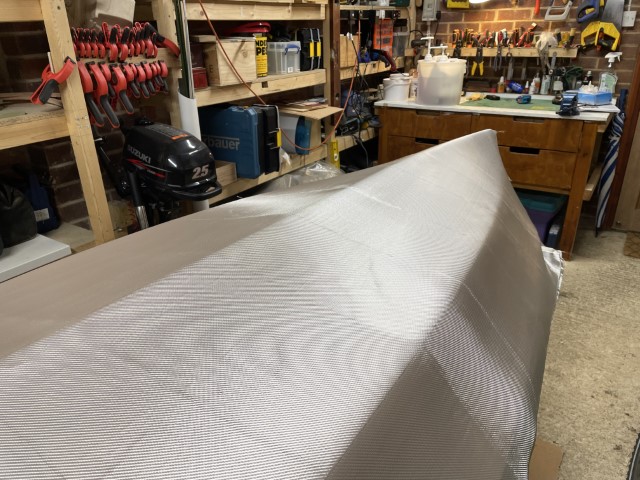
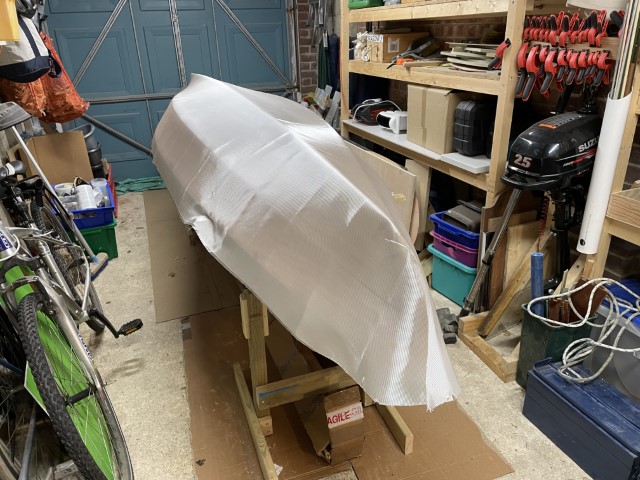
I turned the heat off about an hour before I started to allow the wood to cool slightly and hopefully avoid those bubbles. I'm relieved to say it went really well, especially as this is the first time I've done this Im really happy. These are the hull just after finishing while the epoxy is still wet.
And this morning after it has mostly cured and the excess glass trimmed.
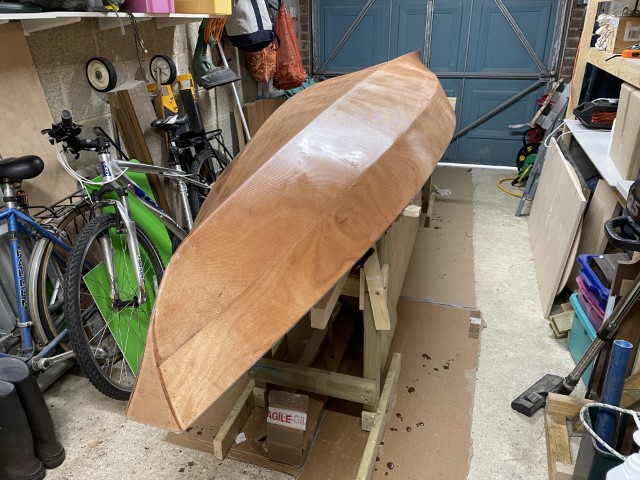
Not too many very glossy bits, almost no bubbles, but a couple of areas where the cloth folds can still be seen. I'm also happy that the toothpicks have mostly disappeared. On the transom there were some unfilled holes and some copper wires and those look a lot more obvious.
Next steps are to make a hoist so the hull can be stored in the roof, ready for when the deck is done. Oh, and as a bonus my shoes are not stuck to the floor either.
Last edited by sailingfree (17 Mar 2022 7:10 pm)
Offline
#7 16 Mar 2022 8:28 pm
- teejay
- Member
- Registered: 26 Oct 2020
- Posts: 66
Re: Another wood Duck 12 hybrid build
Well done - that's a big step forwards! - and well planned too (which is part of the fun)
Tim
Offline
#8 20 Mar 2022 11:40 am
- Curlew
- Member
- From: nr Skipton, N Yorks
- Registered: 8 May 2020
- Posts: 51
Re: Another wood Duck 12 hybrid build
All looking very neat. I certainly didn't manage a bubble free first ever application of glass, and that was one reason for my painted hull if I am honest. Does the keel line in this kit get a second layer of fabric for strength?
Don't worry about the visible cloth folds or texture, if you couldn't see these you probably applied the epoxy too thickly. They will all disappear eventually.
Warm weekend, hope you can make more progress.
Cheers Bruce
Offline
#9 24 Mar 2022 10:29 pm
- sailingfree
- Member
- From: Wareham, Dorset
- Registered: 15 Feb 2022
- Posts: 35
- Website
Re: Another wood Duck 12 hybrid build
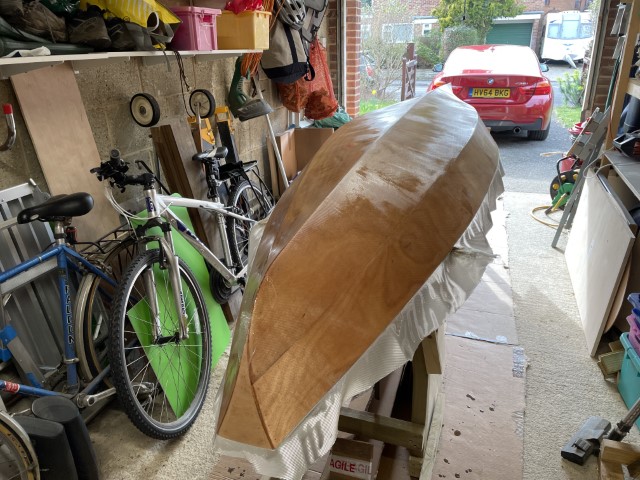
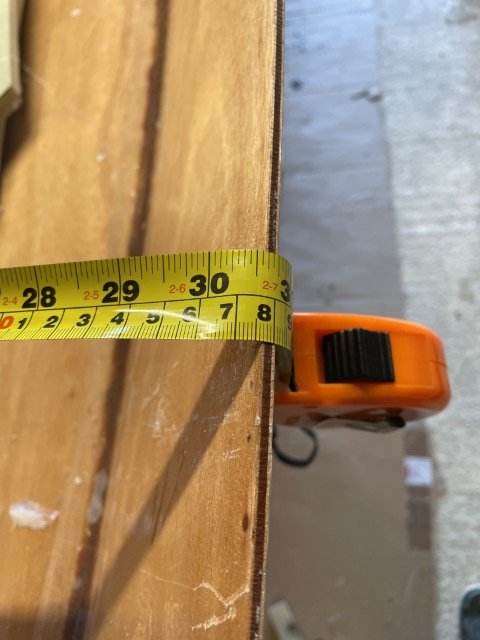
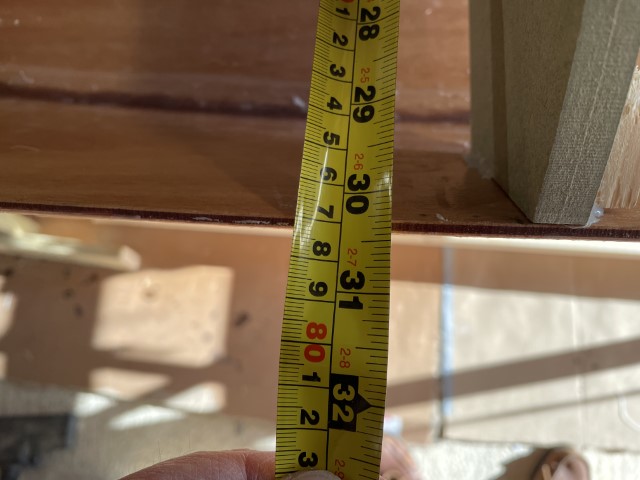
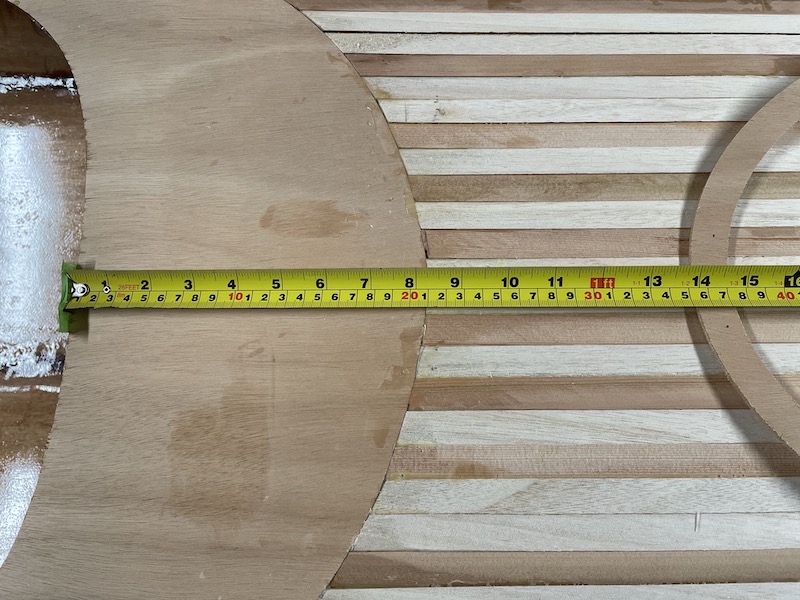
I managed to get some time last week and start on fitting the deck forms. I must admit I was not happy with most of these at the start, the end forms pushed the hull out by a fair bit, and the central forms had a large gap to pull in. The plans show the hull should be 30 1/8 wide but mine was out at 30 3/4, so I guess the hull was not quite the shape it should have been, maybe the saw horses were too close to the ends.
I found that putting a bit of weight on the bow and stern pulled the mid sections in nicely and kept a fair curve so I used a couple of buckets with 5 bricks as weights, around 10Kg. The mid section width ended up closer to 30 1/4, so close enough to get a snug fit on the mid section forms.
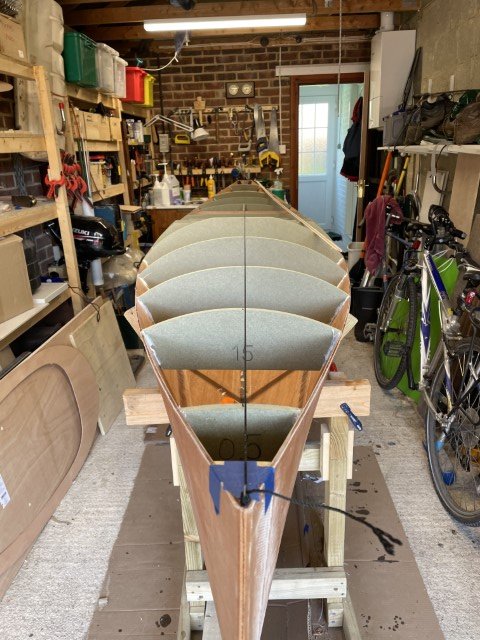
A bit of trimming on the end forms and it started to look deck like. Once the glue had set the weights could be removed and the hull stayed fair, and the forms stayed in place, though fingers crossed on that one.
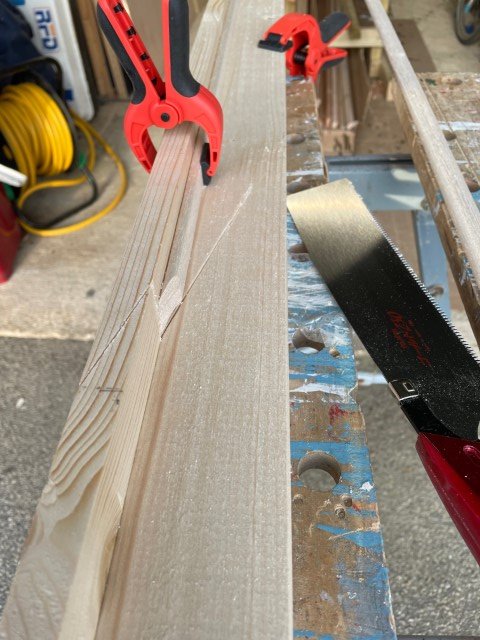
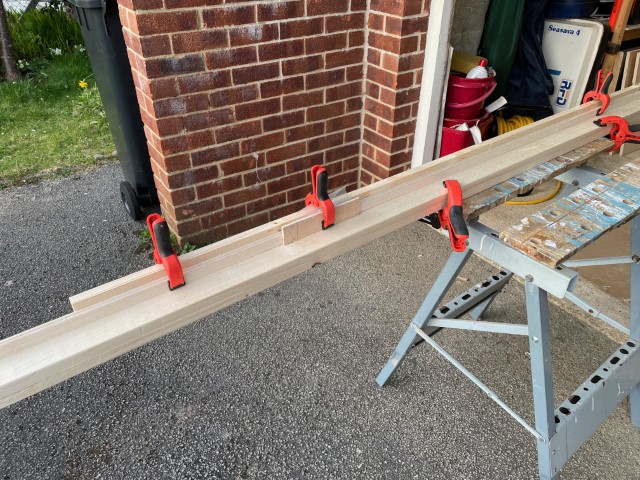
At this point I also wanted to start scarfing the full length strips. With at least 12 joints to make I thought a jig would help getting them straight and neat, so a couple of bits of wood from the spares pile were put to use. I also got myself a very thin Japanese saw which is a joy to use and cuts amazingly straight. I can glue and clamp 4 scarfs at once knowing that they are straight and leave them overnight to set.
Offline
#10 27 Mar 2022 5:36 pm
- sailingfree
- Member
- From: Wareham, Dorset
- Registered: 15 Feb 2022
- Posts: 35
- Website
Re: Another wood Duck 12 hybrid build
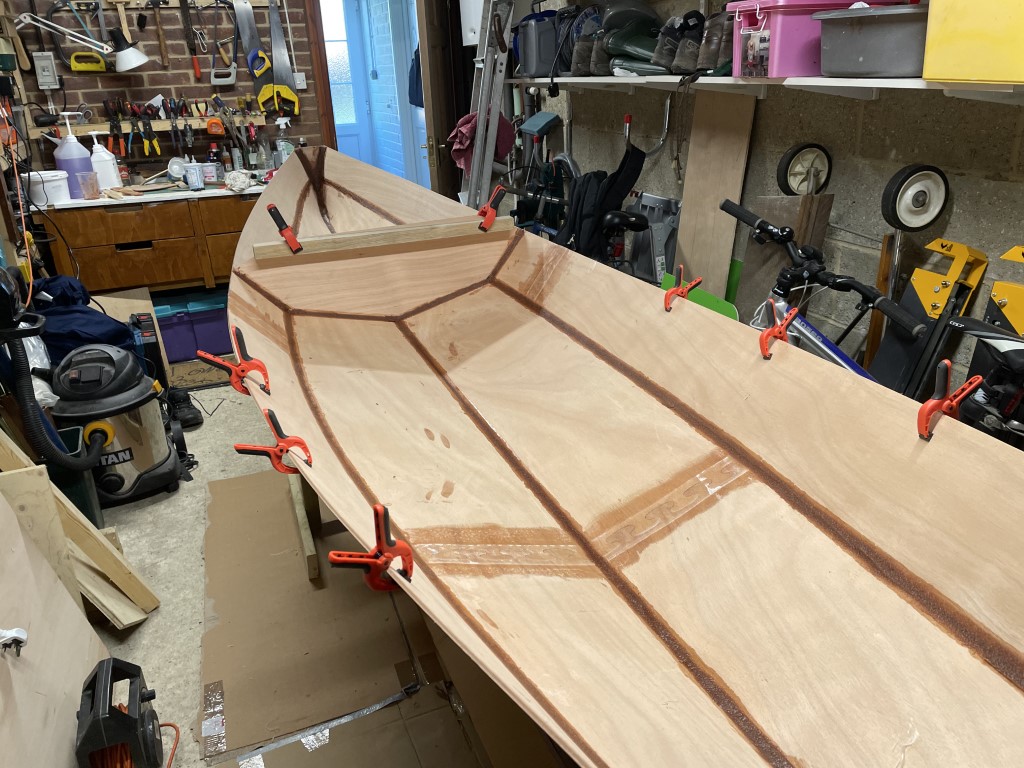
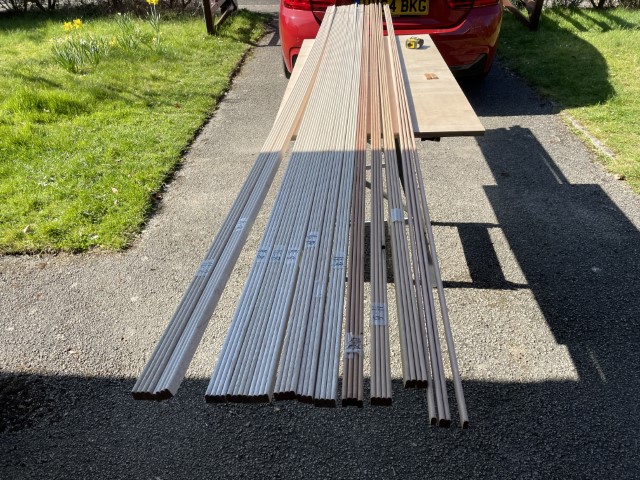
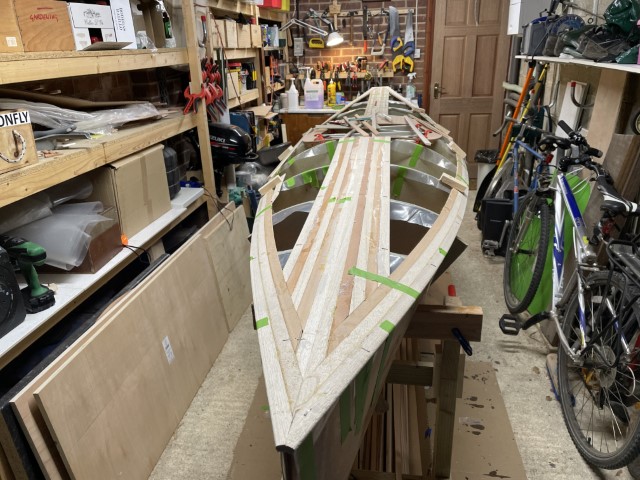
With the great weather and some free time, I've achieved what feels like another milestone by getting some deck strips installed. As usual, this was preceded with hours of reading, doubts, and disappearing down various rabbit holes. The first step here was to see exactly what I had in the way of strips. I didn't specify anything when I ordered, as I figured the folk at Fyne would be able to supply something attractive. It turns out I got 2/3 light yellow cedar - some slightly lighter that others, 1/6 red cedar and 1/6 slightly darker red cedar.
So the plan is a double white strip and single dark strip round the gunwale, a double strip white king plank, and single darker strips along side them. Then a simple pattern parallel with the king plank to the edges, similar to many other designs I've seen.
With some strips scarfed using the jig I made I have manged to get two strips down each side. I thought hard about using staples, some of the boats like the one Jmac58 built look wonderful, but I'm not going to try and go totally staple-less - as Nick Schade says that's a way down the list of things to worry about and I think I'll make a mess if I tried all out for that, but I have managed to get the second strip on with just clamps, blocks screwed into the forms with coarse thread kitchen unit screws and frog tape which I'm quite pleased with.
With those wayward strips that develop a mind of their own now subdued, I'm looking forward to making some real progress.
Offline
#11 30 Mar 2022 10:02 am
- Jmac58
- Member
- Registered: 7 May 2020
- Posts: 77
Re: Another wood Duck 12 hybrid build
Looking really good! looking forward to seeing your deck design. Best wishes. jmac58
Offline
#12 7 Apr 2022 6:40 pm
- sailingfree
- Member
- From: Wareham, Dorset
- Registered: 15 Feb 2022
- Posts: 35
- Website
Re: Another wood Duck 12 hybrid build
Thanks James.
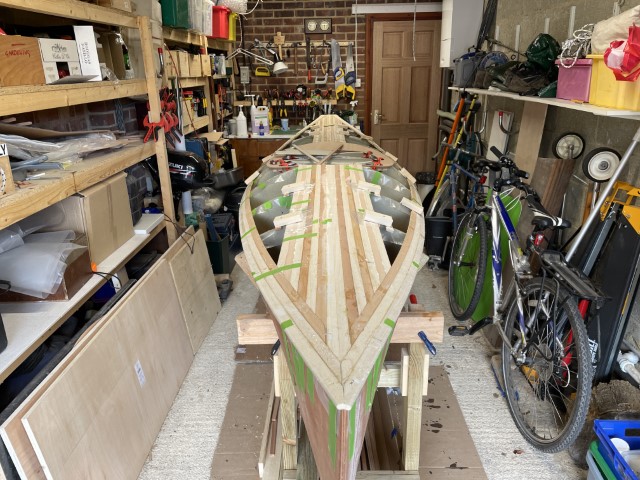
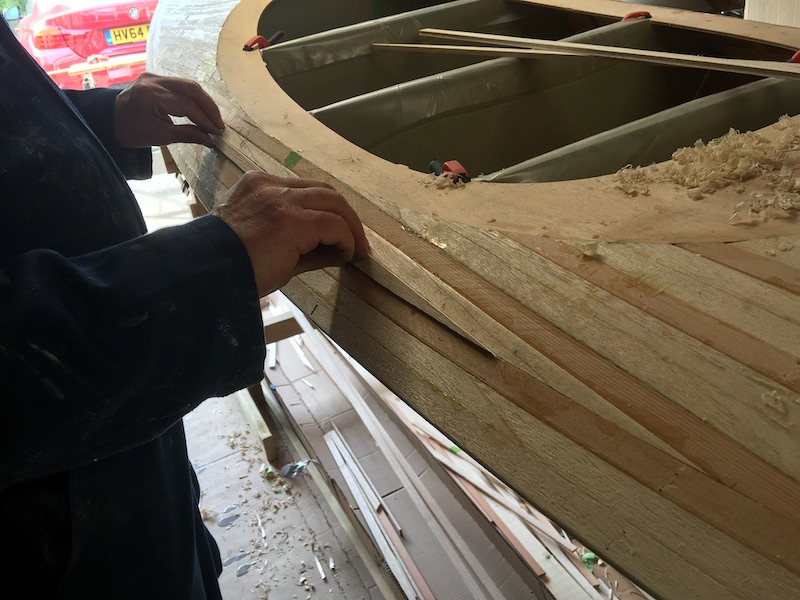
Making slow but steady progress. Being able to pop into the garage for an hour or two is very handy, and the stripping of the deck is very satisfying now.
Here are the first few strips with the king-plank design started. 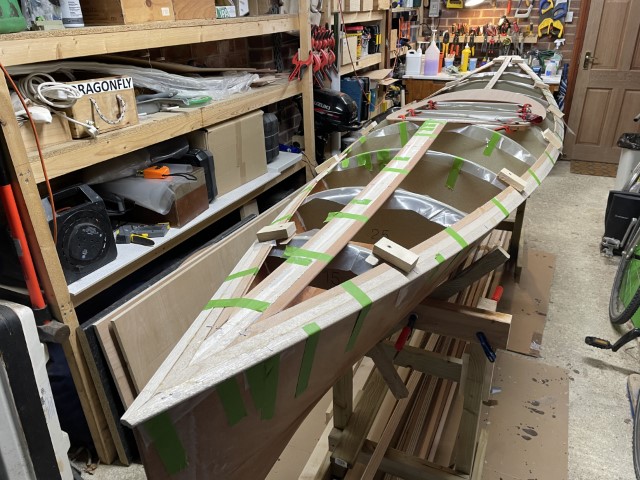
One oopsie I found was trying to get the angled part fitting tightly and at the same time making sure the apron to strip joint was as close as I could get it, I found that if the strip is even slightly too long by pushing it in place, it fitted, but I overlooked the magic power of the wedge that creates at the sharp end, and in a couple of places the previously reasonably well fitting joints opened up.
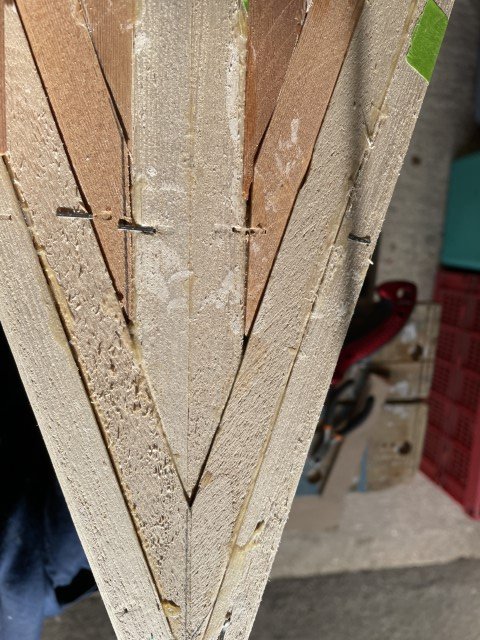
So a very small sliver shaved from the scrap wood was made and lightly glued in, hopefully this will disappear later. There are a couple of other joints also need attention. Things do get easier and the later joints are much better fitting than my initial attempts.
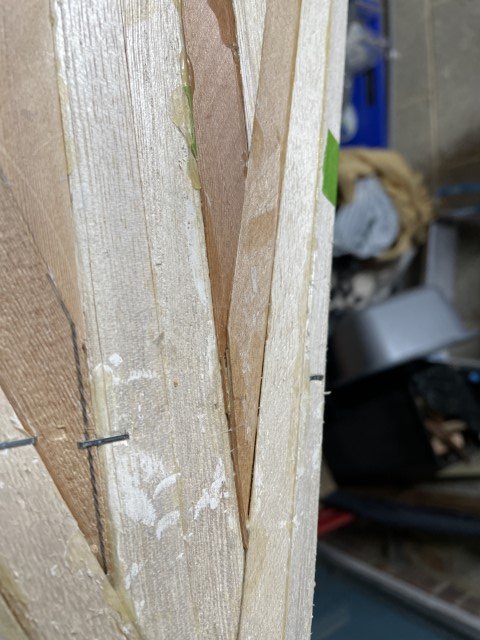
I'm quite pleased with how the apron joint looks too, this was one of those bits I didn't think would actually work, but the D4 glue is pretty strong when left to set.
Talking of the D4 glue I did find that when scarfing some lengths it didn't set, even overnight. The temperature was close to freezing and reading the instructions for the D4 (I know I know), it does say that at low temperatures it can fail. SO some scarfs were made with polyurethane Gorilla glue which I've used on other boaty projects with great success.
Planking carries on over the course of a couple of weeks, interspersed with the first holiday we've had in two years which was nice.
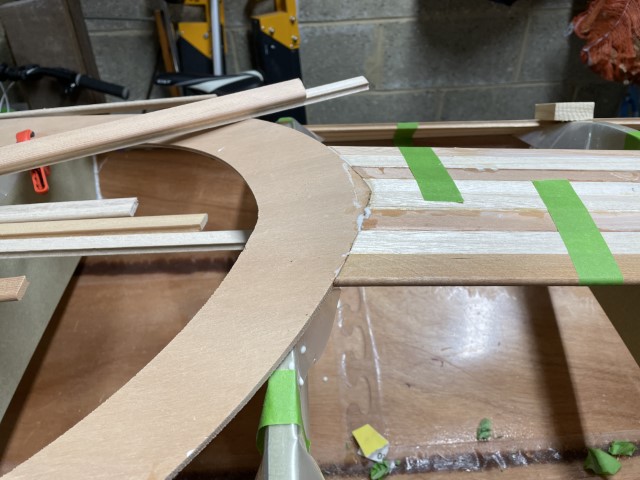
Today I decided to make sure I had the wood I needed to create a reasonably nice looking layout. With 2/3rds light and 1/3 darker with at least two shades of dark, I needed to be careful not to use up all the dark wood and be left with a large light area. I started drafting a CAD model to try and visualize the effect I wanted, but to be honest this seemed like a lot of effort for little reward, so I binned that and rough cut the wood into over sized generous lengths and dry fitted most of the important parts, finding in the process a few dark strips that had knots and other faults which mean a slight re-jig of the strips. I'm pretty happy with this. It also reassures me that the apron is pretty much central and things are straight from front to back.
All the parts are now labelled and I can crack on with the planking again.
Last edited by sailingfree (7 Apr 2022 6:41 pm)
Offline
#13 11 Apr 2022 2:37 pm
- Curlew
- Member
- From: nr Skipton, N Yorks
- Registered: 8 May 2020
- Posts: 51
Re: Another wood Duck 12 hybrid build
Great progress. This is the best bit of the build I think.
I'm sure all our builds have little sliver inserts or bits of filling with woodflour thickened epoxy. I might be able to see them, but i don't think anyone else can!
It might be worth waiting to do these jobs until you have a good plane/sand of the deck (before glassing). Due to the curve of the tongue/groove some of your gaps wil probably lessen and maybe even disappear when you smooth the deck.
Your butt joints with the apron look nice and neat. Not easy.
Offline
#14 12 Apr 2022 9:17 pm
- teejay
- Member
- Registered: 26 Oct 2020
- Posts: 66
Re: Another wood Duck 12 hybrid build
Well done for making such good progress.
I found the neatness of my strips got better as I went on - (to get somewhat worse again as it got tricky towards the last strips). In some ways annoying that I can see the early issues - (although no-one else has) - but also a reminder of what a process of learning it was - and part of the uniqueness of the boat. Particularly well done on getting the skirt/strips joints so neat.
The appearance of the deck is transformed at the sanding stage as Bruce says - which adds a lot of fun to what is otherwise hard labour!
I found my deck design evolved as I progressed and that I had quite a lot of spare strips by the end - but definitely best to think it through at least twice before committing.
All the best
Tim
Offline
#15 18 Apr 2022 12:20 pm
- sailingfree
- Member
- From: Wareham, Dorset
- Registered: 15 Feb 2022
- Posts: 35
- Website
Re: Another wood Duck 12 hybrid build
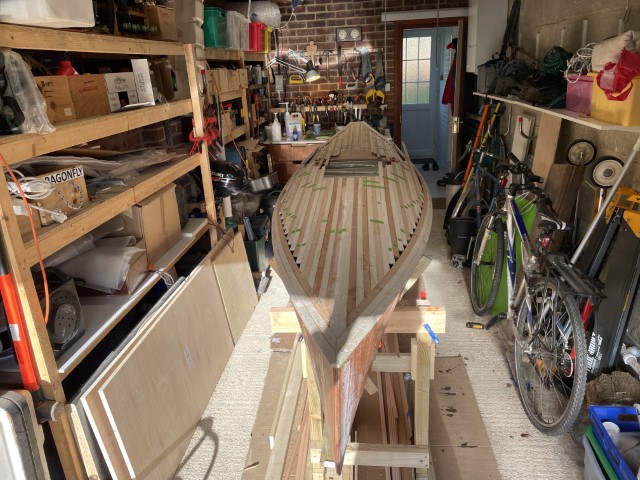
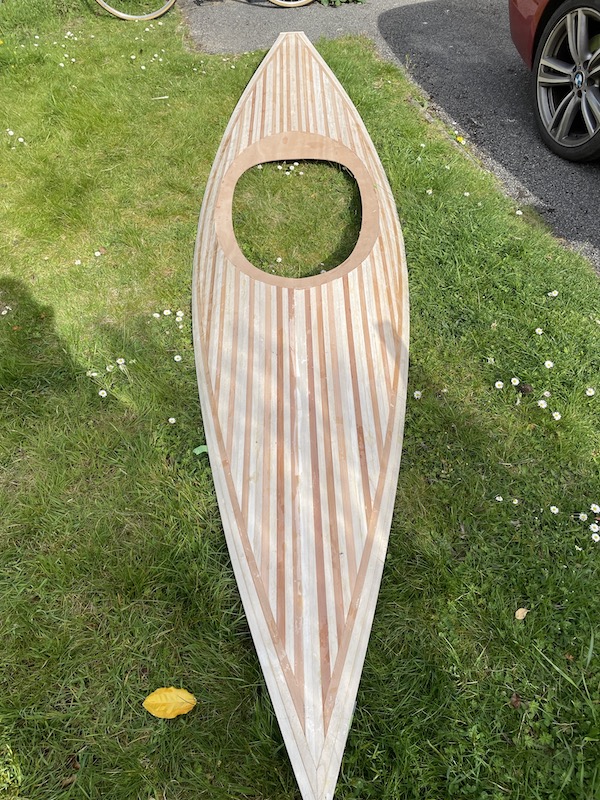
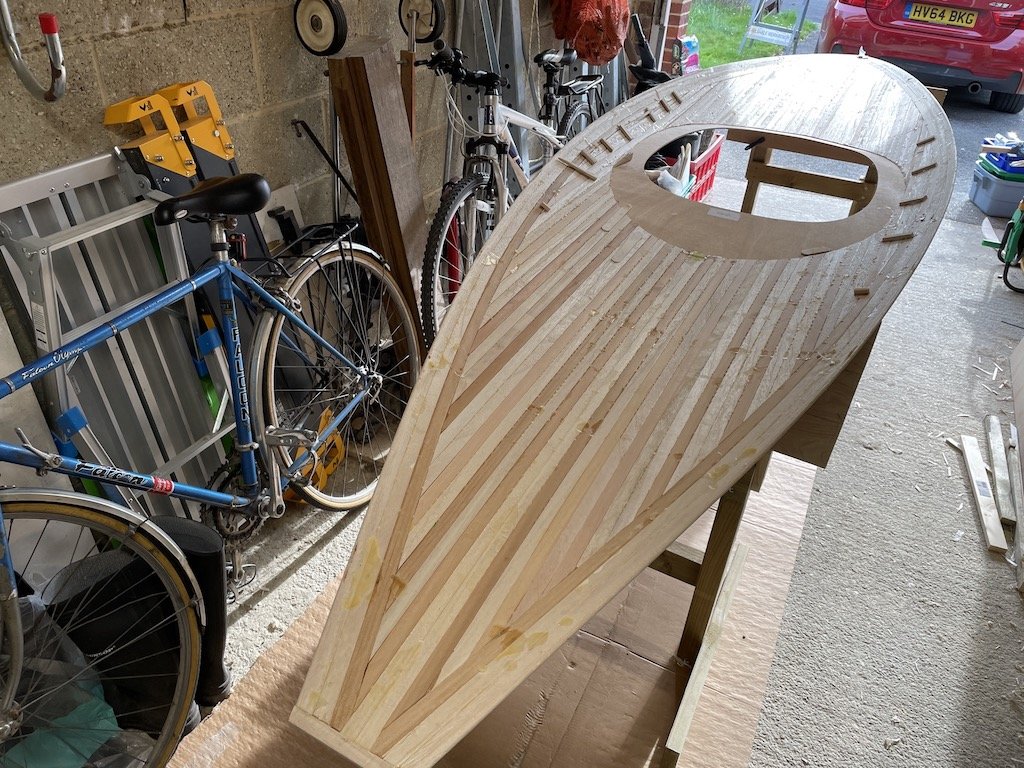
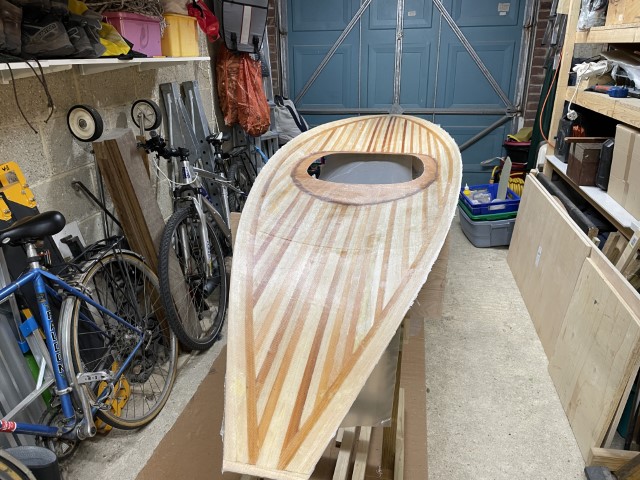
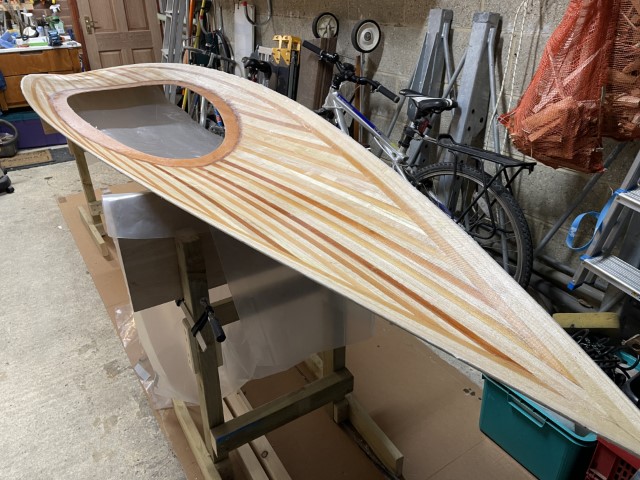
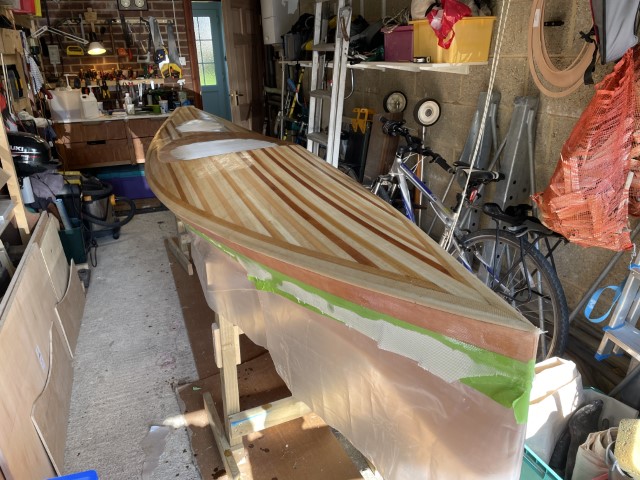
Bruce, Tim, thanks for the feedback. I stopped looking at the minute details, too much of a distractionat this stage, and as you say after the deck is planed/scraped/sanded some of the gaps will look different. I reached a milestone this weekend though, the deck is now fully planked with the final whiskey strip going into place.
Such a satisfying job turning a pile of cedar strips into a 3D sculpture and piles of curly wood shavings.
With some help from my daughter, we removed the deck and finally in the sun got a good look at the overall appearance. Even with good lighting in the workshop, its difficult to get a feel for the overall look, so it was encouraging to see the contrast more clearly.
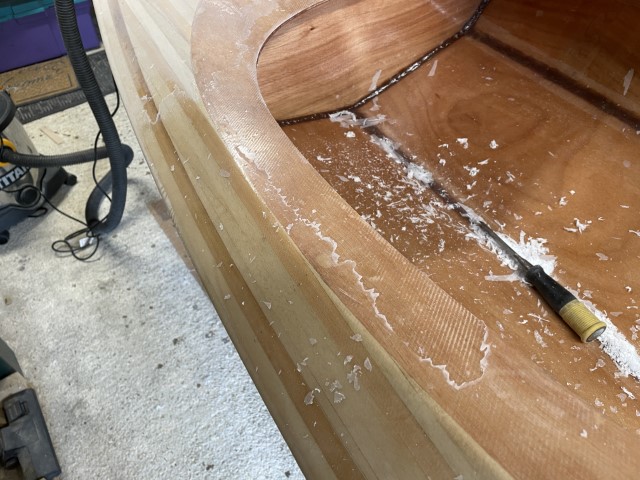
With the hull now hanging from the garage roof I've started to clean up the inside of the deck, removing all the little straps and supports I used to try and get the last pieces fitting neatly where I had removed the cove & bead.
Offline
#16 19 Apr 2022 11:50 am
- teejay
- Member
- Registered: 26 Oct 2020
- Posts: 66
Re: Another wood Duck 12 hybrid build
Looks great - really neat and tidy - congratulations - all the best with the epoxy work coming up.
Offline
#17 27 Apr 2022 3:59 pm
- sailingfree
- Member
- From: Wareham, Dorset
- Registered: 15 Feb 2022
- Posts: 35
- Website
Re: Another wood Duck 12 hybrid build
I've got a question about the position of the rear deck hatch. The instructions say the hatch should be 6 1/2 inches back from the cockpit opening, but that doesn't really work. The rear of the apron is more than 6 inches so that would put the hatch in the apron which is patently not right.
6 1/2 inches back from the rear of the apron looks daft and puts the hatch in the narrow part of the hull.
I don't think I've screwed up here, so eyballing other builds, I'm guessing around 9 1/2 inches back from opening to give enough support for the short strips between the hatch and the apron. Does that make sense?
Pete
Offline
#18 28 Apr 2022 7:43 pm
- teejay
- Member
- Registered: 26 Oct 2020
- Posts: 66
Re: Another wood Duck 12 hybrid build
Hi Pete
I've got the kayak stored elsewhere at the moment so I can't reference it directly - but - looking back at my manual/instructions I've written 9 1/2 inches? above the direction to make the hatch opening 6 1/2 inches behind the cockpit opening - so it looks as if we have had the same thought at this stage of the build - and I'm pretty sure from the pictures of my boat that I went with the 9 1/2 inches.
I wouldn't put the hatch much further back - it'll make sealing the top of the bulkhead very awkward after you've got the deck fitted - the opening doesn't give you much room to work through it - and it's good to have that join pretty solid and watertight.
All the best - it's a thought to cut that big hole out of your precious deck - the metal cutting blade in the jigsaw worked well for me.
Tim
Last edited by teejay (28 Apr 2022 7:46 pm)
Offline
#19 29 Apr 2022 7:43 am
- sailingfree
- Member
- From: Wareham, Dorset
- Registered: 15 Feb 2022
- Posts: 35
- Website
Re: Another wood Duck 12 hybrid build
Hi Tim, thanks for checking your notes, I’ve gone for 9 1/2. I guess the design of rear of the apron was changed at some point. The metal jigsaw blade worked a treat.
Offline
#20 3 May 2022 9:00 pm
- sailingfree
- Member
- From: Wareham, Dorset
- Registered: 15 Feb 2022
- Posts: 35
- Website
Re: Another wood Duck 12 hybrid build
Quite a bit of progress over the past week or so.
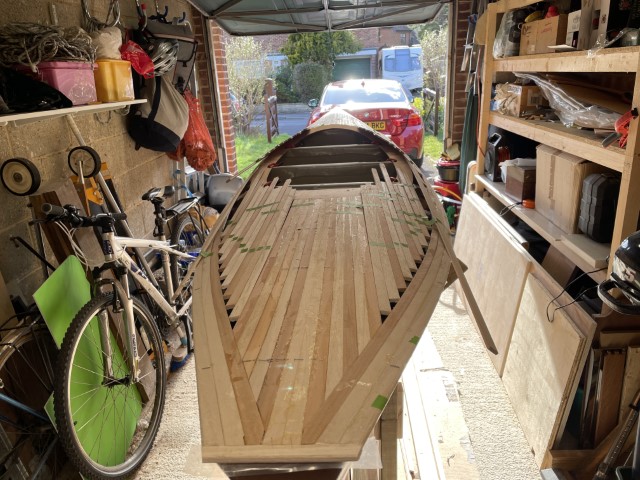
The underside of the deck was scraped, sanded and glassed and this really brought out the final colours of the deck. I added a small fillet between the apron and the strips so that the glass would have a nice smooth transition, and also make this bit stronger.
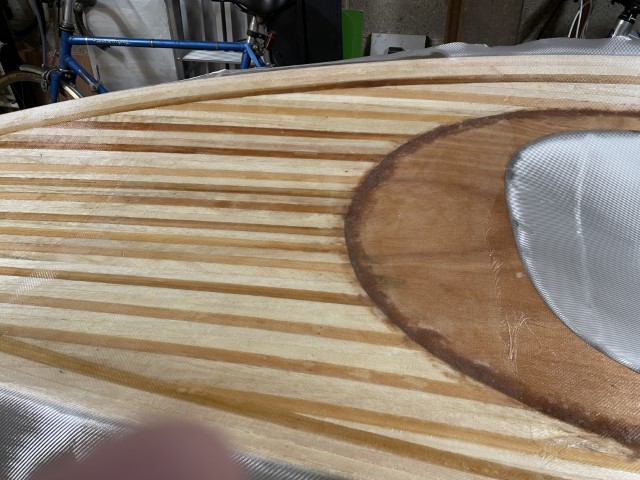
After the reassuring note from Tim, I cut the hatch out. As you say, it's a big step to cut the hole, you only get one go at this. A new metal cutting blade and taking is slowly worked for me.
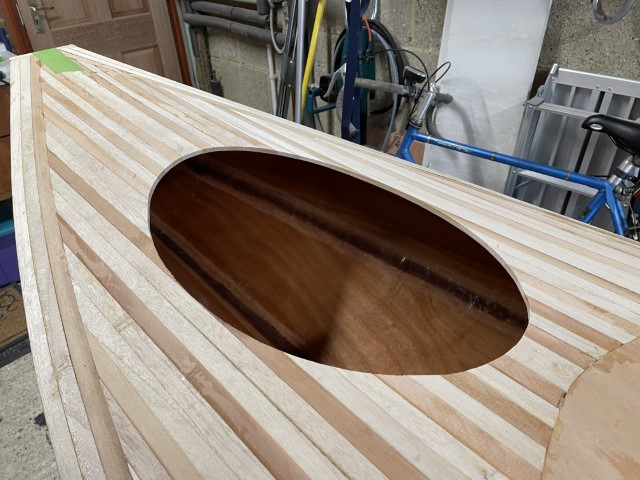
Looking at the end of the hatch was reassuring, showing me that the cove/bead actually works well, though this does highlight a small kink in the deck which I had to sand out.

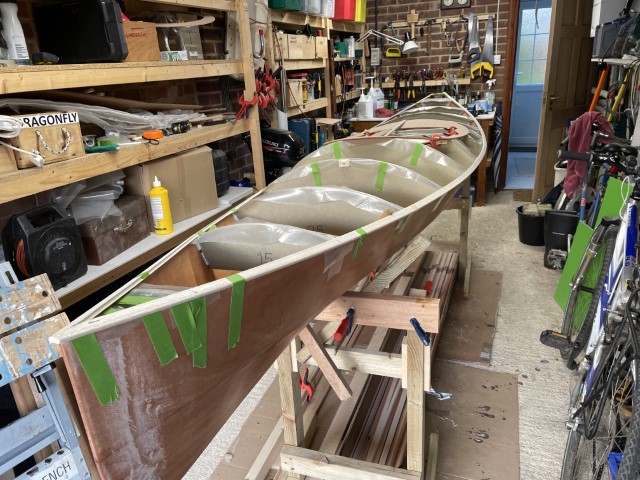
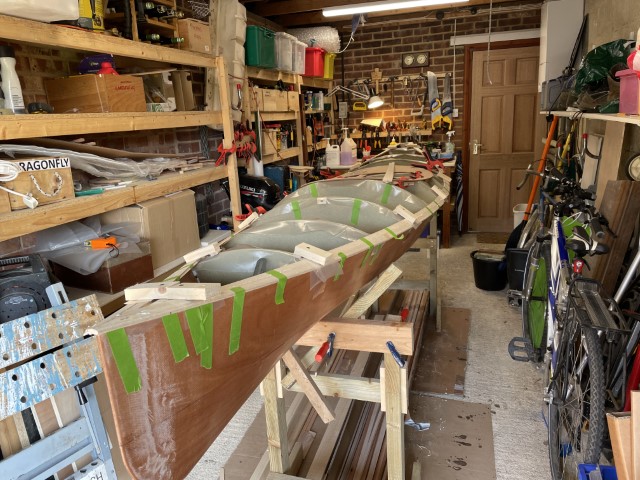
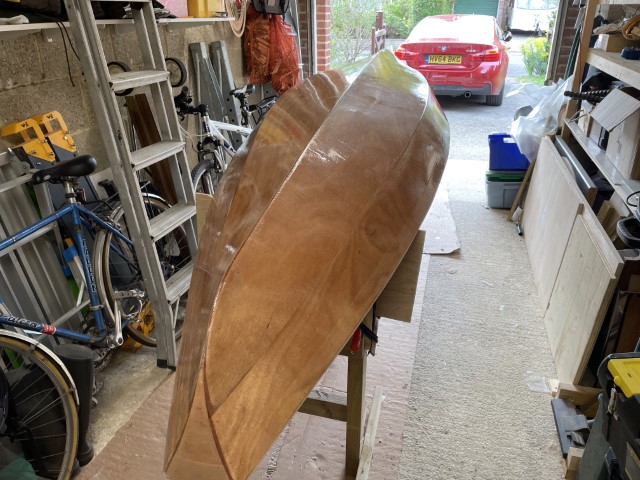
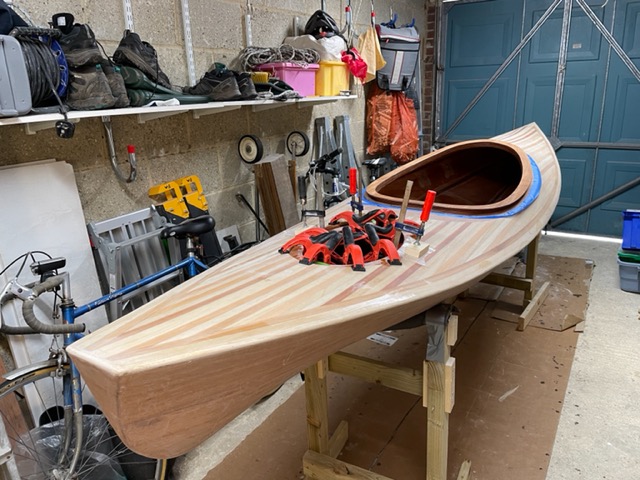
Time to fit the deck to the hull now. Lots of straps, ropes with truckers hitches, and after this picture I added loads of packing tape. I tried to make sure that the overhang was consistent all the way round using spacers, hot melt glue and a couple of wedges, though to my dismay, there is a bit of a wobble where the rear bulkhead is.
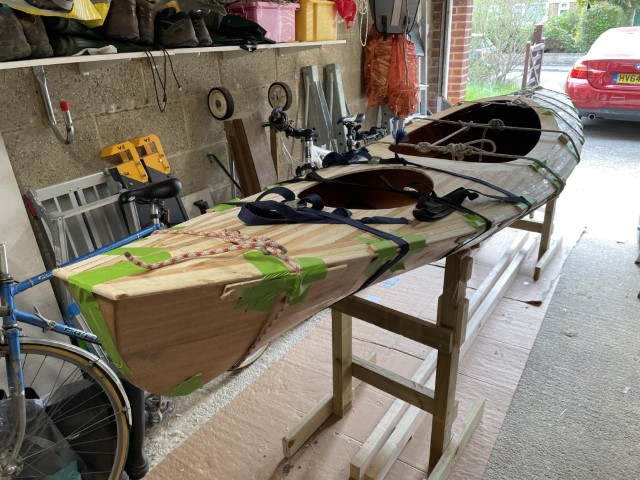
Doing the hull to deck glueing was a struggle. I did get the fillet all the way to the bow by using a rounded stick on a long handle, the seemed to work OK. Using the rolled up tape trick worked only so far until a loose thread at the end started to unravel and tangle up and it ended in a bit of a mess on the port side, the end pour will cove this up. On the starboard side I sealed the tape ends with a bit of filleting epoxy and allowed that to cure before trimming it so the ends wouldn't unravel and that one went much more smoothly.
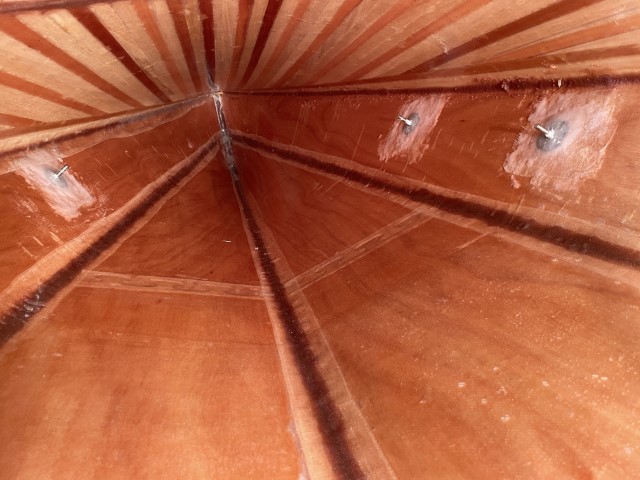
This shows the port side complete and the starboard with the fillet. It also shows the studs I elected to use to secure the footrests, I prefer not to have holes where not needed.
Finally I spent a good day planing and sanding the deck, ending up with 240 grit to get a nice finish. There's a big difference between sanding disks, the ones that came with the sander lasted a couple of minutes, while more expensive Makita disks lasted until they went dull. The best by far were the DeWalt mesh disks which seem to last for ages
Really pleased with this. As Bruce suggested I waited until the deck was faired before adding small slivers to fill a few gaps that were left.
Offline
#21 6 May 2022 8:13 pm
- teejay
- Member
- Registered: 26 Oct 2020
- Posts: 66
Re: Another wood Duck 12 hybrid build
Your build is coming on great - well done. The deck looks lovely - very neat.
Someone suggested a gentle wipe off with a damp cloth - helps to get rid of the dust and gives a better idea of the final look - and brings a smile to the face!
Offline
#22 8 May 2022 11:38 am
- Curlew
- Member
- From: nr Skipton, N Yorks
- Registered: 8 May 2020
- Posts: 51
Re: Another wood Duck 12 hybrid build
Oh yes, looking good.
A wipe with a clean cloth is also a good way of spotting any PVA residue.
Offline
#23 21 May 2022 10:11 pm
- sailingfree
- Member
- From: Wareham, Dorset
- Registered: 15 Feb 2022
- Posts: 35
- Website
Re: Another wood Duck 12 hybrid build
Thanks, that worked well, the true colours and contours really start to show through after a good wipe down with a damp cloth.
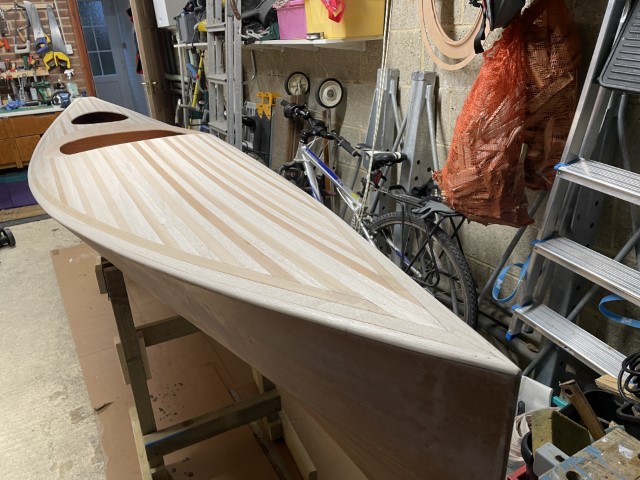
Some more progress, after lots of sanding I glassed the deck which went pretty well, warm resin from the now permanently warm water bath, and the weather is playing nicely too. I used the masking tape method of getting a smooth transition from the deck cloth on the hull, that worked really well and left a clean edge to feather into the hull.
I'm happy with this, though only now do I see that I messed up slightly on the wood selection, mixing up the slightly darker and lighter strips near the middle on the starboard side.
I put a skim coat on the hull after feathering and the join has mostly disappeared. This still needs a final sand and maybe a final really thin skim coat.
However.... I did have a problem with the final top coat of epoxy on the deck. The weather was a bit colder and quite damp, and I left the third coat too long before brushing it on. When I came to sand it a couple of days later, the coat started to come away, and I ended up removing it completely. My guess is that the previous coat had had hardened and there was the dreaded amine blush which I wrongly thought was the epoxy not having completely hardened.
Luckily it was so poorly bonded that it came away in sheets that I could peel off most of the deck. A dismal day of scraping and using a very sharp chisel followed by yet more sanding, washing and messing around revealed the top of the second fill coat that caused the problems. Luckily no permanent damage, and later coats went on just fine.
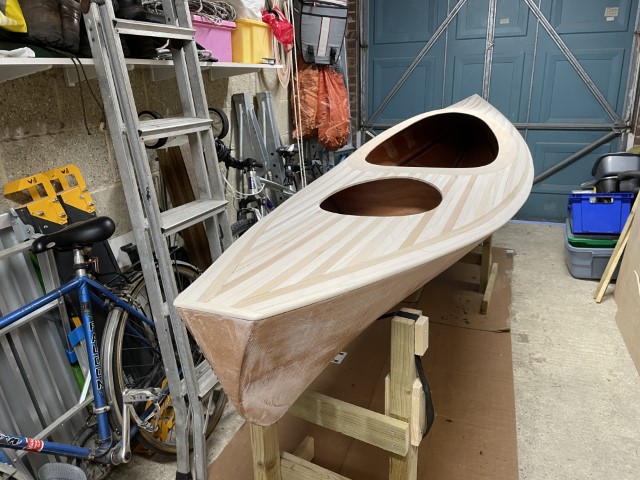
After that little fiasco, some epoxying, sanding, more epoxy, glassing a couple of patches where I managed to sand through the glass with the orbital sander (as Nick and others say, that is really easy to do in the blink of an eye) and yet more sanding, the deck looks OK, and I installed the coaming and hatch support. This is getting close to the point of being ready for varnish, which I hope to start next week after short break.
Offline
#24 27 May 2022 7:39 am
- Curlew
- Member
- From: nr Skipton, N Yorks
- Registered: 8 May 2020
- Posts: 51
Re: Another wood Duck 12 hybrid build
Well it looks like you rescued the situation OK. In the end the glass etc is quite forgiving and can be patched invisibly.
Not sure why you had the problem. I thought the resins they supplied were relatively immune.
Incidentally I found varnish to be far more temperamental and technique-dependent than epoxy. Sorry!
Offline
#25 27 May 2022 9:56 am
- teejay
- Member
- Registered: 26 Oct 2020
- Posts: 66
Re: Another wood Duck 12 hybrid build
It looks as if you've "rescued" the situation really well - one of those things you'll know and no-one else will once the build is finished. The last picture shows you've got a really nice looking boat.
All the best with the varnish - by the feel of it something you're experienced at - but despite years of using 1-pot - I found the change to 2-pot took some adjustment - but the advice on applying it, for instance on the International Paints site, is good.
All the best
Tim
Offline