A forum for discussing wooden boats and boat building
You are not logged in.
- Topics: Active | Unanswered
Pages: 1
#1 26 Feb 2021 7:37 am
- pape
- Member
- Registered: 28 Sep 2020
- Posts: 14
Pocketship build in Finland
greetings fellow builders!
I'm building a Pocketship and thought I'd share some of the stuff I've learned and document a bit of my progress. I'm hoping someone might get a useful hint or perhaps find this entertaining? At least I can read these later and remember the good building times :-)
I've been sailing for years, I live on a lakeside here in Finland and love building stuff. I've build three simple plywood boats before and was looking for something a bit more complex. The Pocketship seemed to tick all the boxes and I was happy to see Fyne Boat Kits was selling them in Europe. With the Brexit looming and nobody knowing how it will effect trade and duties, I decided to go for it. I actually ordered everything at the same time, including sales, hardware kits etc.
I got the plywood kit in September. The time from order to delivery was a bit longer then expected due to the influx of orders at Fyne but no biggie, I was kept informed by the good folks at customer service. The hardware kits+ sails arrived a bit later in November. It was not like I needed them this early anyway, but the key thing was to receive everything before Brexit.
So let the building start!
Here it is, my new boat! (Some assembly required :-D)
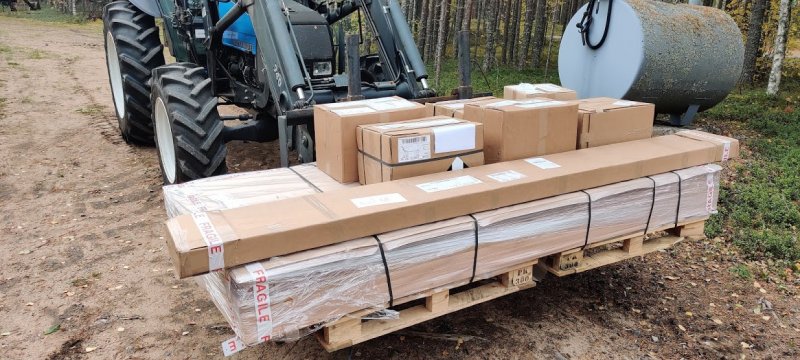
Everything was neatly packed and I spend some time going over and unpacking everything. A lot of epoxy!
Starting with the keelbox as per instructions was straight forward, except I immediately messed up my first ever glassing and epoxing and the surface got a lot of bubbles in it. Probably because of a chain of events that lead me to be in a hurry and I tried speeding things up by gently warming the epoxy. Bad idea in retrospect.
I used a heatgun (as instructed by the friendly customer service at Fyne and not for the last time :-) )to remove the glass and started over. This time things went well.
Then the build continued!
I'll write more about it later
Offline
#2 27 Feb 2021 11:33 am
- pape
- Member
- Registered: 28 Sep 2020
- Posts: 14
Re: Pocketship build in Finland
and the story continues:
Next issue to avoid was making sure the keel box comes out straight. Many blogs have horror stories on it being crooked after gluing and the agony that ensues.
So I tried to be very very careful when doing the gluing and sure enough, it wasn't straight. What did I do wrong? Not sure, but it was a little bent on the bottom, no biggie, but more on the top, which would have been fine for a propeller blade, but not for keel.
In the process I found using a laser is a handy way to check the straightness:
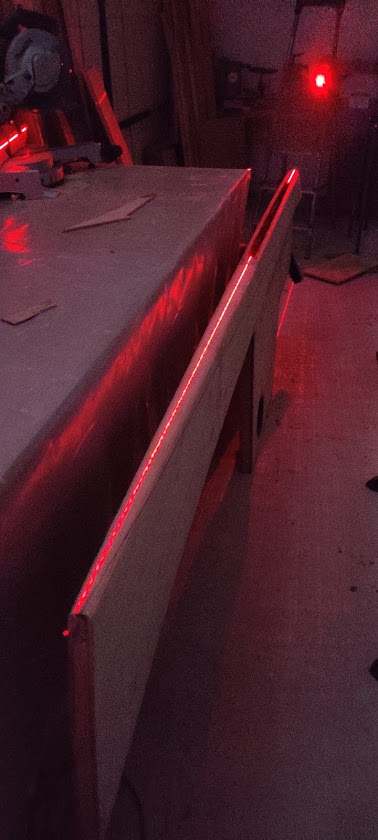
I started fearing that when I pour the led into the keel, the weight and pressure of the molten stuff is going to make the keel top list even more and make things even worse. So I made a sturdy support that forceably straightens the keel, top and bottom, and I kept my fingers crossed that the led will actually freeze the keel in its straight form.
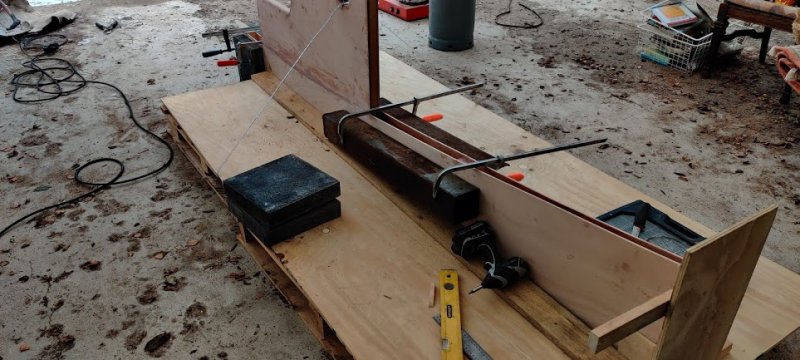

After the pour I measured everything and what a happy day! The keel ended up almost perfect! Within a few millimeter, which is plenty straight.
Onwords and upwords ![]()
Offline
#3 5 Mar 2021 7:46 am
- pape
- Member
- Registered: 28 Sep 2020
- Posts: 14
Re: Pocketship build in Finland
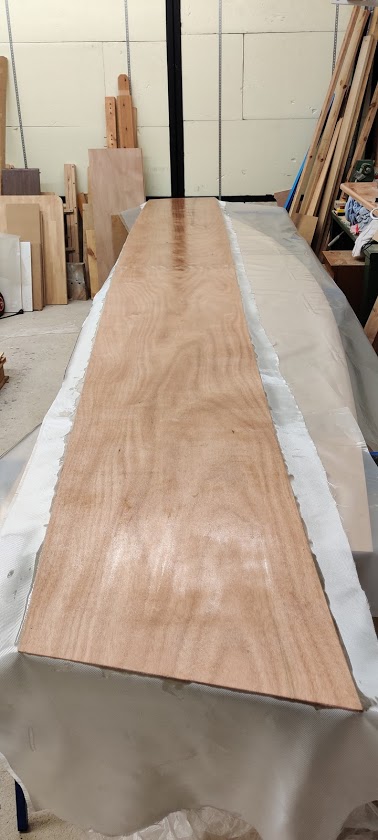
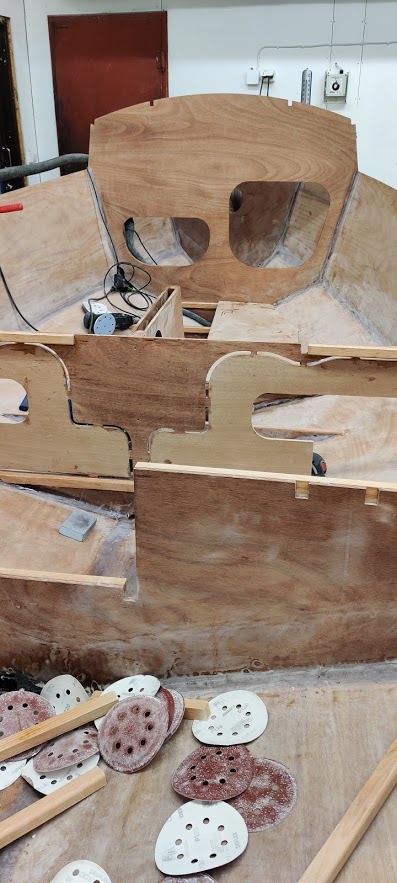
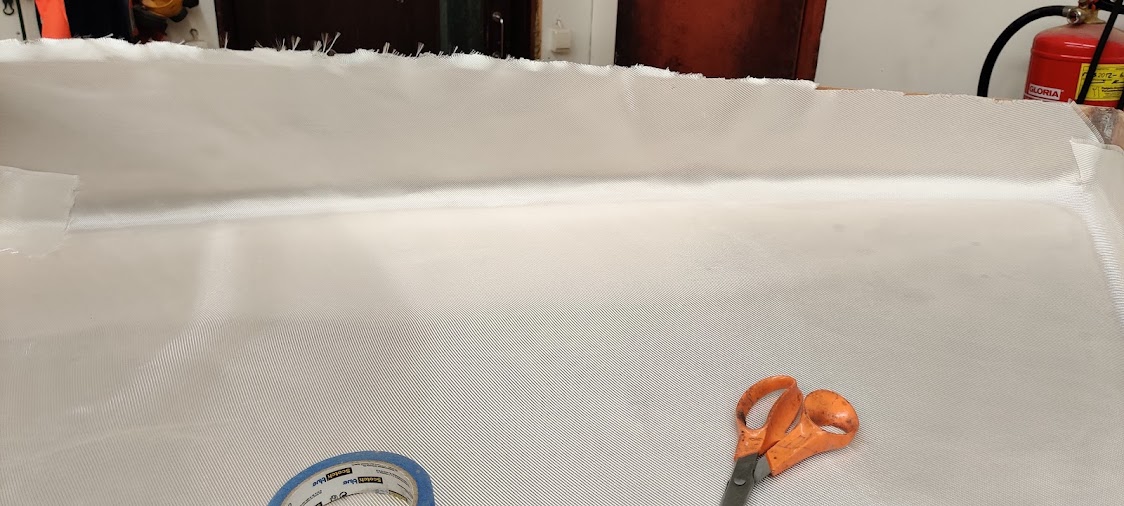
The build continued with assembling the long plywood panels that will form the hull. The CNC made finger joints are nice, but mine were just a bit off and required quite a bit of sanding to fit. What was wrong? No idea, but got them to fit in the end.
Glassing the long, large panels requires space and it wasn't easy, but this time I was happy with my results
In my experience you need four layers of epoxy rolled on to have enough thickness not to sand easily into the glass. Getting a nice flat smooth gray layer requires a lot of sanding ![]()
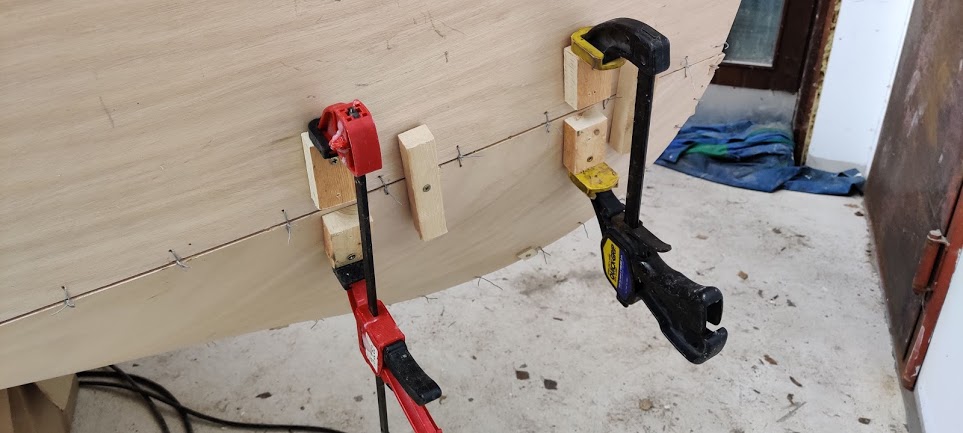
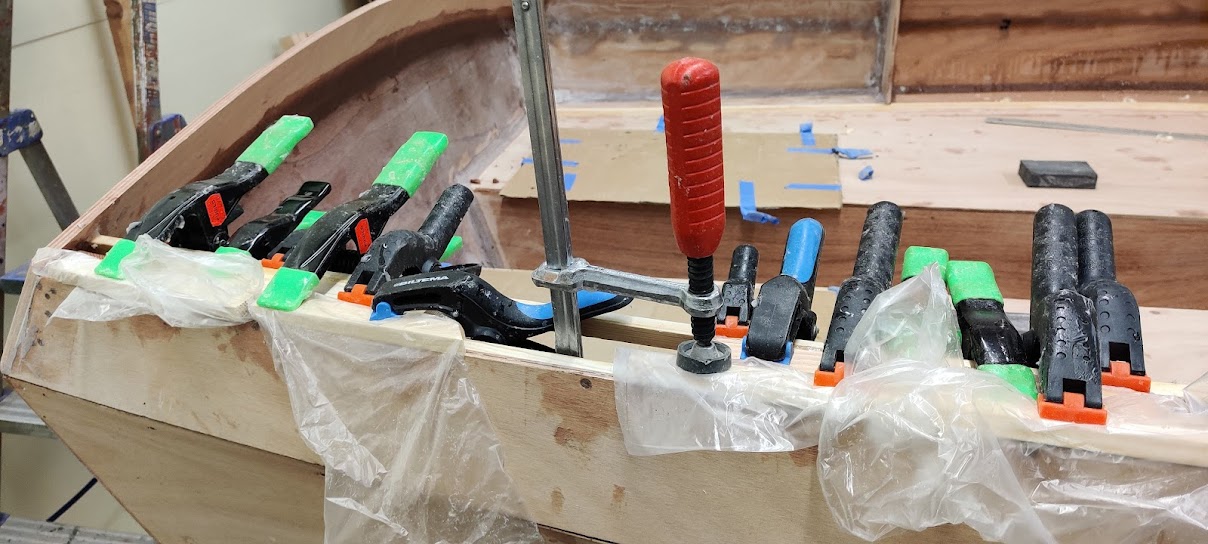
Stitching the hull is easy and fun. The only slight complaint about the kit is the copper and steel wire provided, as I had to switch to a thicker gauge to have any hope of pulling the panels together. And even then I had do some tricks to get the alignment right.
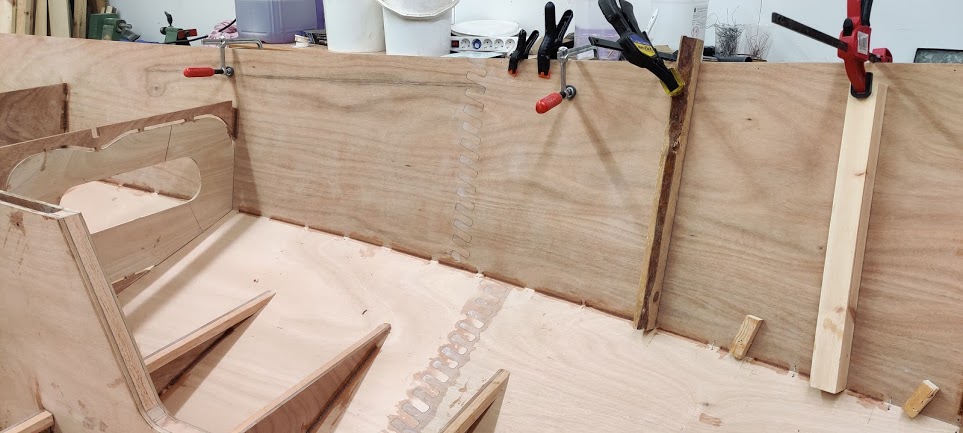
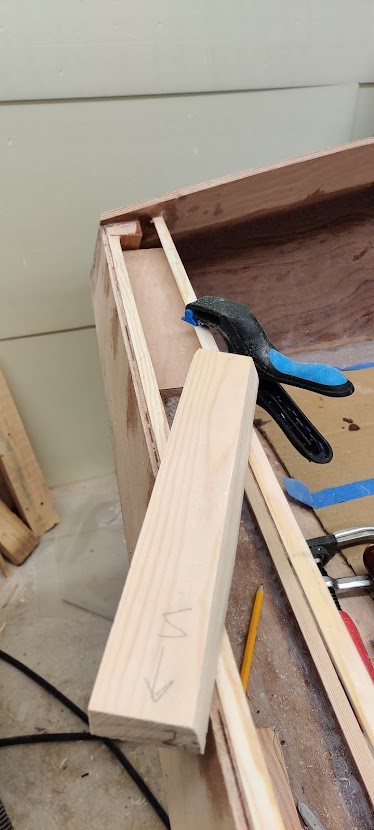
The bow is the hard part. It takes A LOT of force to join the panels, or even to get them fairly close. As instructed in many blogs, I had to add some blocks to allow pulling the edges closer, and only even then only got them to about 5 mm of each other.
A suggestion for metering epoxy while on the subject: In the kit there was a note suggesting to use weight ratio instead of the epoxy pump ratio and that's what I did. At some point I checked the pumps, and they are not nearly as accurate, and if the pump has air in it and spits, you'll have no way of knowing how much was dispensed. So use a scale.
onwards and upwords!
Last edited by pape (5 Mar 2021 8:19 am)
Offline
#4 7 Mar 2021 5:53 pm
- teejay
- Member
- Registered: 26 Oct 2020
- Posts: 66
Re: Pocketship build in Finland
Really interesting reading about your progress and good to hear your ideas and tips - despite your build being a lot more substantial than the small kayak I'm building (I've had no need for a tractor yet!) the issues are similar.
The weighing out of the resin has been a real step forward for me too - and I'm interested that you feel 4 coats of epoxy are what to aim for.
All the best - I'm looking forward to seeing more of the boat build
Tim
Offline
#5 8 Mar 2021 10:25 am
- pape
- Member
- Registered: 28 Sep 2020
- Posts: 14
Re: Pocketship build in Finland
thank you Tim for the kind words and encouragement!
A word on the four layers of epoxy I'm endorsing: The way I do it is to spread the first layer and then after the layer is sticky but not tacky I roll on the second layer. That way you don't have to sand the first layer when the glass weave is still showing through and risk sanding it. After the second layer light sanding, I try to sand the third layer as good as I can and the fourth layer will then make the outcome perfect. Well, not perfect but as good as I can get it ![]()
The build continued:
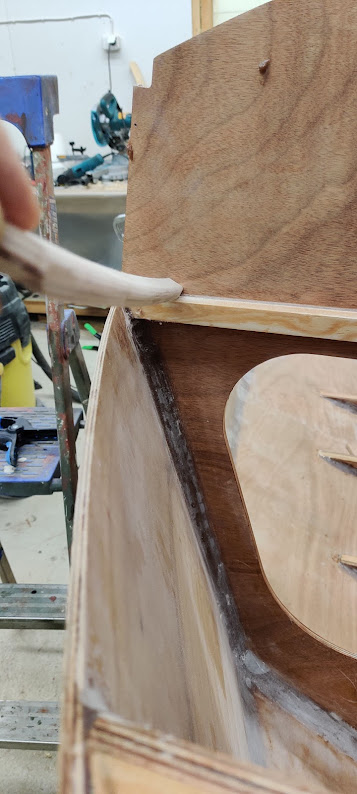
Tack welding between the wire stitches is actually very easy. You just have to take care the stitches are rather small so they won't interfere with the final fillet. It is also amazing how strong the tacks are!
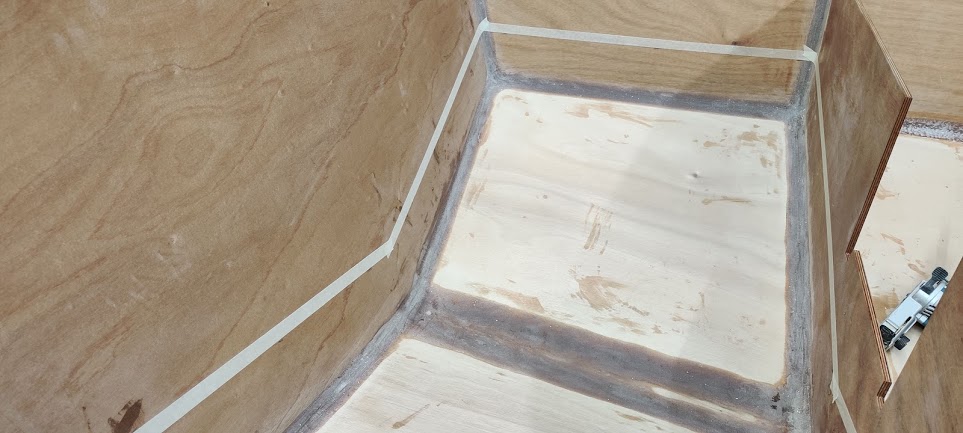
Then starts the part that all bloggers call the most miserable of the build: Filleting and especially sanding the fillets.
I started by making the appropriate filleting tools from scrap 4 mm plywood pieces. Seemed to work well and you can sand them clean if they develop crumples.
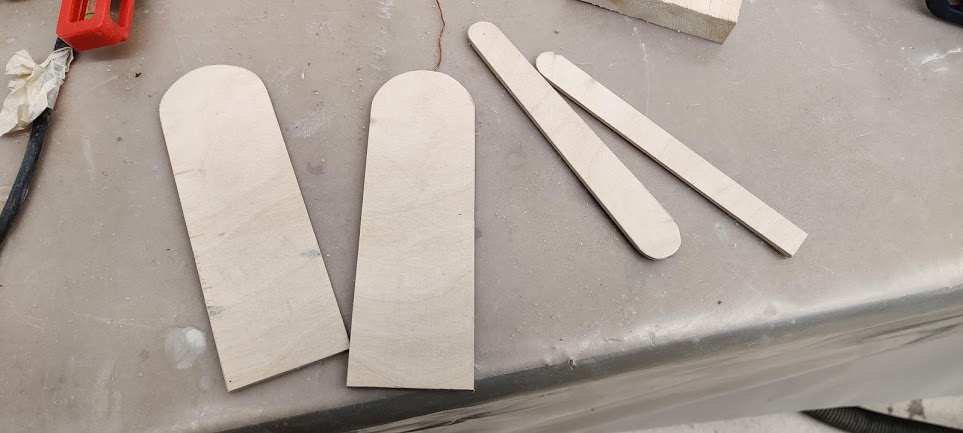
I had to make an even larger radius fillet tool for the chines, not pictured.
I used ordinary freezer bags, mixing about 200 g of epoxy (+hardner) at a time and seems to be the practical maximum.
The actual dispensing and faring of the fillets is not that hard with a little practice, except for the inner corners and T-junctions. The Fyne friendly customer support gave some excellent advice: after a few hours, mix a small batch of clear epoxy (like 10 g), dip you gloved finger in it and you can shape and smooth the epoxy like putty. The clear epoxy will soften the surface saving you hours and hours of sanding. This was very good advice! The manual talks about using alcohol, but the small epoxy batch works as well and saves the alcohol for consumption ![]()
Here is the stern bay where I started:
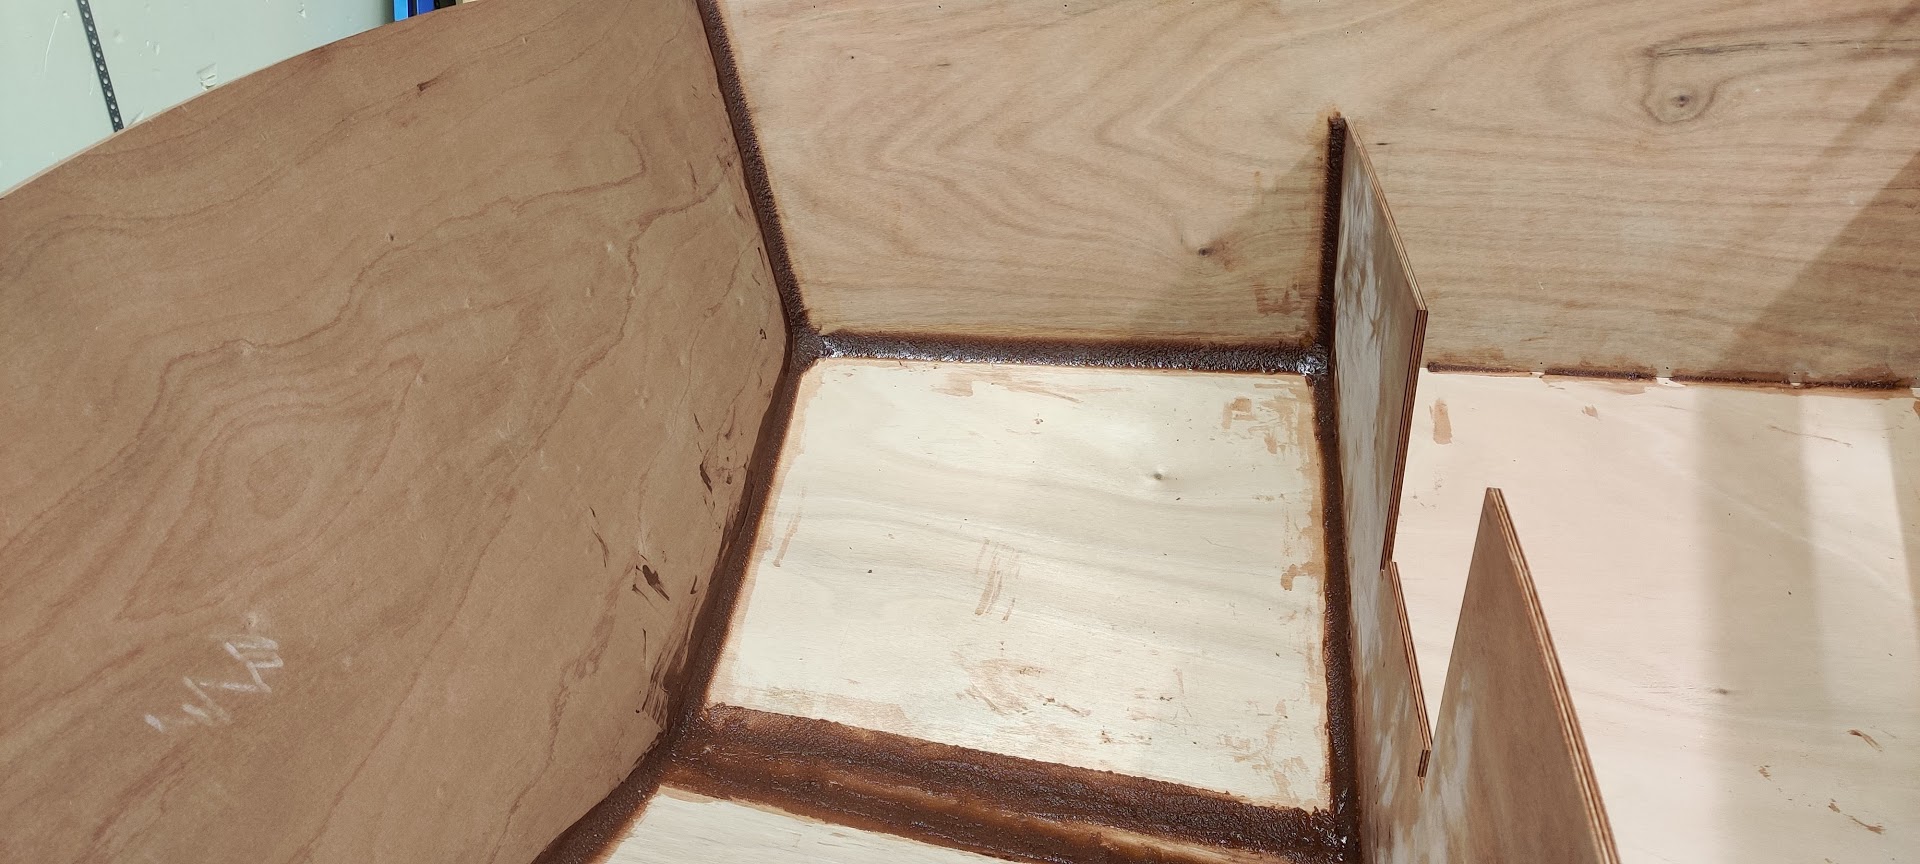
The surface is very very rough and very very hard. I was scratching my head how to sand it. By hand it is mission impossible, so I tried everything I had:
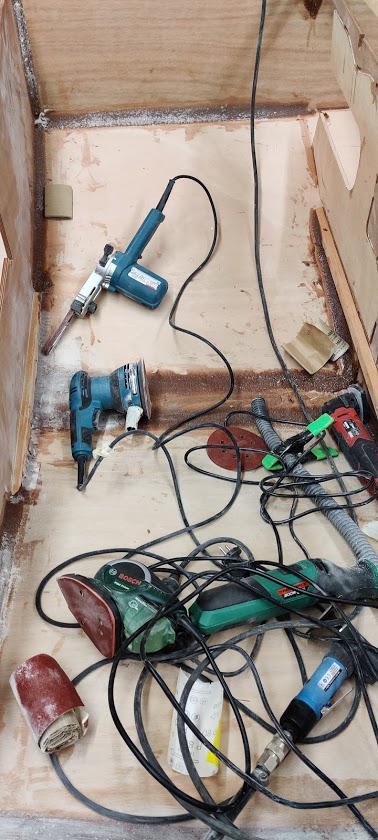
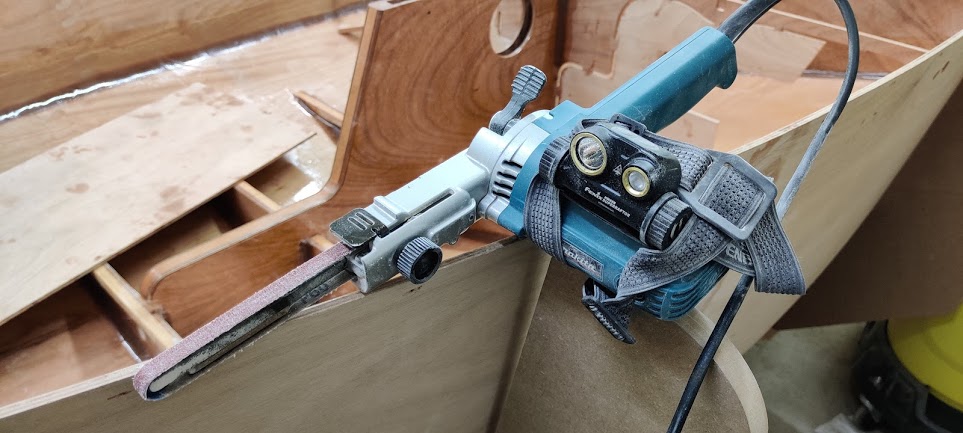
After a lot of trial and error, the Makita orbital sander misused by just using the very edge proved to be the best approach, and especially difficult jobs were best attacked with the Makita narrow belt sander, which proved to be absolutely essential in hard to reach spaces. It eats away epoxy mix at a respectable rate as long as you tune the belt speed to about half. Here you can see it equipped with headlights for the dark bow compartment work:
Instead of the manual outlined work flow of filleting everything, sanding everything and then glassing everything I approached this job differently. After filleting and sanding the stern compartment I filleted the next compartment towards the bow and then moved on to glassing the stern compartment. I moved forward slowly this way: Filleted a compartment or two, sanding until arms sore, glassed a compartment and so on. This way I didn't have to do one very very boring job for a long time but instead alternating between different tasks to keep motivation up. For me it worked well. Someone else might prefer a different approach
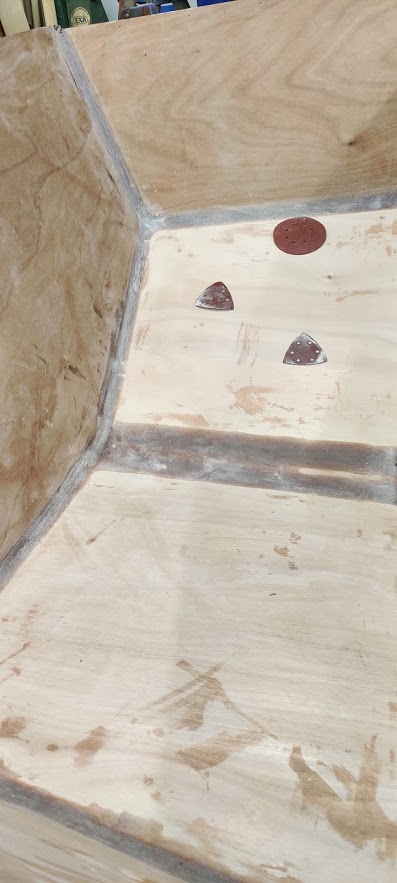
Here is the stern compartment sanded:
As I try to be cautious, I kept checking that the radius of the fillets stay withing the 1 inch radius limit:

many times I had to do another layer to meet the criteria, and also many times I needed to do the visual fillets, like chines, twice to get them to be visually excellent. Well, actually just good. Well ok, even adequate is enough ![]()
The build continues!
Offline
#6 12 Mar 2021 12:25 pm
- pape
- Member
- Registered: 28 Sep 2020
- Posts: 14
Re: Pocketship build in Finland
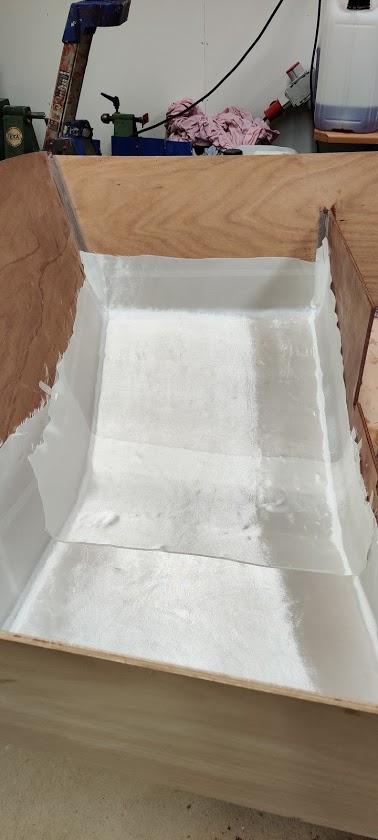
Slowly but surely I got the hang of filleting and sanding, but it was still a lot of fairly miserable work! All the while doing that I also commenced the glassing starting with the stern compartment.
I have read a lot of blogs on the subject, as I think many do, and tried to copy all the good ideas. A lot of them seem to carefully tape the area to be glassed and I did that but only with the top edge as in the picture.
When laying out the glass cloth I overlapped the tape a bit and then after a few hours used a sharp knife to cut the excess.
On hindsight this is not needed in my opinion and I should have left the tape out. First, it was not an easy task in cutting the layer carefully and not overly damage the other glass layer below. very often a strand was not cut and when pulling the excess it would also pull the glass from the plywood making a mess. And if you carefully feather the edges while sanding after all the glassing work, you can't tell where the glass edge is anyway.
Laying the glass cloth is fairly easy, if you stroke it with a cotton gloved hand it seems to pick up static and sticks to vertical parts very well.
in the above picture you can see pieces of tape holding the glass cloth at a few places. In my opinion this was also not a good idea. If the tape is ever so slightly "pulling" the cloth it will not sit nicely in the inside corner right below it. I found that cutting the overly long vertical parts short enough and stroking them flat and then trusting the static was the best way.
My typical working order: Start the workshop extra wood burning heater and keep about 25 - 27 C for a few hours. The epoxy runs better and hopefully will soak into the warm wood better. Then around noon stop heating and start the epoxying. The workshop will slowly cool to about 16 C. After the first layer is done, usually after about 6 hours, the epoxy feels kind of sticky but doesn't stick to your gloved finger and I roll on the second layer. I then let those dry for a at least 48 hours before a light sanding. I didn't sand and add the third and fourth layers until I had glassed everything.
I found a foam roller to be the best tool for spreading the PEC epoxy in the kit. A brush, especially in the first layer, will only stick to the glass cloth in the vertical edges and pull it from its place. Very frustrating.
I learned to start in the horizontal part and when that was almost done "climb" the epoxy in the middle of a vertical wall and widen towards both corners. Leave the corners alone, as the last part to be epoxied needs to be a corner. If you have moved the glass cloth a corner is the only place you can either get a bit more material from or hide a bit if you have excess.
I never quite got the hang of inside corners and sadly ended up with a few air bubbles but no wrinkles, which I surprised and proud of.
The middle "T" sections were just a bit harder, but nothing too difficult. In the picture below is from my largest glassing job of doing three (3) bays at a single go. Took quite a while and boy my legs were sore from crouching for such a long time!
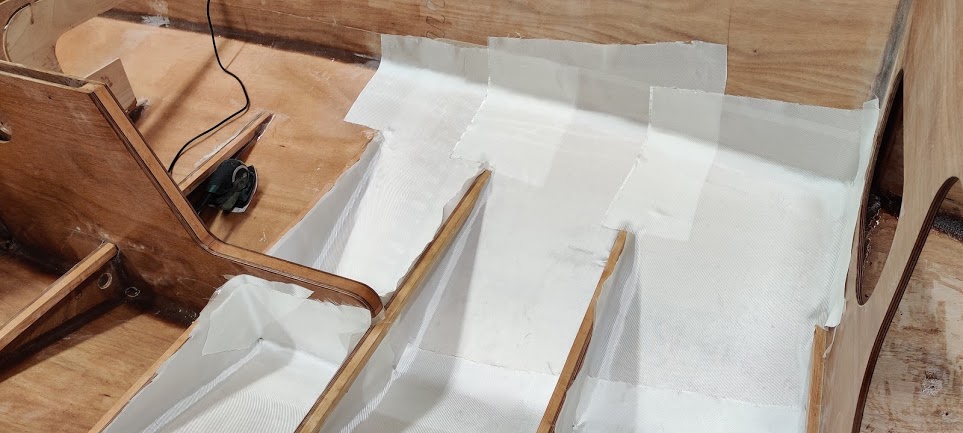
it seems a lot of people do templates first then cut the glass cloth and place it. Maybe I'm just lazy, but I cut a square piece long enough and as wide as the widest part of the "T" horizontal section. I then placed the cloth and cut out the excess. I found this easy and quick. Not to say the results were perfect, there were a couple of bubbles here and there, but structurally sound.
After what seemed like many many many weeks of this, one Sunday morning the whole boat was finally glassed from stern to bow! What I happy day!

Offline
#7 20 May 2021 1:27 pm
- pape
- Member
- Registered: 28 Sep 2020
- Posts: 14
Re: Pocketship build in Finland
so there I was all happy with my shiny new boat interior. "Now I'll just quickly sand and get on the final layer of epoxy and get to some woodworking after months of glassing" I thought, won't take long, I though. Starting the sanding of the hull from one corner, and you quickly realize for a small boat it is HUGE! There seems to be acres of sanding of that tough, resistant epoxy. I got miserable after a while, counted the money in my walled, and ordered one of these:
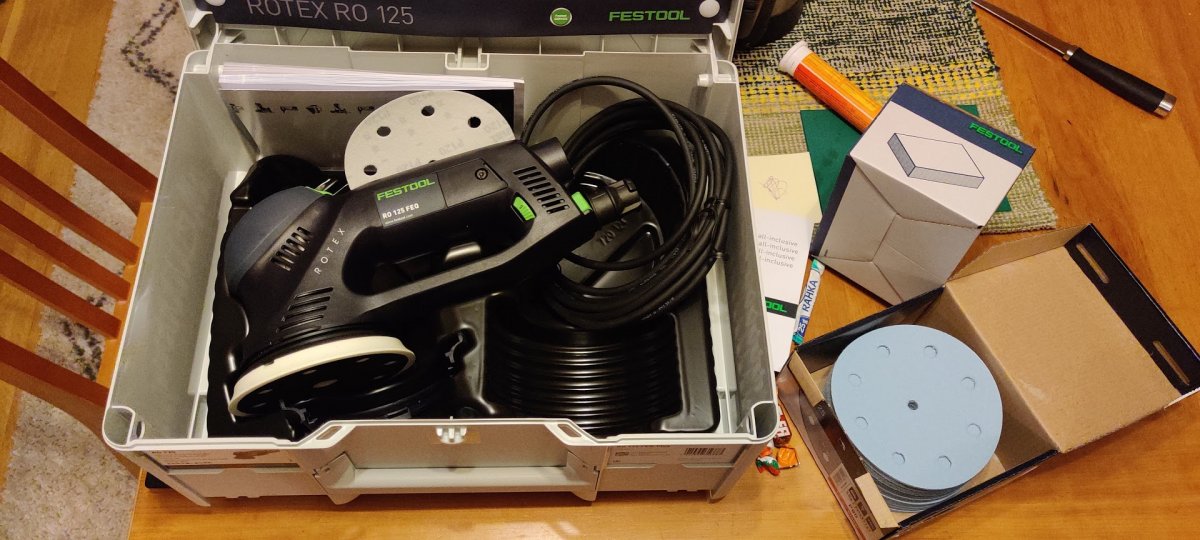
It is a Festool 5 inch geared sander. Yes, it is a lot of money but sure does make things easier. Light and nimble it is not, but especially on horizontal surfaces it is crazy powerful. In fact if you switch it to forced turning you'll have your work cut out just to control the thing. I also got the original Festool sanding pads, which have the dust vacuum holes in the right spot and the dust removal is very effetive. The Festool sandpaper is also really good, and works better then the hardware store brand even on a Makita sander.
After sanding the now well hardened second epoxy coat I rolled on the third coat and spend many miserable hours sanding it with the "soon this is over" keeping me moving. During the sanding I did realize I will end up having to do it one more time to not cut into the glass cloth and getting the shiny stuff out. So again, finishing the sanding I once more whip out the foam roller and another layer goes on. And again the now familiar few hours of sanding.
During sanding I occasionally glued on a cleat here or there, as there are many to be installed and it broke the monotony of sanding.
It took a while and was not my favorite part of the build, but I sure did feel great after it was done. It not only looks good but feels really a lot more solid to walk in and much more "feels like a boat" :-)
Onwards and upwords!
Offline
#8 9 Nov 2021 3:42 pm
- pape
- Member
- Registered: 28 Sep 2020
- Posts: 14
Re: Pocketship build in Finland
When I started the build last fall, I promised myself and the family I will not be building during the summers. There are a million house projects, home projects, vacations and relatives to meet and I also felt that the break will prevent me from loosing interest in the long build.
We have had snow and freezing temperatures here for a while now, so I've been happily working away in the workshop again :-)
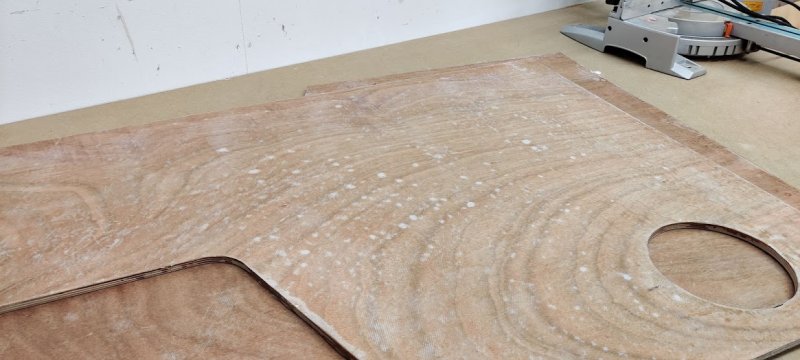
After finishing the long and tedious job of sanding the hull bottom, I was looking forward to the nice woodworking project of making the floorboards. However, first I needed to select a color and paint the hull including the bilge which would be inaccessible later. As so many others, I started with white, and my selection of the paint manufacturer was Hempel, as they were readily available in the local store. After painting I didn't like it. It was too bright white making the interior look like an operating room. Hempel Multicoat luckily had a color named "Pale Cream" that sounded just like what I was looking for, as a touch of cream was needed to soften the color up. After painting it looked like this:
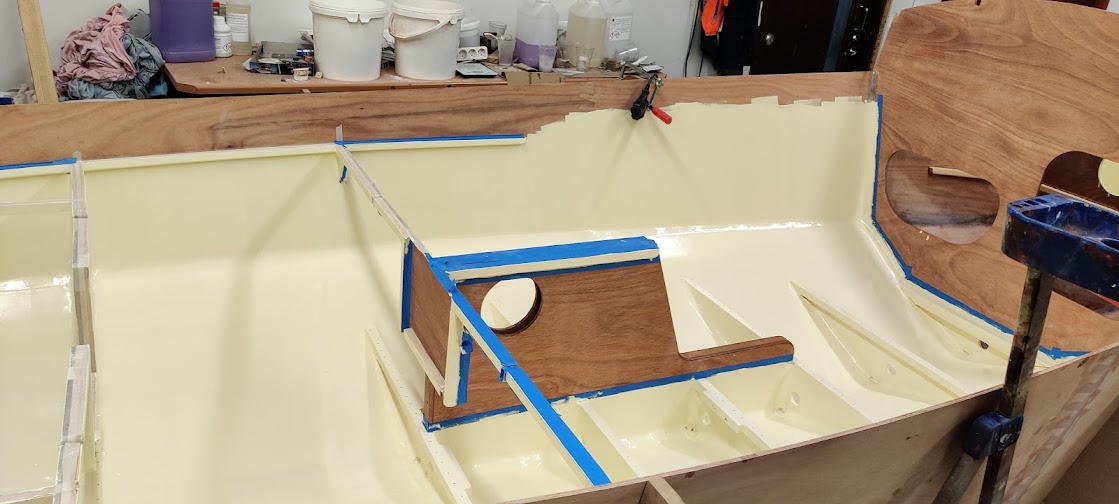
Pale Cream was an understatement, to me it looked more like butter. However, after a few days of looking at it, my wife and I decided to stick with the color. Pale Cream it is!
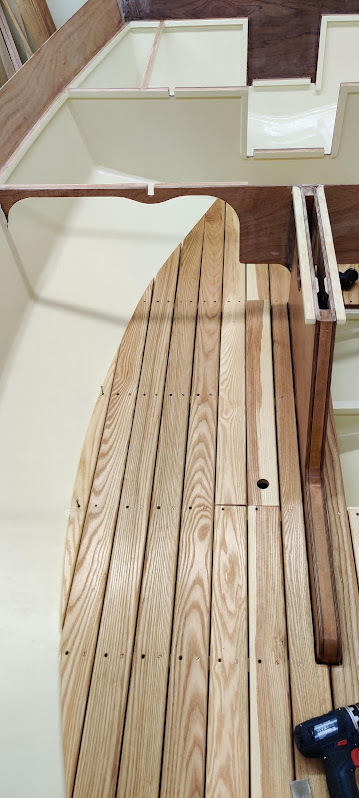
When I set the beautiful, great quality pieces of ash on the boat floor I quickly realized I was missing four of the long boards. I contacted Fyne and believe it or not in just a week I had the missing pieces here in Finland! Talk about fast customer service!
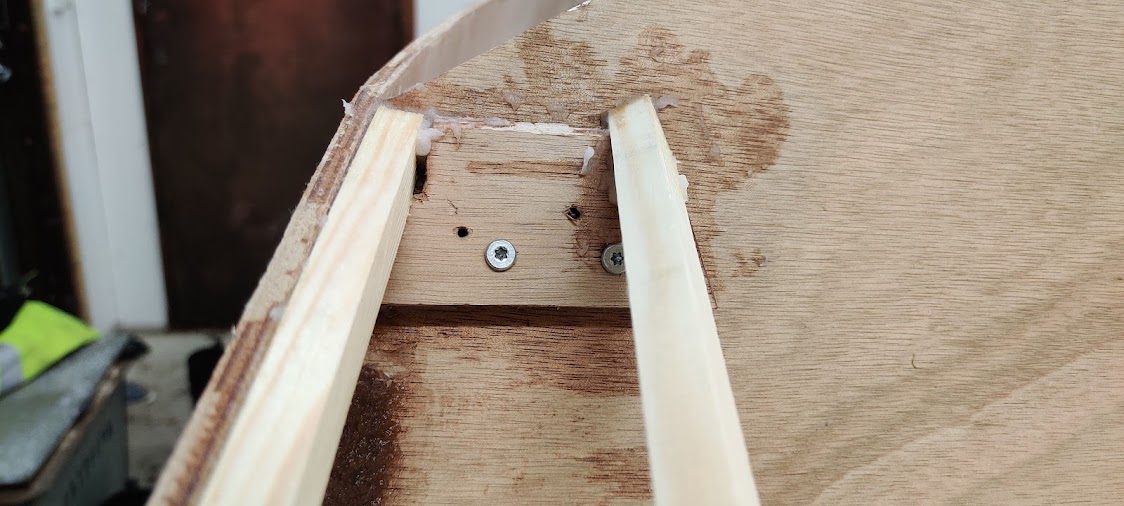
While waiting for the boards, I noticed the bulkhead 2 floor cleat was half it's width too high, which is a mistake in the original drawings. Like an idiot I had not checked, just assumed the mistake had been corrected. I milled half the cleat away like this:
and made an L-shaped thickening piece out pine. In the picture not glued yet. It provides support from below and also makes the cleat wider and easier to screw the boards to:
The ash was a pleasure to work with and fairly straight forward woodworking project. As many others I ended up using Danish oil to finish the boards (curiously named "China Wood Oil" here). The end result is beautiful in my very biased opinion :-)
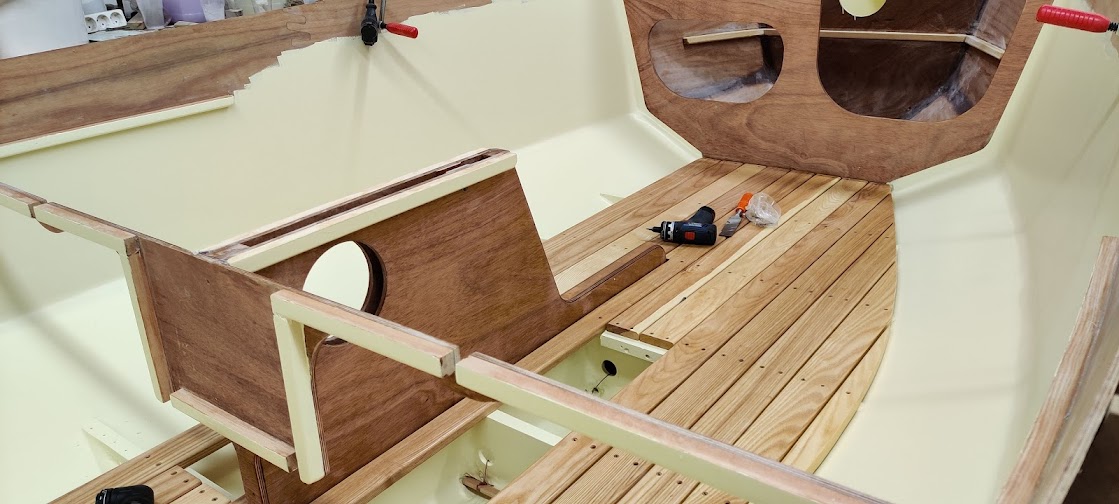
Of course I messed up the finger hole of the right side bilge cover (wrong end) and naturally the ash there had the strongest coloring scheme. Oh well, I'll call it personality. It ended up looking like this:
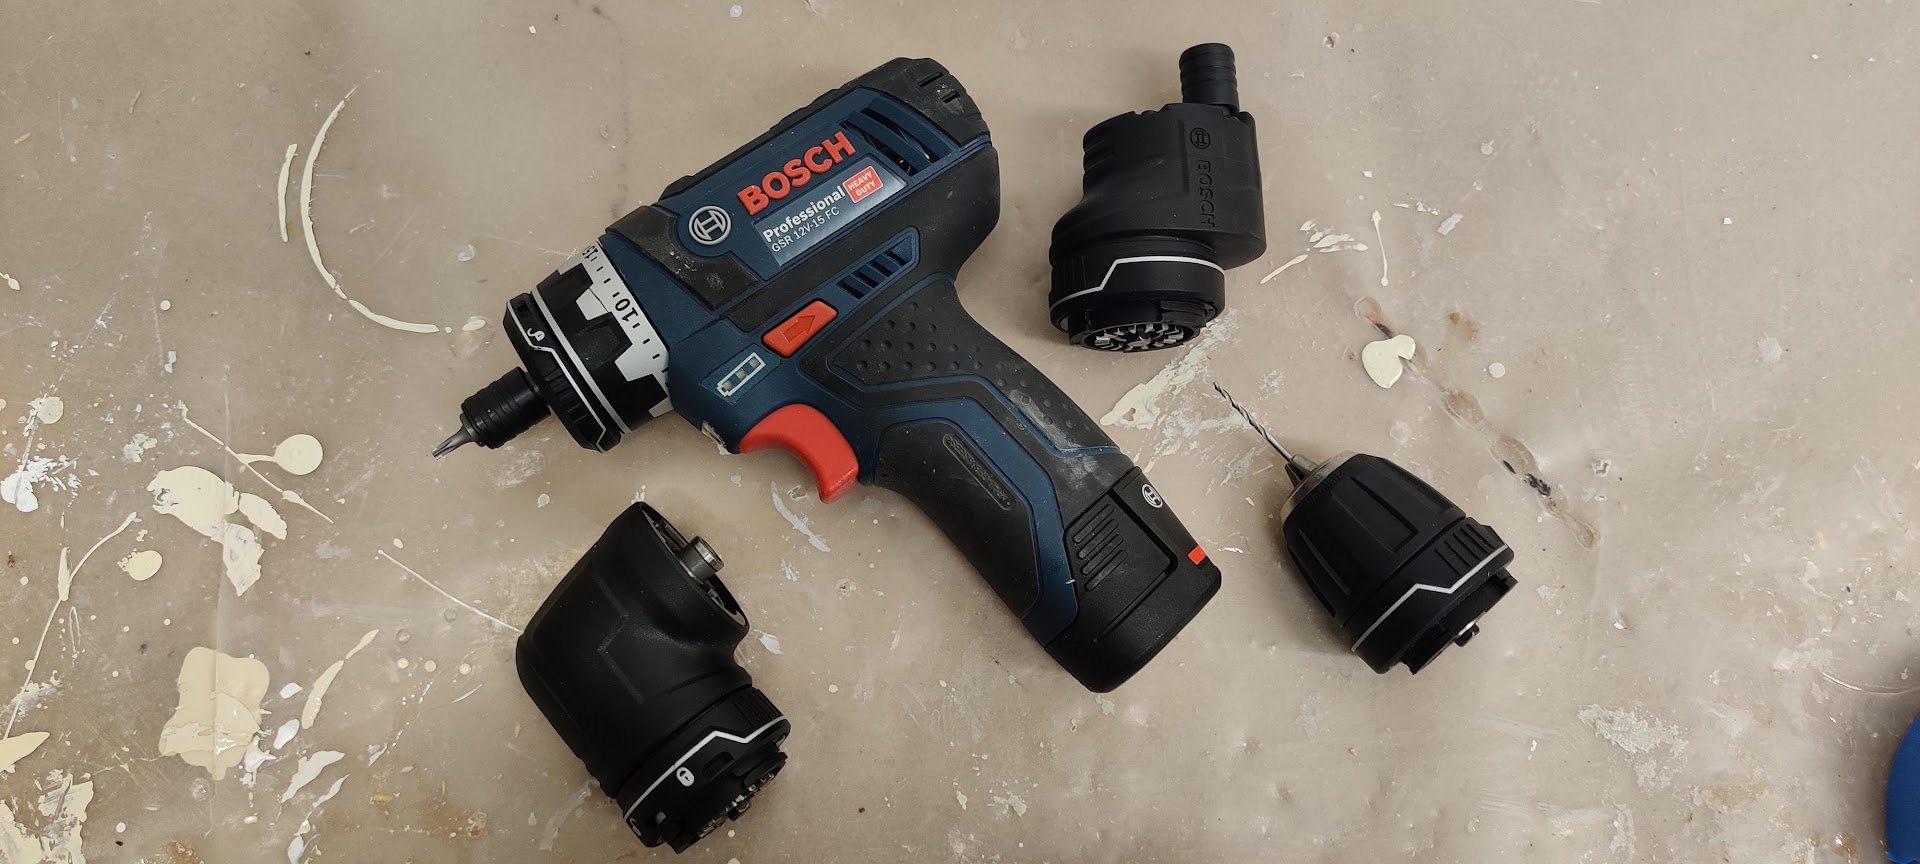
While screwing down the boards I ended up buying a Bosch cordless drill set with changeable heads. It is very light and strong and allows you to screw down screws next to the bulkheads and other tricky locations. I highly recommend it:
Next was adding all the missing cleats for the cockip area. Till next time!
Offline
#9 11 Nov 2021 5:55 pm
- teejay
- Member
- Registered: 26 Oct 2020
- Posts: 66
Re: Pocketship build in Finland
Good to see the progress - and the new toys! All the best with the build over the winter.
Tim
Offline
#10 22 Nov 2021 9:30 am
- pape
- Member
- Registered: 28 Sep 2020
- Posts: 14
Re: Pocketship build in Finland
Thank you Tim once again for your kind words! I love your Wood Duck, great workmanship!
I am in fact somewhat ahead in my build compared to my updates, as the work here happened last spring. Now, only after a few months, it is embarrassing how little I remember what I did, why and what kind of problems I had ?.
Anyway, here goes.
One thing I'd like to mention about making floorboards I forgot on my previous post: Some of the bronze screws on the very edges will penetrate the hull and protrude from the bottom. I have seen different types of solutions for this, but I did this a bit different (or at least I haven't seen anyone else use this method). I used the standard bronze screw supplied with the kit and let the screws go through. After finishing I unscrewed the penetrating ones, used wire cutters to shorten them so they are roughly 5-10mm shy of the bottom and put them back. I will fill the holes with epoxy once I turn the boat. If I had a suspicion there was a screw getting very close to penetrating I did the same just in case. Is this a good and safe way? I hope so ?
All the while making the floorboards I also worked on the bow deck and cleats for the cockpit deck. I like to change projects to keep things from getting boring.
There are many cleats on the cockpit. I had some trouble with the transom cleats for the footwell, as it wasn't as easy to align them as it may seem. I used the footwell parts and a straightedge but they are not perfectly straight. This picture is from the process:
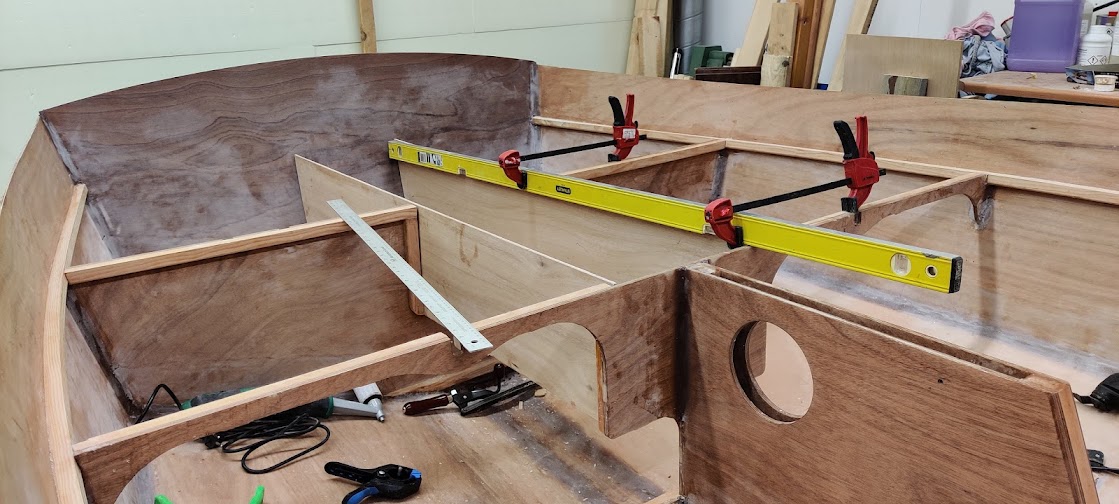
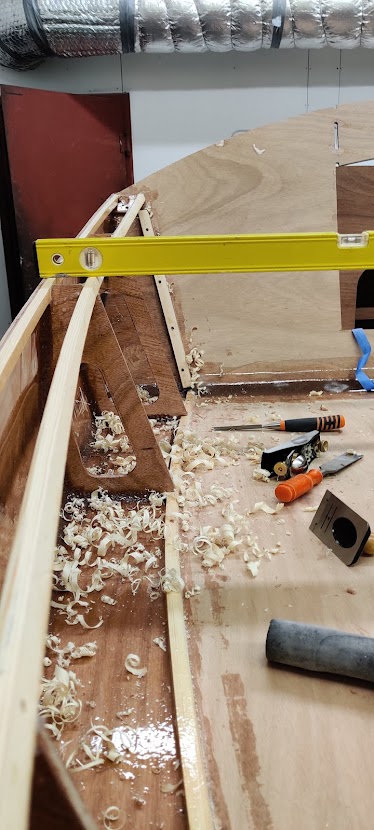
In addition to getting the footwell straight and true, the cockpit deck needs to sit nicely. I used a laser aligned with the (hopefully) straight keelbox top to establish a centerline:
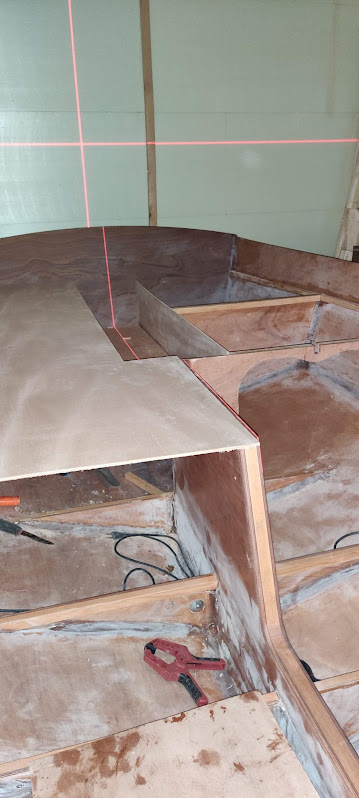
This was also to check that the boat is staying true. I was happy to see it was.
When the cleats were finally all in their rightful places, it was time to glue in the footwell. I had also taped the cleats in preparation of the cockpit gluing.
Two more cleats, more tape and plastic for boat internals protection, some planing of the cockpit deck halves to fit them and it was time to mix up a BIG batch of glue and go for it!
The parts are big, there is a lot of messy glue involved but I finally made it. That was scary.
The end result is not perfect, the deck is not laying perfectly against the cleat on the startboard side leaving a small gap but as there will be a strong fillet on the top I think structurally I'm ok. Just need to fill the gap inside and apply some paint.
I can finally sit in my boat!
Offline
#11 27 Dec 2021 1:40 pm
- pape
- Member
- Registered: 28 Sep 2020
- Posts: 14
Re: Pocketship build in Finland
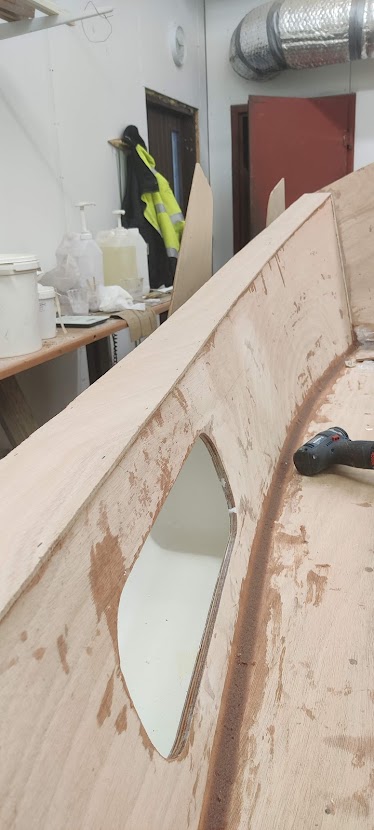
All the while working on the rear deck I was also working on the front deck. The bow compartment needs to be filled with foam and cutting the 50 mm boards to correct sizes in the complex compartment was a bit of a head scratcher. You also need to form a tunnel from the inspection port to the bottom bow to insert a nut for the bow eye. Something like this:
I tried to do my best in filling the compartment but it shure wasn't pretty. For once I was happy the compartment will be sealed away from view forever. It ended looking like this.
Trial fitting the deck I noticed it meant to fit inside-corner-to-inside corner. This is not an issue for the most part as there are cleats to glue down to, but the sides of the storage compartment lack these. The instructions call for a fillet in the inside, which is hard to do, and a lot of the blogs show builders forming a bent cleat in a separate jig.
Lazy as I am, I thought I could have a nice looking cleat AND not have to make a jig to form it. My plan was to use the actual location as the jig. I took some scap 6 mm Okume ply strips, placed some plastic on the boat side to prevent glue from sticking, and glued two strips together hopefully in the correct shape:
After the glue set, I removed the now fairly well shaped part, used a router to make a round bottom corner and sanded the part. It looked like this:
I was quite happy with the results and I tried them out:
looks good! I have something to glue the deck to, they look nice from the inside and I don't have to do a fillet!
Gluing the deck is very straight forward after some minor trimming. The instructions call for epoxying the inside face three times to seal the wood, but I wanted to make the deck a bit stiffer so I laminated a layer of glass to the bottom. A layer on the bottom side makes the plywood a lot more rigid from bending forces from the top side. The topside glassing will more be for abrasion resistance.
All the while working on the aft deck and the bow deck I also decided to make a shelf for the storage compartment. I am hoping this will increase the usability. I made sure the shelf is removable in case it ends up being a bad idea. I used 9mm Okoume ply to make it. It looks like this.
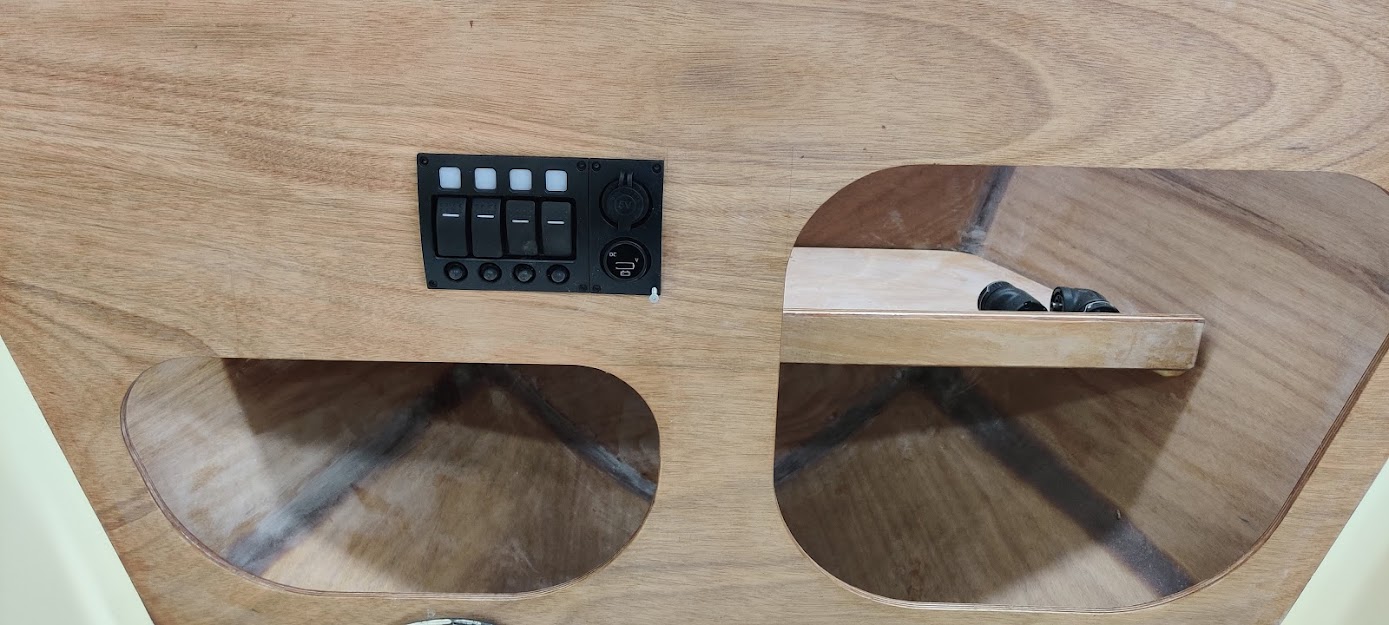
Started on the electrical system also. I plan to go fairly simple, nothing fancy. The little panel in my opinion looks nice and also has an USB port and a voltage meter.
Right around at this stage summer came about and ended my build for a while. The project patiently waited for me for a few months and I got back to working in October.
Offline
#12 27 Dec 2021 9:19 pm
- spclark
- Member
- From: "Driftless" Wisconsin USA
- Registered: 19 Mar 2020
- Posts: 478
Re: Pocketship build in Finland
Very nice Pape! Please keep up with reportage on your project!
There's a Pocketship builder/sailor here in the USA (who's also built a Waterlust canoe!) but he doesn't 'do' forums so if you encounter issues along the way post something here about it. Perhaps I can facilitate getting his input that may help you move forward.
You prolly already know of CLC's PocketShip Forum too I'd guess....
Last edited by spclark (27 Dec 2021 9:24 pm)
Offline
#13 28 Dec 2021 3:47 pm
- pape
- Member
- Registered: 28 Sep 2020
- Posts: 14
Re: Pocketship build in Finland
Thanks! I will certainly try to keep this updated as it is a lot of fun for myself to read these later also. And thanks for the offer on contacting the other builder, very kind of you!
Yes, the Pocketship Forum is very familiar also. Infact I've posted some stuff there as "Pasi in Finland". ![]()
And the story continues!
After the summer break I found that the epoxy had crystallized at least in the bottom. A quick call to Fyne customer service to verify there is no detrimental effect with it and got instructions on heating the epoxy to about 60 C for a few hours. I understood this is easiest and safest to do by immersing the container in hot water. But I live in Finland and have two saunas!! So obviously I took the containers to sauna with me ![]() . It did work, although I had to get my IR temperature meter and monitor that the plastic container material did not exceed 80 C or so. I don't think my wife would have appreciated a melted container and a few liters of epoxy in our sauna.
. It did work, although I had to get my IR temperature meter and monitor that the plastic container material did not exceed 80 C or so. I don't think my wife would have appreciated a melted container and a few liters of epoxy in our sauna.
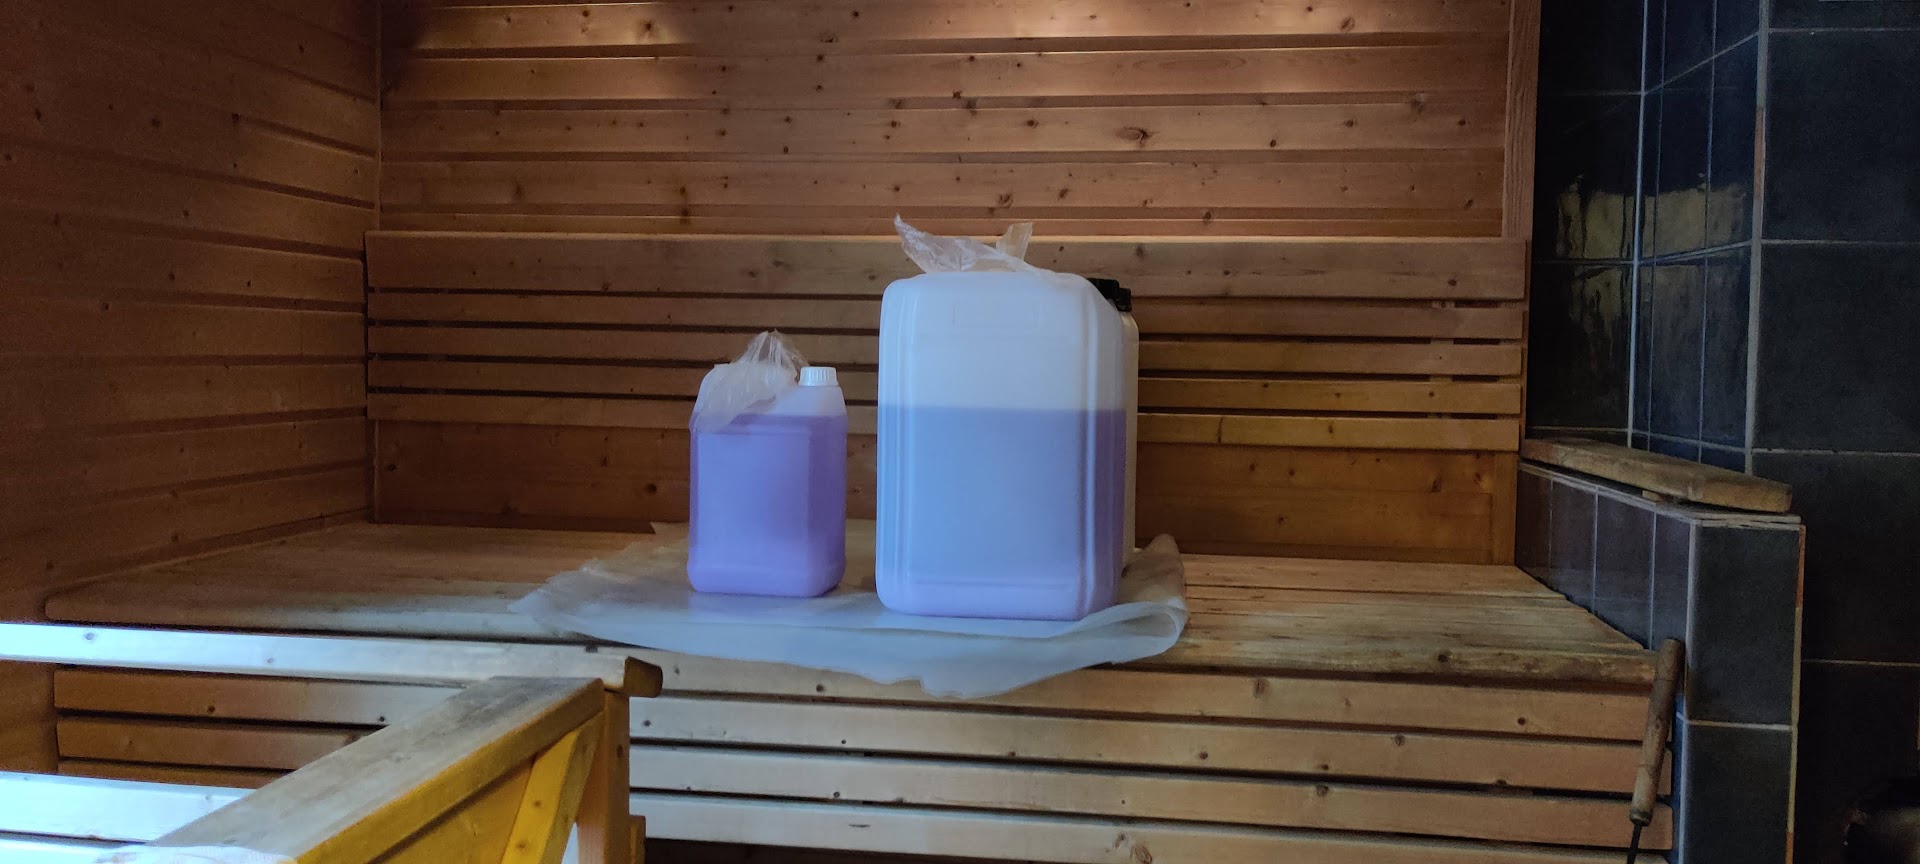
In retrospect it wasn't easy to keep the wood burning sauna at a right temperature for several hours, so perhaps the hot water would have been a better idea.
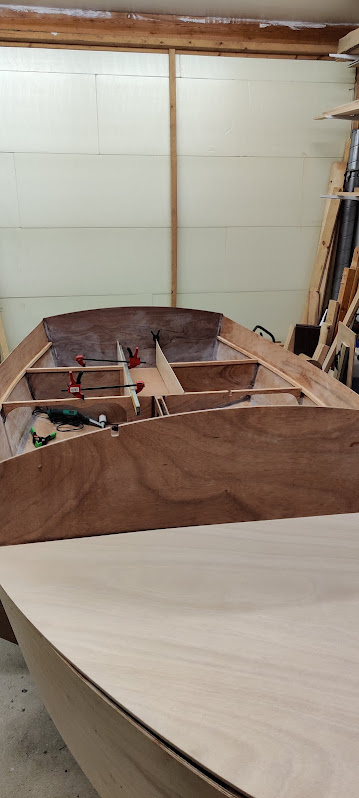
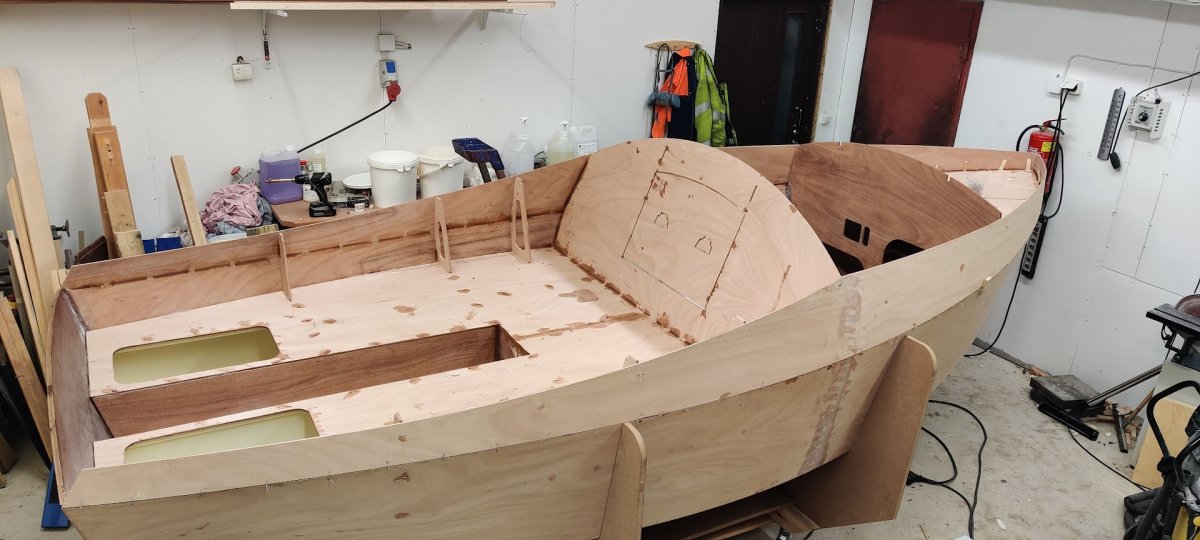
When the epoxy was good to go again, I proceeded to install the two topsides and the cabin rear panel. The manual calls for starting in the middle, but when trying that it was very hard to get the panels to meet exactly in the middle of the bow. So I took out all the stitches and started from the bow and things went very well. Then I tacked the parts and this is surely starting to look like a boat!
All the while building I've also tried to think about the head situation. There will inevitably be both planned and emergency needs for some sort of a head facility, and while I know a lot of people use portapotties in the cabin, I also have toyed with the idea of having some sort of facilities outside. So I tried this

and it also could be stored like this
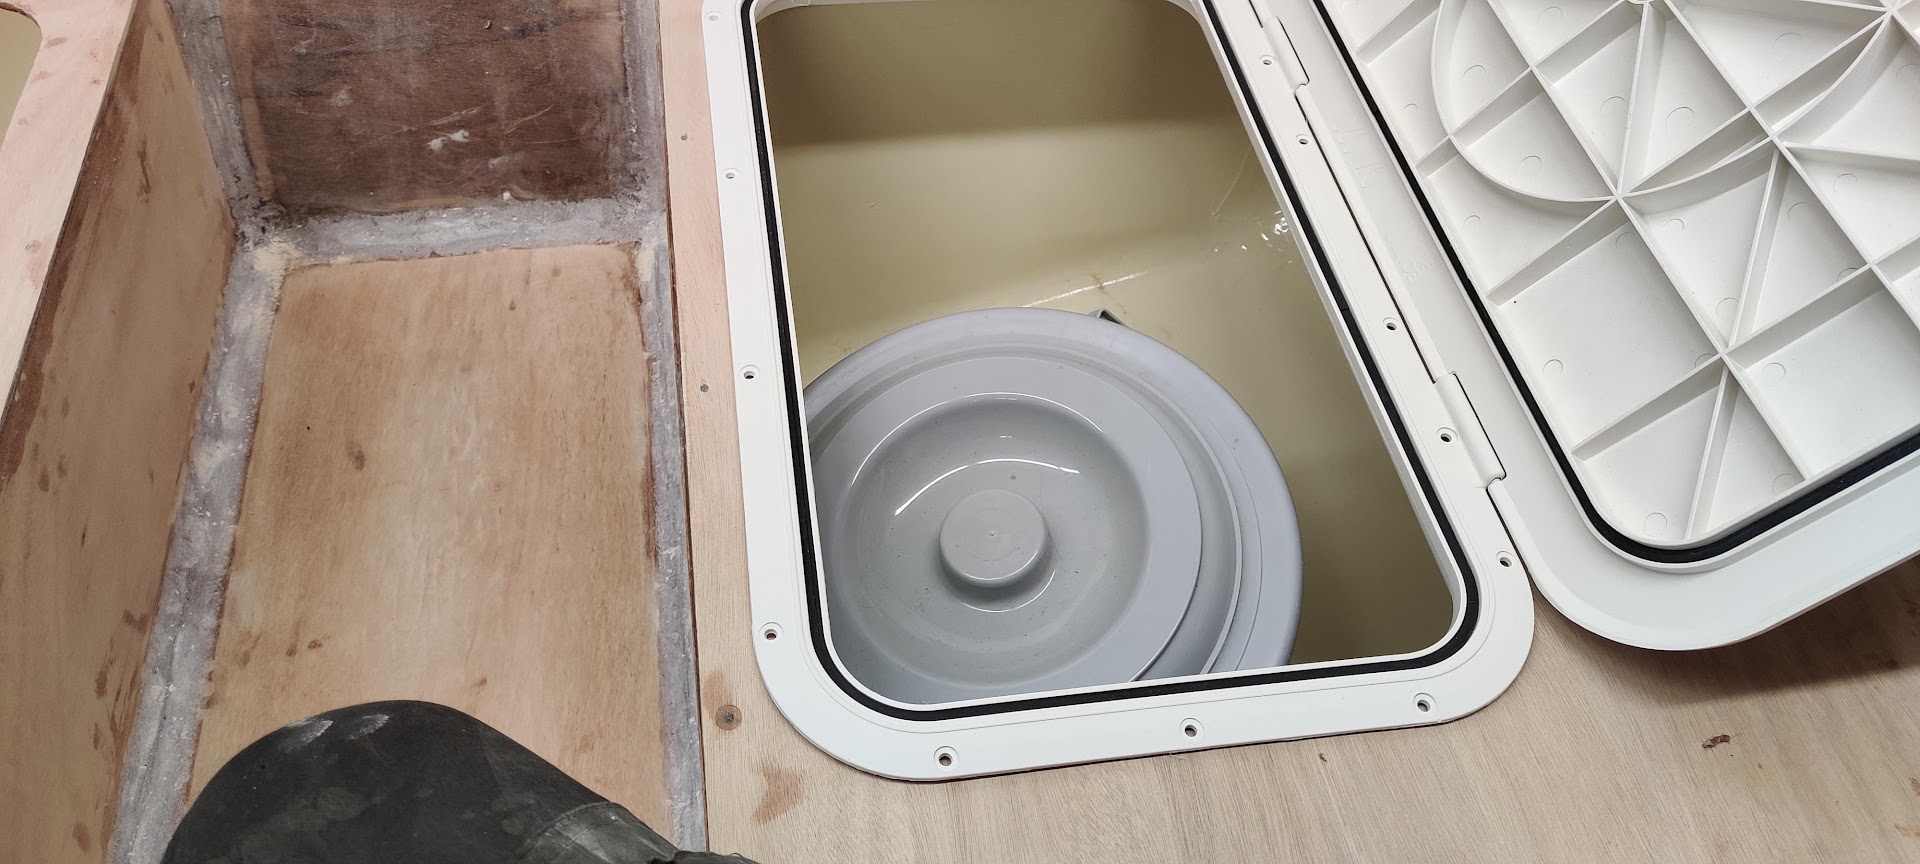
hmm. needs some thinking, but maybe an option.
Right about there in October I got some health issues out of the blue and was unable to continue for two months. It now looks like I'll fully recover and have actually already done some work on the boat, but for a while it didn't look so rosy. So if you are planning to do something, maybe a boat, maybe propose to your girlfriend or whatever, might I suggest you don't put it off? You never now what tomorrow brings.
Onwards and upwards!
Offline
#14 28 Dec 2021 3:56 pm
- spclark
- Member
- From: "Driftless" Wisconsin USA
- Registered: 19 Mar 2020
- Posts: 478
Re: Pocketship build in Finland
Here’s hoping your sudden health issues aren’t related to your ongoing exposure to epoxy! You using proper PPE when handling / sanding the stuff?
We’re all different in how we react to constant exposure yet once we’ve become sensitized it’s never gonna get better! Do - please!! - take care of your body when in proximity to epoxy components unless & until the final mix had had ample time & temps to cure fully!!
Offline
#15 28 Dec 2021 4:02 pm
- pape
- Member
- Registered: 28 Sep 2020
- Posts: 14
Re: Pocketship build in Finland
No, not the epoxy. I am very careful in avoiding both skin exposure and dust as should everyone. It would truly suck not to be able to finish you project due to the epoxy allergy!
We all have a big dice thrown every morning, and mine just landed on a bad number in October, so no fault of my own.
Pasi
Offline
#16 1 Jan 2022 11:28 pm
- Simpsonboater
- Member
- Registered: 26 Jun 2020
- Posts: 29
Re: Pocketship build in Finland
You might want to try Mirka abranet on your festool sander, made my build much more pleasant and cut sanding time drastically.
Offline
#17 2 Jan 2022 12:42 am
- spclark
- Member
- From: "Driftless" Wisconsin USA
- Registered: 19 Mar 2020
- Posts: 478
Re: Pocketship build in Finland
+1 on those net-not-paper discs Simpsonboater! Big improvement on dust mitigation with the open weave holds true with the Diablo brand of similar products fairly widely available this side of the Pond. Another plus is the net’s tendency not to kink if you inadvertently catch an edge against something hard, pretty quick ruin for paper-backed discs.
Offline
#18 4 Jan 2022 8:46 am
- pape
- Member
- Registered: 28 Sep 2020
- Posts: 14
Re: Pocketship build in Finland
a good tip, thank!
I've been very happy with the Festool original disks. With a good shop vac there is hardly any dust at all, they last a long time and cut epoxy well. However the Festool is heavy and I use a Makita orbital sander for any vertical work. I'll give the Abranet disks a try with it.
Pasi
Offline
#19 12 Jan 2022 9:07 am
- pape
- Member
- Registered: 28 Sep 2020
- Posts: 14
Re: Pocketship build in Finland
True to my preferred way of working, I have continued to advance the boat on many fronts at the same time.
The building instructions for the bow deck advice you to add "at least one" layer of fiberglass, as the deck will be under heavy use with people stepping on it with sandy shoes and the anchor dropped on it. What is "at least" one? two? three? would it be better with five? I firmly decided to go with two or three ![]()
The first layer I extended all the way up the sides to give them rigidity and protection.
Again, I just cut a piece roughly of the right size, started spreading it in the compartment, cut the corners and stroked the glass cloth with a cotton glove to make it stick to the wood with static electricity. No tape needed. I covered the first layer with full three coats of epoxy and sanded it.
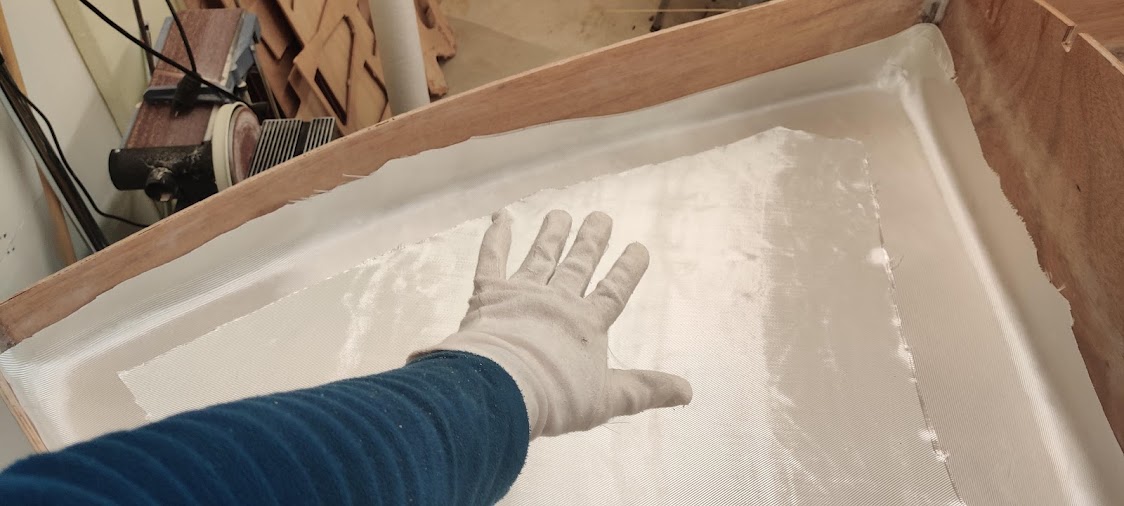
Notice the fiberglass spreading and static electricity tool, a cotton glove, in the picture. I have found these gloves also very comfortable to wear in woodworking. They don't induce sweating and protect your hand at least a bit.
This second layer I did not take all the way up selecting to end it about half way up. The edge is only roughly cut to the approximate shape, as I don't really see a reason to make them straight. The edge will be feathered and you can't see it anyway.
I noticed at the time that one of the offcuts was of a triangular shape and I decided to put it to use and laminate it as an extra abrasion protection layer also. Laminating two fiberglass layers is fairly similar to doing a single layer, but of course needs a lot more epoxy.
After some sanding the bow deck was complete!
I was working on the aft deck at the same time, and I'll cover that later, but one picture:
note to self: think about how you'll remove temporary screws beforehand (facepalm)
onwards and upwords!
Pasi
Offline
#20 28 Apr 2022 11:39 am
- pape
- Member
- Registered: 28 Sep 2020
- Posts: 14
Re: Pocketship build in Finland
I finally got myself around to continuing my documenting:
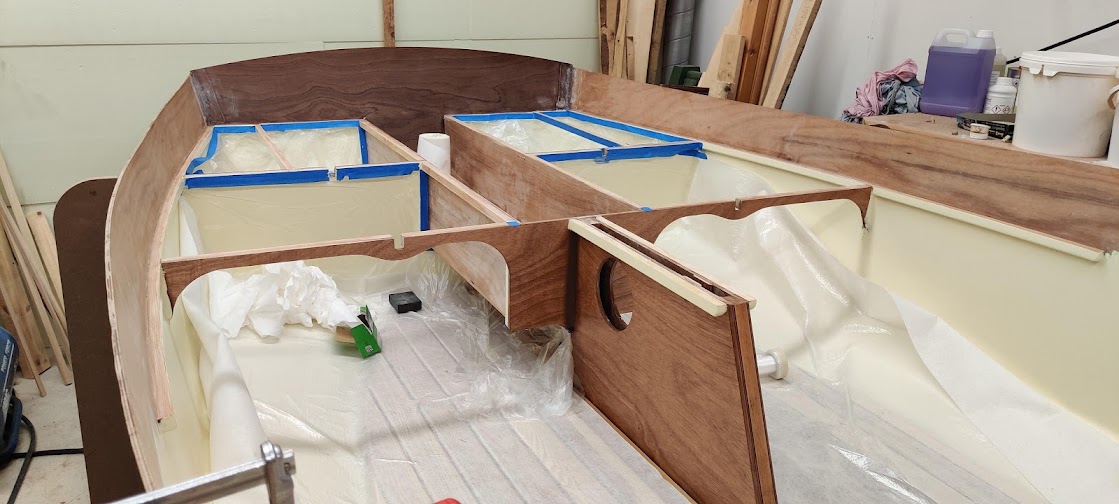
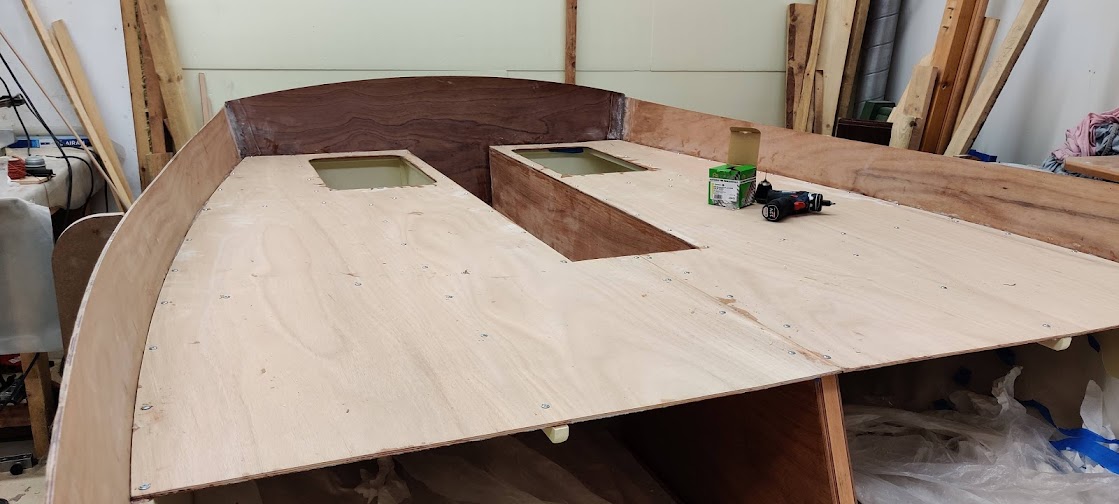
Next was the seatbacks, which on first glance seem rather straight forward but are actually surprisingly complex. The seam between the the two side panels needs to be fiberglass enforced and all the compartments need to get three layers of epoxy not to mention all the woodwork.
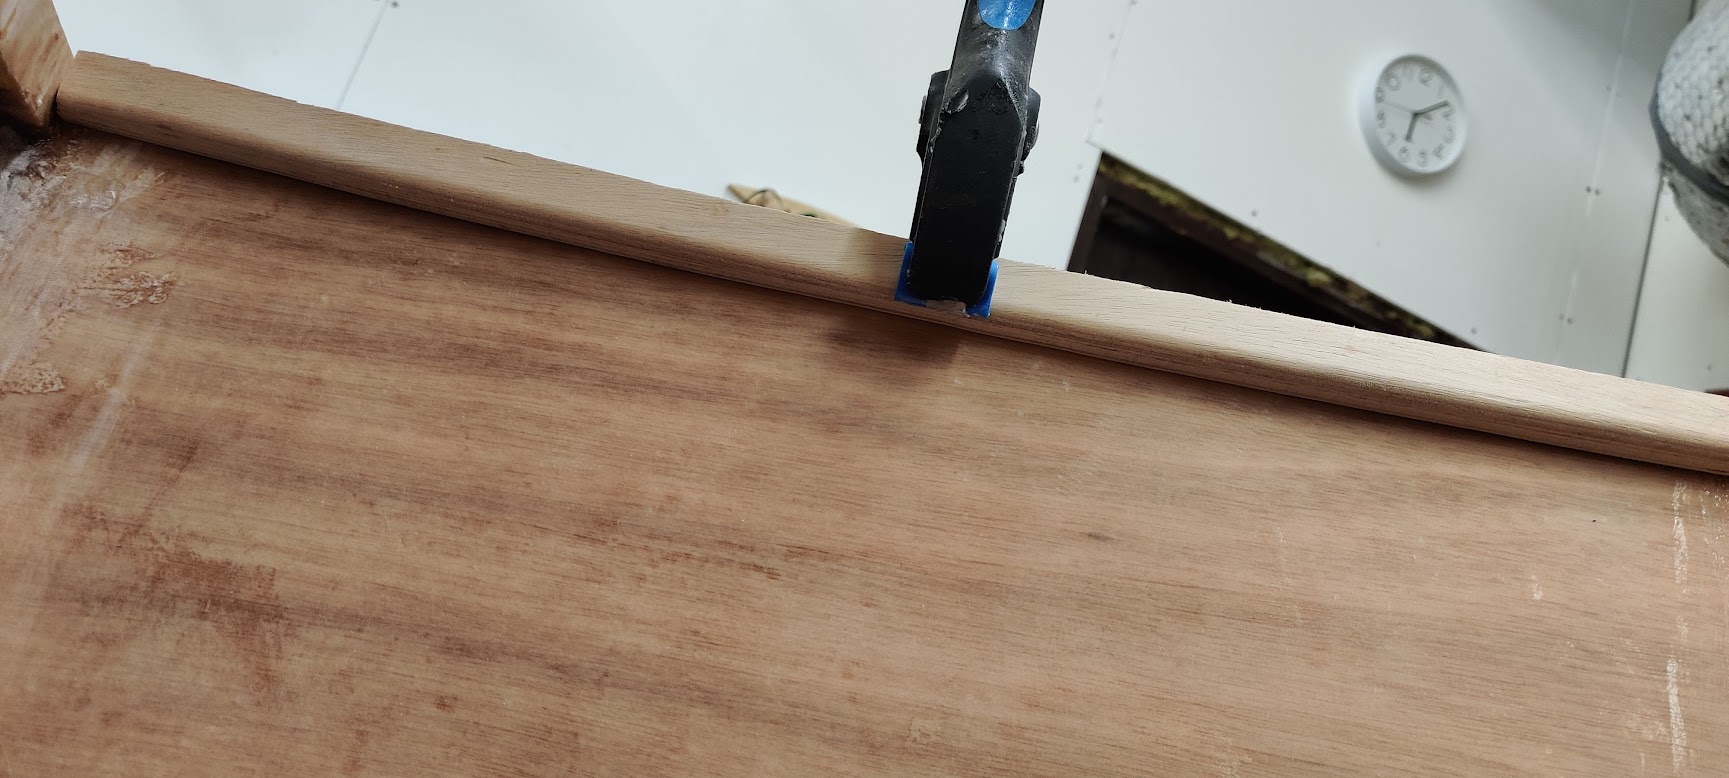
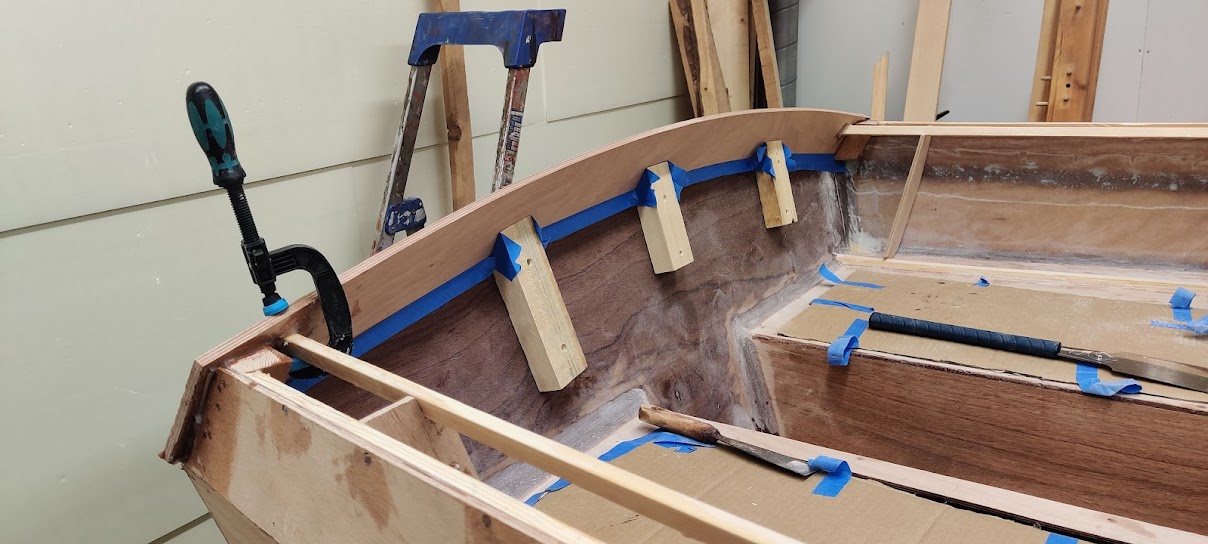
I started by using a hot glue gun to attach all the seatback formers. This was easy and went rather well, a great way to attach them temporarily. I then filleted them. Next was adding the three cleats: bottom, and two top. At this point it looked like this with the mandatory epoxy layers.

Only the very back compartment needs to look nice, the forward three I left with a nonsanded epoxy. I did not want to use temporary screws that protrude to the cabin for epoxying the bottom cleat and instead used weights like this:
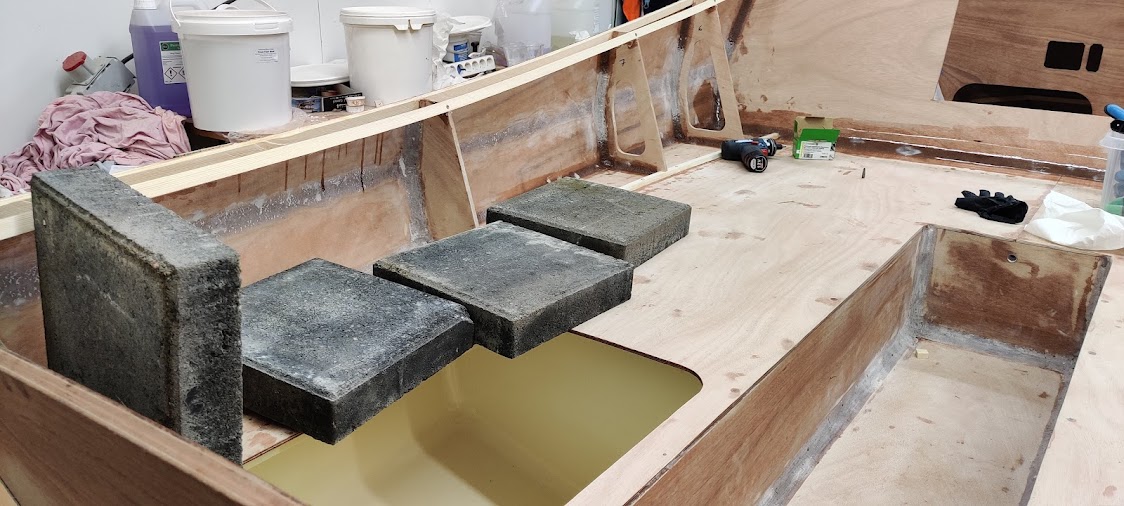
Progressing nicely!
I then planed the tops flat. Suprising amount of planing is needed but was quite easy:
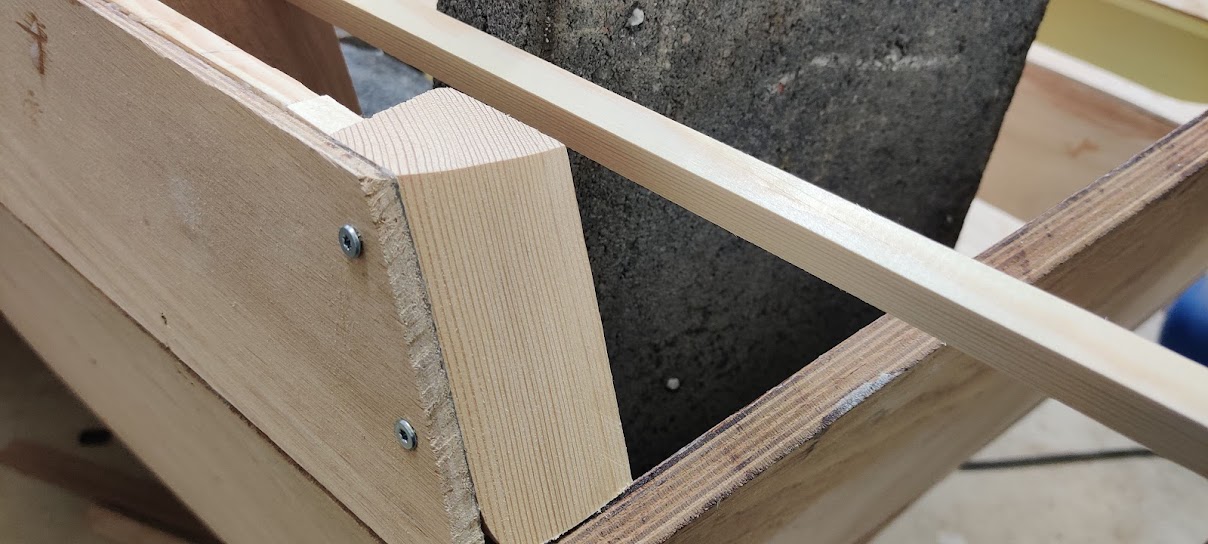
There is a block of wood at the very end of the seatback that is angled in all imaginable directions where the end of the transom skirt is attached. It was a bit of a head scratcher to make and took a lot of test fits but finally it looked ok:
I then added tree temporary supports and glued on the transom skirt:
Really started to look like a boat! The skirt added a lot of character.
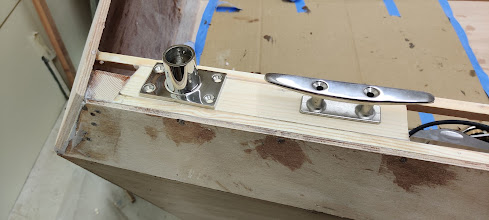
The mooring cleats and also the spinnaker halyard blocks are attached to the seatbacks and need some support. The instructions call for gluing a piece of wood between the cleats and that is what I did, but I ended up gluing an extra 9mm plywood layer below it to further strengthen and add gluing area like this:
Then I glued them:
and after sanding they looked really good and strong!
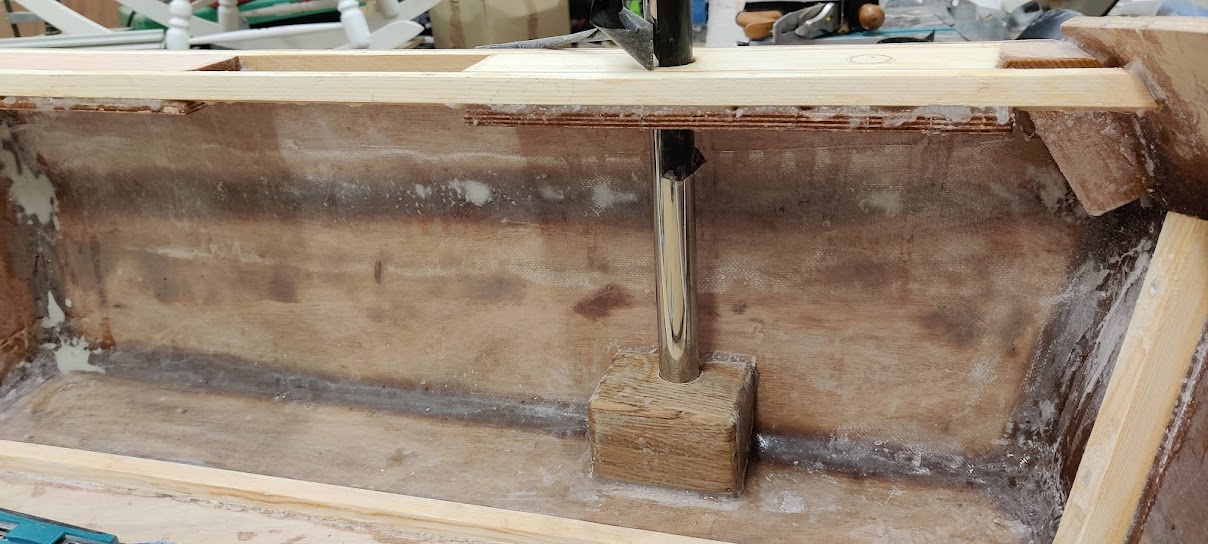
At the rear there is the mooring cleat and the tabernacle support tube, and my first thinking was to reverse their order to make sure the cleat is not crowded between the transom skirt and the support tube and also keeping the support tube bottom structure away from the locker access. Like this:
However I was a bit apprehensive doing something different from the plans and asked in the Pocketship forum. There were some good points why not to do it this way, so at the end I reversed these as the original plan.
As many others I did deviate from the plans by moving the beautiful stainless tube support bracket to top (shown on the picture above. Plans call for it at the bottom) and made a support for the tube from three oak boards laminated together. It looks better and is (hopefully) strong. I personally think the tube will buckle before the support brakes:
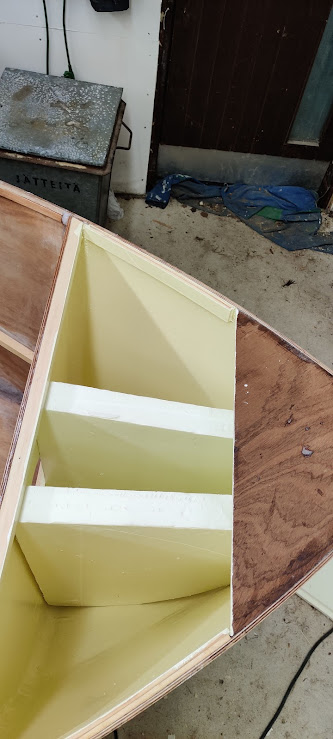
The aft locker is also a storage locker, so all kinds of things will be sloshing around it. To add some abrasion resistance I fiberglassed to locker bottom.
There needs to be a 6 mm hole at the bottom of the locker to allow for water to flow out. Drilling a hole this close to the deck is hard, so instead I put a plastic 6 mm ID tube and epoxied in like this:
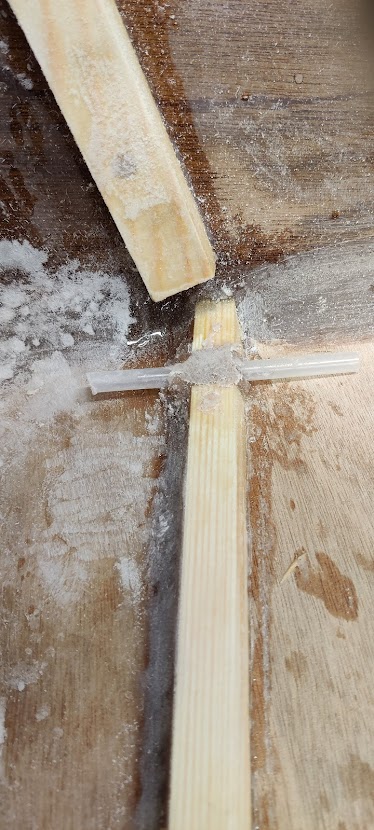
Once I've finished I'll cut excess from both sides. Hope this works!
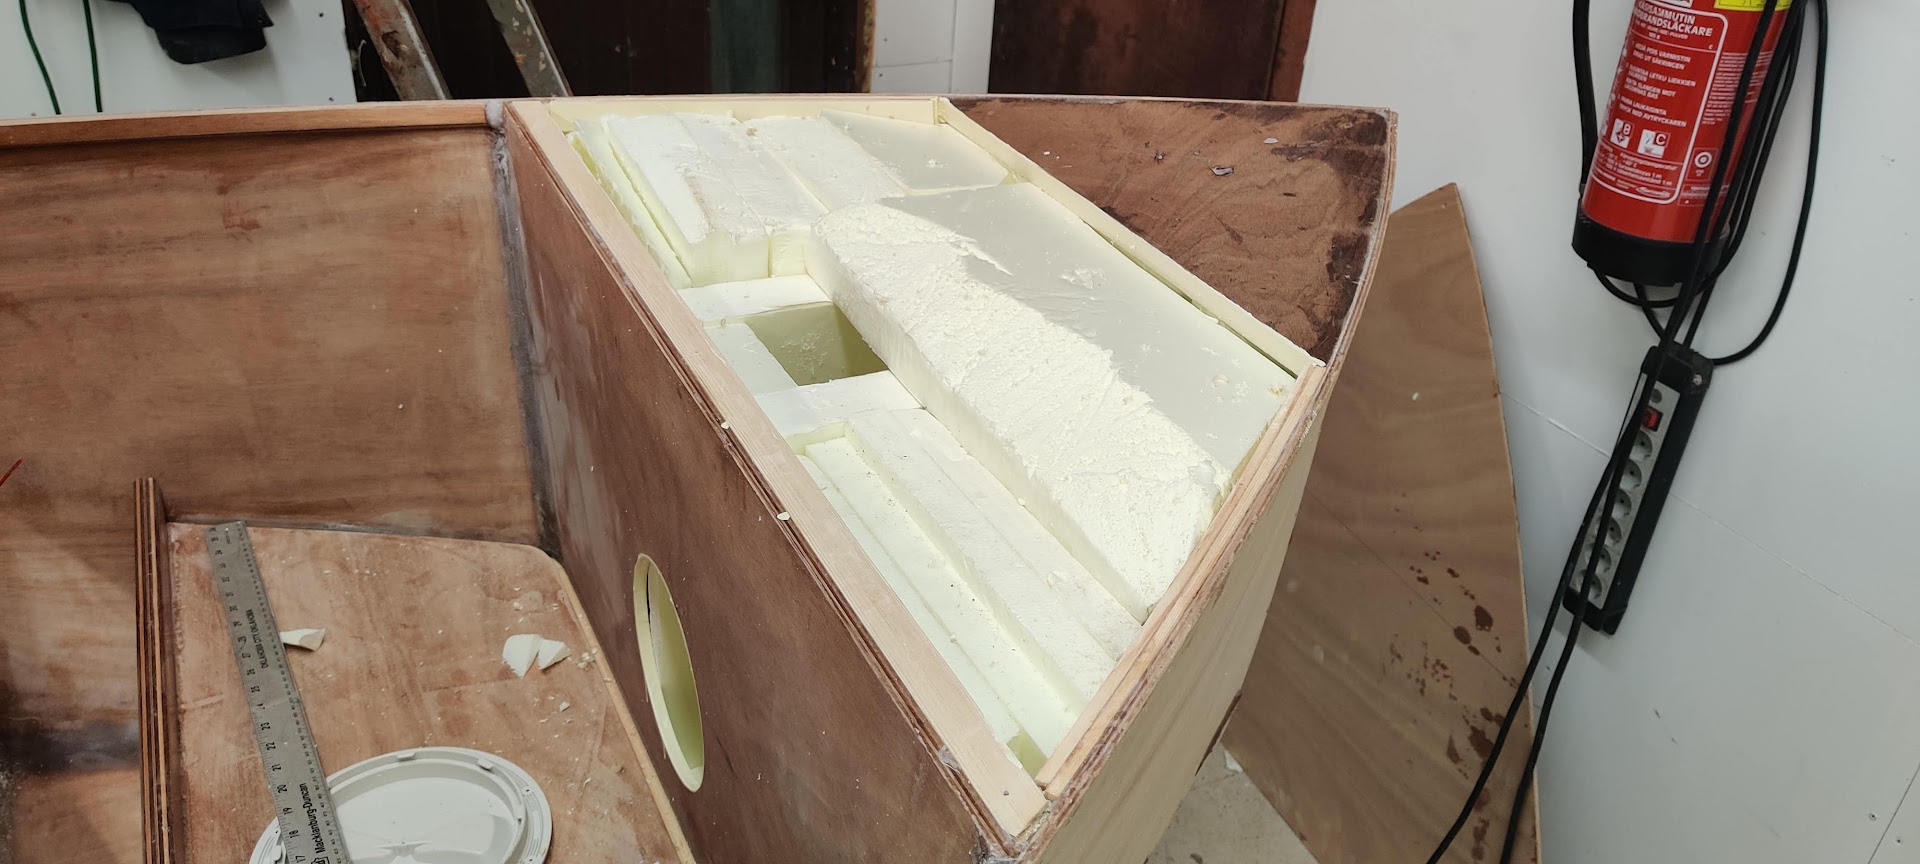
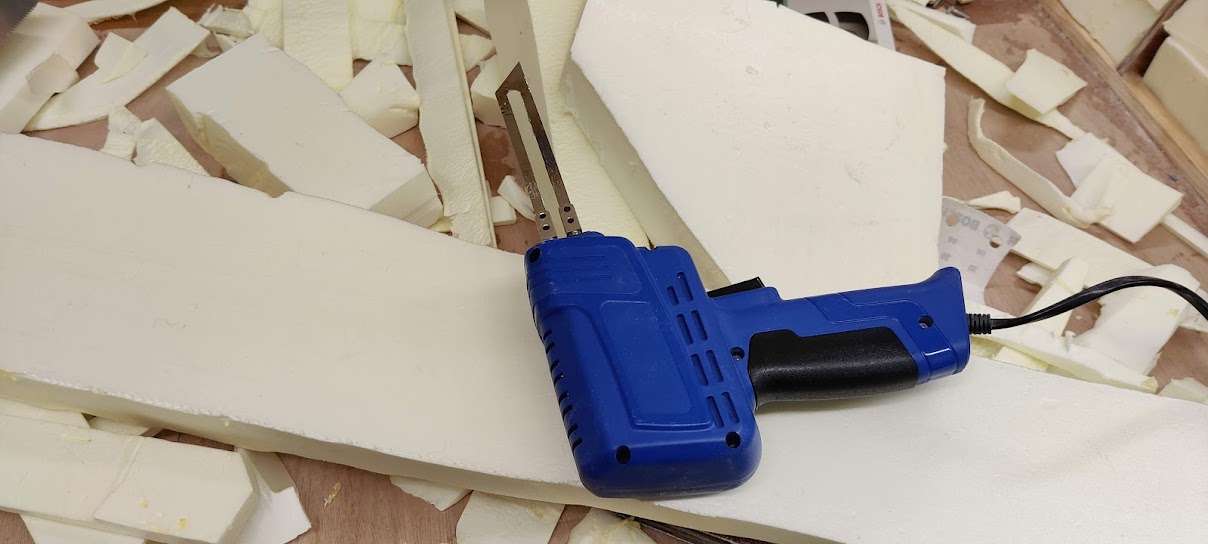
The seatbacks house much of the flotation foam in the sealed compartments. I purchased a tool just for cutting PU board, it cost 30 something euros here and was really useful and easy! A big improvement over the bow compartment PU form shaping! The only drawback was a terrible burning smell, but I wore a breathing mask with an approprate ABEC filter.
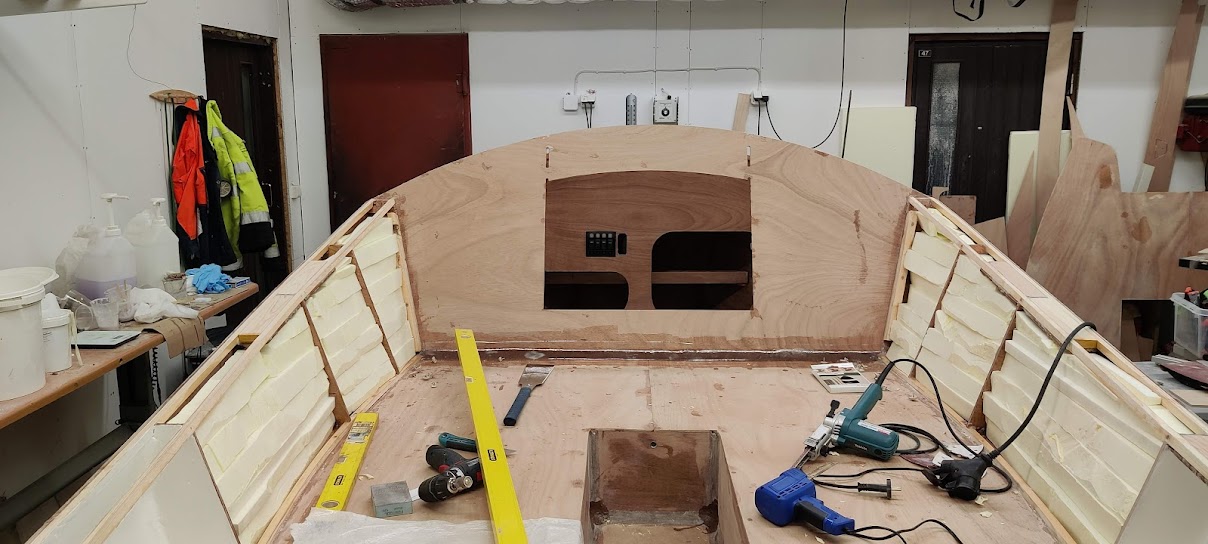
All the compartments filled:
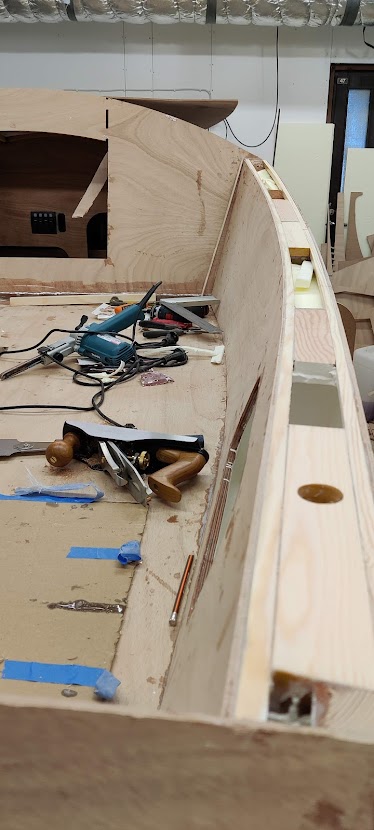
I then painted the insides of the storage lockers and used a brad gun with stainless brads to attach the seatbacks. This is given as an alternative attachment method to temporary screws in the instructions. It is really easy and hold the parts really well. However I needed to use a hammer later to make sure the brads are deep enough. Then I sanded the tops flat. Looking nice:
last operation was adding the seatback tops. Very easy. Of course the seatbacks needed to be filleted to the deck, transom and cabin rear wall.
The seatbacks look nice and with the transom skirt really transformed the boat to again look so much better. They was a lot more work then I thought when I started, but then again, so has just about everything else been also :-)
As I'm writing this I'm almost done for the winter with spring activities taking over and actually way ahead of this write up. I'll try to catch up this humble blog before I forget what I did :-)
Happy building!
Pasi
Offline
Pages: 1