You are not logged in.
- Topics: Active | Unanswered
#51 17 May 2021 4:24 pm
- teejay
- Member
- Registered: 26 Oct 2020
- Posts: 66
Re: Building a 12' Wood Duck Hybrid
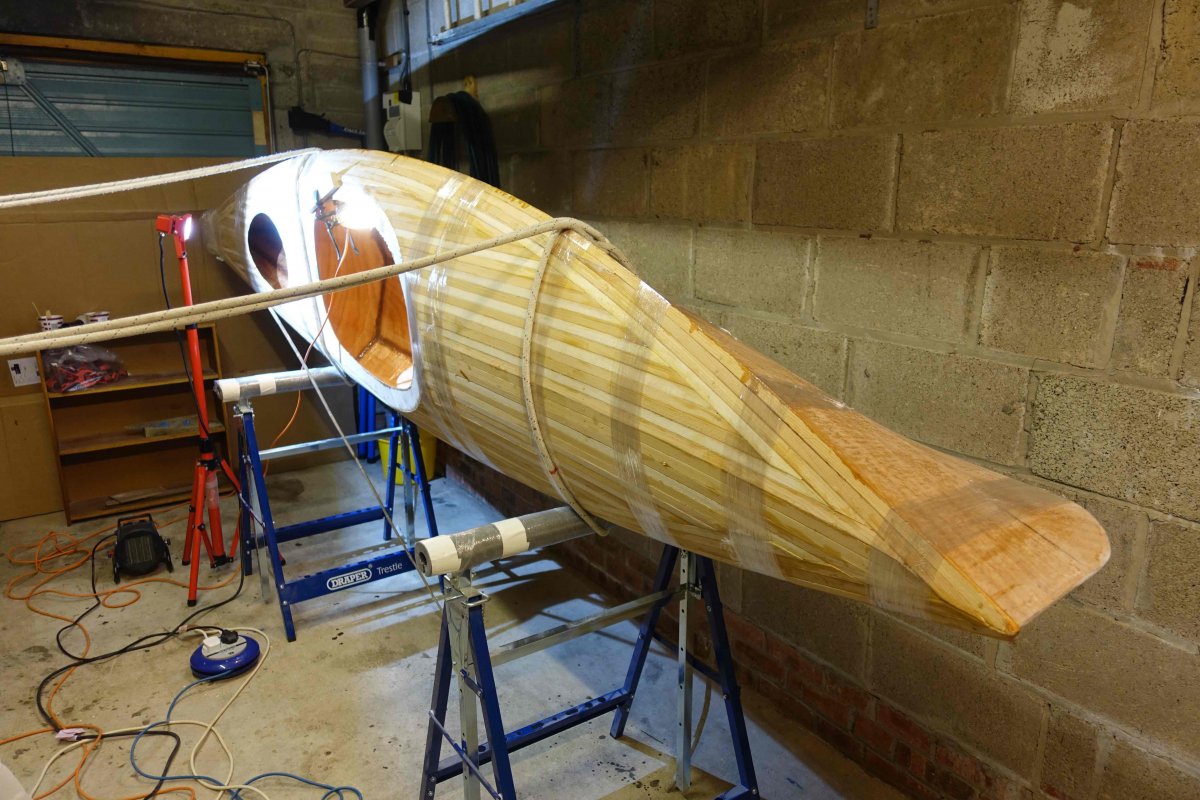
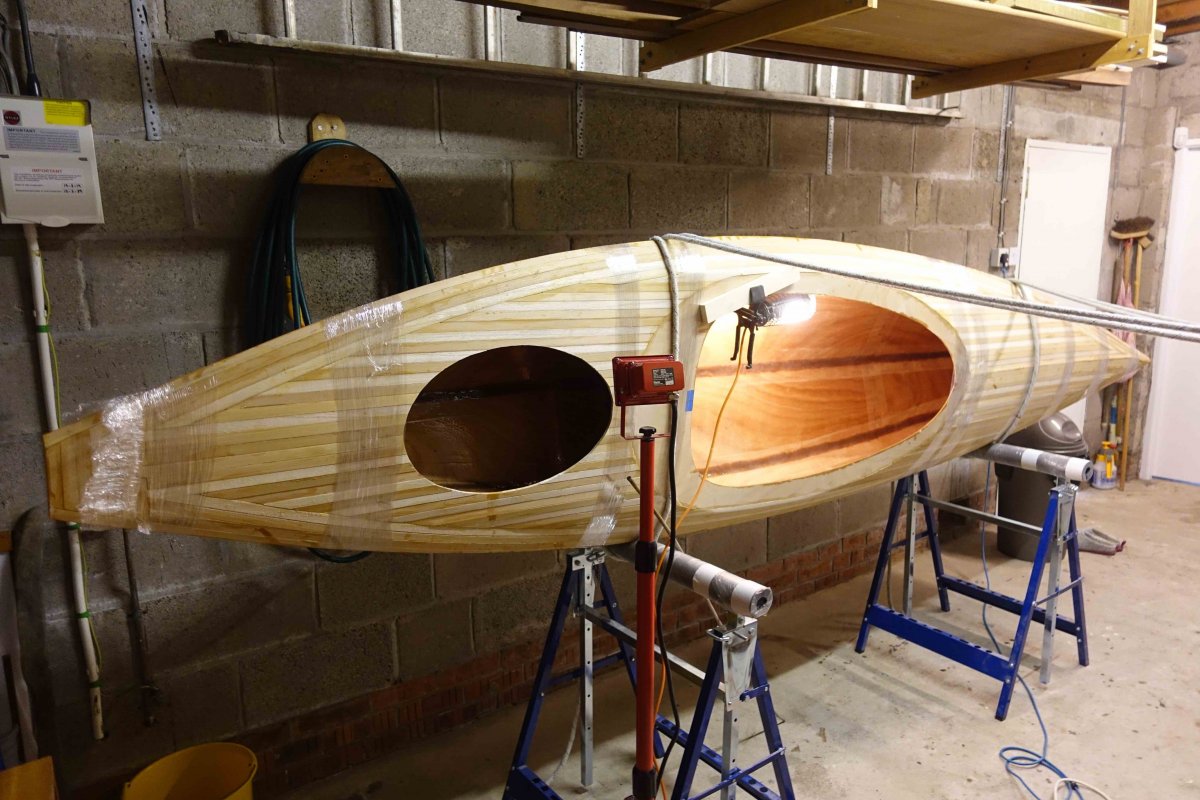
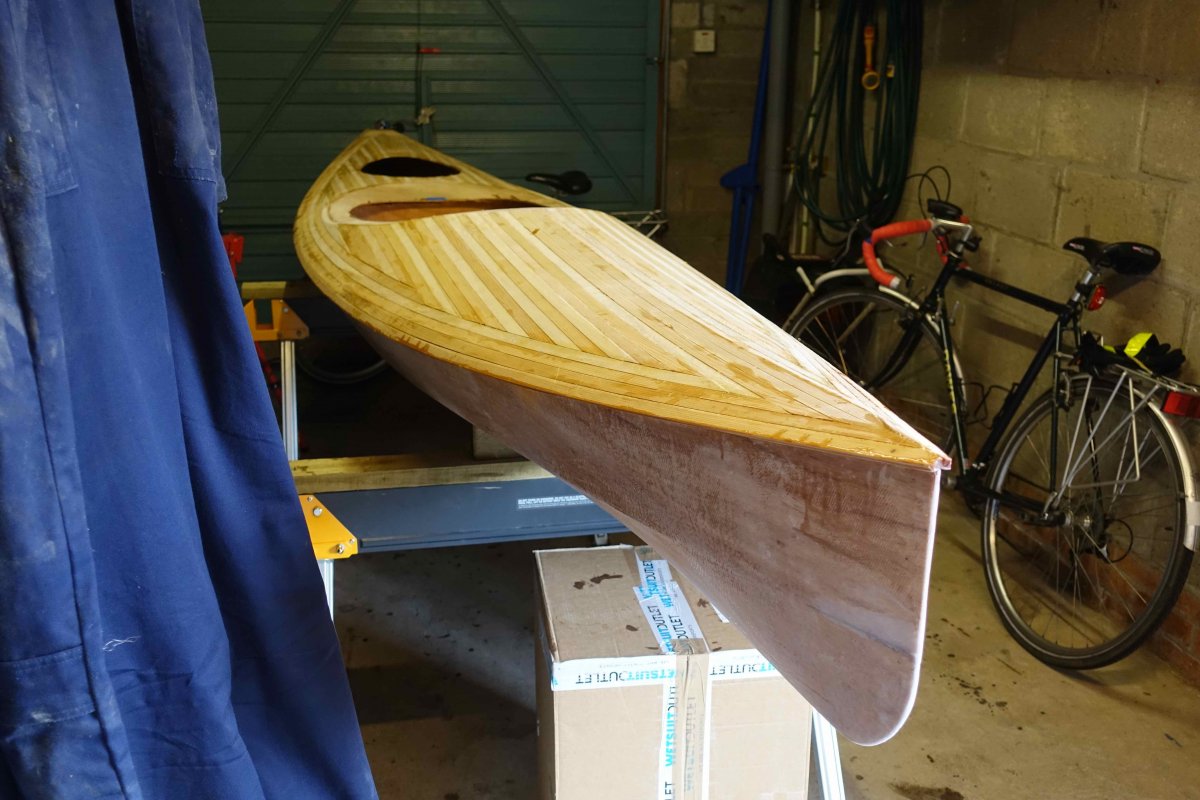
I'm really pleased to have reached what feels another milestone with the build - the deck is now sealed to the hull.
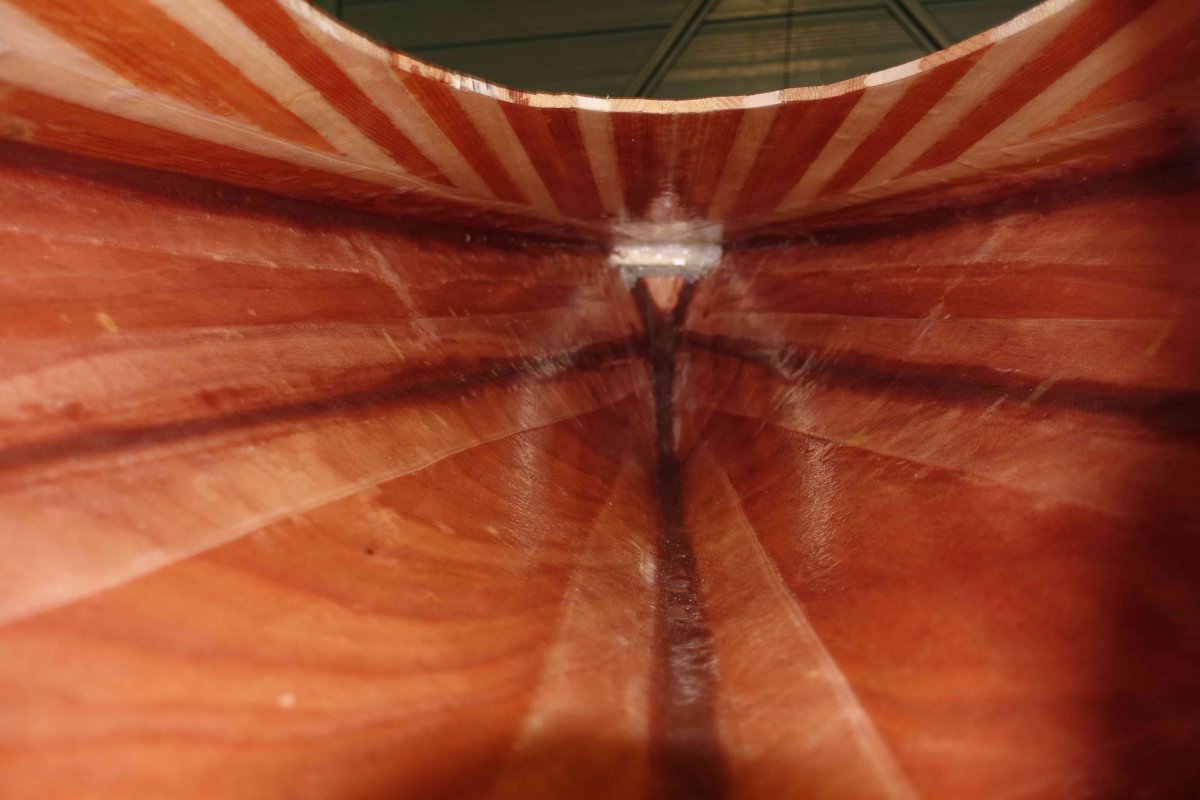
I took this in stages - as I found that helped to keep the hull and deck aligned - the plastic parcel wrap held things well but before the epoxy set the alignment could "wander" due to the "wet" epoxy reducing the friction which was holding the 2 halves in line. So with the slow cure times I'm still working with (it's a lot warmer than it was but the epoxy still takes hours to go off) I did split up the various steps in the epoxying process. Rolling out the tape into the ends wasn't so hard (as the manual states) but it did help to work through the process carefully beforehand.
The rope arrangement holding the kayak on its side looks alarming but worked well.
Having complained about it - the hatch opening turned out to be only just big enough for me to work through - especially when it came to taping the bulkhead - but overall it appears to have gone well and lifting the kayak around as a single unit feels a real step forwards.
I was reading an article in which Chuck Paine , a well respected yacht designer, was talking about "boatbuilding - or as it's otherwise known - sanding". Guess that's what I'll be doing for some time - but at least now I can do that outdoors.
Offline
#52 4 Jun 2021 7:07 pm
- teejay
- Member
- Registered: 26 Oct 2020
- Posts: 66
Re: Building a 12' Wood Duck Hybrid
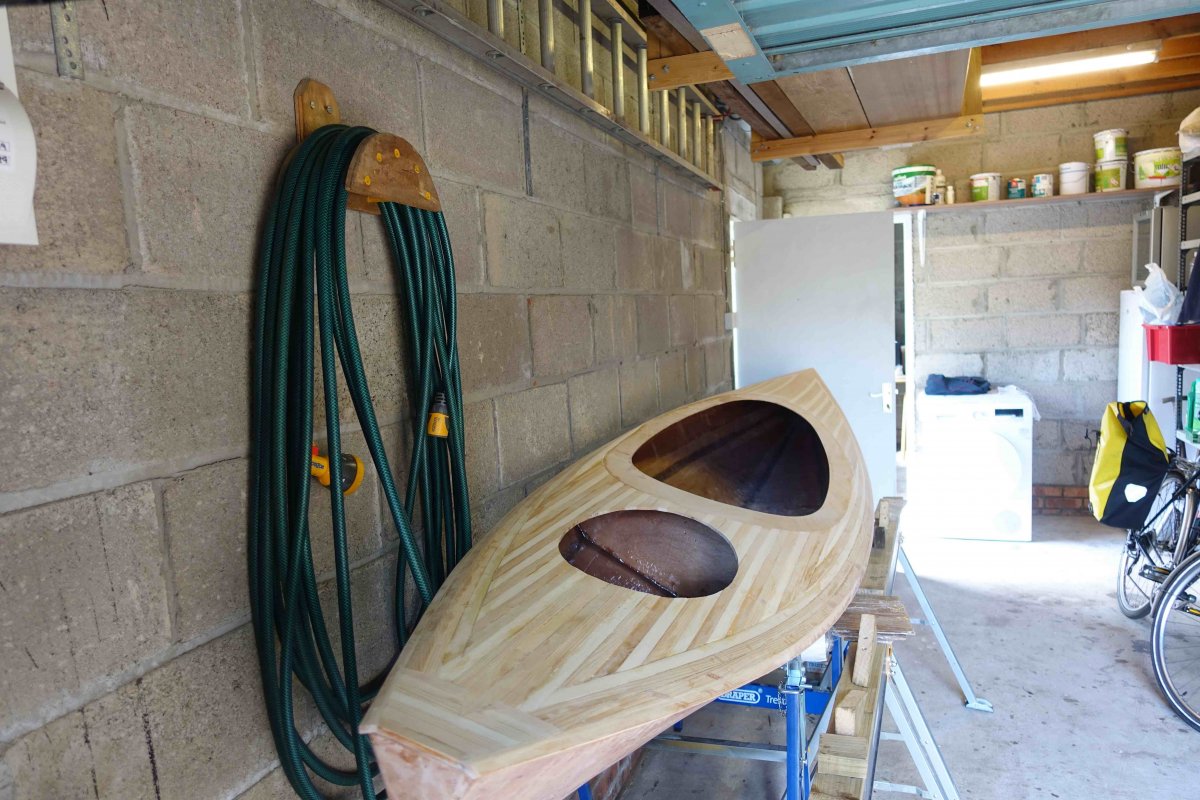
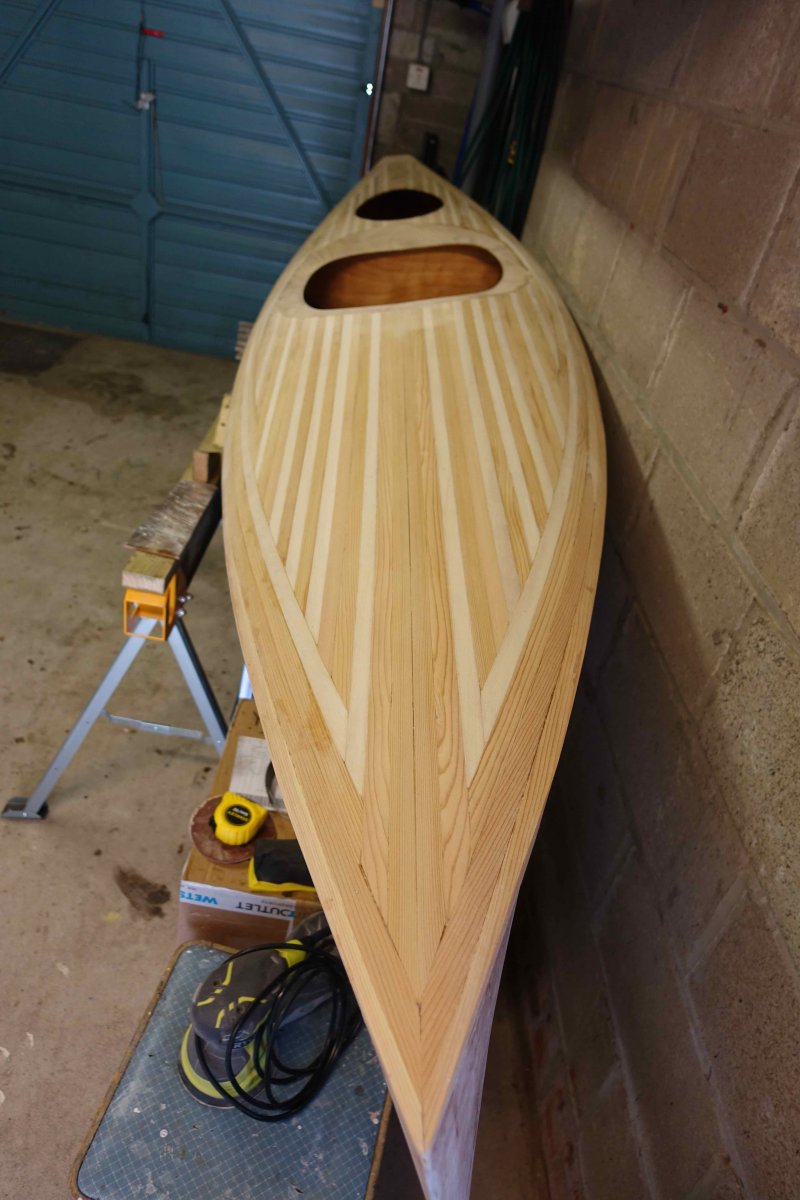
Making progress but a lot of sanding - most of the sanding - to go. However it's rewarding to see a regular improvement in the appearance of the deck as I go along and I haven't fallen out with our neighbours even though the empty hull makes for a lot of noise when I'm using the sander.
Definitely helps to be doing this work outside although having a sander with dust extraction helps a lot.
Offline
#53 6 Jun 2021 4:19 pm
- teejay
- Member
- Registered: 26 Oct 2020
- Posts: 66
Re: Building a 12' Wood Duck Hybrid
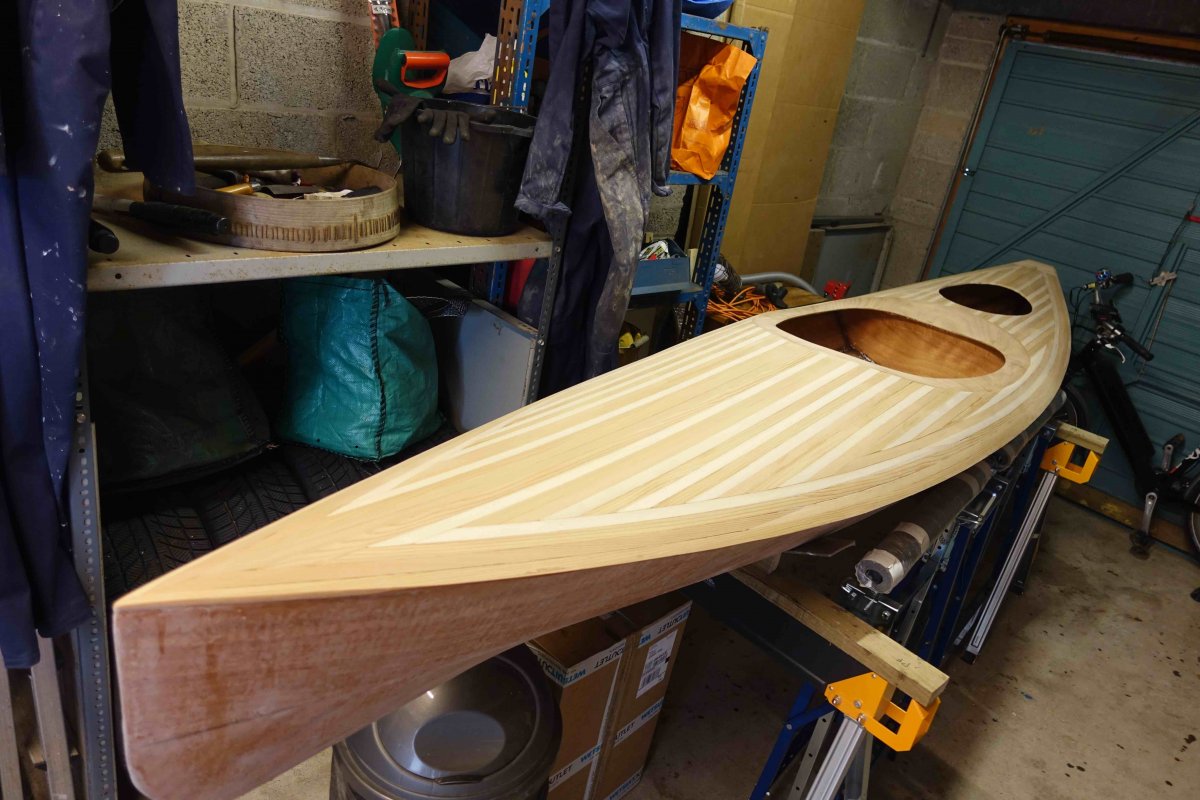
First/rough sanding completed - now to work on filling the small gaps in the deck and then more sanding.
Lots of the roughness has gone and I'm generally happy with how it's working out - still a ways to go but getting there.
Offline
#54 7 Jun 2021 7:43 am
- Curlew
- Member
- From: nr Skipton, N Yorks
- Registered: 8 May 2020
- Posts: 51
Re: Building a 12' Wood Duck Hybrid
Looking smooooooth.
A quick wipe with a damp (clean) cloth is a great way of showing imperfections and little areas that might need filling etc as well as any PVA residue. It also gives a glimpse of the post-varnish colours.
Don't worry about filling every tiny little gap as these sort of disappear when glassed. If you do use some thickened epoxy bw very careful adding woodflour as it goes a lot darker than you think when it is epoxied.
The design at the bow has a sort of Union Jack appearance. Or is that just me?
Bruce
Offline
#55 7 Jun 2021 7:44 am
- Bergen_Guy
- Member
- Registered: 6 Feb 2020
- Posts: 353
Re: Building a 12' Wood Duck Hybrid
That looks really nice! very tidy work. I do think these hybrid decks look lovely .-) looking forward to seeing it all epoxied and varnished :-)
Offline
#56 7 Jun 2021 9:20 am
- teejay
- Member
- Registered: 26 Oct 2020
- Posts: 66
Re: Building a 12' Wood Duck Hybrid
Thanks for the comments and hints - really helpful if the better weather and the positive comments from people walking by as I'm sanding also help.
Any Union Jack reference is unintentional - not sure that would always go down well north of the border - maybe there's a St Andrew's cross reference?
Tim
Offline
#57 19 Jul 2021 2:19 pm
- teejay
- Member
- Registered: 26 Oct 2020
- Posts: 66
Re: Building a 12' Wood Duck Hybrid
I've been making progress - although as restrictions ease the lockdown project needs to be fitted in with other things - so it's all a bit slower than it could be.
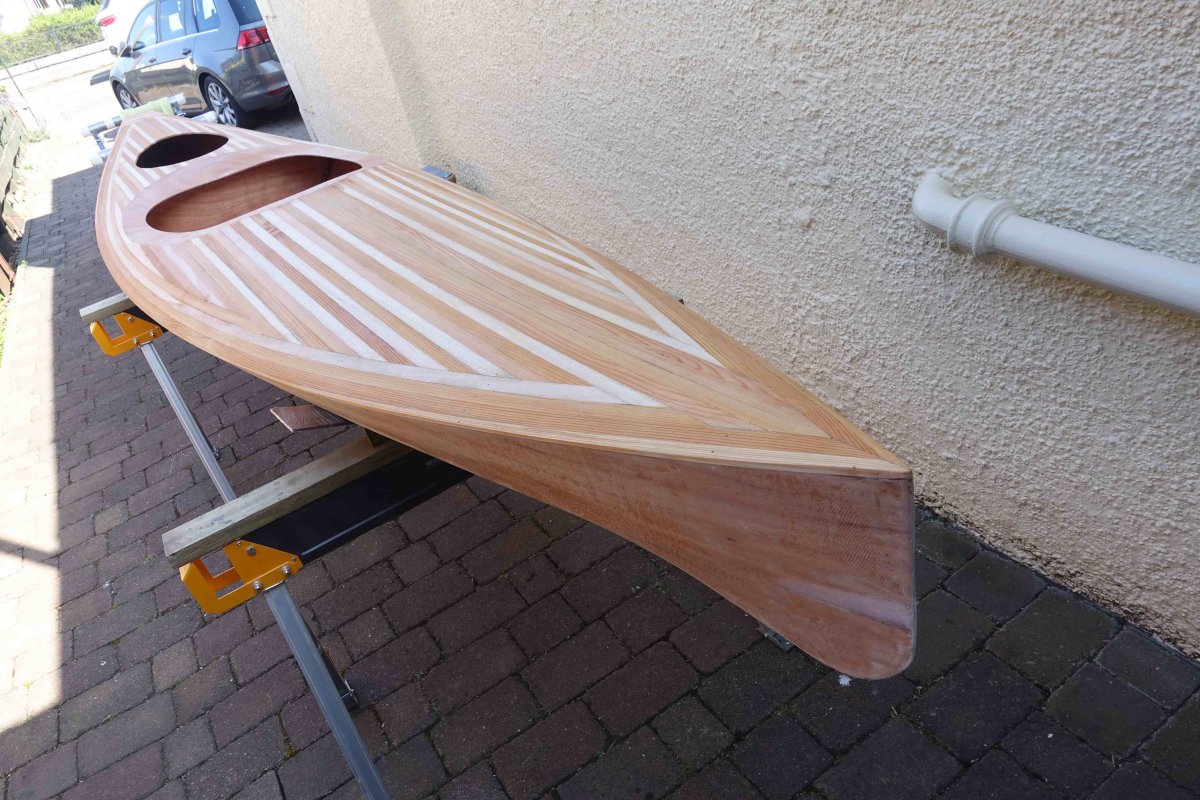
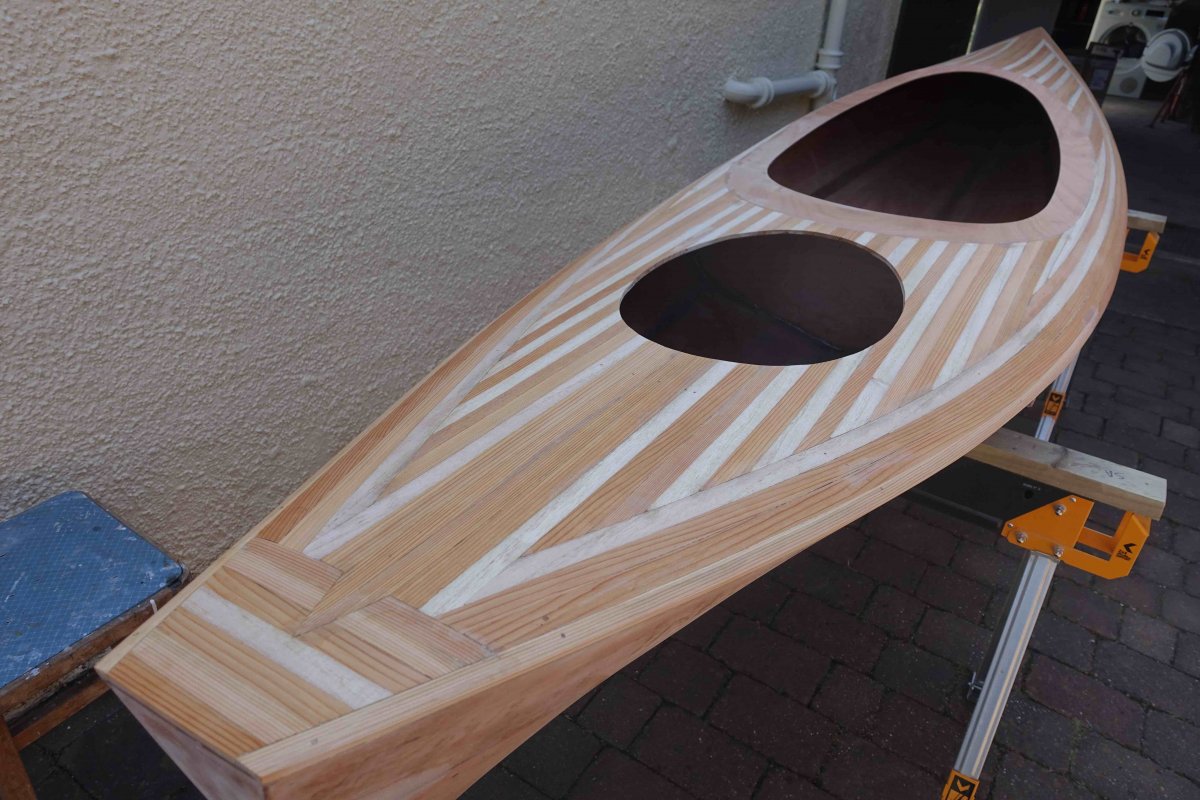
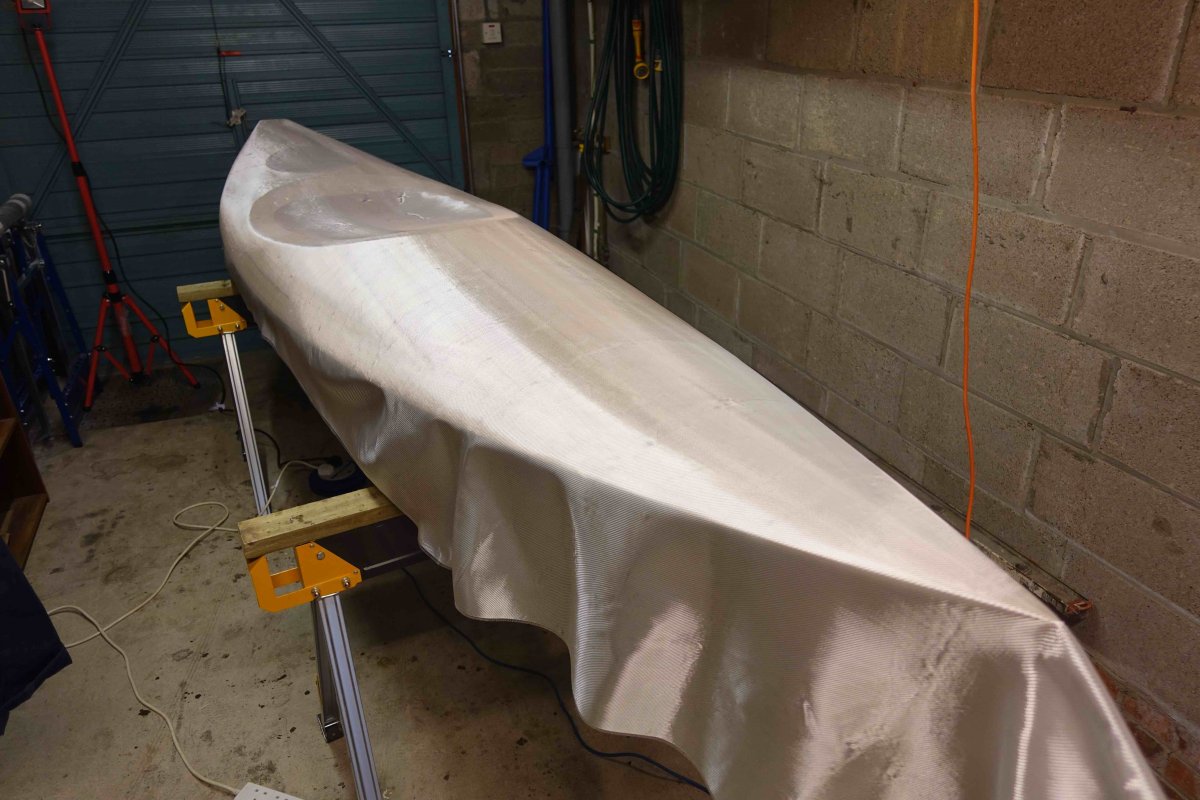
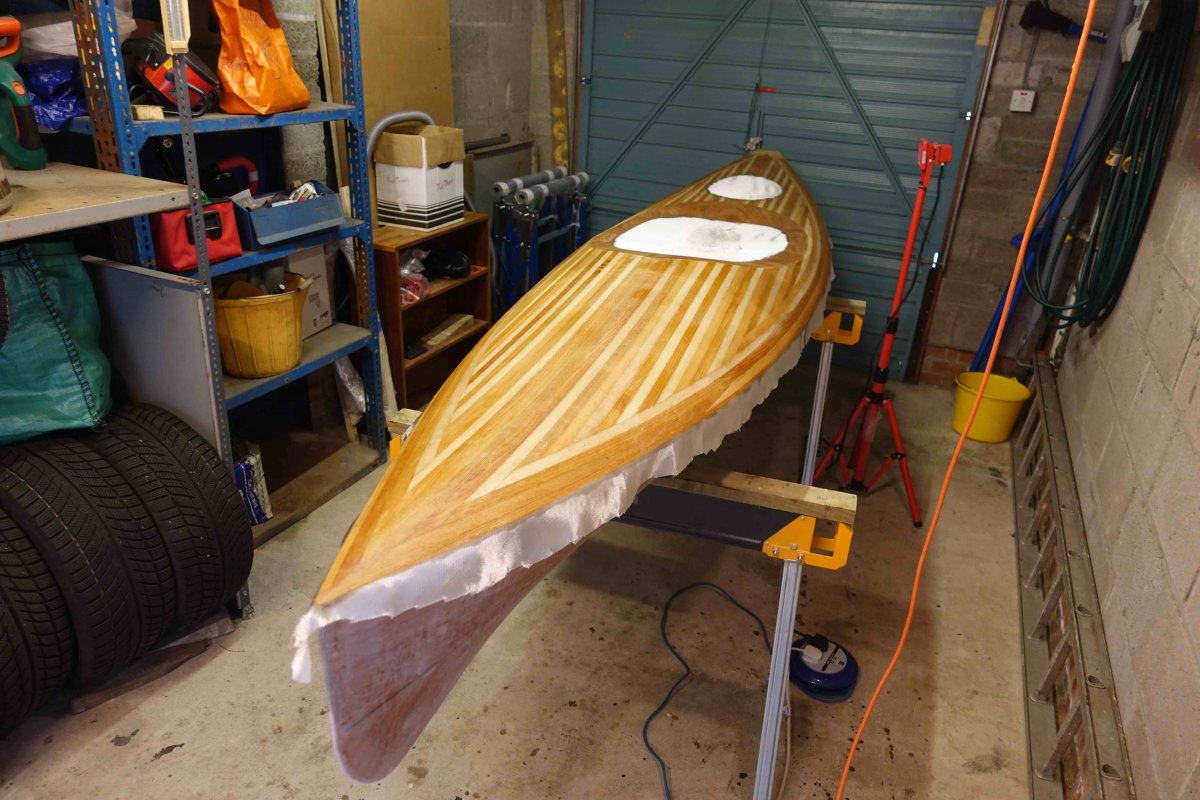
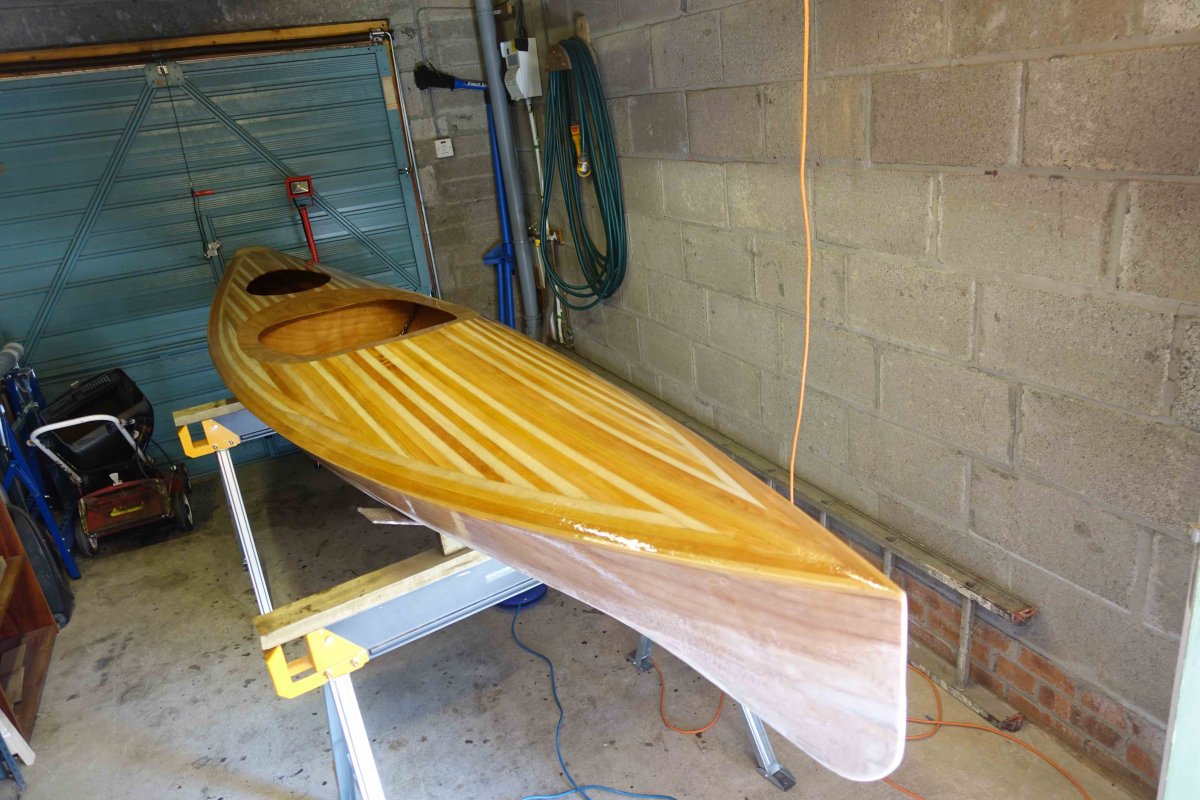
Got to an important stage these last 2 days - getting the deck epoxied - maybe the anxiety about getting this right was contributing to the slow progress - but undoubtedly the warmer weather helped + ensuring the deck was really well smoothed off, using a plastic squeegee to ensure the sheeting was adhering to the deck and using a heat gun to provoke bubbles so they could be eliminated as I was working through the process.
The warmth makes the biggest difference - far better to carry out a build project when it's consistently warm - but - the project also made a huge difference to coping with strange times during the early part of the year. Next time (next time??) I'll try and find a nice big warm workshop!
The pictures show the deck after a final sanding before glassing - then the deck shrouded before the first two coats go on - and finally where I've got to today with the excess sheeting removed and the deck curing ready - for more sanding! ![]()
Offline
#58 21 Jul 2021 6:56 am
- Curlew
- Member
- From: nr Skipton, N Yorks
- Registered: 8 May 2020
- Posts: 51
Re: Building a 12' Wood Duck Hybrid
Well it is all plain sailing (flat paddling?) now. Hope you have plenty of sandpaper ready to go.
I re-varnished mine recently to remove various battle scars. You might hope the weather cools a bit as I found the window between 'drying almost instantly and leaving brush marks' and 'tacky for ages so collecting all the dust' with the supplied varnish is frustratingly small!
Bruce
Offline
#59 21 Jul 2021 11:10 am
- Jmac58
- Member
- Registered: 7 May 2020
- Posts: 77
Re: Building a 12' Wood Duck Hybrid
Looking good Tim. The varnishing and rubbing down seems to go on forever! Hope you are nearly finished and close to launch. I have been using Winifred quite a bit on the Thames...plenty of nice comments from fellow paddlers! Hoping to take to Cornwall and try in the sea - will need a spray deck. Have bought plans and western red cedar to build a petrel play...will start a log at some point. Best of luck and hi Bruce! James
Offline
#60 21 Jul 2021 3:25 pm
- teejay
- Member
- Registered: 26 Oct 2020
- Posts: 66
Re: Building a 12' Wood Duck Hybrid
Thanks Bruce, thanks James
- it can get too warm? - no doubt normal service for Scotland will resume soon enough Bruce
Getting ready for some serious sanding although the hull needs another coat of epoxy now it is warmer + the cockpit coaming and hatch cover & I'm adding a rubbing strake - so I'm trying to not get carried away.
That said I do feel I've crossed the rubicon with the deck sheathed.
Good to hear of the boats being used - the boat build was a project worth doing for itself - but increasingly I'm looking forward to getting some paddling in. Not surprised you've been getting positive comments James - and I look forward to seeing the next boat being constructed.
Tim
Offline
#61 9 Aug 2021 5:33 pm
- teejay
- Member
- Registered: 26 Oct 2020
- Posts: 66
Re: Building a 12' Wood Duck Hybrid
I've had a chance to do some more with the build these last few days.
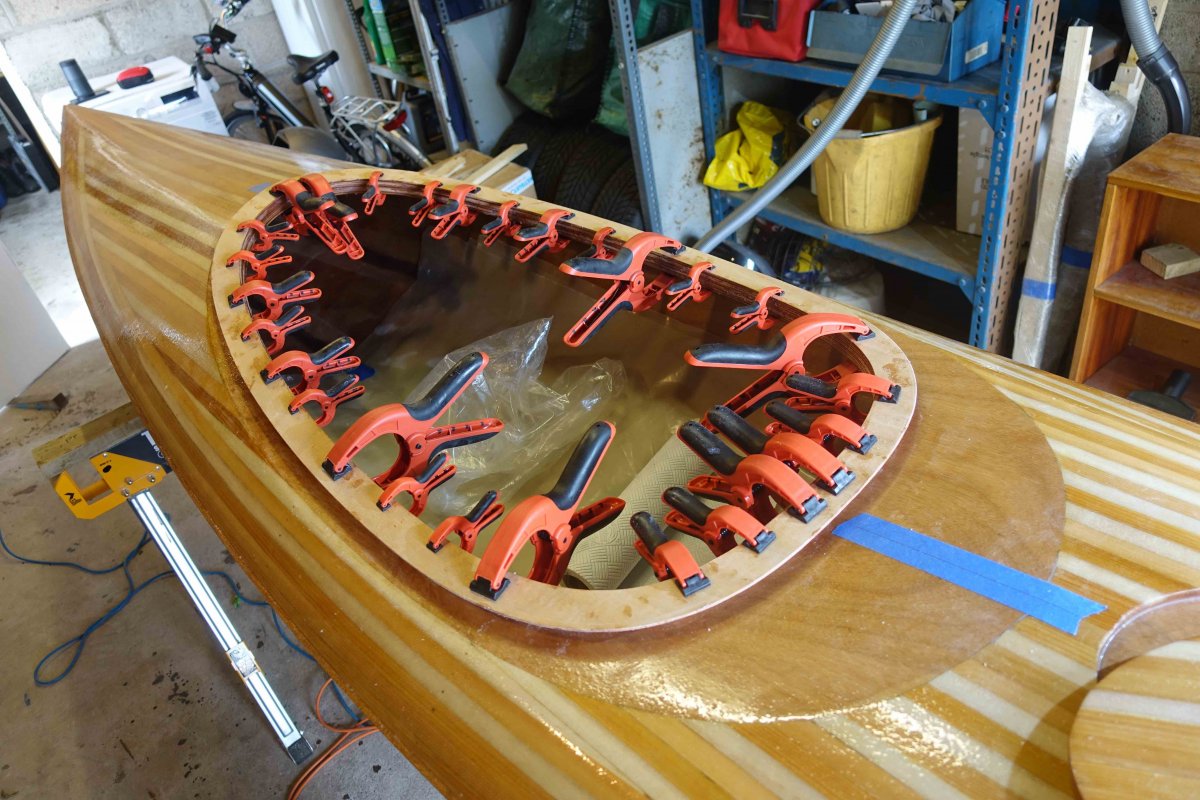
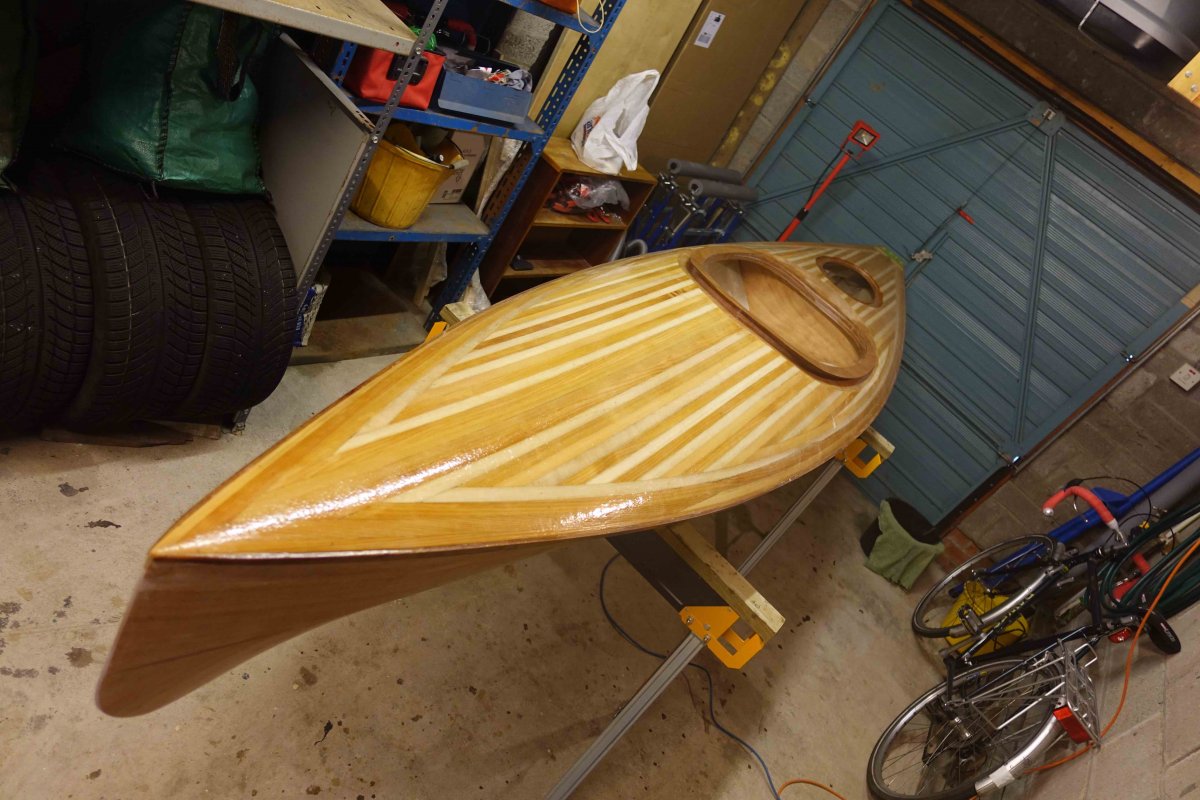
I've got the gunwales attached - somewhat tricky as they had to be held on by tape (no sheer strake on the Wood Duck) while the epoxy set. Sadly no picture of the tape fest but after some clamping and sorting they took okay. These last few days have been a chance to get the 3rd coat of epoxy on the hull that was postponed in the cold earlier in the year and additionally a chance to ensure the gunwales are well epoxied in place.
As you'll see from the clamp fest the coaming is also now on. It's a bit of a pest to work on and sanding, in particular, is not easy - but while I had the boat upside down I found it a good chance to ensure the joint between the coaming ring and the spacers was well epoxied.
Definitely getting there - there's very few pages of manual left - but I'm also aware that time spent finishing the build carefully can make a big difference so telling myself not to rush. Should be ready for the colder weather!
Offline
#62 28 Aug 2021 2:56 pm
- teejay
- Member
- Registered: 26 Oct 2020
- Posts: 66
Re: Building a 12' Wood Duck Hybrid
Another spell of hard labour - or sanding as it's otherwise known - completed and a final coat of epoxy just applied to the deck.
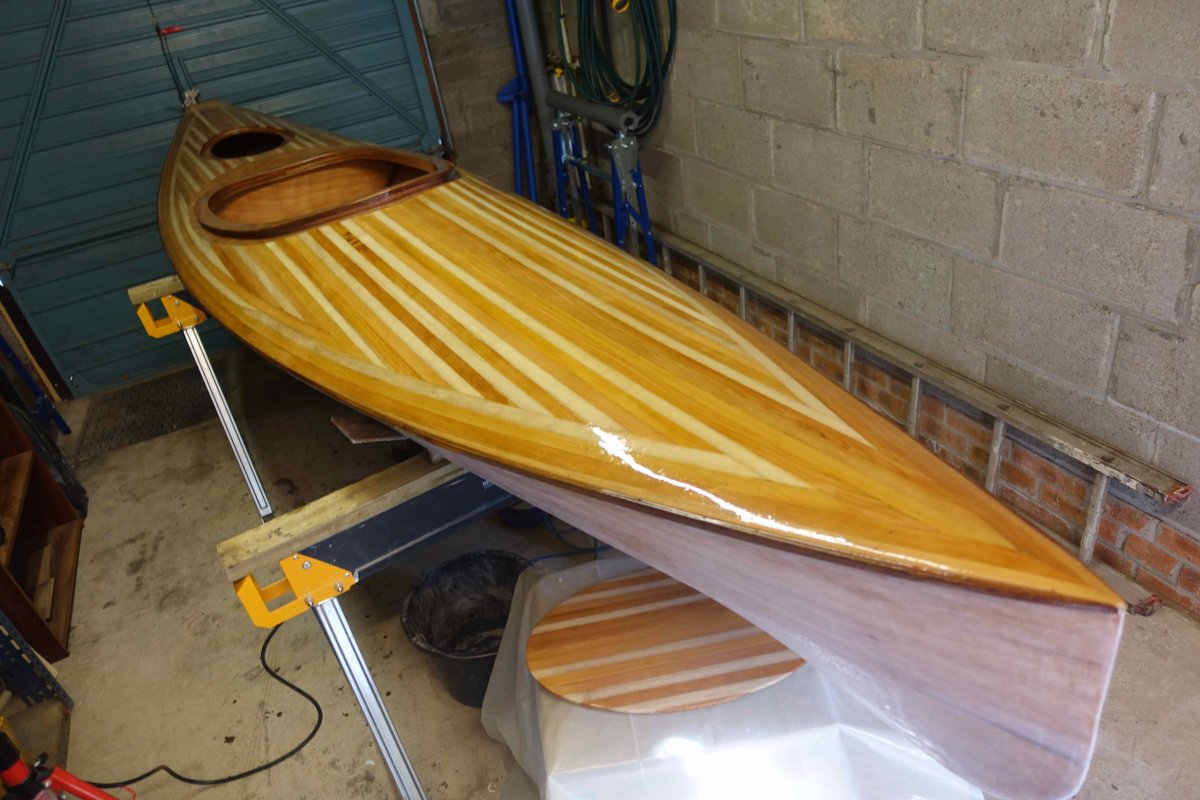
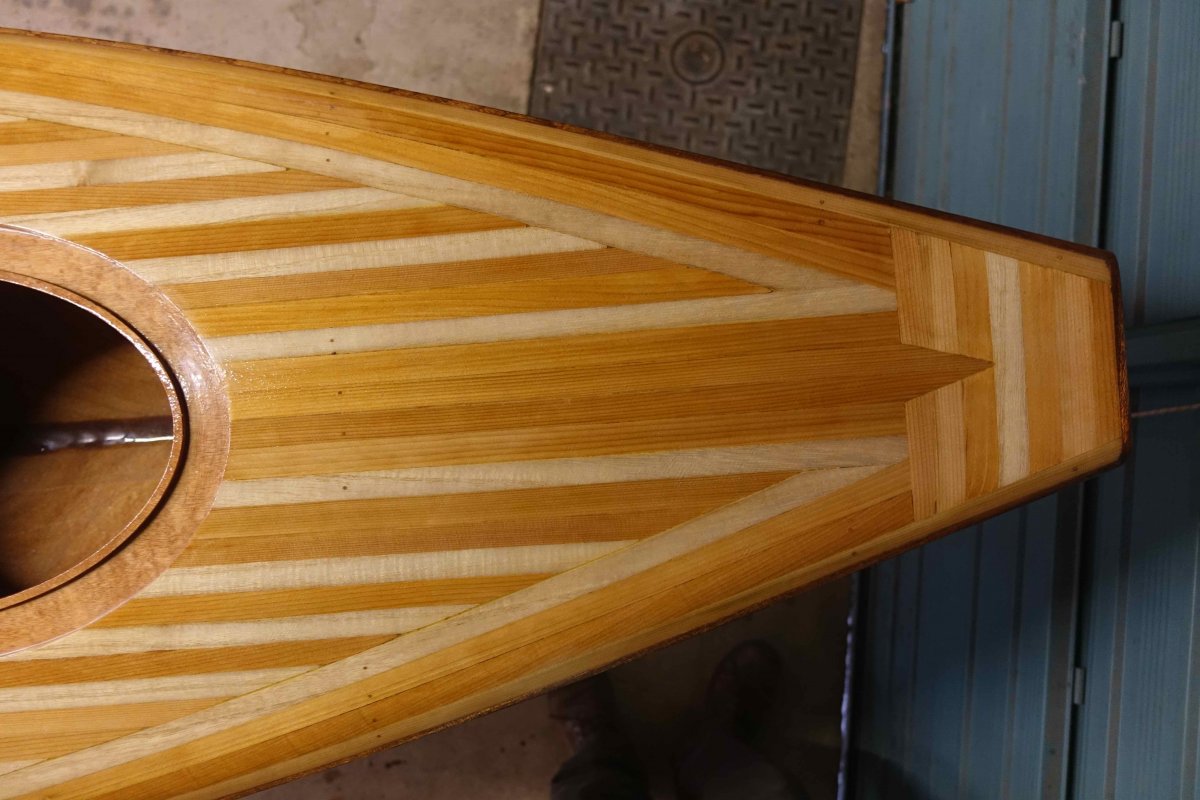
I've added a picture of the stern as, with the addition of the gunwale, I'm pleased with how it's worked out. The gunwale does add a layer of complexity but overall I think it's been worth it - and knowing my ability to hit things while on the water - it should prove helpful! ![]()
The hull itself is ready for painting and it's time to order up the paint.
Offline
#63 23 Sep 2021 3:05 pm
- teejay
- Member
- Registered: 26 Oct 2020
- Posts: 66
Re: Building a 12' Wood Duck Hybrid
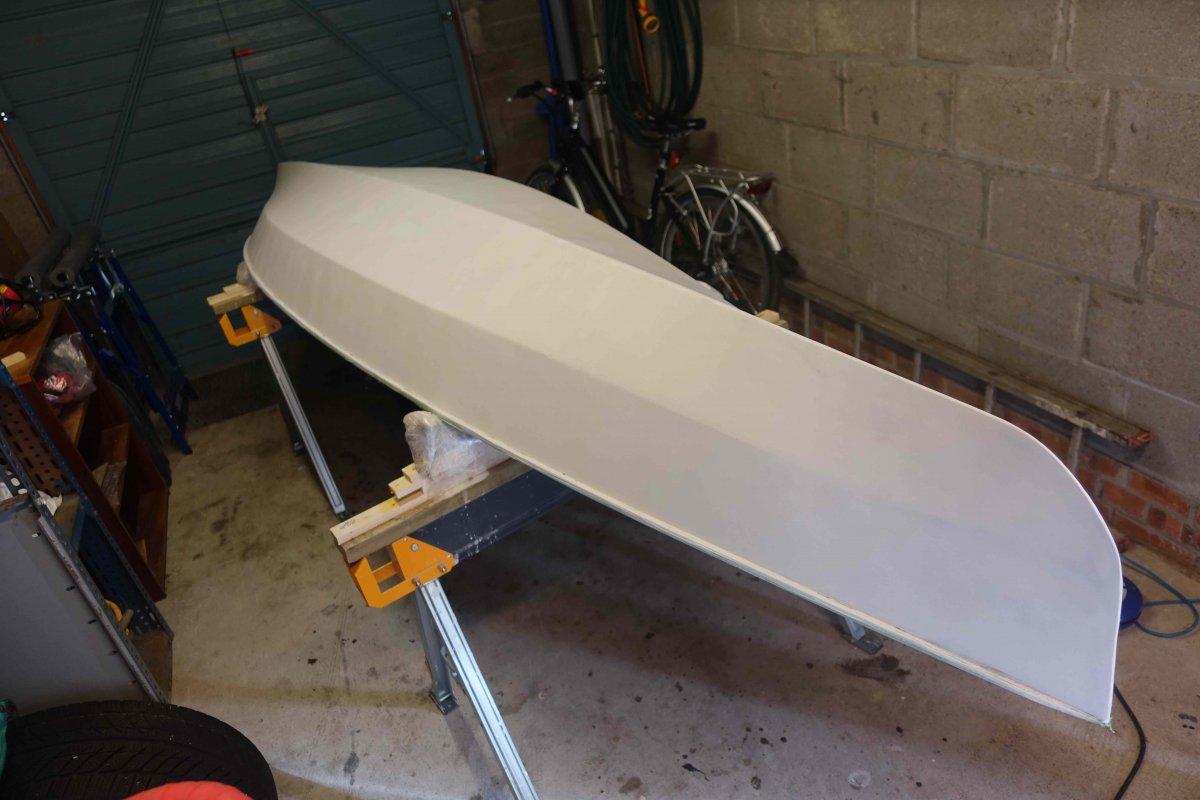
Not a particularly inspiring picture but the journey to get here has been as interesting as ever.
Getting low on epoxy I debated whether a final skim coat on the hull would be helpful - it definitely was and it went on really well (practise, practise, practise!). Then out with the sandpaper again till I couldn't put off the painting any longer.
I've used the build to try a number of new things. I could have made it easier for myself by using one-pot paint/varnish as I'm very used to applying and working with this - but - I thought that I should tackle the joys of two-pot as more in keeping with pushing my boundaries and in keeping with the rest of the build.
As ever there's lots of good advice out there which makes a whole lot more sense when you've messed up! Two-pot is different - markedly different. My first application on a warm afternoon was a minor disaster - the paint was sticky almost as the brush left the surface so smoothing strokes were adding injury to insult. More sanding!
Indeed lots more sanding as I've now also filled the uneven patches on the hull and applied 2 more coats of primer - both with rollers in the cool of the morning (as is advised) and I'm back on course.
Offline
#64 25 Sep 2021 9:39 am
- Curlew
- Member
- From: nr Skipton, N Yorks
- Registered: 8 May 2020
- Posts: 51
Re: Building a 12' Wood Duck Hybrid
It will be interesting to see how the two-pot finish works out in terms of appearance and durability. So far your experience is not tempting me!
The primer coat is quite forgiving I found, and also made it easier to see areas for filling/sanding before painting.
Looking forward to the launch pictures soon
Bruce
Offline
#65 25 Sep 2021 8:10 pm
- spclark
- Member
- From: "Driftless" Wisconsin USA
- Registered: 19 Mar 2020
- Posts: 478
Re: Building a 12' Wood Duck Hybrid
And much of that primer will have to come off in final sanding. It's not so much a coating to ensure a good bond (fact is paint over epoxy is just fine w/o primer!) it's there to fill surface imperfections that otherwise would make the resulting paint coats look less-than-stellar.
Primer can absorb and hold water, it's got a lot of filler (often talc) which is soft so it sands easily once it's dry, but can also compromise the paint bond if there's a lot of it left after final sanding before painting, particularly on boats that are left in the water over time.
Hard to accept that marine primer's not quite the same thing as primers used under paints on metals which serve much the same purpose but are formulated differently.
Last edited by spclark (25 Sep 2021 8:12 pm)
Offline
#66 26 Sep 2021 4:32 pm
- teejay
- Member
- Registered: 26 Oct 2020
- Posts: 66
Re: Building a 12' Wood Duck Hybrid
Thanks for the advice Driftless - I did wonder if I could leave off the primer but the guidance is to use 1 coat and then apply filler to any irregularities and then primer again - so overall I've a much smoother hull as a result of doing that - and it wouldn't be the same if there wasn't lots of sanding involved!
I am expecting the 2-pot finish to be more hard wearing Bruce - and any dings can be repaired with 1-pot in the future - we'll see how it goes.
Last edited by teejay (26 Sep 2021 4:33 pm)
Offline
#67 12 Oct 2021 5:19 pm
- teejay
- Member
- Registered: 26 Oct 2020
- Posts: 66
Re: Building a 12' Wood Duck Hybrid
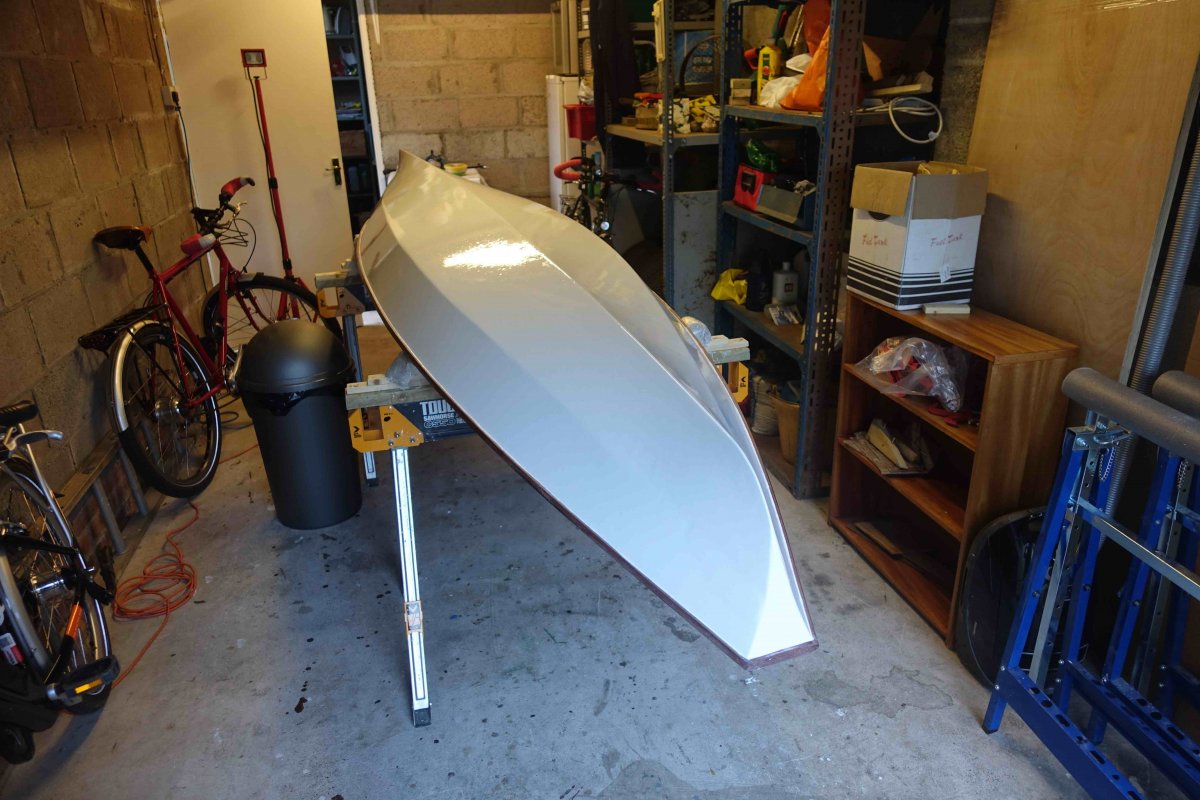
So - 3 coats of primer + filler + 3 of undercoat and 3 of topcoat (and all the sanding associated) = it's now time to move on to varnishing the deck. I seem to have got into a reasonable "groove" with the 2-pot paint if it is horribly volatile to use and achieving a really good finish and ensuring adequate ventilation so I'm not overpowered by the fumes is hard to reconcile. Still - "good enough" fits with the rest of the build and fortunately my OCD is reasonably easily suppressed. (The epoxy primer is particularly unpleasant to work with.)
Using good quality foam rollers and learning to work in small patches and being thorough (because you don't want to go back over what you painted a few minutes ago) - ie following the advice that's out there - does work and the paint does have an amazing capacity to even out and look very glossy.
Still - I'll be glad to finish the painting and I'll almost certainly use one-pot paint/varnish in the future when the kayak needs some work on it.
Getting there! - I did make up a list of stuff I need to buy so I can use it - like - a paddle - so maybe the end is somewhere just round the corner.
Tim
Offline
#68 19 Oct 2021 11:03 am
- teejay
- Member
- Registered: 26 Oct 2020
- Posts: 66
Re: Building a 12' Wood Duck Hybrid
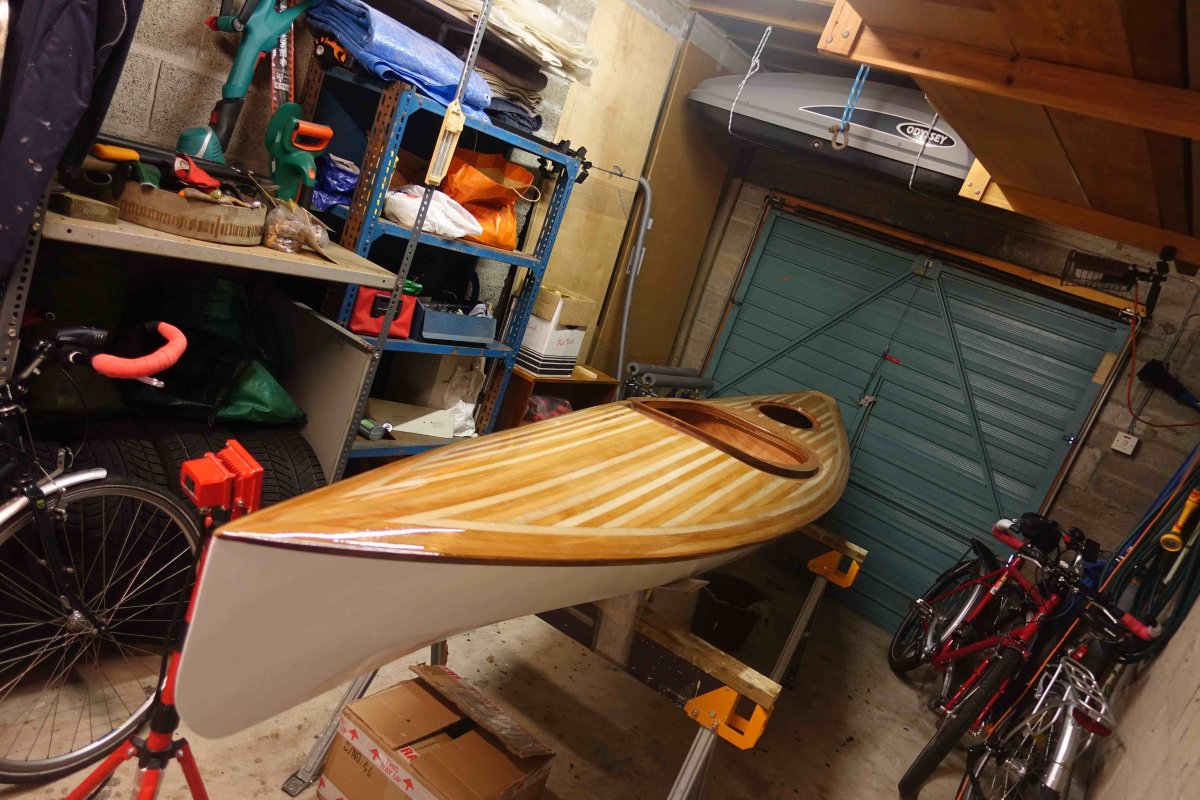
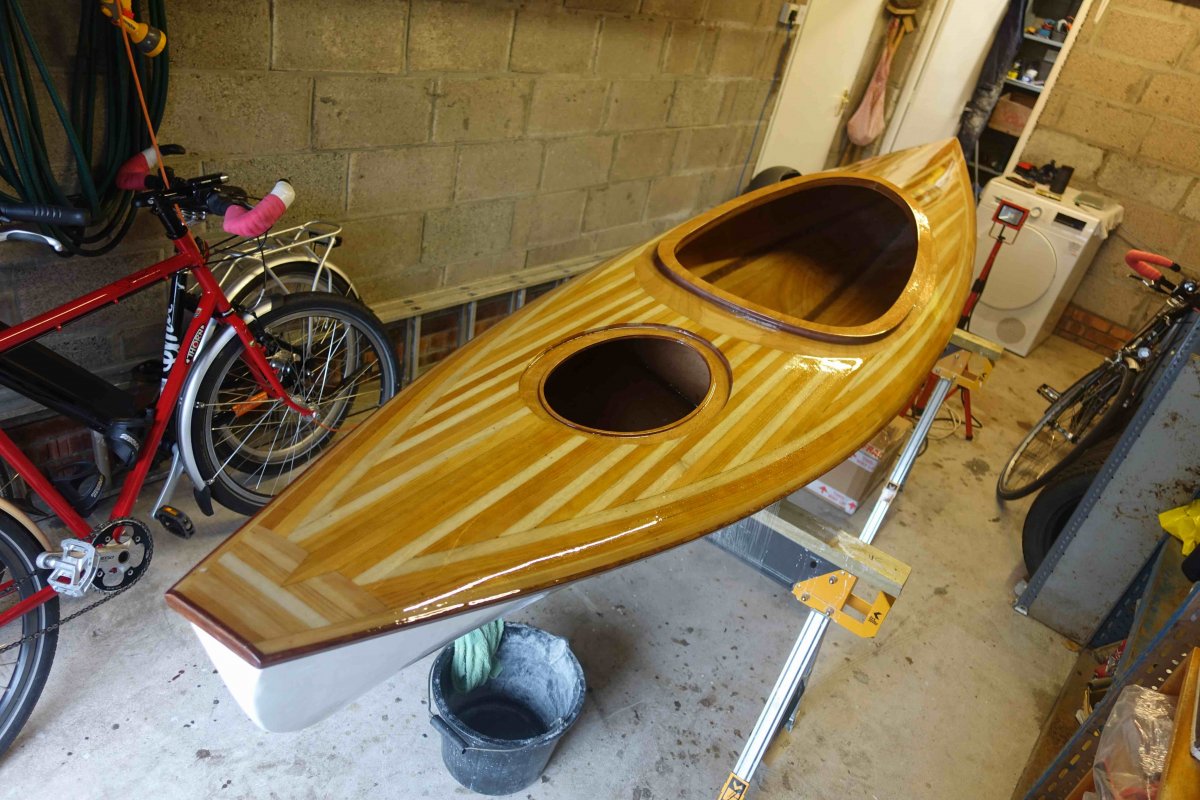
Four coats of varnish later and the painting is almost complete. I'm torn between beating myself up for the small imperfections that I can all too easily pick up and amazement that I've got this far and that the kayak is looking as if it'll be of practical use.
All too glad to stop the painting with the 2-pot paints/varnish because of the fumes but the final finish looks rock solid. Now to let it dry off properly before getting on with kitting the kayak out.
The pictures aren't that good as it's so gloomy here just now - still the warmer weather has helped progress - days of 10 to 15 degrees Centigrade have been a real help in moving forwards - and we won't have those for much longer.
Offline
#69 20 Oct 2021 9:30 am
- Curlew
- Member
- From: nr Skipton, N Yorks
- Registered: 8 May 2020
- Posts: 51
Re: Building a 12' Wood Duck Hybrid
Only you will see the imperfections. Everyone else just goes 'Wow!'
I do like a painted hull
Bruce
Offline
#70 11 Nov 2021 5:10 pm
- teejay
- Member
- Registered: 26 Oct 2020
- Posts: 66
Re: Building a 12' Wood Duck Hybrid
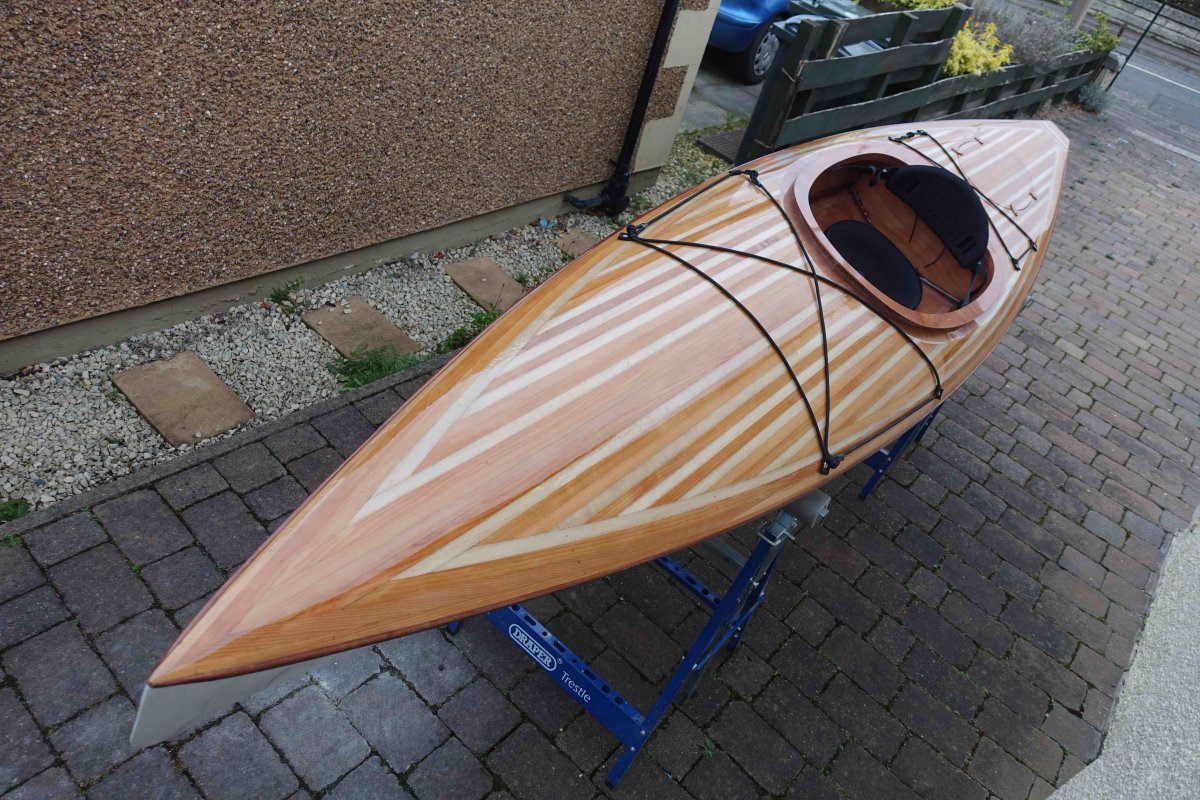
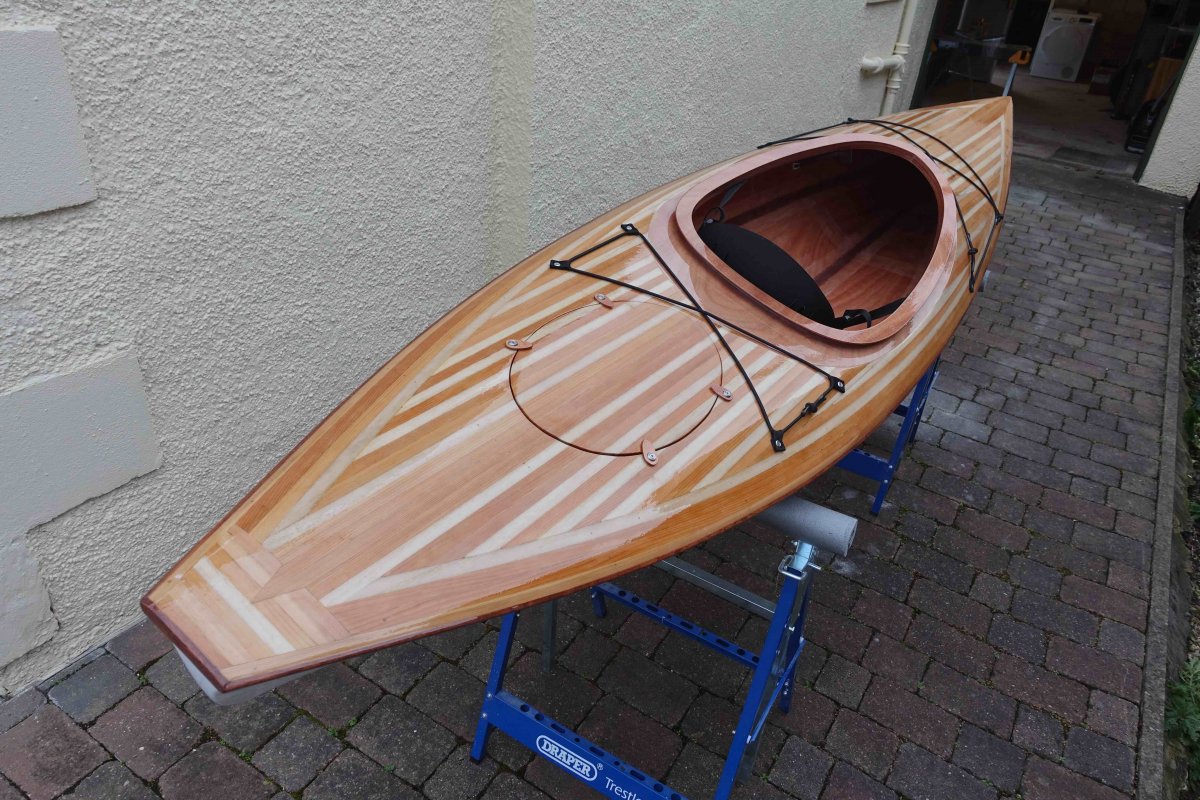
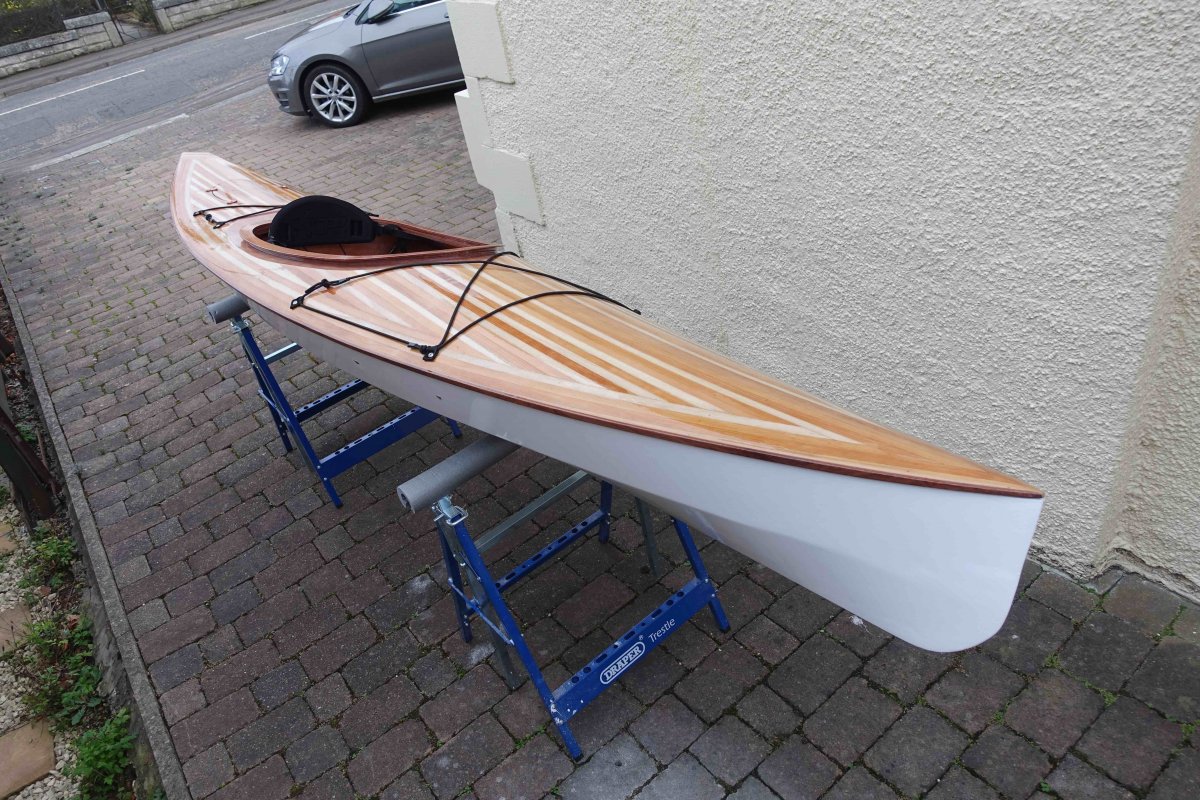
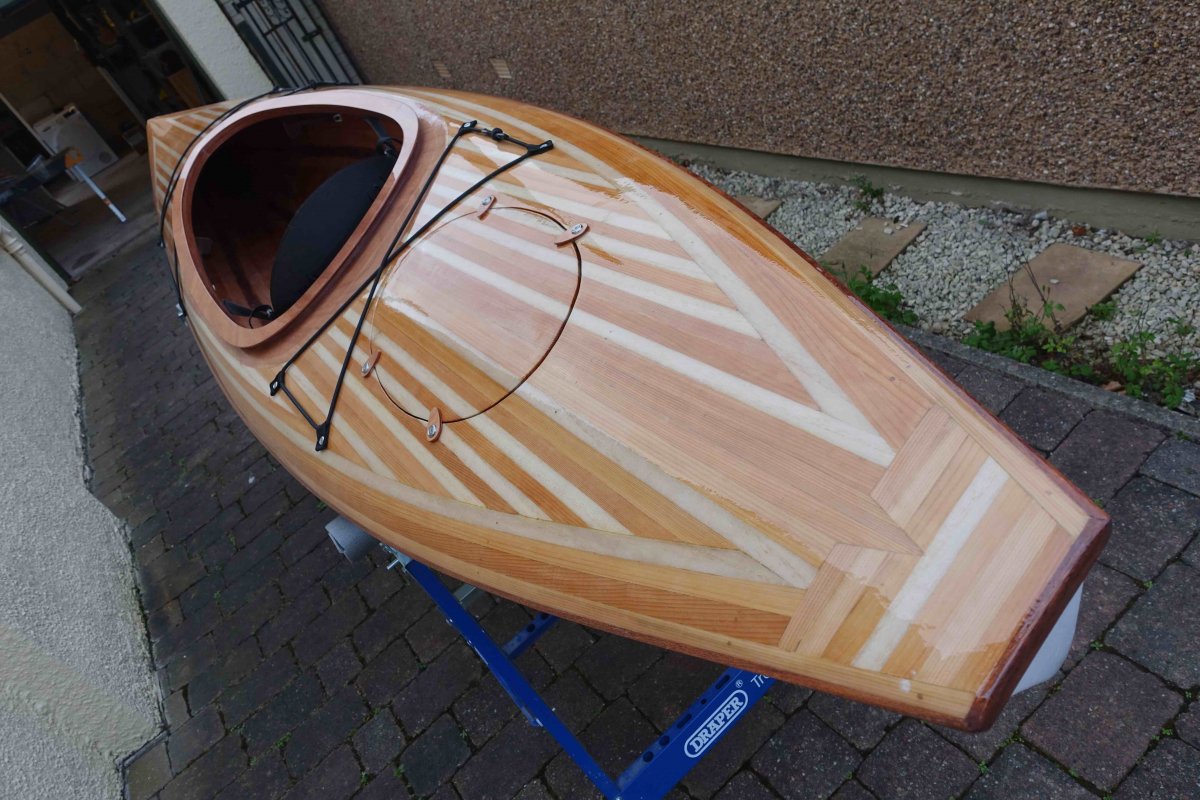
Another few days working with the boat - moving forwards by drilling holes into the hull and deck I spent so long on - the trauma is emotional as much as physical(!) - still the additions do make a difference to the practicality of the boat.
So I guess that means I'm finished if I found the bolts for the hatch toggles were a bit short so I'll replace those some time. Just over a year since I got started - I feel both pleased and surprised at having got this far and sad because I have enjoyed the constant challenges the build has presented and it will leave a gap in my life.
I'm not sure when I'll be able to get the boat wet - the weather isn't that enticing - and I still have to purchase a paddle - but watch this space!
Tim
Offline
#71 13 Nov 2021 9:56 am
- Curlew
- Member
- From: nr Skipton, N Yorks
- Registered: 8 May 2020
- Posts: 51
Re: Building a 12' Wood Duck Hybrid
Great to see it done. I think the white hull looks lovely and I presume you added a mahogany rubbing strip. I ordered this too but decided to lay it on the deck in the centreline for some contrast.
Just need to use it now.
If you want another project why not make your paddle? Conventional or Greenland.
Bruce
Last edited by Curlew (13 Nov 2021 9:56 am)
Offline
#72 14 Nov 2021 12:22 pm
- teejay
- Member
- Registered: 26 Oct 2020
- Posts: 66
Re: Building a 12' Wood Duck Hybrid
Thanks Bruce
I do need to get the paddle & other gear sorted - which is in hand - and looking forward to using it on the water. Once I've tried the boat a few times I may just consider building my own paddle - those Greenland paddles look really neat in particular.
The mahogany rubbing strip does set it off nicely with the white hull - although your build looked great with the dark wood incorporated into the deck - and that's one of the great things as regards the cedar stripping - each boat is unique - and they all look good.
Thanks for all the encouragement and advice.
Tim
Offline
