A forum for discussing wooden boats and boat building
You are not logged in.
- Topics: Active | Unanswered
#1 21 Oct 2011 7:08 pm
- fairplay
- Member
- Registered: 16 Jun 2011
- Posts: 109
...second Pax 18 build...
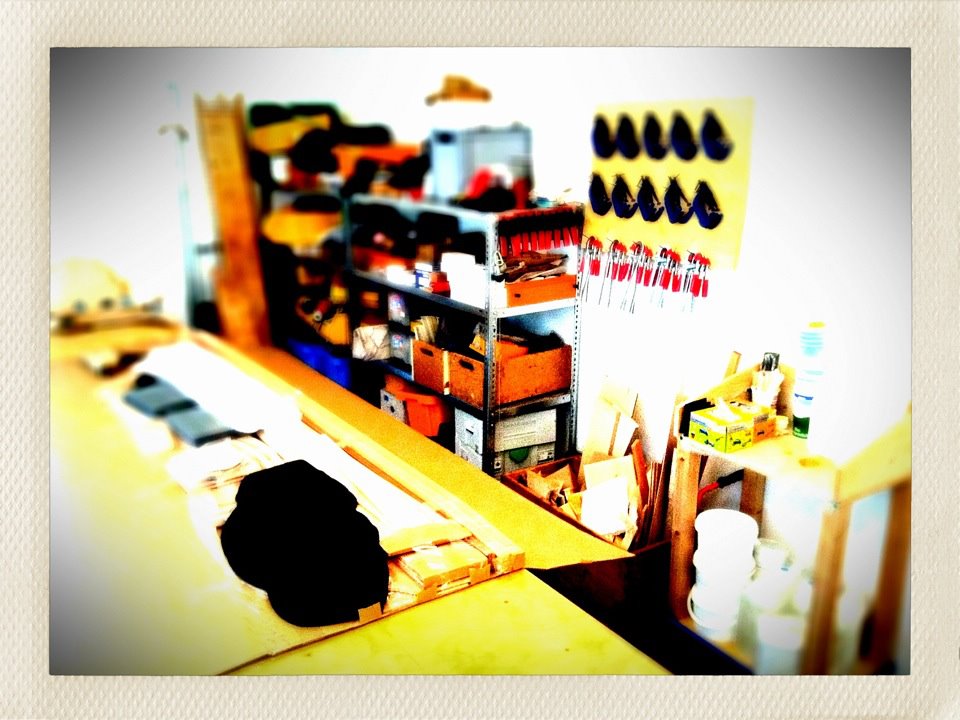
...after spending a couple of weeks - no, unfortunately not paddling, as my wife is on the water with no. 1 almost all the time, but - moving the workspace to new quarters, i had finally the possibility to unpack the packages that had arrived weeks ago from Fyne, containing the next Pax 18 kit...
...luckily i also found some time today to start with the first steps: glueing the bottom & side-panels, the forward deck, the deckbeam and the shear-clamps...
'...so, how many kayaks do you really need?...' - '...one more!...'
Offline
#2 21 Oct 2011 9:33 pm
- Phil
- Employee

- Registered: 8 Jun 2011
- Posts: 74
Re: ...second Pax 18 build...
Fairplay,
I am glad all is well and you have had chance to start. All is looking shipshape and we hope to see you also paddling shortly.
Offline
#3 23 Oct 2011 7:52 am
- fairplay
- Member
- Registered: 16 Jun 2011
- Posts: 109
Re: ...second Pax 18 build...
...hey Phil,
thank you for the kind greeting!...
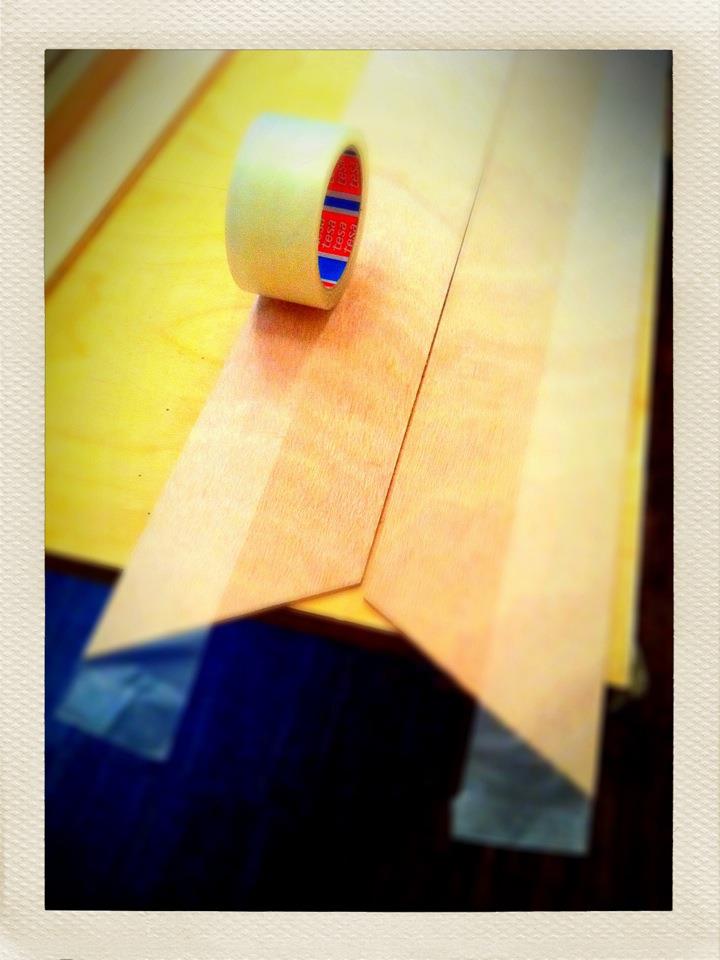
...yesterday i was already able to glue the shear-clamps to the side-panels; after selecting the outsides they were taped along the upper end to avoid floating epxoy to spoil the outer skin:
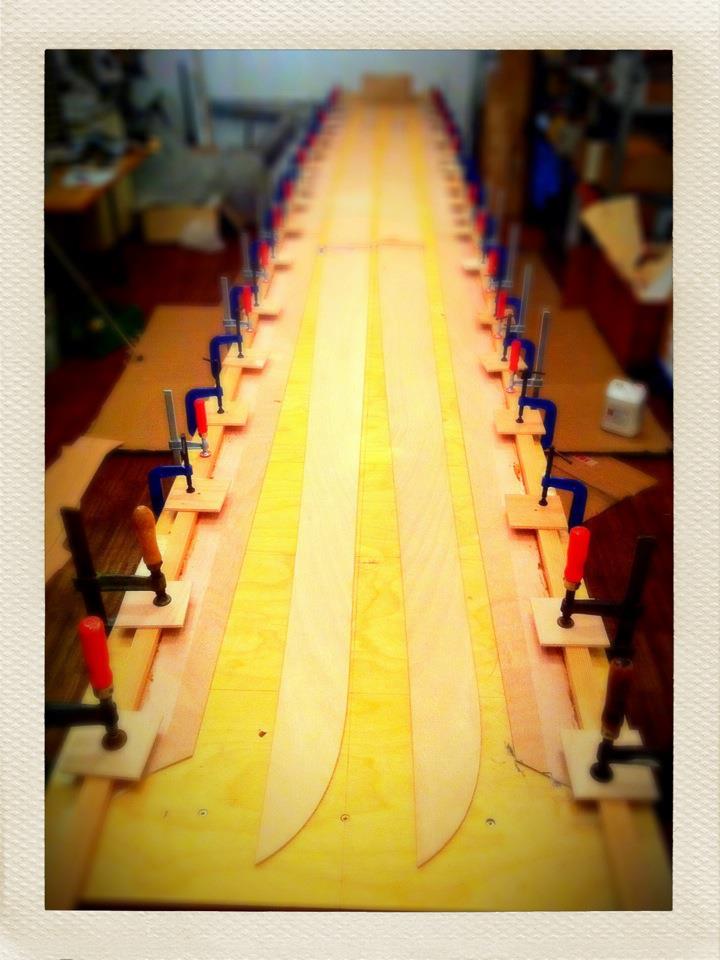
...the shear-clamps following the panels outline form a long curve, so a few clamps were used in this step:
Last edited by fairplay (23 Oct 2011 7:52 am)
'...so, how many kayaks do you really need?...' - '...one more!...'
Offline
#4 23 Oct 2011 5:19 pm
- fairplay
- Member
- Registered: 16 Jun 2011
- Posts: 109
Re: ...second Pax 18 build...
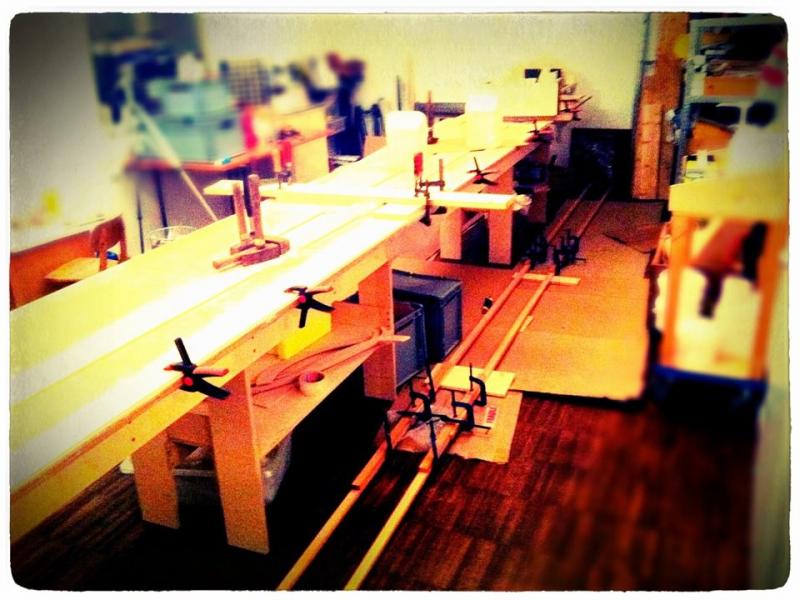
...had a little time today and continued with the stitch-preparation; i am not following the instructions on this as i plan to - again - use my craddle-system to align the hull later on. That is why i drill all the holes upfront using a guide...
...first, cutting the wires:
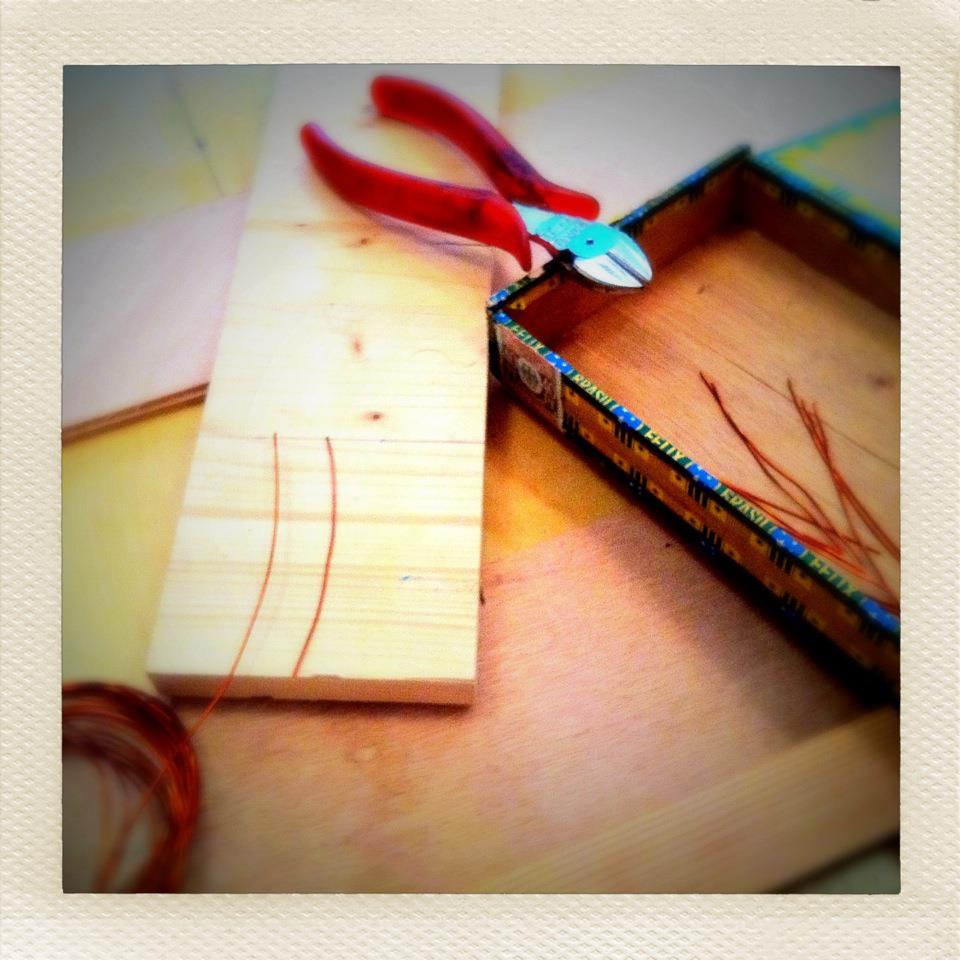
...i ended up with a box of about twohundred of them:

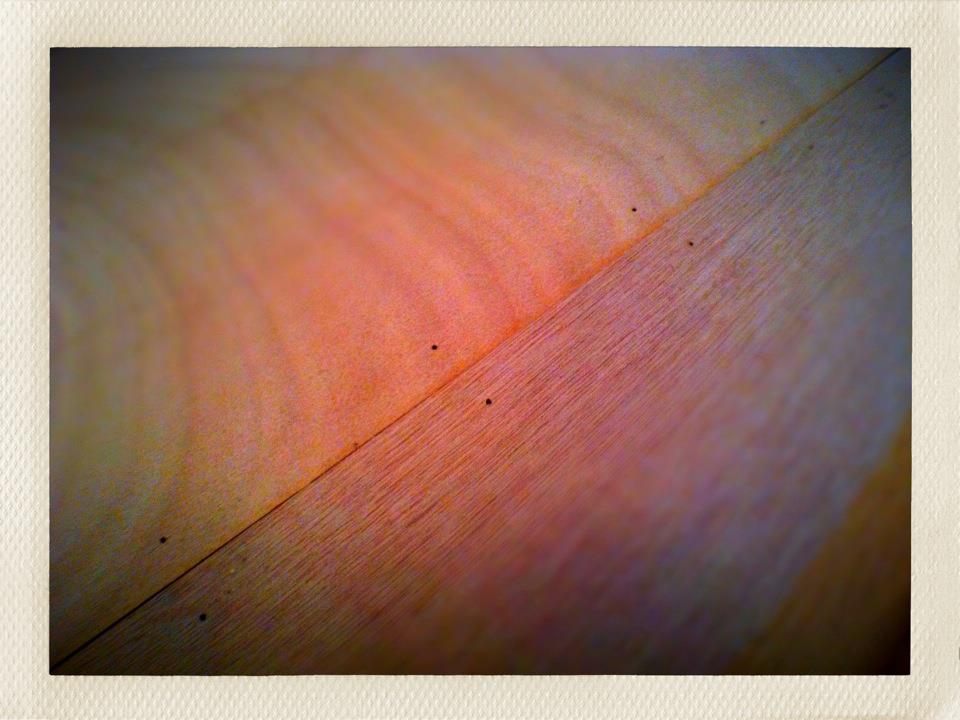
...next came the drilling; as mentioned above, i am using a guide to drill all the required holes - with the panels laying flat and secure on the table:
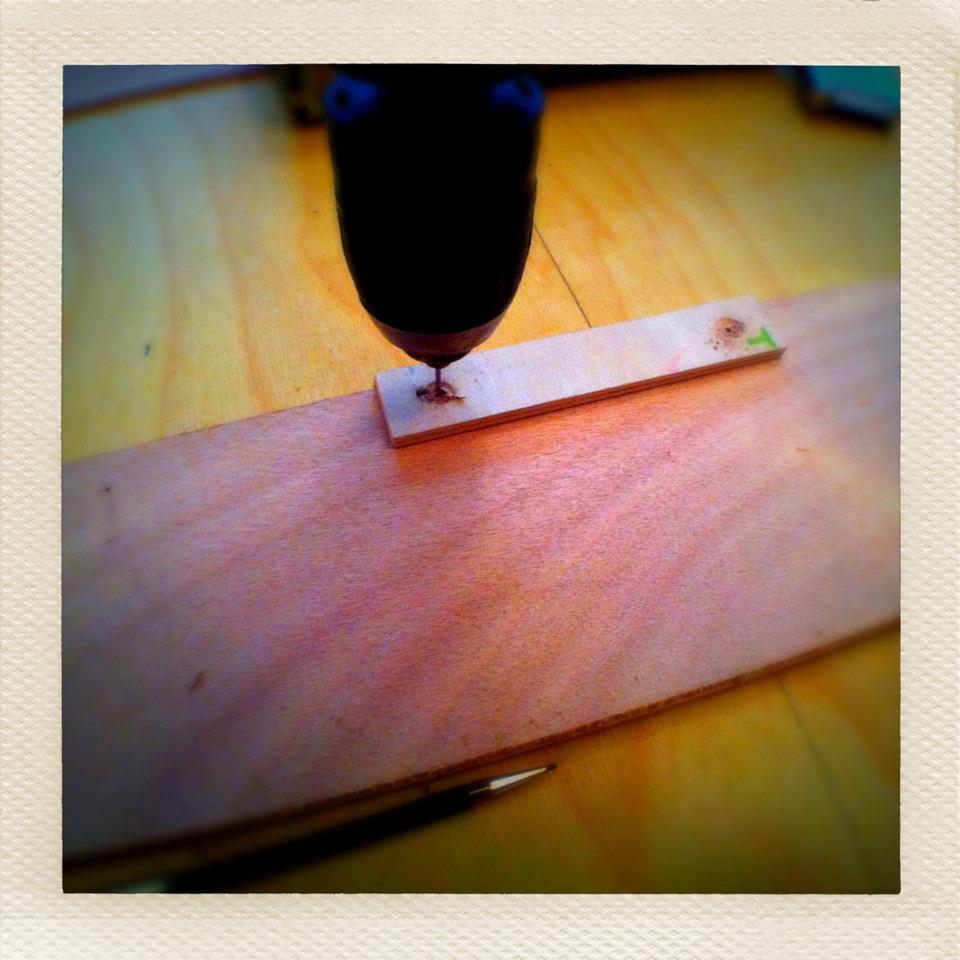
...the holes came out pretty nicely aligned (the photo distorts the dimensons due to the lens used):
'...so, how many kayaks do you really need?...' - '...one more!...'
Offline
#5 24 Oct 2011 9:55 am
- fairplay
- Member
- Registered: 16 Jun 2011
- Posts: 109
Re: ...second Pax 18 build...
...hmmm...
...the wires from the new kit are thinner than they were in the first (from which i had some leftover); they are not stabilizing the hull, and when trying to tighten them, they badly cut into the wood enlarging the drill-hole significantly ![]() ...
...
...nevertheless - we're wired:
'...so, how many kayaks do you really need?...' - '...one more!...'
Offline
#6 24 Oct 2011 7:16 pm
- beaker
- Member
- Registered: 9 Oct 2011
- Posts: 81
Re: ...second Pax 18 build...
Neat drill jig there. Did you cut all those wires one at a time to the guide? I just chopped the coil in half twice.
What's the lens you use to get that model railway effect?
Offline
#7 25 Oct 2011 11:36 am
- fairplay
- Member
- Registered: 16 Jun 2011
- Posts: 109
Re: ...second Pax 18 build...
...hi beaker - great idea to just cut the whole thing at once instead of cutting all the wires one-at-a-time (which is what i did)!...
...all photos are made with an iPhone and an Owle-Bubo-lens-adapter...the one used for the photo above was the standard Owle-lense...
'...so, how many kayaks do you really need?...' - '...one more!...'
Offline
#8 26 Oct 2011 10:10 am
- fairplay
- Member
- Registered: 16 Jun 2011
- Posts: 109
Re: ...second Pax 18 build...
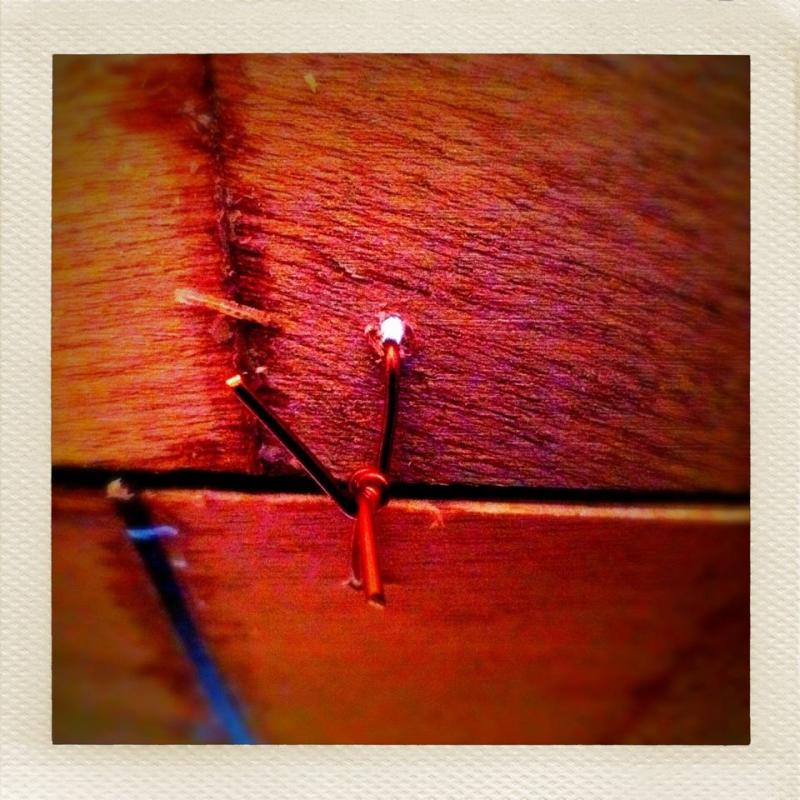
...sorry that i have to bring this up once more, but the thin wire is developing to become a real problem; pictured below is the x-th wire in a row that is breaking when trying to tighten it to close the gap...this does not happen with the older (thicker) pieces i have used here, and it did not happen with the first build...and i am very careful as i now know that this wire breaks easily:
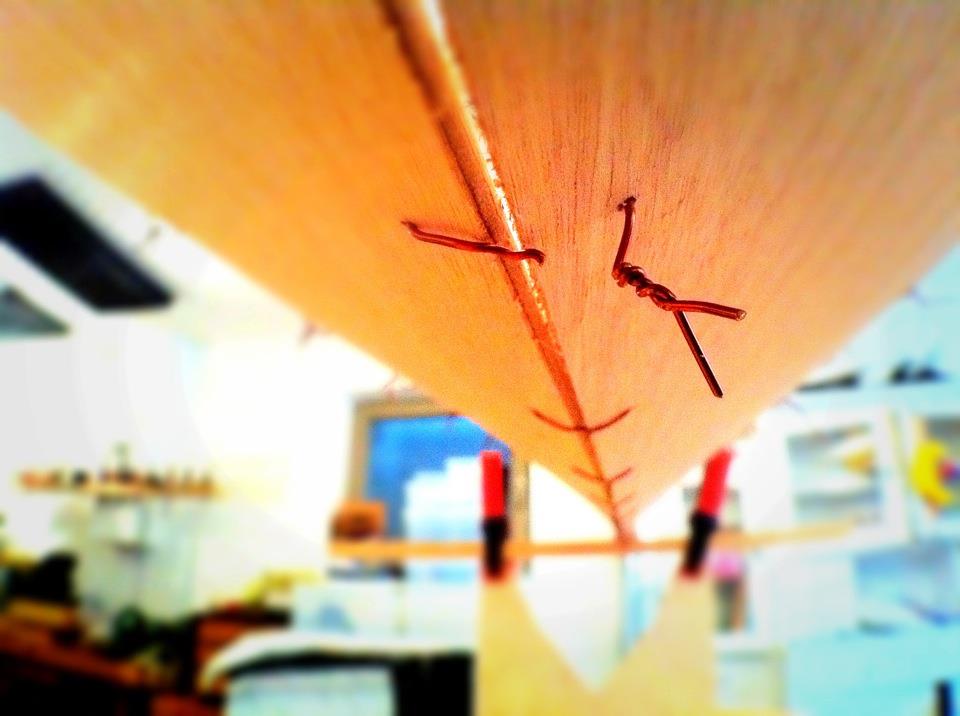
'...so, how many kayaks do you really need?...' - '...one more!...'
Offline
#9 26 Oct 2011 11:21 am
- Paul
- Employee

- From: Gatebeck Cumbria
- Registered: 4 Aug 2011
- Posts: 134
Re: ...second Pax 18 build...
Sorry to hear about the problems but we have not deliberately changed the size of the wire: it should be about the same.
However, the thickness of the wire should not matter, indeed, we often use much thinner wire when we need very small holes. The trick is not to use the wire to close the gap but, rather, to stop the gap widening. The wire should be used to hold the wood whilst the epoxy sets not to bring the wood together. Try bringing the panels together by pulling them with your hand and then tighten the wires. You should find that just a couple of twists will hold the panels in place and it will avoid the danger of enlarging the hole or splitting the wood. Most panels can be brought together between the palm and the fingers but if you find this difficult you might like to try using a strap (or an assistant).
Offline
#10 26 Oct 2011 11:44 am
- fairplay
- Member
- Registered: 16 Jun 2011
- Posts: 109
Re: ...second Pax 18 build...
...hi Paul, thank you for the quick reply...
...unfortunately the wire that causes the problems is about half the thickness of the other one...
...i'll try to make another photo which shows the difference...
...i understand what you're explaining regarding how to work with the wires correctly, and i think i am using it the right way; nevertheless, even when tightening the wire with my fingers only, as soon as there is any pressure on the wire, it starts cutting into the wood...using any tool with the thinner wire causes it to break...
...as you say you're intentionally using thinner wire sometimes for projects that demand smaller drill-holes, i will understand this as a challenge to make the thinner wire work, to be able to make even smaller holes with the next project - which might not be the Oxford Shell as i was hoping (for myself), but rather the Kaholo SUP the children are asking for now ![]() ...
...
'...so, how many kayaks do you really need?...' - '...one more!...'
Offline
#11 26 Oct 2011 11:57 am
- Paul
- Employee
- From: Gatebeck Cumbria
- Registered: 4 Aug 2011
- Posts: 134
Re: ...second Pax 18 build...
You could try putting tape across the joint to hold it - this often works.
If it is springing as much as this maybe it is the rocker not forming. I can see that you have the boat supported at the extreme ends but I wonder if it would help to put a weight in the centre of the boat? I cannot guarantee this but it maybe a worth a try.
Offline
#12 26 Oct 2011 1:58 pm
- fairplay
- Member
- Registered: 16 Jun 2011
- Posts: 109
Re: ...second Pax 18 build...
You would try putting tape across the joint to hold it - this often works.
...thank you for that suggestion - actually, this was the next thing is was going to try ![]() ...
...
If it is springing as much as this maybe it is the rocker not forming.
...no real problem there - it is forming very nicely (photo to follow)...
...not sure that the picture shows the difference clear enough:
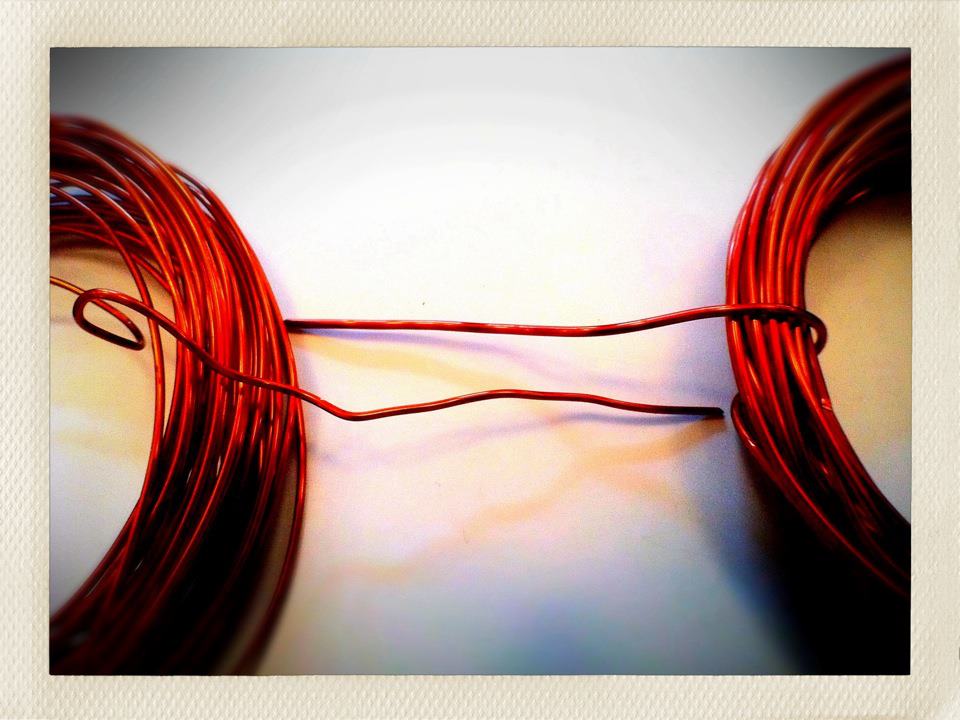
[just in case you need a confirmation: the thinner wire is the one on the left]
'...so, how many kayaks do you really need?...' - '...one more!...'
Offline
#13 26 Oct 2011 9:31 pm
- fairplay
- Member
- Registered: 16 Jun 2011
- Posts: 109
Re: ...second Pax 18 build...
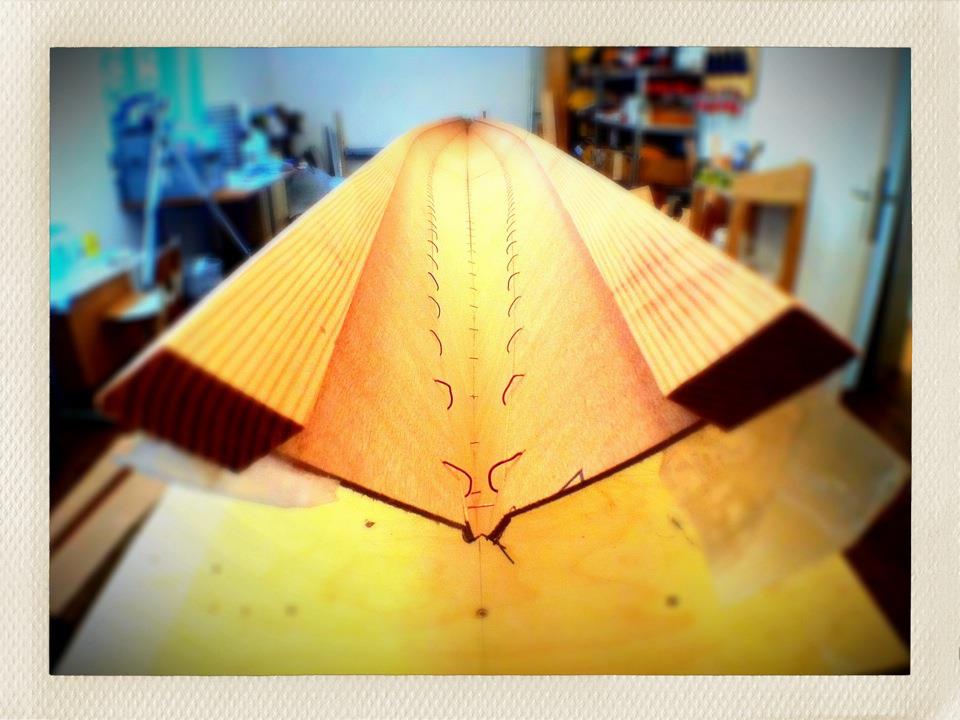
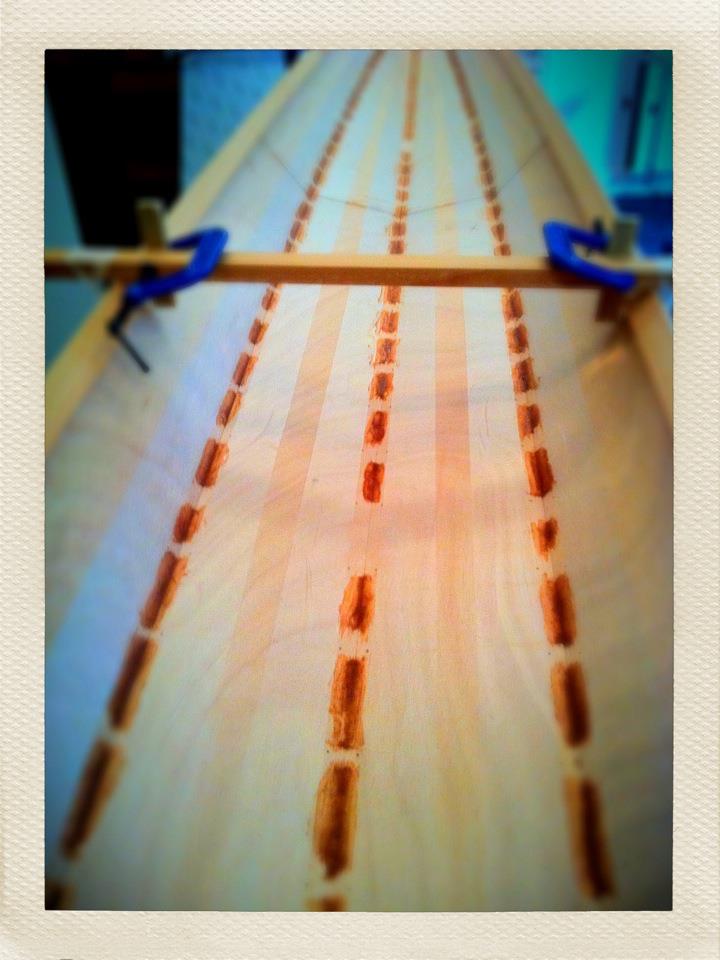
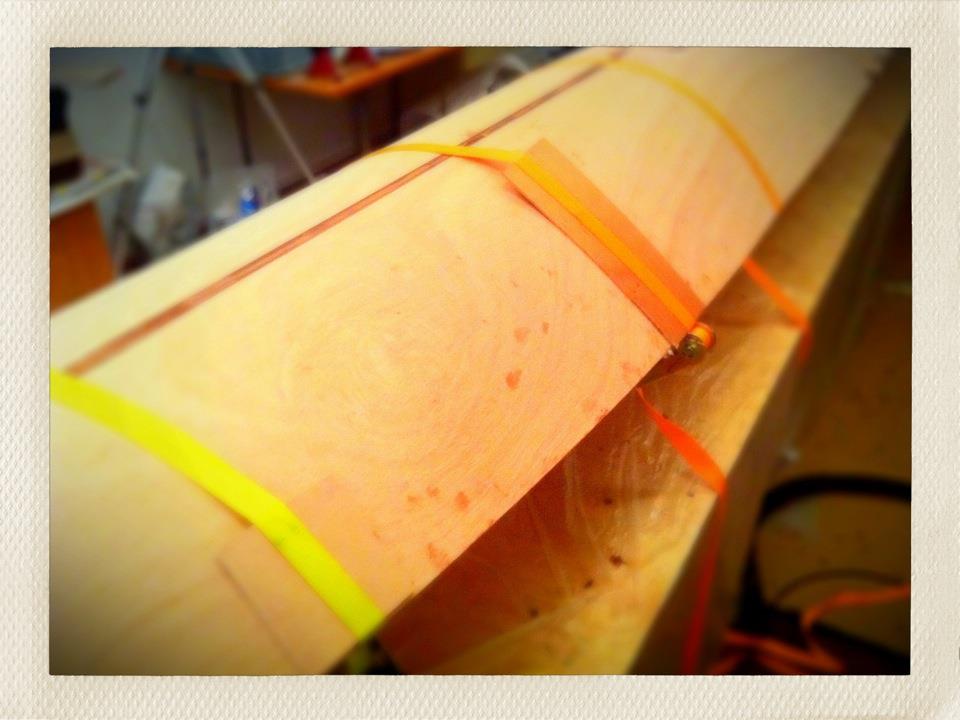
...ok, i have prepared the hull for the first 'tacking' with epoxy; the 'construction' short of the bow is to push the upper panel out a little to get a smooth outer-surface - as the bottom-panels are 4mm thick and the sidepanels have 3mm only there would otherwise be a little 'bump' where they come together:
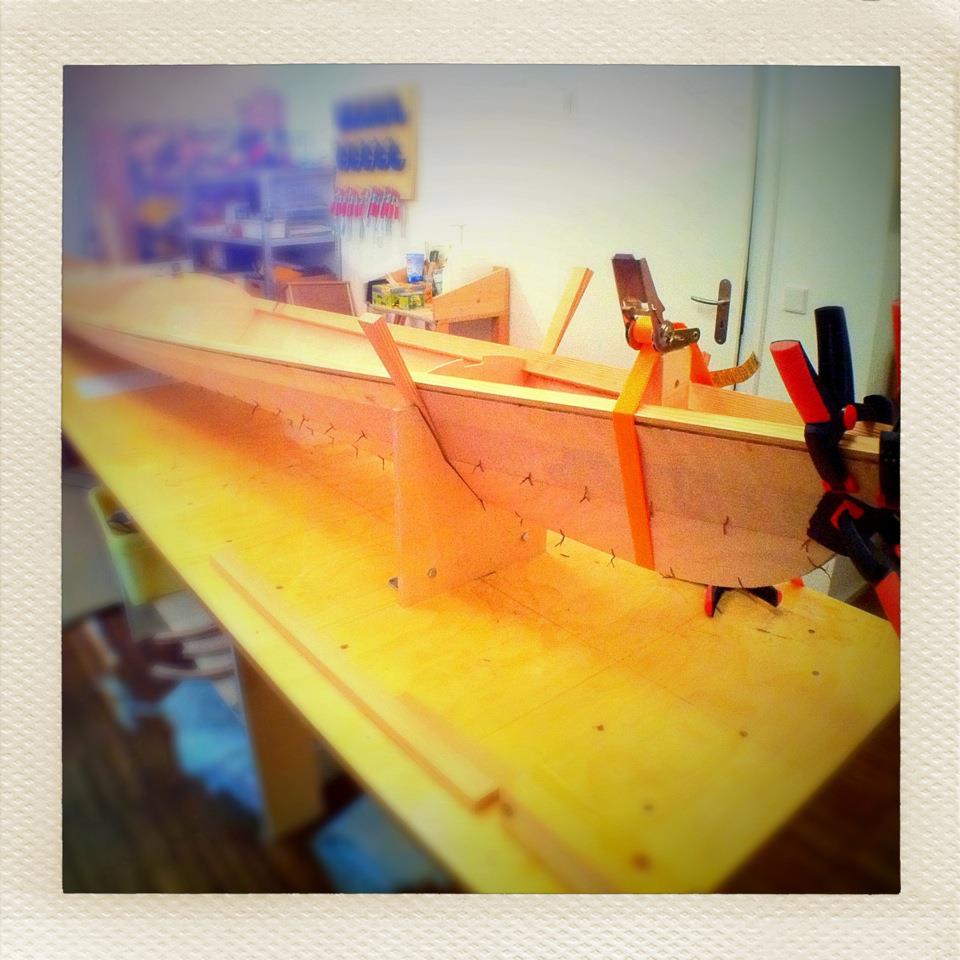
...as i plan to remove all the wires completly from the boat i just put a thin layer of epoxy inbetween the wires to tack the panels together; these epoxy spots will be covered after the next step - removing the wires and the bulkheads- with a layer of epoxy that runs from bow to stern:
Last edited by fairplay (26 Oct 2011 9:32 pm)
'...so, how many kayaks do you really need?...' - '...one more!...'
Offline
#14 27 Oct 2011 12:57 pm
- fairplay
- Member
- Registered: 16 Jun 2011
- Posts: 109
Re: ...second Pax 18 build...
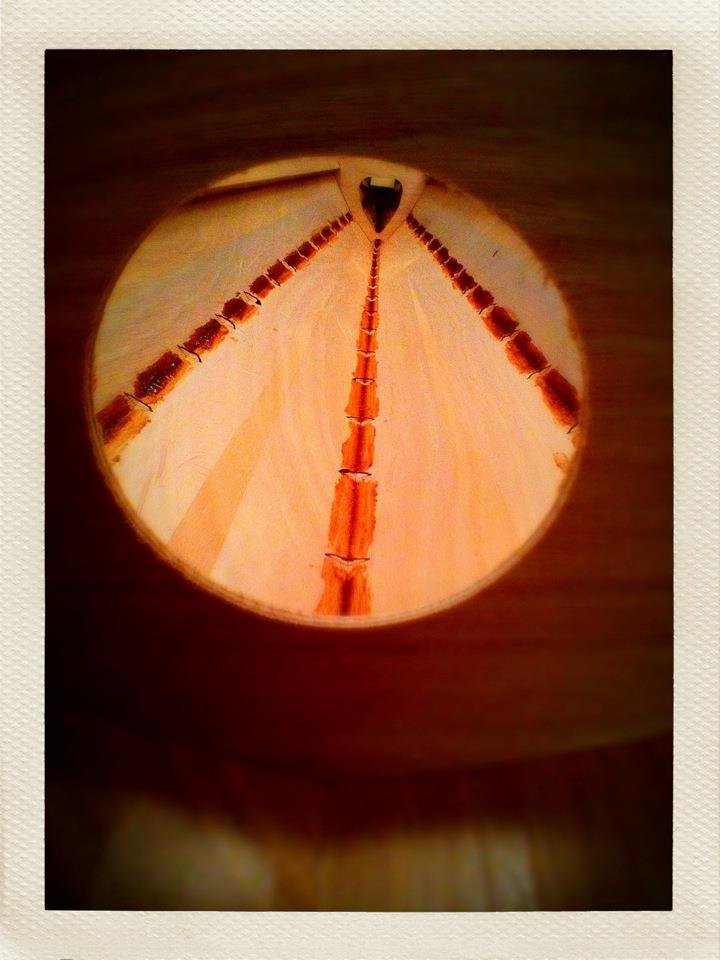
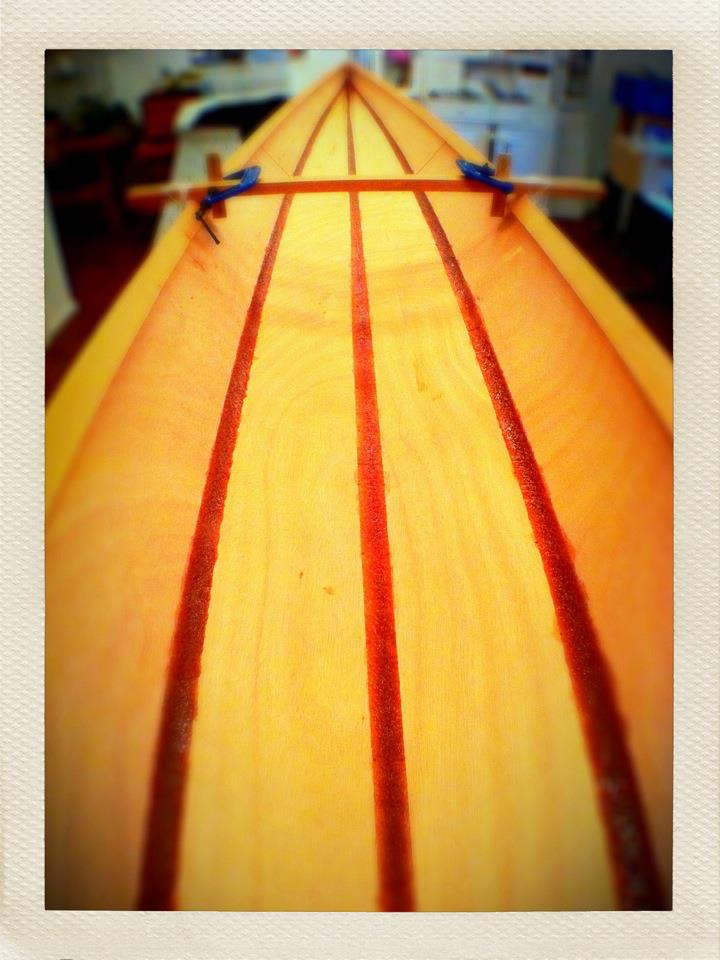
...took the wires out now - not before making one last photo showing how the thin wire cut into the wood ![]() :
:
...in preparation for the expoy-filets and filling the drill-holes with epoxy i also covered the holes with tape on the outside of the hull; as i took out the bulheads i inserted a spacer at the correct position that gives the hull an exact width of 54,6cm from outside to outside:
'...so, how many kayaks do you really need?...' - '...one more!...'
Offline
#15 27 Oct 2011 4:42 pm
- fairplay
- Member
- Registered: 16 Jun 2011
- Posts: 109
Re: ...second Pax 18 build...
...this is the last step i am able to complete in the first week building a (second) Pax:
'...so, how many kayaks do you really need?...' - '...one more!...'
Offline
#16 3 Nov 2011 5:35 pm
- fairplay
- Member
- Registered: 16 Jun 2011
- Posts: 109
Re: ...second Pax 18 build...
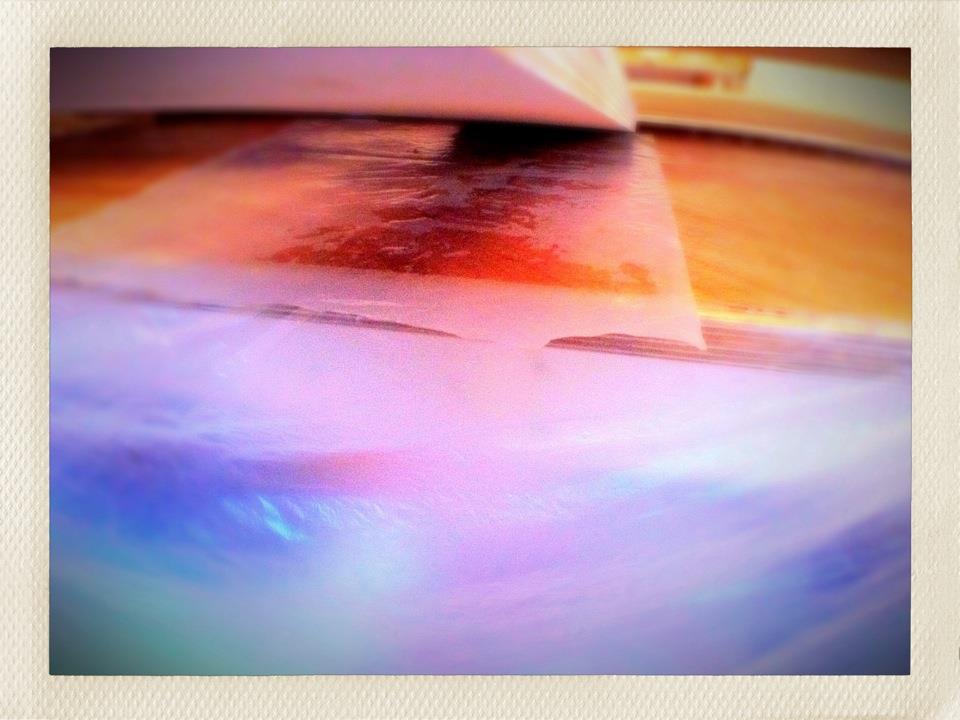
...still on a detour from the original instructions - this morning i laid the glass inside and put on the first of two layers of epoxy (the photo being made during application)...now i am waiting for about eight hours to pass so i can put on the second layer of epoxy:
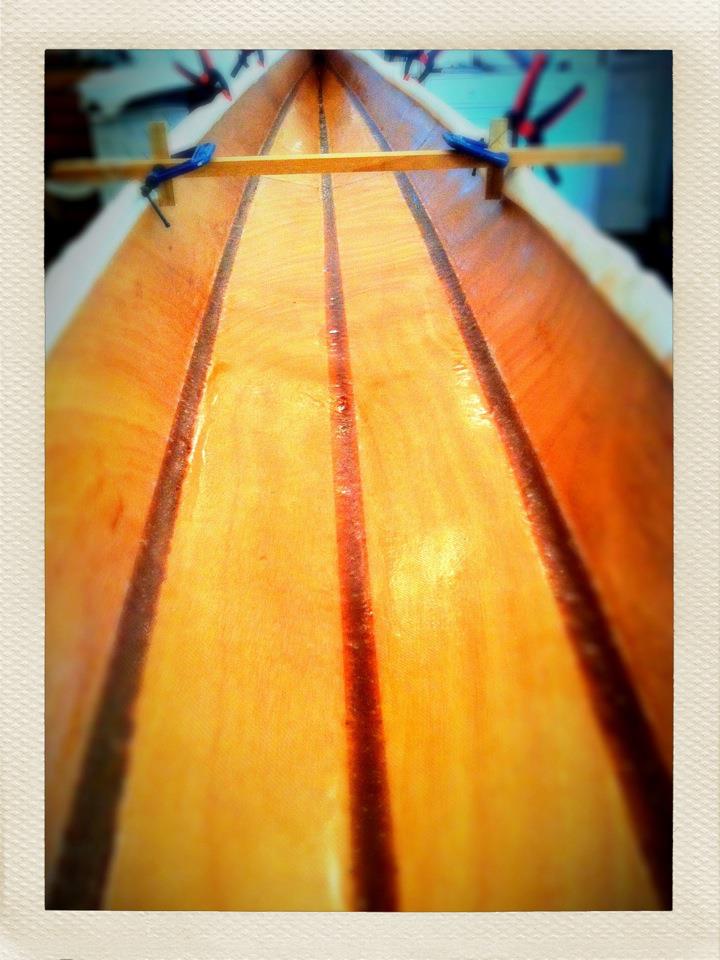
...the spacer is about mid-boat, btw. - so almost the whole inside is visible on the photo...the lens is again distorting a little...
...this time i used a lot less epoxy compared to the first build in this step...all in all i needed a little less than twentytwo pump strokes of epoxy-mixture for the inside...
'...so, how many kayaks do you really need?...' - '...one more!...'
Offline
#17 4 Nov 2011 6:35 pm
- fairplay
- Member
- Registered: 16 Jun 2011
- Posts: 109
Re: ...second Pax 18 build...
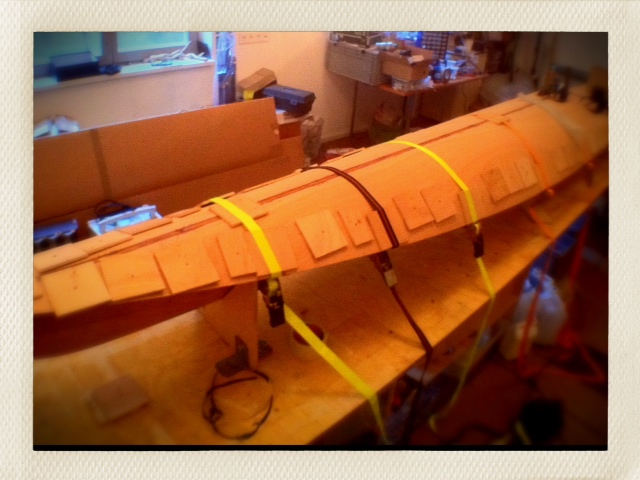
...had a little time to install the bulkheads today:

'...so, how many kayaks do you really need?...' - '...one more!...'
Offline
#18 6 Nov 2011 10:51 pm
- fairplay
- Member
- Registered: 16 Jun 2011
- Posts: 109
Re: ...second Pax 18 build...
...had a chance to work a little this weekend...
...did the outer-hull-filetting and sanding:

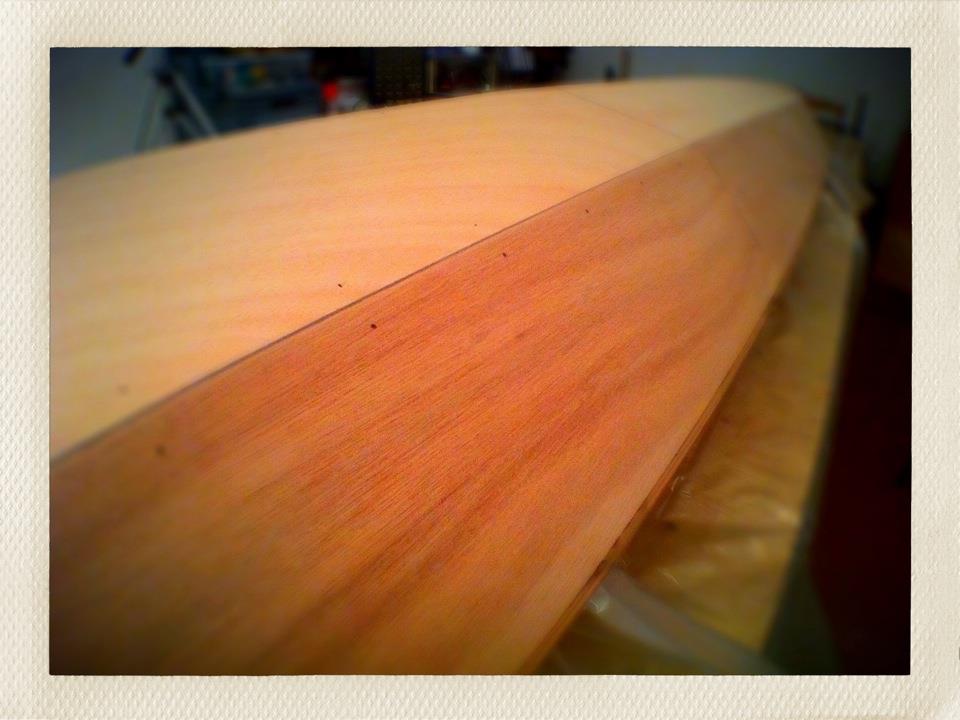
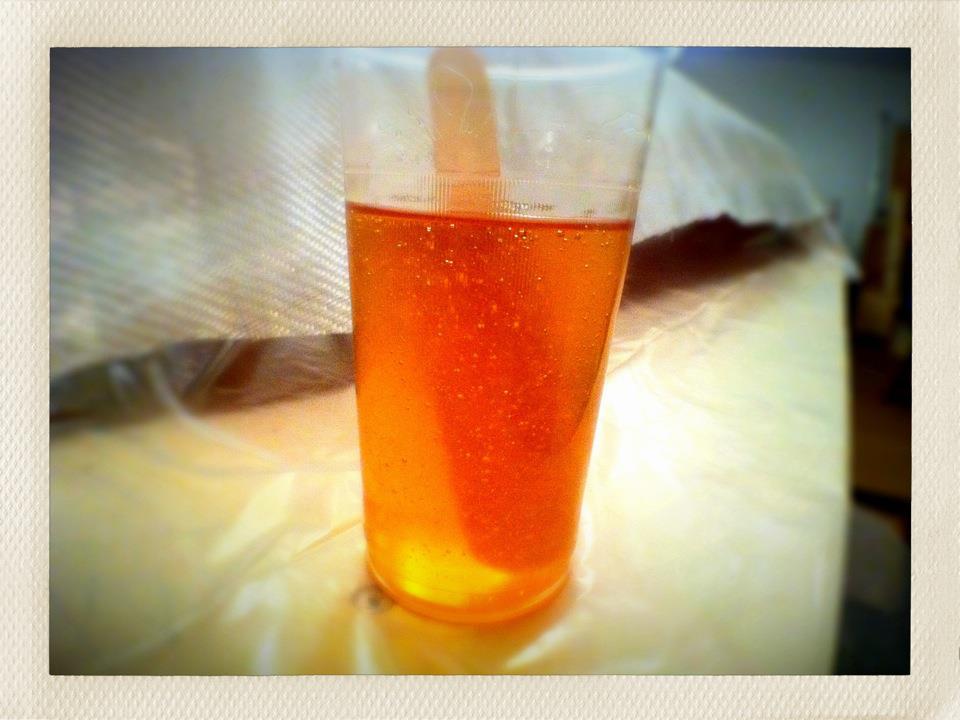
...after cleaning the dust and preparing the workspace put on the glass:
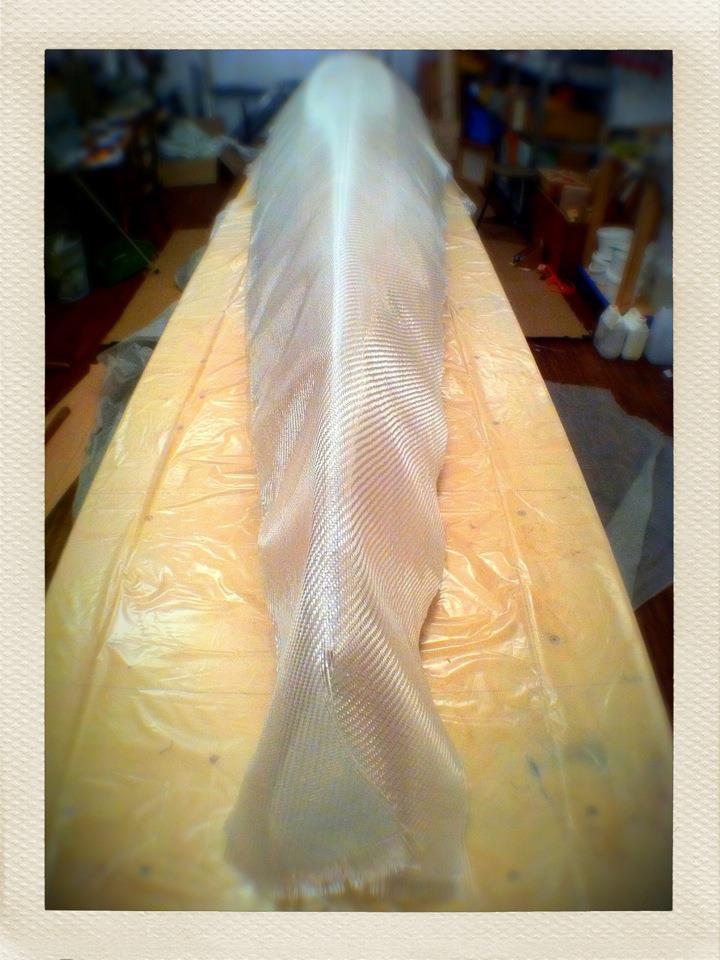
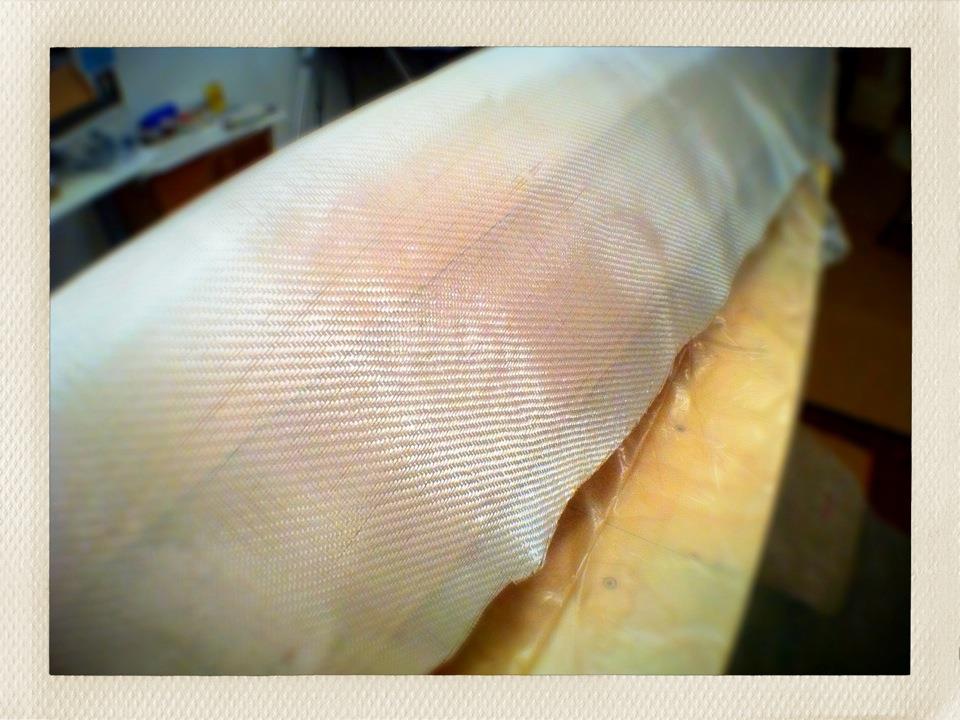
...to wet the whole surface i needed three of these:
...and after scraping of again half of the above the surface looks like this:
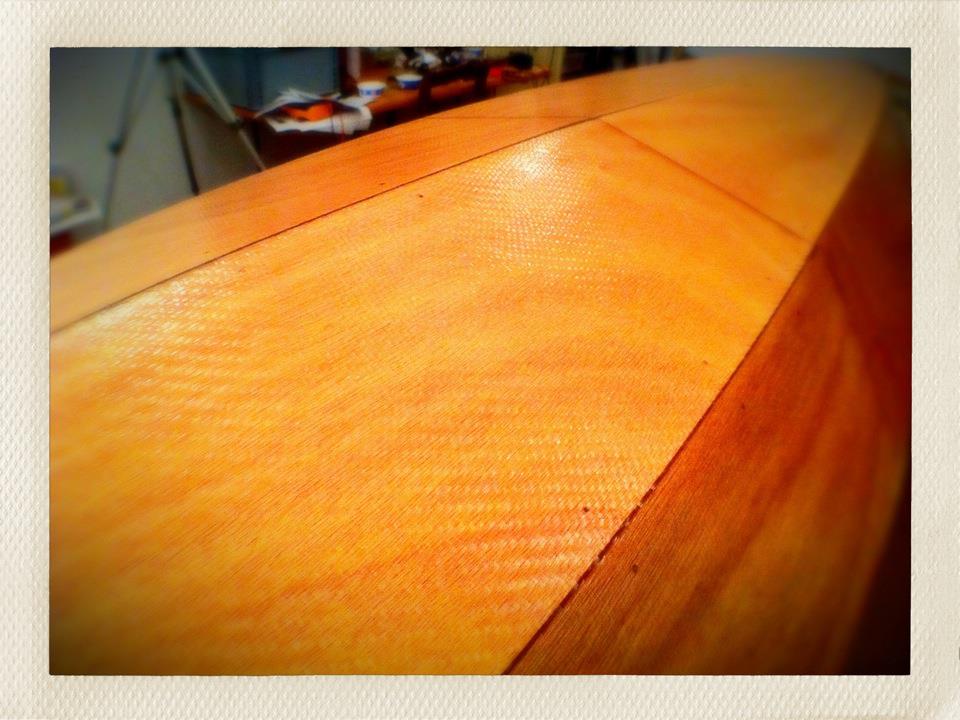
...hope to manage to get on another layer of epoxy tomorrow morning (within 8 hours of first application)...
'...so, how many kayaks do you really need?...' - '...one more!...'
Offline
#19 8 Nov 2011 5:12 pm
- fairplay
- Member
- Registered: 16 Jun 2011
- Posts: 109
Re: ...second Pax 18 build...
...three layers of epoxy outside: done √ ...
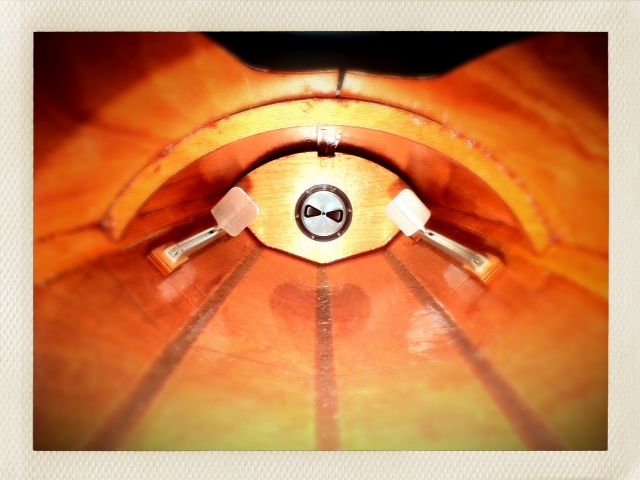
...next is the small stuff inside like the deckbeam, the wooden tabs on the bulkheads, the footrests and first epoxy on the bulkheads:
(...yes, there is still too much epoxy inside - but not as much as it looks like on the photo...)
...now i wonder if i really need to put wooden plugs (as a replacement for the screw that i am not using - as i do not want to have anything going through the hull) to stabilze the connection between the deckbeam and the shearclamp, or if the screws mentioned in the manual are just meant to be used during the mounting of the deckbeam?...
...planing ahead i think about not using staples this time to glue the deck-halves to the kingplanks, but to put only weights where the two meet...weights should be able to exercise enough pressure...it might just not prevent the pieces sliding apart...tape might help prevent the sliding, though...
...i would really like to avoid the little holes in the deck caused by the staples...
'...so, how many kayaks do you really need?...' - '...one more!...'
Offline
#20 9 Nov 2011 8:33 pm
- jerryferry
- Member
- Registered: 13 Jun 2011
- Posts: 18
Re: ...second Pax 18 build...
Love the idea of doing things different from the book. This is what boat building is all about I have heard of peolpe using tape no wire
Lifelong Angler ![]()
Offline
#21 31 Jan 2012 9:42 am
- fairplay
- Member
- Registered: 16 Jun 2011
- Posts: 109
Re: ...second Pax 18 build...
...december came - and went, without too much good happening to the Pax...
...i was able to glue the decks without using staples...after everything dried nicely i went ahead to glue the decks onto the lower hull...while the rear part worked out very nicely i had a huge problem with the forward-deck...
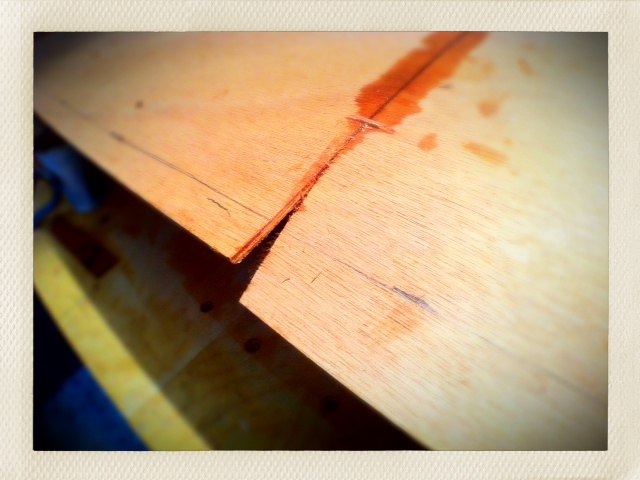
...when pulling it to bend it i heard a strong <crack>ing noise and saw the the deck had ripped along the strap:
...after i had re-assembled my thinking to follow a straight line ![]() i scraped off all the epoxy from the hull and from the lower side of the deck, thereafter washing everything with laquer-thinner to get off as much of the stuff as possible, in the hope to be able to repair the deck somehow the next day and use it again...
i scraped off all the epoxy from the hull and from the lower side of the deck, thereafter washing everything with laquer-thinner to get off as much of the stuff as possible, in the hope to be able to repair the deck somehow the next day and use it again...
...the next day i tried to glue the break using stripes of glass and epoxy so i would be able to bend the deck again and not being hindered by the stiffened glass:

...when the epoxy started to kick i bent the deck so the epoxy would harden with the-bent-built-in:
...from the inside it didn't look too bad...
...however, after the expoy had hardened and i could have a closer/better look at the whole thing i had to admit that the repair wasn't nice at all and would never do justice to such a nice boat...
...so, at the moment i am waiting for a set of replacement-panels that Fyne kindly provides...in the meantime i started with the twin Wood Duck 12 build...
'...so, how many kayaks do you really need?...' - '...one more!...'
Offline
#22 22 Jul 2012 9:23 pm
- fairplay
- Member
- Registered: 16 Jun 2011
- Posts: 109
Re: ...second Pax 18 build...
...yeah! - managed to put on the new deck today - without any any cracks (yet)...photos to follow...
'...so, how many kayaks do you really need?...' - '...one more!...'
Offline
#23 24 Jul 2012 8:47 pm
- fairplay
- Member
- Registered: 16 Jun 2011
- Posts: 109
Re: ...second Pax 18 build...
...ooops!...
...ok, there was no crack but we heard a distinct plopp when driving the screws through the deck into the shearclamp - after we had pulled it down to fit...
...and i think i now do know why the first deck of the second Pax had cracked, as there is a huge gap between the new deck - which is perfectly resting on the deckbeam - and the forward bulkhead!...
...i think this is what happened: during my first Pax-build i somewhat complained about the deckbeam being too short to fit into the hull; in response Fyne did change the size of the deckbeam a little, which now results in it having a different (higher) curvature and which in turn results in the deck resting only on two points: the boats-tip and the deckbeam...the bulkhead ends up about 3 centimeters below the deck...
...so when i installed the first deck on the second Pax the screw i had driven through the deck into the bulkhead excerted a lot of downward-bending force onto the deck - and as the screw held its place in the bulkhead the pressure caused the deck to rip; this time the screw - luckily just popped out of the bulkhead...
...on a side-note there is also a cosmetic problem now where the aft deck (which was glued a couple of weeks ago) and the forward deck meet...i'll have to think about how to gracefully hide that step...
'...so, how many kayaks do you really need?...' - '...one more!...'
Offline
#24 4 Aug 2012 10:53 am
- fairplay
- Member
- Registered: 16 Jun 2011
- Posts: 109
Re: ...second Pax 18 build...
... <BANG!> ...<sigh>...
...i really start to hate the sound of the wood breaking apart...
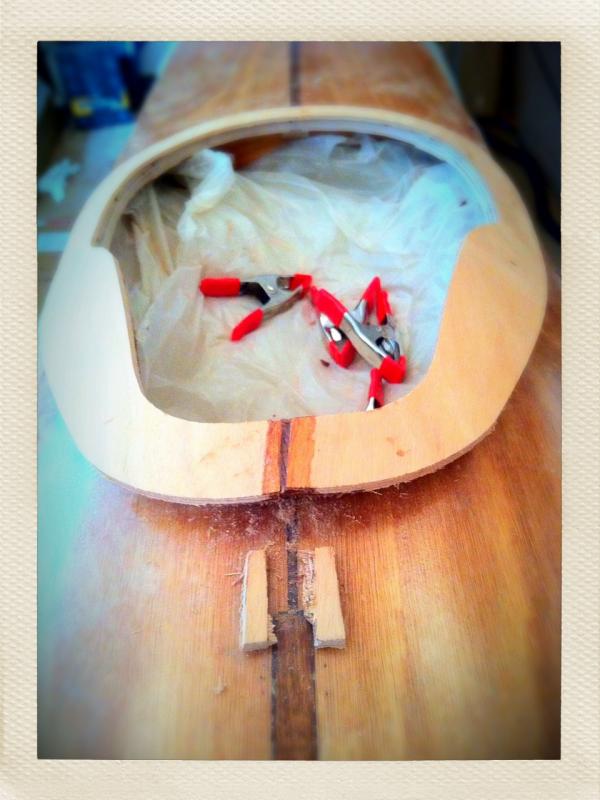
...when i installed the coaming on top of the rim it became very obvious that it would not fit - at all...there was extreme tension on the wood and it threw a wave when i applied the last couple of clamps...
...and then there was that <bang>-sound i had heard before when installing the first deck...the coaming had ripped apart...
...as i was about to install the last two clamps i just took out a small saw and made clean cuts where the break had happened and installed the last two clamps - not feeling really happy about it...
...the too large deckbeam is really a problem concerning everything that is connected to the forward deck...as the curvature of the cockpit differs also, the pre-cut single parts do not fit anymore...really unfortunate - for the look of the cockpit - is, that i have a difference of about two mm of inner-overlap between the left and right side, which will most probably just make the cockpit not look nice and symmetrical when i sand the coaming flush with the inner rim ![]() ...
...
...photos to follow...
'...so, how many kayaks do you really need?...' - '...one more!...'
Offline
#25 4 Aug 2012 12:10 pm
- fairplay
- Member
- Registered: 16 Jun 2011
- Posts: 109
Re: ...second Pax 18 build...
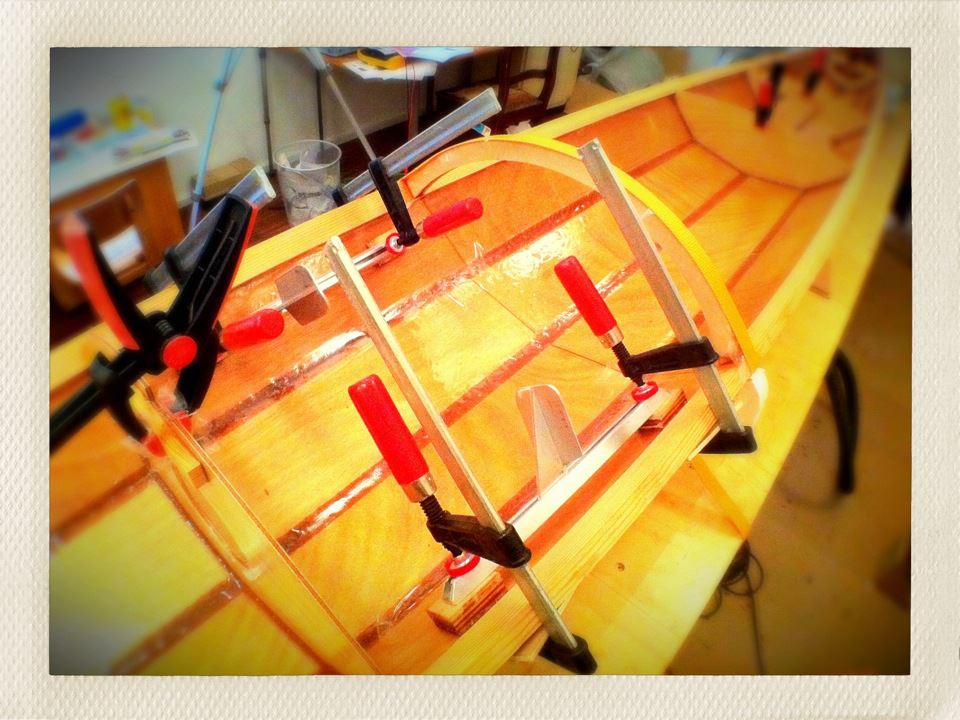
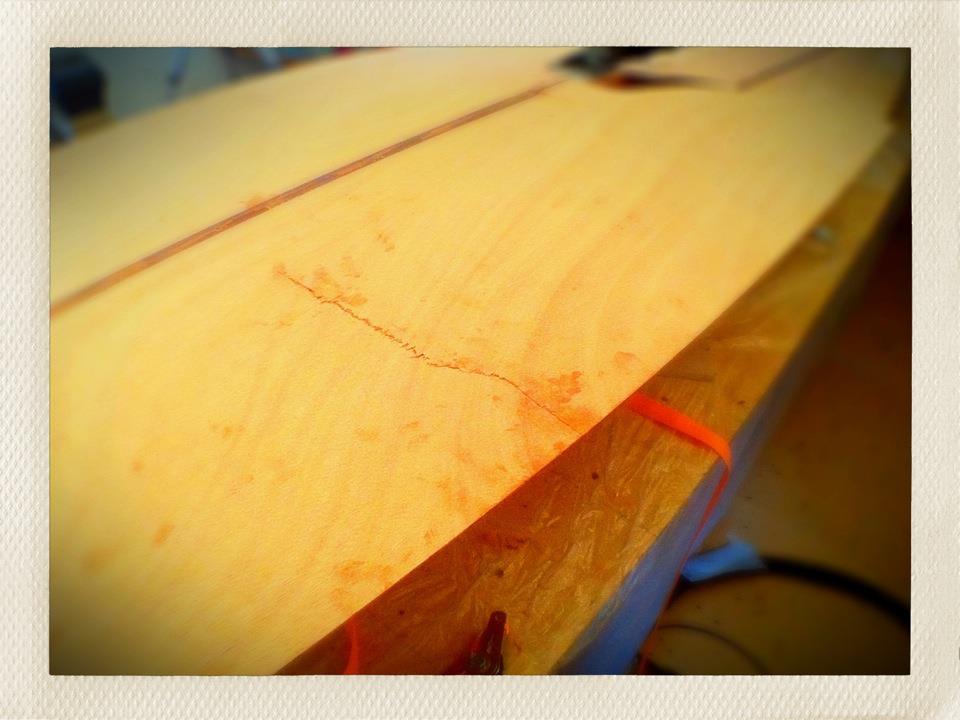
...so, here are the photos:
...glueing the rim went pretty easy:
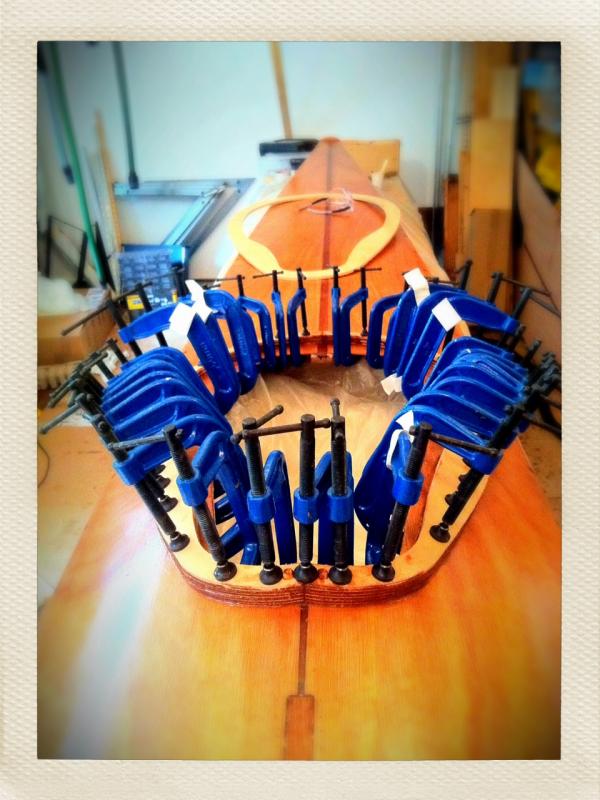
...at the same time i used the already mixed epoxy to glue the forward and aft end-caps:
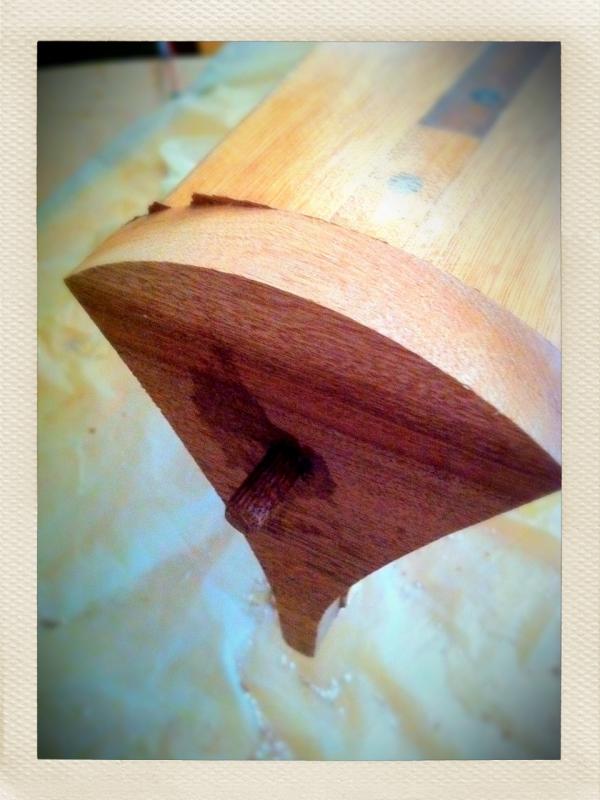
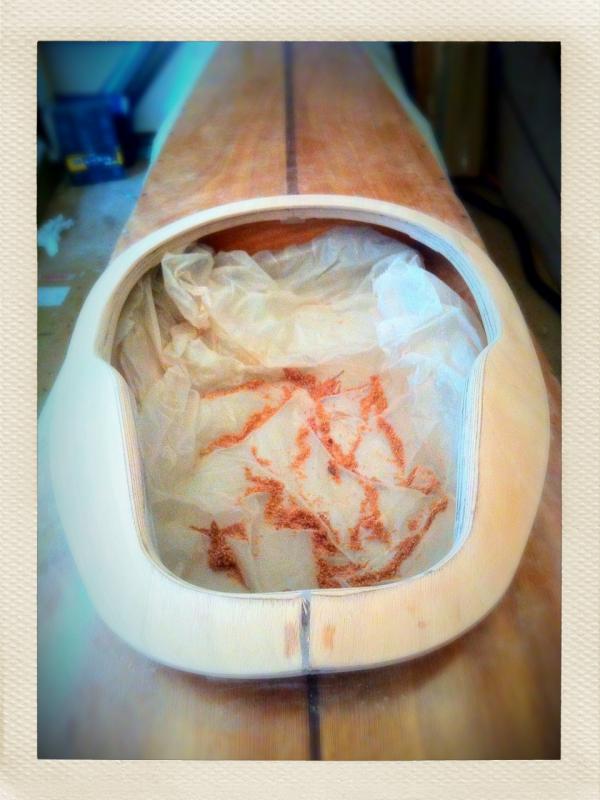
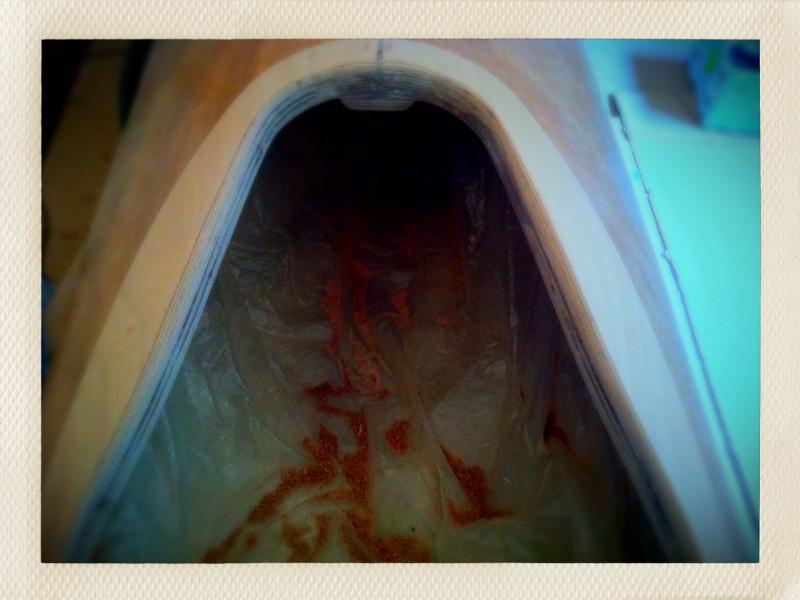
...this is the unfortunate coaming after the epoxy had cured:
...and the coaming after it had been treated with a router and some sand-paper:
'...so, how many kayaks do you really need?...' - '...one more!...'
Offline