You are not logged in.
- Topics: Active | Unanswered
#1 2 Nov 2020 12:48 pm
- teejay
- Member
- Registered: 26 Oct 2020
- Posts: 66
Building a 12' Wood Duck Hybrid
I’ve just started work on building a 12’ Wood Duck Hybrid and thought keeping a record of the build would be fun and hopefully of some interest and help to others particularly since I’ve enjoyed looking at other build logs - finding them inspiring and daunting at the same time.
I’m coming at this project as a novice in terms of boat building but with a long background of sailing, kayaking and canoeing behind me. I’ve needed to buy a fair bit of kit and tools to get started since this is a project on a different scale from what I’ve attempted previously.
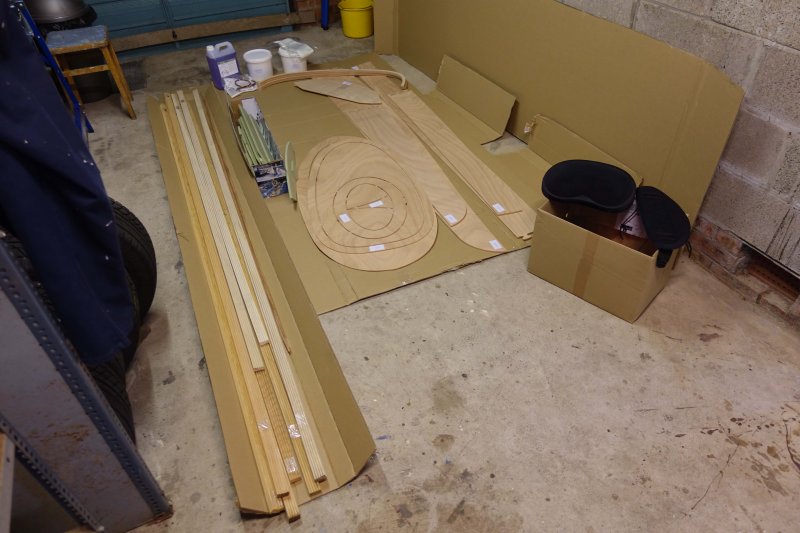
The kit arrived in 3 boxes - and, to my relief, fitted the space I had in the garage - which had been a significant consideration in terms of the kit chosen - really helpful to have the advice on this on the website and the extra information on tools and worktops in the manual.
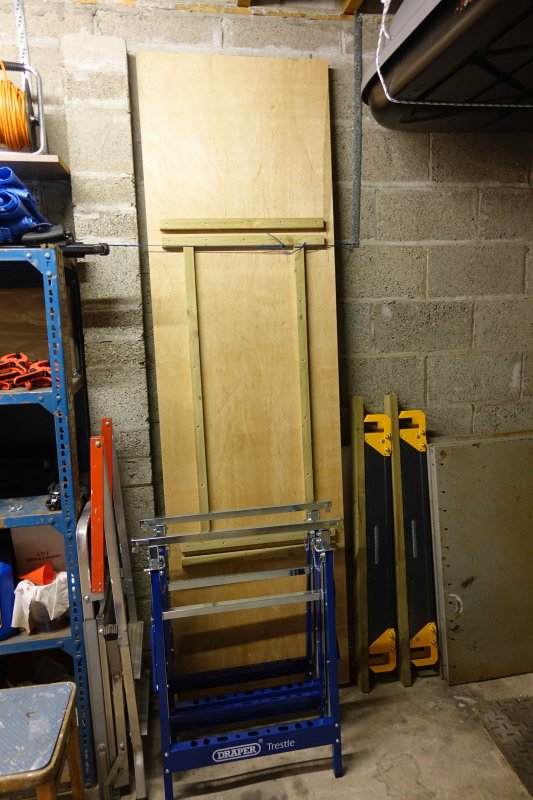
The 1st picture shows the fold-away worktop and saw-horses/supports that I’ll be using. It would have been cheaper but more complex and bulky to build my own trestles as space is at a premium in my single garage. Storing the wood needs some thought and care - I have enough space in the roof of the garage to store it flat but it took a bit of time to sort it out so I could access it easily.
Offline
#2 2 Nov 2020 12:55 pm
- teejay
- Member
- Registered: 26 Oct 2020
- Posts: 66
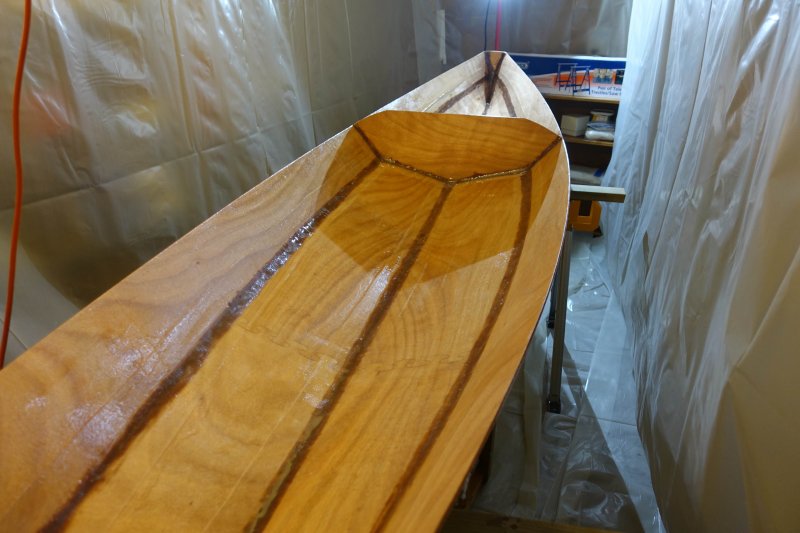
Re: Building a 12' Wood Duck Hybrid
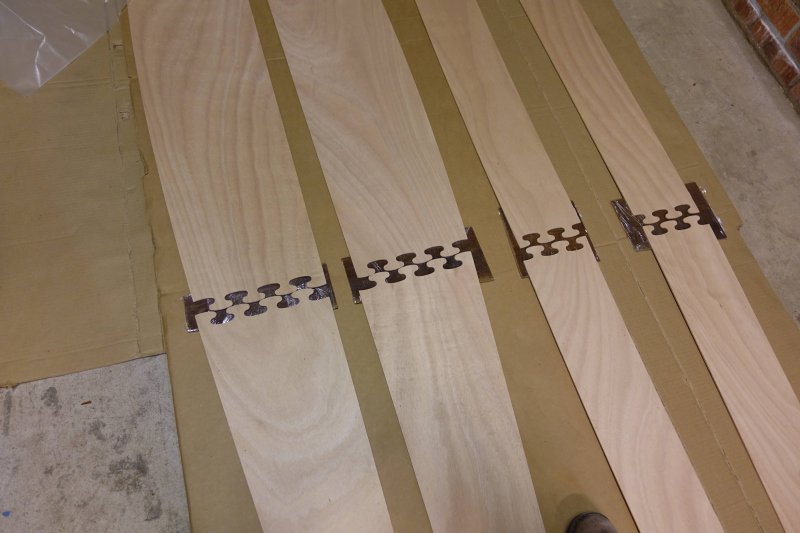
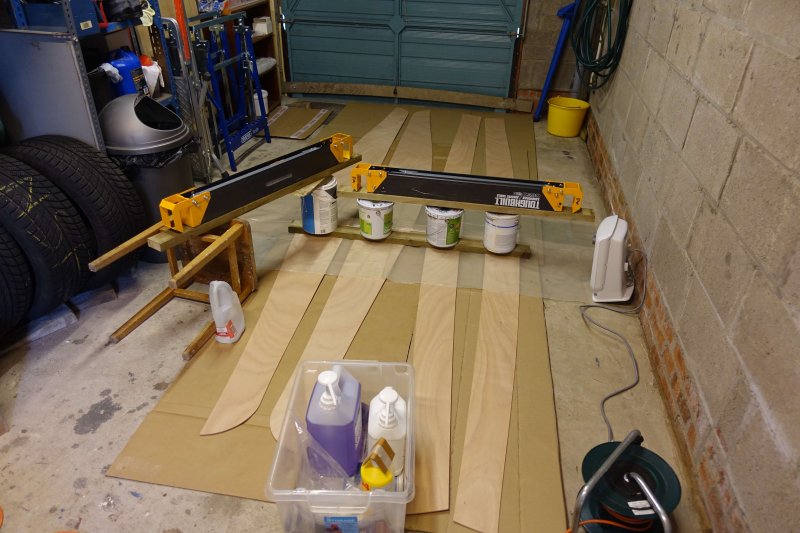
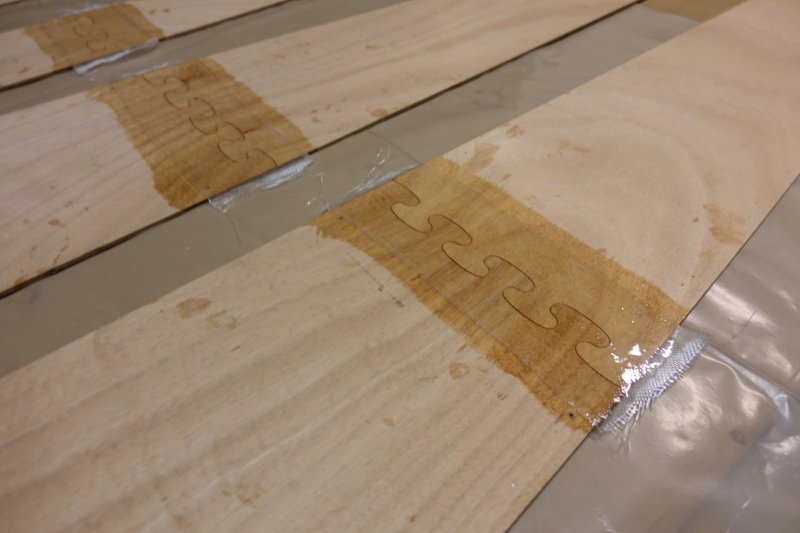
I used the cardboard boxes used to transport the kit as a floor covering to counteract the cold concrete of the garage floor and supported the joins with thin sheets of plastic covered plywood so I could place weights to ensure the join would be flush. I spent some time choosing which sides of the joined wood would be the outside and which the inside as I'm hoping to finish the hull with a varnished finish. I went a bit more slowly than the manual states with the epoxy - completing the join in 3 stages - the initial join and then 2 coats of epoxy over the webbing to give a smoother finish.
Offline
#3 2 Nov 2020 2:58 pm
- spclark
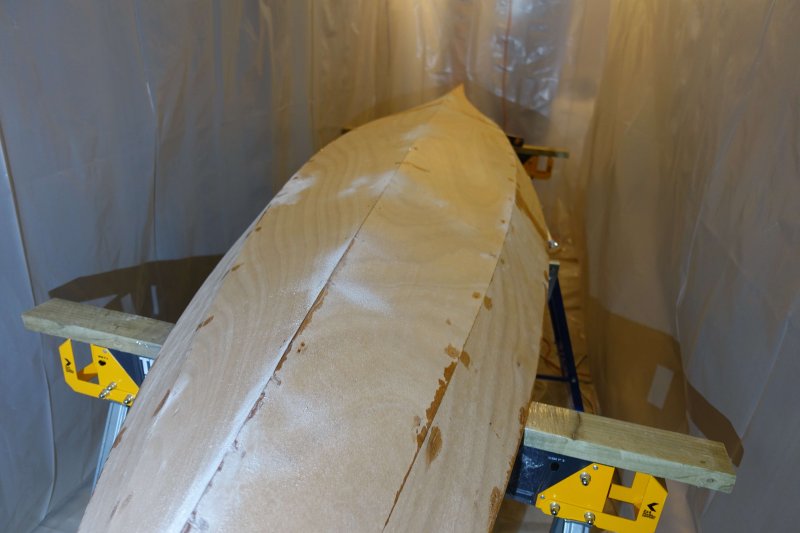
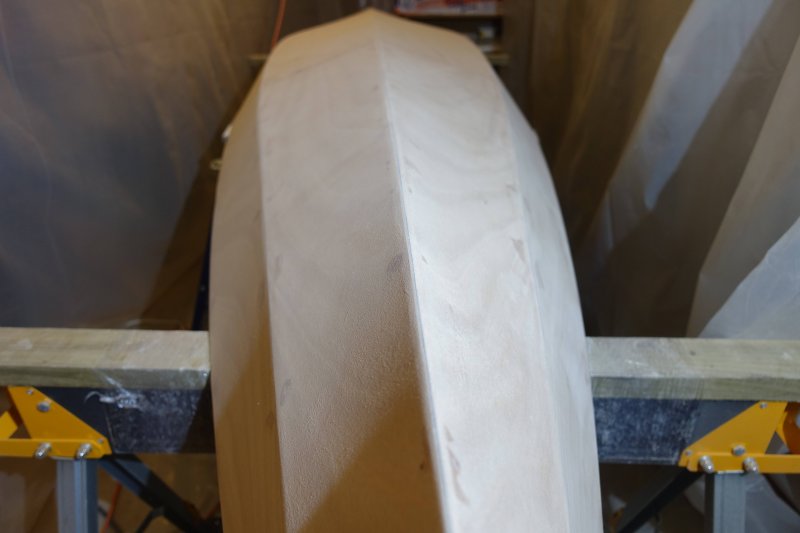
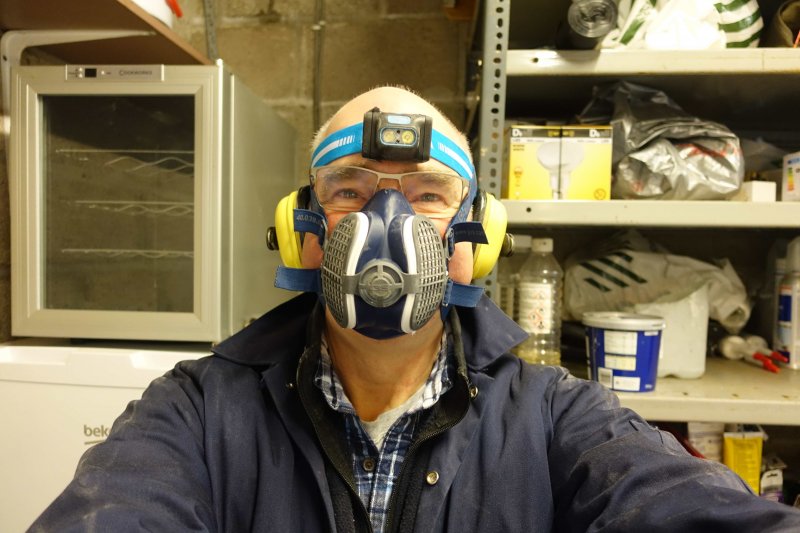
- Member
- From: "Driftless" Wisconsin USA
- Registered: 19 Mar 2020
- Posts: 478
Re: Building a 12' Wood Duck Hybrid
Good start Teejay! You put a lot of thought into planning for your new build!
I did too with the Waterlust canoe kit I fell head over heels for when it was announced back some four years now. You can read more of that saga in that epic thread elsewhere here.
I’ve been aware of the forum at CLC here in the States for several years. If you’re not yet you should acquaint yourself with it too!
There’ve been some Wood Duck threads over issues builders have encountered that have given them pause. My thinking is that perhaps the insights expressed by other builders may help you as well!
Last edited by spclark (2 Nov 2020 3:00 pm)
Offline
#4 2 Nov 2020 3:42 pm
- Curlew
- Member
- From: nr Skipton, N Yorks
- Registered: 8 May 2020
- Posts: 51
Re: Building a 12' Wood Duck Hybrid
Nice pics.
I am a bit jealous; I remember that stage when everything has arrived and is all nicely neat and organised. My Shearwater hybrid kit arrived right at the start of the first lockdown, and I completed it more or less as it ended.
Very thorough technique but don't forget you are going to have several coats of epoxy/glass over the joints later when you do the hull. I certainly never had issues with them being visible at a later stage.
With the weather turning cold I hope you have a way of heating the garage rather than just that fan heater. My build in the spring made me realise that all the wood and epoxy elements must be thoroughly warm and at a stable temp ie probably heated overnight before applying resin/glass. This prevents outgassing and helps with keeping the resin at the right consistency. I made the mistake of warming the epoxy only, then erecting a warm 'tent' after applying.
Not an issue with puzzle joints, or thickened epoxy tasks, but might be with the big jobs.
I'll keep checking your thread; I'm no expert but my cock-ups remain fresh in the memory!
Bruce
PS Have you seen the Jason Eke videos of him building a Shearwater Hybrid? Helped me a lot and a fair bit will still apply to your hybrid kit. That and the manual were my constant companions. Link below to the first of the series
https://www.youtube.com/watch?v=O3FBamD … dex=1&t=4s
Last edited by Curlew (2 Nov 2020 3:46 pm)
Offline
#5 2 Nov 2020 4:17 pm
- teejay
- Member
- Registered: 26 Oct 2020
- Posts: 66
Re: Building a 12' Wood Duck Hybrid
Thanks Bruce and Driftless
I've been reading your logs and posts - very timely and very helpful - and I'm working on the heating in the garage - the tent idea had already occurred to me but you've raised my incentive levels to do that + wait for a warmer spell(!?) before tackling the bigger epoxy work. There's no rush and it's good to just take it slowly - if spreading the anxiety about the next stage over time doesn't diminish it - just maybe gets a bit easier to bear with pause for thought.
Thanks for the encouragement and help
Tim
Offline
#6 15 Nov 2020 5:23 pm
- teejay
- Member
- Registered: 26 Oct 2020
- Posts: 66
Re: Building a 12' Wood Duck Hybrid
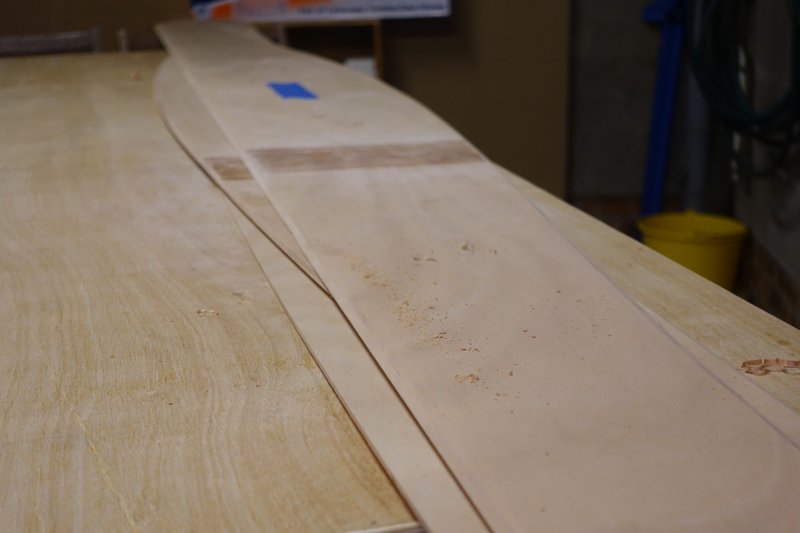
Beveling the edges of the panels was something I wasn’t looking forward to as I’ve not used a plane much. However after a few try-outs on old pieces of plywood, and following the advice to keep the plane blade sharpened regularly it seemed to go fairly smoothly.
I was apprehensive that I’d bevel the wrong edges given that I was focusing on my novice planing technique - so I wrote directions to myself on masking tape to remind me which edge was which and how much of a bevel was needed - mildly OTT but it was helpful.
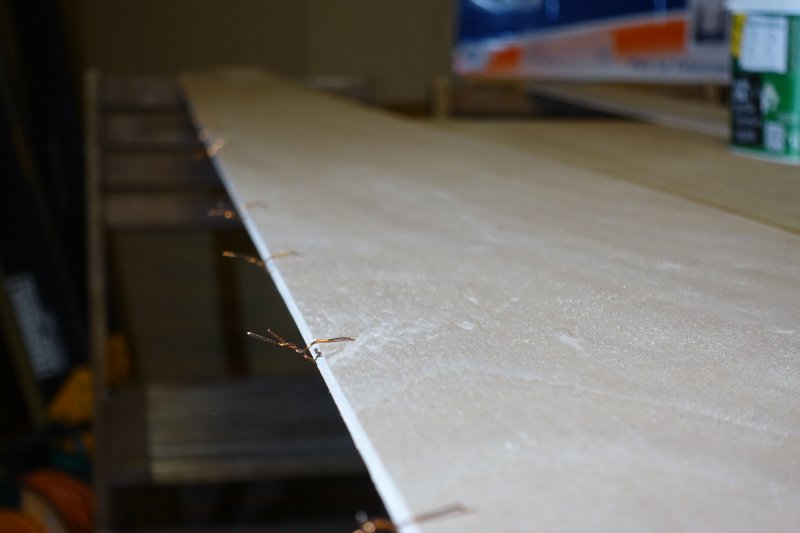
Cutting the wires into lengths was pretty relaxing in comparison, although when I started wiring my first edge I was glad I’d made 3” pieces rather than the 2”-3” pieces suggested - although the suggestion in the manual to pull all the slack through makes it easier to twist off the ends loosely.
Last edited by teejay (15 Nov 2020 5:28 pm)
Offline
#7 15 Nov 2020 5:34 pm
- teejay
- Member
- Registered: 26 Oct 2020
- Posts: 66
Re: Building a 12' Wood Duck Hybrid
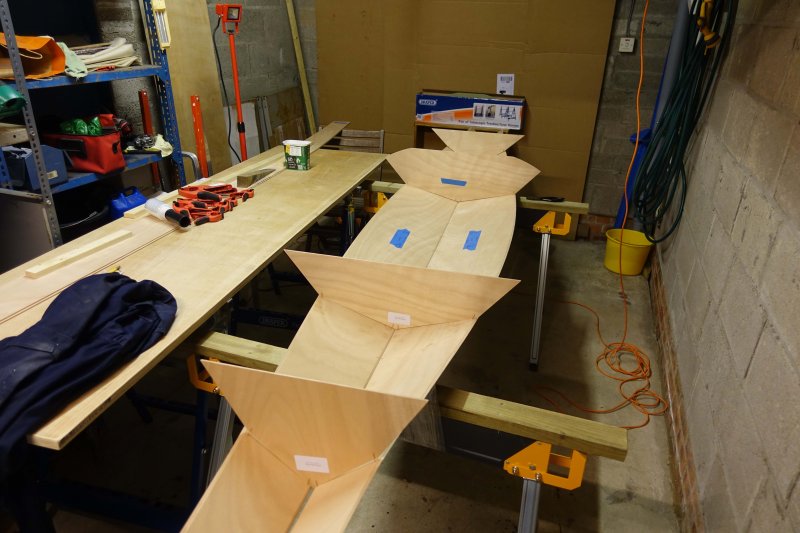
Next step = opening up the 2 bottom panels and fitting the bulkheads. In some ways this is pretty straightforward but really rewarding in terms of actually seeing the kayak taking shape. One unsettling moment was caused by 2 of the temporary forms having been wrongly named causing me to think I’d got everything upside down or inside out - but reference to the manual quickly sorted the confusion and I was back on track.
I’ve found the advice given in the manual, on the various blogs and on Jason Eke’s videos really helpful (https://www.youtube.com/watch?v=O3FBamD … gW&index=1) - my advice would be to check out each step a few times before actually doing it for real and stop before you lose concentration and don’t rush it.
Having got the bulkhead and forms fitted I then got the hull well supported on the stands before attempting to pull the bow and stern into shape. This bit is anxiety provoking as I’d been focusing on keeping the panels flat and dry up to this point and now there’s a need to really bend the wood. The advice to wet the panels first seemed to help a great deal - I did this, very thoroughly, at least a couple of times and went gradually. Along with many others I added holes for additional wires. The other thing that occurred to me was to use some fairly thick rope which I could wind round the bow and stern to pull the sides together. Others have used straps but the multiple turns seemed to work really well in spreading the load and the thick rope meant that I wasn’t digging into the top edge of the panels too much.
Otherwise I’ve been trying to guard against any twist in the hull form as I would expect that would only cause issues further down the line. Now I’m looking forward to getting the side panels wired on but I’ll give the bottom panels a chance to get used to their new shape.
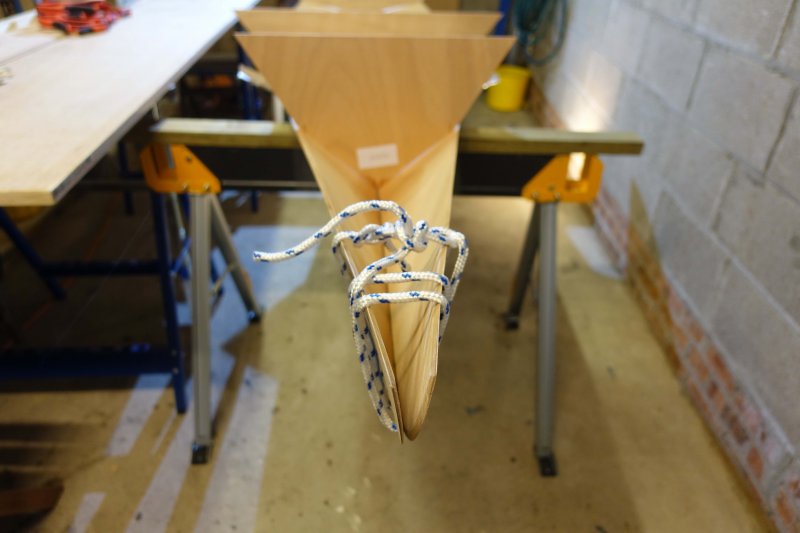
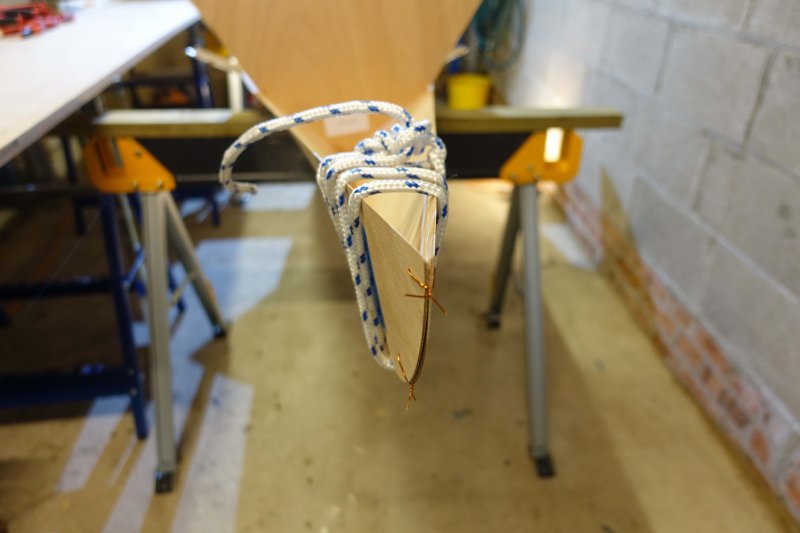
Offline
#8 16 Nov 2020 6:23 pm
- Jmac58
- Member
- Registered: 7 May 2020
- Posts: 77
Re: Building a 12' Wood Duck Hybrid
Hi Tejay. Great to see your progress. All looks very neat. I have just built the same as a first build so will be watching with great interest! Any problems, please shout as the manual only goes so far. Fyne also very helpful. Building the deck around the forms and fixing to the hull without any sheer plank is the most challenging part. Wishing you the best. James (Jmac58)
Offline
#9 17 Nov 2020 5:34 pm
- teejay
- Member
- Registered: 26 Oct 2020
- Posts: 66
Re: Building a 12' Wood Duck Hybrid
Thanks James. I've been following your progress which you recorded through the build carefully - so thanks + for all the pictures and tips on your blog. I got a bit further today with the side panels. Once again giving the wood a good wetting and letting it soak in made progress much easier. However I ran into a concern with the transom as it seemed to extend much further down into the bottom panels than the manual suggests. However both your blog and an earlier one suggested it was meant to be the size it is and I've got it placed - if the whole boat now needs tightened up and made neater - especially the stern!
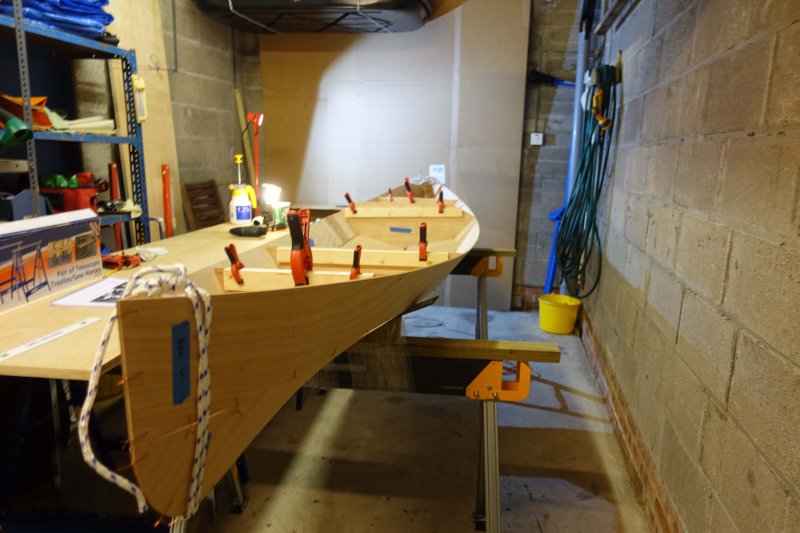
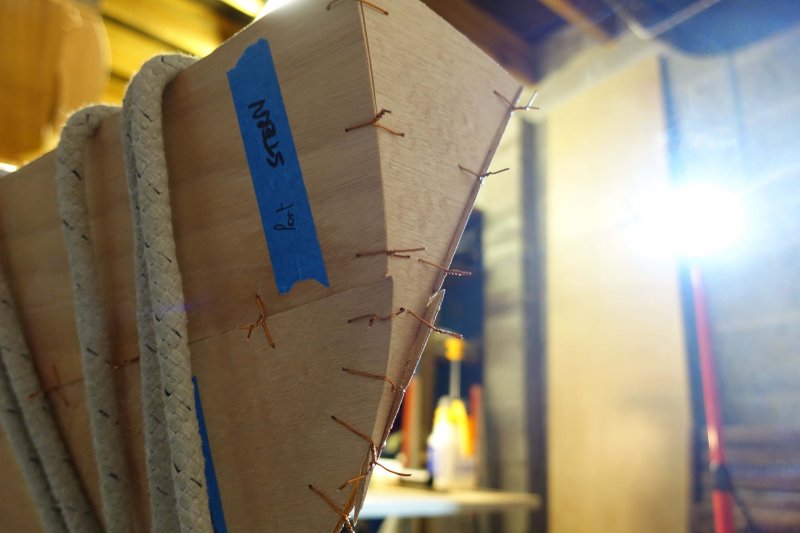
Offline
#10 18 Nov 2020 6:58 pm
- Jmac58
- Member
- Registered: 7 May 2020
- Posts: 77
Re: Building a 12' Wood Duck Hybrid
Hi Teejay. I wedged some blocks of wood behind the transom to push the panel out to fit the sides. Quite fiddly but worth persevering. Best. J
Offline
#11 22 Nov 2020 9:17 am
- Curlew
- Member
- From: nr Skipton, N Yorks
- Registered: 8 May 2020
- Posts: 51
Re: Building a 12' Wood Duck Hybrid
Looks OK. Your kit requires more twist and curve than my longer panels so it clearly takes more time and tension. Make sure any temporary wedges don't get in the way of tack welding and I would not add too many more holes or it will be also hard not to trap some of the copper-although I'm not sure that is such a big deal. I painted my hull so you could not see the ones I left behind!
You can get quite a bit of movement when you tighten up but be careful, the stitch can tear the hole slightly if you do too much. Maybe up to a couple of millimetres irregularity on the panel fit is also going to be easily smoothed out and hidden when you apply glass etc so it does not have to be absolutely perfect.
Don't forget to check the whole thing is true side to side and fore and aft before tack welding. It is probably a tribute to the kit construction that although I obsessed about checking this (a twisted kayak is probably a bugger to paddle) mine was absolutely perfect without any fettling.
Once tack welded the whole is amazingly solid by the way. It then looks like maybe you can build a boat after all!
The labelling is a good idea. I spent my first morning stitching the side panels together with the keel panels above them and wondering why it looked a bit odd!
Last edited by Curlew (22 Nov 2020 9:18 am)
Offline
#12 23 Nov 2020 5:05 pm
- teejay
- Member
- Registered: 26 Oct 2020
- Posts: 66
Re: Building a 12' Wood Duck Hybrid
Thanks Bruce
I've tried to get the balance right as you describe and like you I've not had to tweak the boat as it seems to have aligned itself perfectly.
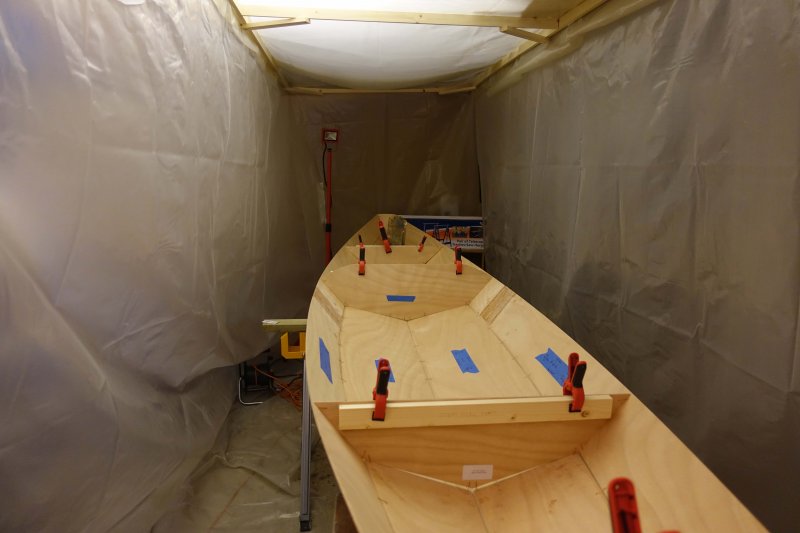
Been busy with constructing a tent around the boat ready for the epoxy work - thanks for the heads up on that.
What with all this the build is certainly proving a great way of keeping going through grim times!
Tim
Offline
#13 23 Nov 2020 6:30 pm
- Curlew
- Member
- From: nr Skipton, N Yorks
- Registered: 8 May 2020
- Posts: 51
Re: Building a 12' Wood Duck Hybrid
Top tent!
Grim times maybe but had a two hour paddle in winter sunshine today, chasing kingfishers along the bank. I have a canal outside my front door and it has been a fantastic escape this year when more exotic trips have been off the menu.
Bruce
Offline
#14 27 Nov 2020 4:30 pm
- teejay
- Member
- Registered: 26 Oct 2020
- Posts: 66
Re: Building a 12' Wood Duck Hybrid
Thanks to the tent I've been able to make progress - I can now be confident it's warm enough for epoxy work.
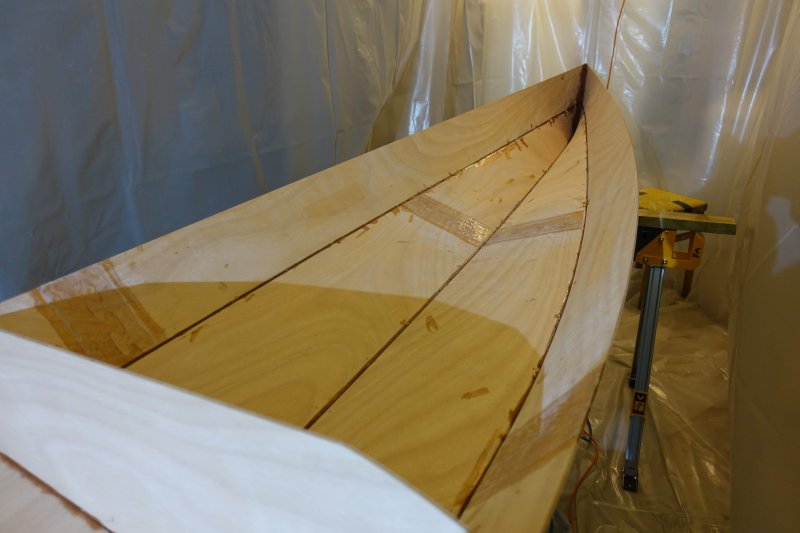
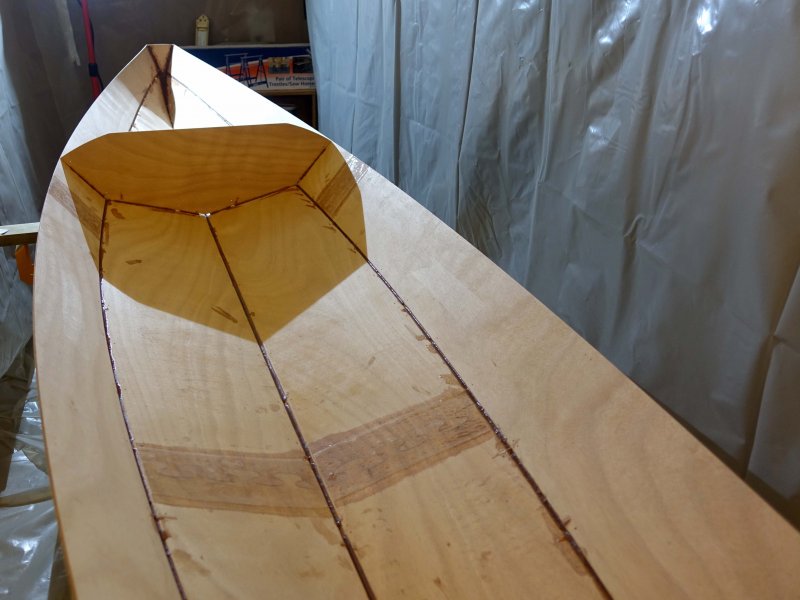
My tack welding mix was slightly too runny so a number of wires got epoxy on them - but the trick in the manual to heat the wire to remove them works really well - if it takes a bit to get up the nerve to do so. A wee while ago I was soaking the boat - now I've been setting it alight! In reality the wire heats up so fast that a couple of seconds heat is enough to loosen it and then a pair of pliers and out it comes.
Really good to have got rid of the wire - hoping to get the fillets and tape on over the next few days.
Tim
Offline
#15 28 Nov 2020 3:17 pm
- Curlew
- Member
- From: nr Skipton, N Yorks
- Registered: 8 May 2020
- Posts: 51
Re: Building a 12' Wood Duck Hybrid
Looks good. Get the filleting mix nice and thick too.
How warm can you get it inside the tent?
Offline
#16 29 Nov 2020 2:06 pm
- teejay
- Member
- Registered: 26 Oct 2020
- Posts: 66
Re: Building a 12' Wood Duck Hybrid
Thanks Bruce - the advice to go for smooth peanut butter consistency looks about right.
The tent warms up easily to 19 degrees C / 66 degrees F independently of the weather outside the garage - which is a big improvement on trying to heat the garage itself. The plastic and wood should be reusable too.
Tim
Offline
#17 3 Dec 2020 7:09 pm
- Jmac58
- Member
- Registered: 7 May 2020
- Posts: 77
Re: Building a 12' Wood Duck Hybrid
Looking very good Tim. Tent a masterpiece! I used masking tape for the fileting - recommend removing while still tacky. Best. James
Offline
#18 14 Dec 2020 5:17 pm
- teejay
- Member
- Registered: 26 Oct 2020
- Posts: 66
Re: Building a 12' Wood Duck Hybrid
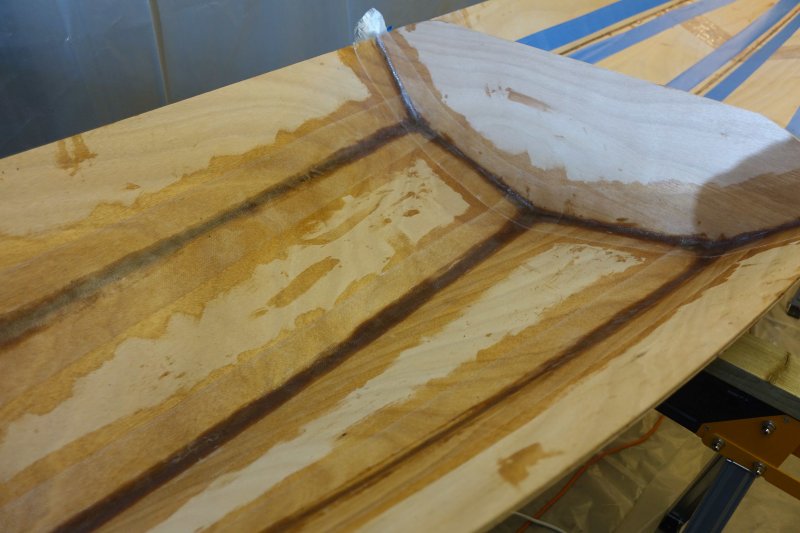
I've been working away at the interior of the hull. I split the task of filleting the joints and taping over 2 sessions - first of all tackling the rear 1/3rd of the boat behind the bulkhead to the stern - and then the fore 2/3rds in a longer session. I then went back and epoxy coated over everything later. This meant I kept the advantage of the chemical bonding between the fillet and tape but meant I wasn't stuck in the tent for too long as it does get a bit claustrophobic. I also managed to run into problems with the resin pump which was frustratingly disruptive - I found the valve at the end of the cylinder got pushed off when squeezing the resin out. This despite my best efforts to keep the resin warm - but Scotland in December isn't renowned for its warmth - so the 20 to 30 degrees C recommended is a challenge! Problems solved through superglueing the valve into the pump and weighing out the activator/resin mix (as suggested in the manual - good tip - knowing you've got the right mix is really reassuring once into covering large areas with epoxy) and judicious use of radiators and heaters.
Thanks for the masking tape tip - that's well worth doing - makes the job easy to keep neat.
Next to turn the boat over - looking forward to that.
Offline
#19 14 Dec 2020 10:44 pm
- Simpsonboater
- Member
- Registered: 26 Jun 2020
- Posts: 29
Re: Building a 12' Wood Duck Hybrid
I found a radiant pad for reptiles under the bottles and wrapped in bubble wrap kept the epoxy from going too thick.
Offline
#20 15 Dec 2020 12:35 pm
- teejay
- Member
- Registered: 26 Oct 2020
- Posts: 66
Re: Building a 12' Wood Duck Hybrid
Thanks Simpsonboater - that's a great suggestion.
I was worried a reptile warming pad be would be very hard to get hold of - but when I looked on-line it was easily ordered and not expensive to buy (or apparently run) - about the same cost as a set of kitchen scales which are also on the shopping list before I run the risk of getting our present scales sticky. Thanks so much - that should be really useful as we head into January/February.
Tim
Offline
#21 15 Dec 2020 4:48 pm
- Curlew
- Member
- From: nr Skipton, N Yorks
- Registered: 8 May 2020
- Posts: 51
Re: Building a 12' Wood Duck Hybrid
That looks good, and neater than mine for sure.
I broke the resin pump on the first day so from then on I always weighed my resin etc. Cost me a new set of digital kitchen scales when I'd finished but had no problems with my mixes.
Good luck getting everything warm. The key is everything warm and stable for a good time before you start the job. Don't worry too much after it is applied, I found even when the temperature dropped pretty low things still cured well enough overnight.
Bruce
Last edited by Curlew (15 Dec 2020 4:49 pm)
Offline
#22 15 Dec 2020 8:35 pm
- Simpsonboater
- Member
- Registered: 26 Jun 2020
- Posts: 29
Re: Building a 12' Wood Duck Hybrid
You can always dunk the jug of resin in a part filled bucket of warm water for bit too if you are careful not to contaminate it. That also worked for me post winter break to get things moving.
Offline
#23 26 Dec 2020 4:24 pm
- teejay
- Member
- Registered: 26 Oct 2020
- Posts: 66
Re: Building a 12' Wood Duck Hybrid
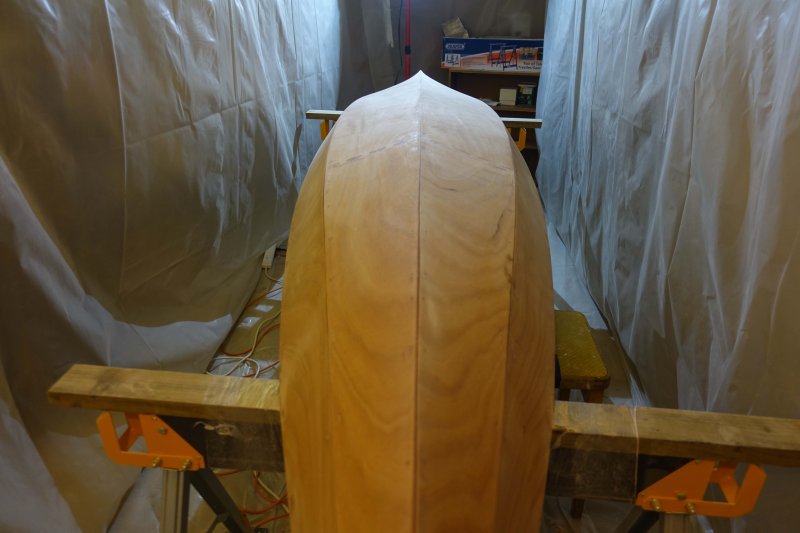
The orbital sander has been hard at work these last 2 weeks in between using the epoxy to fill holes and make sure everything is as smooth as I can get it - and the tent has been gradually filling up with dust that's going to need shifting before going any further. This is part of finding there are definite disadvantages to building in the winter in a single garage in terms of space, warmth and an ability to open doors but it's also fun to be working my way through the process and once tidied up I can get the hull sheathed.
Sadly the hull has one or two areas where the joins aren't as good/smooth as I might have hoped for but it's good enough and I'm ever more hopeful of the kayak's eventual capacity to float.
Offline
#24 30 Dec 2020 11:11 am
- Curlew
- Member
- From: nr Skipton, N Yorks
- Registered: 8 May 2020
- Posts: 51
Re: Building a 12' Wood Duck Hybrid
Those small gaps will fill with epoxy when you glass the hull, don't worry. I would not fill them now unless they are really a problem as you risk sanding through the outer layer of the ply-which is quite obvious later. The glass layer produces a nice smooth edge too. It is a pretty forgiving process. Just make sure no big voids are going to be made-which would be very unlikely
Definitely worth getting rid of the epoxy dust as you go. I did my epoxy sanding outside which was a great way to minimise exposure. Be pretty cold for that now!
Offline
#25 4 Jan 2021 6:21 pm
- teejay
- Member
- Registered: 26 Oct 2020
- Posts: 66
Re: Building a 12' Wood Duck Hybrid
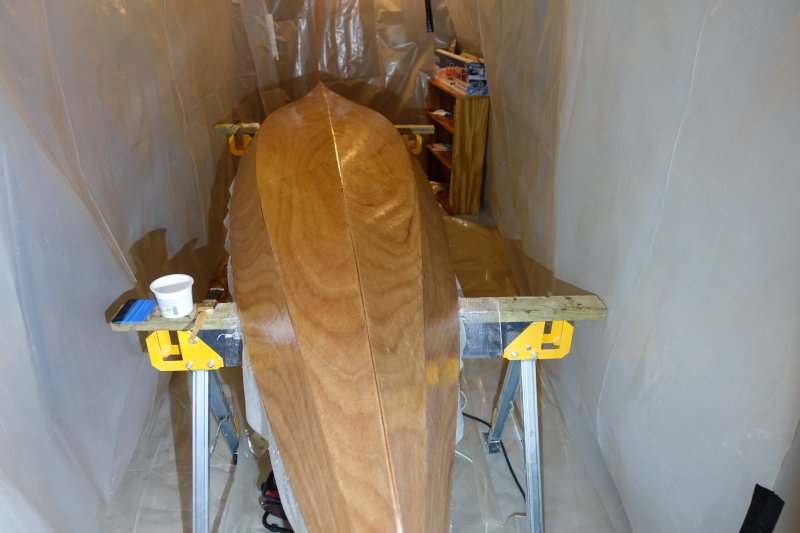
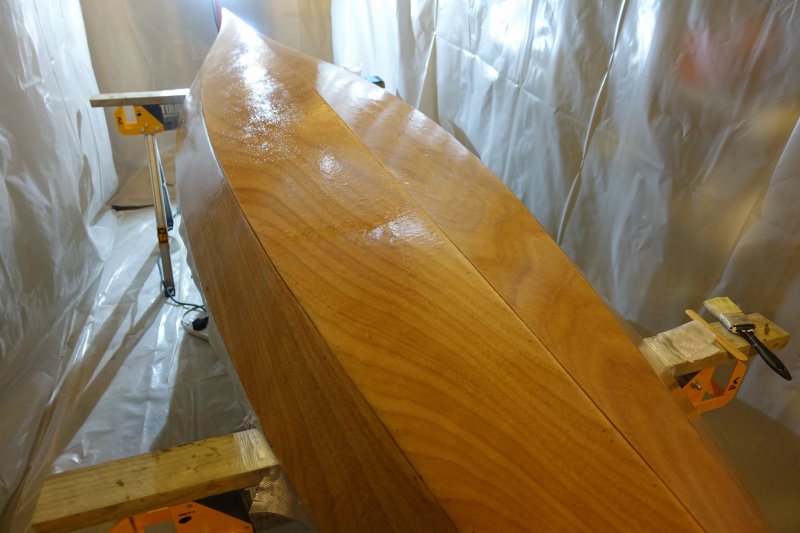
Well - I summoned my bravery - or my foolhardiness - yesterday as I felt I needed to keep making progress on the build to stave off the frustrations of the impending lockdown - and sheathed the hull with the glass fibre sheet and 2 coatings of epoxy.
Definite assets were the vivarium heater warming the epoxy to a good working temperature and the often repeated advice to weigh out the resin mix. Also - a squeegee really helps in getting the sheet on smoothly - another small investment that makes a big difference to making this task practical.
On the minus side I have found some "outgassing" occurred today despite trying to follow all the advice to avoid this - it's not much and almost certainly not enough to affect the strength of the boat but enough to push me towards accepting that I'm now heading towards a painted hull which is a bit disappointing but not a disaster. I've also got a few larger bubbles that need sorting and the ends definitely need some work but nothing more than I had anticipated. A few practical lessons learnt for later in the build but at least by then the weather should be a bit kinder.
So - ideally - build your kayak in better weather if you don't have a nice big heated workshop - but - given these strange times it's just good to be able to do something creative and constructive.
Offline
