A forum for discussing wooden boats and boat building
You are not logged in.
- Topics: Active | Unanswered
#1 11 Jul 2020 11:30 pm
- Fiona
- Member
- Registered: 22 May 2020
- Posts: 20
Oxford Shell II
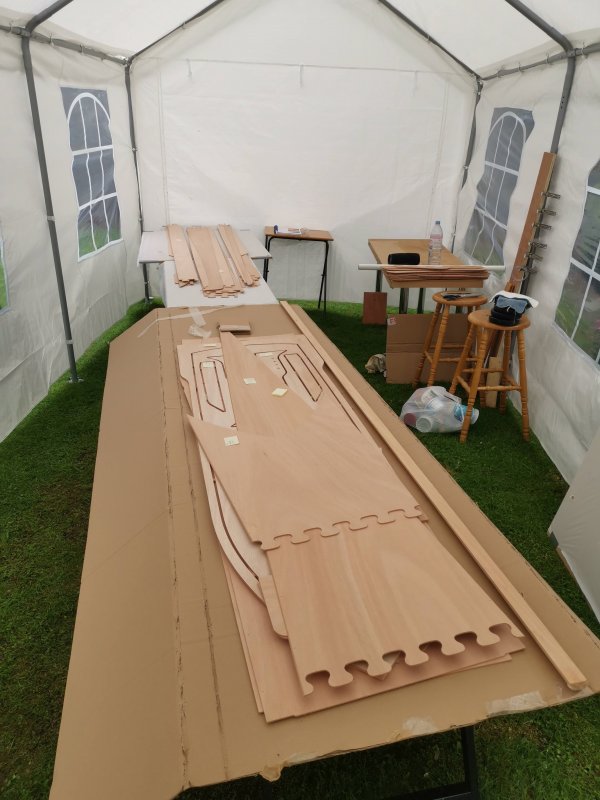
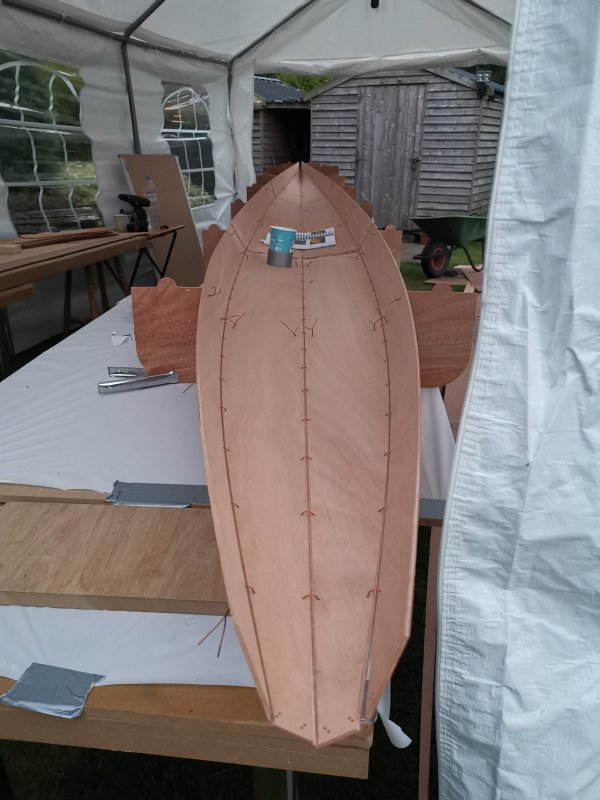
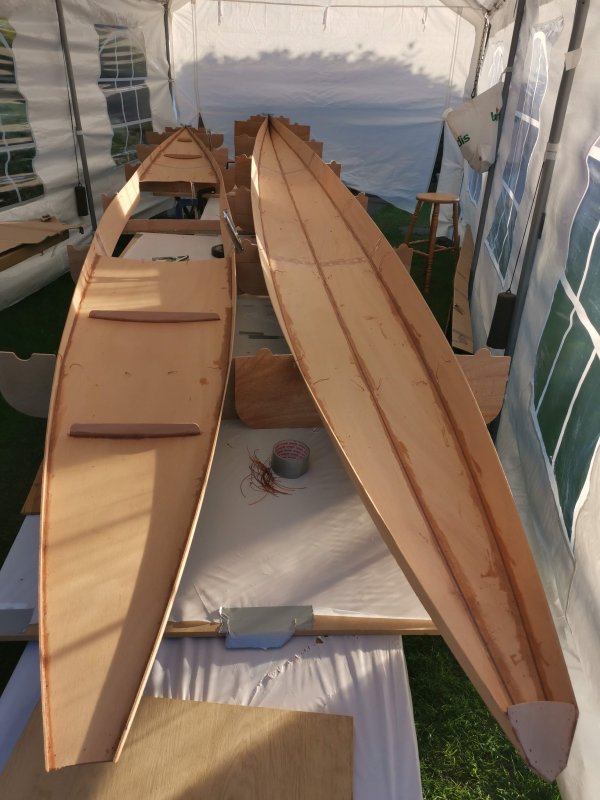
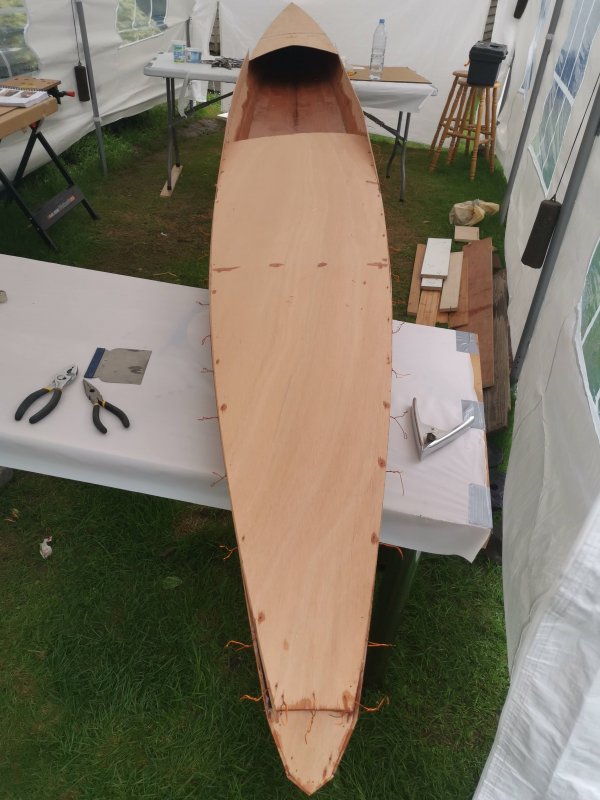
I started this Oxford Shell II build at the end of June during the lockdown. I’ve never built a boat but I’ve been rowing as a hobbie for the last few years.
The trickiest part so far was definitely getting the shelter for the 6 metre build and waiting for the strong winds to die down.
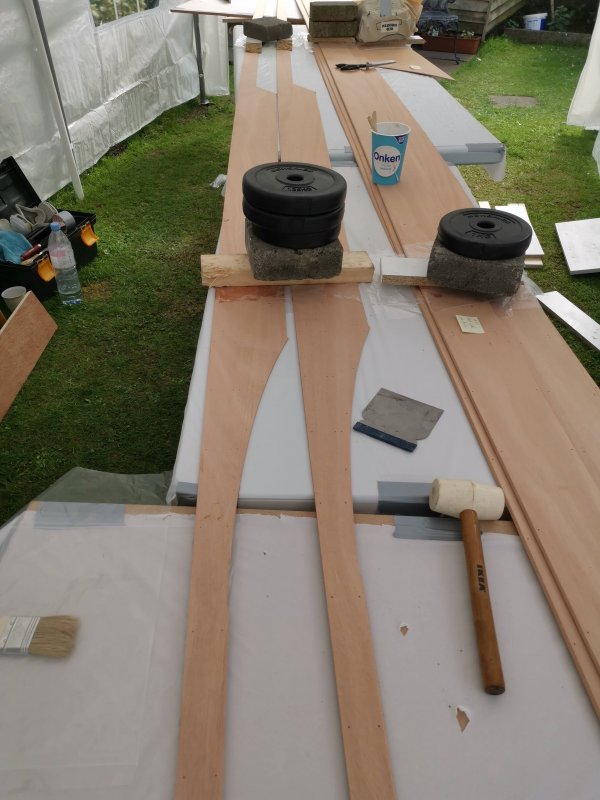
Today I’ve taken off the wire stitching and applied the fillets. I was hoping to do the boatbuilding course at Fyne boats but decided to go ahead with the build at home and hope for the best. I’m really enjoying it so far..delighted that I went ahead with it. Without a doubt I’ll be checking in for some tech advice.
Thank you
Fiona


Offline
#2 13 Jul 2020 12:57 pm
- Ian
- Employee

- Registered: 24 Nov 2014
- Posts: 103
Re: Oxford Shell II
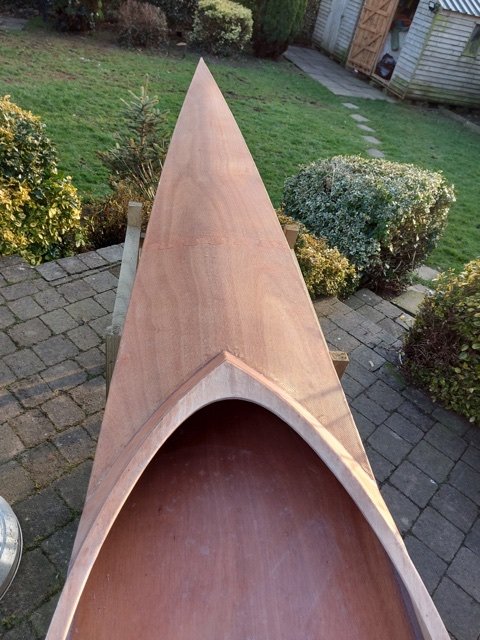
You've made a neat job of your fillets. However, there's a fine line between keeping them small to save weight and making them too small for the glass to conform to the curve, so I'd recommend checking them for low spots before you glass over them. With bevelled panels like these, I've found that the epoxy can sink below the edges of the plywood (or maybe I used too small a radius to make the fillets) and then the glass won't stay in contact with the fillet -- it just bridges the gap, leaving a pocket of air behind it. The glass won't stay put in a sharp corner, so even a slight low point should be topped up. Any large lumps in the fillet should be sanded, for the same reason.
It's worth taking a close look all along the length of them beforehand, to save headaches when you start glassing.
If you're unsure, one way of checking might be to press a piece of paper into it and see if it makes sharp parallel creases along the edges of the plywood -- but I haven't tried that, because I usually glass while the fillets are still slightly soft, to save having to sand them.
Keep up the good work!
Offline
#3 13 Jul 2020 3:56 pm
- spclark
- Member
- From: "Driftless" Wisconsin USA
- Registered: 19 Mar 2020
- Posts: 478
Re: Oxford Shell II
Agree on the fillets needing to be a bit stouter, put a cove into those corners so the glass will follow better when the time comes. It's easy to add more fillet when necessary as opposed to taking some off / out if you feel they've grown too full after they've cured. Just be sure to sand well the hard epoxy surfaces before you add more thickened epoxy. I think it's also a good idea to begin another layer by first adding a thin layer of 'primer', nothing more than unthickened epoxy carefully brushed on all the surfaces that will be getting more thickened epoxy soon. Let that primer coat be until it's begun to set up, get a bit tacky, otherwise the fillet blend will tend to slide about & not stay in place.
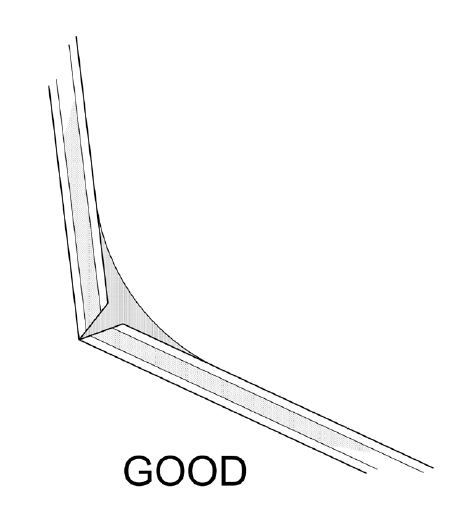
What radius your fillets ought to be gets a bit complicated. The tighter the angle between panels the harder it gets to work between them and the radius can be tighter as well. Panels that are barely tighter than butt-edge deserve a wide radius, fairly shallow fillet by contrast.
Looking at your pics I get the idea your fillets might be something like 5 or 6mm radius? I'd go back and add more thickened epoxy so that they're more like what I've drawn in this rough illustration:
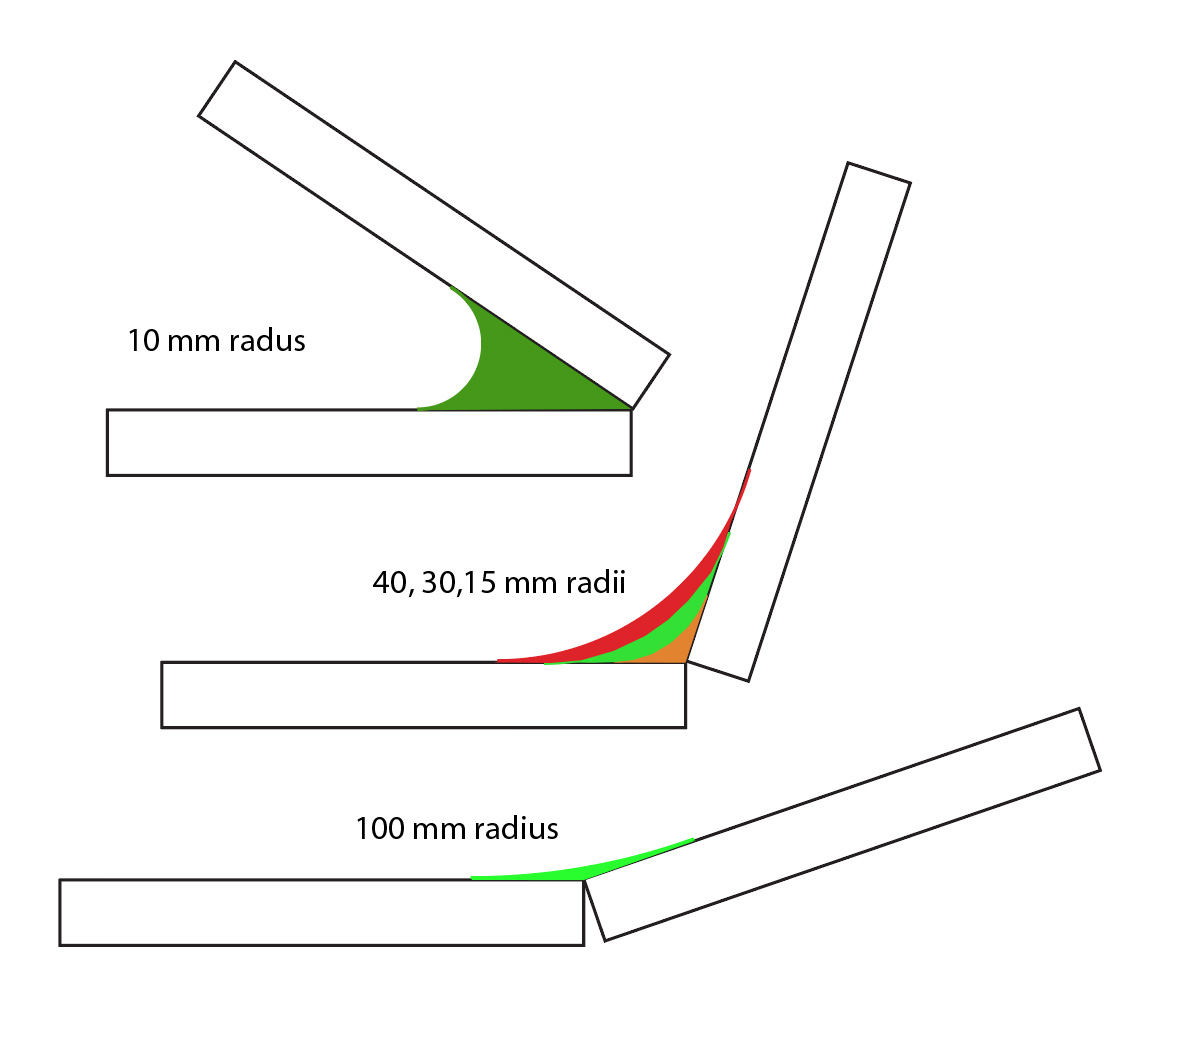
Top example shows how hard it is to get a smaller radius as panels grow increasingly close in a bow or stern seam; 10mm's about the smallest that can be easily achieved. 'Glass will still lay down but you'll have to babysit it as the epoxy cures or it'll lift. A wider radius improves things but the wider you go the deeper the fillet of course.
That center example shows bare minimum (15mm), something closer to an average radius (30mm), then probably the most (40mm) if you're worried about total weight for fillets.
The bottom example could be a deeper, wider radius but you don't really gain much strength because the glass is what add's strength and will lay down just fine though I'd not want to go much less.
I set up this illustration using 5mm thickness for the plywood rectangles so the scale of fillets will be relative to that. The dimensioned radii are what's worth nothing; I hope this helps!
Offline
#4 13 Jul 2020 6:06 pm
- Fiona
- Member
- Registered: 22 May 2020
- Posts: 20
Re: Oxford Shell II
Thank you Ian and SP.
I did wonder if I was doing it right..for some reason I was afraid to go too heavy.
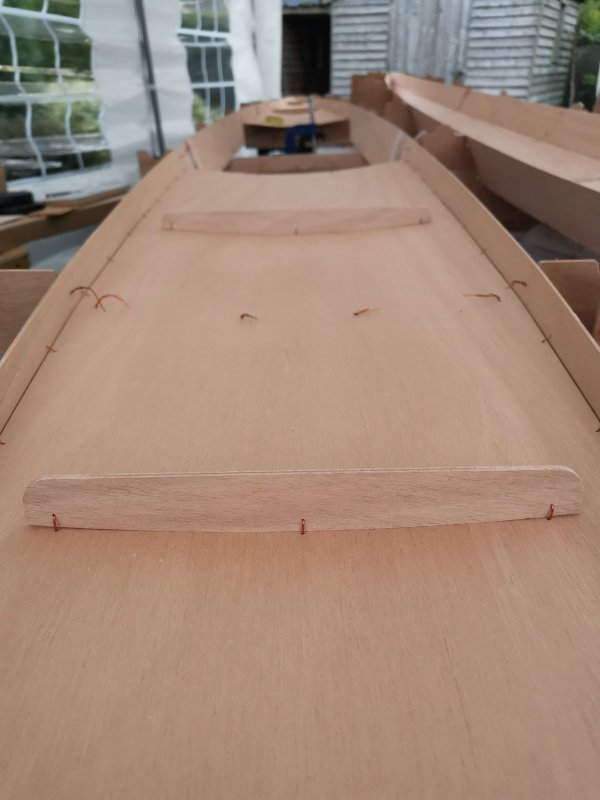
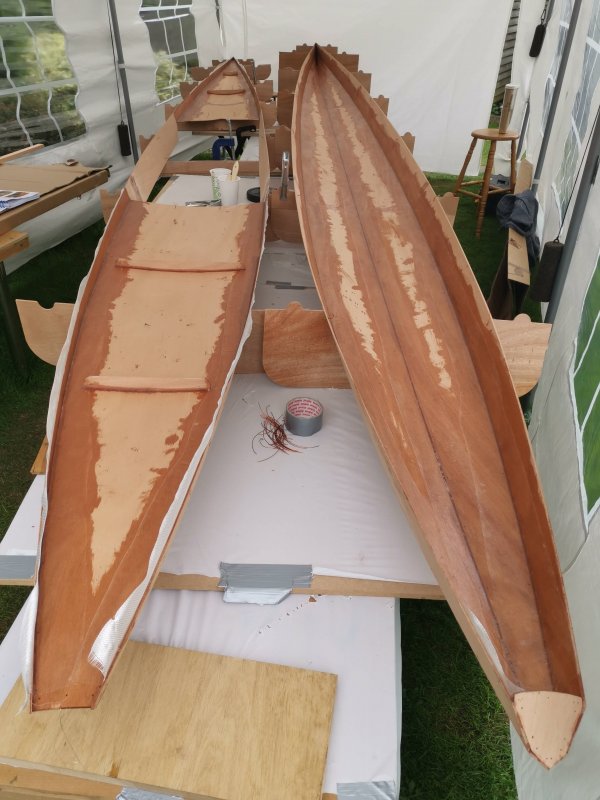
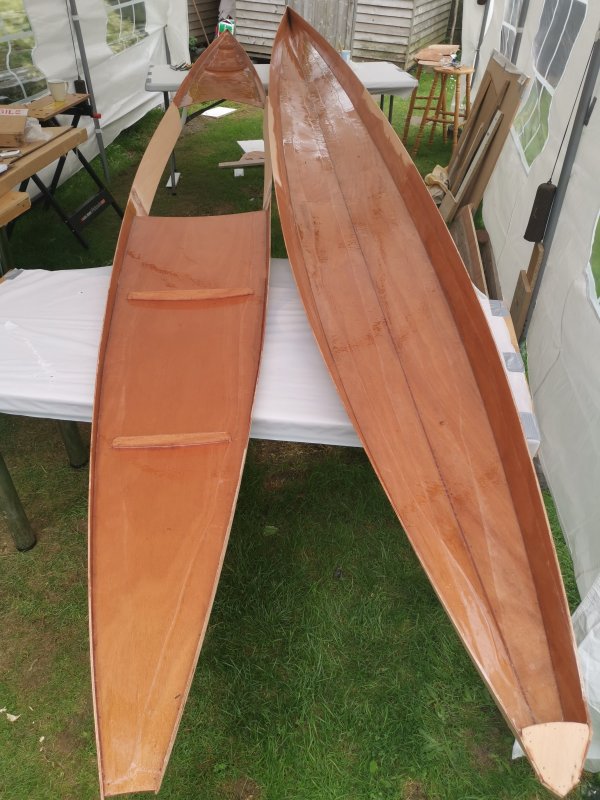
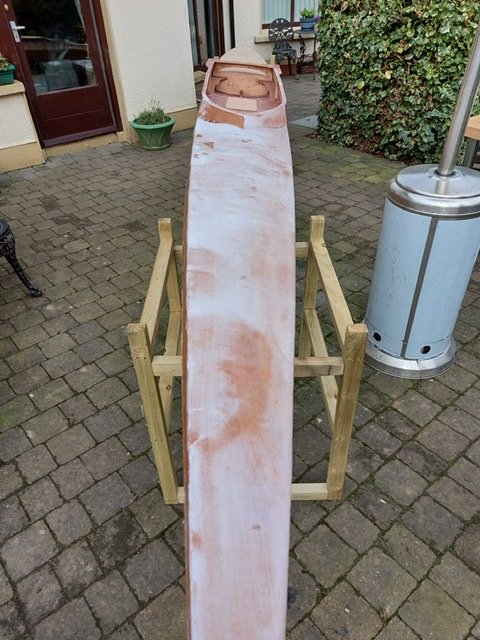
I’ve already gone ahead and put the fibreglass tape on the seams and epoxied the interior, waiting for that layer of epoxy to cure. Then I was planning on putting a second layer of epoxy on the interior as I’ll be storing it outside.
Do you think that it’s too late now to do something with the fillets at this point?
I’ll have a good look at the seams and see if any look particularly thin.
Thanks again for the advice ..I should have checked that before going ahead.
What do you think I should do?
Fiona
Offline
#5 13 Jul 2020 6:07 pm
- Ian
- Employee
- Registered: 24 Nov 2014
- Posts: 103
Re: Oxford Shell II
I wouldn't top up those fillets by much, if anything (the manual specifies about a 6mm radius for most of the fillets). It's one of the few kits with bevelled panels, so most of the fillet actually sits in the angle between the edges of the plywood instead of between the inside faces, as in this diagram from the manual:
Larger boats need larger fillets (like your Waterlust, SP) but, in this case, being able to carry it and lift it onto a roof rack easily is a feature of the boat, and it will still be much more rugged than most rowing shells.
Offline
#6 13 Jul 2020 6:11 pm
- Ian
- Employee
- Registered: 24 Nov 2014
- Posts: 103
Re: Oxford Shell II
Do you think that it’s too late now to do something with the fillets at this point?
Don't worry about them. If you didn't have the problem I mentioned about an air gap under the glass, you made your fillets just right.
Offline
#7 13 Jul 2020 6:56 pm
- Fiona
- Member
- Registered: 22 May 2020
- Posts: 20
Re: Oxford Shell II
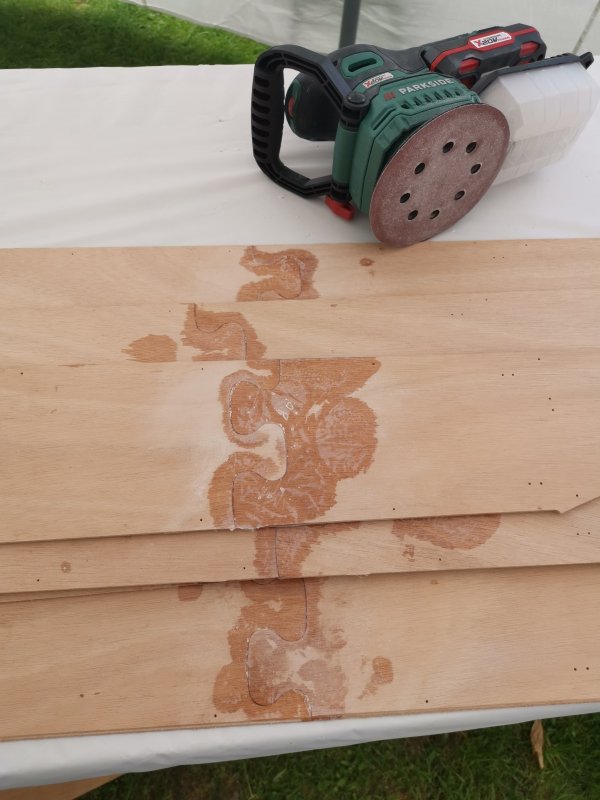
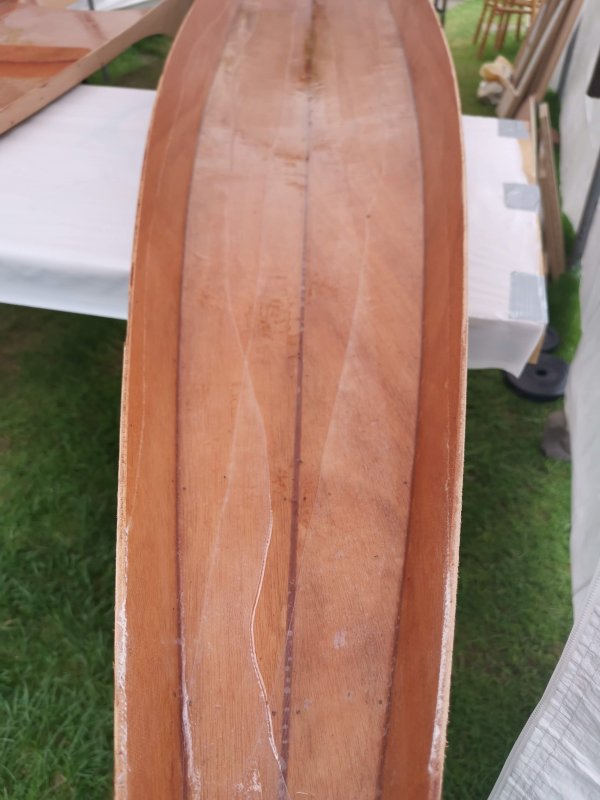
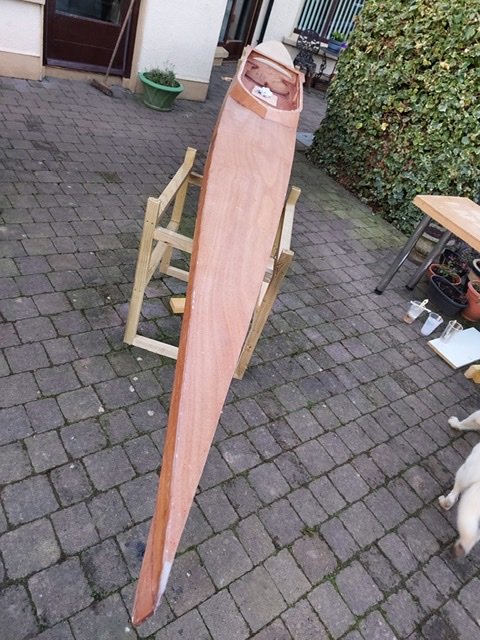
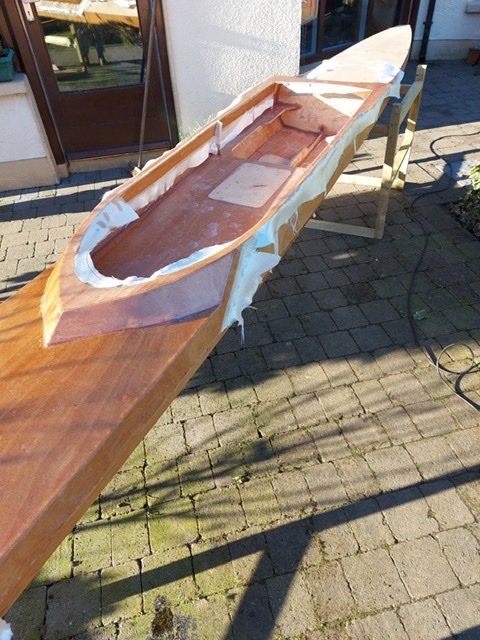
Thanks Ian, on closer inspection there’s a few of these..but not all over, see the photo towards the bottom. ..
Offline
#8 13 Jul 2020 8:19 pm
- spclark
- Member
- From: "Driftless" Wisconsin USA
- Registered: 19 Mar 2020
- Posts: 478
Re: Oxford Shell II
I wouldn't top up those fillets by much, if anything (the manual specifies about a 6mm radius for most of the fillets). It's one of the few kits with bevelled panels, so most of the fillet actually sits in the angle between the edges of the plywood instead of between the inside faces, as in this diagram from the manual....
Looking at that manual illustration I have to agree Ian!
Beveled panel edges will make a big difference for the strength the joint fillets eventually provide over the edge-touching style I drew up. Thanks for steering Fiona (and me!) back on course ---
Offline
#9 13 Jul 2020 8:26 pm
- Fiona
- Member
- Registered: 22 May 2020
- Posts: 20
Re: Oxford Shell II
Thank you both. I’m pretty much following the manual as close as I can but sometimes it’s only as I’m doing it that 10 other questions come to mind. All tips are very welcome.
Offline
#10 13 Jul 2020 8:37 pm
- Ian
- Employee
- Registered: 24 Nov 2014
- Posts: 103
Re: Oxford Shell II
Thanks Ian, on closer inspection there’s a few of these..but not all over, see the photo towards the bottom. ..
Those will be all right. A few small bubbles won't harm the strength, and nobody will ever see them there once the deck is on. The overlapping glass will also add strength at that point.
Offline
#11 13 Jul 2020 9:45 pm
- Fiona
- Member
- Registered: 22 May 2020
- Posts: 20
Re: Oxford Shell II
Excellent. Thank you, full steam ahead so.
Offline
#12 14 Jul 2020 9:50 am
- Ian
- Employee
- Registered: 24 Nov 2014
- Posts: 103
Re: Oxford Shell II
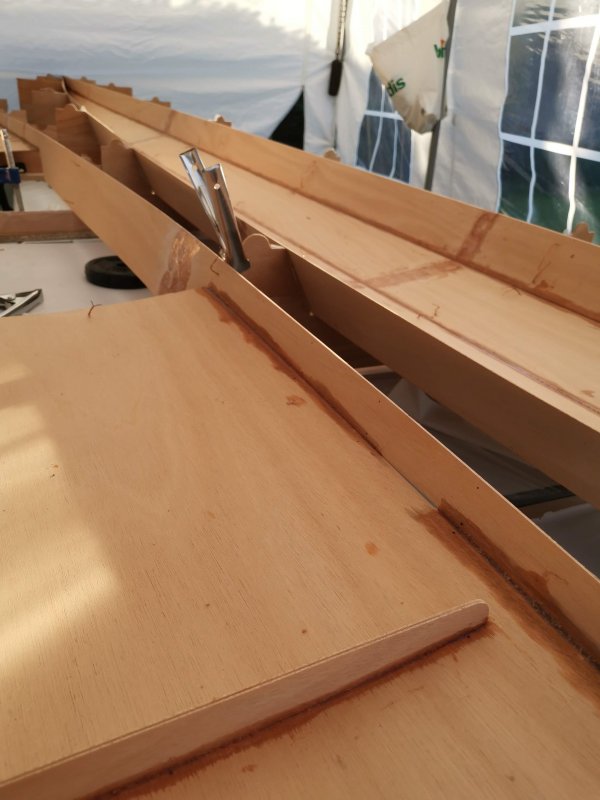
Looking at your photos, I think the glass tape we sent you is a bit too wide for joining the deck to the hull -- it's going to make an "interesting" task even more fiddly. We're going to send you some narrower tape in the post today. I think the post may be taking a little longer than usual at the moment, but hopefully it won't hold you up. If you can't wait, you could try cutting down the tape you have, especially at the ends where the panels are narrower. It will probably fray quite messily once it's soaked in epoxy, but nobody will see it hidden at the ends of the boat.
Last edited by Ian (14 Jul 2020 10:04 am)
Offline
#13 14 Jul 2020 10:04 am
- Fiona
- Member
- Registered: 22 May 2020
- Posts: 20
Re: Oxford Shell II
Ah ok great, but I was hoping to do that in the next day or so..could I just cut it narrower?
Offline
#14 14 Jul 2020 10:05 am
- Ian
- Employee
- Registered: 24 Nov 2014
- Posts: 103
Re: Oxford Shell II
You were too quick for me: I was just editing my last post to add that!
Offline
#15 14 Jul 2020 10:25 am
- Fiona
- Member
- Registered: 22 May 2020
- Posts: 20
Re: Oxford Shell II
Haha great, thanks Ian...how wide should it be? 3 inches?
Offline
#16 14 Jul 2020 11:05 am
- Ian
- Employee
- Registered: 24 Nov 2014
- Posts: 103
Re: Oxford Shell II
CLC use 3-inch tape, but we have either 50mm or 100mm. We'll provide 50mm in future, but you probably only need to taper the end a bit, along one side. I think I would lay it out so that one edge follows the narrow side panel of the deck, then taper the excess off the other edge, expecting it to fray by up to half an inch from the cut. We haven't had any feedback about it so far, so it must be manageable. Let us know how you get on!
Offline
#17 14 Jul 2020 6:36 pm
- Fiona
- Member
- Registered: 22 May 2020
- Posts: 20
Re: Oxford Shell II
ok thanks Ian..
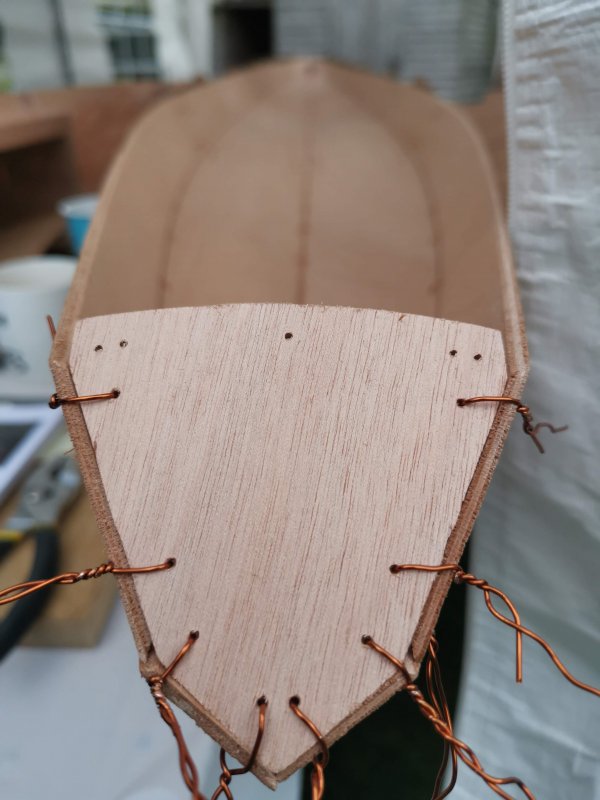
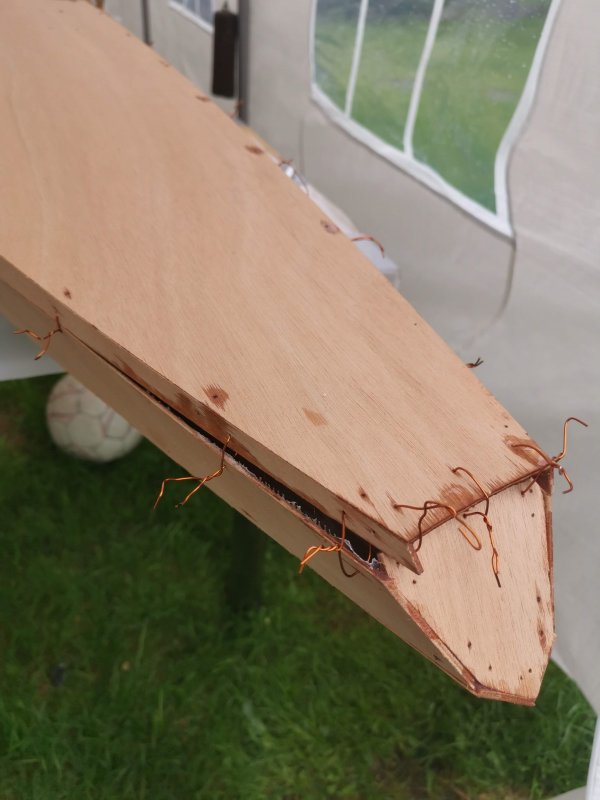
I’ve just wired the hull and deck together and all looks good apart from the transom.
I don’t have a heat gun to try and soften the epoxy so I can fit it...would a hair dryer work? Or any suggestions? ( Should I write this in the other section for building help?)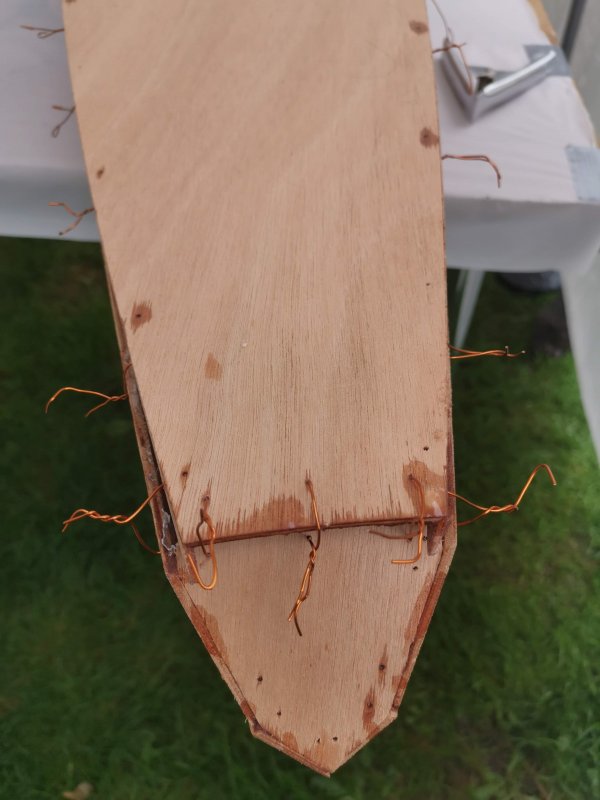
Offline
#18 15 Jul 2020 9:55 am
- Ian
- Employee
- Registered: 24 Nov 2014
- Posts: 103
Re: Oxford Shell II
A hair dryer may be hot enough -- give it a try!
If not, you might be able to separate the panels for that last foot or so with a thin blade, but take care not to alter the shape of the outside edges (the inside doesn't matter) or to scratch the outside (assuming you plan to varnish rather than paint).
Last edited by Ian (15 Jul 2020 9:56 am)
Offline
#19 15 Jul 2020 10:09 am
- Fiona
- Member
- Registered: 22 May 2020
- Posts: 20
Re: Oxford Shell II
Thanks Ian, I'll try that.
Offline
#20 15 Jul 2020 10:16 am
- Fiona
- Member
- Registered: 22 May 2020
- Posts: 20
Re: Oxford Shell II
Sorry which panels do you mean... On the hull?
Or deck?
It just seems the transom was wider than the aft deck
Offline
#21 15 Jul 2020 10:48 am
- Ian
- Employee
- Registered: 24 Nov 2014
- Posts: 103
Re: Oxford Shell II
I mean the deck panels. It looks like the sides of the deck just need spreading apart a bit to fit over the transom.
Before attempting to cut them, I think I'd try bracing them apart. A stick of scrap wood slightly narrower than the transom, placed between the sides and then tapped aft with a hammer should push the sides out. Stick packing tape over the ends of the stick to help it slide. Combined with the hair dryer, I think that may work.
Also, check whether the deck is correctly aligned with the hull. If you slide it aft a bit, there will be more room for the transom.
Offline
#22 15 Jul 2020 11:00 am
- Ian
- Employee
- Registered: 24 Nov 2014
- Posts: 103
Re: Oxford Shell II
You might even be able to use the 'wrong' end of a spring clamp to push the sides apart. Anything you can think of, really. Just be wary of snapping off the corners of the ply where they stick out past the transom.
Offline
#23 15 Jul 2020 12:51 pm
- Fiona
- Member
- Registered: 22 May 2020
- Posts: 20
Re: Oxford Shell II
Ok thanks Ian, I’ll give that a go.
Offline
#24 3 Mar 2021 6:49 pm
- Fiona
- Member
- Registered: 22 May 2020
- Posts: 20
Re: Oxford Shell II
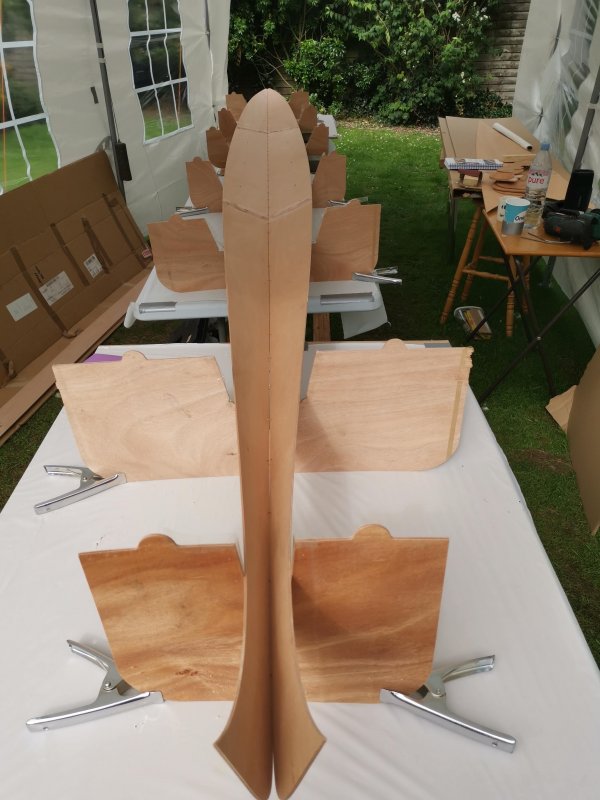
I finally got the boat back out to work on after months being wrapped away. But I think it’s still too cold at the moment. I did the foredeck’s fibreglass layer on Sunday when the weather was good. But the next day it went all white..probably as it was cold and damp overnight. Luckily this came off when I wiped it with acetone..not sure if that was the right thing to do but it seemed to have worked. The most difficult part of this process was definitely getting the shelter and weather right. But when it’s good, it’s amazing!
I welcome any comments if the more experienced people have noticed anything that needs attention.
Offline
#25 3 Mar 2021 6:51 pm
- Fiona
- Member
- Registered: 22 May 2020
- Posts: 20
Re: Oxford Shell II
You might notice the stern seems kind of twisting at the end by the transom...no idea how that happened but i think possibly too late now to fix.
Offline