A forum for discussing wooden boats and boat building
You are not logged in.
- Topics: Active | Unanswered
#1 17 Sep 2018 2:07 pm
- Jonathan
- Member

- From: Harwich Essex UK.
- Registered: 4 Sep 2018
- Posts: 32
Ten years floating around in my head
Ive been thinking of building a boat now for about ten years.
Back then I had a boss that owned a yacht and I happen to say one day I was thinking of building a sailing dinghy.
He scoffed and said "You're to fat to sail a dinghy". As you can imagine, those words of encouragement put the project on the back burner for some time to come.
Although disillusioned I hadn't completely given up on the idea, and enjoyed watching other folks videos posted on youtube of their builds. I was having a little look on ebay one afternoon and came across some plans originally given away free in Practical woodworker magazine of a small 9' dinghy called a Crest. I decide to buy the plans and during the lofting increase the length to 11' to cater for my size.
I then started to look around for Marine ply and was surprised by the prices of up to £61.00 per sheet.
Talking to one of the chaps at work he advised I try Kent Blaxill in Colchester Essex. I gave them a ring and they quoted me £21.99 + VAT, so about 25 quid, which i thought reasonable.
I got my ply home and cut one sheet in half. As I was going to build an 11' dinghy the 8 by 4 sheets would need joining.
I set up a bench in my garden and leveled it, then went about lofting.
I set out my station on the ply and added three extra. I then started lofting from each end of the boat until i reached the middle, where I was left with the three stations I had no dimensions for and so left them blank.
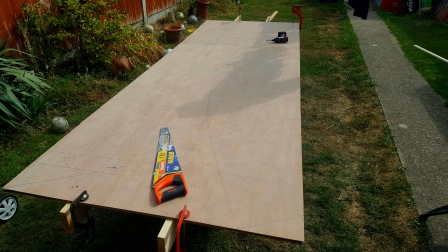
The aim was to use my lofting batten to plot the known points, and it would find the missing points as it bent round. That was the theory anyway.
Fortunately it worked and my parts came out with nice lines. with only one minor problem ill talk about later.
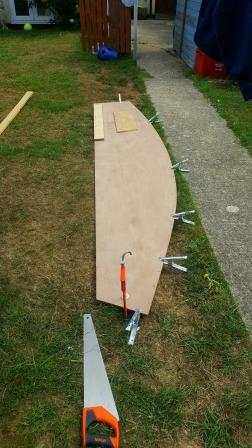
Parts cut I clamped them to my work bench and smoothed off the cuts with my block plane.
At the end of day one (Saturday) I had all my parts cut out, drilled and ready to stitch together.
Offline
#2 17 Sep 2018 2:32 pm
- Jonathan
- Member
- From: Harwich Essex UK.
- Registered: 4 Sep 2018
- Posts: 32
Re: Ten years floating around in my head
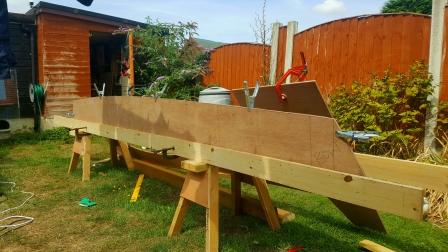
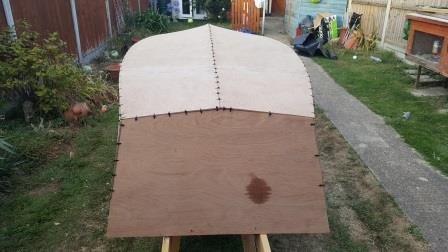
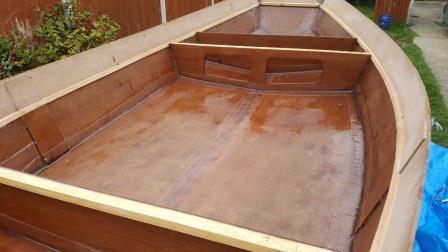
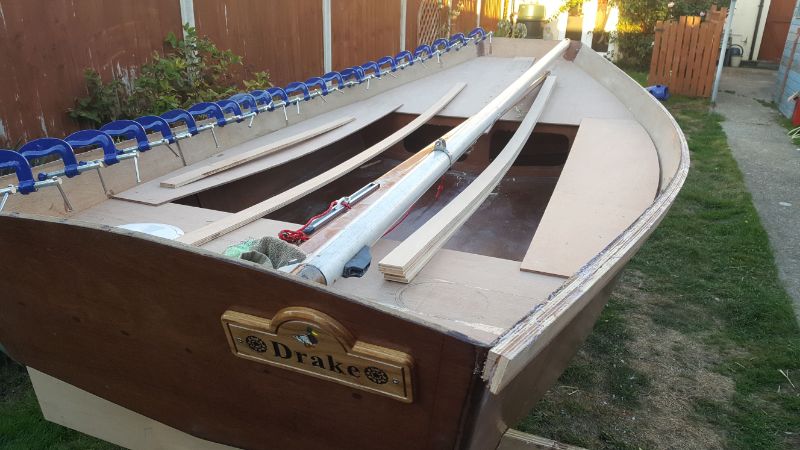
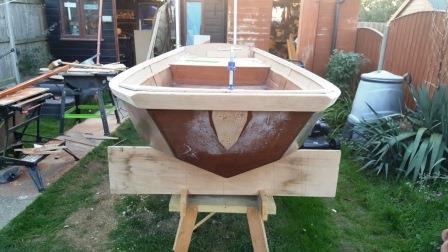
Day two (Sunday) I started to stitch the it all together and was surprised just how quickly it all came together.
The small problem i mentioned earlier was the sides at the bow were 20mm longer than the bottom and sat proud. I just scribed a line parallel to the end bevel and trimmed it back.
At this point the fore and aft ends were still to high as the plan had detailed a mold in the center of the boat that supported the middle whilst it was stitched together.
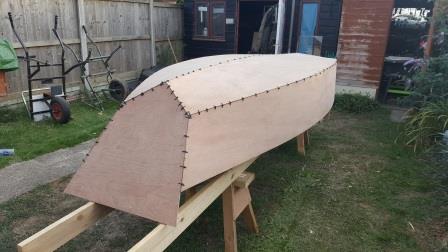
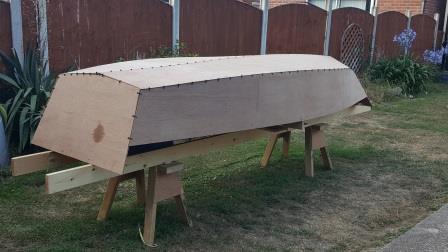
And that was day two.
As this was my first boat build, I wasnt to sure how much of a success it would be so held off on the epoxy etc until I had something that looked like a boat in front of me.
After looking around the internet I found Fyne boat kits. I have to say I didn't quite figure just how lucky a find it was at the time but more of that later.
So, after looking at what was on offer I went for the Dinghy building epoxy kit at something like £175.00. When it arrived there was everything I needed in the kit to start gluing up the boat including protective gloves.
Dinghy Building Bundle
This contains sufficient epoxy to build an average sized dinghy.
The bundle contains the following products:
8 kg of Professional Epoxy Coatings
Measuring/dispensing pumps
3 litres of Microfibres
3 litres of Wood Flour Blend
100 Filleting and Mixing Sticks
20 Vinyl Gloves
Believe me, there is more than enough for my 11' Dinghy.
Next Job would be the glue up. ![]()
Offline
#3 17 Sep 2018 3:11 pm
- Jonathan
- Member
- From: Harwich Essex UK.
- Registered: 4 Sep 2018
- Posts: 32
Re: Ten years floating around in my head
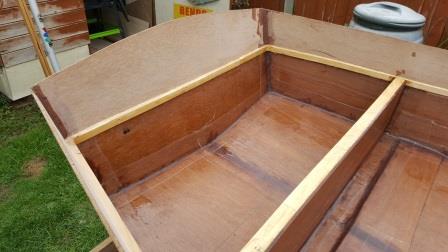
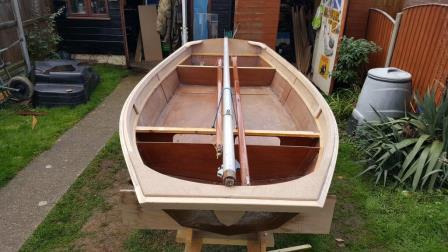
Next, I fitted the bulkheads to help set the shape of the boat prior to the glue up. I also fitted spreader battens to the gunwales.
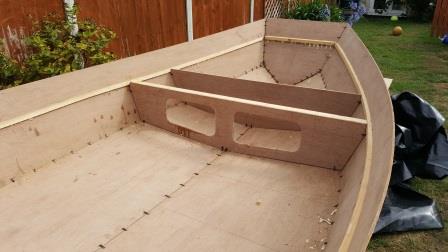
I also glued and screwed a batten around the boat 5" down from the top of the boat to push the boat into shape.
Last edited by Jonathan (5 Oct 2018 7:17 am)
Offline
#4 18 Sep 2018 9:57 am
- Jonathan
- Member
- From: Harwich Essex UK.
- Registered: 4 Sep 2018
- Posts: 32
Re: Ten years floating around in my head
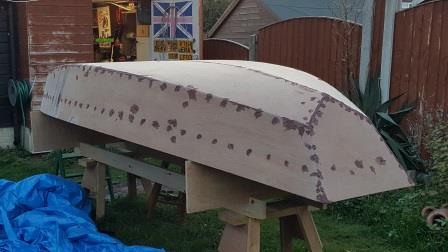
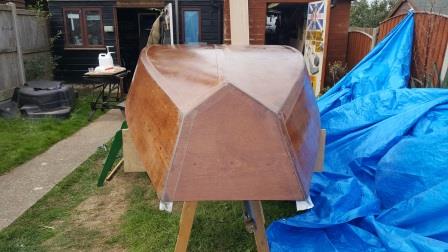
So, after glue up and removing all the ties I went round with epoxy and wood flour I received in my Fyne Dinghy Kit.
I got a couple of ripples in the tape down one side, but it wont show as it will be inside a buoyancy tank. however, it did flag up I need to pay extra attention when I come to do the outside of the hull where it will show.
But on the whole not to shabby.
A foot note about the resin and hardener supplied by Fyne boats, Its easy to dispense the correct amounts of each with the pump system supplied. Mixing is ease with the large lolly sticks they supply. I did however buy 80ml plastic shot glasses for a couple of pounds from ebay. I think it was something like £2.99 for 120.
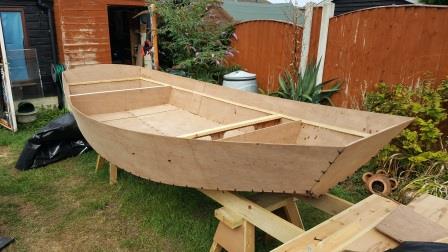
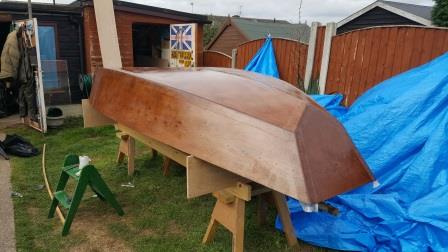
Once the inside was done (for now) I flipped the boat and sanded the outside.
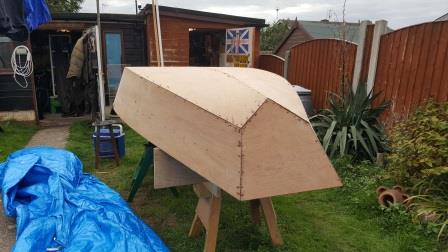
That done it started to look like a boat
Then on to filling. Now before I became a site manager, I was a carpenter for 22 years so my joints were all nice and tight and only needed a wipe of filler here and there. However, I would come to regret drilling so many holes when it came to sanding.
And sanding
And sanding.
Offline
#5 18 Sep 2018 10:19 am
- Jonathan
- Member
- From: Harwich Essex UK.
- Registered: 4 Sep 2018
- Posts: 32
Re: Ten years floating around in my head
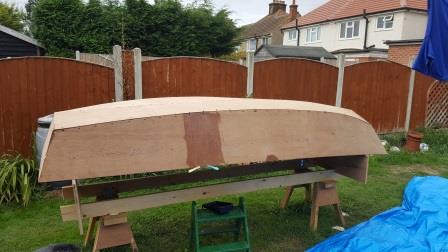
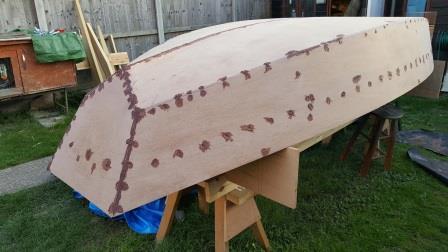
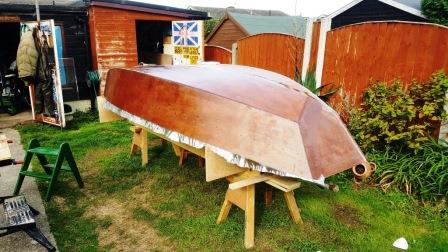
Once I got the outside sanded I set about taping all the external joints. Inside the keel had received 3 layers of tape over lapped and on the outside it would get 1 layer of tape then a second layer of glass when I covered the boat in sheet glass. (A job I am dreading),
Now when taping the inside the tapes were a bit up and down, so on the outside I thought it might be a bit easier to follow a layout line. My tape from Fyne was 100mm wide so off each joint I marked a line 50mm to one side. All the outside angles were scribed with my combination square the line down the keel I used a straight edge.
I pre-soaked all the joints as I thought the end grain would drink the epoxy and leave me with a dry joint. Once I was happy the joint had stopped absorbing I went over the run with more epoxy and just like wallpapering laid my tapes to the line, and Im glad I did as it left a far neater job.

The tapes dried quite quickly, well within 8 to 10 hours they were touch dry, but I decided to leave them a couple of days to properly cure.
Offline
#6 18 Sep 2018 10:24 am
- Jonathan
- Member
- From: Harwich Essex UK.
- Registered: 4 Sep 2018
- Posts: 32
Re: Ten years floating around in my head
Next I had to sand all the edges of the tapes to blend them into the boat. so it was more sanding then more sanding and more sanding then more sanding and more sanding sanding then more sanding and more sanding then e sanding and more sanding sanding then more sanding and more sanding then more sanding and more sanding sanding then more sanding and more sanding then more sanding and more sanding sanding then more sanding and more sanding then more sanding and more sanding sanding then more sanding and more sanding then e sanding and more sanding sanding then more sanding and more sanding then more sanding and more sanding sanding then more sanding and more sanding then more sanding and more sanding
I think you get the idea.
But, it was worth it.
Offline
#7 18 Sep 2018 10:30 am
- Jonathan
- Member
- From: Harwich Essex UK.
- Registered: 4 Sep 2018
- Posts: 32
Re: Ten years floating around in my head
And Voila, after nearly 2 days sanding it was done.
I think so far the boat has been 40% build and 60% sanding lol ![]()
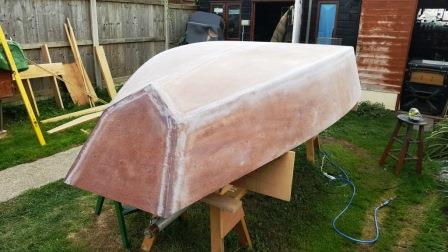

Something very satisfying about sanding.
Offline
#8 18 Sep 2018 10:46 am
- Jonathan
- Member
- From: Harwich Essex UK.
- Registered: 4 Sep 2018
- Posts: 32
Re: Ten years floating around in my head
Next was the bit Ive been dreading.
I watched so many youtube vids before attempting this, I was convinced it would all go horribly wrong.
But, again the products provided by Fyne Boats did exactly what it was supposed to, and went on a treat.
I do have to do a bit more sanding on some of the edges (Now there's a surprise) But all in all I happy with the results.
I have a few other bits to be getting on with, so I going to let it cure up for the next five days until the weekend, then I'll sand off all the edges and give the entire boat a light sanding prior to giving it a last coat of epoxy.
Yesterday I placed an order with Fyne Boats for my hull paint, undercoat and gloss. Well I figure everything Ive brought from them so far has done exactly what it says on the tin, so why change a winning formula.
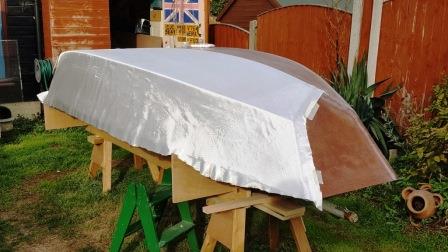
How good does that look. ![]()
Offline
#9 22 Sep 2018 9:56 pm
- Jonathan
- Member
- From: Harwich Essex UK.
- Registered: 4 Sep 2018
- Posts: 32
Re: Ten years floating around in my head
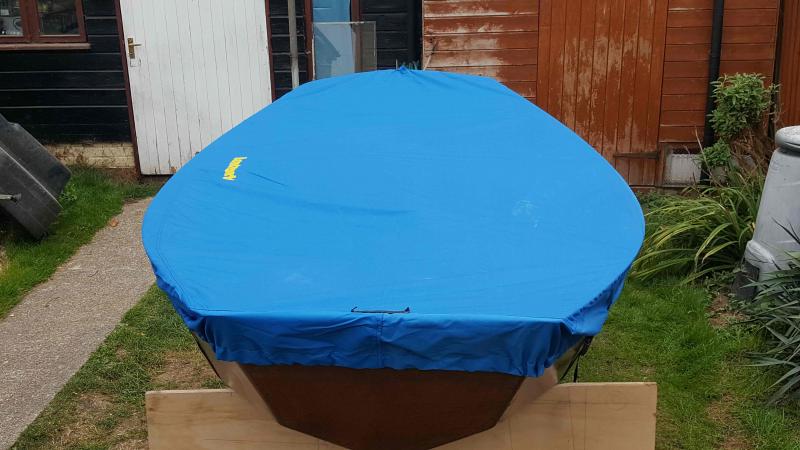
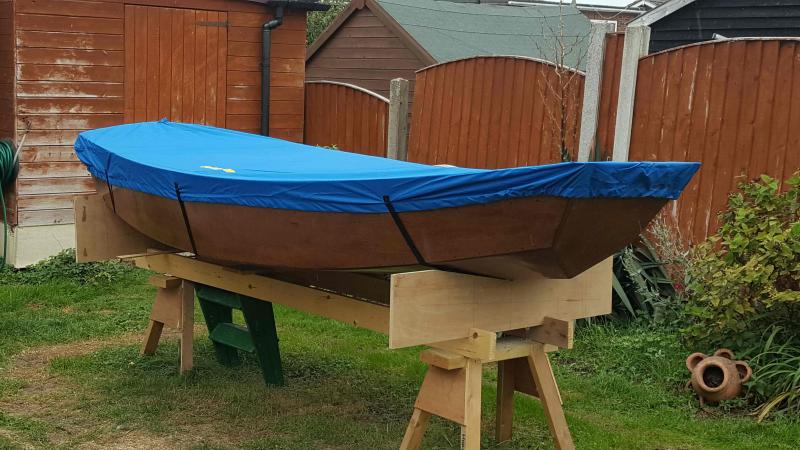
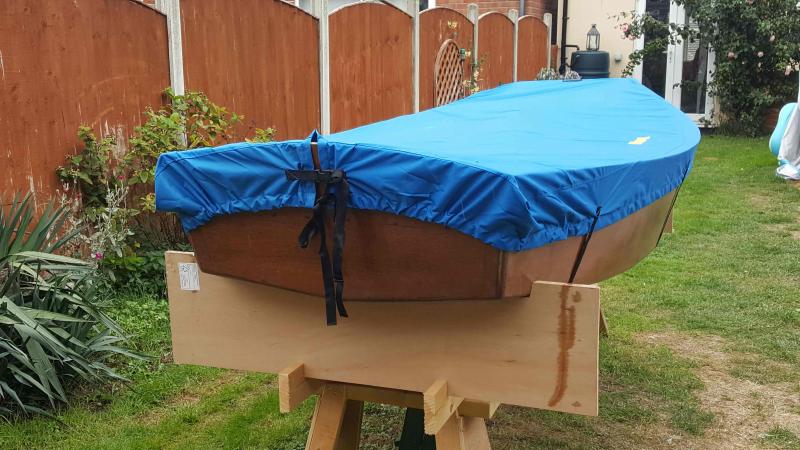
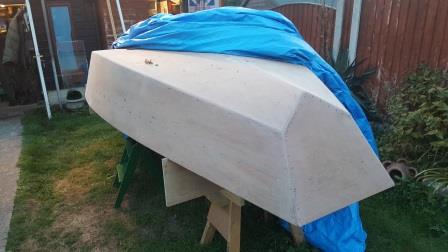
I brought myself a Mirror Dinghy cover for my boat and it fitted like a glove.
Offline
#10 2 Oct 2018 1:54 pm
- Jonathan
- Member
- From: Harwich Essex UK.
- Registered: 4 Sep 2018
- Posts: 32
Re: Ten years floating around in my head
A while ago I decided to model my boat on the Mirror Dinghy and thought it would be easier to rig with available parts found on ebay.
I started looking around and found a mast for £20.00 or best offer from a guy over in Woodbridge. About 45 minuets from where I live. I offered him 20 quid and he excepted it, so on the way home from work i went over to collect it.
When I arrived he brought out the mast, and was totally honest, it wasn't new, but it was very usable. After chatting with him he told me he was a shipwright and had actually built a Mirror some time back that the mast came from, and said he had a gaff for it if I would like it to.
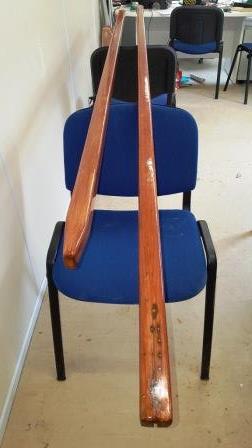
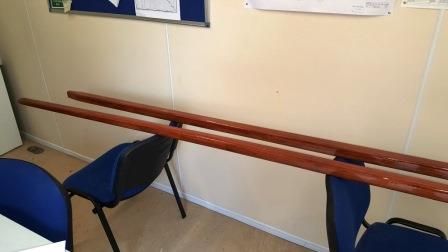
So, I collected my new mast and gaff and made my way home.
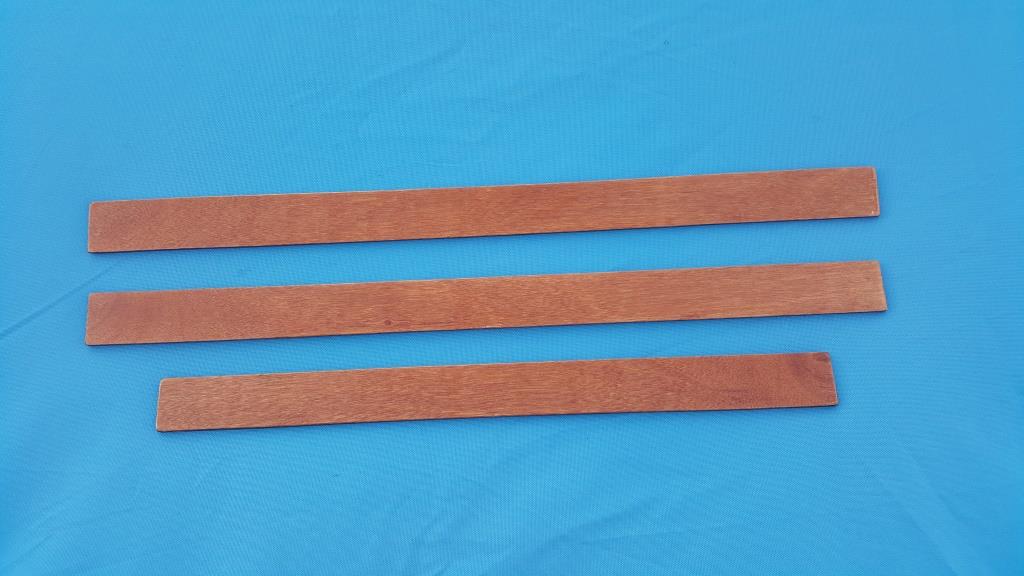
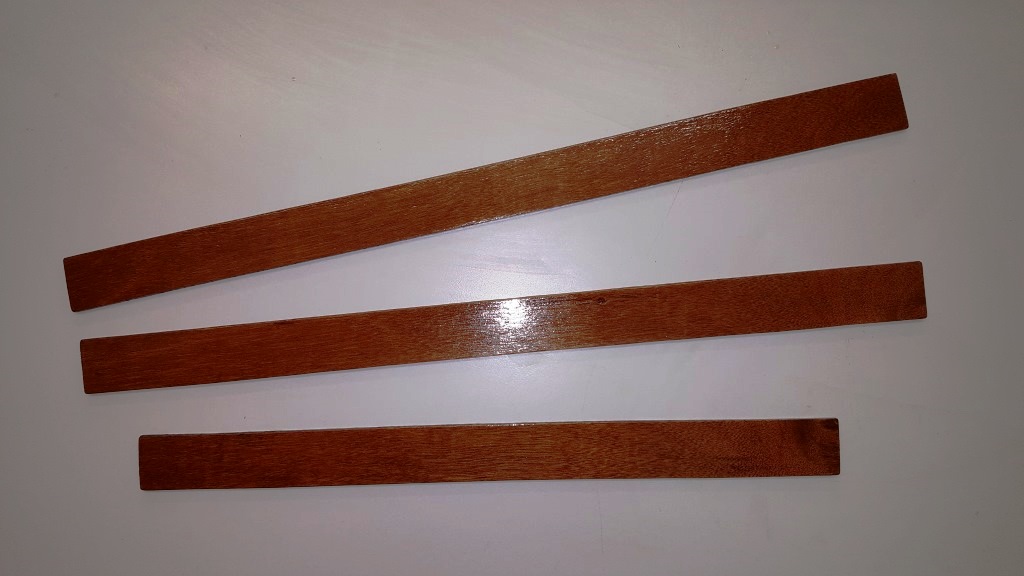
The gaff had seen better days but with a little TLC epoxy and glass tape came up better than I expected. I still had to make the two Gaff Jaws, but easy enough to do.
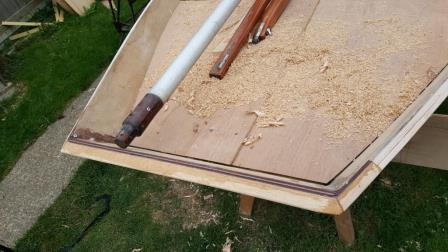
At this point I had no Boom. I looked through my research of Mirror specifications and found the boom was 7' 6" long and 2"x 2"
with the end tapered to fit the goose neck. I found a floor joist at work with little or no knots in it with a very tight straight grain.
I made the part, but it was very light in colour compared to the gaff. I was also worried about it bending over time, so decided to wrap the length on one side and two edges with fiberglass tape, and when dry I did the other side wrapping it round to meet the other side.
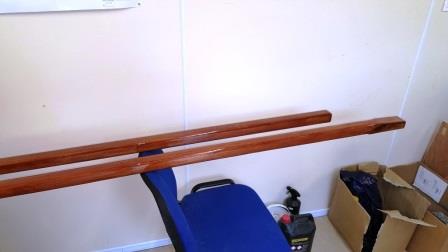
I gave it a couple of coats of epoxy and sanded it smooth. I then stained both the Boom and the gaff and gave them 3 coats on International Varnish I brought from Fyne Boats..
I also glassed the spine of the gaff to give it a bit more strength prior to stain and varnish.
Both parts now look like they came from the same tree, so I'm happy about that.
My next purchase is the sails.
I managed to win those on an ebay auction, so more about those later.
Offline
#11 4 Oct 2018 8:26 am
- Jonathan
- Member
- From: Harwich Essex UK.
- Registered: 4 Sep 2018
- Posts: 32
Re: Ten years floating around in my head
I live just around the corner from Dolphin sails in Harwich and thought it would be nice to use them as I would be supporting a local company. I phoned them for a quote for a set of Gunter rig Mirror Dinghy sails but just got voice mail. I left a message asking for a call back, but after a week, Nothing! I called twice more over the following days and finally got an answer on my third attempt.
I explained what I wanted, and said as it wasn't actually a Mirror Dinghy, if they wanted to add their logo to either side of the main sail I was happy to help them out with a bit of free advertising for their product.
Anyway, the upshot was they wanted around the £400.00 mark for a set of sails, to which the guy said even he felt was a bit excessive, and gave me the numbers of other sail makers to try for a better quote. the best of which came in at £250.00. I may go for them at a later date, but fornow I decided to look at the used market on ebay.
So after a bit of a nail biting week I won my main sail and Jib from the same seller on ebay. The jib was £15.00 + £10.00 PP and the main sail was £35.00 + £10.00 PP so all in all 70 quid. When I checked my statement the chap had only invoiced me for £62.00 so had quite nicely combined the P&P for me.
When they arrived they were in pretty good shape with no repairs. That said, they did have the old mirror I.D. numbers hanging off, with a crusty glue layer beneath. The numbers peeled straight off just leaving the glue.
I got a small swab of kitchen paper and dampened it with Acetone and dabbed a spot lightly trying to avoid the possibility of melting the sail. It turned out it didn't affect the sail at all so I sloshed it on all over the glue and left it for a few minutes.
After about five minutes the glue de-laminated from the sail and rippled up like paint that had stripper applied over it.
By now the Acetone had evaporated and with the help of an old loyalty card the glue scraped straight off.
I can still see where the decals had been, but the sail looks far better than it did.

Next I needed a set of sail slats that sit in the stitched pockets, On line they were around £18.00 so I cut some 6mm ply 40mm wide and then to length and gave them a good sanding to smooth off all the edges and corners.
They went to work with me the following day and got one thinned coat of International varnish, and two full coats. I left them over night in my nice warm office to cure, then they got a light sanding with 220 grit and a final coat to seal them up nicely.
So, for now anyway that's a couple more boxes ticked.
Offline
#12 4 Oct 2018 2:52 pm
- Jonathan
- Member
- From: Harwich Essex UK.
- Registered: 4 Sep 2018
- Posts: 32
Re: Ten years floating around in my head
Going off on a minor tangent for a moment, I would like to say, with no prior knowledge of boat building or anything nautical, how difficult and at the same time rewarding it is to find out the information needed to build a small boat.
I spent quite some time looking for Mirror Dinghy plans before I found out you cant buy them. I thought it strange that someone from the Orient hadn't brought a kit and reverse engineered it, or something or other. It seems that the Mirror Dinghy is quite a guarded design that the owners keep close to their hips.
As I said earlier though, I was lucky to stumble over a set of plans on ebay for a few quid. I have always had a talent for making things fit to things that were never designed to go together and have built countless Streetfighter Motorcycles from parts found in breakers, then altered to fit what ever I am building at the time without prior knowledge that it will fit. (I'll make it fit)
The Example below is a 1200 Suzuki bandit frame hacked up and re-welded to fit a Honda VTR 1000 Engine. It has a part bespoke part Hyabusa front end and a Honda VFR800 single sided swingarm with a Wolf Race Assassin car wheel with a 240mm section Kawasaki ZX10 rear tyre fitted to it. I swapped out the original swing arm studs and replaced them with a set of Ford transit van 63mm studs. Lots of one off parts made by me held it all together and it went like a cat with Mustard on its A**e.

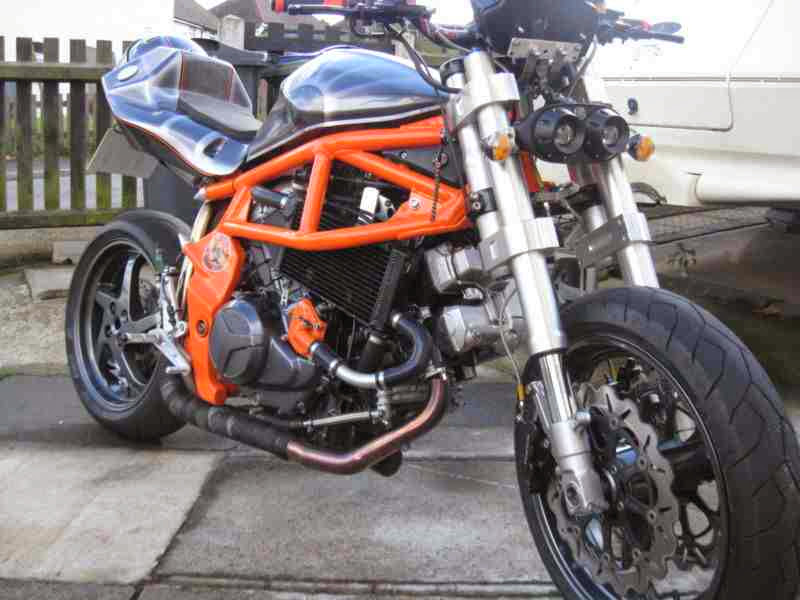
Back to the boat.
I was then fortunate to find on the Canada Mirror Dinghy website a download of the Mirror Dinghy assembly instructions. In there, is enough information to set out the Aft flotation tank and the forward bulkheads. I could also set out where the shroud plates are located. The side Bouyancy tanks I can put where I like, or leave them out all together and just fit a seat to stow stuff under. I can see where the mast step is located on the fore deck and pretty much everything else I can work out for my self with the exception Of the rigging.
It took me ages, and hours of youtube video to find out what all the ropes and pullies are for, and Im still not quite there yet. But half the fun is searching until I have that "Eureka" moment.
I love watching "Tips from a shipwright", But I have to say I have learnt most about rigging the Mirror Dinghy from a short Video
called "Whitby Rigging" by Martin Seagate. Lots of rewinds and pause on that one so well worth a view or two.
I think the Internet is a fantastic tool for gathering Infomation and my advice to anyone thinking about a build is gather up as much info as you can before starting, and keep looking for more as you go on.
I was a Carpenter for 22 years before becoming a Construction Site Manager for the last 21 years. But since starting this build I have regained knowledge I thought I had lost, and learned a Whole bunch of new stuff as well.
Well Ive rambled on long enough for now, next Ill be fitting a few bits and bobs to my Gaff and Boom Ive just finished as by the weekend they should have cured hard enough to play with.
Offline
#13 8 Oct 2018 9:03 am
- Jonathan
- Member
- From: Harwich Essex UK.
- Registered: 4 Sep 2018
- Posts: 32
Re: Ten years floating around in my head
The weather forecast for Saturday was "Rain all day". I got up Saturday morning and nothing!!
I waited a while as I didn't want to get set up outside and the heavens open, still nothing. In fact it didnt start raining until about 3 in the afternoon. What a total waste of a day. ![]()
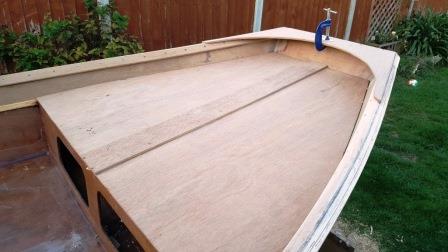
So on to Sunday, and the weather looked as though it might be a good day, out everything came, and the boat uncovered.
A week ago i scribed in the tops of the thwart bulkheads and today it was going the be the fore and aft decks. I wont bother you with the details, suffice to say I made a simple template and marked stations approximately 50 to 75mm apart. It didn't have to be exact.
Then with a rod I made from an off cut of ply I went about marking the template as though I was lofting a hull. I then transfered those marks to my ply and put a pin in at every mark, I then used my bendy edge to form a curve. It didnt have to be spot on at this stage as I can use my deviders to do a more accurate scribe once it was in the same ball park.
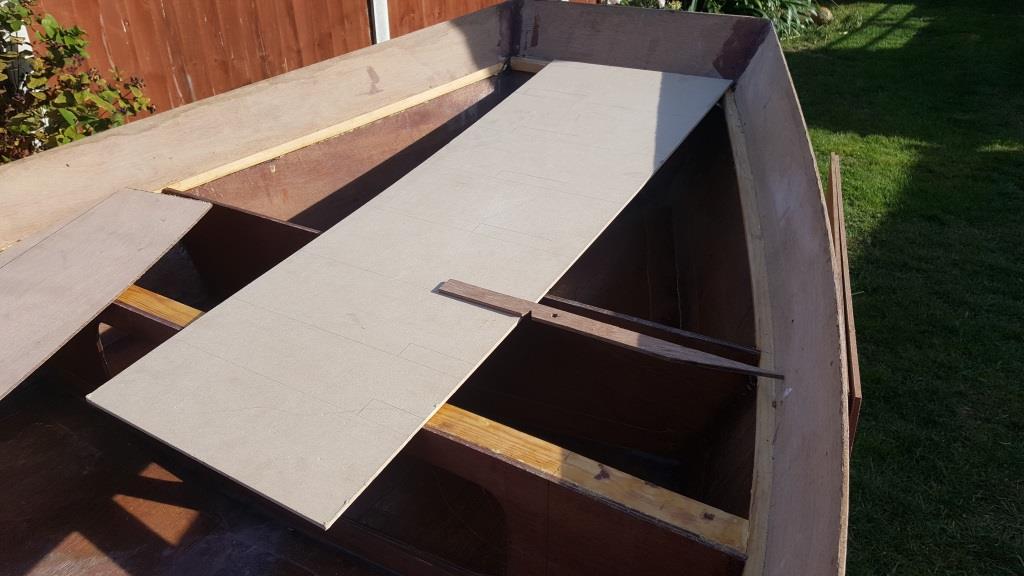
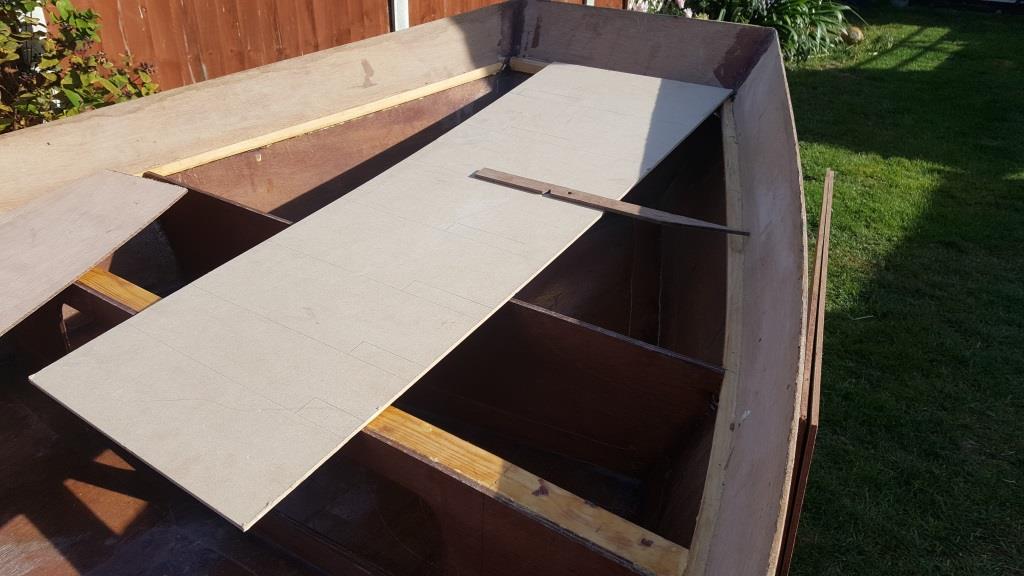
Once I got one side perfect I cut it out and flipped it to see if it fit the other side, and it did. I used the first one I made as a template for the other side making sure the undercut was on the correct side.
I used the same technique on the aft end to make the buoyancy deck.
Next I moved on the the Gunwales.
I have an idea in my head that if I use ply for the gunwales then once its planed and sanded the varnish will bring out the individual laminates running down both sides and look a lot nicer than just a plane piece of hardwood.
I was at first worried it might not be hard enough, but when I made my gaff jaws and epoxied them they were quite rigid, so I thought I would give it a go.
I put on the first laminate on Sunday and Ill go over it with the second when I get in from work today.
Offline
#14 8 Oct 2018 9:35 am
- Jonathan
- Member
- From: Harwich Essex UK.
- Registered: 4 Sep 2018
- Posts: 32
Re: Ten years floating around in my head
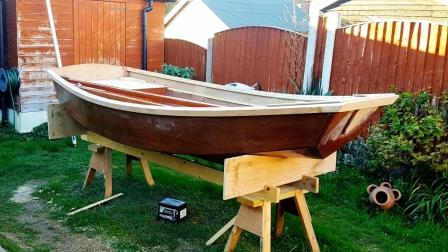
Ive been rambling on for a bit now, and cant remember if Ive told you what Im going to call the boat yet.
Well, when I started work as an apprentice joiner the carpenter that took me under his wing was a lovely fella called Alan Drake.
During our time together he told me of his apprenticeship in the boat yard down at Thundersly in Essex, near Southend.
He told me so many stories of how they made the boats back then and the way they steamed the oak planking to bend it round the frames of the boat. How they fitted them out and some of the techniques they used, I sat there spellbound by his stories and he truly was a massive inspiration in my career as a carpenter and joiner. He never got cross with me and had really nice way about him. He was an old school joined and wore a shirt and tie, with a blue bib and brace over the top, and a wool jacket over that. His black shoes were always polished and his hair combed. Of all the advice he gave me, and I valued it all, he said to me
"It doesn't matter how good a job you do, the only thing anyone will see is the mess you leave behind yourself, so always have a good clean up when you are finished, and they have only your work to look at"
Alan set me on my career path that took me to Germany in the 90's then Norway and on to Africa where I mist my sons first birthday and decided to remain in England and took a position as a Site Agent, a job I've done now for around 21 years.
I've had a good living form my trade, and seen many places I wouldn't have, had I worked in an office. I'm 57 now and not far off retiring myself and thought it might be a nice tribute to name my boat after the man to whom i owe so much, that started his career as a boat builder.
Thank you for everything Mr Alan Drake.
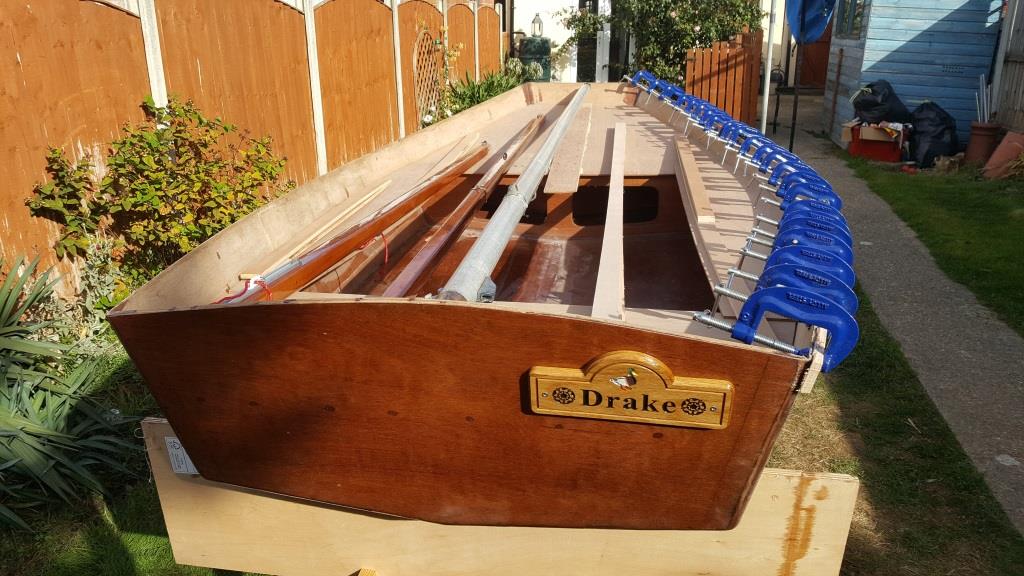
Of course it will look much better once the hull is painted white.
Offline
#15 9 Oct 2018 10:38 pm
- Jonathan
- Member
- From: Harwich Essex UK.
- Registered: 4 Sep 2018
- Posts: 32
Re: Ten years floating around in my head
Gunwales done on the starboard side, tonight I made a start on the port side.
Next it's the inwales.
Offline
#16 15 Oct 2018 10:28 am
- Jonathan
- Member
- From: Harwich Essex UK.
- Registered: 4 Sep 2018
- Posts: 32
Re: Ten years floating around in my head
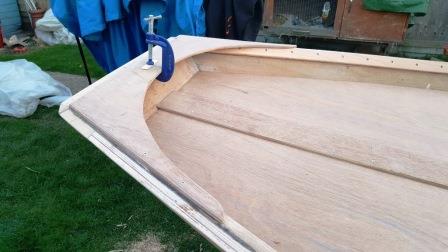
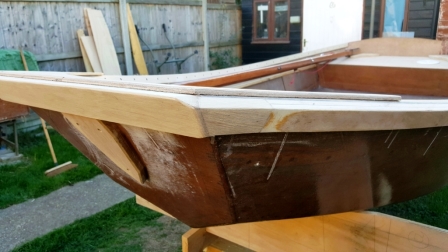
As you know I've been fitting my Gunwales and the look I was after was varnished with the laminates on show.
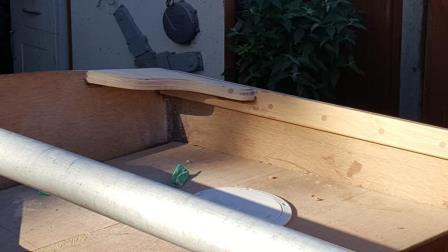
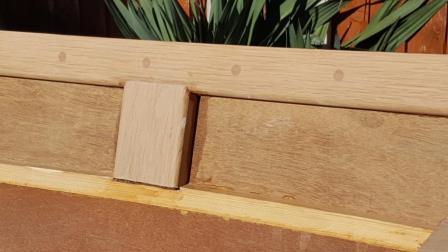
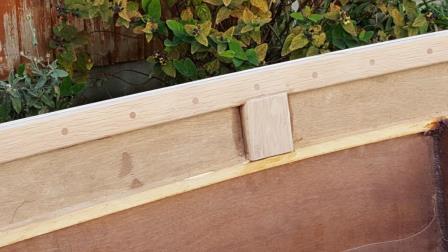
When I got to the bow transom I marked up for the external joint then had a bit of a thought.
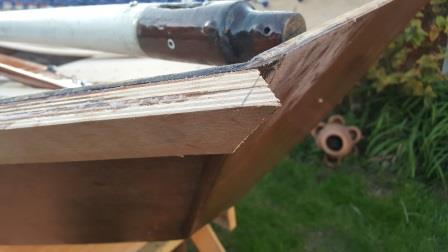
What if I take it out and bounce the bow off something harder than the ply. As a novice its completely possible I will have the odd knock or two whilst learning to sail.
Now as I've said before, this is my first build so I had to think around the problem.
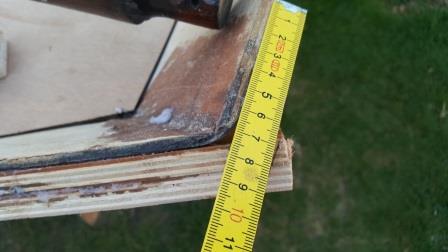
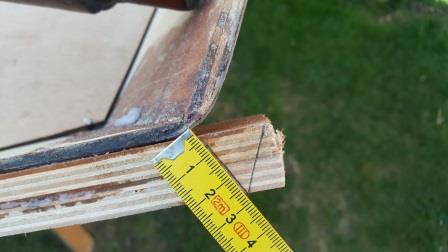
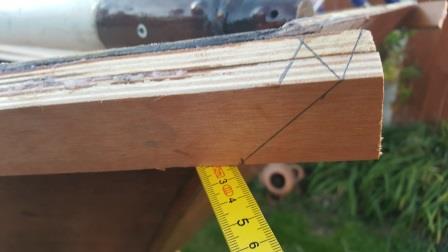
I started with the white Oak on the bow, and thought if I wrapped it round the side around 100mm it would be like a fender on a car, well an old car anyway. Next, do I scarf the joint or butt? I thought if i under scarf and hit something it would act like a chisel and force off the gunwale. If I over scarfed it would slide over the gunwale and crumple the front end. So I decided to butt the joint as I thought on impact it would have the glued surface of the entire gunwale as resistance and only damage the corner. So right or wrong that's what I did.
Once the epoxy has dried and the weather cleared up Ill sand it up ready for varnish.
There is one aspect I'm not sure about and that's the chisel edge of the front Oak fender. I think i might plain it back a bit to square it off a little.
Still got a bit to do to the bow transom, so not quite done in that area yet.
Last edited by Jonathan (15 Oct 2018 10:31 am)
Offline
#17 19 Oct 2018 10:38 am
- Jonathan
- Member
- From: Harwich Essex UK.
- Registered: 4 Sep 2018
- Posts: 32
Re: Ten years floating around in my head
New to boat building that I am, I take in as much information as I can, trawling various sites trying to get a better insight into the subject. Whilst doing so I stumbled over this article about stitch and glue boats and thought it worth sharing.
https://www.clcboats.com/life-of-boats- … s-age.html
The basics of the article are about keeping your stitch and glue boat looking good for decades to come.
I found it quite enlightening and answered questions I haven't even asked yet about Epoxy, Varnish and Paint.
I hope you find it as informative as I did, and it helps keep your vessel in tip top shape.
Offline
#18 22 Oct 2018 8:50 am
- Jonathan
- Member
- From: Harwich Essex UK.
- Registered: 4 Sep 2018
- Posts: 32
Re: Ten years floating around in my head
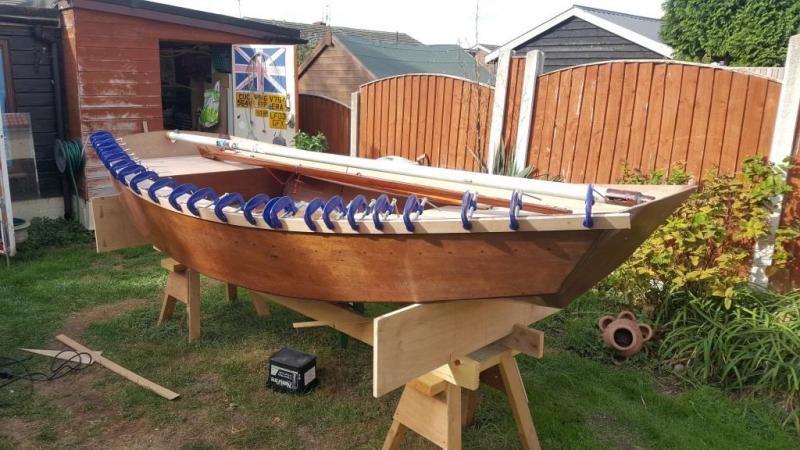
What a lovely weekend we just had, and with the good weather I was able to make more progress.
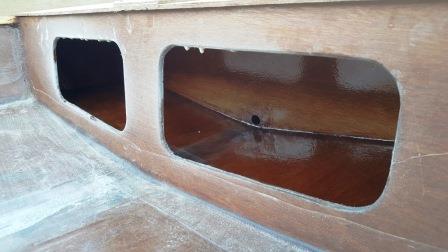
I started by sanding inside the small stowage area under the fore deck as I need to give it another coat of epoxy. I might paint in there to at some point, Im not quite sure yet.
Next, in the Mirror Dinghy construction manual it shows two battens under the fore deck to add strength so I had some off cuts of American whit oak kicking around and decided to use those.
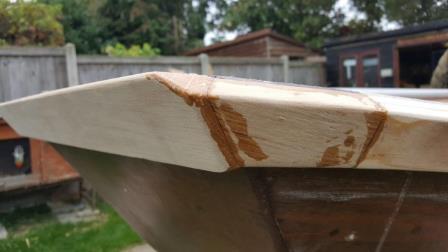
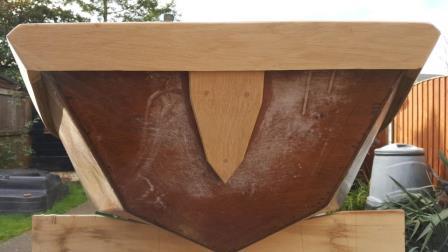
I really like the bow of the Mirror Dinghy and the signature knees so rather than replicate the Mirror version I made my own to suit my boat, the way I like them.
I also wanted them to meet with the grain on the ply in a V which I think will look good when varnished.
Once I got those on I made up my mind to keep the front fender chiseled rather than square it off.
I made the little shield next that will strengthen the bow transom once I fit the fore stay. I tried a couple of times to cut it curved with my jig saw but couldnt get the accuracy I wanted so had a rethink and cut all straight lines using my table saw.
There are a few jobs ive done that have been put off because Ive thought they are going to be a right ball ache. Fitting the inwales was one of them. But so far every one of those jobs has gone really smoothly and without a hitch. I hadnt got any 4 x 35mm stainless screws so I fixed them using just normal zink screws, however when I finished for the day yesterday the first thing i did was to order 100 on line, so the wooden pellets will have to wait until they arrive and I can change out the zink screws
The inwales were also made from American White Oak.
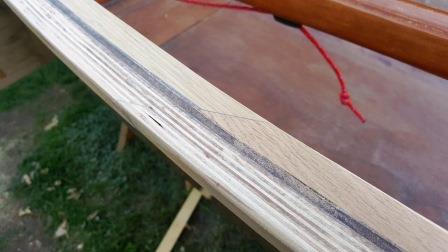
Im looking forward to seeing them varnished.
Next I thought I would have a go at the mast step, also American White Oak. Whilst routing out the pocket for the mast foot to sit in I went a bit deeper than the tenon on the foot as I understand its lucky to place a coin under the mast. I'm going to find a 2018 coin and epoxy it into the bottom of the mortise.
Some years back I was given a bunch of Walnut off cuts from a London gun maker whilst working in town. I saw them sitting in my workshop and thought I just have to use a bit on my boat, so I made a foot plate I will attach the ironmongery to that will run a rope to my anchor.
It has a lovely figure to the grain and I can only imagine what the gun must have looked like it came from.
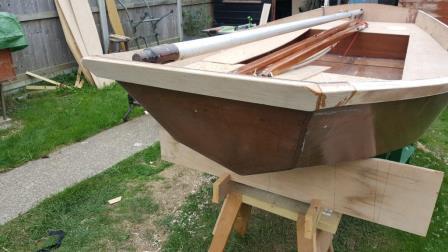
So for now that's about all I have to report other than my next job will be the blocks that hold the shrouds as Im gagging to get the mast stood up lol ![]()
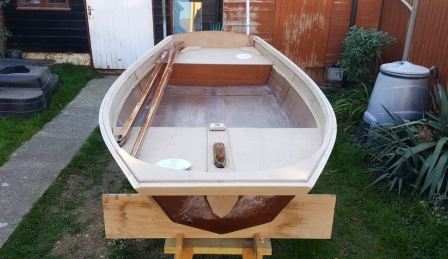
Taking shape nicely now.
Offline
#19 29 Oct 2018 8:55 am
- Jonathan
- Member
- From: Harwich Essex UK.
- Registered: 4 Sep 2018
- Posts: 32
Re: Ten years floating around in my head
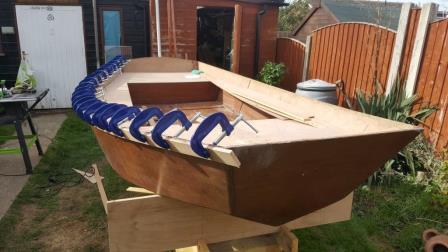
So, not quite so nice weather this weekend, and only a limited time available to work on the boat
Last week I had to use zink coated screws to fix the inwales, so first job of the day was to replace them all with stainless steel. Once I had done that I went along and pelleted the holes. Now I know some folks would say I should have cut oak pellets, but I like to see them on show so I used Iroko.
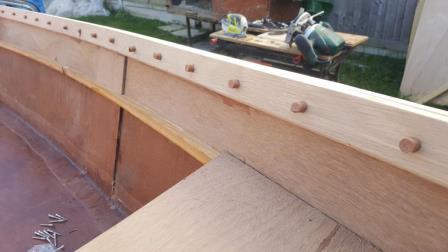
Whilst they were drying I fitted the knees I roughed out last week fitting the tops tight but leaving about a millimetre gap on the underside so I had plenty of resin ensuring a good bond. I also popped in a couple of screws to hold it in place whilst the glue went off.
I know the Mirror Dinghy has simple right angle triangle knees on the aft transom, but this is my boat and isn't really a Mirror so Ill have them the way I like them.

And I like them like this.
Next I cut and fitted the the backers for my shrouds to fit to, and epoxy glued those on. I basically used my router to cope out the ends of the blocks to sit nicely over the round-over on the underside of my inwales.
I also plugged up the holes in the bow transom with Iroko pellets and sanded them off.
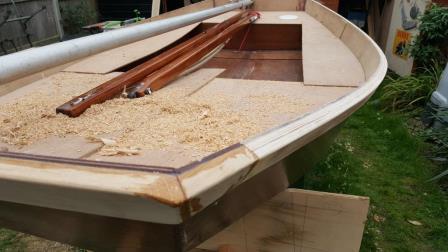
As the weather is getting a bit chilly now, I decided to take off the decks and take them to work so I can epoxy the undersides prior to fitting them. So at some point today Ill sand them ready to epoxy whilst the resin and hardener has a chance to warm up a bit in my office.
So, not a massive amount of progress, but better than none.
Plus when you think about it, once the fore deck is on I should be able to get the mast up and figure out my rigging, so its all good ![]()
Offline
#20 30 Oct 2018 9:05 am
- Jonathan
- Member
- From: Harwich Essex UK.
- Registered: 4 Sep 2018
- Posts: 32
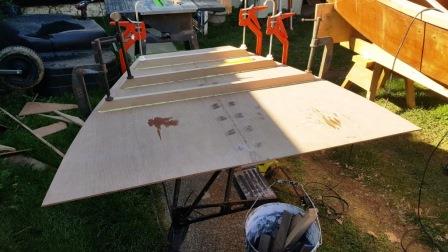
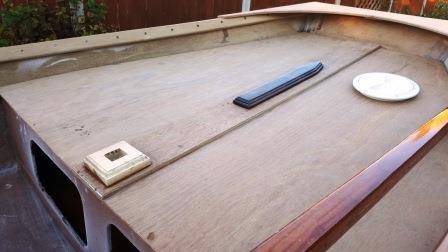
Re: Ten years floating around in my head
I think its about time I thought about getting my fore and aft decks on so I can build my thwart buoyancy tanks. First thing I need to consider is getting the underside of all my deck plates coated in epoxy to waterproof them. I stuck them into the back of my Van and brought them into work. Gave them a light sanding then applied plenty of Fyne Boats epoxy to the under side. Doesn't need to be pretty, just water tight.
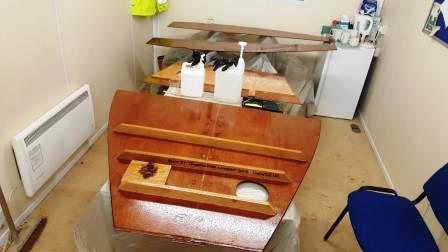
Just before I went home I put both heaters on and let it cook over night.
Came in this morning and they were bone dry. They look pretty good, but I might just give them one more coat of epoxy and take them home tomorrow.
Offline
#21 21 Nov 2018 4:39 pm
- Jonathan
- Member
- From: Harwich Essex UK.
- Registered: 4 Sep 2018
- Posts: 32
Re: Ten years floating around in my head
So, its been a couple of weeks since i posted last and to be honest I have put the boat under cover for the winter. However before I did there were a few small jobs I wanted to do to it so I had a mile stone in my head.
I fitted the knees to the stern transom and gave them a little something extra to the design on the Mirror Dinghy. I made them from White oak and glued screwed and pelleted them on to the boat.

I then made my backer blocks and glued those on with epoxy. These are where the shrouds will attach to.

I also sanded off all of the Iroko the pellets on the inwales.
The fixing for the forestay on the bow transom had the pellets sanded off and as far as I could make out the Dinghy was now ready for a test fit of the mast.
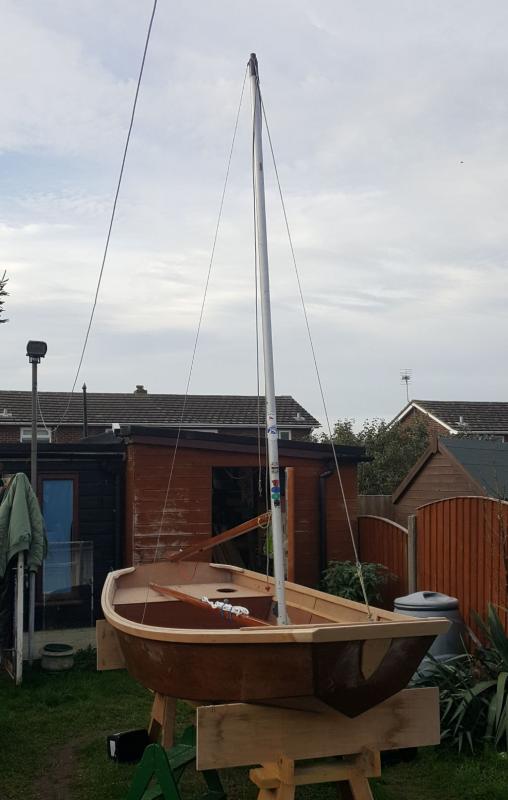
This was quite a satisfying moment, because all the research and careful measuring resulted in the mast standing perfectly in the seat, and the shrouds coupling to the port and starboard sides exactly where they were supposed to.
I have been working on the forks on my gaff as I made them to small and couldnt fit it to the boat but more about those next.
Offline
#22 13 Dec 2018 2:45 pm
- Jonathan
- Member
- From: Harwich Essex UK.
- Registered: 4 Sep 2018
- Posts: 32
Re: Ten years floating around in my head
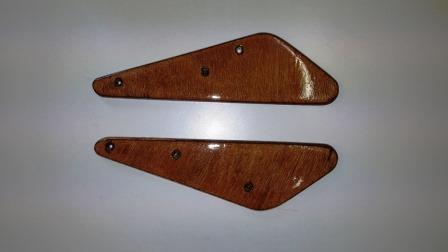
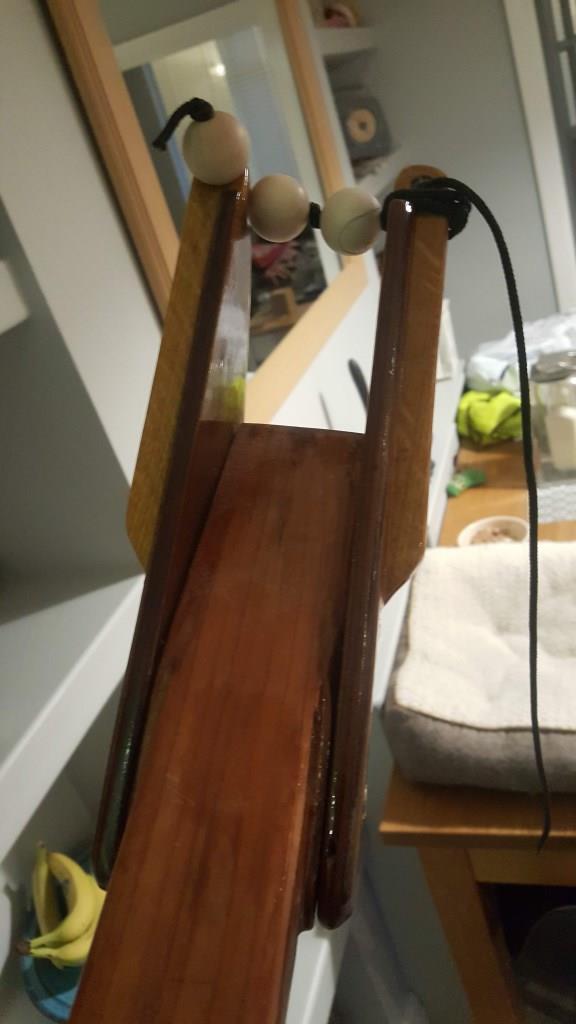
So, a while back I made the jaws of my gaff from ply, but when I came to fit them they were to small and the tie rope was set to far back to pass round the mast.
I had a little rethink and decided to make them slightly larger, but also add splines to the sides so the cord exited at a different angle so as not to foul the mast.
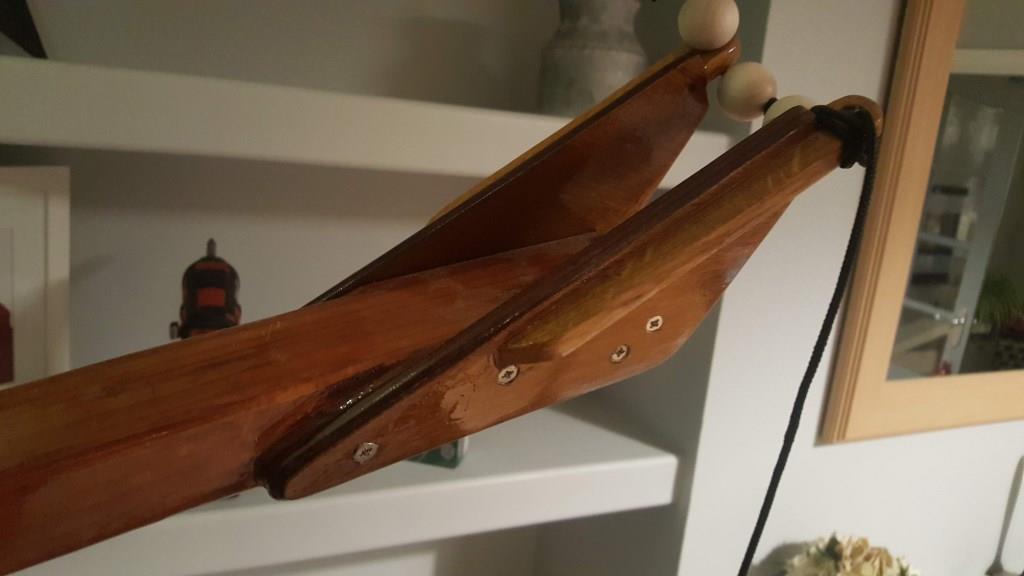
I also found on ebay some 25mm hardwood balls with holes pre-drilled in them to use as a very basic roller baring to help the gaff run up the mast.
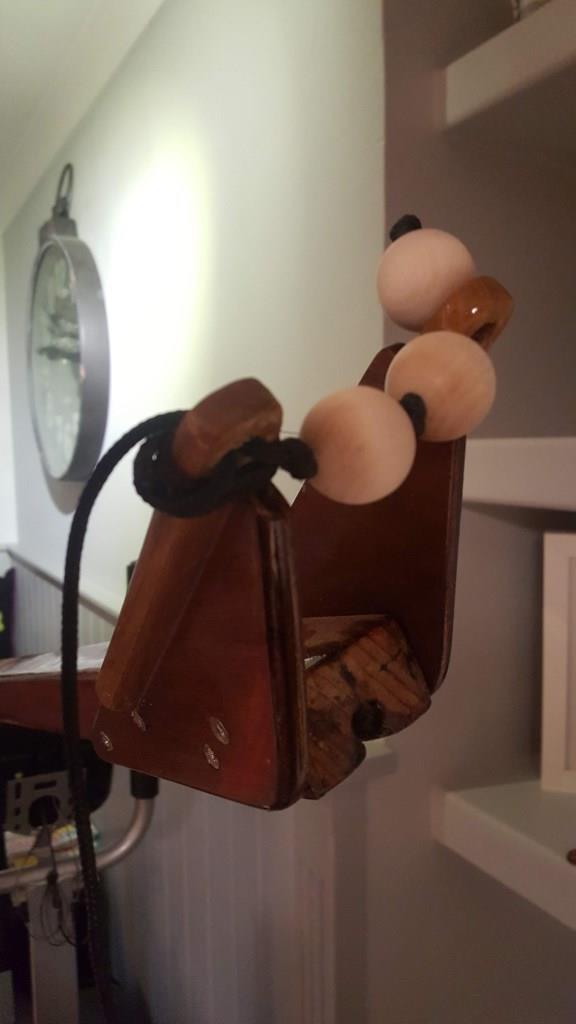
I also thought it might be a good idea to bolster the strength of the ply and white oak bu adding a layer of fiberglass and resin to them before adding three coats of varnish.
Just need a nice forecast for a weekend when I can get the boat out and try the mast gaff and boom all together.
Still got plenty to do though. I'm off to Kent Blaxill in Colchester at the weekend to get a sheet of 18mm marine ply for my rudder and dagger board. £69.58 including VAT.
This is the design i found on the internet and have decided on.

Ive made my template from 6mm MDF and placed an order for the stainless hardwear from Trident.
To be honest I hadent got a clue what I needed but a really helpful guy on the other end of the phone talked me through it and I got everything I needed for £65.00
I am however getting a bit low on epoxy, so Ill be placing an order with the good folks at Fyne Boats for that in the very near future.
Offline
#23 13 Dec 2018 3:03 pm
- Jonathan
- Member
- From: Harwich Essex UK.
- Registered: 4 Sep 2018
- Posts: 32
Re: Ten years floating around in my head
Anyone else at this stage interested in building a rudder here is a link to Trident
and this is a breakdown of what you will need and the costs.
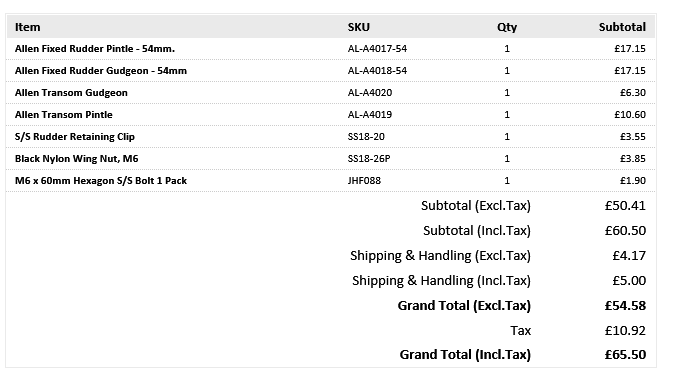
Plus plywood and epoxy
Last edited by Jonathan (13 Dec 2018 3:04 pm)
Offline
#24 28 Dec 2018 6:35 pm
- kangoo01fr
- Member
- From: Segny, France
- Registered: 26 Dec 2018
- Posts: 6
Re: Ten years floating around in my head
Wow that's realy a Professional build!!
I'm jealous of your F-clamp series!! ;-)
Offline
#25 28 Dec 2018 9:07 pm
- Jonathan
- Member
- From: Harwich Essex UK.
- Registered: 4 Sep 2018
- Posts: 32
Re: Ten years floating around in my head
Thank you for those kind words Sir, but like you it's also my first build.
I started on my rudder yesterday, went fishing today and should have an update tomorrow.
Offline