A forum for discussing wooden boats and boat building
You are not logged in.
- Topics: Active | Unanswered
#1 30 Jul 2018 8:17 pm
- Sam Taylor
- Member
- Registered: 22 Oct 2011
- Posts: 50
Building From Plans .... Wood Duck 12' .... Part 2
Apologies for the delay but some progress has been possible. Now to remember how to save and upload the photos...... here goes......

This where I'd got up to last time.
Last edited by Sam Taylor (30 Jul 2018 9:18 pm)
Offline
#2 30 Jul 2018 9:27 pm
- Sam Taylor
- Member
- Registered: 22 Oct 2011
- Posts: 50
Re: Building From Plans .... Wood Duck 12' .... Part 2
After being in storage and wrapped up from the elements things were pretty much as I remember but what to do next has been a memory test. Frustratingly a couple of taped joints had taken a blow so Ive to start with repairs in a couple of places. Injectining some epoxy from the outside to attempt to reclaim a join - has been moderately successful. Lesson is - store it carefully !
Offline
#3 31 Jul 2018 9:24 pm
- Sam Taylor
- Member
- Registered: 22 Oct 2011
- Posts: 50
Re: Building From Plans .... Wood Duck 12' .... Part 2
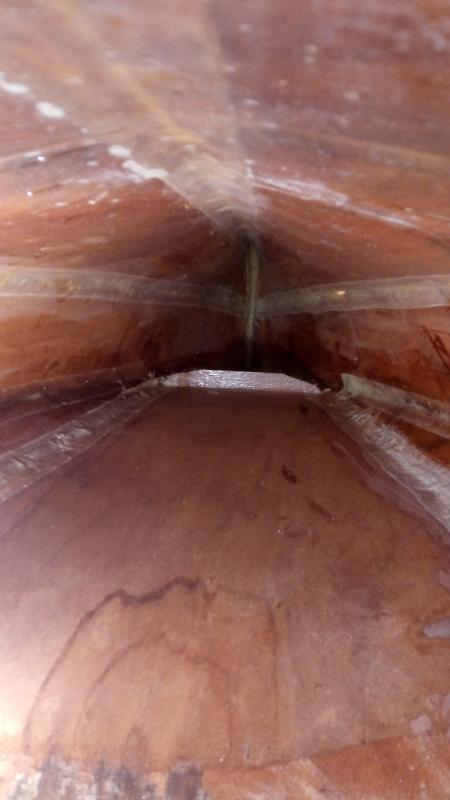
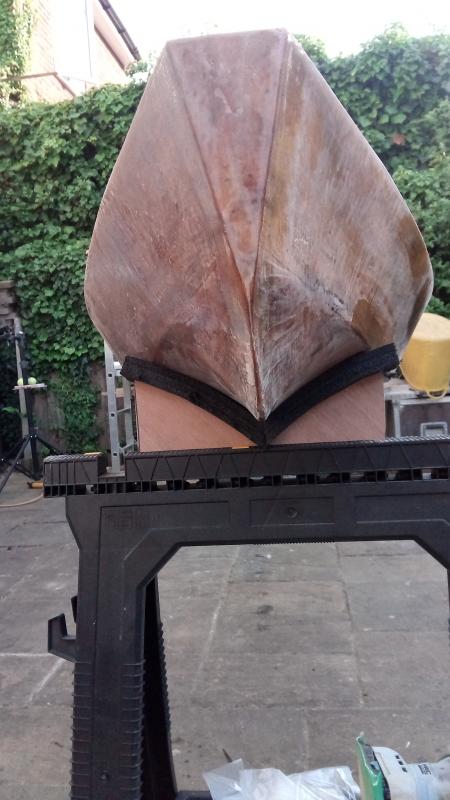
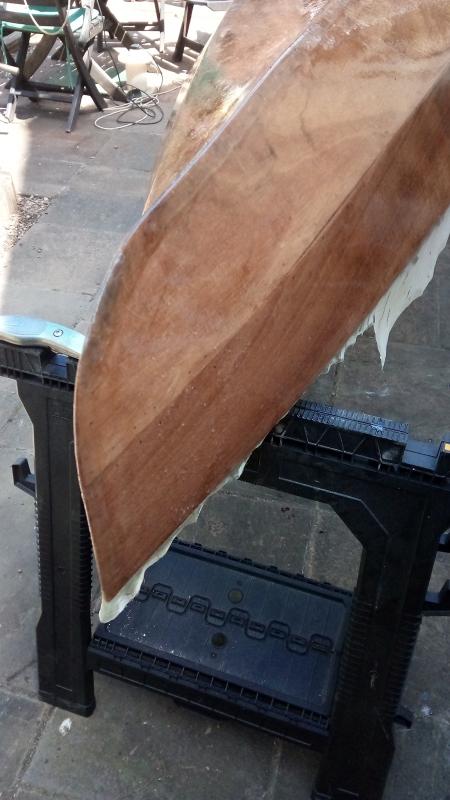
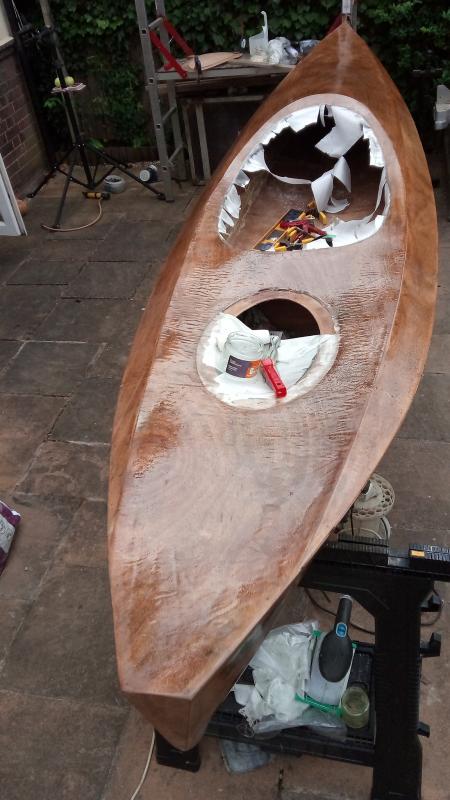
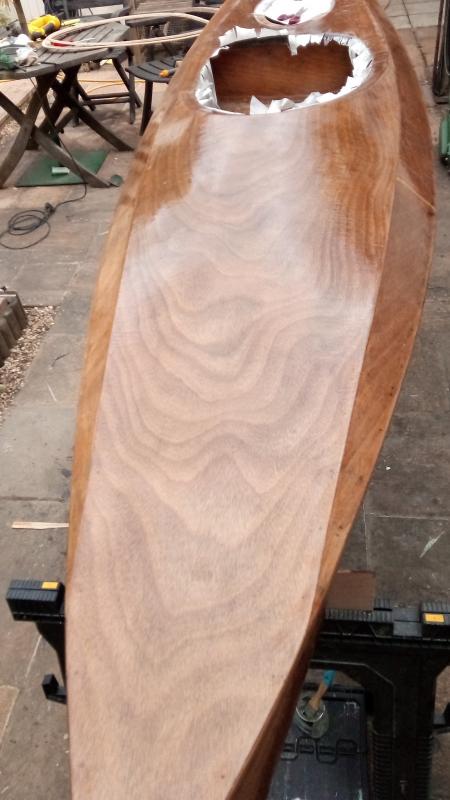
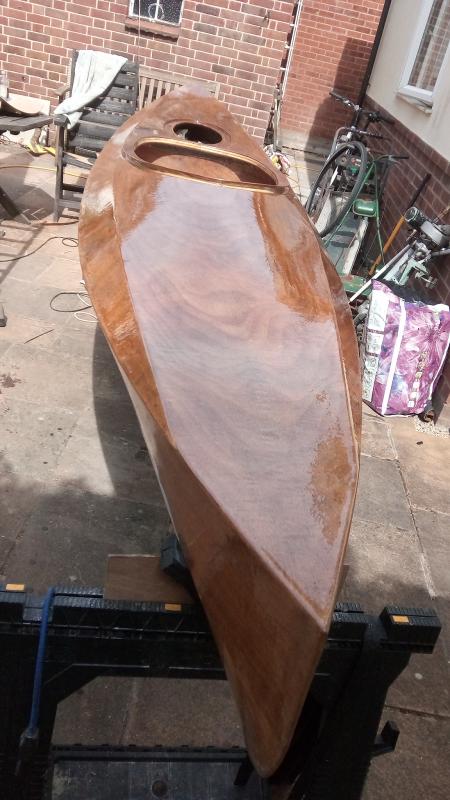
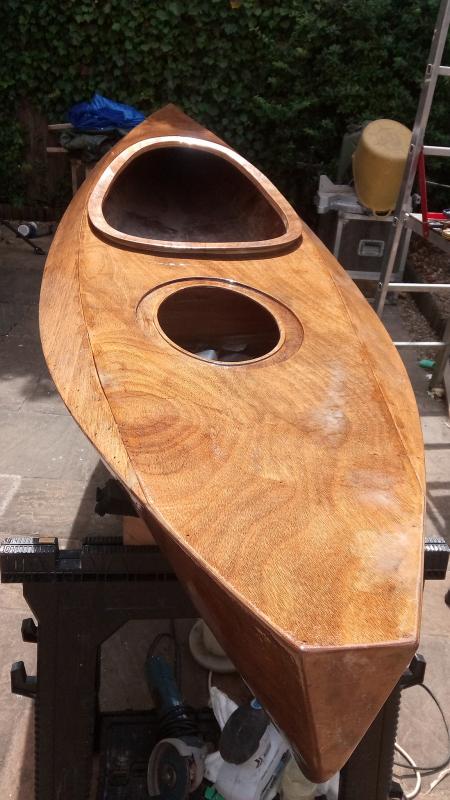
With the bow propped up a ladder at 45 degs...it gave me the opportunity to stand and look inside and see whats still to do...
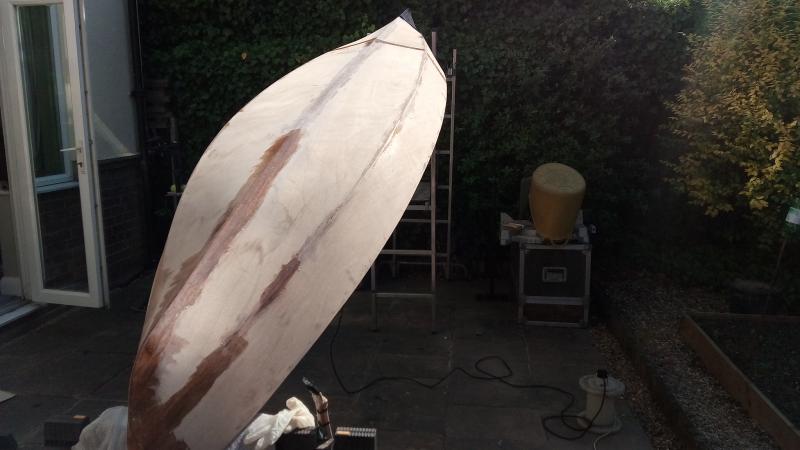
The view reminds me of some blistering and more epoxy required to tidy up the inside + how to reach the very bow with some more epoxy. Perhaps the pouring trick.... later...
And to avoid any mishaps I made myself a decent pair of 'keepers' that fit to my saw-horses to keep it all steady. recommended.
Offline
#4 31 Jul 2018 9:27 pm
- Sam Taylor
- Member
- Registered: 22 Oct 2011
- Posts: 50
Re: Building From Plans .... Wood Duck 12' .... Part 2
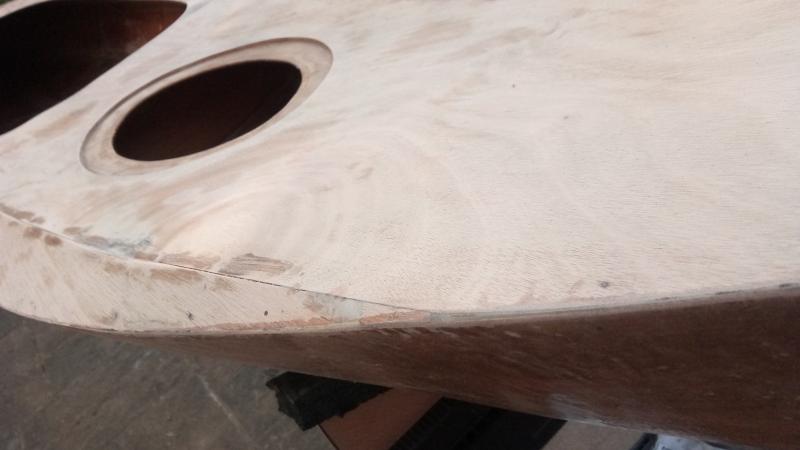
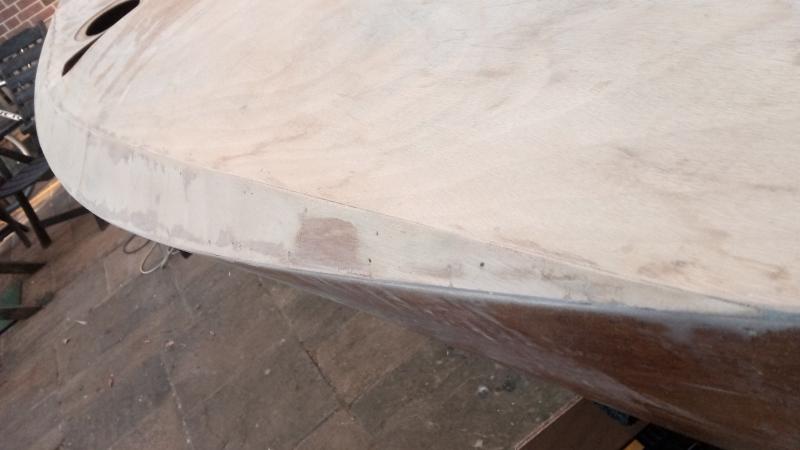
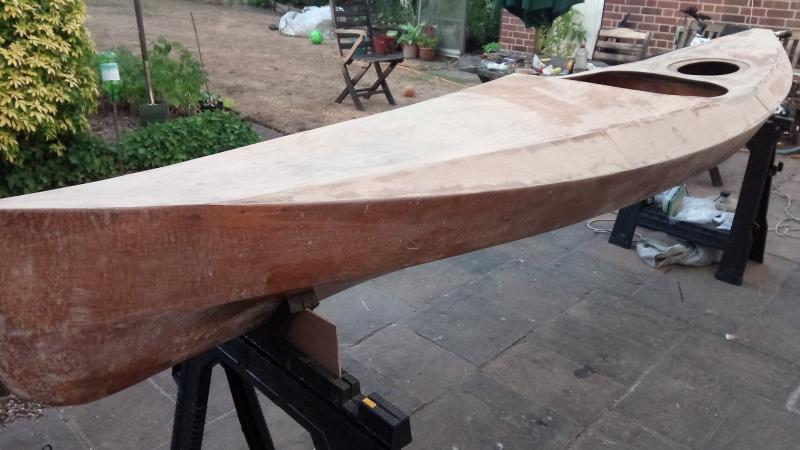
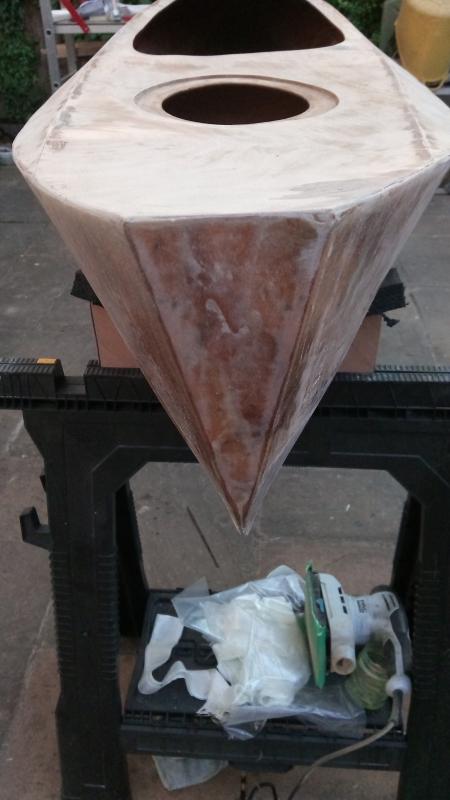
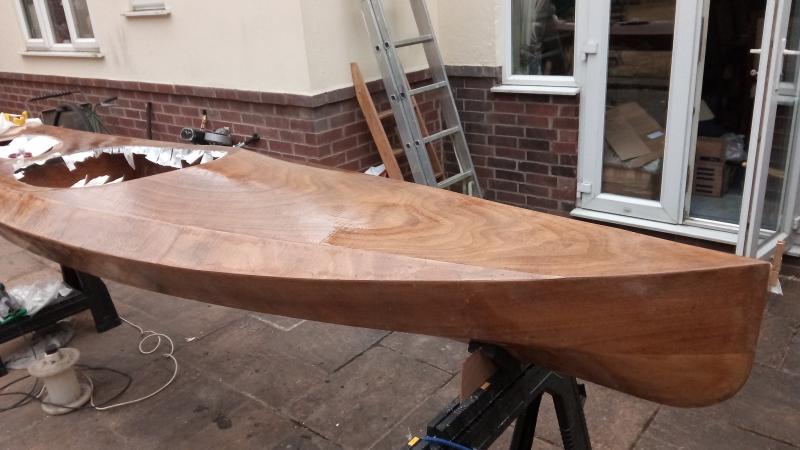
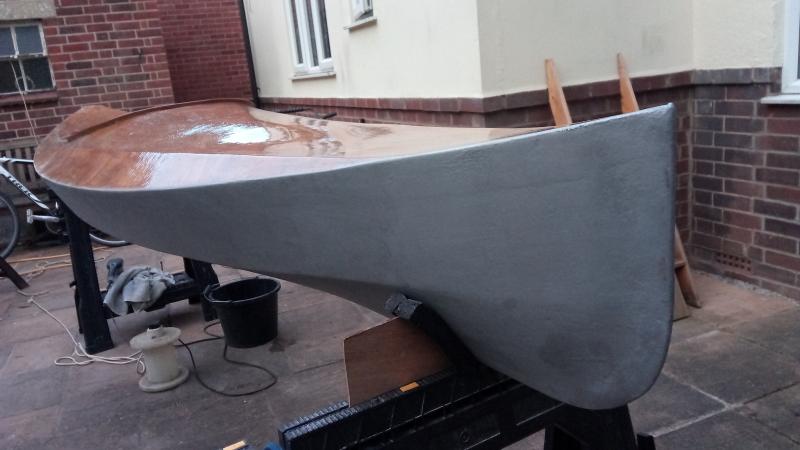
Back to preppeing the hull in readiness of a clear coat prior to the cloth. I added a keel strip of cloth-tape just for that belt n braces strength...

More prep to the deck and joins...
Offline
#5 31 Jul 2018 9:31 pm
- Sam Taylor
- Member
- Registered: 22 Oct 2011
- Posts: 50
Re: Building From Plans .... Wood Duck 12' .... Part 2
Hot weather made this an interesting task. Clothed from bow to stern and plenty of epoxy.
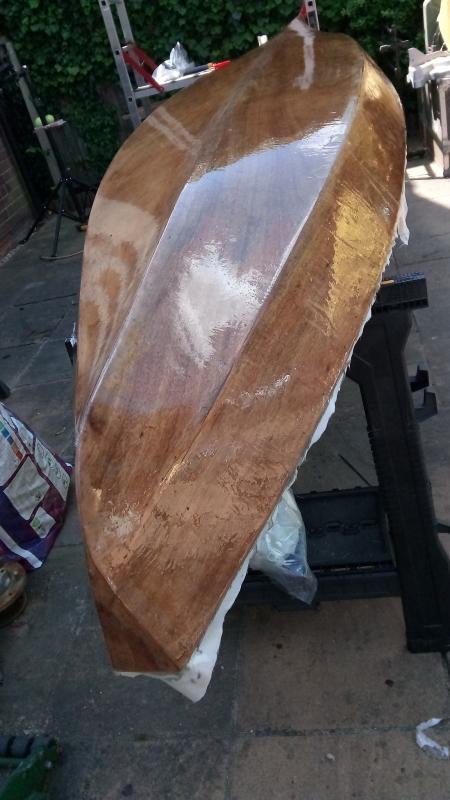
A job for more than two hands.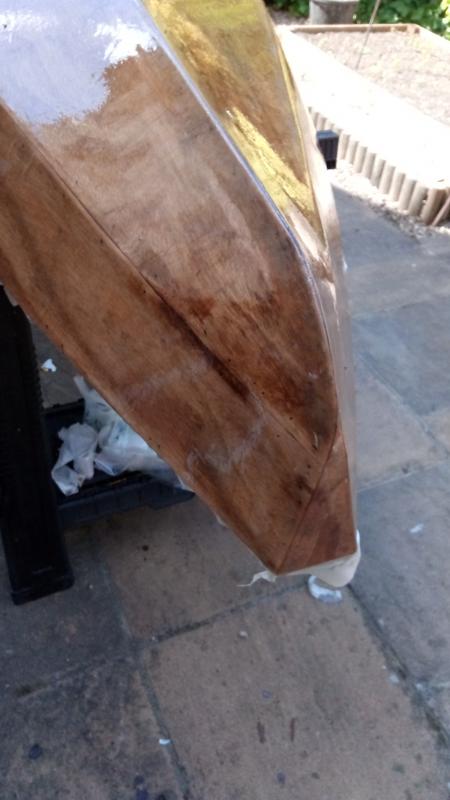
Had to keep an eye out for developing blisters. Had a few to contend with but on the hole this went quite well.
Offline
#6 31 Jul 2018 9:36 pm
- Sam Taylor
- Member
- Registered: 22 Oct 2011
- Posts: 50
Re: Building From Plans .... Wood Duck 12' .... Part 2
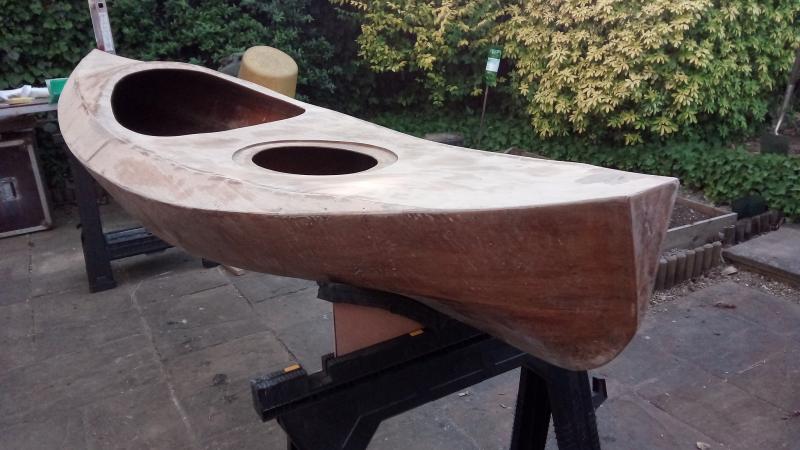
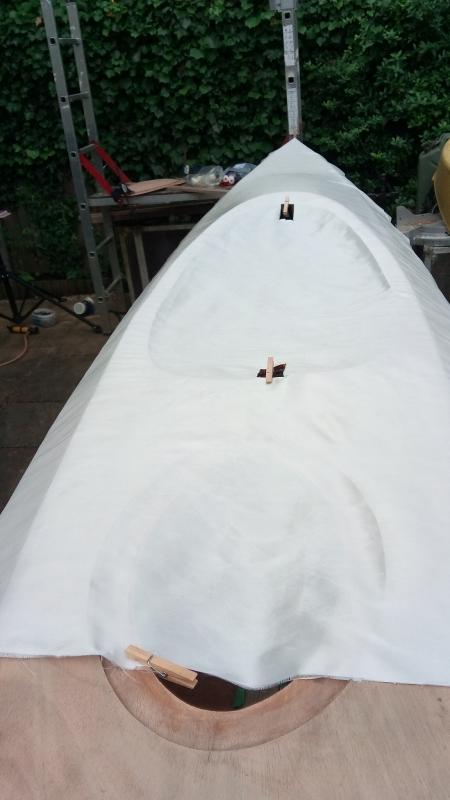
Once cured, we turned back to start preps on the deck and clothing..
Trial fit of the cloth.. shall have to make a join in the cloth across the aft area, but needs must, we'll see how this goes.
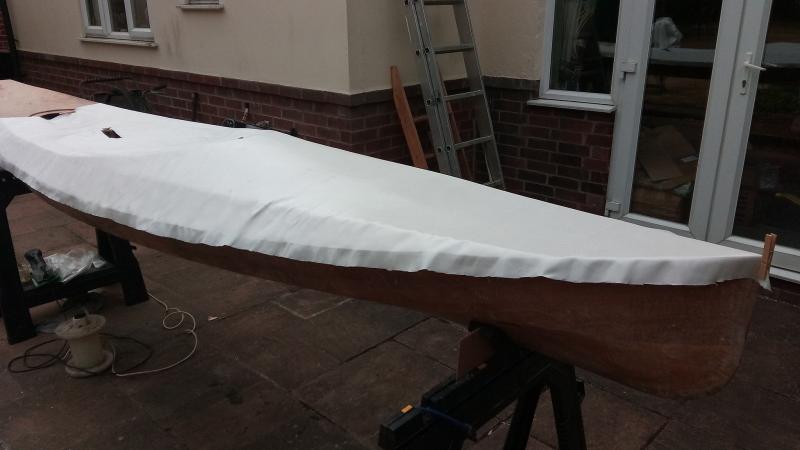
I've trimmed the edge / overlap as best I think necessary, we'll see how this pans out...
Offline
#7 31 Jul 2018 9:40 pm
- Sam Taylor
- Member
- Registered: 22 Oct 2011
- Posts: 50
Re: Building From Plans .... Wood Duck 12' .... Part 2
Another two-man effort, this was trickier than expected to wet out the cloth top-side, found cutting and relieving the cockpit helped manourvre the cloth to avoid blisters. the overlapped top edge was reasonably successful as was the joing across the rear hatch area.

Offline
#8 31 Jul 2018 9:47 pm
- Sam Taylor
- Member
- Registered: 22 Oct 2011
- Posts: 50
Re: Building From Plans .... Wood Duck 12' .... Part 2
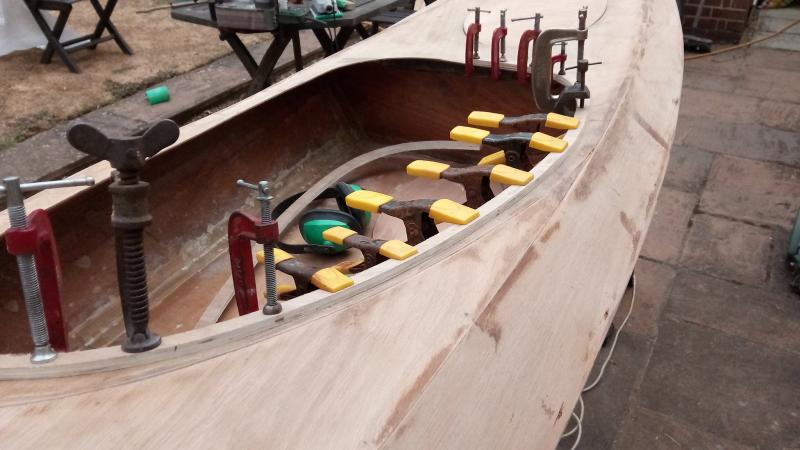
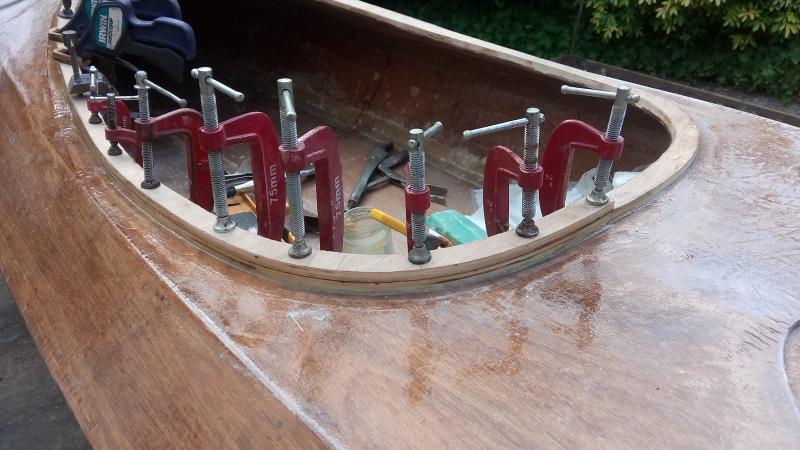
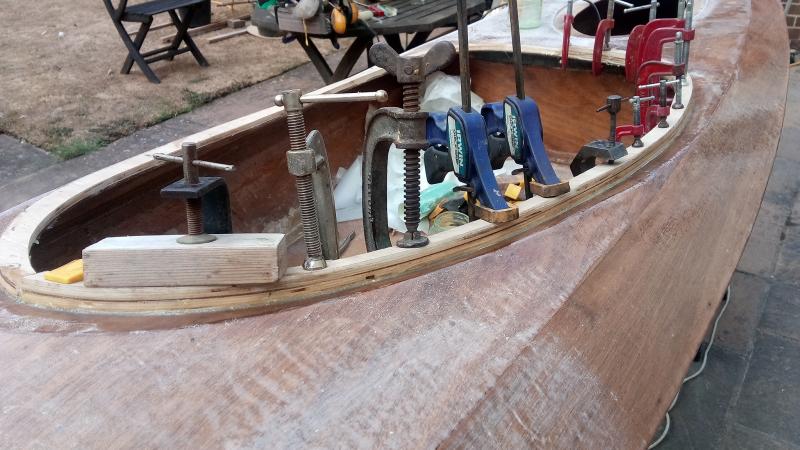
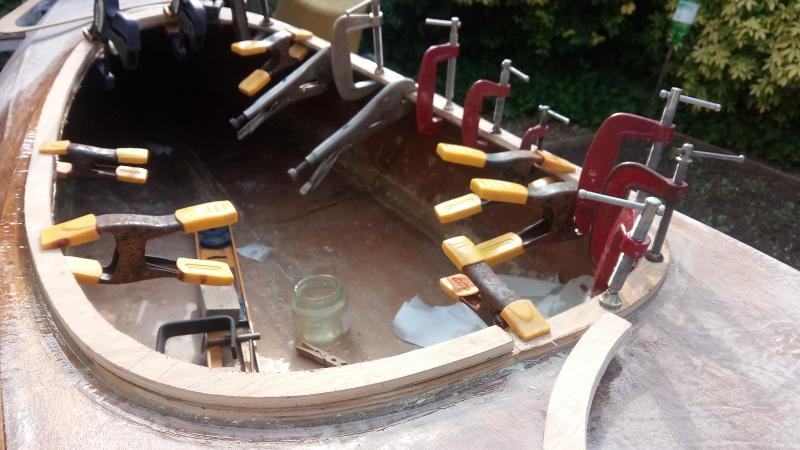
The coaming presented a few challenges. Each half of each layer was cut from the template, there were subtle differences. Each two halves (Lh & RH) were clamped together and sanded as best as possible to ensure a reasonable shape and neatness before epoxying to the deck. Each half was dampened and clamped in position to allow it to take on some shape as the cockpit area does make the coaming twist / rise quite a bit. I adopted a different approach and chose to epoxy each layer, ie, building it up one layer at a time. Whilst one half was curing, id clamp another half in place to attempt to make it gain some shape. then repeat on the other side. The effort in sanding them as pairs has reduced the need for more edge sanding around the inner radius....I think.
Last edited by Sam Taylor (31 Jul 2018 9:50 pm)
Offline
#9 31 Jul 2018 9:53 pm
- Sam Taylor
- Member
- Registered: 22 Oct 2011
- Posts: 50
Re: Building From Plans .... Wood Duck 12' .... Part 2
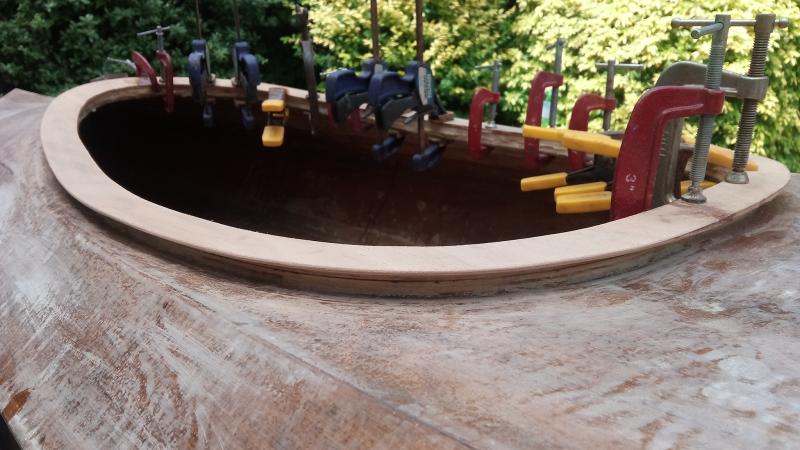
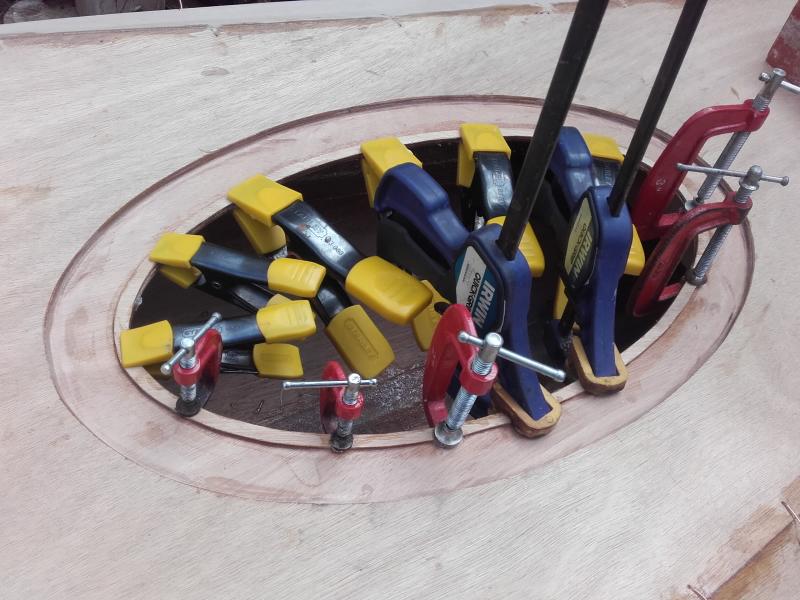
The coaming top again was cut to my template and will need adjustments to the outer and inner edges. Thankfully enough material all round to make it fit. A trial fit proved I was close with my marking out....

Offline
#10 1 Aug 2018 9:13 pm
- Sam Taylor
- Member
- Registered: 22 Oct 2011
- Posts: 50
Re: Building From Plans .... Wood Duck 12' .... Part 2
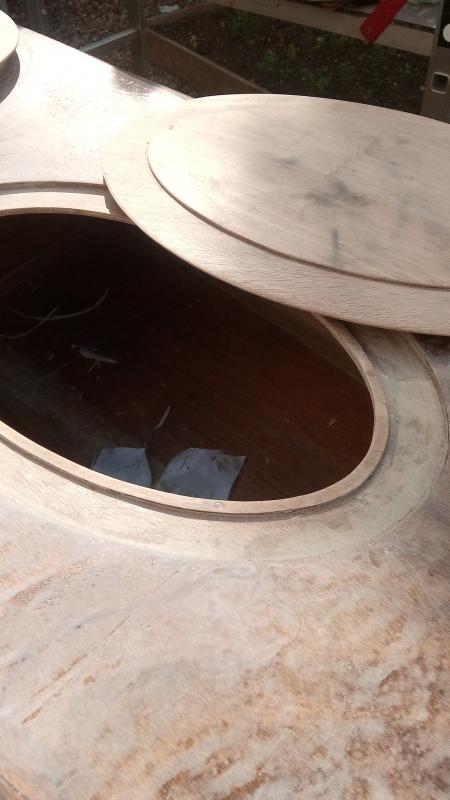
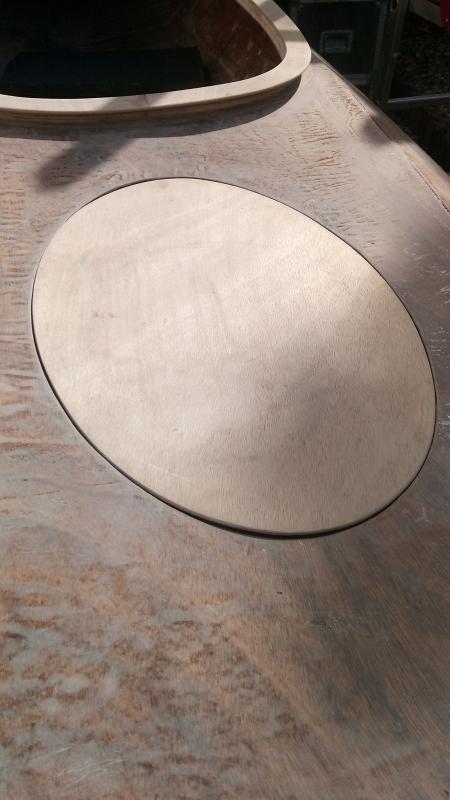
No dramas here, guled on the hatch inner flange and cleaned it all up. The precut hatch lid and backing piece were glued together over a 1/2" dowel and pulled down to encourage a slight curve which worked out ok, some trmming of the edge will be needed after all the epoxy coats are on.
Offline
#11 1 Aug 2018 9:15 pm
- Sam Taylor
- Member
- Registered: 22 Oct 2011
- Posts: 50
Re: Building From Plans .... Wood Duck 12' .... Part 2
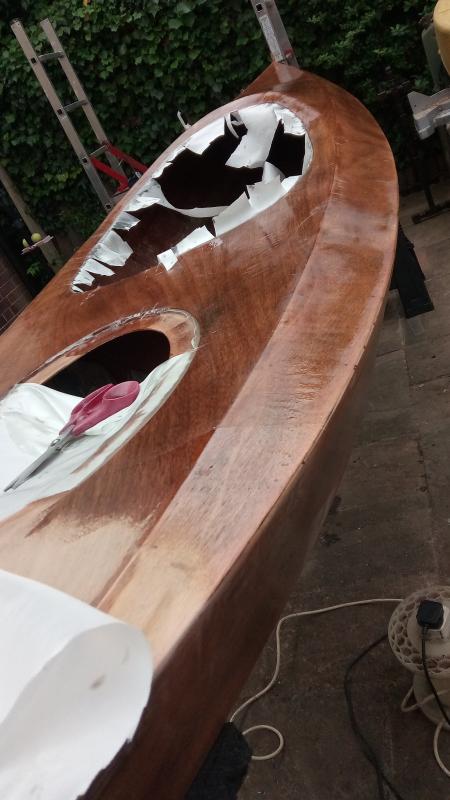
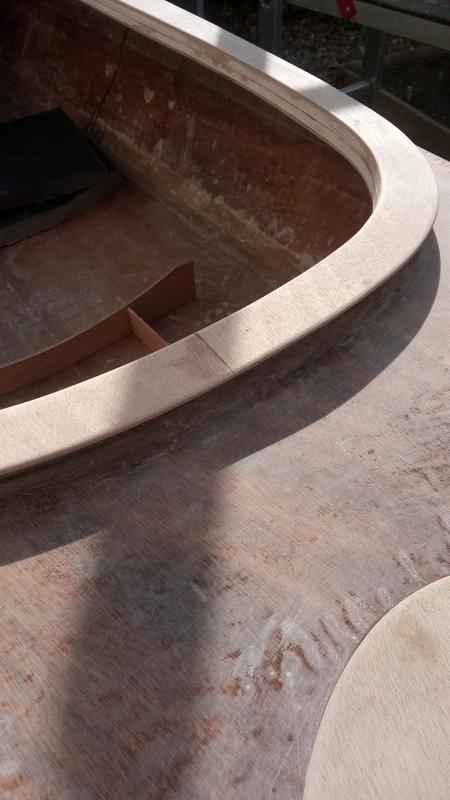
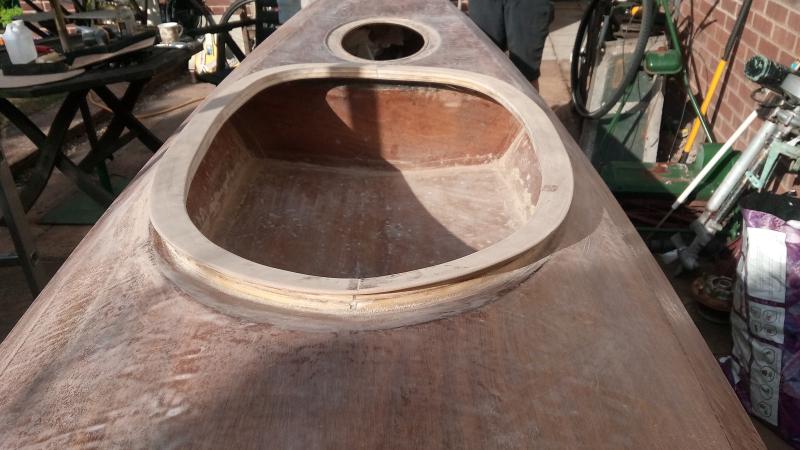
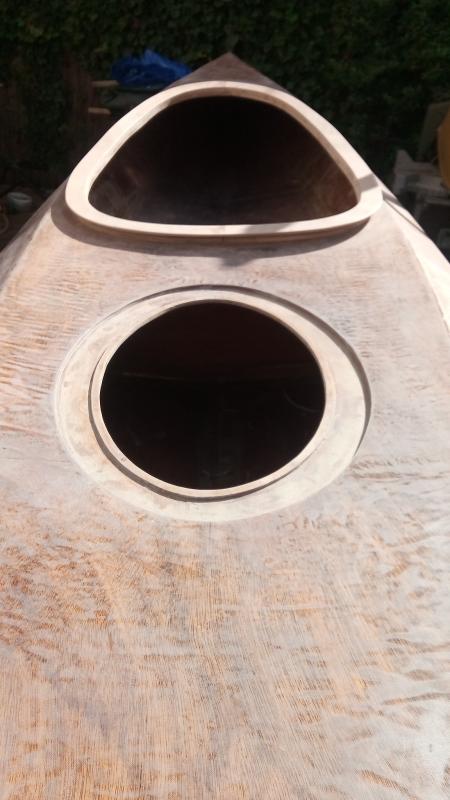
Back edge of the coaming now finished and dressed up, all looks and feels ok. Surprising how much the flange face twists and curves, but it wil do its job if i need to have a spray deck fitted... still need to run out some clear coats on the hull and deck areas..
Around the hatch area I suffered some terrible blistering an raised ribs... cannot think why, we tried our best to keep it all staright and rolled out flat and need but after curing we returned to find it all rucked up. No bother... it will get the mother of all sandings and a a couple of clear coats to level it all off... lets see how that pans out...
Last edited by Sam Taylor (1 Aug 2018 9:18 pm)
Offline
#12 1 Aug 2018 9:22 pm
- Sam Taylor
- Member
- Registered: 22 Oct 2011
- Posts: 50
Re: Building From Plans .... Wood Duck 12' .... Part 2
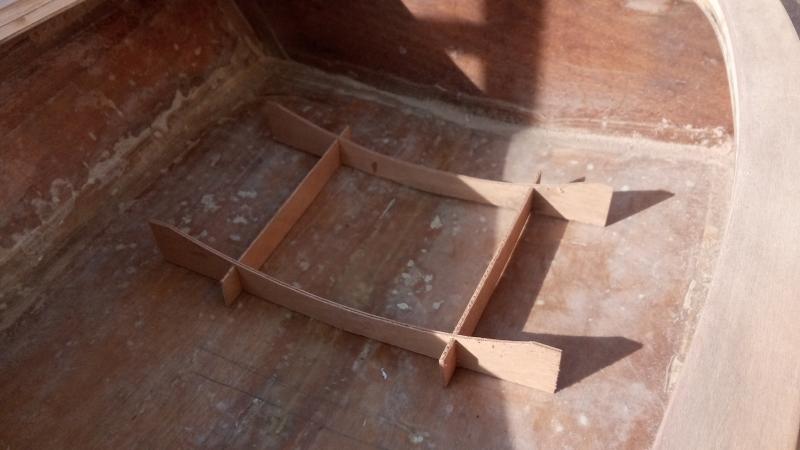
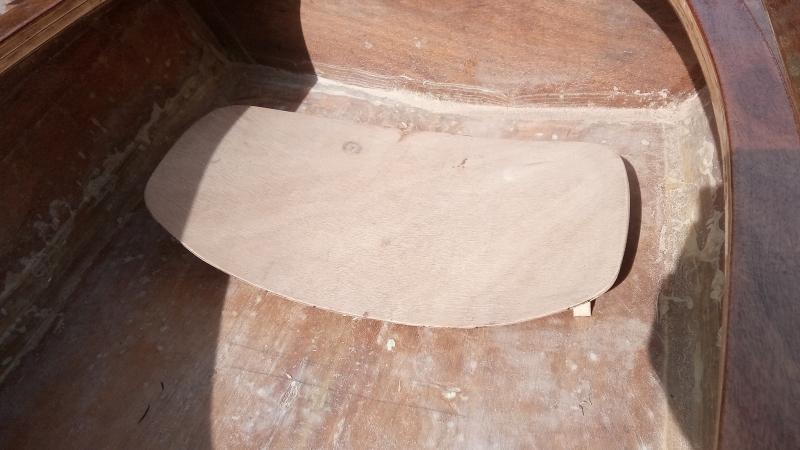
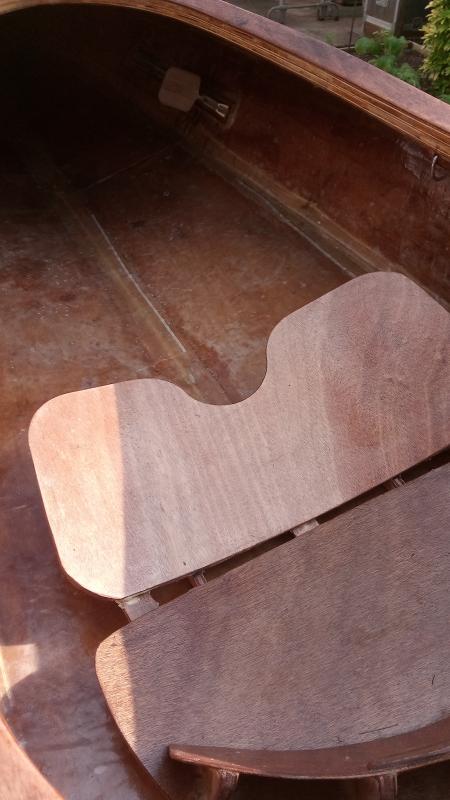
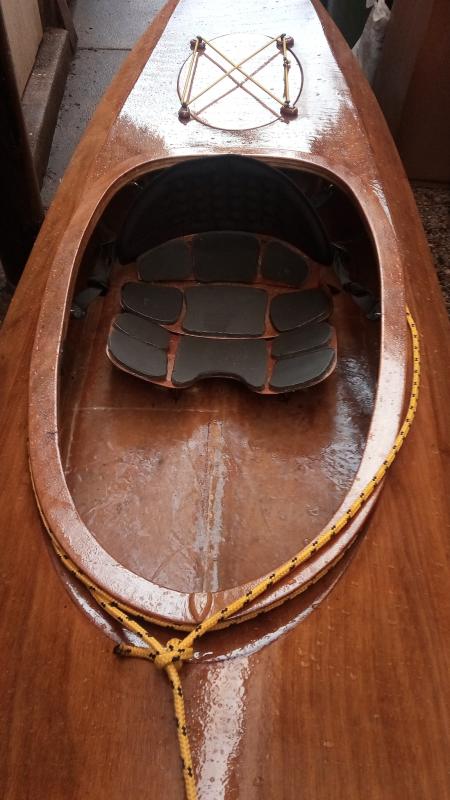
Comfort is everything... in the other canoe we have I made some curved seat bases and with an added cushion they are bearable for an hours paddling. I want the kayak to be equally comfy and have started thinking about how a curved seat base could fit into the space. Early days here but I'll do my best to fashion up a seat and then see how it feels with me on it... this will give me chance to mark out the position for the foot rests and knee pads and fit the back rest / pad....
Offline
#13 1 Aug 2018 9:24 pm
- Sam Taylor
- Member
- Registered: 22 Oct 2011
- Posts: 50
Re: Building From Plans .... Wood Duck 12' .... Part 2
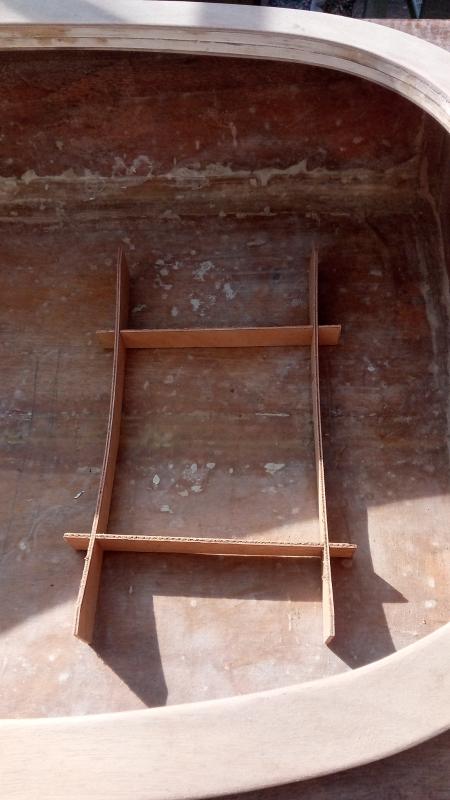
Still working on a seat idea.... this is now at version 3....
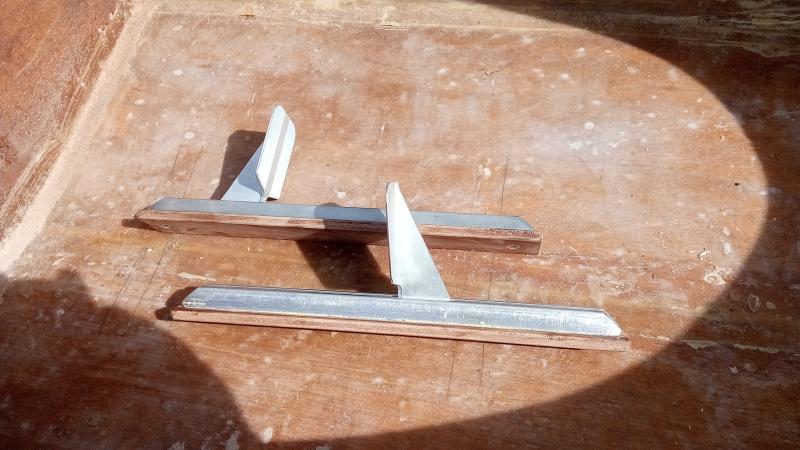
Foot rests arrived in the post and now mounted a backing strip ready for epoxy-ing into the hull after a seat fitting...
Finally a couple of clear-coats feels like I'm making progress. If I can get a coupel of coats on the rest of the hull then its primer & paint next..
Last edited by Sam Taylor (4 Aug 2018 4:36 pm)
Offline
#14 8 Aug 2018 7:27 pm
- Sam Taylor
- Member
- Registered: 22 Oct 2011
- Posts: 50
Re: Building From Plans .... Wood Duck 12' .... Part 2
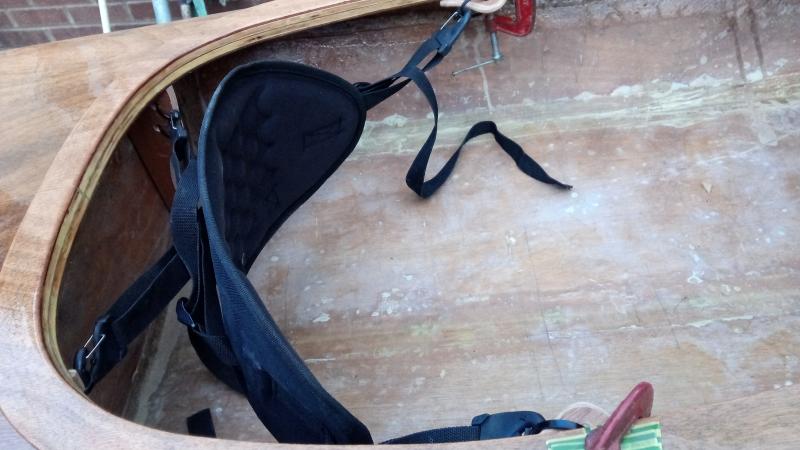
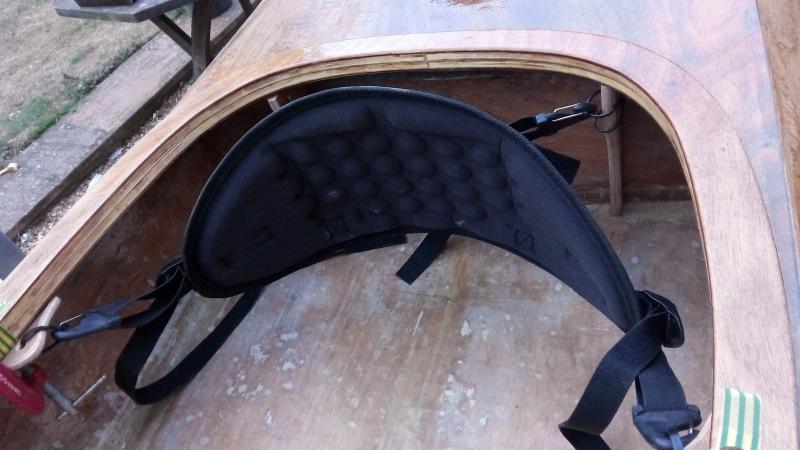
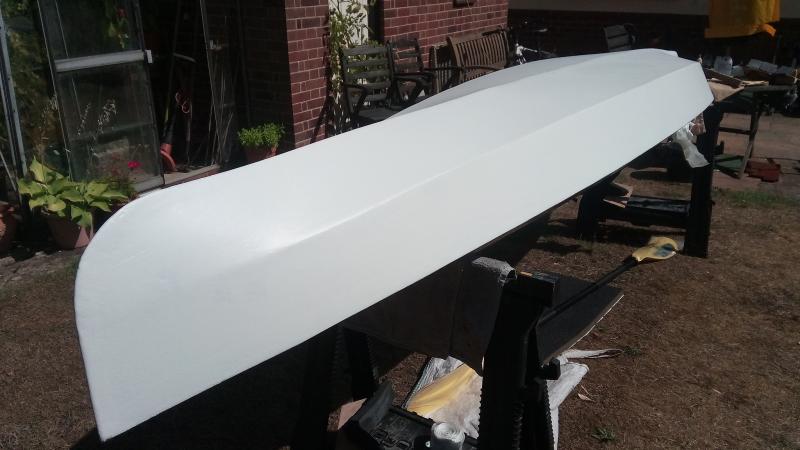
Managed to get a foam seal around the hatch opening which leaves me some minor work to the hatch outer edge to make fit. Working on an idea of hatch-lug that includes a J-Hook that can then be kept in place by a bungee stretched across lugs. The back rest needed some thought as to where to place attachment points leaving some adjustment once aboard. I think Im on the right path..... we'll see. managed to get a few coats of primer ontot he hull and rubbed down in between. The warm weather is great for drying your paint !!

Offline
#15 18 Aug 2018 3:34 pm
- Sam Taylor
- Member
- Registered: 22 Oct 2011
- Posts: 50
Re: Building From Plans .... Wood Duck 12' .... Part 2
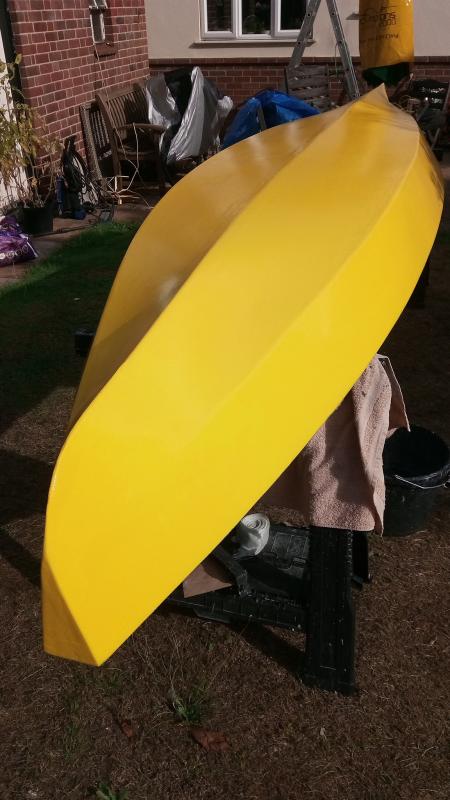
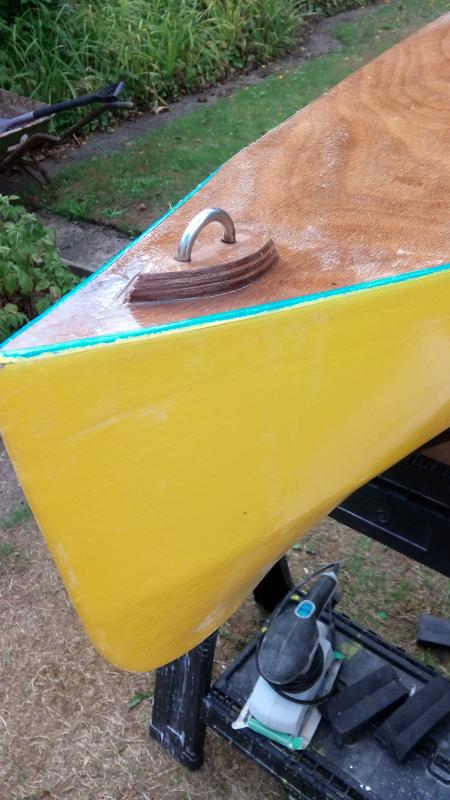
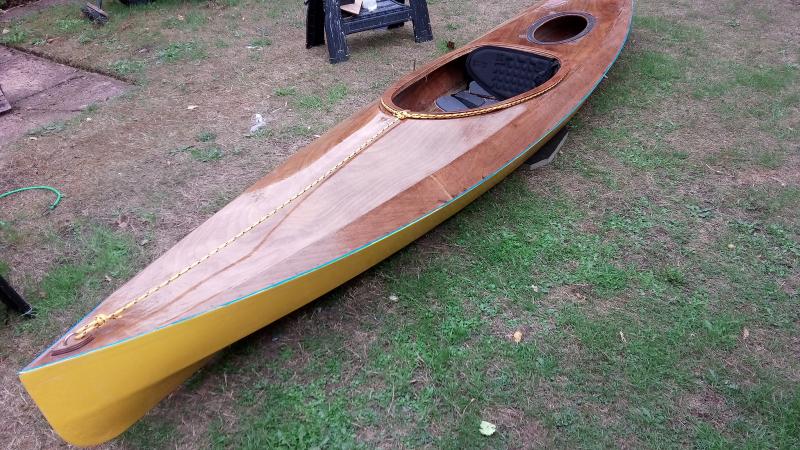
Well the hull has gone from a few coats of undercoat to a few coats of Top coat in yellow thanks to the dry weather. Not entirely sure about the colour but its on...
Offline
#16 18 Aug 2018 3:36 pm
- Sam Taylor
- Member
- Registered: 22 Oct 2011
- Posts: 50
Re: Building From Plans .... Wood Duck 12' .... Part 2
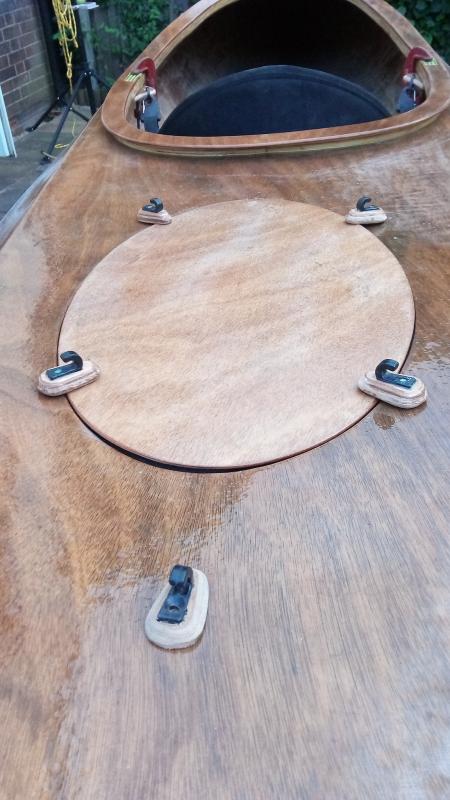
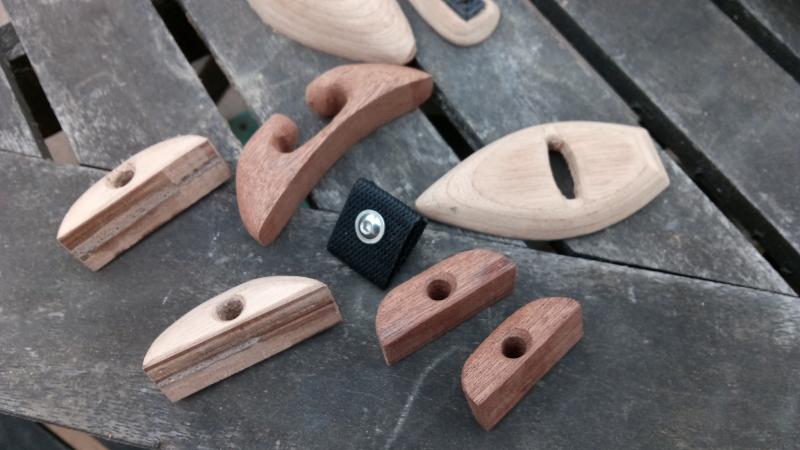
From scrap hardwood I'd fashioned a few keepers to hold a stainless D ring for better attachment of the back rest. Epoxied into place these seem very sturdy. Also I added a couple of 'knees' to the front face of the bulkhead.
Last edited by Sam Taylor (18 Aug 2018 3:43 pm)
Offline
#17 18 Aug 2018 3:40 pm
- Sam Taylor
- Member
- Registered: 22 Oct 2011
- Posts: 50
Re: Building From Plans .... Wood Duck 12' .... Part 2
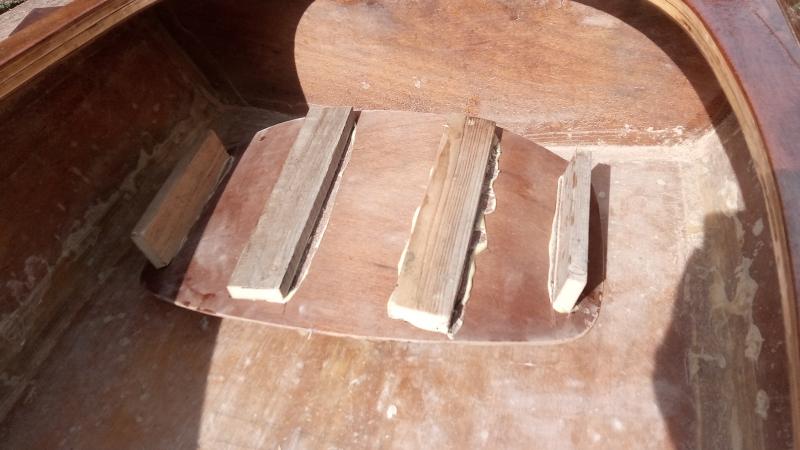
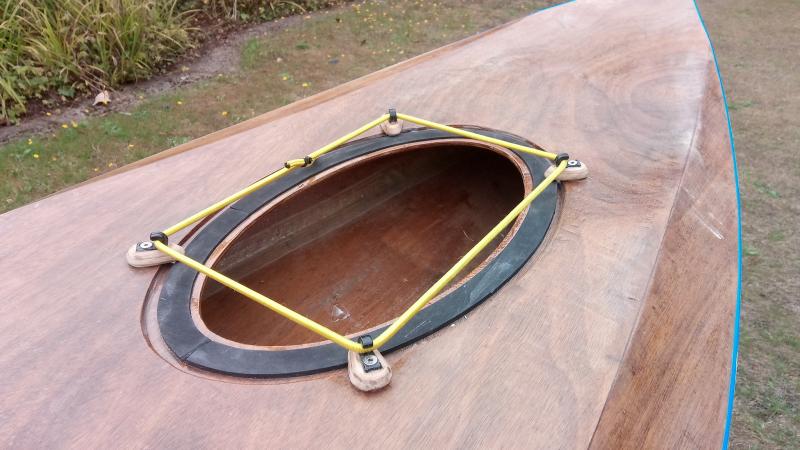
Made up a bungee that goes around the four hatch spacers. It might help keep them in place but if I find some netting suitable I will add this to make a stowage / net on top of the Hatch.
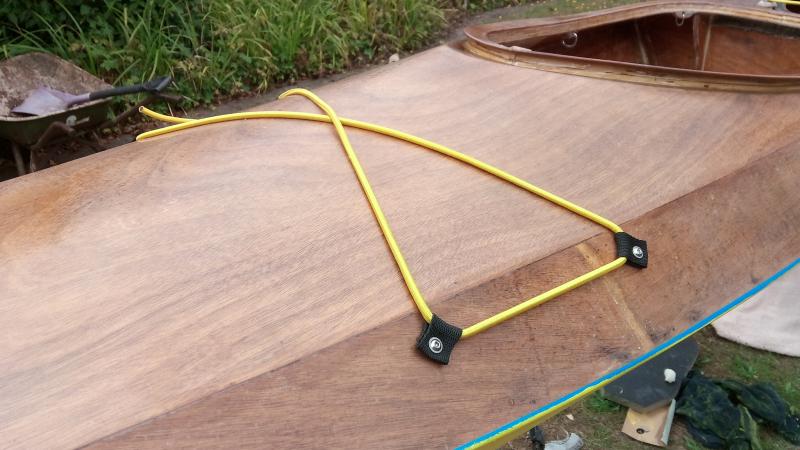
Front deck rigging went pretty much to plan following the standard instructions. if I think I need more of need to alter I'll wait and see. So far so good and looking like a Kayak !
Last edited by Sam Taylor (18 Aug 2018 3:42 pm)
Offline
#18 19 Aug 2018 5:05 pm
- Sam Taylor
- Member
- Registered: 22 Oct 2011
- Posts: 50
Re: Building From Plans .... Wood Duck 12' .... Part 2
My seat is at version 11... or there abouts. All made from bits of scrap I just kept adding pieces and altering and have finally got something comfy. I'm cutting some foam to stick to the surface to improve things but sitting in the kayak with the back rest in place does give me hope ! I took some inspiration from Gees-England on speciality seating then noticed the price... a beautiful product though.
http://gees-england.co.uk/adjustable-pl … -seat-147/

Offline
#19 19 Aug 2018 5:10 pm
- Sam Taylor
- Member
- Registered: 22 Oct 2011
- Posts: 50
Re: Building From Plans .... Wood Duck 12' .... Part 2
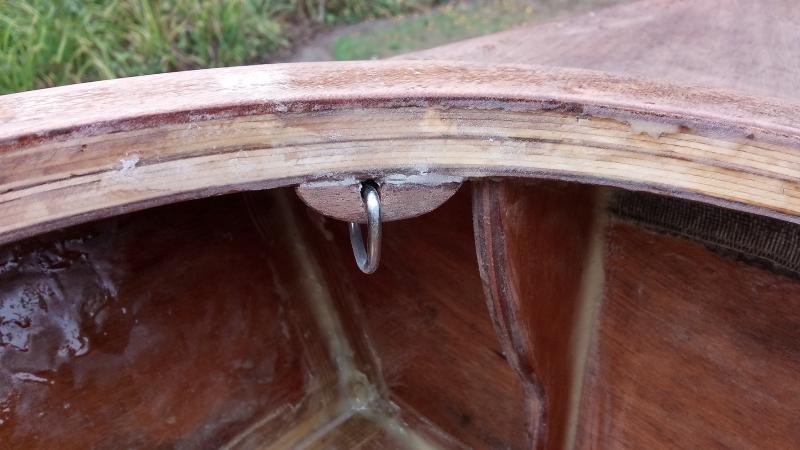
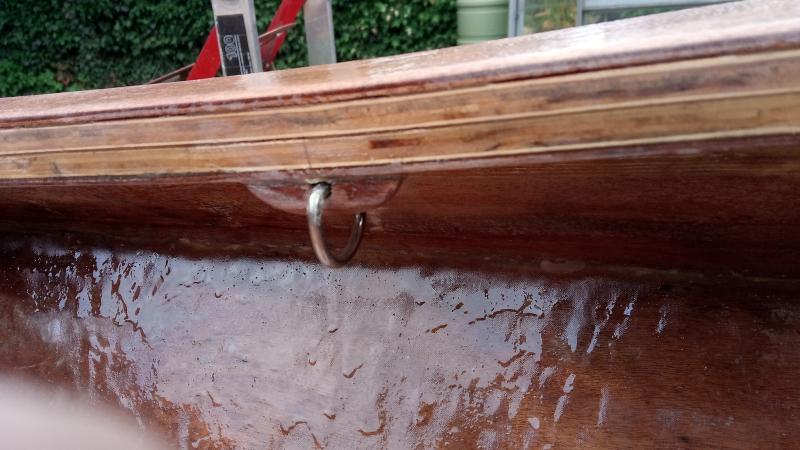
After much deliberation as to drill throught the bow and fit a rope / hoop or drill through the forward deck into a pad and fit a deck staple ... I've opted for another scrap material DIY solution, I made a stainless hoop from wire and fitted this through a plywood pad (which cannot pull out) which is now bonded to the forward deck. I can attach a carrying handle or a deck line as required... I think...
The bow 'pour' of additonal epoxy went to plan as per the instructions. Be prepared to roll & manouvre the kayak as required so a helper is a must plus a ladder plus some bungees to hold upright.
Launch date is in the calendar. Bow bouyancy bag to fit, velcro the seat down, varnish the deck.... the list is getting shorter.
Last edited by Sam Taylor (19 Aug 2018 5:13 pm)
Offline
#20 25 Aug 2018 7:43 pm
- Sam Taylor
- Member
- Registered: 22 Oct 2011
- Posts: 50
Re: Building From Plans .... Wood Duck 12' .... Part 2
I've pondered how to attach the seat and leave it removable / adjustable just in case I need some adjustment. I came up with a simple tongue / tongue locking arrangement that holds it but can be un done. Hopefully I've got it about right....
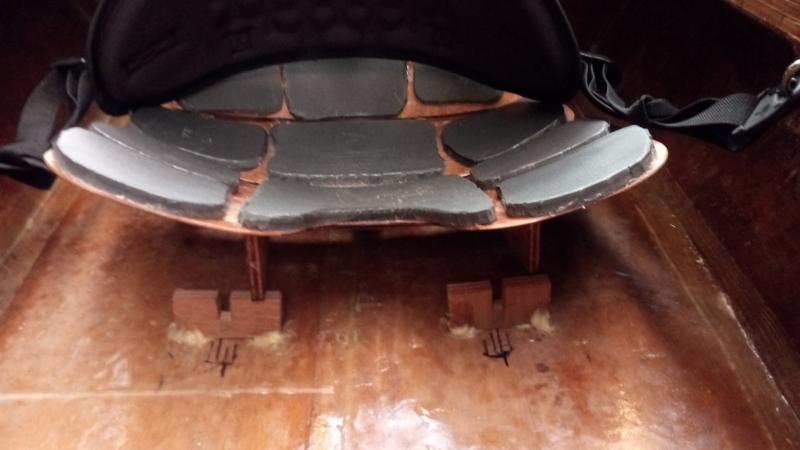
Here it is locked into position..
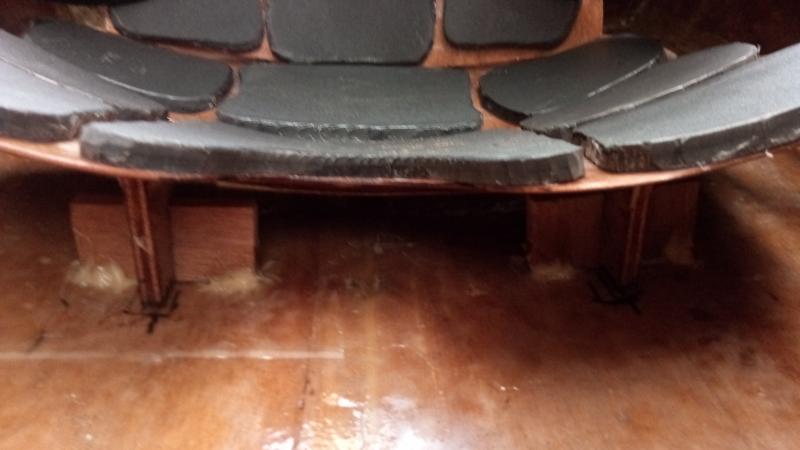
Also I decided to add some scrap pieces of expanded foam to aid comfort..
Basically its ready to go...when I've refitted the front rigging....
Last edited by Sam Taylor (25 Aug 2018 7:44 pm)
Offline
#21 1 Sep 2018 3:07 pm
- Sam Taylor
- Member
- Registered: 22 Oct 2011
- Posts: 50
Re: Building From Plans .... Wood Duck 12' .... Part 2
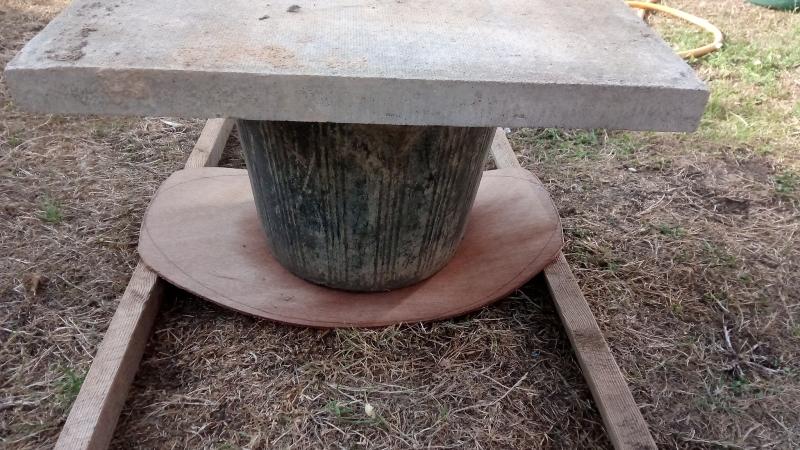
Before i can go anywhere I needed to make myself some kind of Kayak trolley that was light enough an dstrong enough to do the job... this is about version 5....
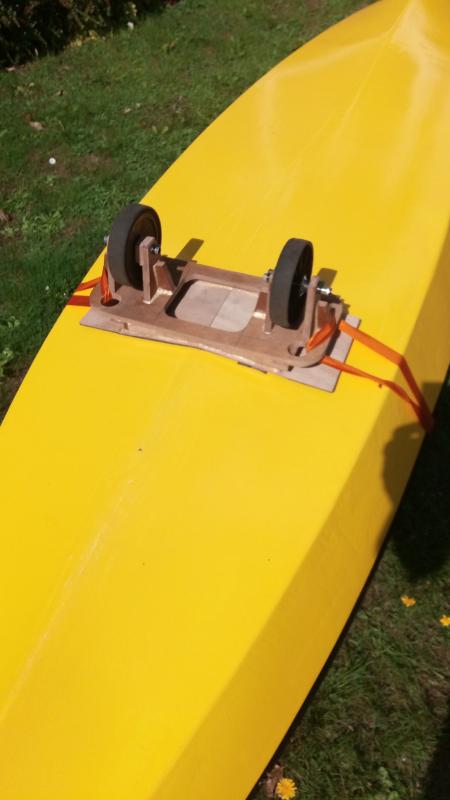
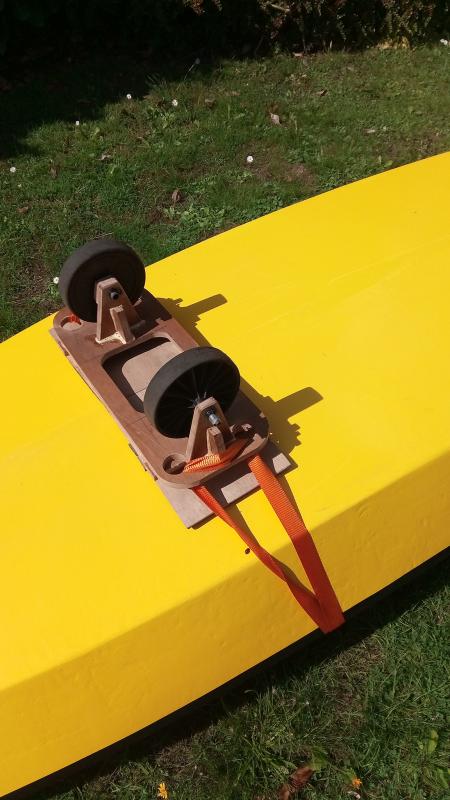
Some garden trials and all seems well and no accidents...
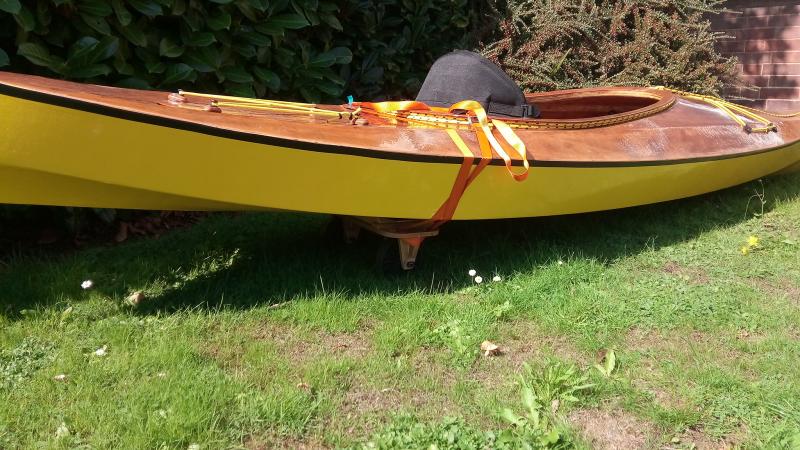
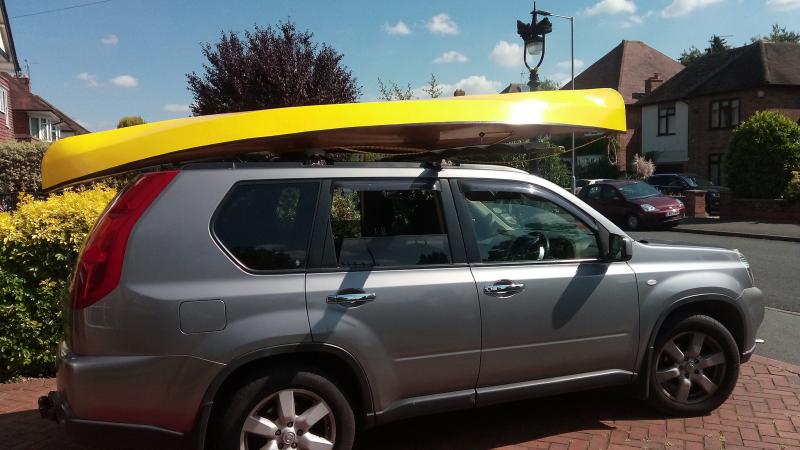
Now for the dangerous bit of trying to mount the roof bars on my own. Total displacement is 20 kg which Im happy with... but to lift completely above my head onto the roof is risky.
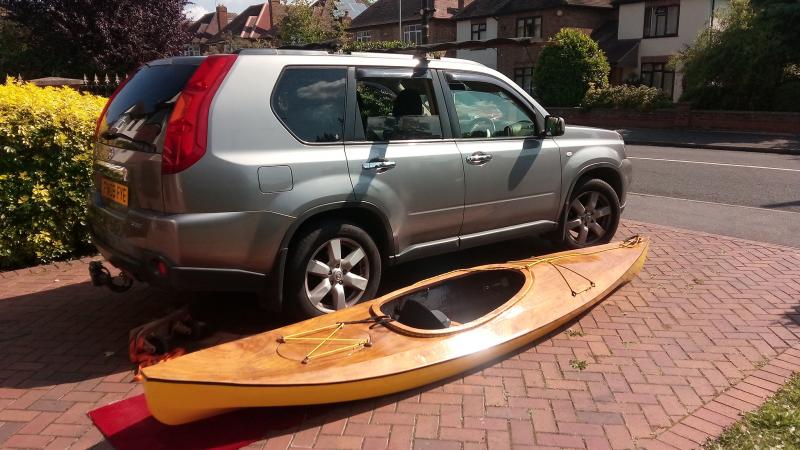
Some research lead me to modify the roof bars and make an extension that enable one end to be lifted first and then the other. so far so good. I started with the kayak sitting on its keel but this left it too high overall at 2.4 M which is not low enough for the barrier. I had to resort to plan D and sit it on the coaming.
Offline
#22 1 Sep 2018 3:10 pm
- Sam Taylor
- Member
- Registered: 22 Oct 2011
- Posts: 50
Re: Building From Plans .... Wood Duck 12' .... Part 2
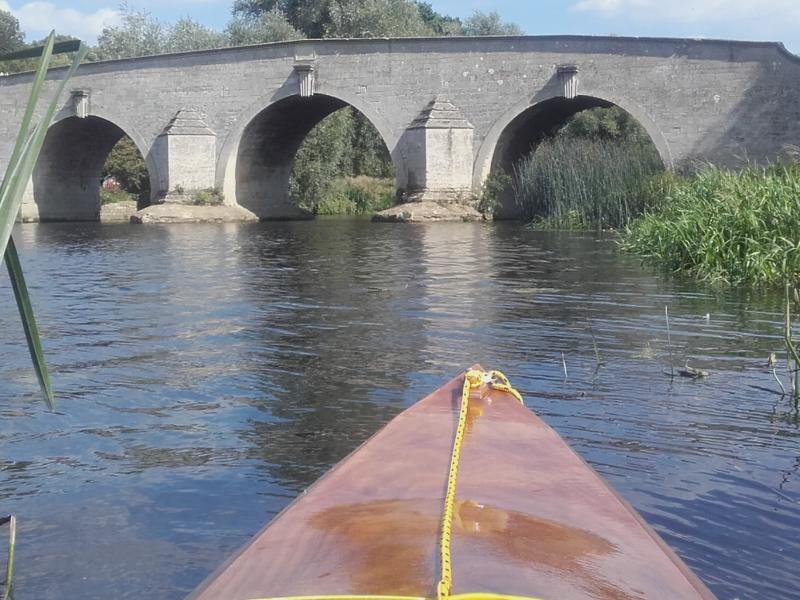
Launching was successful. Just a quick trial to see if the seat is corrrect and foot rests are adjusted. All seemed well so I went up river for a short distance.

Paddled under the Nene Valley Railway at Ferry Meadows...
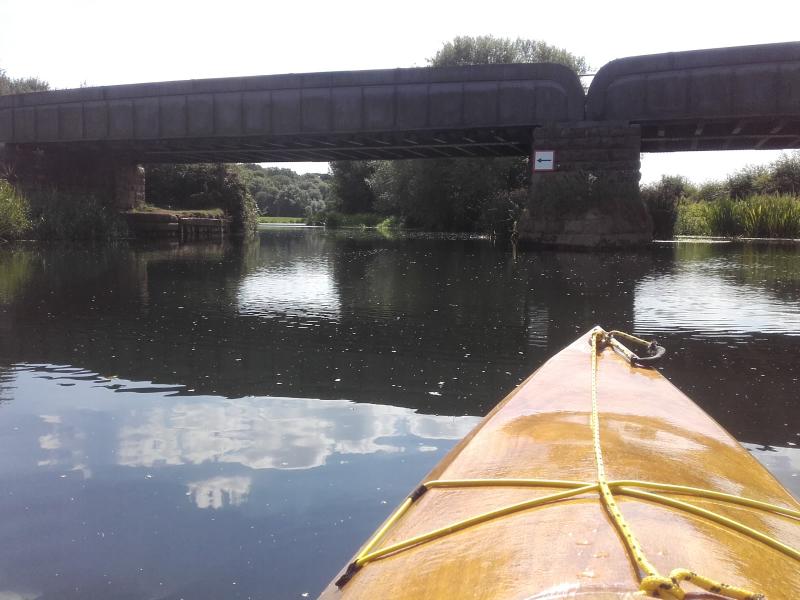
Even saw a steam train (A4 class)...
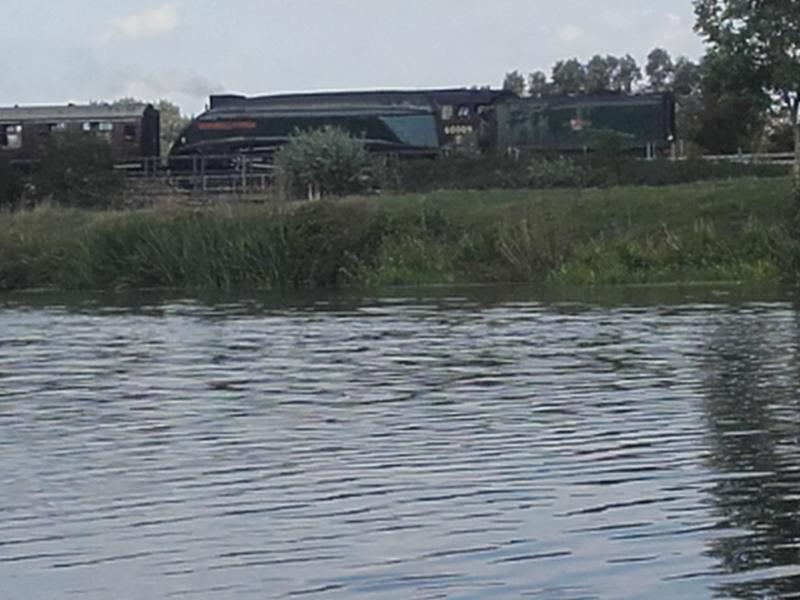
And back to Milton ferry. Very happy - kayak performs well.
Last edited by Sam Taylor (1 Sep 2018 3:18 pm)
Offline
#23 2 Sep 2018 9:10 pm
- Sam Taylor
- Member
- Registered: 22 Oct 2011
- Posts: 50
Re: Building From Plans .... Wood Duck 12' .... Part 2
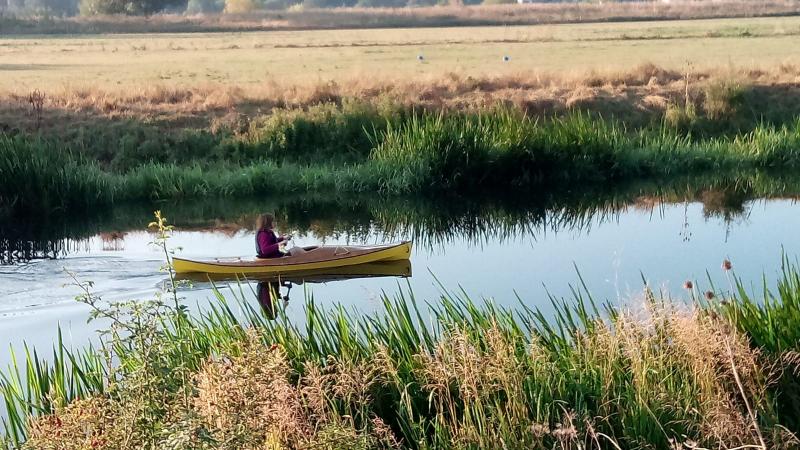
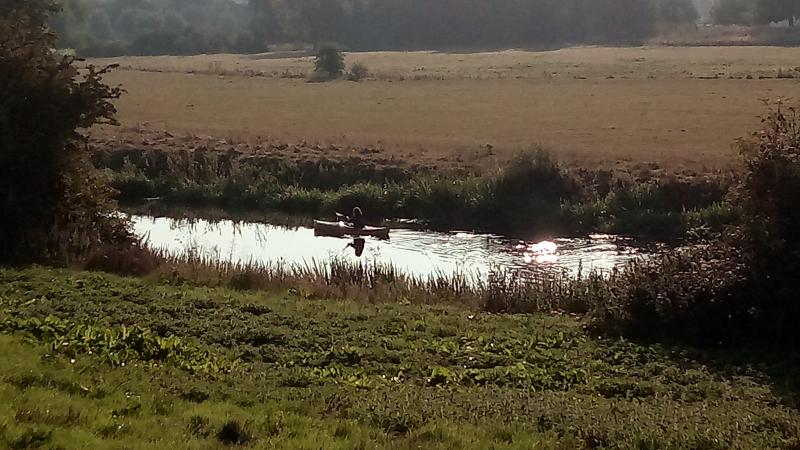
Even Mrs.T couldn't resist a go.....
Offline
#24 4 Sep 2018 9:29 am
- Jonathan
- Member

- From: Harwich Essex UK.
- Registered: 4 Sep 2018
- Posts: 32
Re: Building From Plans .... Wood Duck 12' .... Part 2
What a great little build.
Offline