A forum for discussing wooden boats and boat building
You are not logged in.
- Topics: Active | Unanswered
Pages: 1
#1 17 Jan 2018 8:20 pm
- Gleam
- Member
- From: Nr Kendal
- Registered: 8 Jan 2018
- Posts: 9
Christmas Mystic
Hey, guess who got a Mystic River canoe kit for Christmas ! Thought it would be a pair of socks (again) but no, lots of boxes full of bits of wood. Crikey, what to do ? first need to make some space in the garage which will need a car or two shifting, then a bit of warmer weather. Reading the glue & resin blurb it seems to desire 15C or more - As If - it hardly ever gets that even in mid summer bar a couple of days. (Its 3C today).
This seems a good place to document the build so thanks to all at Fyne Kits for the forum, this blog is really for my own benefit but if anyone's interested that's great too.
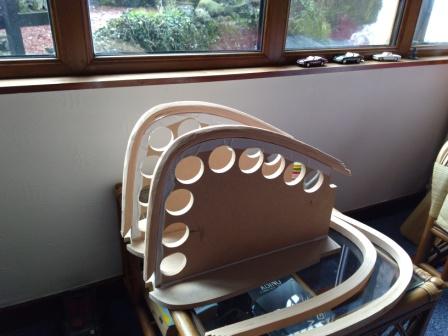
Anyway, done a bit of indoors stuff like laminating & shaping the stems, but will have to wait a while for a bit of warmth to make progress.
Here's my steaming set - a wall paper stripper & a bit of pipe ! But it worked really well, its a delight when the stiff strips get all floppy and bend easily. Note - wear gardening gloves or similar - its hot stuff.
Lots of clamps make things easy.
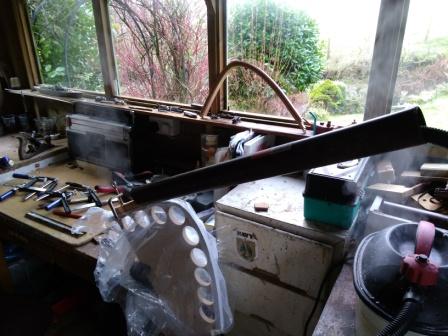
It can get a bit steamy ...
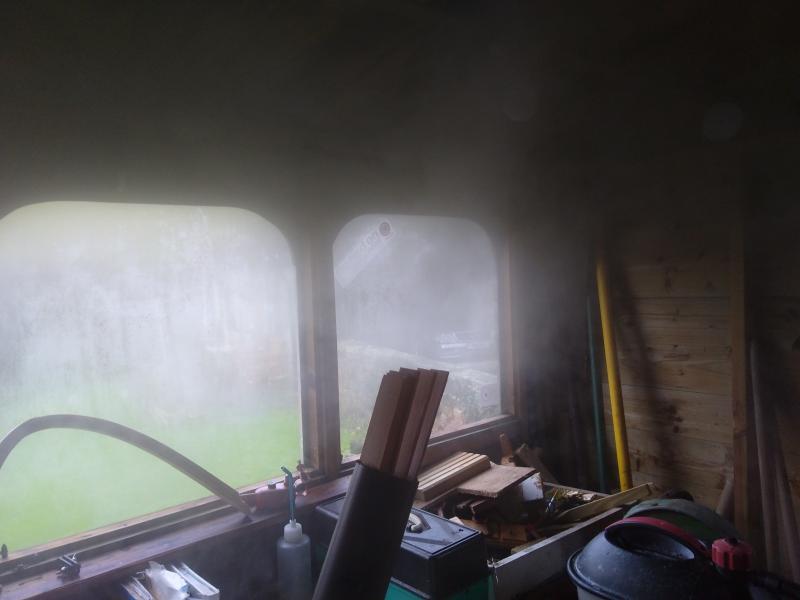
and you end up with
Last edited by Gleam (28 Mar 2018 9:35 pm)
Offline
#2 19 Jan 2018 11:57 am
- Ian
- Employee

- Registered: 24 Nov 2014
- Posts: 103
Re: Christmas Mystic
Welcome to the forum!
You don't need to heat your garage to 15°C, but you should keep your epoxy bottles that warm if possible. If it gets too cold it will get too viscous to work with and it may crystallise. Photographic trays or electric plant propagators are a good way to keep the bottles warm while you work and you can store them somewhere warm in the house overnight.
Since it's a strip-planked boat, you'll mainly be using the wood glue to start with. I'm not sure how warm that needs to be, but I'm sure it isn't as temperature-sensitive as epoxy. If you keep it in the house when you aren't using it, it will probably be fine.
So your garage just needs to be warm enough to stop your fingers and toes going numb. Otherwise, you might find yourself wishing you had been given the socks after all!
Offline
#3 23 Jan 2018 5:27 pm
- Gleam
- Member
- From: Nr Kendal
- Registered: 8 Jan 2018
- Posts: 9
Re: Christmas Mystic
Hi Ian, Thanks for that - yeah, cold fingersville ! Glue & epoxy are inside & nice & warm - Decided I'll make a proper start when winters on the way out ...
Offline
#4 12 Mar 2018 11:39 am
- Gleam
- Member
- From: Nr Kendal
- Registered: 8 Jan 2018
- Posts: 9
Re: Christmas Mystic
March - Well we're off ! warmish weather might be here for a bit so :-
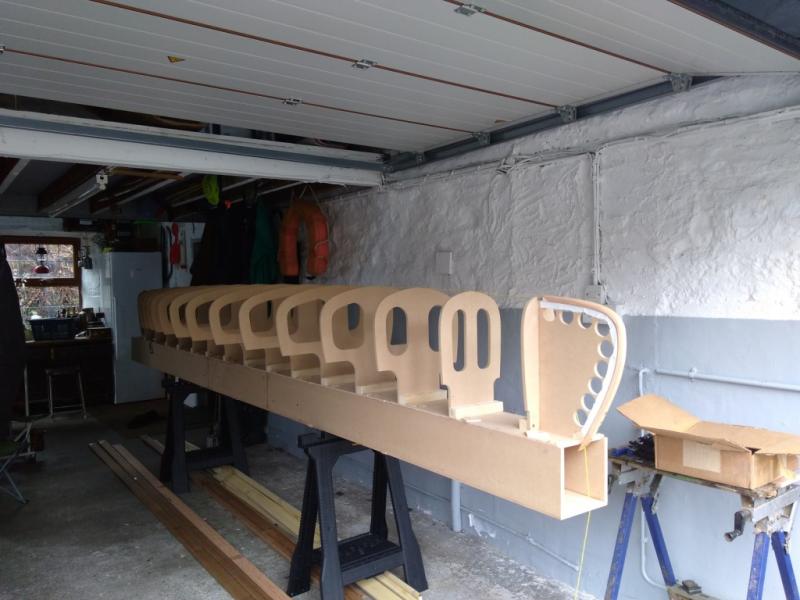
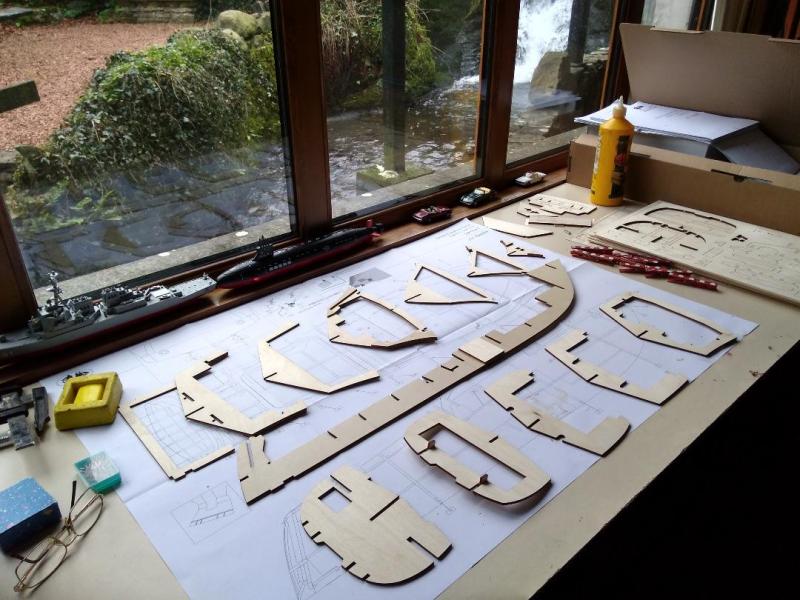
Strong back made
Forms positioned, jiggled & fixed
30 small jigs made to hold the strips in place (instead of staples - I didn't want to leave marks)
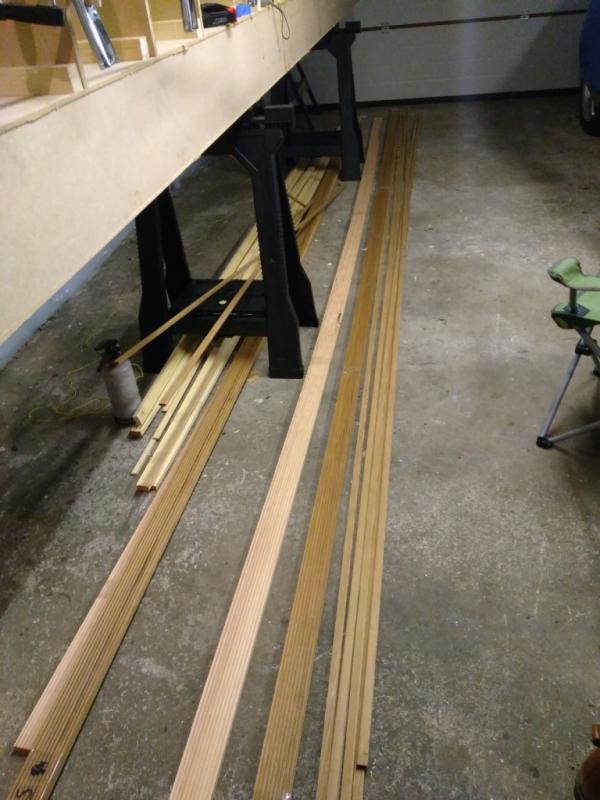
Strips examined for colour - dark, light & white it seems
Lengths a bit of a mystery having just laid them all out but it'll make sense with a bit of thought
Lots of pictures taken, but can't seem to load them on here, I'll fiddle around a bit later on.
Progress at last !
Offline
#5 13 Mar 2018 10:57 am
- Ian
- Employee
- Registered: 24 Nov 2014
- Posts: 103
Re: Christmas Mystic
warmish weather might be here for a bit
Let's hope so.
There are some instructions for uploading photos here: Uploading pictures. They were getting hard to find, but hopefully I've fixed that now. I'm looking forward to seeing some photos.
Offline
#6 13 Mar 2018 2:51 pm
- Gleam
- Member
- From: Nr Kendal
- Registered: 8 Jan 2018
- Posts: 9
Re: Christmas Mystic
Thanks Ian, Aha - Its easy !
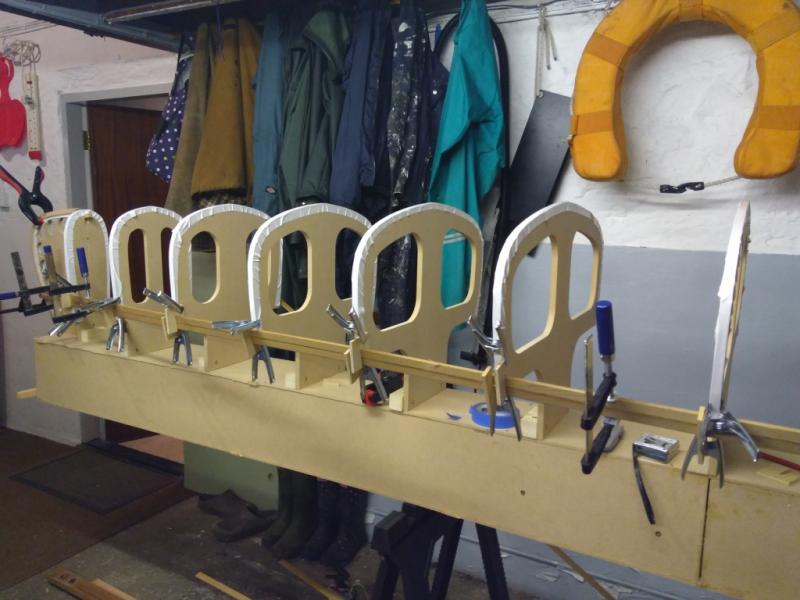
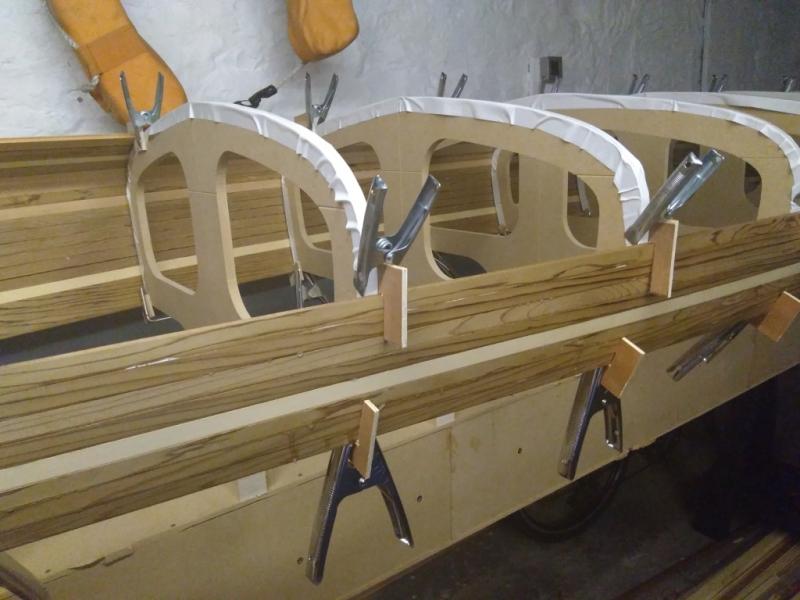
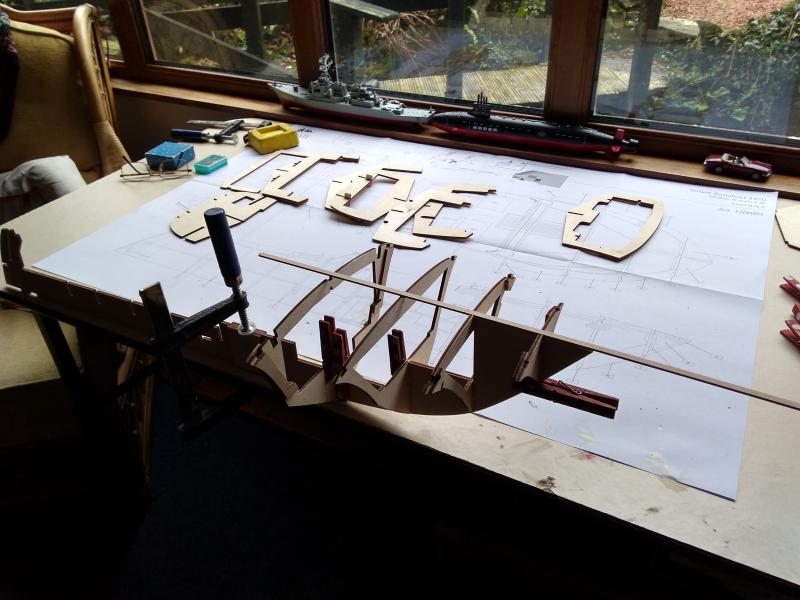
Here's the strong back with forms attached. Its a delight to see these in place as they are so perfectly cut.
and check for straightness & alignment (thats a bit of string with weights)

This is one of the little clamps I made to hold the strips in place. I made 30 which should be enough. Use of a bench jigsaw a big help with these fiddly things.
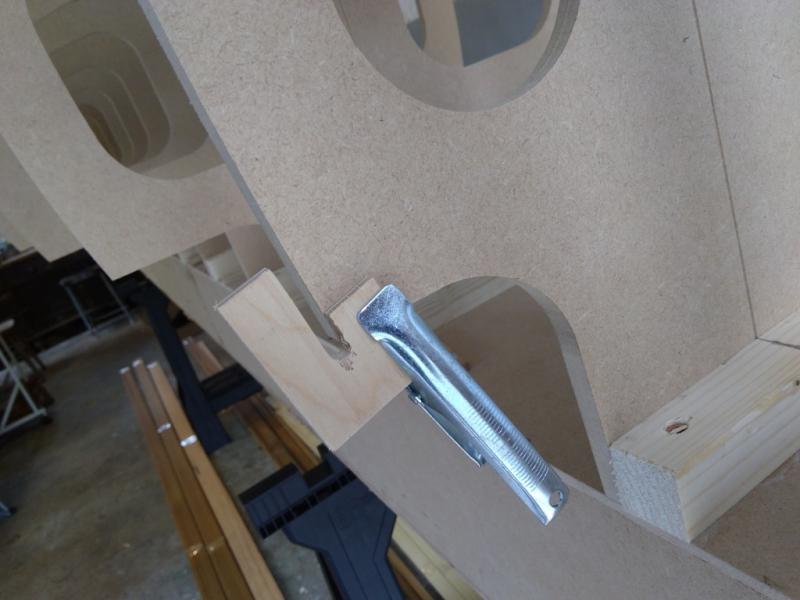
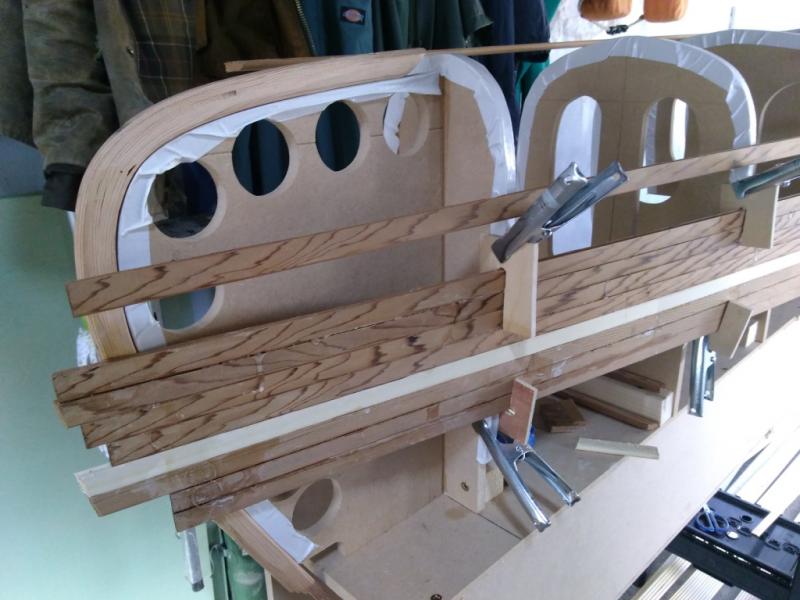
Here we have the first two strips glued up. Note after this picture was taken I replace the 'F' clamps with tape to hold the strips tight together. Tape then removed after an hour or so.
Close up - as said before, you can't have too many clamps !
Here's the little jig I made to cut strips accurately for a butt joint - similar to that in the instructions.
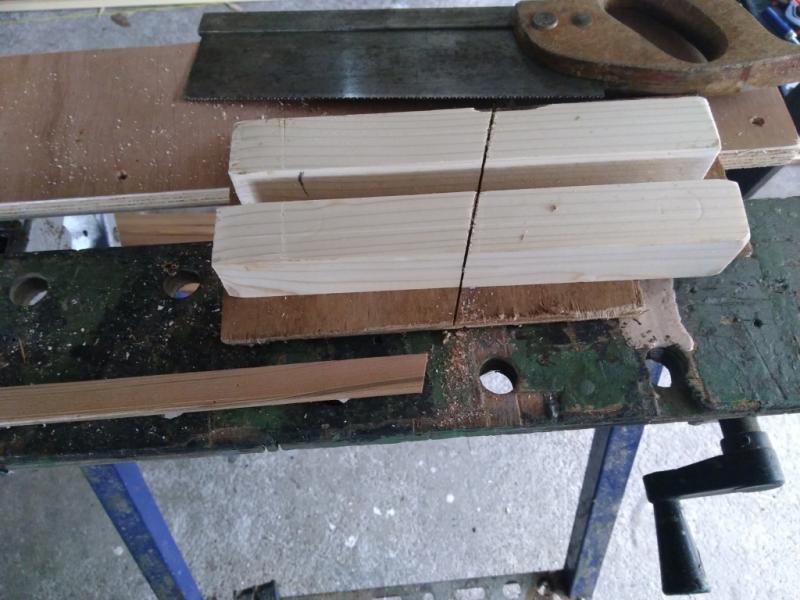
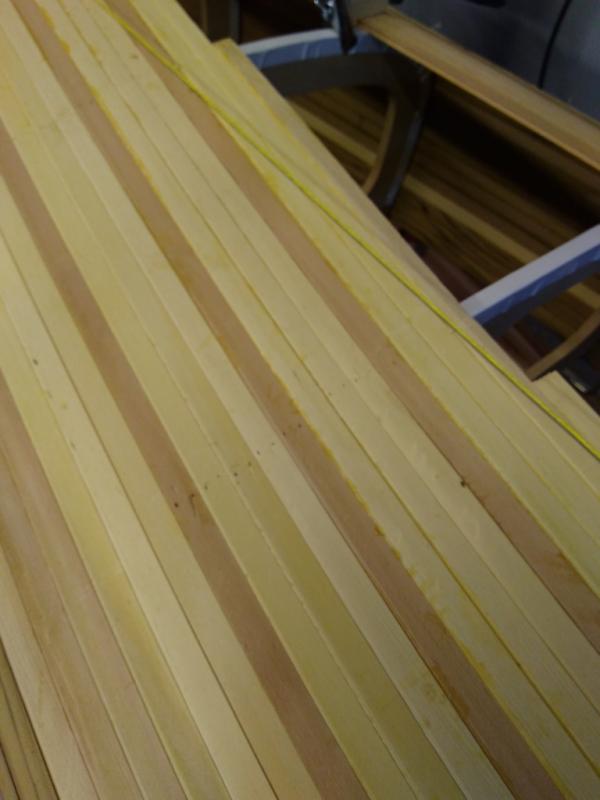
And finally for now a look at the strips - dark, light & white. Still thinking of the striping pattern though.
Note the chair - very necessary to sit back & admire the handywork
Last edited by Gleam (24 Mar 2018 5:02 pm)
Offline
#7 17 Mar 2018 3:53 pm
- Gleam
- Member
- From: Nr Kendal
- Registered: 8 Jan 2018
- Posts: 9
Re: Christmas Mystic
Bit more stripping done, next a few more dark strips then a couple of lighter strips and a couple of white ones for the water line I think so far.
Although the glue has hardened ok & seems pretty strong you can see a bit of surface chalking - it was a bit less than 10 deg C when I did this although the day warmed up a bit later on. I think it needs to be consistently above 10 C before work commences. (Its now 1 C and looks similar for the next few days so work suspended for a bit)
A couple of butt joints are visible, with closely matching grain I think the join will disappear after sanding smooth

Some nice 'tiger' stripes I have matched up as best can, should look pretty cool.
Ah yes, after reaching the waterline I shall start the other side - as I don't want to leave the side unclamped to the forms I now realise I need 30 more jigs and even more clamps ![]()

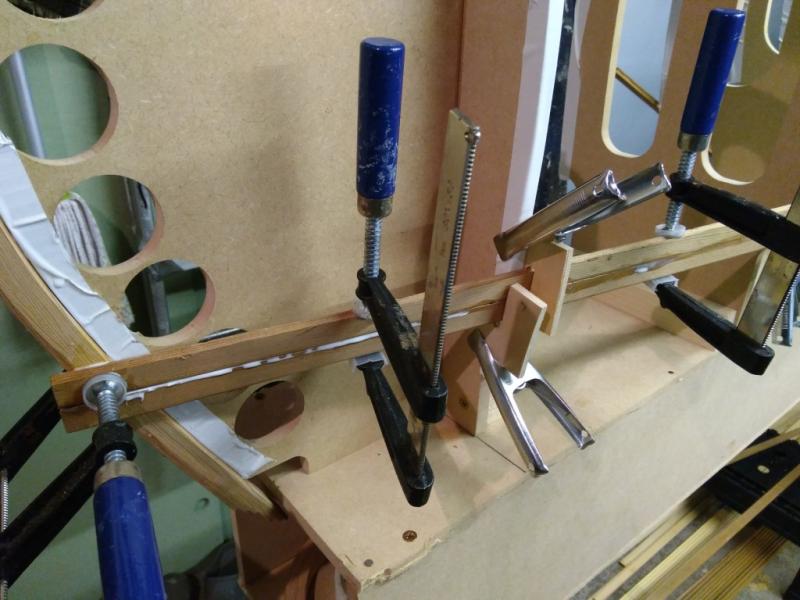
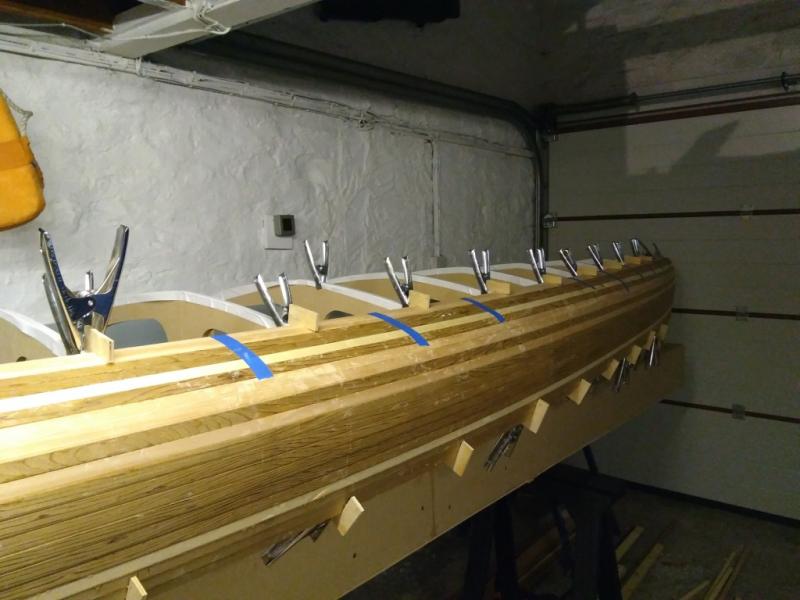
Today is warmer & sunny so here's a bit more stripping done with the lighter strips which should make a nice pattern at the waterline. A couple of strips have been added to the other side too, having made 30 more jigs & got some more clamps. Little bit tricky making the strips lie tight on the forms at at extreme curve mid section, but nothing a bit of fiddling & patience can't solve. (touch wood).
The big clamp is where a strip has been joined - its only holding them fairly loosely, it seemed easier than taping.
Note the little silver box on the wall above former no. 2 - A thermometer & hygrometer, pretty necessary when temperature conditions are a bit marginal.
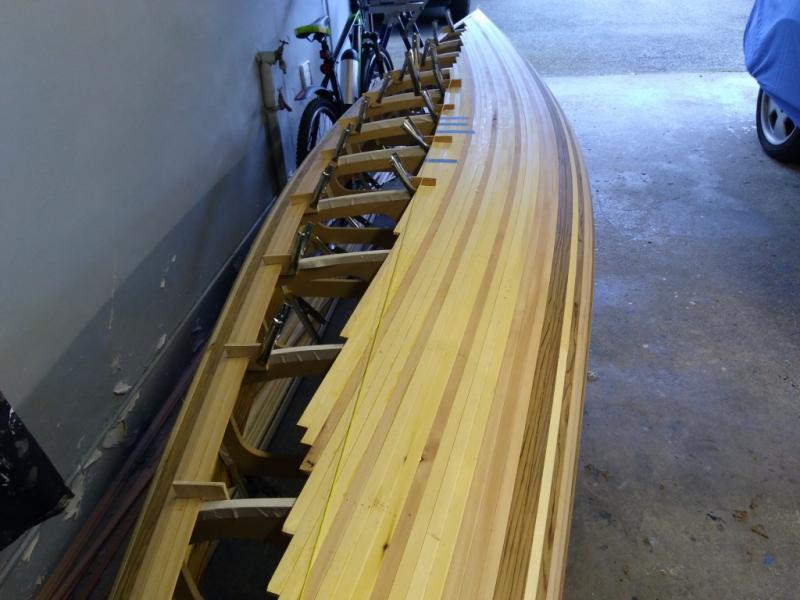
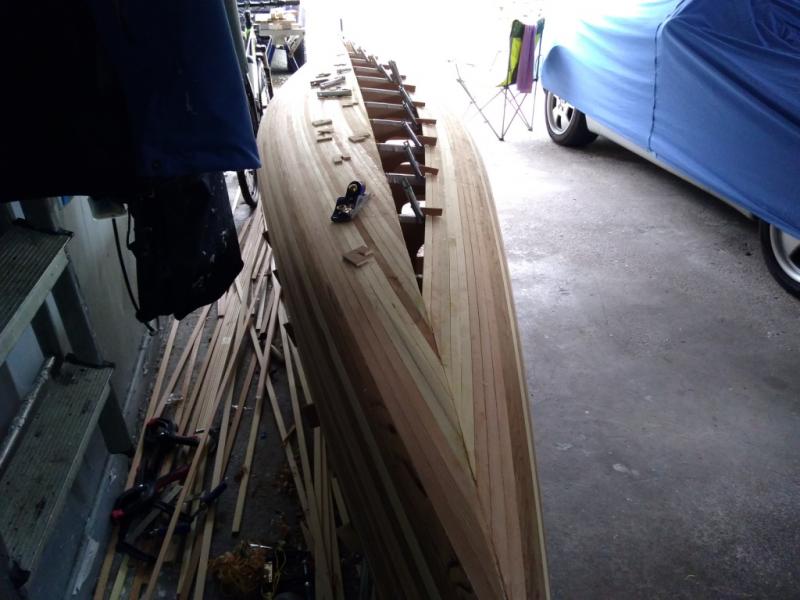
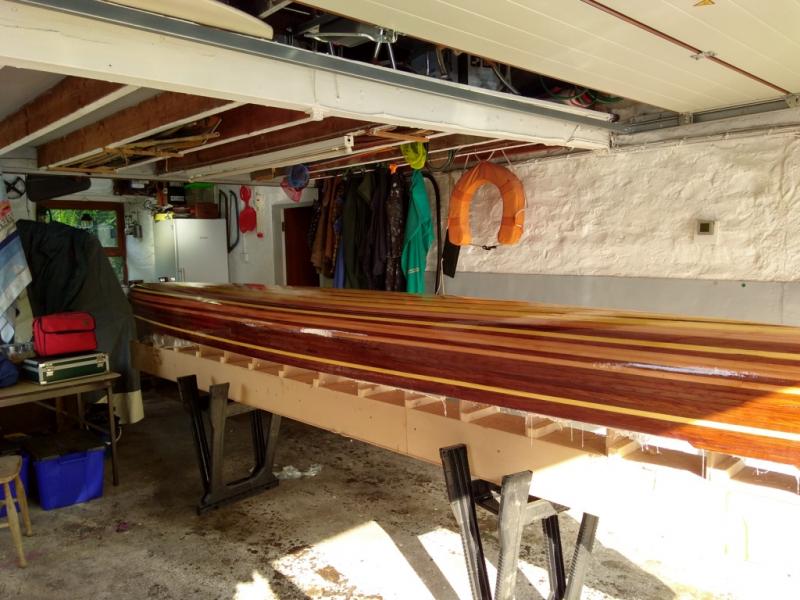
A few more strips on, so that side is just about all that can be done for now. Note colours, hopefully they should make a nice pattern if I can do the glassing correctly. Next thing is to turn the whole rig round and finish off the other side. Its actually quite hard gluing with the boat being so high so when the other side is at that level I'll drop the whole lot down about 9''. That might stop me getting glue all over my favourite fleece (never seem to get round to changing into stuff that doesn't matter, you know, like your supposed to when painting the house etc. but forget ... )
Garage door shut - it was a nice 11 C inside but would you believe it snowed again briefly.
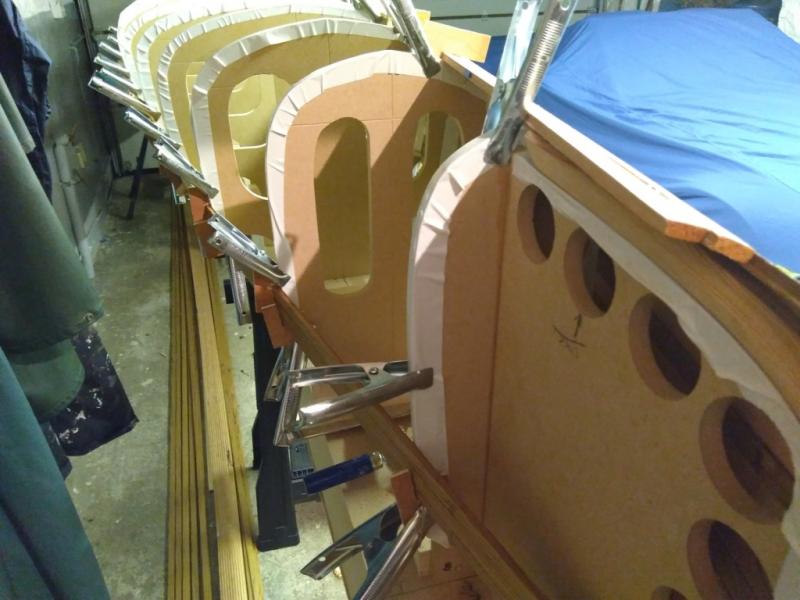
This shows the strips have now covered the inner stems (I did remember to take out the screws holding the inner stem to the former).
Next piccy should be a complete side & a nice straight line down the middle (I hope) - but that'll be a while away.
All in all I think this is the easy stuff, getting the hull smooth & clean is going to be a right old job I'm not looking forward to. Might invest in a new orbital sander - the old Black & Decker bought with Green Shield stamps is a bit past it for this sort of job...
This shows a start on the other side, note how its a bit less messy, well quite a bit less messy if truth beknown. I think thats due to practice and getting the right amount of glue on, not too much & not too little. The picture was taaken just after gluing a strip on hence white glue can be seen. When dried thats disappeared. If I can do a couple of strips a day we should make good progress ...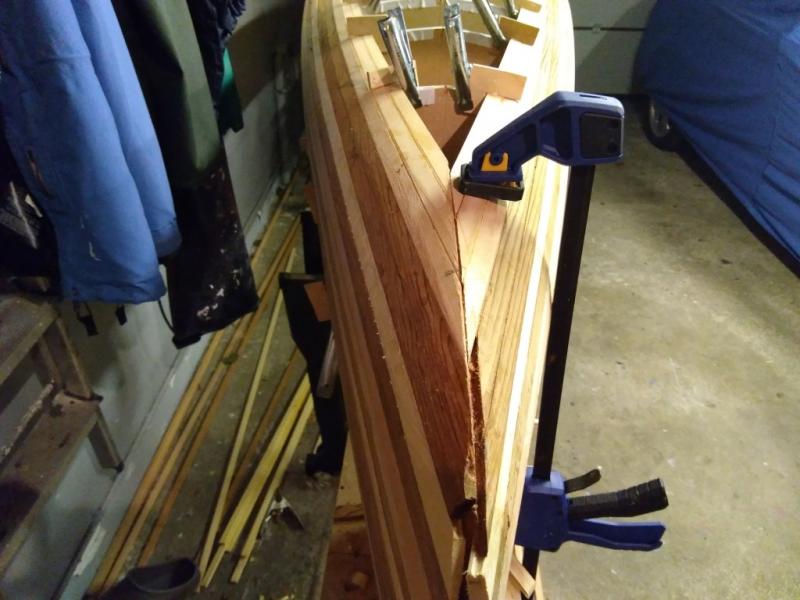
Ok, its not pretty, here I've got both sides to the same level, just above (below) where the outer stem pieces will fit. Practice makes perfect and after a couple of goes or so I've managed to get a good cutting and trimming technique. The pieces above where the the outer stem will go are quite a good fit, the other end is much better. The rough looking ones will be cut out anyway for the outer stem to fit. Technique is to mark, cut with a fine tenon saw, trim with a knife & finish off with a small hand plane.
I've decided to use staples for the remaining strips, it should be a bit quicker and any marks due to little holes should be largely invisible. That way I can do 2 or 3 strips at once. Time will tell ...
(Mid April & its nice & warm now & the glue dries in a couple of hours or so.)
Had a go at stapling some of the bottom strips. Firstly, its very fast, I did most of the bottom in a morning. However, its not as much fun or satisfying as the slow strip by strip way, and it does leave a line of small holes - hopefully these will fill seamlessly but in any event its on the bottom which will get scratched & bashed so not really a problem. I did the last 2 or 3 little ones on the centrline by the usual way. With temperatures soaring to 16 - 20 C the glue hardened enough in a couple of hours or so.
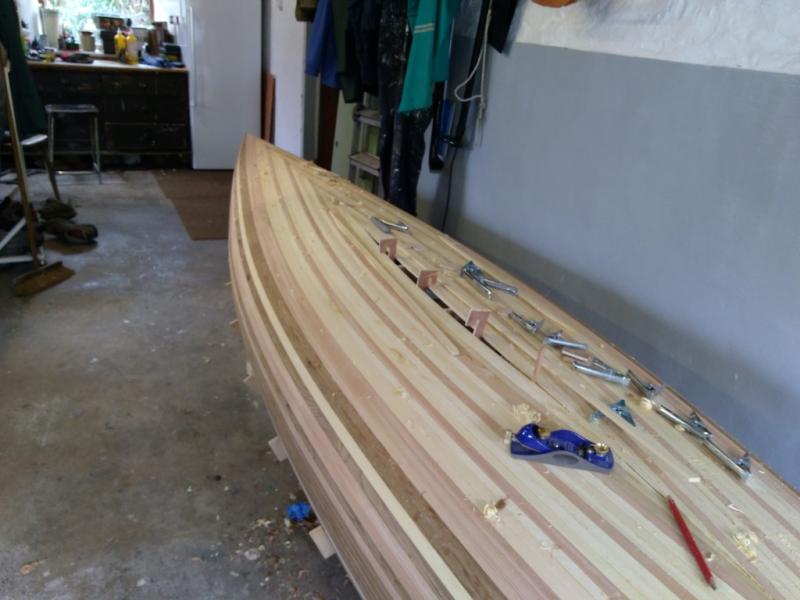
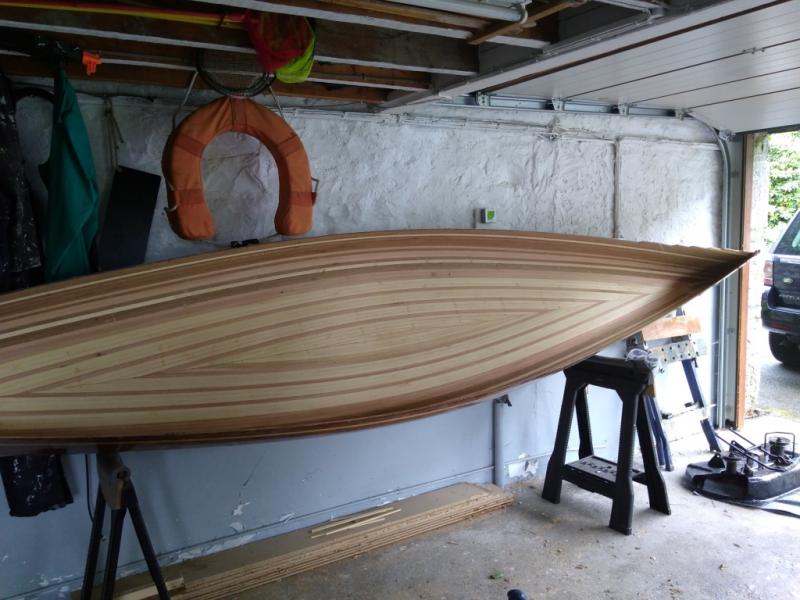
So here is one side completely stripped. Now to mark the centreline & cut a straight edge. This could be tricky, I've dropped the whole lot pretty much onto the floor to get good access, and we'll see how we get on ... The instruction book makes it seem straightforward with a couple of nifty tools which of course I don't have so a bit of improvisation may be required.
Very pleased with the 'Rings of Saturn' striping effect, looking forward to seeing this after glassing, hoping the striping pattern will show through ok.
So far so good ..
Just 2 little closing strips to add when the glue dries on this last one. Quite fiddly but very satisfying to get the strip to fit properly, very fine tapering ends take a lot of time to get right. Saw first, leaving a bit of spare then hand plane down.
Good idea putting the strong back on a couple of 4'' blocks on the floor, its just the right height to work away in the middle.
Next its up on the stands and putting on cheater strips and outer stems. (I didn't do the cheater strips earlier as I thought there would be lots of short strips left at the end - which there is - and didn't want to carve up the long strips as they were needed full length).
May now & its 8 deg C outside - so no rush to get ready for glassing ....

Oh dear, this should have been easy ... Putting on the cheater strips - the last 2 on this end I put on too short with not enough overlap over the inner stem. Idiot. Did these last night and the light wasn't brilliant, but also too lazy to check & check again.
So this morning had to remove them, (not easy) tidy up the edges & glue again. End result not harmed, hopefully. Lesson learnt.
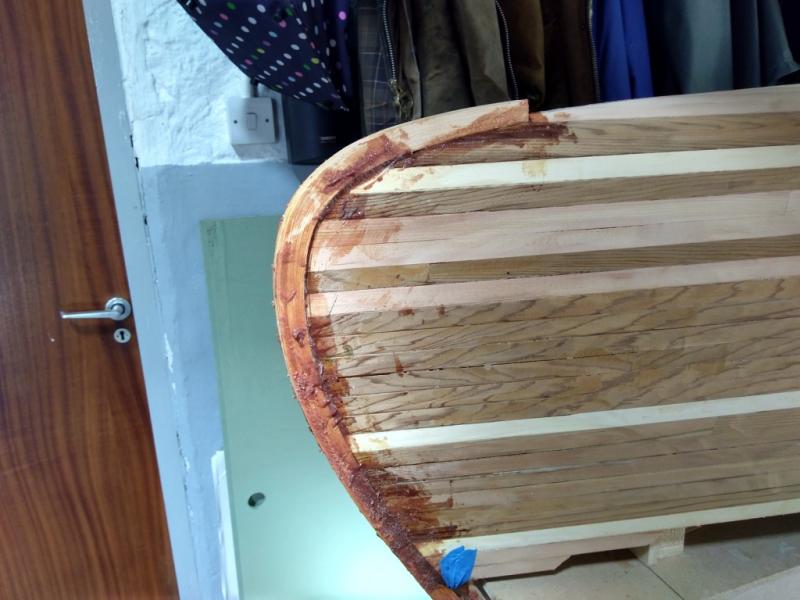
A loverly sticky mess. Trimming the ends to take the outer stem pieces a bit heart stopping as a mistake would be a big problem but measure twice, then again, cut to mark, check & so on. Resin & filler mix, then pop on holding with a couple of small screws.
Then :-
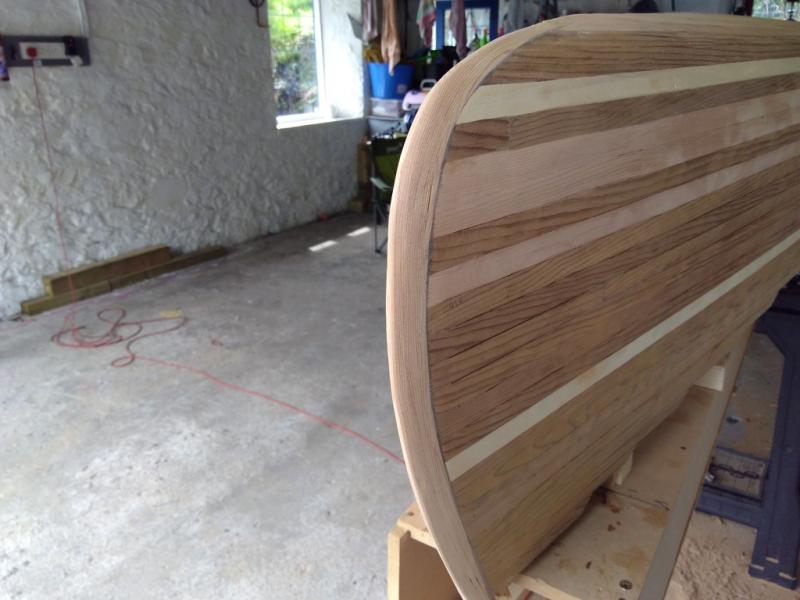
Quite a pleasing result.
Now to sand the hull proper, and fill/sand any small gaps between the strips. Having made a start I can say this is quite a time consuming job. I think it'll take me a week at least. Overalls & respirator mask essential !
OK, that went well. After a lot (& I mean a real lot) of sanding, planing & sanding plus filling in gaps with wood dust mix I got round to glassing. Valuable advice from Paul on temperature control, which is really critical, and a sweet spot temperature wise did the glass coat followed 2 hours later by a fill coat. Hard work, and messy. Don't think the garage floor will ever recover. Hardest thing on the fill coat was standing in the resin drips on the floor & having a shoe firmly stuck. Also lighting is critical, it was very hard to see where I'd missed, lots of lighting needed as this was an evening job. Couple of snags to be sanded/filled again, and the stems need a bit of grinding/filling, I couldn't get the glass to lie flat over the sharp ends so bits sticking out. No voids or bubbles thankfully & looking really good. For the inside will definitely require an extra pair of hands, my back is giving me a serious amount of gyp this morning.
After a bit of a pause in construction work has commenced again - sanding smooth the interior. This is proving a bit back breaking but by putting the canoe on one side its a lot easier to get the sides done - one at once. Here we are half way through doing the lower side. The glue overspill marks from where the formers were come off easily enough, 30 mins of a job with a sharp scraper, then power sand / hand sand with 80 & 120 grit. Lots of dust so respirator and goggles essential, much more so than when doing the exterior. Oh yes, as well as a garage floor covered in resin drips, and shoes, my 'clean' overalls have solid cuffs and elbows due to absorbing lots of resin. Very crisp they are.
(That black thing on the floor at right is the cutter assembly from Dad-in-laws lawn tractor - 27 years old with the steel shroud full of holes - repaired with a few offcuts of spare mat & a bit of resin - versatile or what !)
Half done - another day or so should finish it.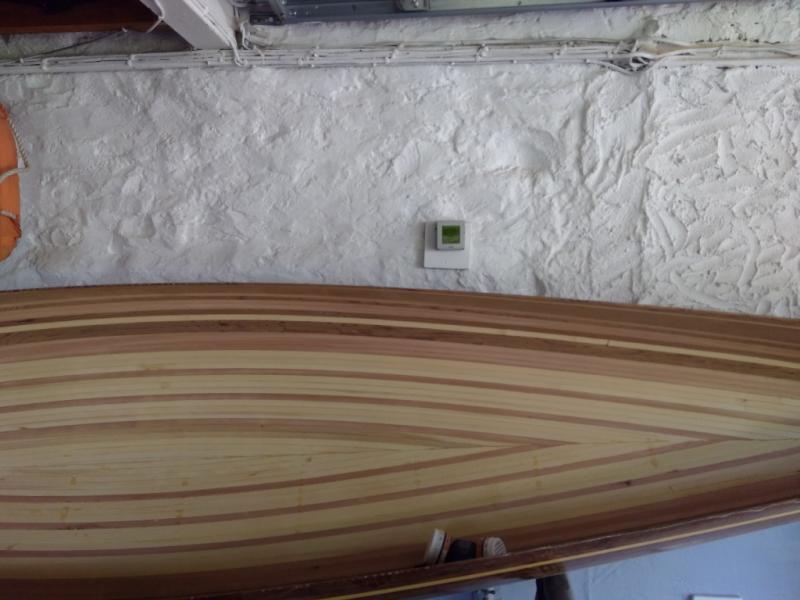
But boy its HOT !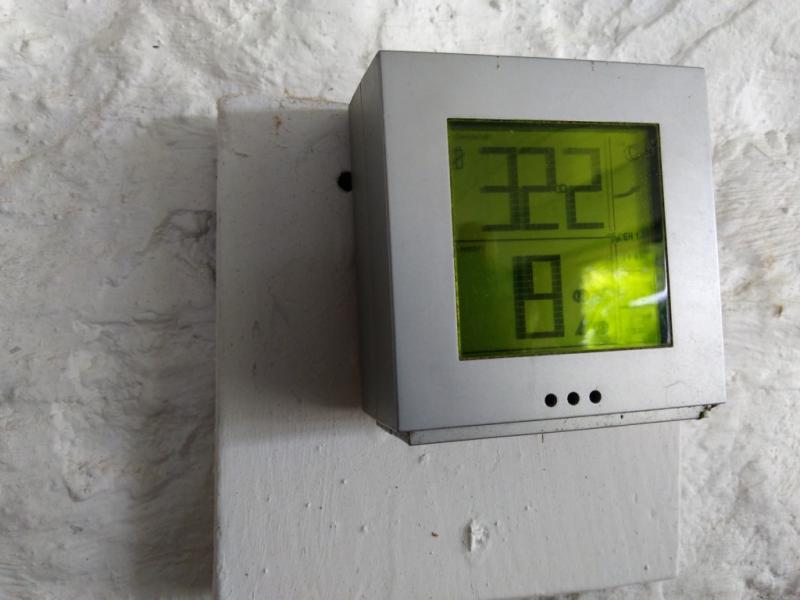
PROGRESS DELAY August / September - Just a note to say progress temporarily halted as I recover from a replacement knee operation.
Canoe currently strung up in the garage loft, inner whales on, end decks built & shaped, just need outer whales on next then mega sanding/varnishing. Hope to commence that in October all being well.
January update
Recovery taking a bit longer than expected so no progress, anyway its too cold still ...
However have a minor project in hand to play with -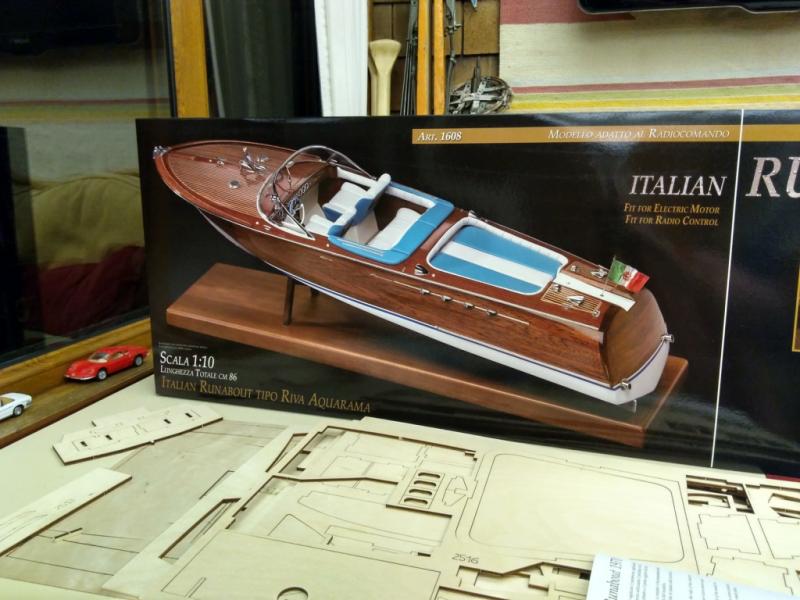
Riva Aquarama by Amati - a nice kit, pretty straight forward so far, frame then 2 layers of planking. 2 x 540 electric + r/c, should be fun.
April Update
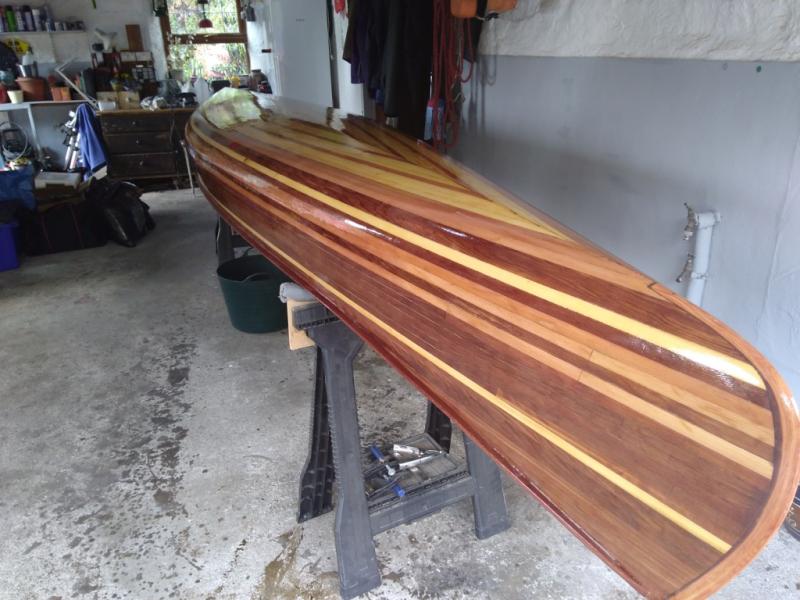
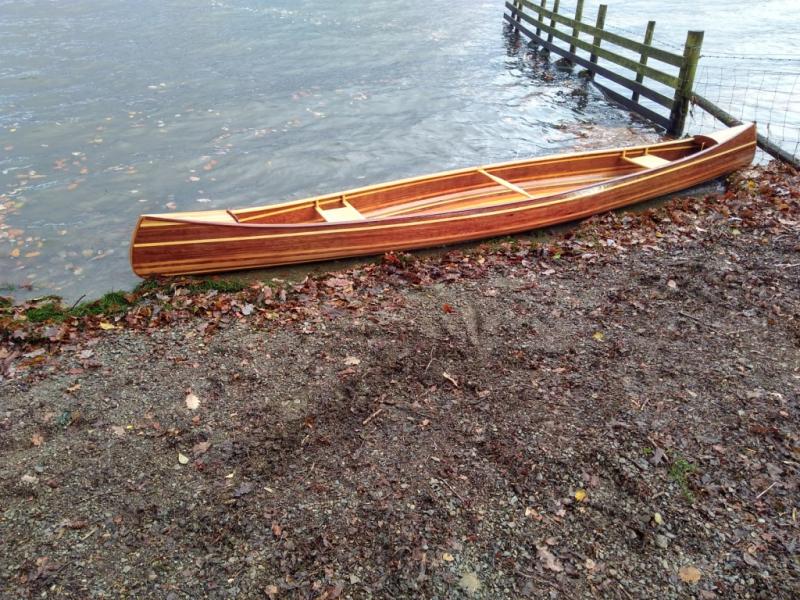
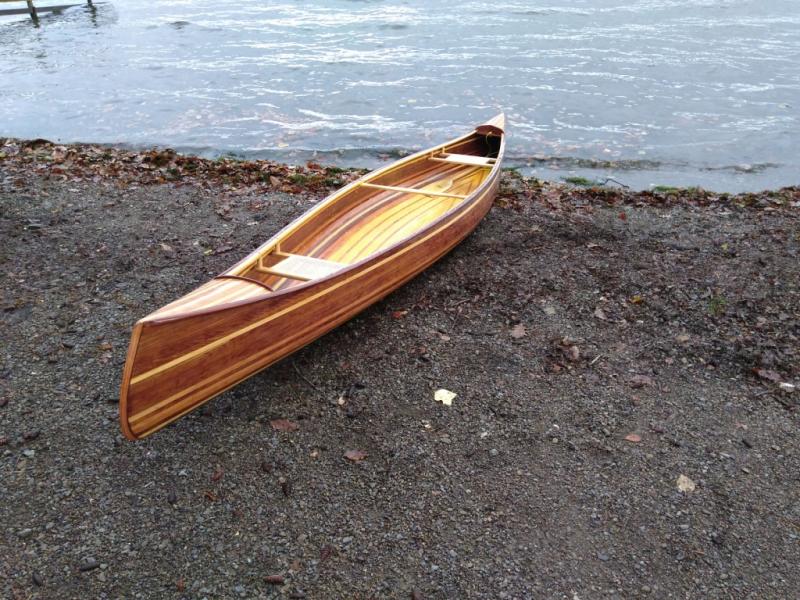
Final Furlong !
Here we are after a first coat of varnish. Gunwhales on, deck coamings on, grab handles on, seats ready to fit, sanded as much as could stand - not quite enough I think but that resin is super tough and anyway its a boat to use not a fine piece of furniture.
Next picture will be on the water - just need to work out how to get it onto the car......
Last edited by Gleam (29 Apr 2019 11:51 am)
Offline
#8 1 May 2018 3:31 pm
- Gudgeon
- Member
- Registered: 23 Feb 2012
- Posts: 13
Re: Christmas Mystic
Beautiful.
Offline
#9 12 Nov 2019 2:06 pm
- Gleam
- Member
- From: Nr Kendal
- Registered: 8 Jan 2018
- Posts: 9
Re: Christmas Mystic
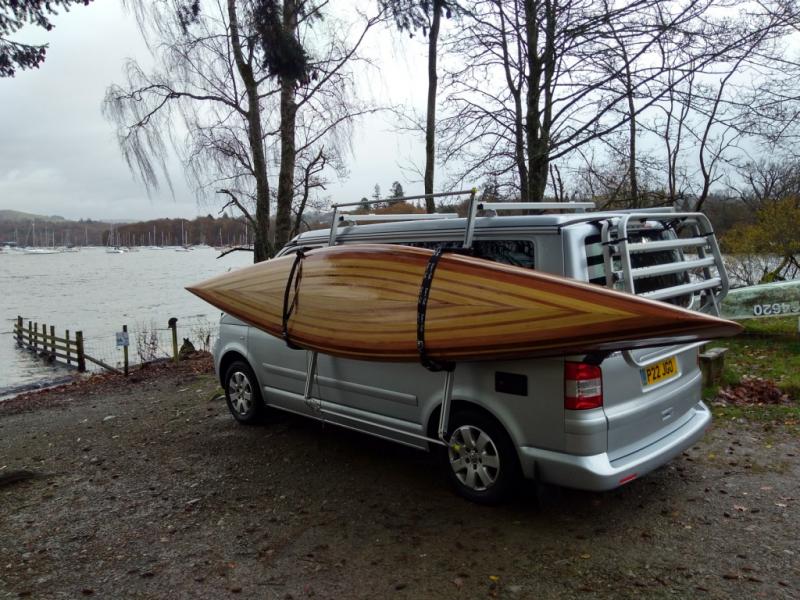
Here we are on Windermere on a rather chilly day, just to show she floats !
Note roof rack device - by Kari-Tek, a marvellous piece of kit which means I can load up & unload singlehanded, previously quite impossible even with two of us with ordinary roof bars.
Last edited by Gleam (13 Nov 2019 5:13 pm)
Offline
#10 10 Dec 2024 3:18 pm
- Gleam
- Member
- From: Nr Kendal
- Registered: 8 Jan 2018
- Posts: 9
Re: Christmas Mystic
Latest update : having had good use mainly on Derwent water have decided to add a third seat at near centre. This should enable single handed use and also the bow seat position is just a tad too far forward, with water over the bow when 2 up & it's choppy. Getting the right positions in the build is tricky as once there in they're in.
All in all a great success !
Offline
Pages: 1