A forum for discussing wooden boats and boat building
You are not logged in.
- Topics: Active | Unanswered
#1 31 Oct 2017 8:35 pm
- Ben2
- Member
- Registered: 31 Oct 2017
- Posts: 6
Millcreek 16.5 Hybrid Build Diary
Well its finished.
I was looking at the Fyne Boats website which states 5 days build time. I tried hard initially in particular, but it took a year of evenings and weekends, on and off (mostly off during the winter).
I really enjoyed the build process, but as I was building a hybrid boat it seemed to cause all sorts of issues, but they were always solved admirably by Paul at Fyne at the other end of the telephone. How I wish some of his knowledge was in the manual!
The Kit
The kit arrived at the end of October 2016, and I set about it immediately. First issue was identifying some of the parts on the packing list, which didn’t quite tie up. A couple of calls to Paul sorted it.
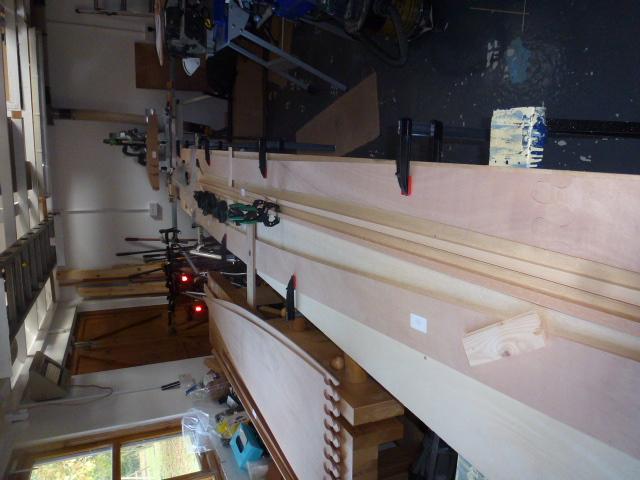
I built a superlong bench with a couple of ¾” plywood sheets and other bits I had in my workshop – I didn’t fancy putting the bits together on the floor so this made the initial tasks much easier. I also bought a shedload of new clamps for the build as I only had a few. Unfortunately after I had unwrapped them, I found them on the Fyne website considerably cheaper!
Offline
#2 31 Oct 2017 8:38 pm
- Ben2
- Member
- Registered: 31 Oct 2017
- Posts: 6
Re: Millcreek 16.5 Hybrid Build Diary
First Mistake
I made my first mistake putting the panels together – when clamping up I was a little lopsided and one of the puzzle joints wasn’t quite as flat as it could be. Fortunately I got away with it with a bit of sanding, without going through a layer of plywood. The other thing I found here and consistently through the build was that the epoxy was never set after 24 hours, I always had to wait a couple of days.
Sheerclamps next – you can’t have enough clamps – with epoxy on both sides the parts had a life of their own, even when I thought they were clamped and positioned. I got there in the end though!
First Kit Problem
Once dry it was on to the building stage! The 2D bits becoming 3D bits! I started wiring it up, putting the bulkheads in place and the spreader bar. Cutting the sheerclamps was a bit scary to get them nicely lined up. No amount of clamping would hold the two halves together so gave up and put a big screw though which is still in the boat now!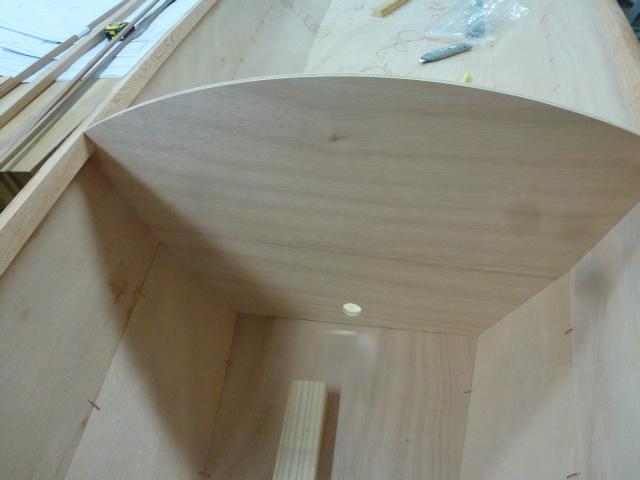

I then tried to fit the knee clamps only to find that there was around a 25 mm gap. I tried tightening everything, loosening everything (breaking many wires in the process) before I gave up and called Paul. (I wished he worked weekends too!) We ascertained that I had the wrong knee clamps (never happened before I’m told).
Once the new ones arrived with new supplies of wire it was all relatively straightforward to get a boat shape that I was happy with, with all the gaps reasonably OK.
Last edited by Ben2 (31 Oct 2017 8:41 pm)
Offline
#3 31 Oct 2017 8:43 pm
- Ben2
- Member
- Registered: 31 Oct 2017
- Posts: 6
Re: Millcreek 16.5 Hybrid Build Diary
Epoxy
I had got to the stage to tape up all the joints!
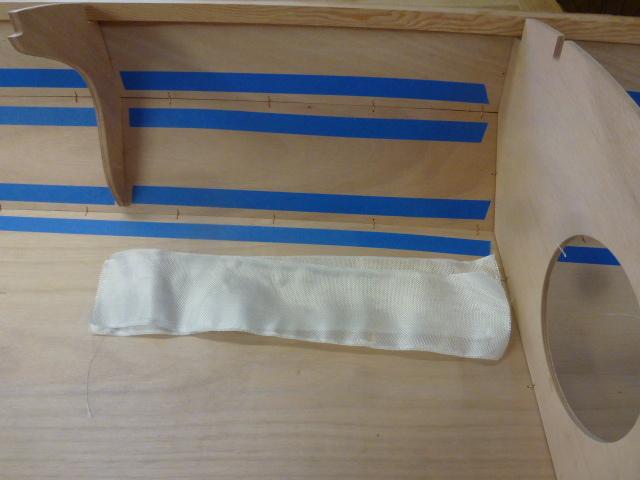
I masked each side of the join first, the instructions said mix up epoxy with the wood flour, which I found really coarse and difficult to handle, but eventually I got a fillet I was reasonably happy with. The plan was to put the fibreglass tape over the fillet and then epoxy over it and the rest of the innards of the hull. The tape part was a matter of being accurate so as not to get a wavy line. The epoxy was not so easy and I tried to apply with a brush as I had done building fibreglass canoes when I was a kid. I found the fillet tried to wash away, and the finish wasn’t as good as I hoped.
Before I did the middle part of the hull had a chat with Paul, and used a scraper to put the epoxy on – and got a much better finish.
If I were doing it again I would ditch the woodflour all together and use the silica filler – much much easier to get a nice fillet.
After a couple of days I gave the inside another coat of epoxy. One of the things I found hard was doing the jobs in a sensible order, I often deliberated about what to do next not to waste epoxy and make best use of the working time rather than drying time…
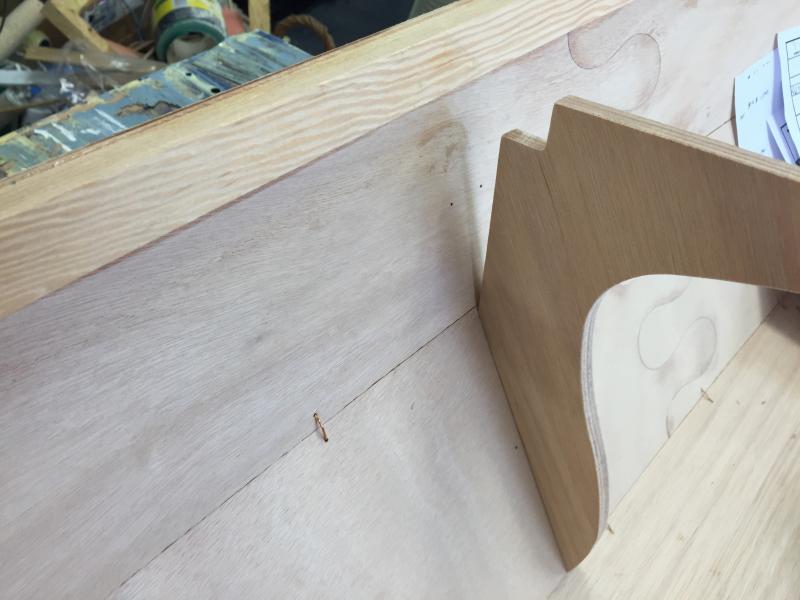
I built up the deck frame and fitted the seat brace bars on the hull bottom. Frustratingly there were no dimensions for these on the plans, and I hope they are in the right place! I also cut the wires and filled the gaps in the outside of the hull.
In between jobs I painted the inside of the hull, nice clean white, I hope it lasts!
Glassing the hull
I read up extensively on this and watched numerous videos on you tube and the CLC website build series. After a final discussion with Paul, checked the sanding of the boat (wasn’t too fussed as I was going to paint it) and laid out the glass fibre. I warmed the workshop up to 18 of so degrees and then switched the heating off so the temperature was dropping whilst epoxying. I got the odd airbubble but was pretty happy with the result. I put 2 coats of epoxy on in a day left it to cure.
Offline
#4 31 Oct 2017 8:47 pm
- Ben2
- Member
- Registered: 31 Oct 2017
- Posts: 6
Re: Millcreek 16.5 Hybrid Build Diary
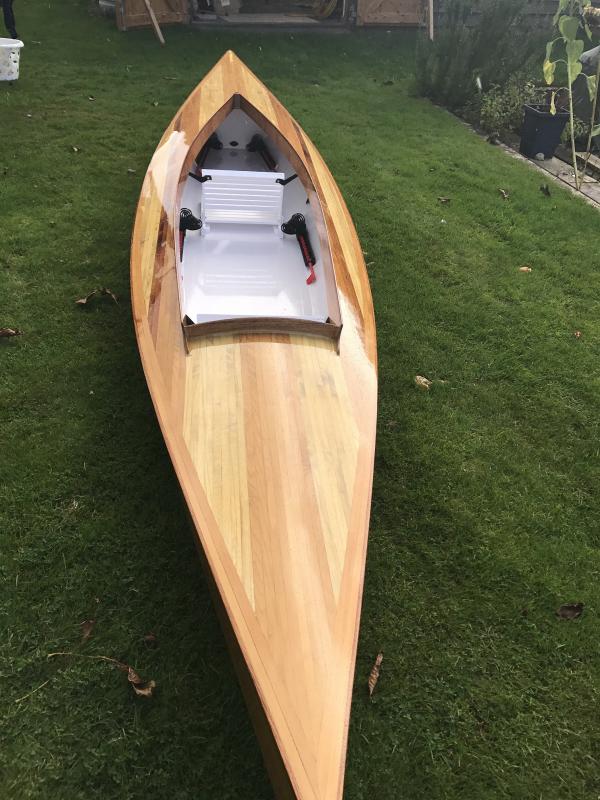
Seats
I had gone for the traditional wooden seats, I didn’t read the drawing properly and put a frame bar at the front and the back of the base, rather than just the front. The holes are still in the base as evidence! Making the bases was fine, the ply was double thickness, so plenty of meat to nail into.
The seat backs were much harder and eventually I ended up redrilling all the slats to get the correct positioning. Nothing a good coat of paint can’t hide. Next time I’ll double the thickness of the ply support of the back too.
Deck
This was the bit I was looking forward to as it was less temperature dependent. I had already joined 4 strips together to form the outer edge. However first job on the boat was to fit the forms. I looked at the plans, and looked at the forms. The drawing called for 12 forms, and I only had 7. After discussion with Paul it turned out that there had been a design change, I had the new drawing but the old forms. A couple of days later the correct new design forms arrived, and after much more fitting were all hot melt glued in place. I then planed the sheerclamps to shape using the guides, which was oddly satisfying.
Finally I could start the deck! Getting the first edge pieces required real patience and eventually a lot of clamps as I gave up on the staples on this piece as they didn’t quite hold. Getting the ends cut correctly was not as easy as I hoped, but the end result was good.
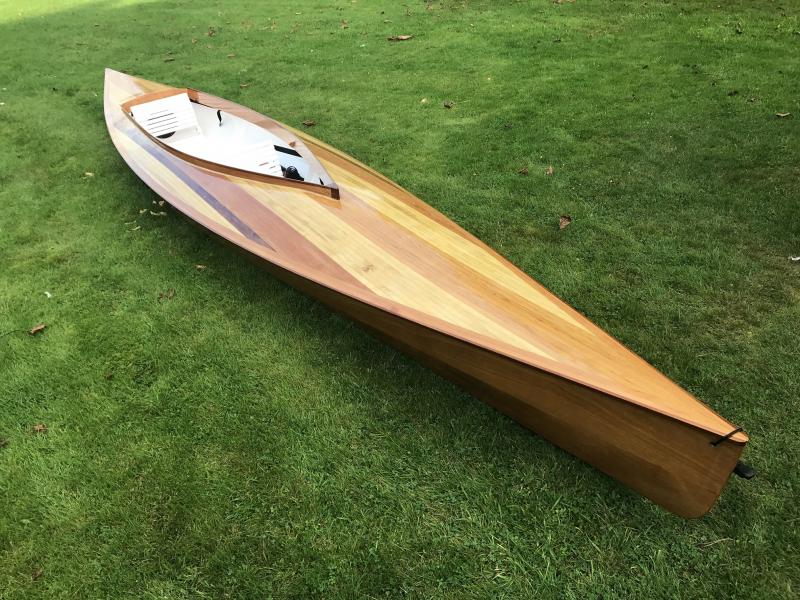
I could then do the rest of the strips. I chose a very simple design, starting in the middle and working out. I was doing 2 each ends each evening, and 4 at the weekends. I think I spent around 40 hours doing the deck alone. My simple design proved quite difficult in the end - to get the strips line up with its opposite number, meant that some needed thinning and then re-profiling. Also as the radius of the deck was different front to back, means there is one extra strip at the front. It was very satisfying to do, although I was concerned at how lumpy it all looked.
I umm’d ad arhh’d about buying a new sander and eventually did, going for a Festool Rotex 150, using Abranet disks. My lumpy deck was transformed within 2 hours using this machine, using a cheap vacuum cleaner there was virtually no dust (but I still wore a mask, eye and ear protection though).
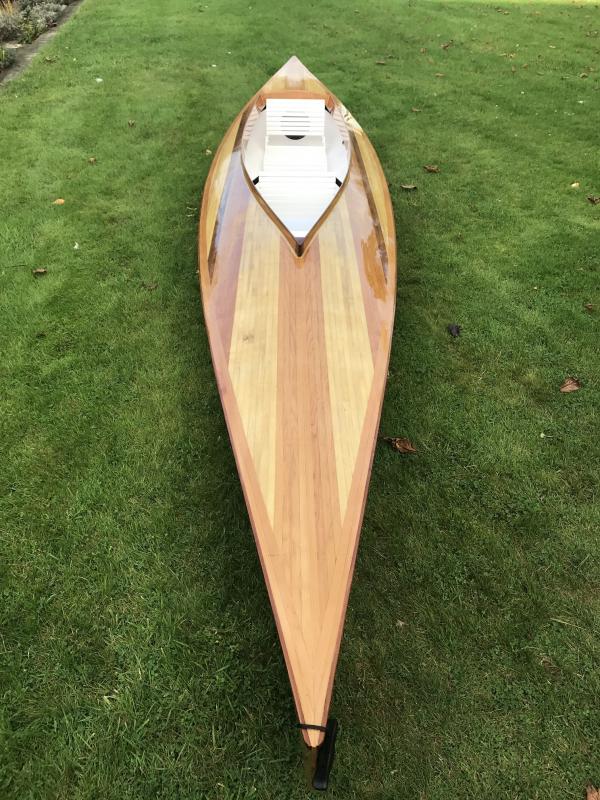
Removing the deck was quite fun, and I set up the sheerclamp form guides as supports. After working through the grades of sandpaper I had a reasonable finish (its not something you are going to really ever see again), before glassing and epoxy. I put 3 layers of glass-fibre on the bit of the deck behind the rear seat for extra strength.
The result was quite stunning.. and this was the inside! I did 2 quick coats of epoxy, trimmed the edges, job done.
End Pours
I was surprised, considering the detail of the kit there were no end pour plywood pieces to wedge in and seal. I struggled first time with my bit of cardboard..the epoxy oozed out and is now strengthening the bottom of the boat…
I used any left overs to do the end fill and then used an unthickened mix to fill in the gaps, which seems to have worked reasonably well.
Fitting the Deck
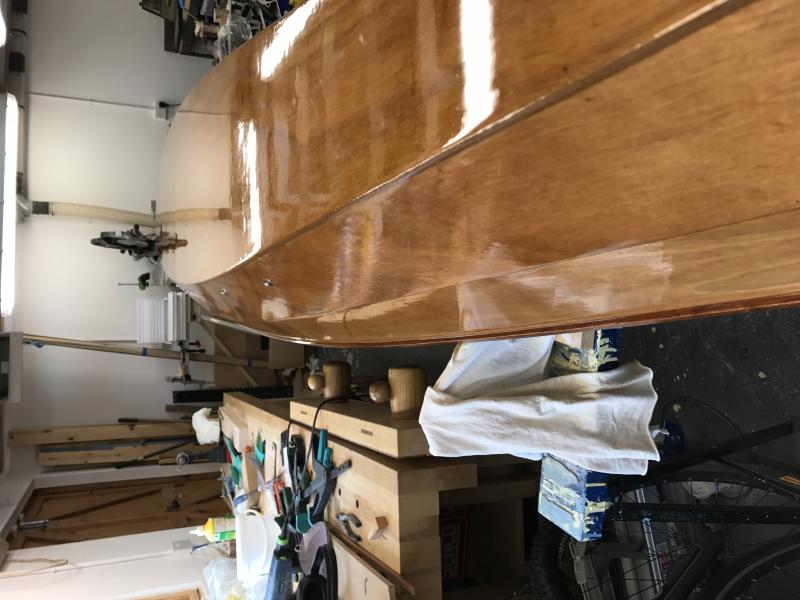
Once the inner deck was done it was a relatively easy job to fit the deck. Clamping was quite hard though, and I used loads of tape to hold it in position and load of clamps on the inner edge) ok all of them!) Once dry I decided to run a fillet of thickened epoxy between the sheerclamps and the deck for added strength. I hung the boat upside down on a couple of ratchet straps - made it much easier!
I then sanded the deck and trimmed the edges with a block plane, and from the ugly duckling a swan emerged. I did have a couple of bits where there was a little gap, but a little thickened epoxy sorted this.
Once happy with the finish I was ready for more glass and epoxy. This was the one that mattered, so preparation was meticulous, even using 320 grit on the sander. I tried my best and the finish is not bad, but there are a few pockets where the glass bubbled. I had bought some syringes and fine needles to get under the glass to add resin, and generally this was successful. The frustration was it would look perfect one minute and there be a bubble the next. I was pretty pleased with it.
Offline
#5 31 Oct 2017 8:51 pm
- Ben2
- Member
- Registered: 31 Oct 2017
- Posts: 6
Re: Millcreek 16.5 Hybrid Build Diary
Deck Combing and Rub strips
The manual was very sketchy about this in my view. I had joined the rubbing strips together some time before, but struggled to decide how to finish them at the ends. Eventually I had decided just to round them off as close to the stern and aft of the boat as possible. As I hadn’t wrapped the fibre from the deck over to the hull the rub strips act as the extra bond between the deck and the hull. I think it gives a better finish, but time will tell.
Doing the deck combing I thought was the most difficult part. The kit came with a strip to stick on top of the combing sides. This meant the nose block was too small, and I added a piece of oak to get the height correct. Getting it all to fit with nice tight joints was really hard – maybe next time I’ll template it first.
Gluing it required every clamp I had again, and I think it looks Ok. I then did the fillet around the edges, masking it up carefully.
I did it one evening, and the epoxy wasn’t dry enough to remove the tape..and by the next morning it was too dry. Very careful cutting removed the most of it, there are a couple of traces, but only I know about it..
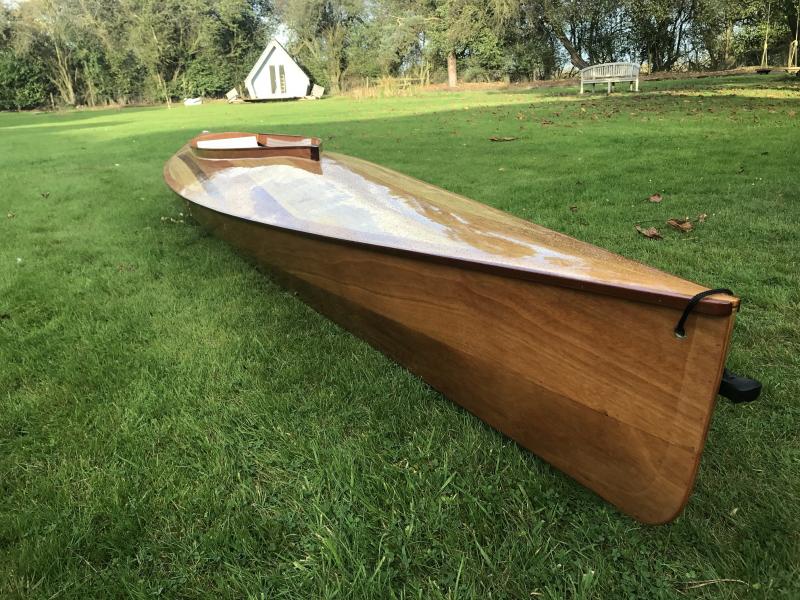
Sanding and Varnish
Before I started on the bottom, my wife had made an executive decision that it should be varnished rather than painted. There were a couple of bubbles in the glass but I decided to go with it.
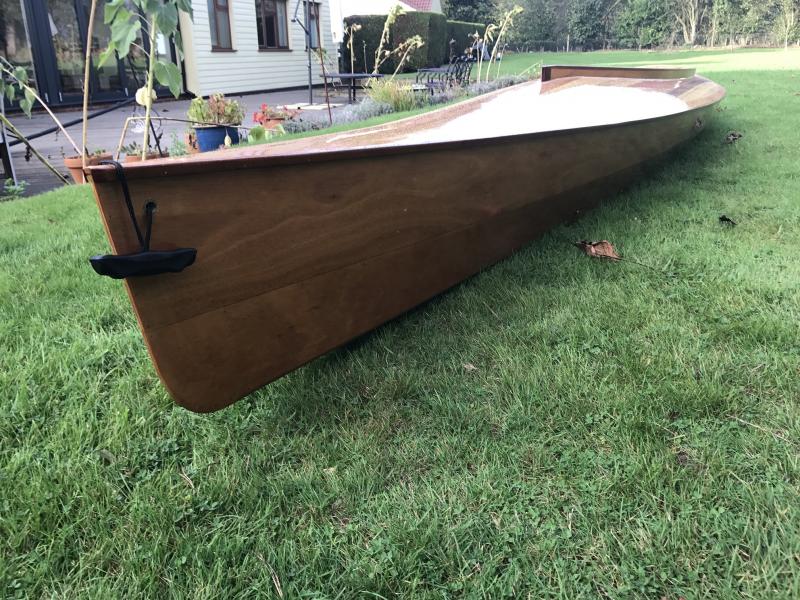
I also acquired a couple of bits of stainless pipe and I drilled the hull at the front and back for eyes to attach the carry handles. These were glued in with a goodly amount of epoxy, covering any raw edges at the same time.
Sanding down was just about being methodical and I went all the grades again, before putting another coat of epoxy on the hull just to fill any parts of the weave etc. not full covered – I think 4 pumps from the dispensers covered it, but it made me feel happier.
I left it a week before I sanded it down again before cleaning thoroughly and wiping down with thinners and a tack cloth when dry. I used slightly thinned International Schooner varnish, to give a slightly longer wet life. I followed the instructions, always going from dry to wet, using a standard bristle brush and was amazed at the finish – far better than I thought I could achieve. I left it a little too early and when I checked the next day there were a few drips which needed to be sanded out.
3 more coats and I was done. Looked great.
I turned the boat over and started the repeat process on the deck. Getting the deck ready was the easy but, it was all the deck combing which was time consuming, getting it to look good, getting the fillets nice and smooth.
I was a bit disappointed with the finish in the end as I had been so careful, I found some very fine orbital sanding marks which I had missed – next time I’ll do the last sand by hand.
3 coats later the job was done.
Finishing
Very satisfying morning! I had predrilled all the screw holes so fitting the inspection hatch, drain plug and seat straps was very easy. I had originally planned to splice a rope handle but it proved too difficult and I fitted decent carry handles found on the internet.
Offline
#6 31 Oct 2017 8:52 pm
- Ben2
- Member
- Registered: 31 Oct 2017
- Posts: 6
Re: Millcreek 16.5 Hybrid Build Diary
Summary
I was woefully out on my timings to get this done. Its not a week long thing due to the epoxy drying times. Paul at Fyne Boats was always brilliant irrespective of what stupidity I directed at him!
There were errors in the kit – the knees were wrong, and the forms for the deck were the old versions, these were corrected as quickly as possible, normally next day. I thought the manual (I was sent the wrong one originally, non hybrid) was poor. If I hadn’t got a new job I would have re-written it for Fyne. I learnt as much from Paul as I did from the manual. Colour pictures would help a lot, as would more detail on the seat, rubbing strips and a whole host of other bits.
Next job is the launch – moving in a few weeks to a house on a river, so will try it then.
I also wish Fyne did a better range of paddles – I don’t want to spend over £200 on a paddle ..and I need 2!
Would I do it again – definitely! Already looking at the kaholo board to make for my daughter!
PS Thanks Paul for your help and patience!
Offline