A forum for discussing wooden boats and boat building
You are not logged in.
- Topics: Active | Unanswered
#1 10 Nov 2015 1:25 am
- David Wood
- Member
- From: South Devon
- Registered: 15 Apr 2015
- Posts: 25
Sassafras 16 open canoe build
Having spent quite some time choosing between the lightweight Canadian canoe and the clinker-style Sassafras, I eventually ordered the kit for the Sassafras in April 2015. I had intended to record my progress here in real time, but now that the boat is very near completion, I'll travel back in time to trace my progress.
First of all, I watched the CLC Boat Building DVD, in the hope that it would give me confidence, which it did to some extent, though the frequent doom-and-gloom references to Viking funerals (if care wasn't taken) did seem to apply to me as a novice builder. The manual is excellent, explaining almost every stage in considerable detail. From this, I created a tick-chart to ensure I covered every stage, particularly as I planned to do some parts of the construction in a slightly different order. Happy in the knowledge that the Fyne Boats team were on hand to advise, I began. . .
Last edited by David Wood (11 Nov 2015 4:49 pm)
Offline
#2 10 Nov 2015 12:48 pm
- David Wood
- Member
- From: South Devon
- Registered: 15 Apr 2015
- Posts: 25
Re: Sassafras 16 open canoe build
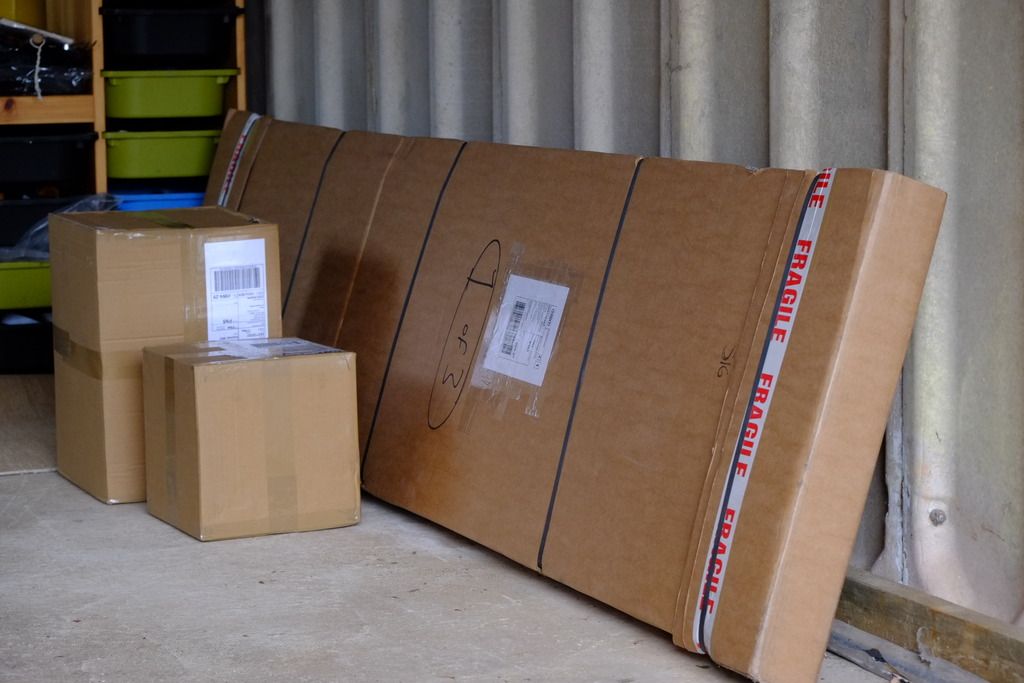
On opening the package, I was struck by the apparent vulnerability of the plywood panel sections. Would these really fit together to form a strong, stiff canoe? At that stage, with my inexperience in boat building, this seemed unlikely.
Last edited by David Wood (2 Aug 2016 11:00 pm)
Offline
#3 10 Nov 2015 1:04 pm
- David Wood
- Member
- From: South Devon
- Registered: 15 Apr 2015
- Posts: 25
Re: Sassafras 16 open canoe build
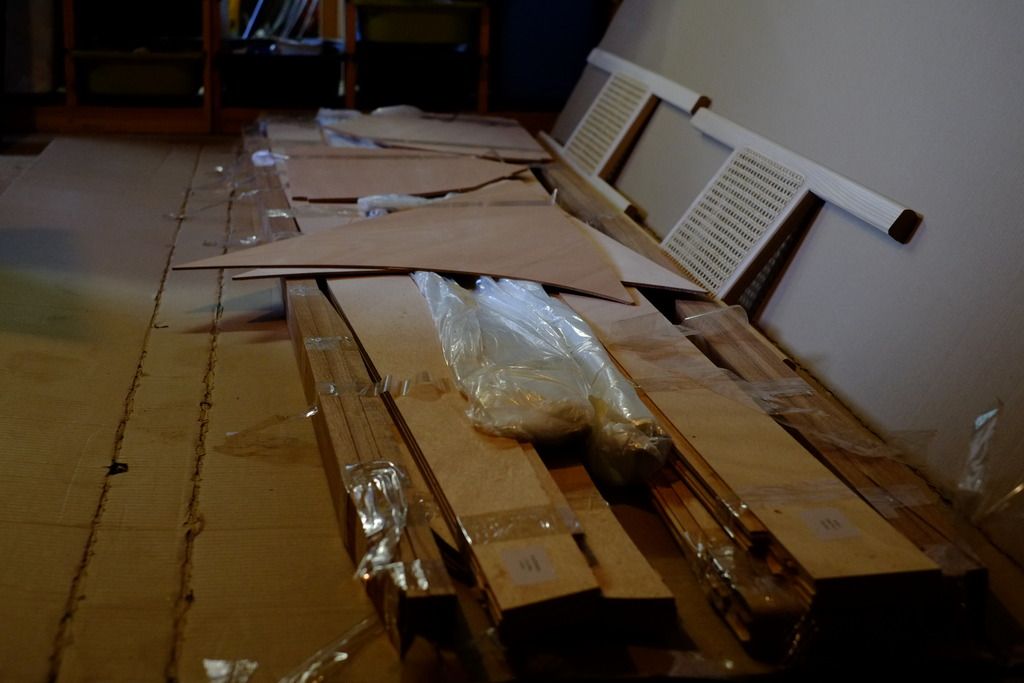
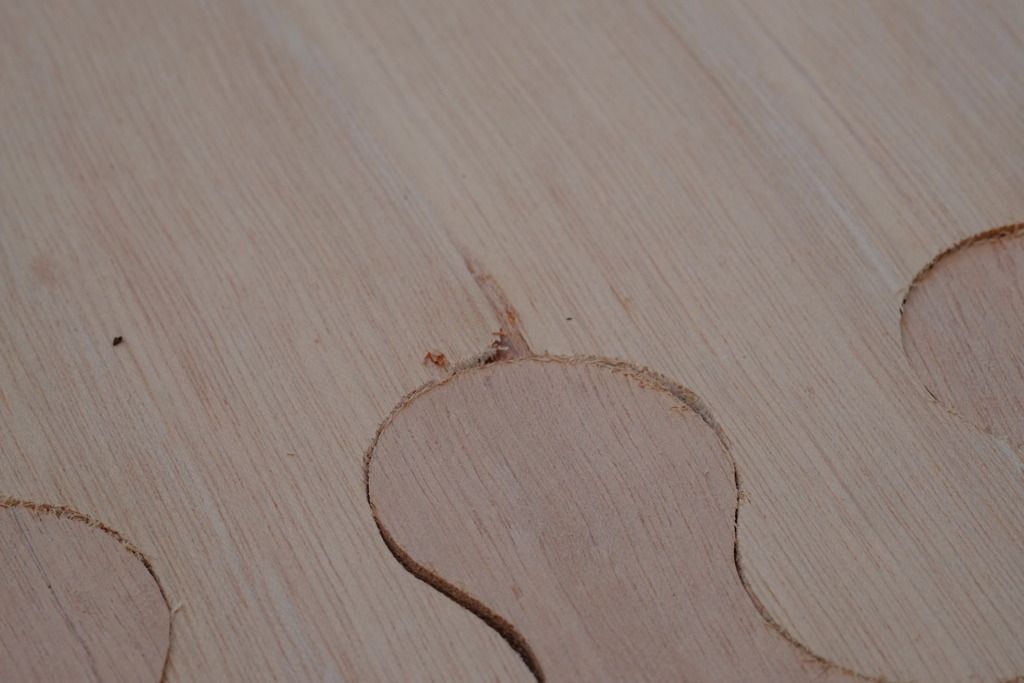
The first task for kit builders is the careful removal of machine tabs left over from the cutting machine. The initial reaction was that this was going to be an irritating delay, but it turned out to be a confidence builder - a straightforward task that gave me a great deal of confidence in handling the various boat sections.
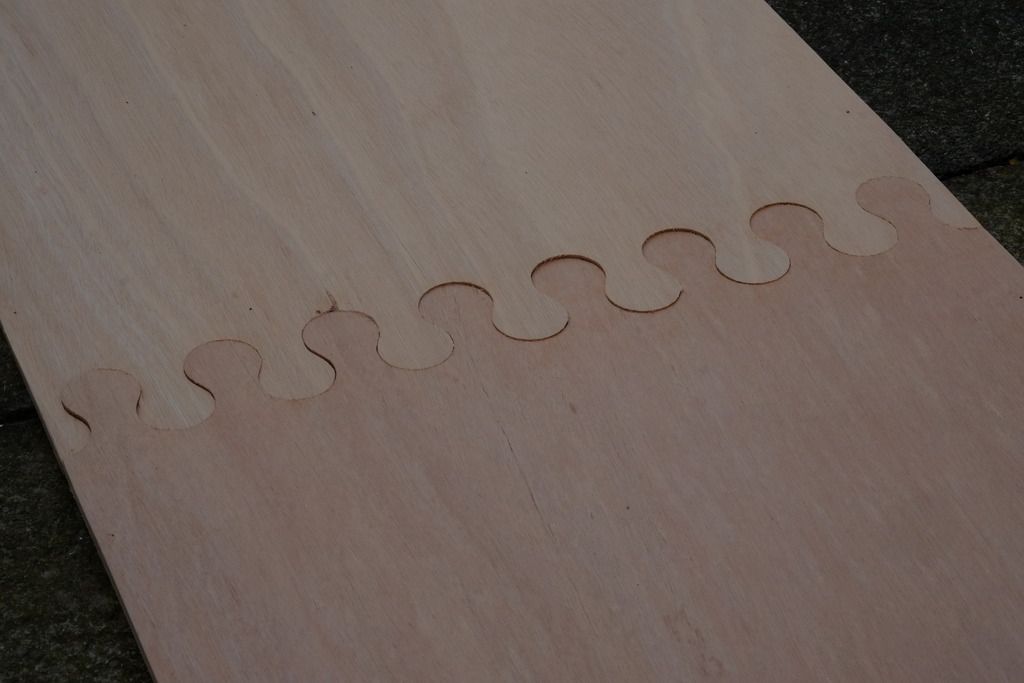
Next came the assembly of the 16 plywood strips to create the 8 panels which constitute the hull. This kit comes with pre-cut puzzle joints, which needed very little adjustment, though I had managed to damaged one of them very slightly when removing the machine tabs, but was able to repair this after mixing my first yogurt pot of epoxy.
Glueing these panels required copious amounts of plastic sheeting to ensure that the various panels didn't become permanently glued together. I used some of the packaging for this, and applied the necessary pressure on the pile of jointed panels with heavy sandbags.
24 hours later, one of the plastic sheets refused to come off the plywood, so I used greater force. The cause of the problem was a paper label on one side of the plastic. Epoxy sticks everything except for plastic. The paper was easily removed by gently sanding.
Last edited by David Wood (10 Nov 2015 1:13 pm)
Offline
#4 10 Nov 2015 3:50 pm
- David Wood
- Member
- From: South Devon
- Registered: 15 Apr 2015
- Posts: 25
Re: Sassafras 16 open canoe build
It was mid-May. The puzzle joint epoxy was fully cured, so the stitching of the panels could begin. I had to wait a few days until my son was able to visit. I had tried to lift the rathe flimsy 16 ft. panels by myself, but realised it was rather risky for the structures at this stage.
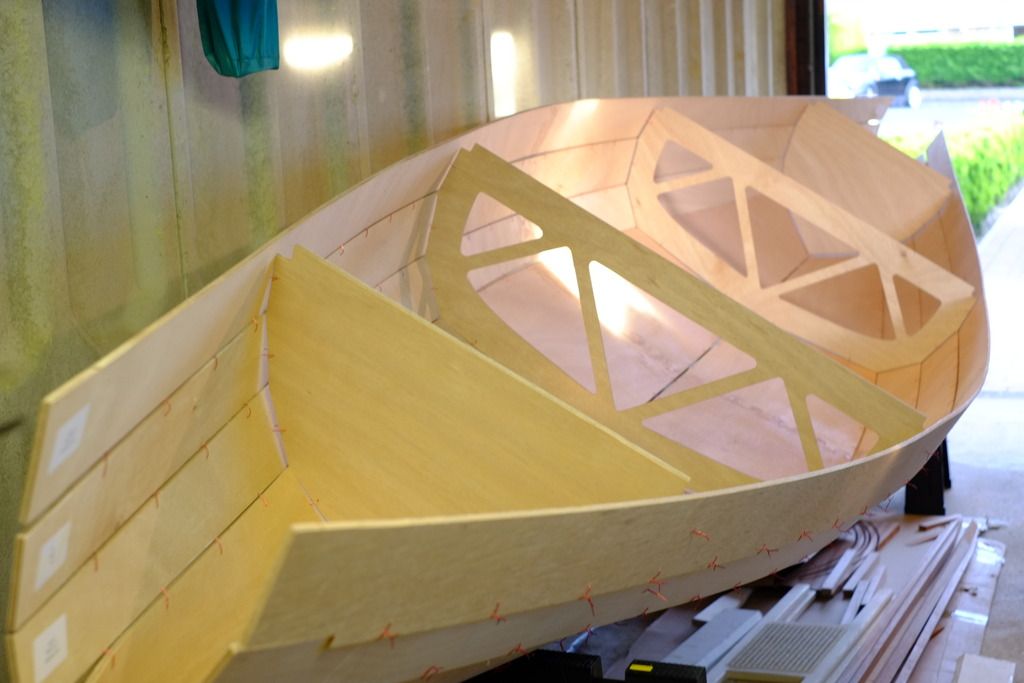
Stitching the "no. 1" (bottom) panels together was straightforward enough, but the instruction said "open the two panels like a book" in order to fit the two temporary frames which should be "dropped into place". This involved considerable bending of the plywood, so I phoned Fyne Boats to explain that the panels didn't seem to want to co-operate. Reassured that the okume plywood was stronger than it appeared, I tried again, but it was clear that I would scratch the panels quite badly if I persisted. Moving the panels and temporary frames from the garage to the lawn meant we could apply body weight, but the force of the wood still made it very difficult to fit the frames without the wires breaking, but eventually I succeeded by wiring from the outside in, rather than from inside out. Once this was done, we carried it all back into the garage and placed it on the sawhorses. This was the most exhausting part of the build.
Fitting the other panels was really enjoyable. Care was needed to align the rabbets when stitching the upper panels, but after several hours, all eight panels were joined together, along with the temporary frames and permanent bulkheads.
Offline
#5 10 Nov 2015 3:53 pm
- David Wood
- Member
- From: South Devon
- Registered: 15 Apr 2015
- Posts: 25
Re: Sassafras 16 open canoe build
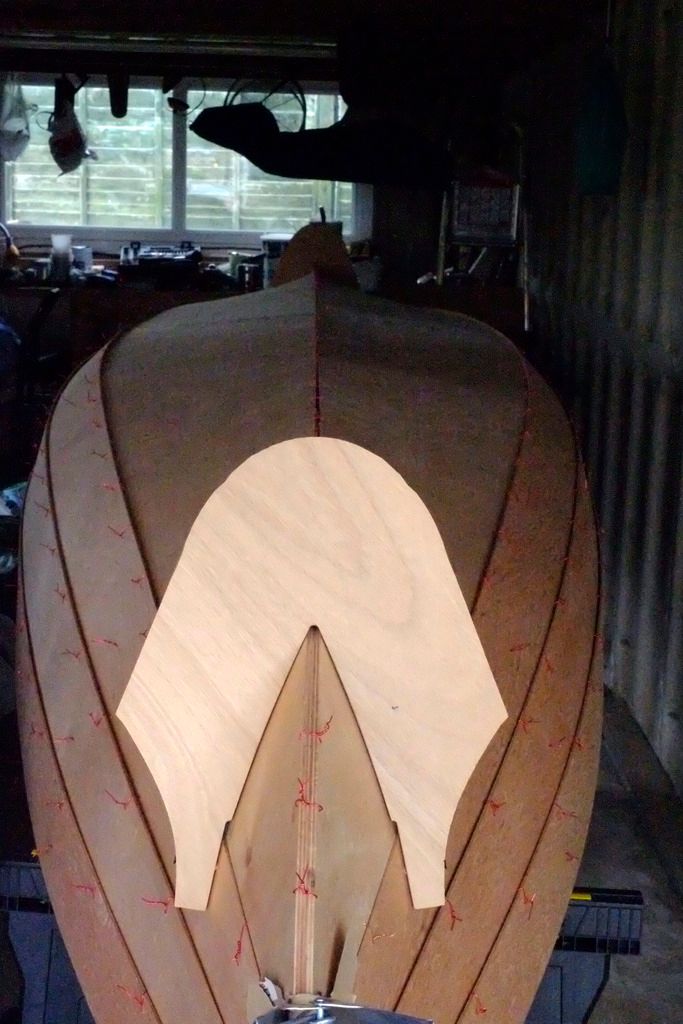
Stitching the panels together at the bow and stern did require some patience and physical effort, as it involved considerable bending of the panels around the bulkheads. Wires kept breaking, so I used clamps for reinforcement. I overdid this, and the consequences were discovered later.
This is the "good" end of the boat, which I have designated the bow.
The stern has had many "issues", all of which have been remedied to my satisfaction.
Offline
#6 10 Nov 2015 5:24 pm
- David Wood
- Member
- From: South Devon
- Registered: 15 Apr 2015
- Posts: 25
Re: Sassafras 16 open canoe build
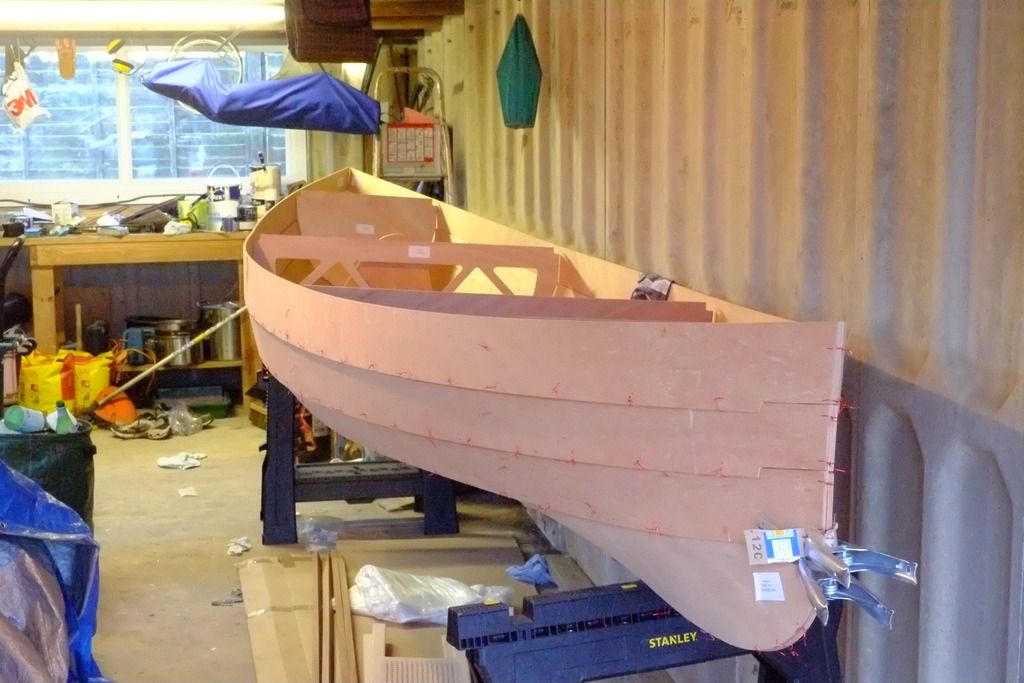
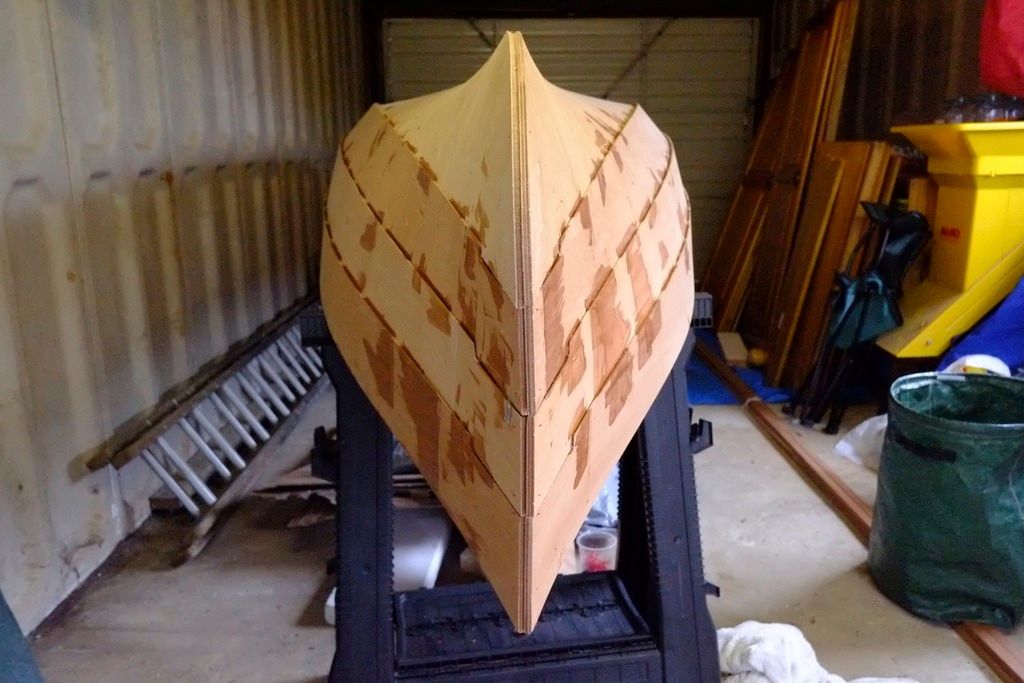
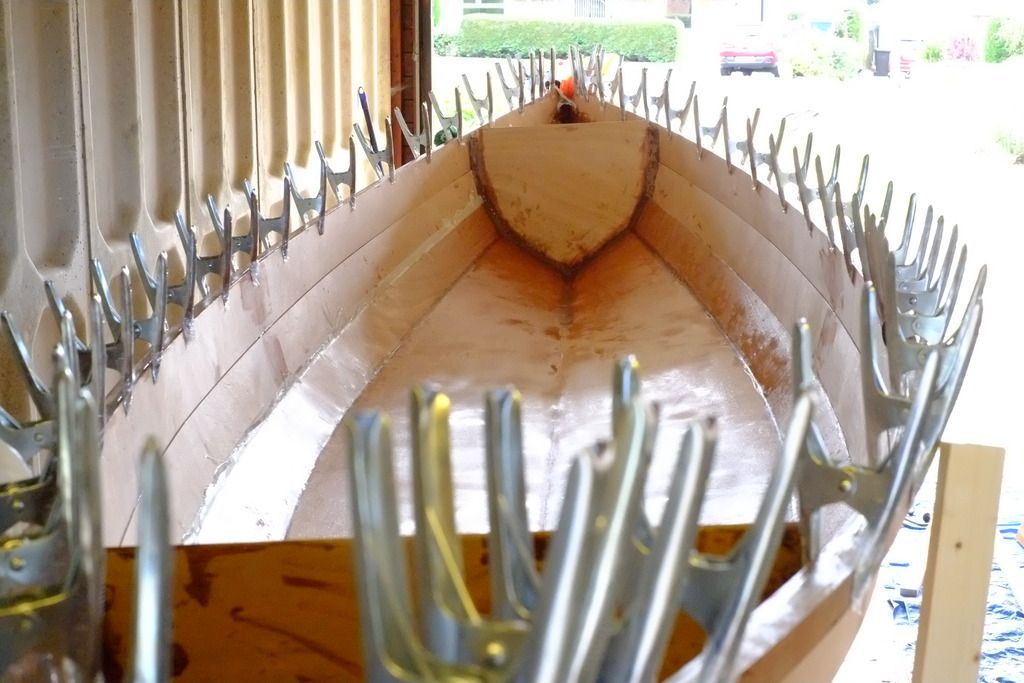
The Sassafras 16 kit had arrived without the external molds, but Fyne Boats were very quick to remedy the omission.
It took some time to persuade them into position, as this required further pressure to the plywood panels. I'm unsure of how much different their use has on the finished product, but it did help to reduce pressure on the stitches at the bow and stern.
Then began the process of tightening the wires and aligning the bow and stern panels. As it said in the instruction manual, care needs to be taken at the lap stitch joints, but with a little patience, this was achieved within a day. The difficulty was the gap along the keel line, where there was a gap which exceeded the recommended maximum of 2 mm.
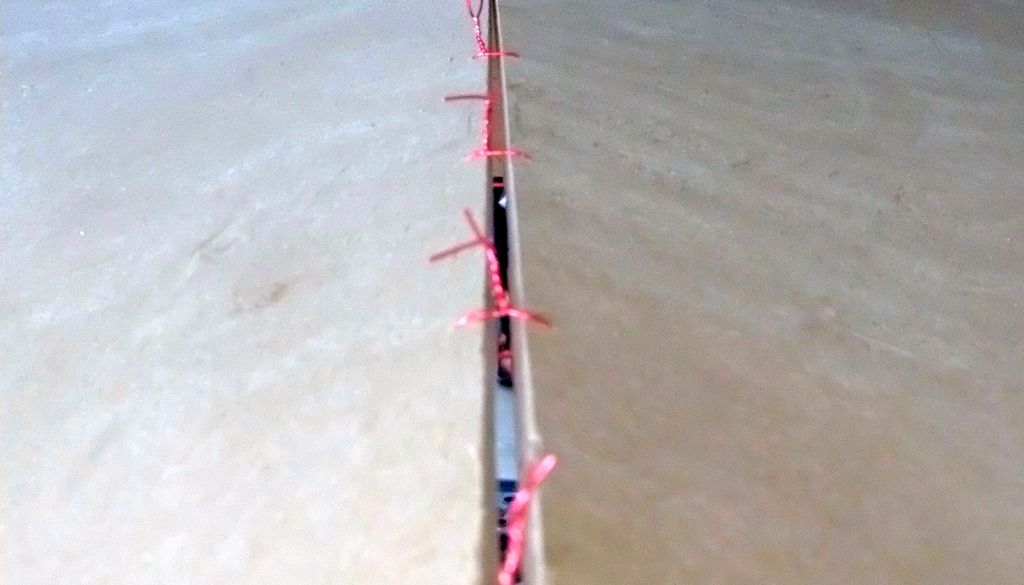
Whenever I tried to tighten the wires to close the gap, they would snap. I drilled extra holes to lessen the strain on each individual wire, encouraged by the Fyne Boats helpline, until the gap was sufficiently small.
I can only say that the support offered (and given) by Fyne Boats has been superb.
On seeing one of my e-mailed photos, FB noticed that the permanent bulkheads had rather large gaps around them, and encouraged me to adjust them.
It was now early June.
Last edited by David Wood (19 May 2016 10:28 pm)
Offline
#7 10 Nov 2015 5:58 pm
- David Wood
- Member
- From: South Devon
- Registered: 15 Apr 2015
- Posts: 25
Re: Sassafras 16 open canoe build
A visit from my Australian in-laws in June/July meant putting canoe construction on hold.
In this time, a remarkable thing happened. Gravity came to my aid. All the shortcomings in my stitching sorted themselves out. The 2mm gap along the keel line reduced itself to zero, and the bulkheads settled into position.
Filletting was something I was not looking forward to. Any errors made in wiring was reversible, but epoxy, once cured, is about as permanent as it gets.
In practice, it wasn't the permanence that was the issue. Although it was now early August, curing was still sufficiently slow to allow for some flexibility. It was my inexperience in mixing epoxy that caused me to get the thicknesses wrong. Trying to work out the fine tuning between gravy, hollandaise sauce, mustard, jam and peanut butter textures was easier said than done, and my initial problem was in mixing the epoxy too thinly, causing drips and runs in the initial stages. Practising on the inside of the permanent bulkheads is recommended - very wisely as I made a horrendous mess of this, applying far too much of it.
By the time I came to the tack-weld filleting of the exterior seams, I felt as though I knew what I was doing, though there were still many epoxy runs.
On 5th August, I set to work on removing the wires. 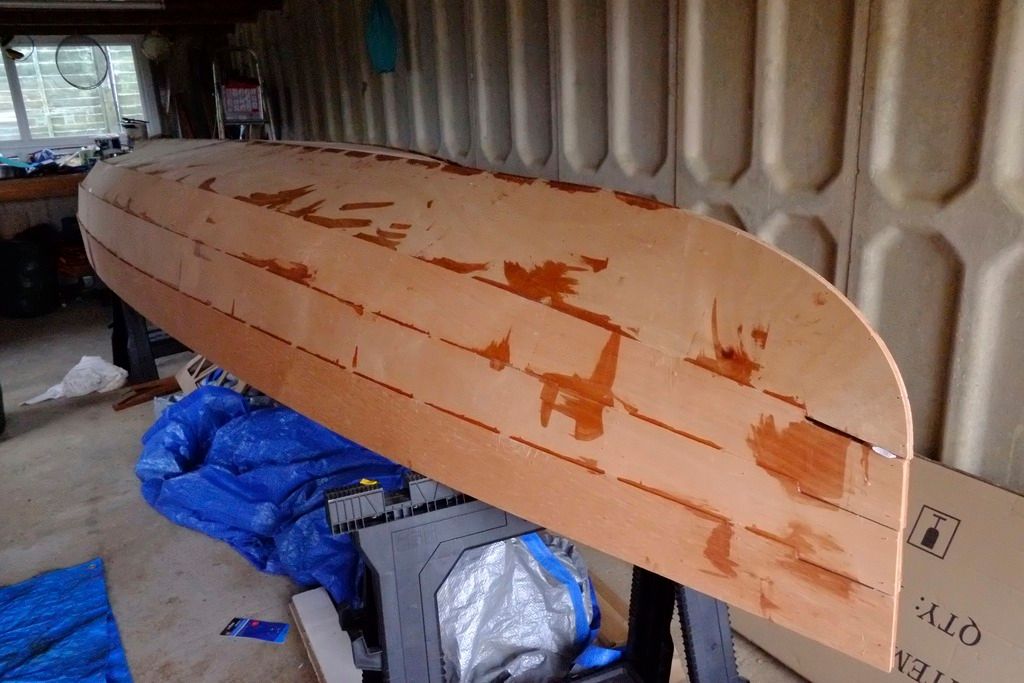
Then I discovered a mistake. Having aligned the bow and stern during wire tightening, I must have knocked the stern out of true alignment at a later stage.
Something else to work on. . .
Last edited by David Wood (2 Aug 2016 11:02 pm)
Offline
#8 10 Nov 2015 6:11 pm
- David Wood
- Member
- From: South Devon
- Registered: 15 Apr 2015
- Posts: 25
Re: Sassafras 16 open canoe build
Filleting and glassing the interior were two jobs recommended for completion within the same day. I was initially quite nervous about this, but the instructions were very clear about how to prepare the fibreglass fabric.
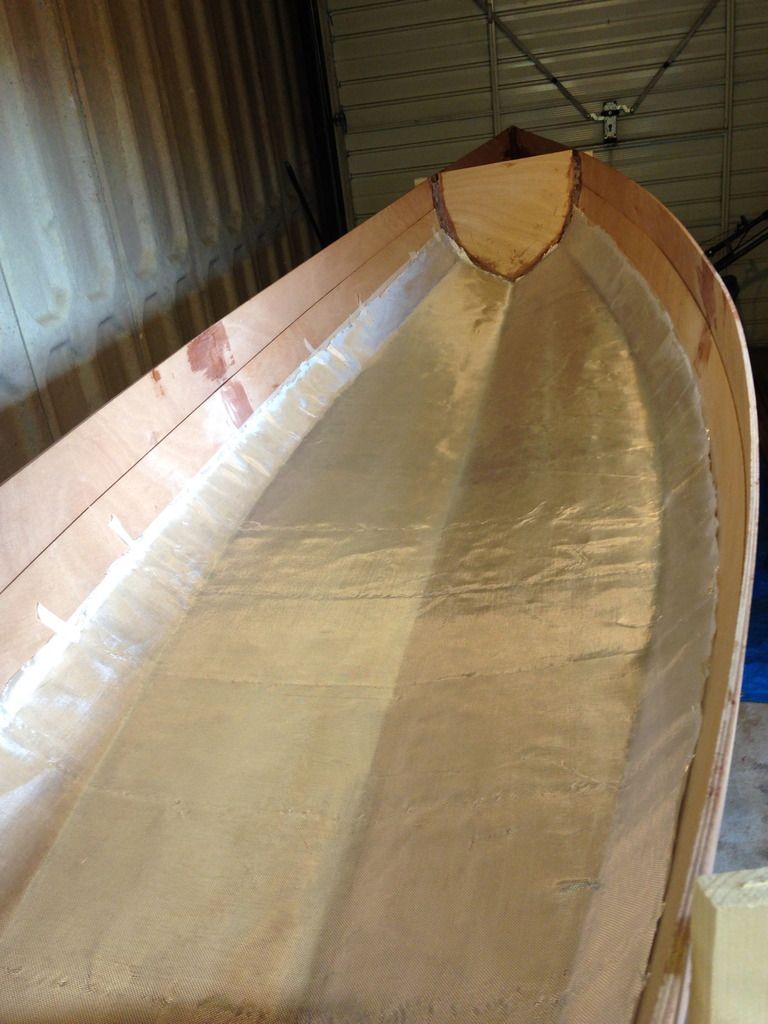
Adding the unthinkened epoxy was straightforward, but care was needed to ensure it didn't dry leaving thick patches.
Last edited by David Wood (10 Nov 2015 6:14 pm)
Offline
#9 10 Nov 2015 6:27 pm
- David Wood
- Member
- From: South Devon
- Registered: 15 Apr 2015
- Posts: 25
Re: Sassafras 16 open canoe build
I had not glued the rails together when I first started, doing so later while epoxy was curing. But they were ready long before they needed fitting to the boat. I had bought 60 spring clamps and a number of G-clamps. My son was there to help with this task. It appeared to be the easiest day of construction to date.
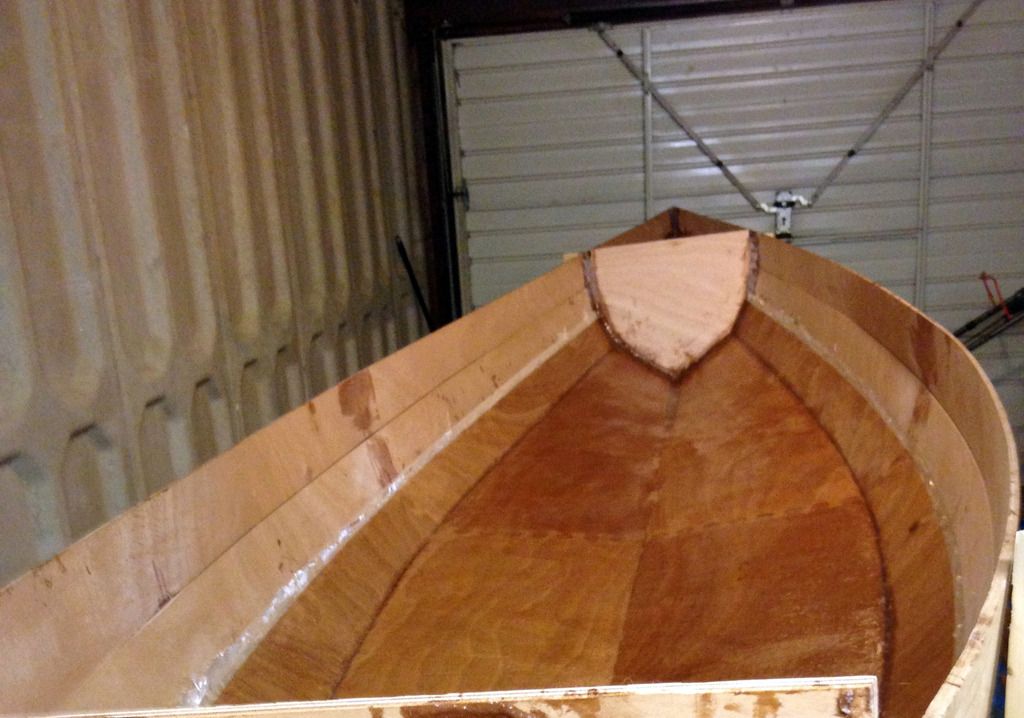
Then something went wrong. As always, the problem was at the stern. Just as the last clamp was put in position, there was a loud cracking sound - not the splitting of wood; indeed everything looked fine. On closer examination, I saw this:
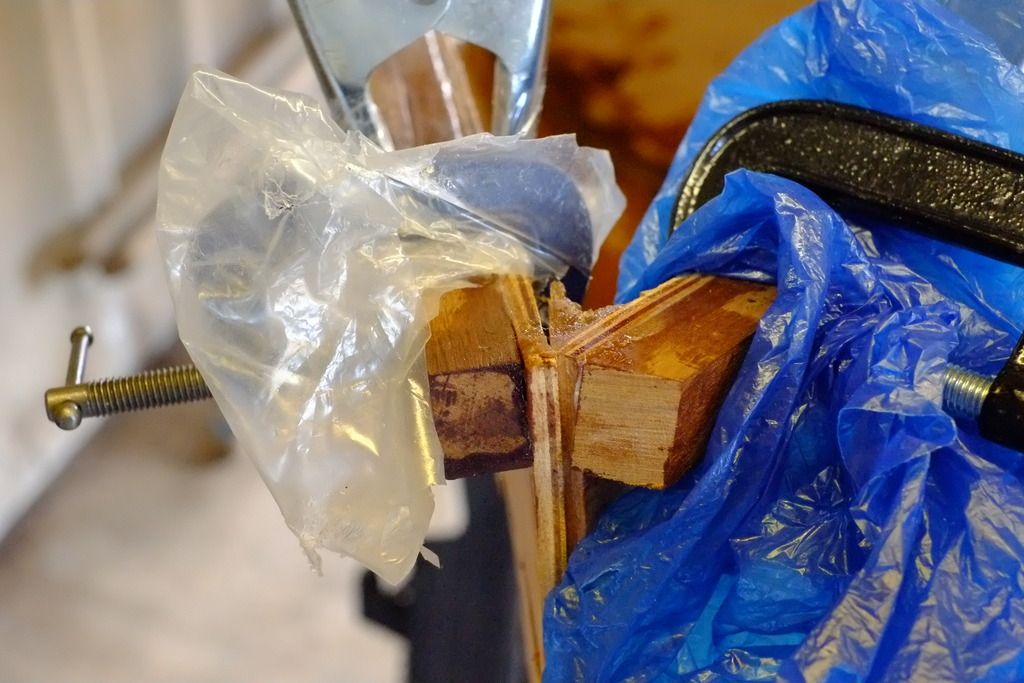
The thick fillet of epoxy on the inside of the stern had come away from the wood. However strong the epoxy was, it could not defy the laws of physics. My over-enthusiastic clamping at the wiring stage had caused this. A quick phone call to Fyne Boats assured me that all that was required was filling the new gap with epoxy, and it would be prudent to add a strip of fibreglass cloth on the inside of the joint. I did both, and glassed the inner joint at the bow also, just to be on the safe side.
(Incidentally, on the top picture, the lighting does the finish of the interior no favours. It's much more even than it appears here.)
Last edited by David Wood (10 Nov 2015 6:54 pm)
Offline
#10 10 Nov 2015 6:39 pm
- David Wood
- Member
- From: South Devon
- Registered: 15 Apr 2015
- Posts: 25
Re: Sassafras 16 open canoe build
Sanding began in earnest. I did it all by hand, not wishing to risk damaging the plywood. It also meant there wasn't too much dust flying around.
Quite a bit of work needed to be done to improve the profile of the crooked stern, which I did, accepting that it meant the boat's exterior would have to be painted rather than varnished.
Exterior glassing required some tricky moulding of the cloth before applying the epoxy, particularly the added strips at the bow and stern.
It was now mid-August.
Offline
#11 10 Nov 2015 9:56 pm
- David Wood
- Member
- From: South Devon
- Registered: 15 Apr 2015
- Posts: 25
Re: Sassafras 16 open canoe build
Next came the installation of the inner rails. No problems this time.
Then I added the seat supports and planed/sanded and shaped the rails.
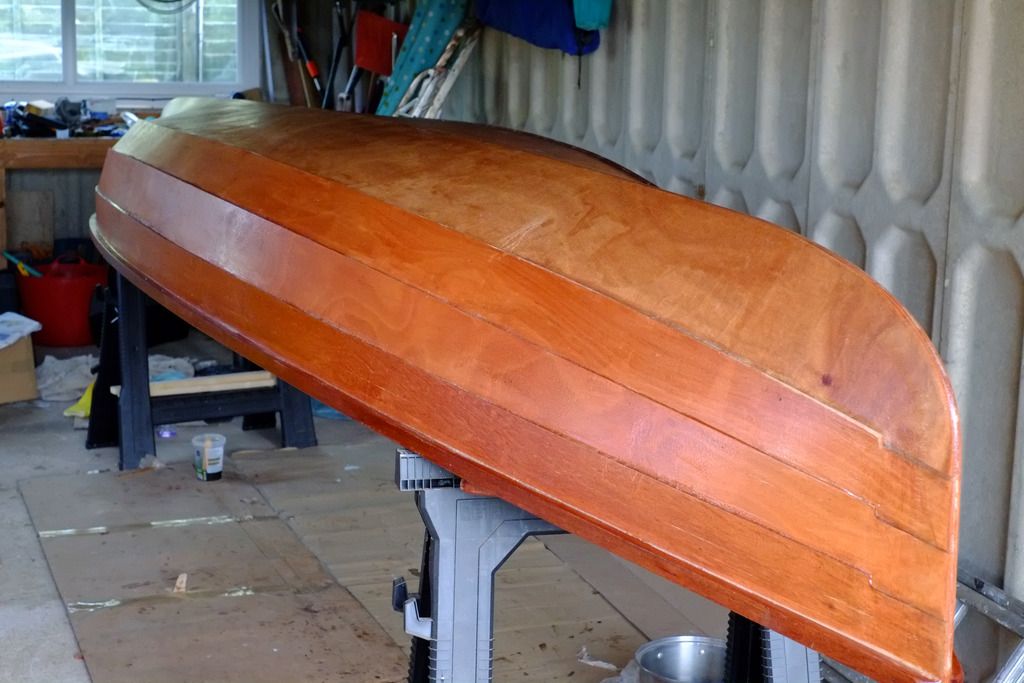
Once the lids were installed to the bow and stern, the canoe looked almost finished, but it was the coating of the interior and exterior with unthickened epoxy that made the canoe look good for the first time since before starting the filleting. Curing of epoxy is very slow in this weather. It's taken almost a week for the last coat to cure.
And that's where we are on 10th November 2015.
Last edited by David Wood (12 Nov 2015 7:49 pm)
Offline
#12 29 Nov 2015 5:34 pm
- David Wood
- Member
- From: South Devon
- Registered: 15 Apr 2015
- Posts: 25
Re: Sassafras 16 open canoe build
Too cold in the garage for the final epoxy coating. ![]()
Last edited by David Wood (29 Nov 2015 5:34 pm)
Offline
#13 15 May 2016 10:34 pm
- David Wood
- Member
- From: South Devon
- Registered: 15 Apr 2015
- Posts: 25
Re: Sassafras 16 open canoe build
Today, I finally returned to working on the canoe. The temperature is warm enough to use epoxy and it's dry enough to remove the tarpaulins covering the canoe in the leaky garage.
Having warmed up the hibernating epoxy, I met a snag I hadn't anticipated: the pumps wouldn't work. The tubes were clear, but nothing would persuade the liquid to emerge from the bottles. The problem was that there was so little epoxy resin and hardener left in them that the tubes weren't quite long enough. So it was a question of measuring the correct proportions manually, and before long I was rolling the mixed epoxy on the inside of the boat. Tomorrow - the exterior
.
Last edited by David Wood (15 May 2016 10:35 pm)
Offline
#14 18 May 2016 11:41 pm
- David Wood
- Member
- From: South Devon
- Registered: 15 Apr 2015
- Posts: 25
Re: Sassafras 16 open canoe build
It was all going so well. ![]()
I discovered a weak spot along the keel line. Following advice from Paul at Fyne Boats, I added an extra strip of fibreglass cloth along the keel line, only to find I'd knocked over the pot of mixed epoxy, so that one of the sawhorses was about to become permanently fixed to the garage floor. In trying to clear up the mess, I tipped the canoe on to the concrete floor. (It landed on me too!) Despite my initial panic and shock, there was no visible damage other than a minor scuff to the outer rail. These canoes may be thin wood and air, but they have strength!
Last edited by David Wood (19 May 2016 8:16 pm)
Offline
#15 2 Aug 2016 10:57 pm
- David Wood
- Member
- From: South Devon
- Registered: 15 Apr 2015
- Posts: 25
Re: Sassafras 16 open canoe build
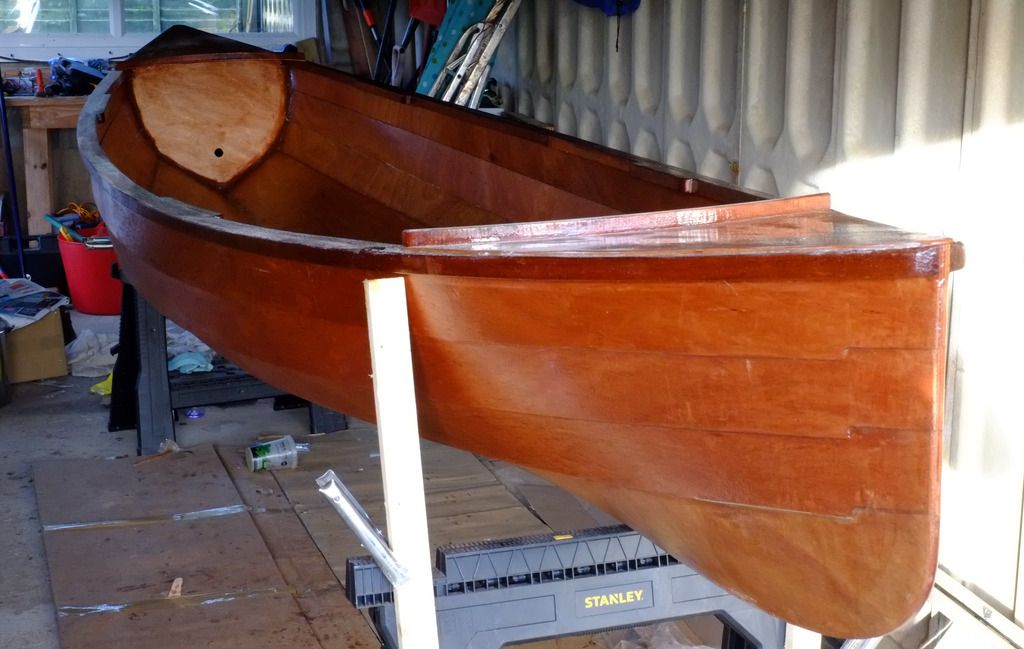
On 9th June, I did a temporary "fix" to see what the completed boat would look like.

Since then, I've adjusted and strengthened the seat supports, and have made a smoother finish, where the panels meet at the bow. All epoxying and sanding done, so it's just the painting and varnishing left
Why do I tremble at every new task? It always turns out well in the end.
Offline
#16 15 Sep 2016 5:08 pm
- David Wood
- Member
- From: South Devon
- Registered: 15 Apr 2015
- Posts: 25
Re: Sassafras 16 open canoe build
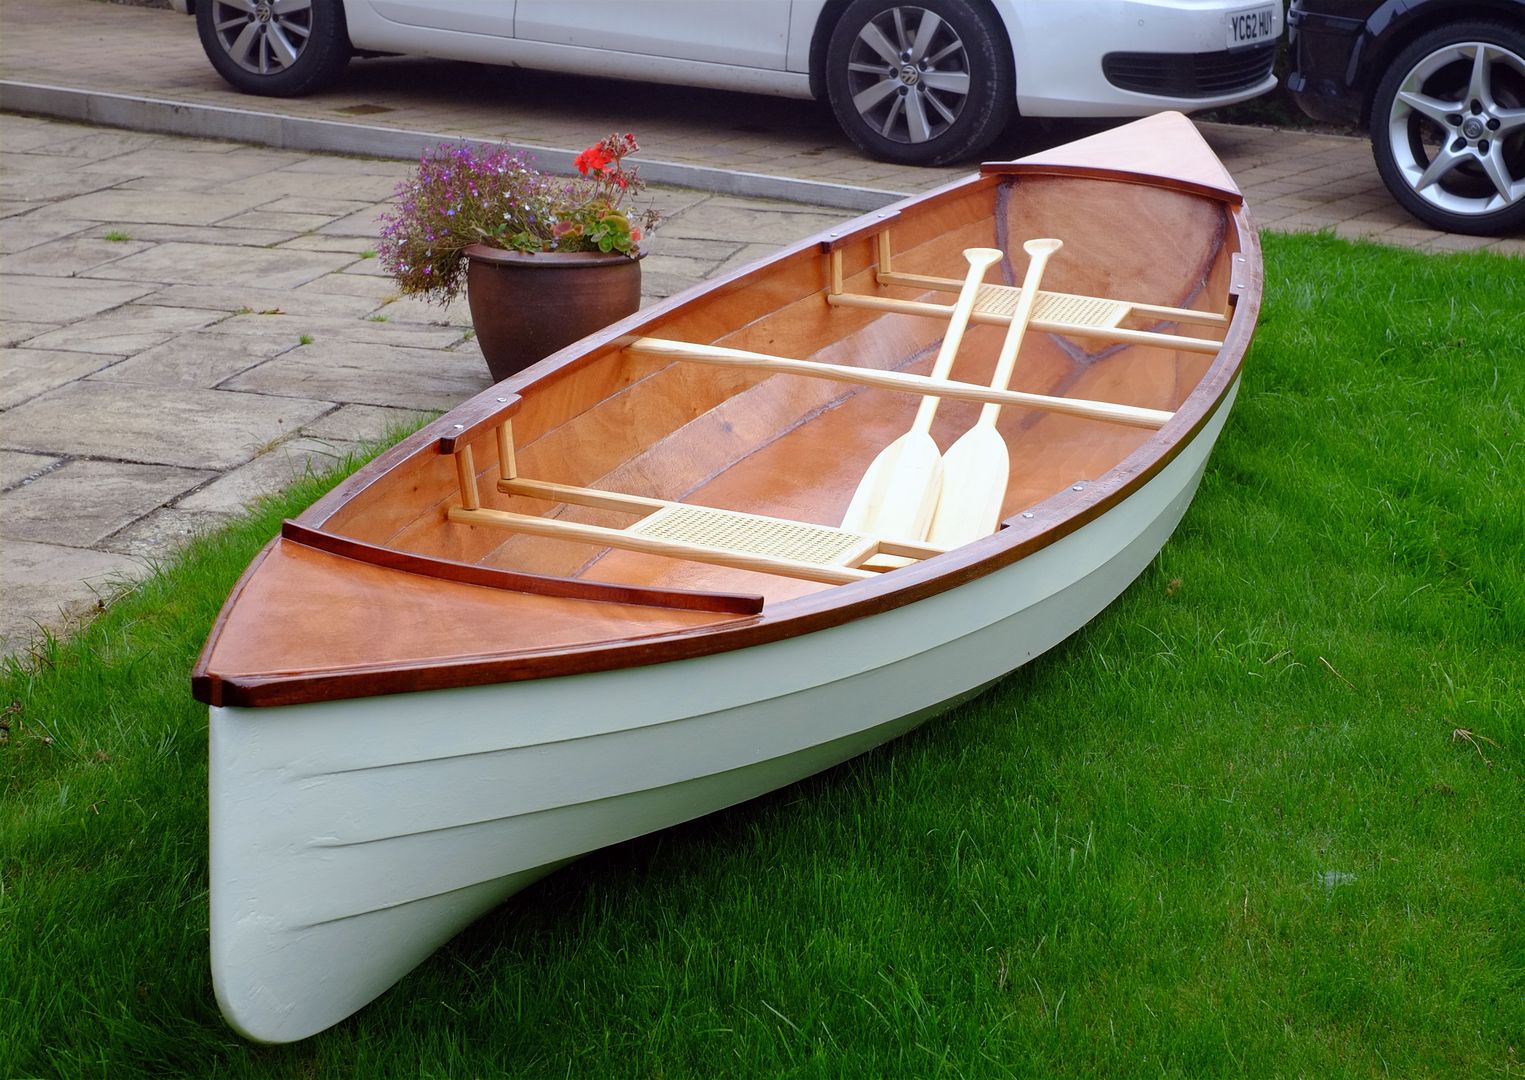
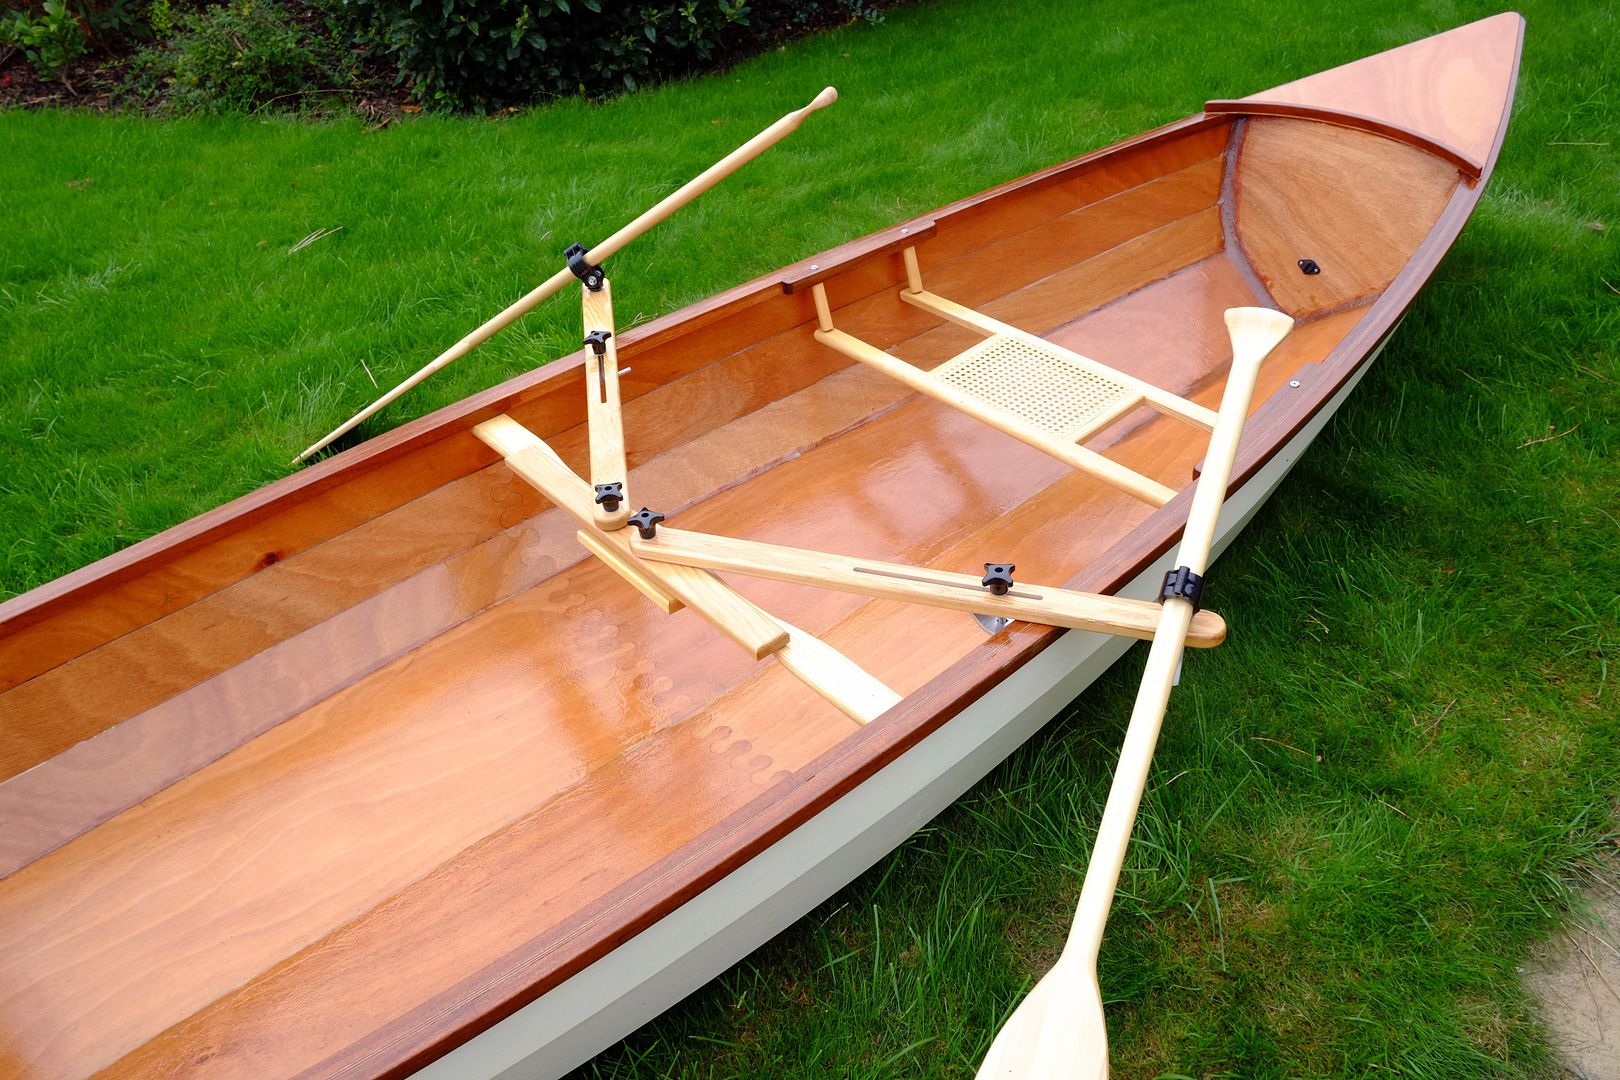
At last - absolutely complete. Yet to be launched, but look how versatile it is - equipped for paddling or rowing:
Offline
#17 17 Sep 2016 8:10 am
- Yambo
- Member
- Registered: 17 Jul 2014
- Posts: 36
Re: Sassafras 16 open canoe build
It's a beauty David, well done!
Offline
#18 18 Sep 2016 6:52 pm
- Sharpy
- Member
- Registered: 20 Jul 2016
- Posts: 44
Re: Sassafras 16 open canoe build
Lovely - Looking forward to seeing her afloat.
Offline
#19 21 Oct 2018 12:14 pm
- David Wood
- Member
- From: South Devon
- Registered: 15 Apr 2015
- Posts: 25
Re: Sassafras 16 open canoe build

Offline
#20 21 Oct 2018 12:16 pm
- David Wood
- Member
- From: South Devon
- Registered: 15 Apr 2015
- Posts: 25
Re: Sassafras 16 open canoe build
All the things claimed for this boat are true. It's very stable (important for a Canadian canoe) and glides through the water like in a dream.
Offline
#21 20 Feb 2023 2:05 am
- Carolyn d
- Member
- Registered: 20 Feb 2023
- Posts: 2
Re: Sassafras 16 open canoe build
Hi David,
We are building the same canoe from Chesapeake Light Craft (the Sass 16) This was supposed to be a wonderful couple bonding experience and by all our research easy to do. We are not doing well with this; our boat looks like your photo # 5. We have the panels on, but cannot bring the bow and stern together. Tried the ratchet tie down, wetting the wood; not sure what to do. Called CLC they were not helpful. Any specific suggestions would be greatly appreciated and marriage saving (just joking-I think)
Thanks!
Offline
#22 20 Feb 2023 2:12 am
- Carolyn d
- Member
- Registered: 20 Feb 2023
- Posts: 2
Re: Sassafras 16 open canoe build
Sorry not picture 5-- picture 4
Offline
#23 20 Feb 2023 8:23 am
- MartinC
- Member
- Registered: 3 Apr 2020
- Posts: 353
Re: Sassafras 16 open canoe build
Don't dispair Carolyn!
I have no knowledge of your boat, but all the builders of the Waterlust had a similar issue with bending the ends together around the breasthooks. You have to work out a system (in advance) which works for you. I ended up in a complete mess with epoxy drying, copper wires parting, and wood splitting. In desperation I sawed through the semi-dry epoxy, drilled both sides and put a substantial bolt through! This isn't something I would recommend in the heat of the moment, but planned carefully in advance it would have been a perfectly good solution to the problem.
The good thing about this type of building is that it is very forgiving. The next day I removed the bolts, sanded off the epoxy mess, and in the end I had a boat which noone would guess had undergone such radical surgery!
I hope David can help you with the specifics of your boat, but please don't dispair..... or divorce!
Offline
#24 20 Feb 2023 10:22 am
- Phil
- Employee

- Registered: 8 Jun 2011
- Posts: 74
Re: Sassafras 16 open canoe build
Good Morning Carolyn d,
It sounds like you are almost there. The end forms as seen in photo 6 will help take some of the strain out of the ends. At the bows there is quite a lot os stress going through the 6mm plywood and sometimes letting the wood rest almost in the right place allows it to relax a little before the final tightening and getting the wood into place.
You can try wetting the plywood on both sides with clean water and a clean sponge as this will help it slightly. If you do however, please ensure it is fully dried before putting epoxy on!
I would urge you to keep in touch with CLC as they have built more of these than anyone.
I hope this helps.
Phil
Offline