A forum for discussing wooden boats and boat building
You are not logged in.
- Topics: Active | Unanswered
Pages: 1
#1 16 Sep 2015 11:08 am
- TheHikingEngineer
- Member
- From: Newcastle upon Tyne
- Registered: 15 Sep 2015
- Posts: 12
Canadian Canoe first build
Hello all!
Thought I'd open a thread and introduce myself to this Fyne Forum. I've recently purchased a Canadian Canoe kit, after much deliberation, and it is due to arrive next week. This will be - as the title suggests - my first boat build, ever. I am a keen amateur woodworker and, having tackled the usual ornate jewellery boxes, large storage chests, coffee tables, chairs and the like, have decided to build a wooden boat. I enjoy woodwork as it gives me a chance to make something physical. My name is a misleading give-away, I am a software engineer so for all my time spent building things, I have nothing tangible to show for my work, so a chance to work outdoors with wood gives me the opportunity to produce a physical object I can take pride in and display.
I have chosen the Canadian Canoe to allow me to explore the Lakes of the Lake District, having spent many years since childhood wandering the fells and hills, valleys and forests of that most beautiful land. A place where I truly feel relaxed and happy to spend my time. I hope to share this build with you all over the coming weeks and months, as I settle into the build as a winter project.
Thank you all for having me, I've seen some beautiful craftsmanship so far and I'm sure very much more to come!
Mick
My work is long, and tough, and dry,
Among those hills I yearn to fly.
Though I may toil, and graft, and grumble,
Among those Lakes, I feel so humble.
Offline
#2 21 Sep 2015 2:16 pm
- TheHikingEngineer
- Member
- From: Newcastle upon Tyne
- Registered: 15 Sep 2015
- Posts: 12
Re: Canadian Canoe first build
So, in the style of a true carpenter, with only one week to go before my Fyne boat kit arrives, a friendly gentleman offers me some pallets, and I accept, naturally. So the empty, boat ready workshop became filled, see the image below. 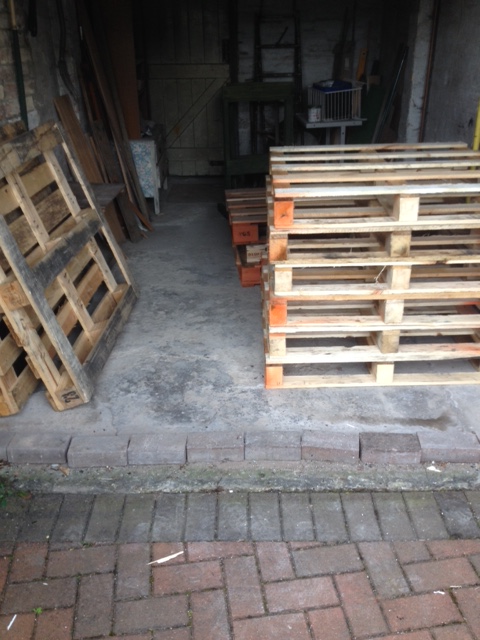
I have made great progress this weekend, pulling pallets apart, dressing and storing the timbers for wondrous creations to come, in fact there are only three left to dispose of before Thursday. I did, however, get somewhat sidetracked, as my workshop lacks a comfy space to sit, drink coffee and indulge in an electronic cigarette - bad habit I know. So I did digress, and built a little chair to sit and rest on. 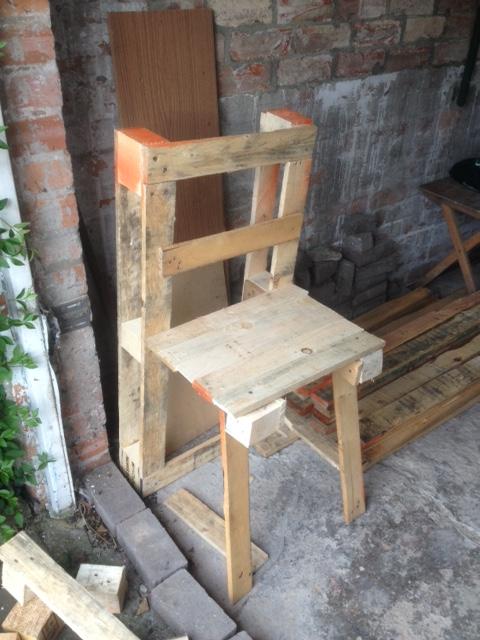
Hopefully I'll be back on here after the weekend with some boat-related progress to show!
Hope you're all well,
Mick
Last edited by TheHikingEngineer (28 Sep 2015 9:33 am)
My work is long, and tough, and dry,
Among those hills I yearn to fly.
Though I may toil, and graft, and grumble,
Among those Lakes, I feel so humble.
Offline
#3 28 Sep 2015 9:25 am
- TheHikingEngineer
- Member
- From: Newcastle upon Tyne
- Registered: 15 Sep 2015
- Posts: 12
Re: Canadian Canoe first build
This weekend was very productive! My Fyne kit arrived on Friday afternoon, a worthy excuse for a half day, and by that evening I had it unpacked and familiarised myself with the manual. I was a little bit giddy when I realised the true scope - or the canoe's length - of this project. Having previously measured my workspace and realised I would have just enough room, I had not bargained for how tight a squeeze the initial work be be! 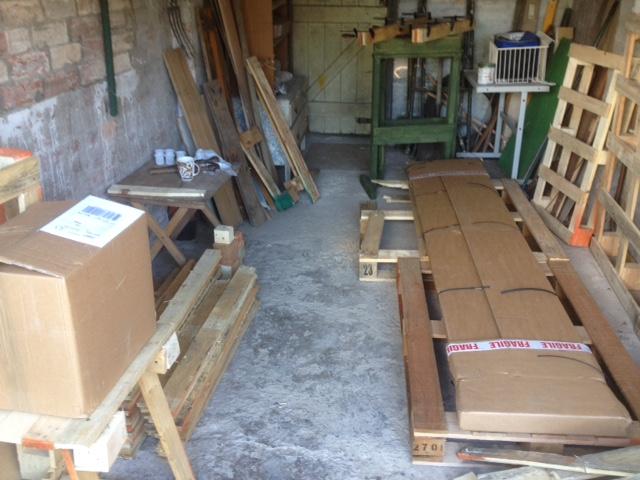
Nonetheless, I set to on Friday evening, after popping home for the appropriate tools and a change of clothes. I took to the epoxy like a duck to water, in fact I quite enjoyed the simplicity and elegance of the puzzle joints, and by the time I left due to fading light, half of the planks were setting nicely under their weights. 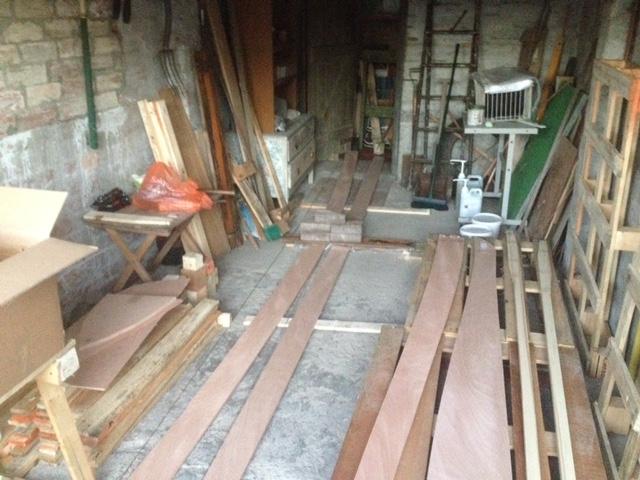
Not wanting to vanish from the face of the earth completely, especially not to return with a canoe in tow - I'm sure this would lead to some puzzled looks, I had to spend Saturday running errands and doing all of those adult things we have to do to function in a modern society, but hey, it gave the epoxy a chance to set!
Returning on Sunday, I expectantly reviewed my epoxied puzzle joints, and found I may have used a little much. Not to say the joints were messy, I just feel I could have easily gotten away using less and requiring less sanding. After sanding, dusting, sanding, drinking a coffee, and another bout of sanding, these joints looked pretty enough and I carefully stored the completed planks and moved onto the next ones, the keelmost planks. This time round, I was more careful and perhaps more sparing with my epoxy - definitely gotten the hang of it now. A pleasant afternoon and another rejigging of the workshop produced the image below, showing the latest extent of the weekend's work.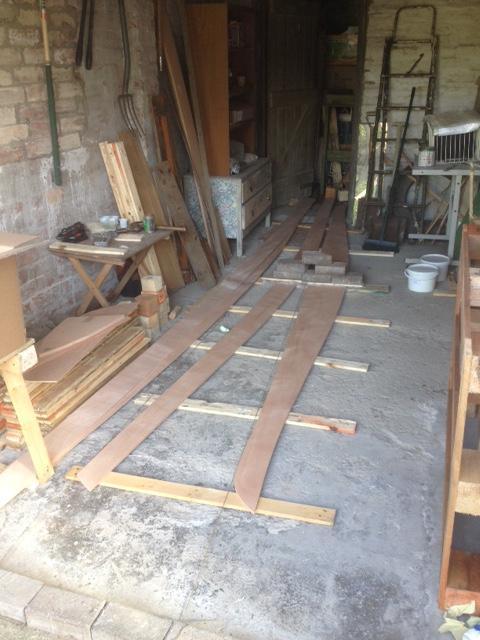
This week I will be purchasing a random orbital sander, I feel this will make lighter and more even work of the puzzle joints, should the epoxy prove testing to neaten up again, and I will no doubt be grateful for its help when the bigger sanding jobs arise later on. All going to plan, I hope to have something resembling a hull shape by next Sunday.
Regards,
Mick
My work is long, and tough, and dry,
Among those hills I yearn to fly.
Though I may toil, and graft, and grumble,
Among those Lakes, I feel so humble.
Offline
#4 5 Oct 2015 9:12 am
- TheHikingEngineer
- Member
- From: Newcastle upon Tyne
- Registered: 15 Sep 2015
- Posts: 12
Re: Canadian Canoe first build
This week's build has flown by, a lot of progress has been made, I have learned a lot, and I would gladly do it all again!
My bare workshop now has new power tools and even a lovely space heater (the nights are getting chilly), it is starting to look lived in. As you can see by the last picture, it is also becoming even smaller now that it is home to my beautiful canoe.
The orbital sander has been a wonder, it makes everything it touches absolutely beautiful, so of course it was focused on my beginners attempts at the puzzle joints. With the sanding complete and eight boat-length panels ready on the workshop floor, I used Wednesday evening to lay the keel of my Canadian canoe, an exciting step that made me sense real progress, in my mind's eye I could already seen a fine vessel before me.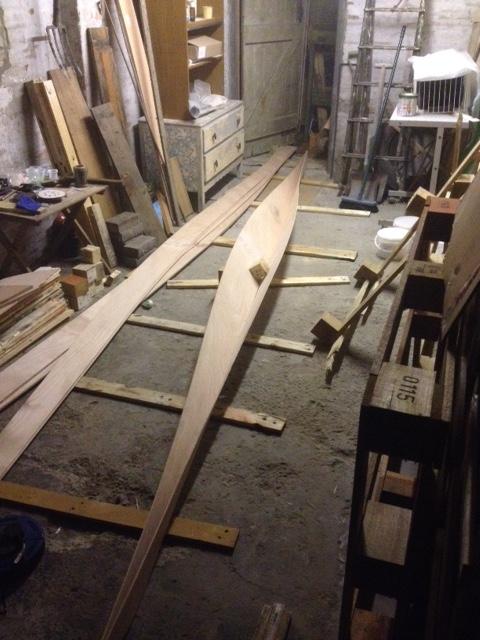
Friday and Sunday saw me drilling the stitching holes and beginning to wire my creation together further. I had to adopt a workshop-friendly and unique practice to begin joining the second panels. I was restricted to working solo so I had to use the workshop floor to support the panels in turn, pivoting the whole creation about its keel to facilitate the progressing joints along the hull. While this practice worked for me, it did involve a lot of careful moving of fragile parts, I cannot recommend anyone to stray from the advice in the manual, however, this did work for me. 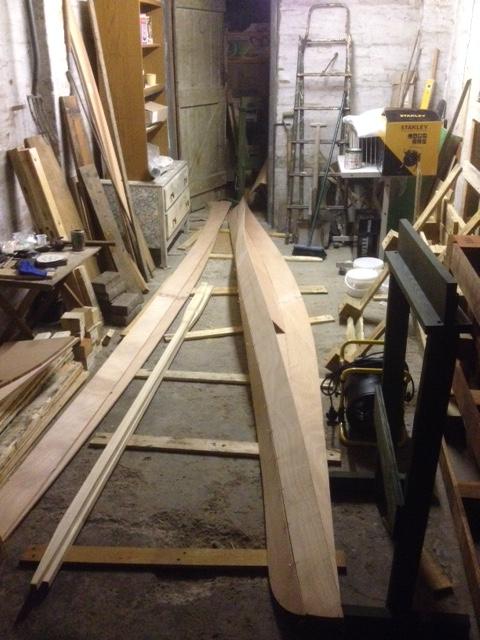
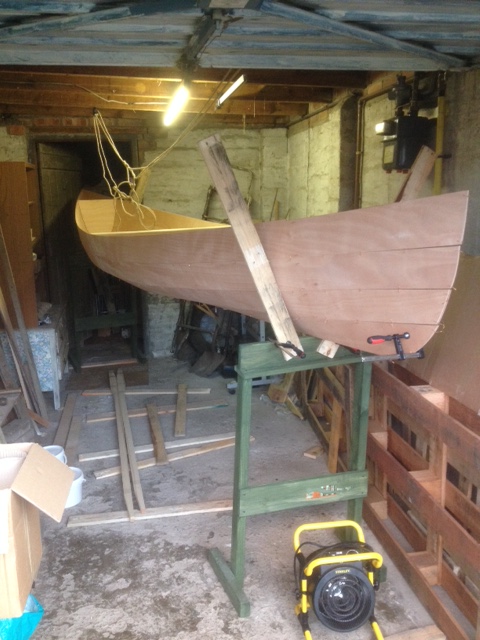
Once I had the first two layers together, the craft was stable enough to handle, I tentatively moved and balanced everything to be certain no damage would arise. With held breath, I lifted the vessel onto my boat stands. Surprisingly, even at this early stage, the canoe feels remarkably strong and sturdy. And it as whole lot easier to work with a vessel that is raised to waist height!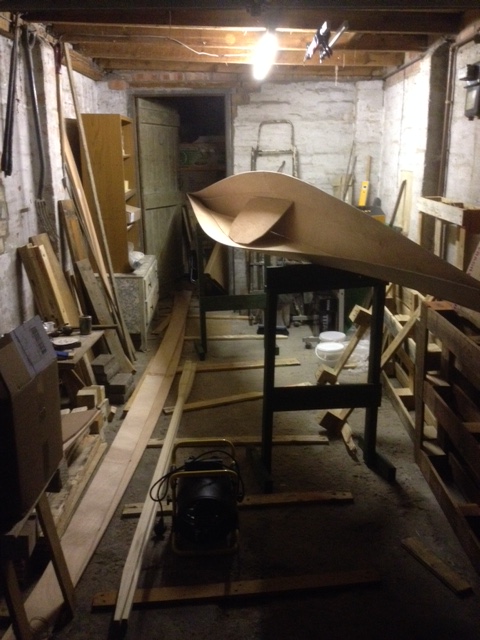
I finished this weekend by fixing the third layer in place, this time able to work in a comfortable, upright position, and it really does make a difference. 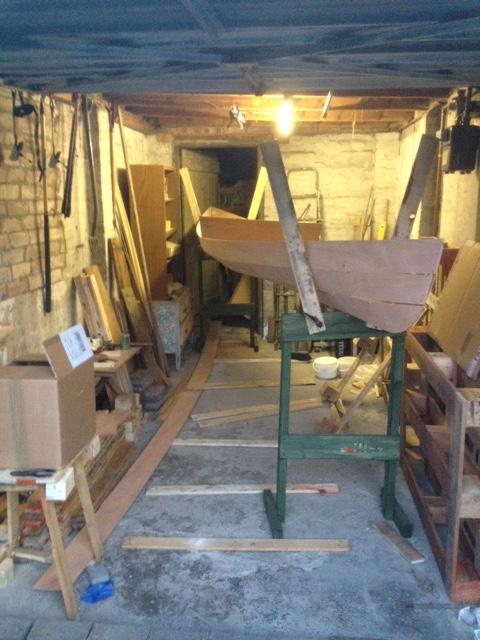
The key to this project is going to be little and often. I can already notice the dwindling light earlier and earlier, and the weather is also threatening to turn this week. Hopefully, with free time and some luck, I can get the last layer in place on an evening and - if I'm lucky - begin some epoxy work this coming weekend.
Having fun, as always,
Mick
My work is long, and tough, and dry,
Among those hills I yearn to fly.
Though I may toil, and graft, and grumble,
Among those Lakes, I feel so humble.
Offline
#5 5 Oct 2015 5:47 pm
- Yambo
- Member
- Registered: 17 Jul 2014
- Posts: 36
Re: Canadian Canoe first build
This week I will be purchasing a random orbital sander . . .
If you're going to work with boats Mick you're going to have to like sanding! I have 2 random orbitals, a flat bed, a detail sander, a bench top disk and belt sander and numerous blocks of wood for wrapping sandpaper around - dowels as well. There's not much that can't be fettled with a bit of sanding. ![]()
Offline
#6 6 Oct 2015 8:26 am
- TheHikingEngineer
- Member
- From: Newcastle upon Tyne
- Registered: 15 Sep 2015
- Posts: 12
Re: Canadian Canoe first build
If you're going to work with boats Mick you're going to have to like sanding! I have 2 random orbitals, a flat bed, a detail sander, a bench top disk and belt sander and numerous blocks of wood for wrapping sandpaper around - dowels as well. There's not much that can't be fettled with a bit of sanding.
Very true Yambo! I find that with woodwork in general, it can be quite therapeutic at times. I just hate waiting on some heavy sanding when I know there's lovely fiddly wiring waiting for me!
Personally, I've taken to using those blocks you find holding pallets together. They do require larger sheets of paper, but they're nice and square and make great hand holds. I gave a few to my dad, he's a metalwork fan and hobby engineer, they're dense enough to make great clouting blocks for bending metal sheet, without taking too much damage themselves. Actually, there's one holding that back door open in the workshop!
Last edited by TheHikingEngineer (6 Oct 2015 8:27 am)
My work is long, and tough, and dry,
Among those hills I yearn to fly.
Though I may toil, and graft, and grumble,
Among those Lakes, I feel so humble.
Offline
#7 18 Oct 2015 3:14 pm
- David Wood
- Member
- From: South Devon
- Registered: 15 Apr 2015
- Posts: 25
Re: Canadian Canoe first build
It's fascinating to follow your progress on this boat. I've been building a Sassafras open canoe since early summer, with the same objective in mind - exploring the English Lakes.
From my limited experience, I suggest you warm the epoxy resin and hardener before mixing, every time you use it, now that outdoor temperatures are dropping.
Offline
#8 20 Oct 2015 9:28 am
- TheHikingEngineer
- Member
- From: Newcastle upon Tyne
- Registered: 15 Sep 2015
- Posts: 12
Re: Canadian Canoe first build
It's fascinating to follow your progress on this boat. I've been building a Sassafras open canoe since early summer, with the same objective in mind - exploring the English Lakes.
From my limited experience, I suggest you warm the epoxy resin and hardener before mixing, every time you use it, now that outdoor temperatures are dropping.
Hello David, thank you for following my progress. I'm pleased to hear that I'm not the only one who longs to explore under my own power, I love the lake cruisers on the larger waters, and I'm even guilty of hiring a motor boat for larger family gatherings at Coniston, just a small one but it takes more passengers, however I can't help but feel you miss out on the peace and the wildlife. I saw a half-built Sassafras when I visited the Fyne workshop, a truly beautiful craft, it very much helped me decide to start this project.
A great suggestion, I'm approaching the resining stage now, hoping to square the boat up and start tomorrow - due to a rare warm day forecast! I've been storing my resin and hardener indoors, at room temperature, until required. I'm hoping that'll give me the edge and start the reaction properly, despite the cold nights that I cant avoid. I've also been employing a space heater to keep the workshop temperature stable. I'm managing to achieve a balmy fourteen degrees at the moment - enough to make for comfortable working conditions and hopefully decent resin curing.
I've made limited progress in recent weeks due to other commitments, a bout of flu and ever-darkening nights, however I'm hoping to make a big leap this week. I completed the bulkheads and began tightening wires last night, almost ready to straighten things up and make some permanent - hopefully - joints! Stay tuned guys and gals, I'll be back with photos shortly!
My work is long, and tough, and dry,
Among those hills I yearn to fly.
Though I may toil, and graft, and grumble,
Among those Lakes, I feel so humble.
Offline
#9 2 Nov 2015 2:01 pm
- TheHikingEngineer
- Member
- From: Newcastle upon Tyne
- Registered: 15 Sep 2015
- Posts: 12
Re: Canadian Canoe first build
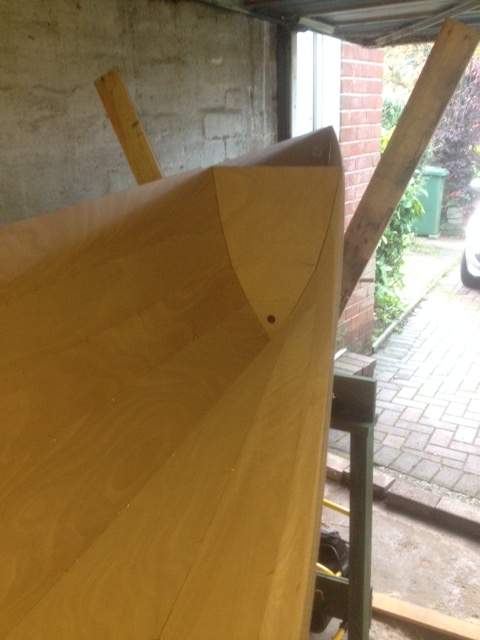
Still fairly little progress in recent weeks, however I do have some snaps to share from this weekend, of the fully wired, snug hull and both lovely bulkheads. At some point this week, I will start work with the epoxy!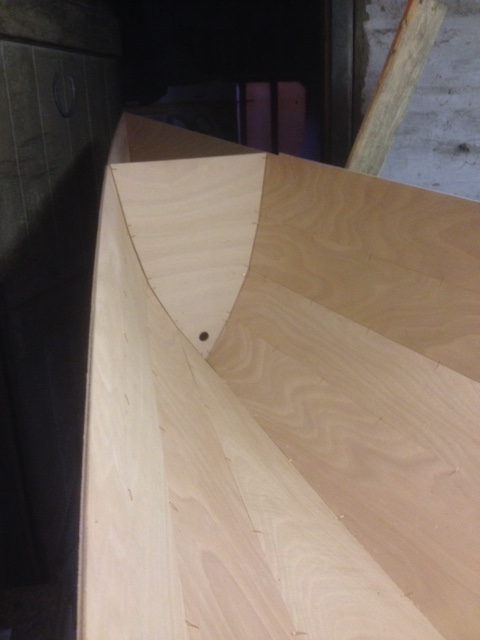
Last edited by TheHikingEngineer (5 Nov 2015 12:40 pm)
My work is long, and tough, and dry,
Among those hills I yearn to fly.
Though I may toil, and graft, and grumble,
Among those Lakes, I feel so humble.
Offline
#10 5 Nov 2015 12:52 pm
- TheHikingEngineer
- Member
- From: Newcastle upon Tyne
- Registered: 15 Sep 2015
- Posts: 12
Re: Canadian Canoe first build
Made some sticky progress yesterday, on a half day from work I got to grips with the epoxy. As you can see, my 'tabs' were more fillet-like due to a lack of space between the panels, absolutely no gap in most cases. 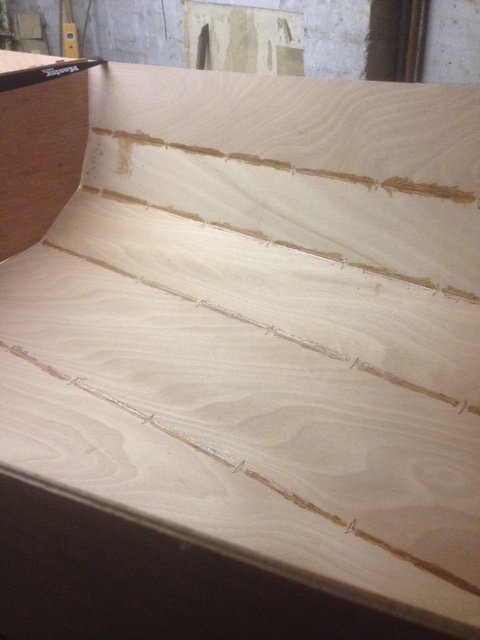
Nonetheless, if the epoxy holds (oh please God, I hope it holds!), it should neaten up nicely when I apply the remaining fillets. For this I will be using masking tape to keep things neat. 
Overall, the build was long at this stage. Fyne advise allocating three hours for tabbing the hull, glassing the keel in both watertight compartments, and fully sealing the outside of the bow and stern. So far, I've spent around three hours and I've done three quarters of the hull, and the inside of the bow bulkhead. I estimate it will take at least seven hours in total to tab the whole thing and fully seal the bulkheads and bows. Still, this is easily broken down into smaller segments over a week or so, so I cant complain.
Over the weekend I hope to complete the tabbing and tidy up the bow and stern on the outside. This is where the worst gaps lie on the outside and where I need to be very careful in finishing off the lovely line - hopefully - of the bow.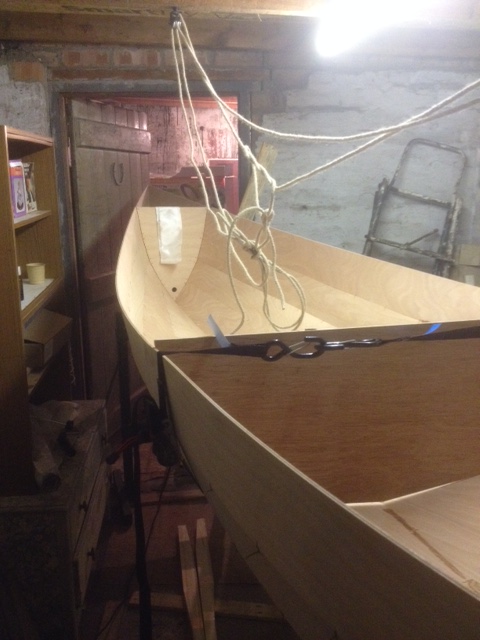
Stay tuned!
My work is long, and tough, and dry,
Among those hills I yearn to fly.
Though I may toil, and graft, and grumble,
Among those Lakes, I feel so humble.
Offline
#11 16 Nov 2015 10:22 am
- TheHikingEngineer
- Member
- From: Newcastle upon Tyne
- Registered: 15 Sep 2015
- Posts: 12
Re: Canadian Canoe first build
This weekend was the definition of bitter-sweet! Saturday was a great day, with the tabs having been finished during the week, I was able to remove all of the copper stitches, also a great opportunity to bond with my father (I needed his help to turn the boat safely later). My previous prayers were answered, and the epoxy tabs held firm. The Canadian finally looked like a true canoe, no wires in sight! After being turned over, we could both admire the lovely straight lines of this craft, a boat at last.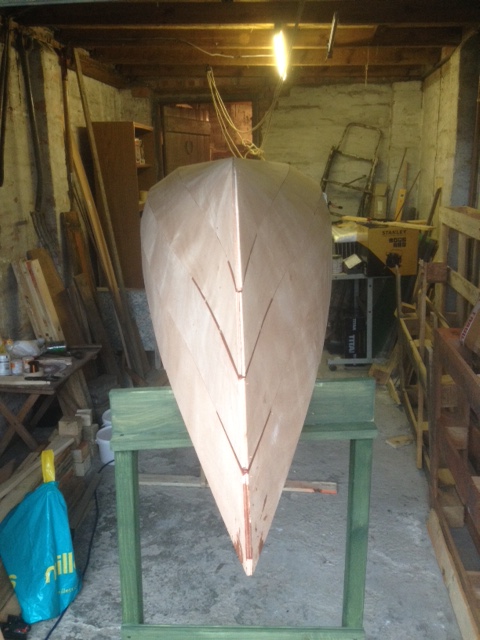
Little did I know what I'd come back to the next day, when I tidied and locked up on Saturday night...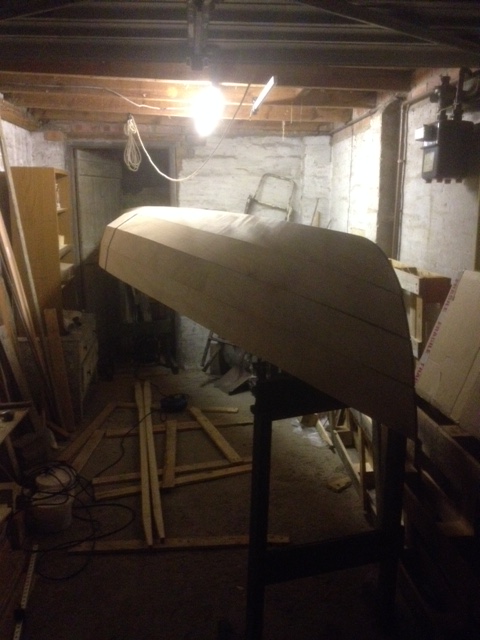
Returning on Sunday afternoon, something was obviously wrong. The canoe was resting on its port side, a full ninety degrees on its port side, with the bow propped, just, on a stand. The stern was flat on the ground, on top of the space heater where it had fallen during the night, the stern stand had collapsed on the uneven floor, despite my best efforts to check for wobbling or precarious angles the night before.
I had to wait a full thirty minutes before my second pair of hands - Dad again - arrived and we could move it to check for damage. It felt like an hour, all that work in recent weeks, all the "what if" scenarios surfacing at once, how much of it had been undone...
Alas, the worry was unfounded. A one inch by half an inch section of the ply at the port, stern, topmost panel had smashed out, likely where it had collided with the metal tube framework around the space heater, but this can easily be epoxied back in, and wont be visible once the rub rails and tank tops are in place. The shock of the fall had also dislodged the same panel around the mid section, a good foot of the tabbed joints had split from each other, but this also worked easily back into place, and was stitched so it could be tabbed again with just three ties in existing holes.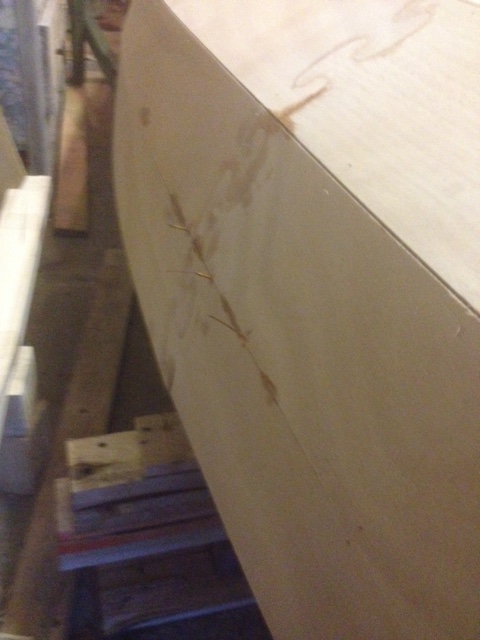
So after the repair, I spent the remainder of Sunday filleting the keel on the outside, having masking taped a good portion of the joints the day before. This went fairly smoothly, and used exactly one portion of thickened epoxy, to the drop! I left the fillet for almost an hour after finishing, before removing the tape completely. 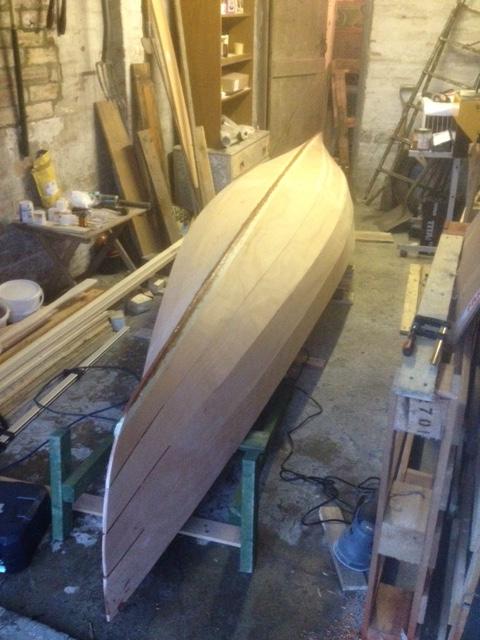
The result is very pleasing, and should be friendly enough for the fibreglass cloth.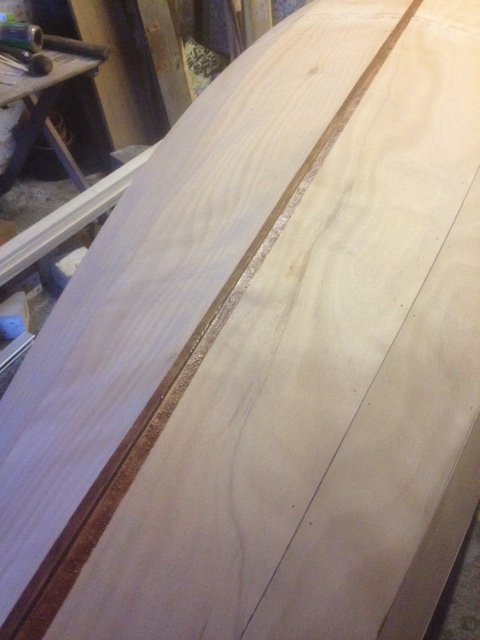
The evenings are now very dark, but the canoe's new, lowered position in the workshop makes working around it a lot easier, so I'm hoping to do another fillet by the weekend. And now there are no copper stitches to injure myself on, that's a bonus.
My work is long, and tough, and dry,
Among those hills I yearn to fly.
Though I may toil, and graft, and grumble,
Among those Lakes, I feel so humble.
Offline
#12 4 Jan 2016 11:13 am
- TheHikingEngineer
- Member
- From: Newcastle upon Tyne
- Registered: 15 Sep 2015
- Posts: 12
Re: Canadian Canoe first build
Happy New Year all!
I thought it would be prudent to start 2016 by reviewing, and of course updating, the build log on the work up until the end of last year. During a brief holiday around the festive period, I was able to sneak a few more days work in - a rare glimpse of daylight might be spotted in a photo below! Up to now, I've managed to complete both of the Canadian's bulkheads, and fillet the hull inside and out, ready for fibreglassing when I next get a day off.
So here it is, through the popular medium of pictures, an overview of 2015's progress:
The outer hull is now filleted, sanded and ready to be laminated with fibreglass cloth.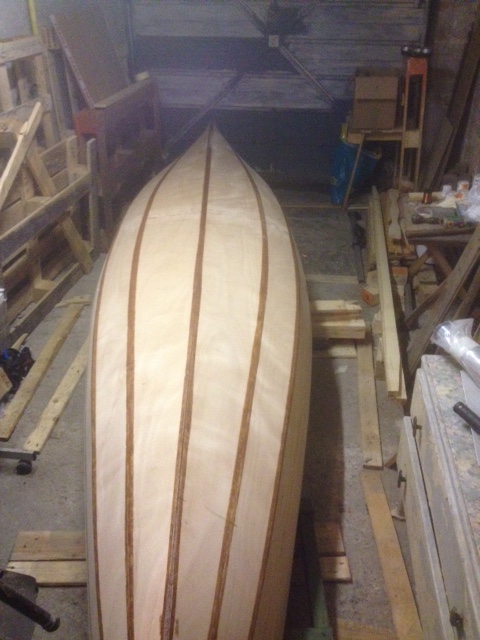
Towards the start of December, the inner hull received the same treatment, all sturdy and sanded.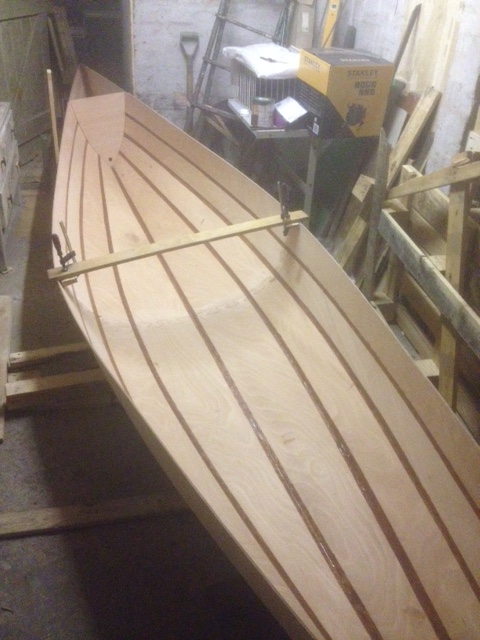
After what felt a huge break, missing weekends through voluntary work, paid work and the dreaded Christmas shopping trips, I finally got the fibreglass tape onto the bulkheads around Boxing Day. I was a little anxious to find that I had nowhere near enough tape in the kit supplied, having already used some to line the keel in both bulkheads, and being aware I would need some for the outer hull at a later stage, I got inventive. Having measured the tape I needed for each join, I split the lengths down the middle, effectively doubling the amount of tape I had, while still leaving a two-inch wide strip to cover each joint, This should spread the tape out well enough through the rest of the build. Though, I would be aware if taking on this project again, that you will definitely require additional tape if you do not wish to narrow your joints. While Fyne do supply fibreglass tape on their website, it can also be sourced readily from a popular online auction site, or any good chandlers. 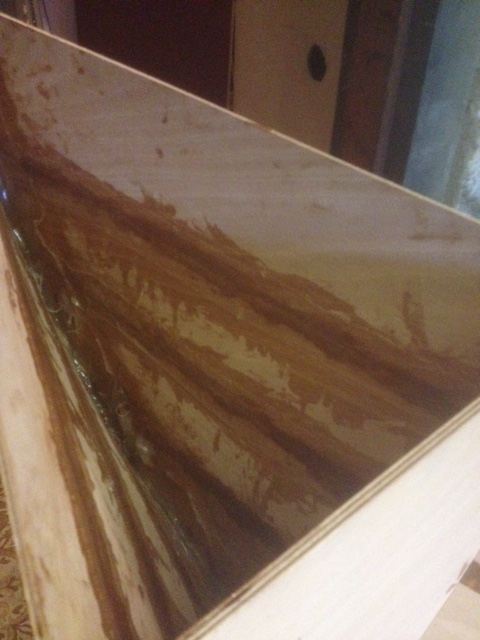
The narrower joints shouldn't effect the overall durability of the canoe, but I might slop some extra unthickened epoxy over the bare wood, just to seal it off.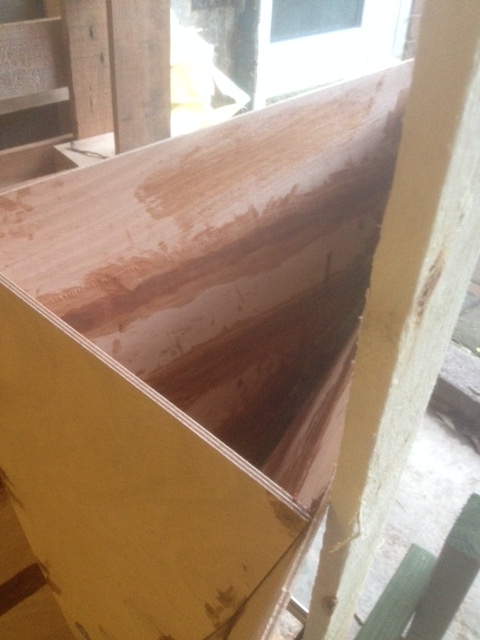
Finally, I decided to tidy up the workshop a bit - not that anyone can tell - and backed the car up to the door for the first time. It was pleasing to discover that I could negotiate that narrow driveway in a rather wide 4X4, and means that the completed canoe can simply be lifted straight onto the roof. Much better than the alternative, walking it down the drive, along the road, around the corner and up the hill! 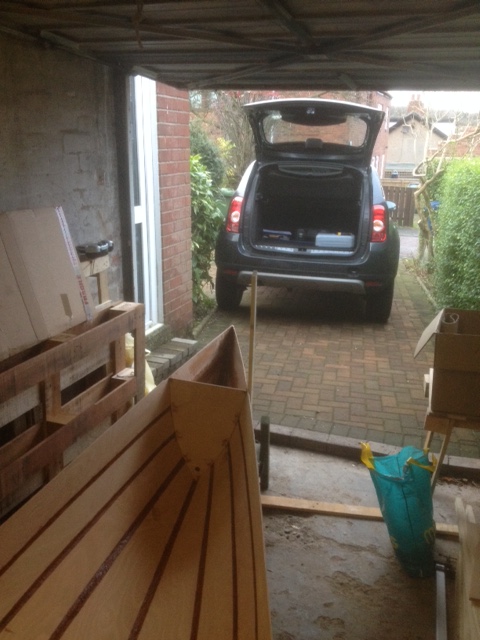
Hoping everyone has had good holidays, and is building happily,
Mick
My work is long, and tough, and dry,
Among those hills I yearn to fly.
Though I may toil, and graft, and grumble,
Among those Lakes, I feel so humble.
Offline
#13 16 Feb 2016 9:58 am
- TheHikingEngineer
- Member
- From: Newcastle upon Tyne
- Registered: 15 Sep 2015
- Posts: 12
Re: Canadian Canoe first build
In what seems like an eternity since I last posted - probably given the extreme weather changes we've suffered of late, feels like its been a year - I have achieved much on the Canadian, and am almost sorry to say that I feel I am nearing completion. I will summarise the last month and a half or so of work, as I cannot accurately recall when I did what and where! I do know that I finally got to grips with fibreglass fabric, and the results were pleasing.
I began with the outer fabric, after much sanding and then sizing up the fabric, I cut two pieces for the bow and stern, and the remainder fits nicely with a secure overlap, about an inch, to ensure a good bond. 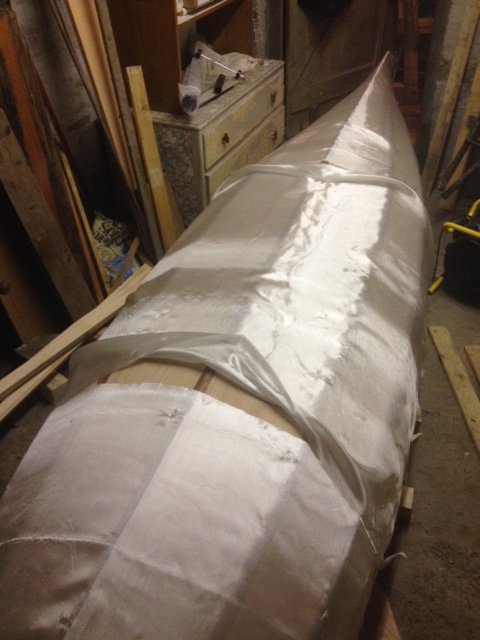
Applying the warm resin was laborious, as I insisted it must be done in one sitting to preserve the finish. I had timed it such that I could return later and put the second coat on, however it took too many hours to wrestle the fabric and apply the first coat. No doubt this was made worse by my cramped workshop and the yoga positions I have to adopt in order to work in there...
With the outer fabric in place, I retired for a hot bath and coffee. I believe there may have also been pizza and alcohol involved as a reward. The following week was spent sanding the hull, applying the second coat of resin and the thickened bow and stern resin and fibreglass tape. Not as long a sitting as the first layer, thankfully.
More recently, I applied - with the aid of a helper - the inner fabric. My dad has always been keen on boats and used to sail, I think he was interested to see how I was doing the fibreglassing. The second pair of hands - which lasted all of two hours - was much appreciated, and he can even be seen applying some resin in one photo below!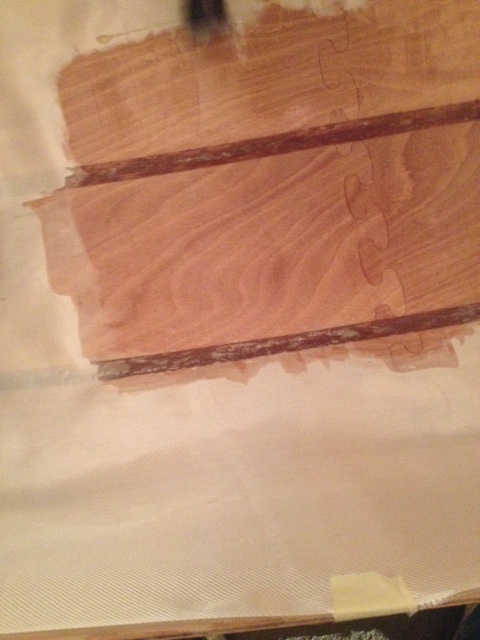
The helper, doing all three feet of his work for the day! 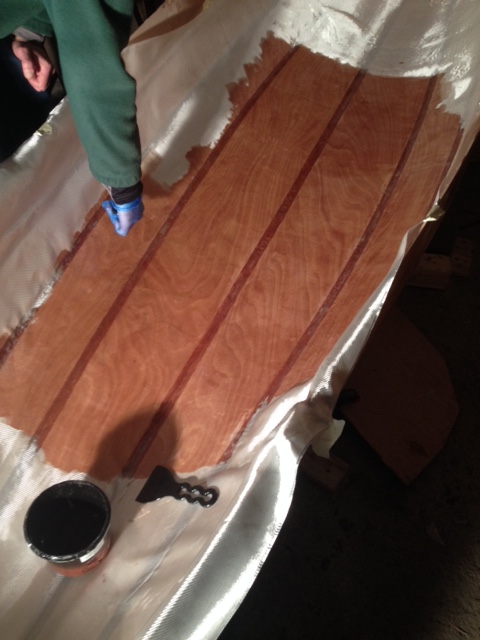
The following weekend was spent sanding the inside, preparing to apply the second and final coat of resin. I was very pleased with the finish, as I intend to varnish the inner hull and trim. 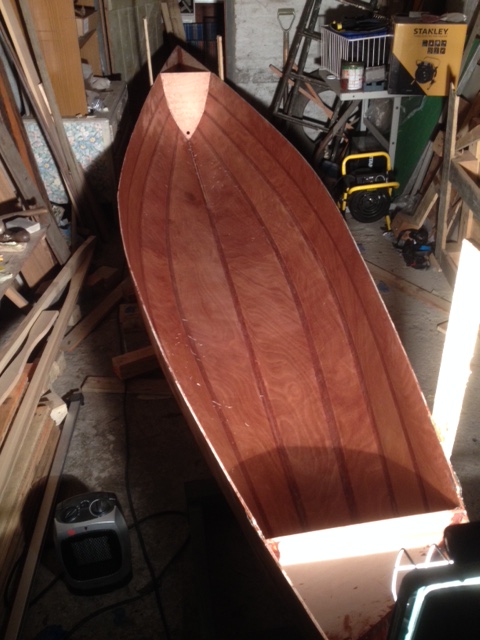
And finally, after two trips to the tip and some cleaning up, I have a liveable, workable workshop.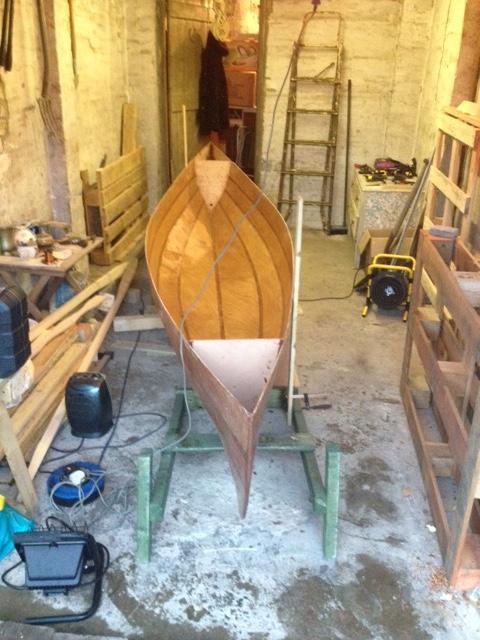
In the coming weeks I'll be adding the tank tops, rub rails, thwarts and bow and stern cleats. I estimate that I should have a complete and varnished canoe by the end of March, ready for the outer hull to be painted in the Spring.
Mick
My work is long, and tough, and dry,
Among those hills I yearn to fly.
Though I may toil, and graft, and grumble,
Among those Lakes, I feel so humble.
Offline
#14 18 Aug 2016 7:45 pm
- TheHikingEngineer
- Member
- From: Newcastle upon Tyne
- Registered: 15 Sep 2015
- Posts: 12
Re: Canadian Canoe first build
Hello once again!
It has been a very long time since last I posted, I wholeheartedly apologise. This was due to many big life changes, including a house move and new job, well, new career even!
But I had to return to complete this tale, my canoe is finished and I'm quite frankly in awe of the results. I've had so many compliments and it's great to be able to say "I built that". I've learned so much and it's been a worthwhile investment in both time and money. Without further ado, here she is.
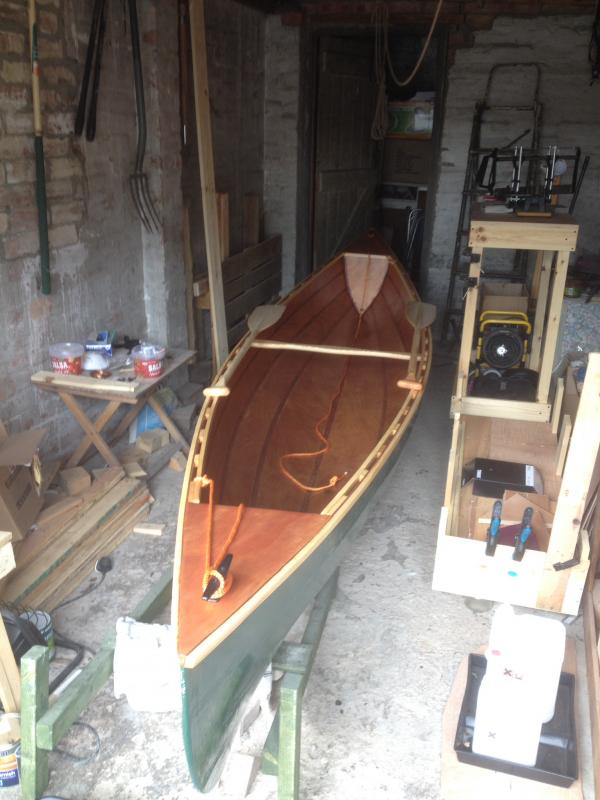
For those of you who are eagle-eyed, yes I had forgotten about (misplaced, actually) the drain plugs for the bulkheads. These were installed just after this photo was taken! Doh!
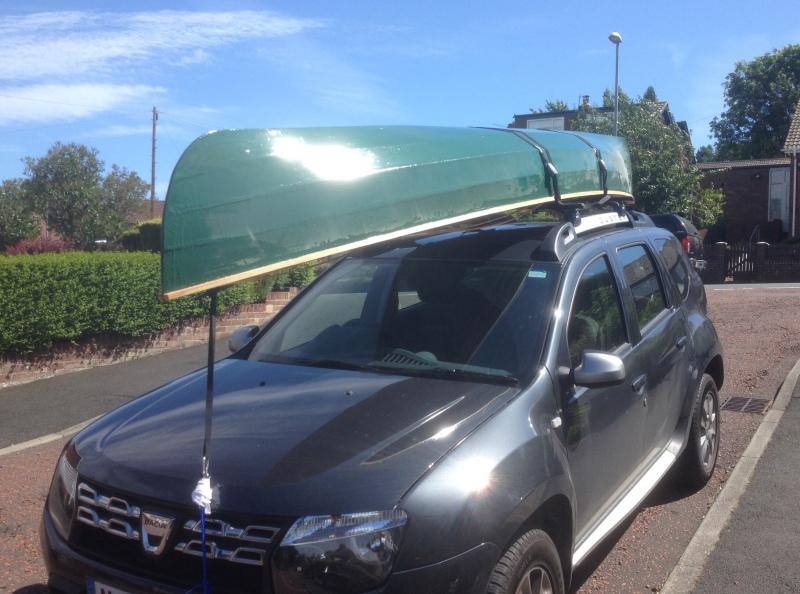
And ready for our first trip on the roads.
I can't thank Fyne Boats enough for introducing me to this. Since moving I've procured plans for another boat, an 18' Bo Jest from Glen L, which will be started this Autumn. A far bigger project, but I'm already looking forward to the challenge.
Take care all, I've had great advice from here, and I've no doubt I'll be back again.
Mick
My work is long, and tough, and dry,
Among those hills I yearn to fly.
Though I may toil, and graft, and grumble,
Among those Lakes, I feel so humble.
Offline
#15 26 Nov 2016 6:29 pm
- Sharpy
- Member
- Registered: 20 Jul 2016
- Posts: 44
Re: Canadian Canoe first build
Well done, I hope you've had lots of fun in it!
Offline
#16 29 Apr 2017 7:07 am
- Bowker
- New Member
- Registered: 26 Apr 2017
- Posts: 1
Re: Canadian Canoe first build
Well done, it looks great and the green is a nice colour.
Offline
Pages: 1