A forum for discussing wooden boats and boat building
You are not logged in.
- Topics: Active | Unanswered
Pages: 1
#1 17 Jan 2016 12:12 am
- Arne H
- Member
- Registered: 18 Dec 2015
- Posts: 21
Chesapeake 16 build
Hi all,
Now that I've had it finished a couple of days ago and finally got to try it out on the water today (proud as a punch!), I thought I'd share my experience of building the Chesapeake 16 kayak.
This was my first time build, and I'd been thinking of building a Chesapeake for over 10 years. Since I have neither the workspace nor the tools at home, I decided to go for building it at Fyne's workshop. Get it done in 5 days and then take home to Belgium to put on the finish, or so was the plan.
With that plan in mind, I started off in April right after Easter last year in the lovely Lakes at Fyne's workshop. Things went generally very ok, and Paul's and Phil's answers to my questions and their assistance and constant availability made it straightforward. Now, I wouldn't say that I gots 2 left hands, but I'm also not very familiar with woodworks and with working with epoxy, so there was a fair bit to learn. I do have my own pace of working and that sure was not the pace that Fyne's helpful advisors suggested. As a result, 2-3 days into the works it became clear that I would not be able to get the boat to a state where I could take it home after 5 days. But that was no problem, I pretty quickly came to terms with the fact that I'd have to come back later to finish it - all good!
First important conclusion: If you're not an experienced woodworker and/or not a wizard already with epoxy, don't rush it, and plan some extra time in. Personally, if I were to build another boat, I'd want to do it in my own workshop at home (yet to materialise ![]() ) and at my own pace. Feeling rushed sure is something that does not help in getting a nice end-result - but it probably depends on your character and preferred way of working as well. I adjusted the pace of work to what I felt comfortable with, and the end-result tells me that this was the right choice!
) and at my own pace. Feeling rushed sure is something that does not help in getting a nice end-result - but it probably depends on your character and preferred way of working as well. I adjusted the pace of work to what I felt comfortable with, and the end-result tells me that this was the right choice!
So, all in all, that first stint at Fyne's was very busy, climbing a steep learning curve, but all went well, progress was good, and I left as a happy bunny after the first week (well, 5 days in effect).
Here are some photos and comments from that first working week.
Wooden parts of the kit unwrapped: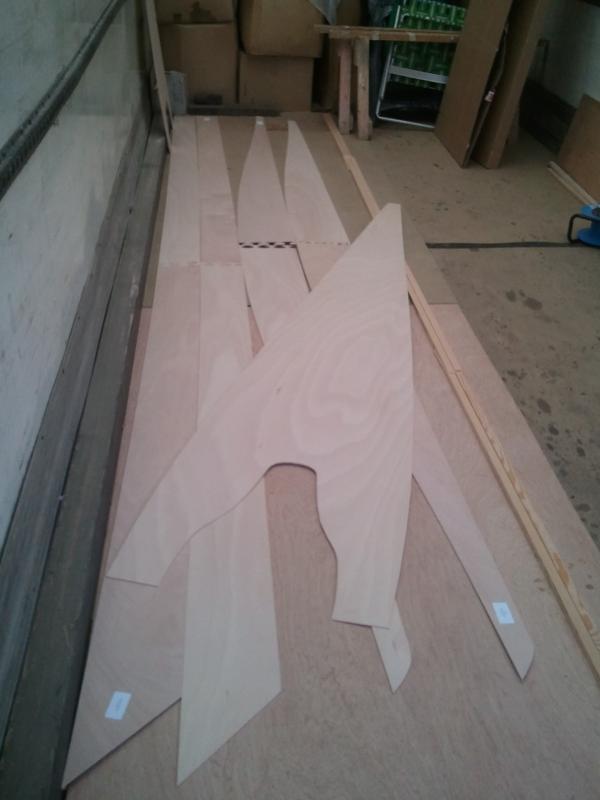
Glueing bottom panels and sheer clamps to length, and laying out the side panels: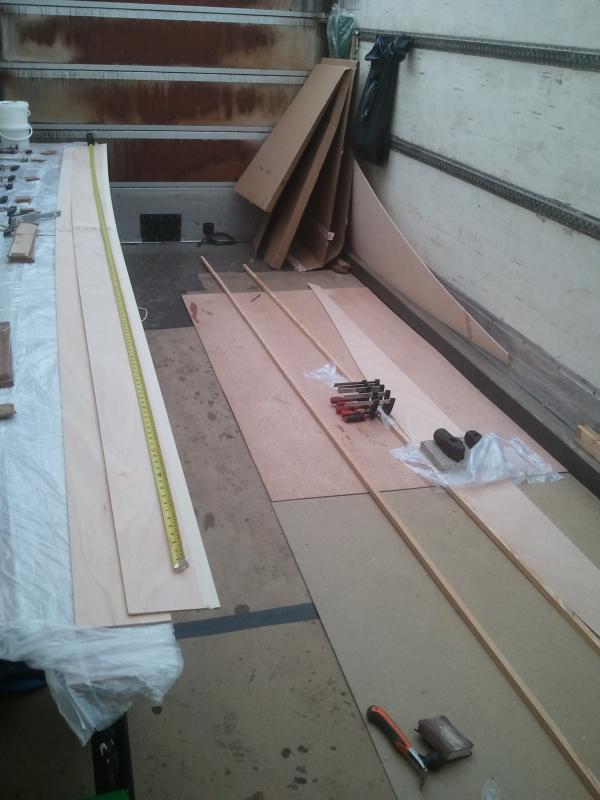
Close-up of puzzle joint of the side panels: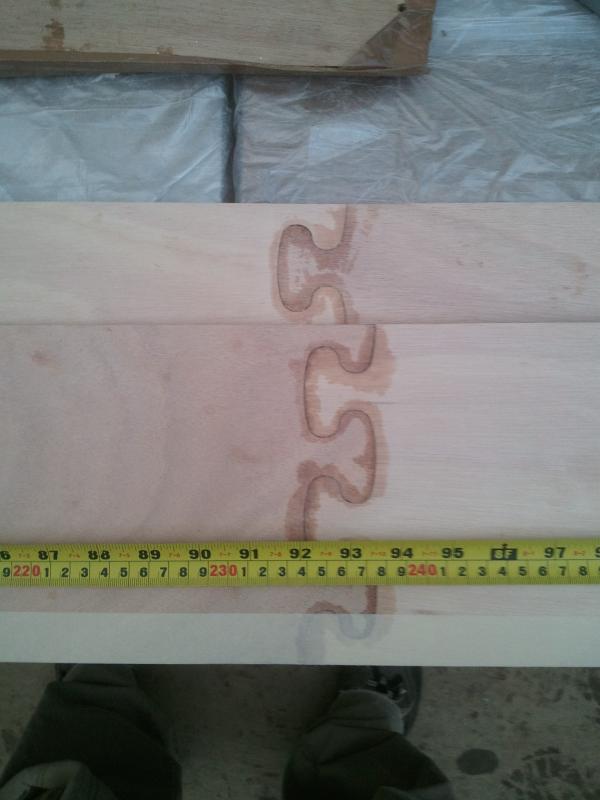
Sheer clamps being glued to the side panels: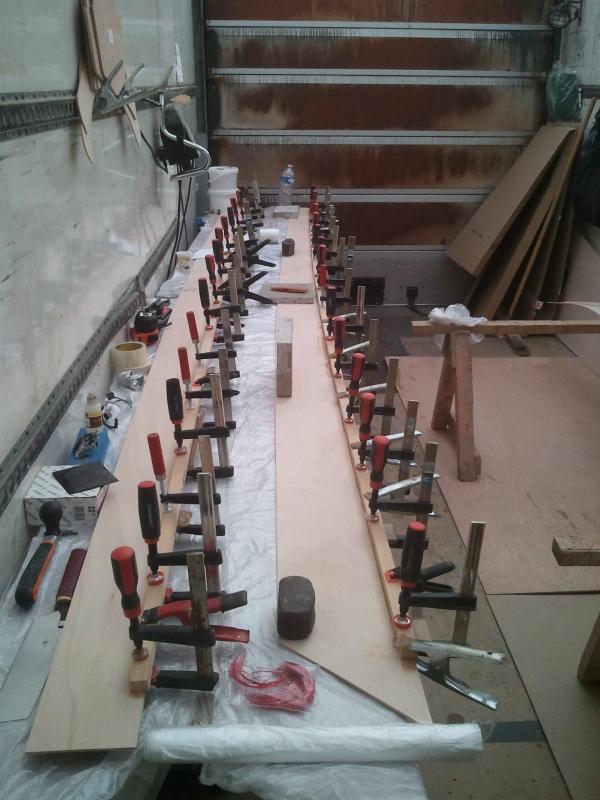
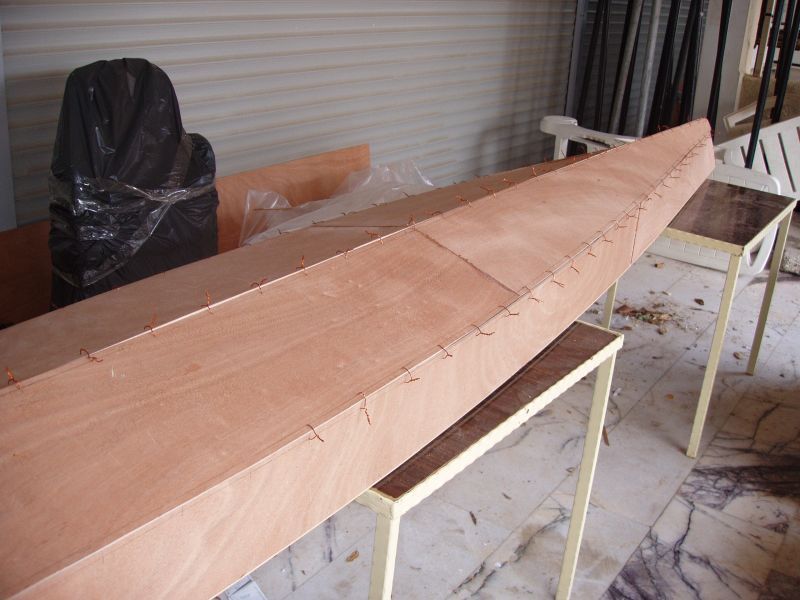
Starting to stitch bottoms and sides together: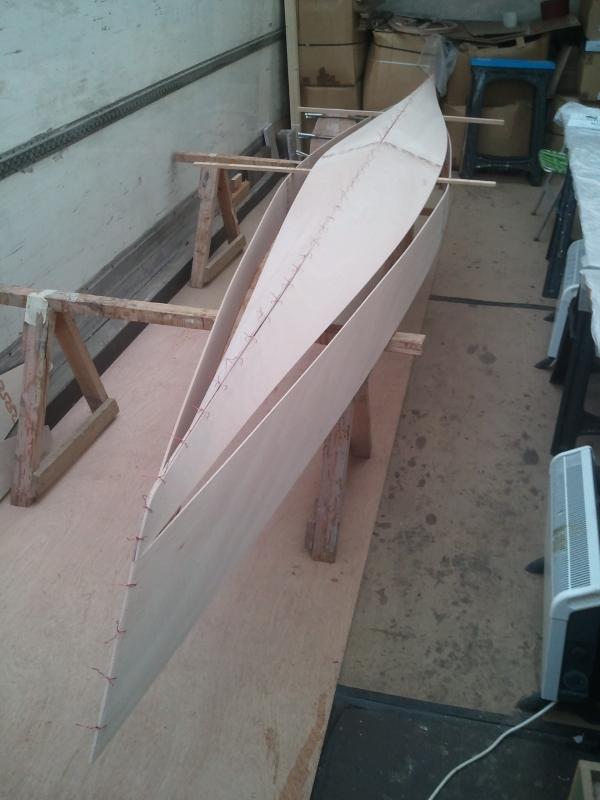
Right, so much for today, it's getting late - more over the coming days.
Offline
#2 19 Jan 2016 8:49 am
- Arne H
- Member
- Registered: 18 Dec 2015
- Posts: 21
Re: Chesapeake 16 build
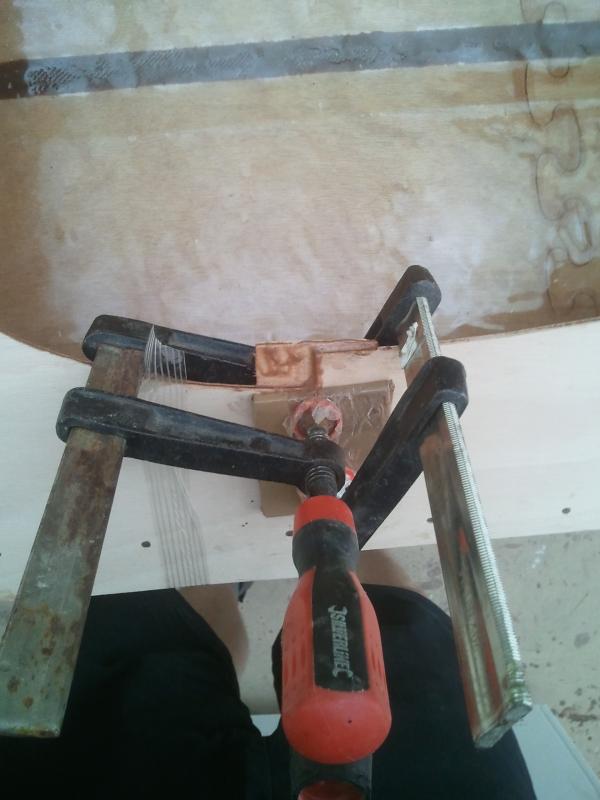
I started early in the process, whenever I had time, to do the hatch covers. That proved to be a good idea, because for the first fillets that I had a go at, to glue the frames to the hatch covers, I didn't get the consistency right, they were too runny. This way, I had a bit of time to play with the thickeners and get it right before I went on to the step of filleting the hull joints (see further below). This just shows the frames aligned on the hatch covers, before glueing.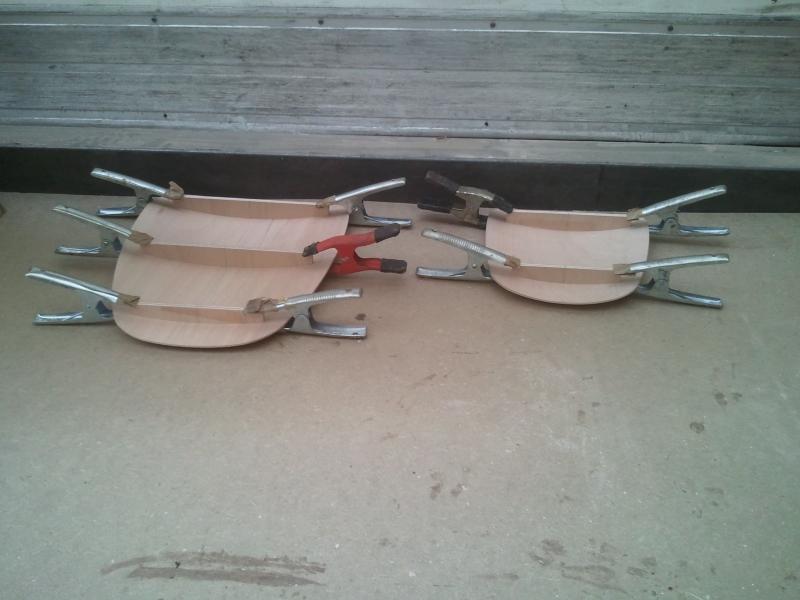
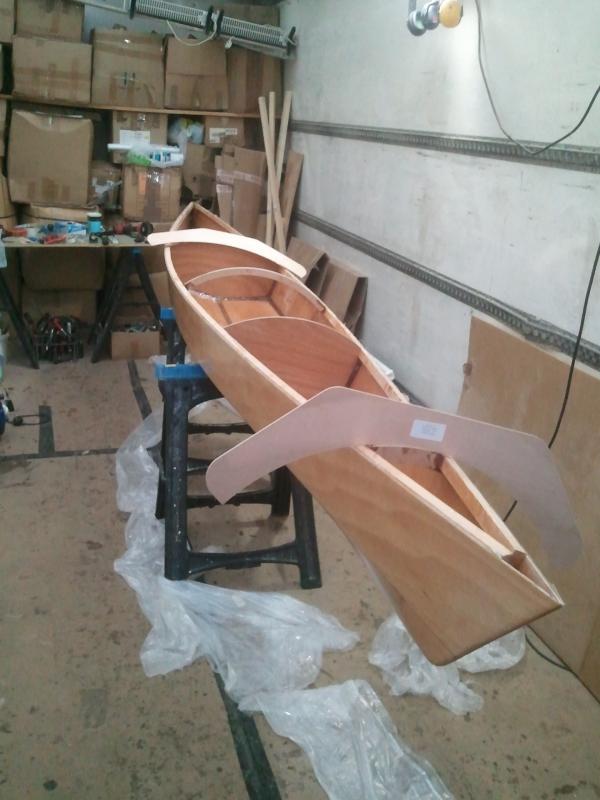
Here's the hull all stitched up. One thing I did not spend too much time on this stage was fairing the hull, and admittedly, I guess my keel line could be somewhat smoother. But I'm not that perfectionist, and I don't think it's affecting the way the boat behaves on the water (but I don't have much to compare to - probably a good thing ![]() ).
).
Turned the right way around and the hull already straightened by leveling at the location of the points where it's fixed to the upright 2 by 4s (Paul helped me with this). With the benefit of hindsight, one thing I would do differently at this stage before filleting and adding the epoxy is to straighten out the hull along the gunwales towards the tips, because the side panels will bend differently where the sheer clamps are and where they are not. In someone else's build log I saw a good way of doing this: Put in a nail 1/2" from the end of each sheer clamp, let them stick out enough and draw the pair of nails together with wire twisted around each pair just enough to have a smooth side panel towards the tips where the sheer clamps end. Not doing that leaves a little kink in the side panels exactly where the sheer clamps end, which is not a problem at all, really, but: If you'd like a smooth and even finish, this might be worth doing. It's just for the eye, really - you can only spot at very close range on mine that there is a slight change of angle at those locations because the sanding brings it to light (actually visible in a close-up picture further down, after the deck is fixed).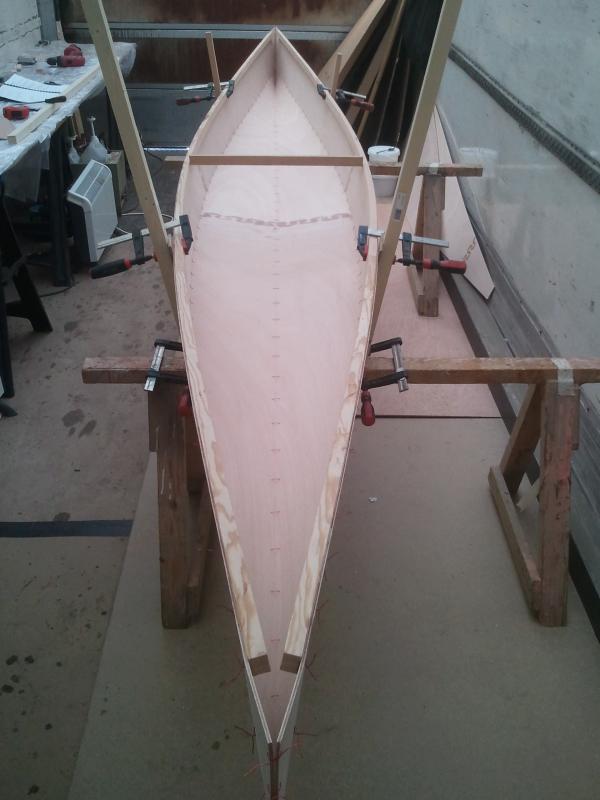
Next step is to place the bulk heads and stitch them in. I just trusted they'd fall in where they should according to shape, but it was not that straightforward, at least on one of them - it had gaps on the sides and would not go in further towards the tip because the sheer clamps restricted it, so I used rasp and file to shape it to fit. However, I did not really measure the exact suggested location from the plans, which could have been done to double-check. Not sure if they're far off, and if it matters all that much? But to be sure, on my next build, I'd double-check and compare better with the plans, as the location of the rear bulk-head in particular determines where the cockpit hole goes later - using the location of the rear bulk-head to locate where the deck should go proved a slight cock-up when placing the deck, see further below (will put this in a future post, bear with me).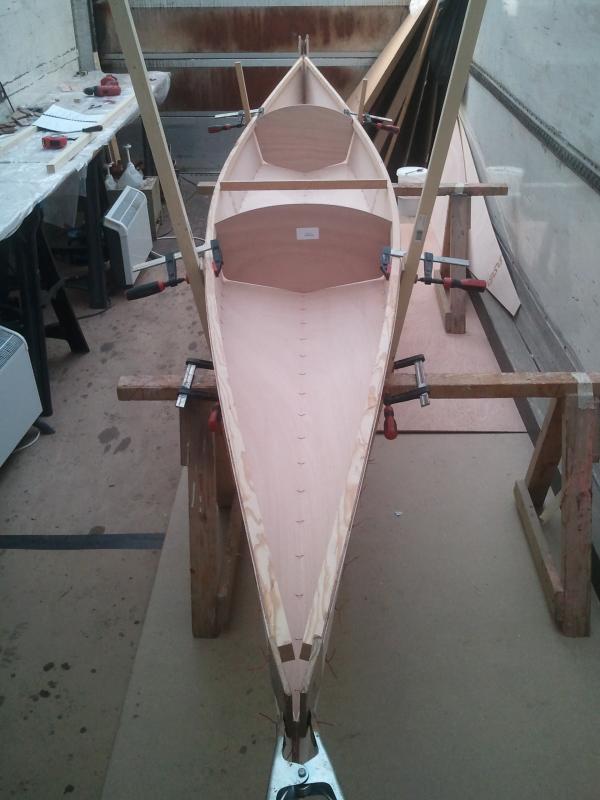
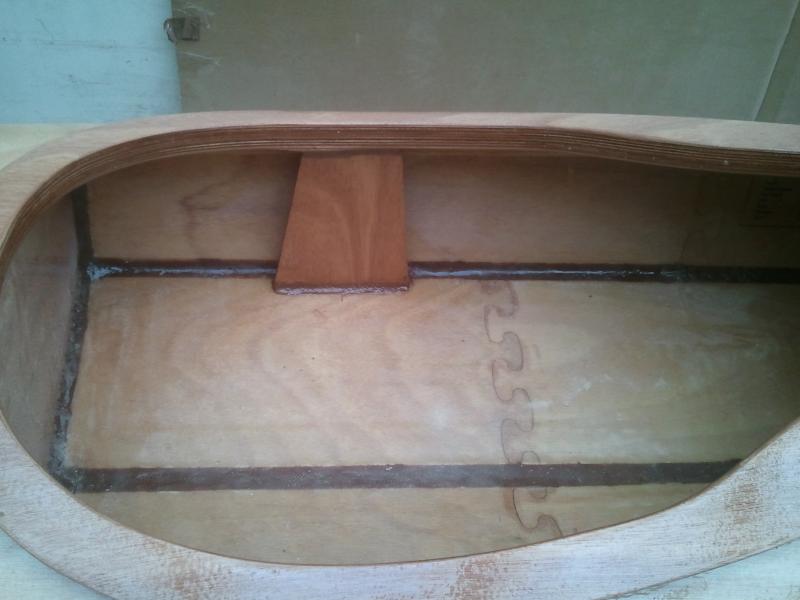
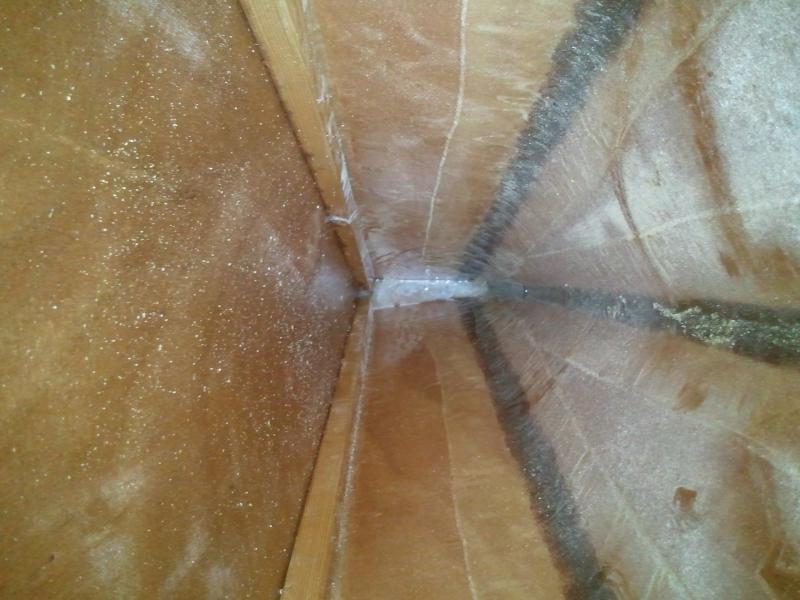
Here's 2 compartments filleted and epoxied, the center (=cockpit) compartment showing the masking tape that was added before, for neat filleting.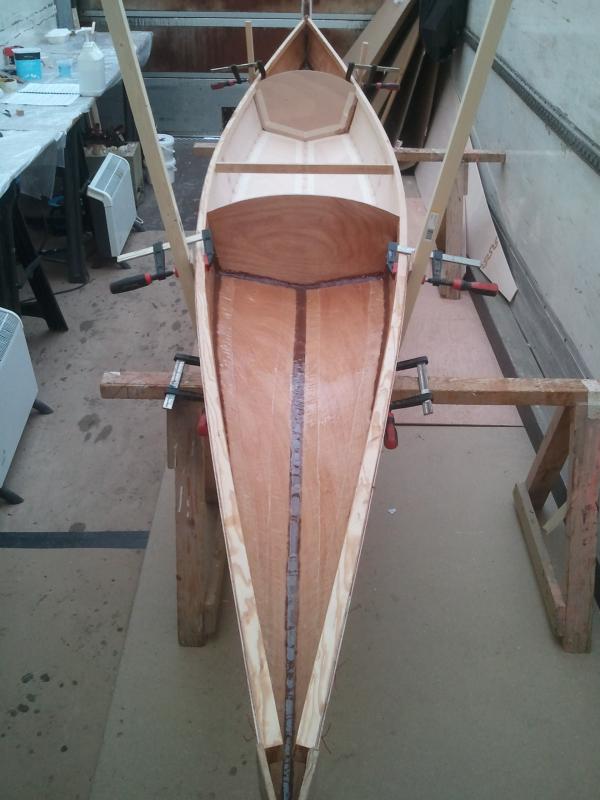
I did all in one go, one compartment after the other, which was indeed, as the manual suggested, a glue-a-thon. In general, it was straightforward, but doing this all by oneself is not much fun.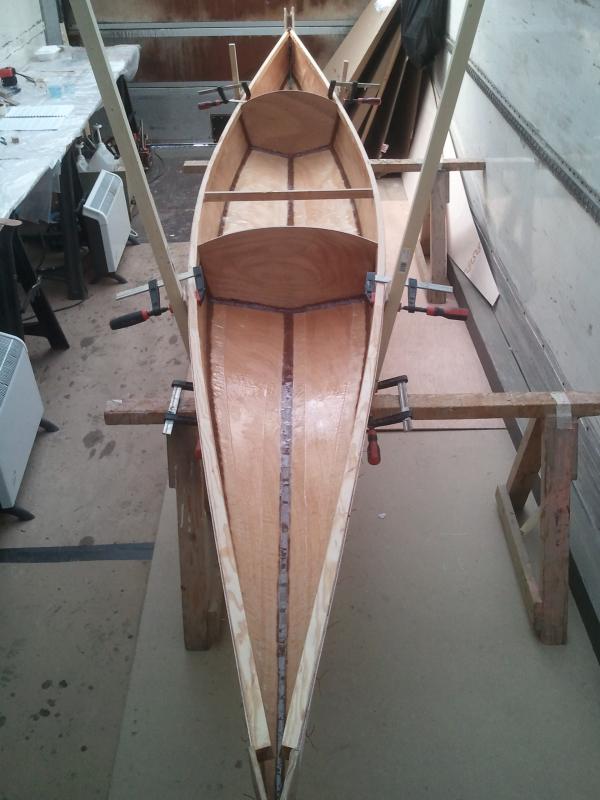
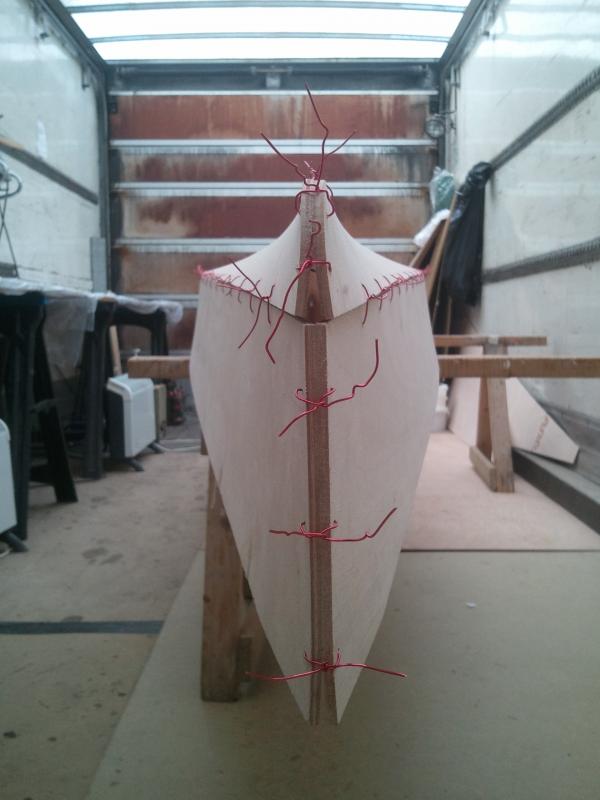
Then on to turning the stiffened hull around, before clipping the wires: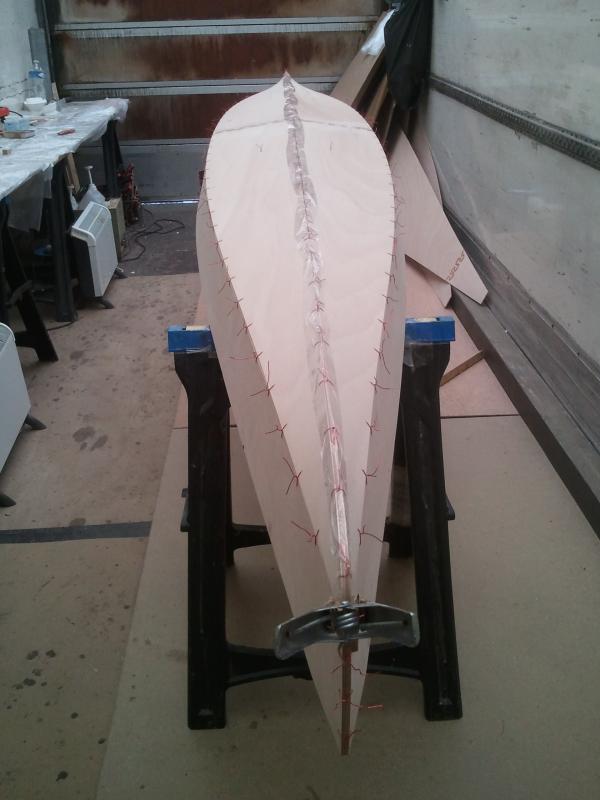
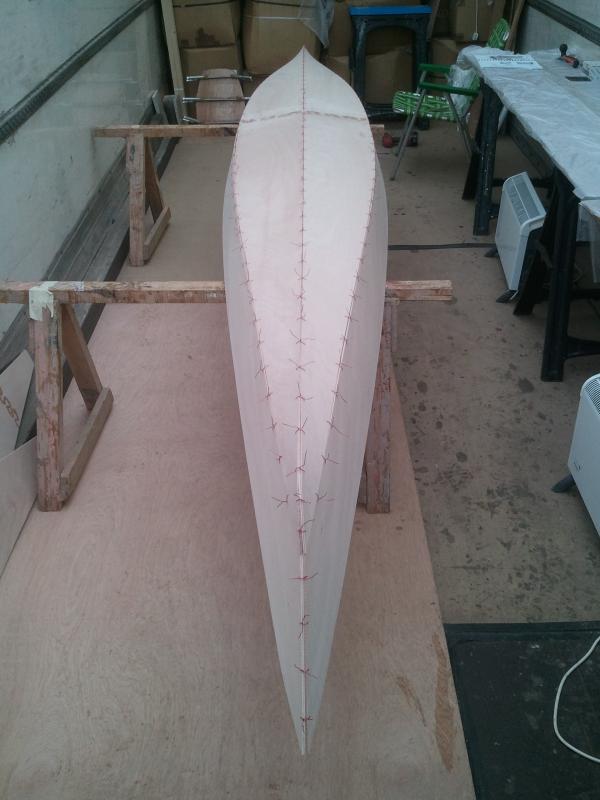
And here, with wires clipped and the edges all sanded:
And that's how far I had gotten by the end of 5 1/2 days of work in April 2015! Now I had to go back home to earn some money to afford part 2 of the building and figure out when that could be done...
(to be continued soon)
Last edited by Arne H (7 Feb 2016 6:14 pm)
Offline
#3 19 Jan 2016 9:02 am
- Arne H
- Member
- Registered: 18 Dec 2015
- Posts: 21
Re: Chesapeake 16 build
2 things I should add about the hatch covers:
When I tried fitting them into the hatch holes much later, I realised that I was not accurate enough with placing the frames, they had each moved (magically) 2-3mm towards the outer edge of the covers before glueing them in. To make them fit snug in the hatch holes, I had to rasp away at the frames' edges a fair bit. This was not a big issue, but is 1/2 hour's work that could have been avoided just by putting the frames (both on the small hatch cover, and the 2 outer frames on the large hatch cover) 5mm further to the inside than suggested on the plans - this will ensure that they'll fit nicely.
The other item is rather cosmetic, but if you want a perfect finish, read on: I decided to add the first layer of unthickened epoxy to cover all of the hatch covers right after I had added the fillets, which meant I still had to keep the clamps on to keep the hatch covers in shape. This meant that the first layer of epoxy did not cover the small spots where the clamps were located on the top side of the hatch cover. That is not a problem as such, but this means the epoxy was not added evenly everywhere, and also the 2nd layer of epoxy did not smooth that out. Even after sanding the epoxy smooth and after all the varnishing, one can still spot this uneven application. You'd have to look really closely to see it, but I thought I'd mention it. I'm not bothered myself. But still, if I were to do it again, I'd simply apply fillets only, wait for the fillets to cure, remove the clamps and then apply epoxy evenly everywhere.
Last edited by Arne H (19 Jan 2016 9:04 am)
Offline
#4 25 Jan 2016 11:22 am
- Arne H
- Member
- Registered: 18 Dec 2015
- Posts: 21
Re: Chesapeake 16 build
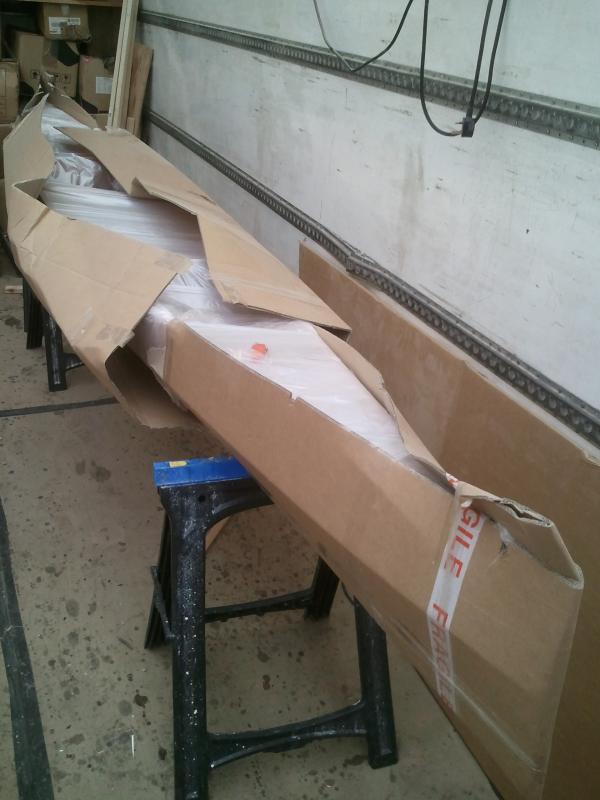
Fyne Boats were kind enough to agree on storing my boat after the first session in April 2015, and I could finally return in late August to advance the build to allow me to take the boat home.
I arrived one fine Saturday morning, started right away, and from Monday morning onwards, my good mate Martin joined me for 5 days of holidays in the Lakes and helped a lot with the build. It was so much easier and nicer to spend that time in the workshop between the 2 of us. Also, I would not have wanted to attempt attaching the deck on my own. In addition, this second work week saw quite a lot more waiting time (for epoxy to cure) with nothing else to do while waiting, so we enjoyed some nice hikes and bike rides in the great scenery in the meantime.
I had drawn up a really detailed schedule in preparation for this work, which Paul had kindly commented on, and this made this week really straightforward. The following Friday morning, we were able to take the boat with us as planned.
Anyway, back to chronological order. Here's unwrapping the boat after the break, the colleagues of Fyne Boats did a great of job of protecting it during the months of storage:
I filled some gaps in the chines with thickened epoxy, then placed the sheet of fibre glass on the hull:
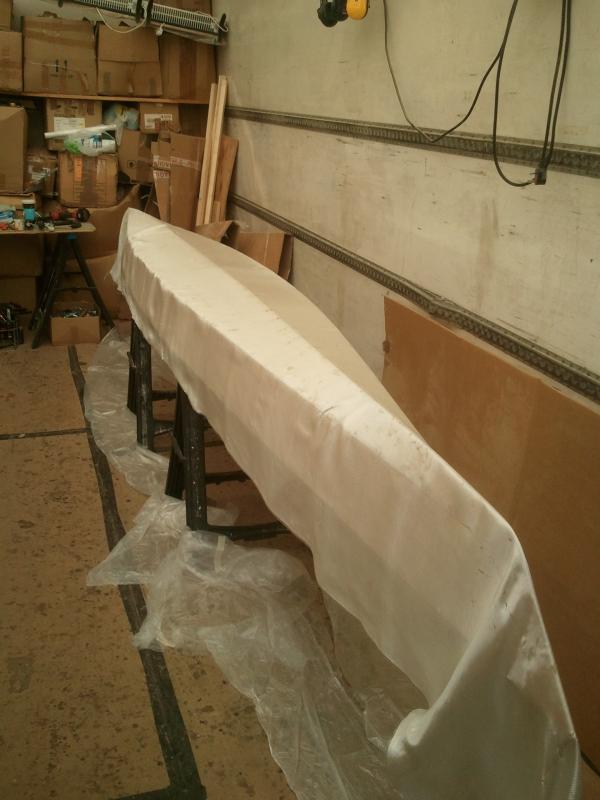
Here it is soaked in epoxy:
You will note that I added the name of the boat at this stage. This is a printed-on rice paper on-lay, which I learned about on Berger Boote's website. There's pros and cons to this technique, as I found out, and I'll post some lessons learned on that topic later on.
Once the first layer of epoxy was dry to the touch (about 12h), I added the second layer of epoxy. I can highly recommend squeegees for adding the first layer, and disposable foam brushes for subsequent layers. I added 3 layers all together, which seems to have covered all the weave. However, I did get some runs here or there, which created a bit more work when sanding. If I were to do it again, I would try indeed to take more time and to apply every additional layer as thinly as possible, even if this means adding 5 or 6 layers in some locations. But it's always a trade off: Spend more time at this step, or spend more time later, smoothing things out? Depends on one's attitude and time schedule...
On a slightly different topic, if I were to do this step again, I would also follow the advice that I found on another building log page (forgot which one that was) and add a very thin layer of epoxy to the hull first, wait for that to be dry to the touch, and then add the fibre glass and soak it in epoxy. The reason for this, as that builder explained, is as follows: When applying the first layer of epoxy, the epoxy that one presses into the weave wants to go in 2 directions during curing: Into the wood on the one hand, and into the weave of the fibre glass on the other. This may create dry spots in between the fibre glass and the wood that might stay as very flat bubbles of air. I only noticed one spot like this in the general areas, but it definitely occurred in several places where I added the rice paper on-lays between the wood and the fibre glass. I thought I could just saturate everything with epoxy by simply applying a lot, but that did not work everywhere under the rice paper. So, in conclusion, to be on the safe side, I'm led to believe that adding a thin layer of epoxy BEFORE adding the sheet of fibre glass ensures a good saturation of both, wood and fibre glass (and whatever one wants to put in between ![]() ). Not that these bubbles are very visible or create a problem on my boat, but I find this issue worth mentioning, in particular for those who want a perfect finish.
). Not that these bubbles are very visible or create a problem on my boat, but I find this issue worth mentioning, in particular for those who want a perfect finish.
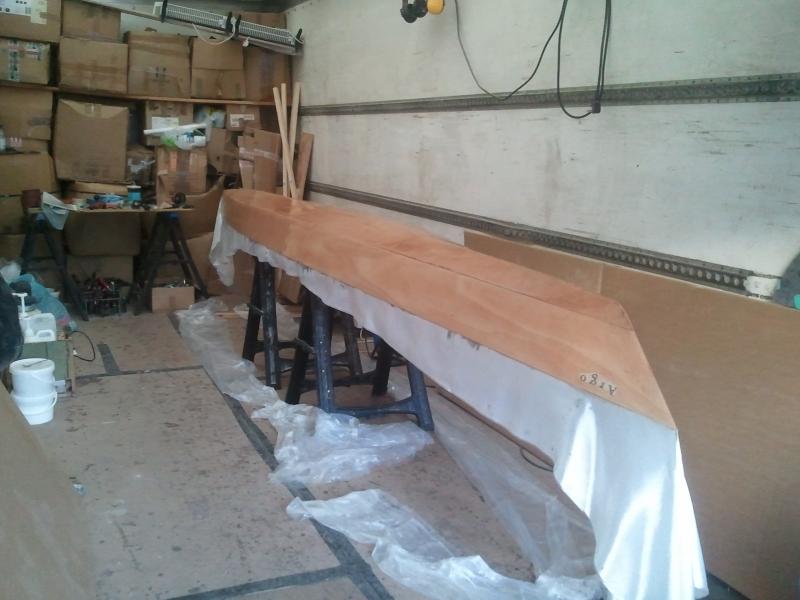
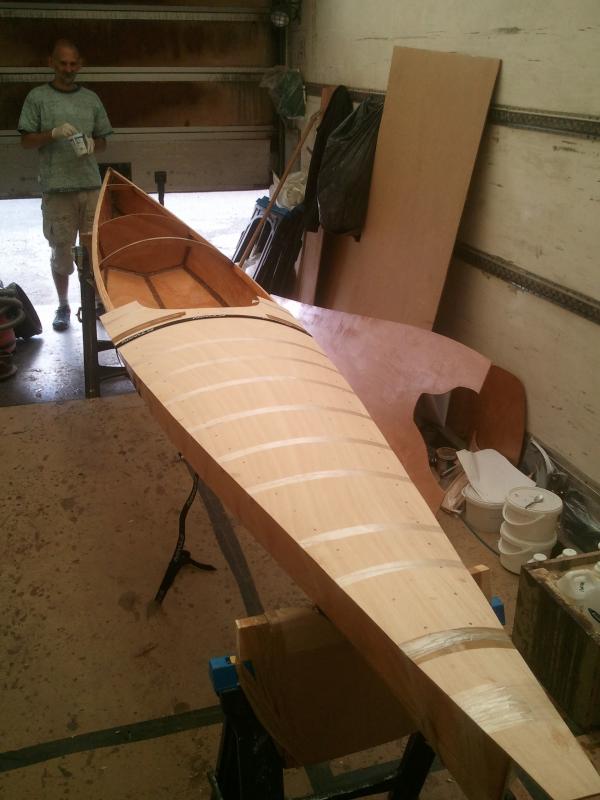
Here's the hull flipped right side up, hardened fibre-glass overhang simply trimmed with a carpet knife, and on to planing the gunwales:
The planing really is a lot of fun. Before starting to plane the gunwales, we had added the deckbeam, as the photo shows.
Note that cutting the fibre-glass at the aft tip of the boat left a little gap right down the vertical part of the tip that was not covered with fibre-glass. I added another strip of fibre-glass to that at a later step, after the first sanding of the epoxy all over.
Last edited by Arne H (25 Jan 2016 11:23 pm)
Offline
#5 25 Jan 2016 11:13 pm
- Arne H
- Member
- Registered: 18 Dec 2015
- Posts: 21
Re: Chesapeake 16 build
Note that we decided to do the end pours and the foot brace fitting later, and to move on straight to fixing the deck. As for the end pours, I found it ok to do it later, once the deck was on, standing the boat upright and just letting gravity do its thing. As for fitting the foot braces in the finished boat, that was very fiddly with the deck on - I would recommend drilling the screw holes and fitting the internal fibre glass tape reinforcement on BEFORE putting the deck on.
So, on to the deck it was then:
Based on Martin's ingenious idea, we constructed some v-notches out of cardboard with wood-support for stability, taped to the saw-horses, in order to keep the boat steady during the nailing action. The aft deck went on nicely. With the two of us, it was pretty straightforward. (Frankly, I would not want to attempt that on my own. But I'm being told it has been done - if you fancy having a go at single-handed fixing of the deck as a first-time builder, I'd suggest to have a good chat with Paul or Phil beforehand to get some good detailed advice on the technique, e.g. "put 1 knee under the boat where you hammer" I seem to have heard, but I guess there's more to it.)
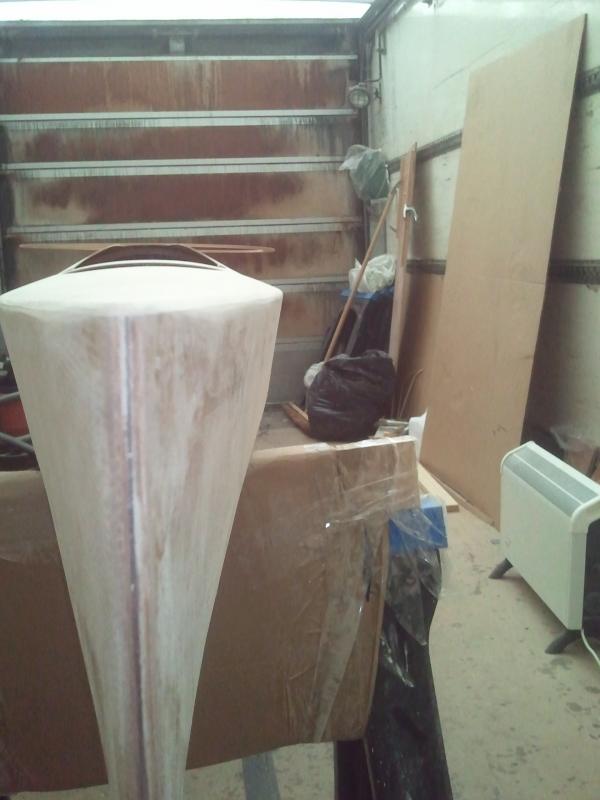
Once the aft deck was nailed down, we went on to the bow deck. Alas, when we lined it up, it was too short at the front! After 5 minutes of agonizing about how this could have happened and what to do, Martin managed to calm me down, and he had another simple, but ingenious idea: Just add another short piece of plywood to the front. I was a bit worked up and would never have come up with this, so I was more than happy with this. That's how we ended up with a tip looking like this:
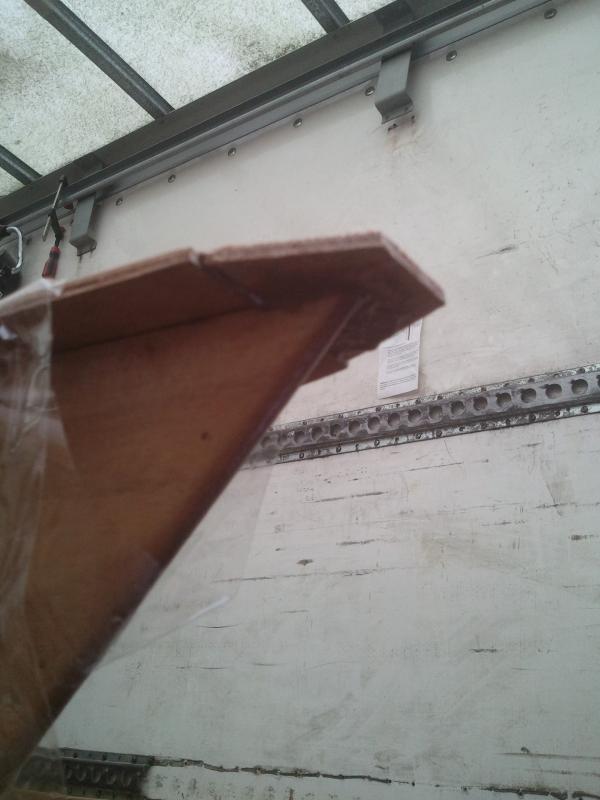
Here's how that came about:
Before applying any epoxy, we just did a dry run with the aft deck, i.e. laying it on and ensuring that we were happy with all the steps needed to fix it, nail it on etc. For the positioning of the aft deck, we simply trusted that the advice in the manual would suffice, i.e. the recess of the cockpit should fall so many inches in front of the rear bulk head. That is good as long as the rear bulk head is in the right position - in my case, it must have been at least 1 1/2" too far in the back, because of the apparent shortage of deck at the bow tip! So, as mentioned previously at the step of fitting the bulk-heads, a bit more care could have gone into the placement of the bulk heads, especially when using their position as guidance for the placement of the deck, as we did.
Be that as it may, it turned out that this was not a problem after all. The little extra piece of plywood added to the tip adds character to the boat! Although this may have shifted the cockpit slightly somewhat to the back, who is to say that this was for the better or for the worse, or in fact may have any impact at all?
So, nailing down the second part of the deck was also straightforward.
Cutting through the overlapping deck to make straight joints was easily done, and we then glued on the "butt blocks" underneath the joint to support and connect the two deck parts.
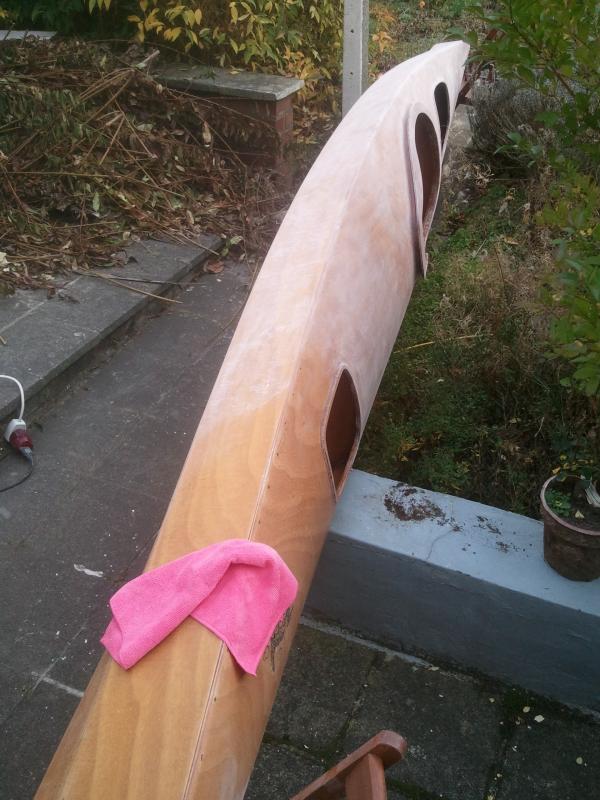
While waiting for the epoxy to cure, we cut out the hatch holes. Once the epoxy had cured and firmly attached the deck to the gunwales, we sawed the overhang off the deck, planed to get it closer and then rounded over with the random orbital sander, all of which was very rewarding, because the boat took more and more shape and it felt like a big step:
Offline
#6 27 Jan 2016 7:42 pm
- Arne H
- Member
- Registered: 18 Dec 2015
- Posts: 21
Re: Chesapeake 16 build
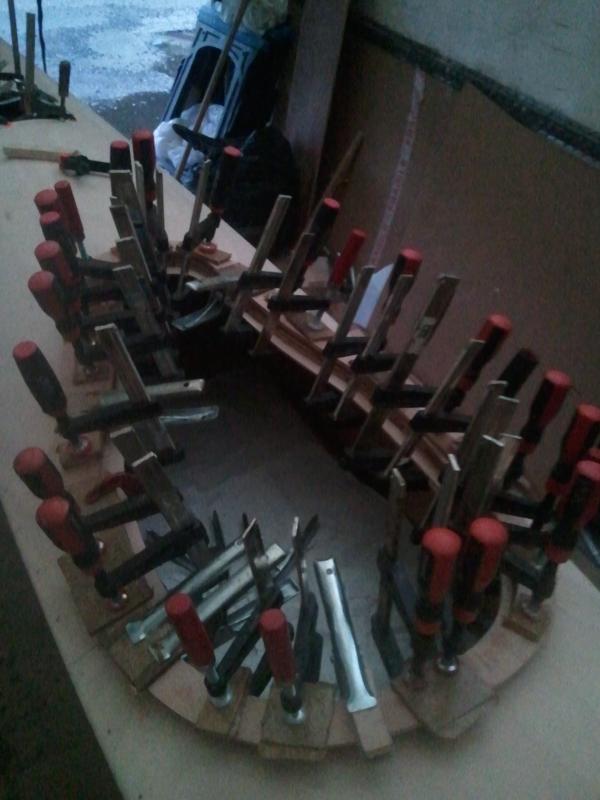
We attached the spacers and the coaming rim all in one go, which was way less tricky than we had expected. 4 hands made (relatively) easy work of this.
I'll let the next photos speak for themselves.
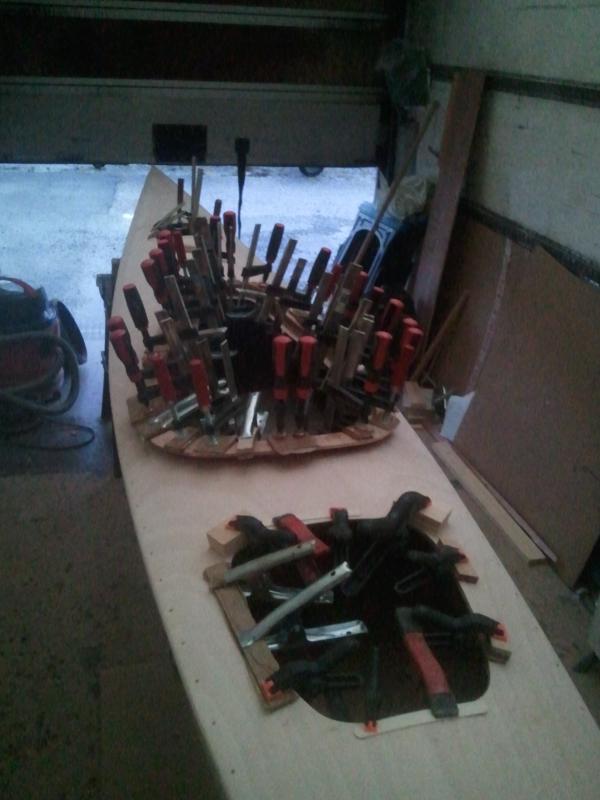
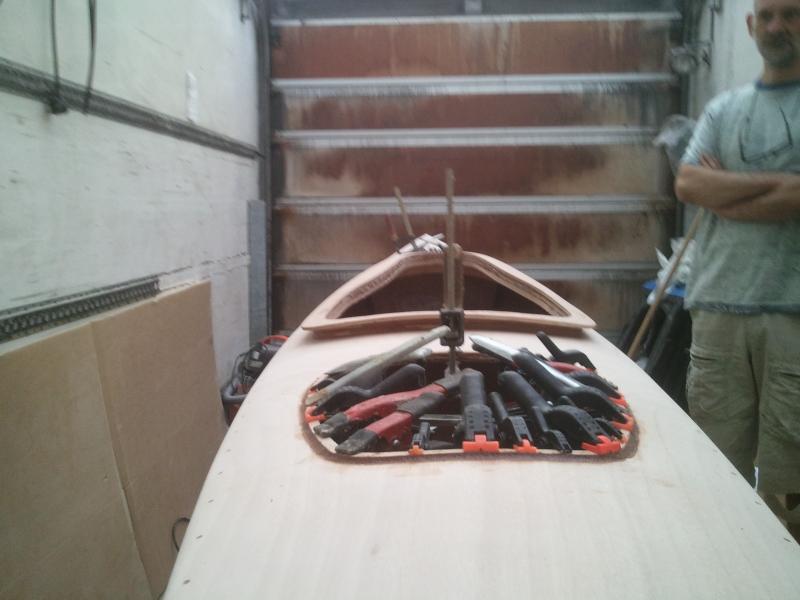
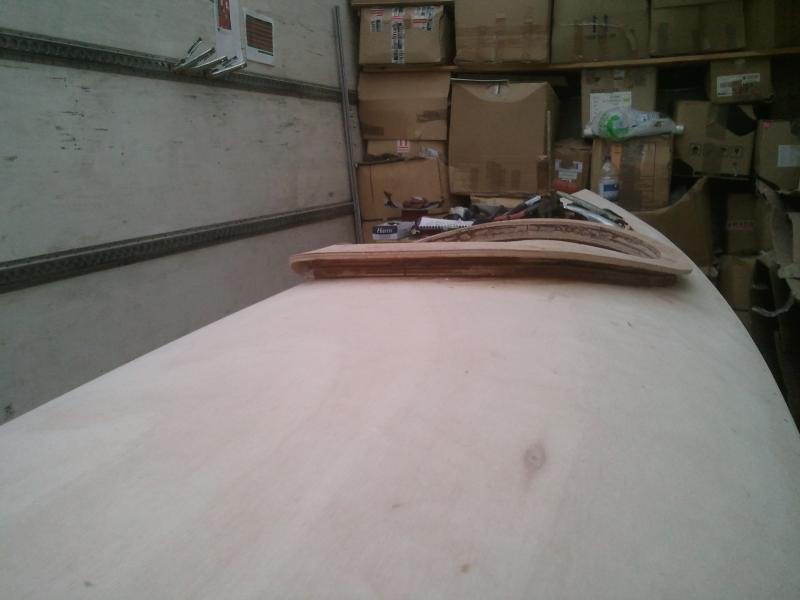
Adding all the hatch doublers, stiffeners and rims was ok, a big clamp-o-rama, together with the coaming. The sanding of the coaming was again good fun, because these parts were taking shape so rapidly in front of us. We then added 2 layers of epoxy on the deck and coaming, and installed the hip braces to finish it off to a state that allowed taking it home.
But, before wrapping it up for the trip to Belgium, we really had to take a preliminary maiden voyage on Windermere:

...and that wraps up the 2 stays at Fyne Boats' workshop to get the boat to this stage.
I have to say a big thank you to Phil & Paul at Fyne Boat Kits for how well the workshop was set up for my needs, including all tools and consumables, for being available for questions and good advice, for getting epoxy on the weekend when I feared I'd run out, and for checking on me/us to ensure we wouldn't do anything stupid. In addition, the excellent email advice whenever I had questions in preparation for the trips and also during putting the finishing touches on (next set of photos), was much appreciated.
Offline
#7 27 Jan 2016 8:19 pm
- Arne H
- Member
- Registered: 18 Dec 2015
- Posts: 21
Re: Chesapeake 16 build
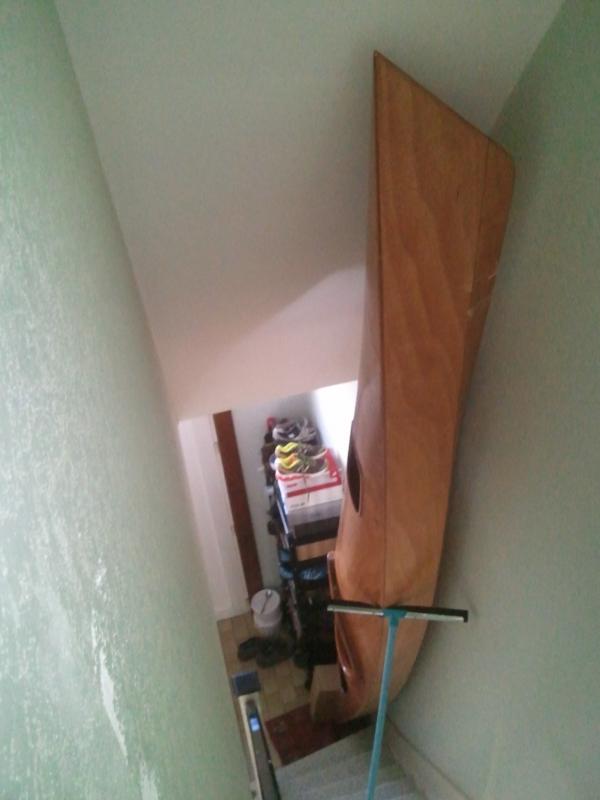
Back at home in Tervuren, I had trouble finding time and space to add the finishing touches, but on some weekends and evenings managed to advance, step by step. First thing was getting the end pours in, so I got the boat as vertical as possible in the staircase and simply poured some thickened epoxy in:
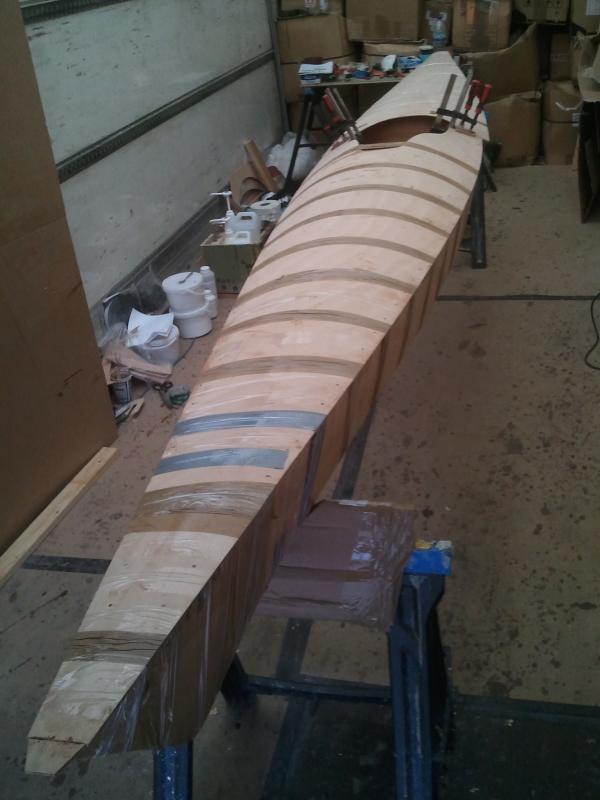
Next was quite a few hours of sanding the epoxy on the hull all over, in the garden, first with 120, then 220 grit; here's a photo of the sanded hull, just wiping the dust off:
I have to admit that I did not get a completely smooth surface everywhere, the occasional groove or shiny spot remained, and I treated those areas a bit by hand to still get as good a sanding as possible. My random orbital sander worked well for the large areas, but on part of the coaming's edges, on the hatches' edges and in particular where the deck meets the hull, I managed to sand slightly into the wood with that at places. For those areas, I'd highly recommend to sand by hand only. Anyway, so I patched these areas up with epoxy and sanded them by hand again once dry. At this step, I also added a strip of fibre glass to the vertical bit at the aft as reinforcement, so I also sanded that over again by hand once the epoxy had dried. Then I sat in the kayak and figured out where the foot braces should go, drilled screw holes, and added strips of fibre glass on the inside as reinforcement. I'd recommend doing this before putting the deck on, as it was really fiddly. I also drilled rope holes at the aft and bow through the end pours now.
Next steps were painting and varnishing - courtesy of my mates Jo & Mike, I could do this in their garage. Here's the boat after I had added 2 layers of paint to the bottom panels:

These went on well with a normal brush. Then on to varnishing. I tried a normal bristle brush for the first layer, but realised that they really are not as easy to use as foam brushes, because I had a lot of runs on the first layer. The runs simply would not dry, even after 5 days, even though everywhere else dried nicely in <24h. So, I carefully scraped the runs off, waited another day to dry to be on the safe side, and then wet sanded the first layer of varnish with 400 grit. This also got rid of the unevenness around the former runs. For the second layer of varnish, I used a disposable foam brush, and that worked much better. Still got the odd run, but hardly worth mentioning.
Last things were the deck riggings, foot braces and the seat. For the screw holes into the hull, I used the drill-fill-drill method (as described on the CLC-webpage), which worked well. One word of advice: I'd recommend a thin syringe to fill the first, larger drill holes with epoxy, in order to avoid air bubbles by filling the holes from bottom to top - I had to fill some holes twice, because only when I drilled into them again with smaller diameter bit did I realize that they weren't properly filled.
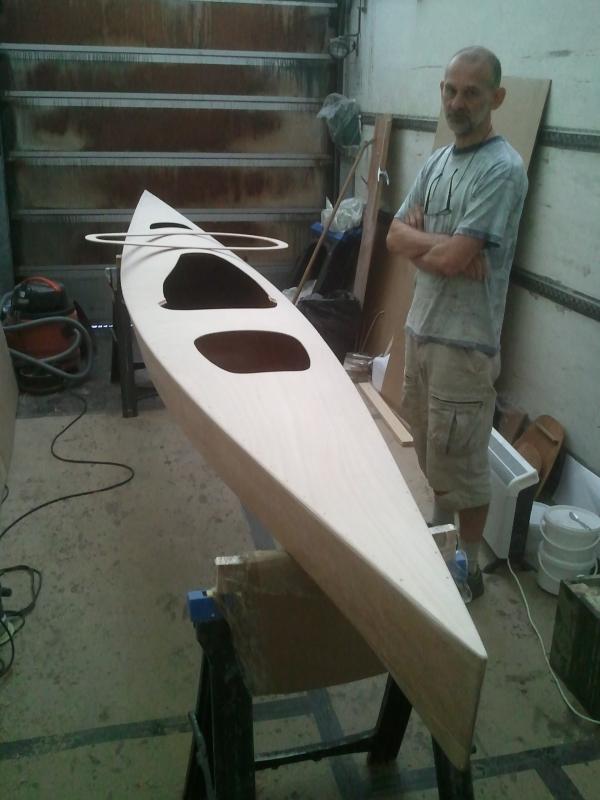
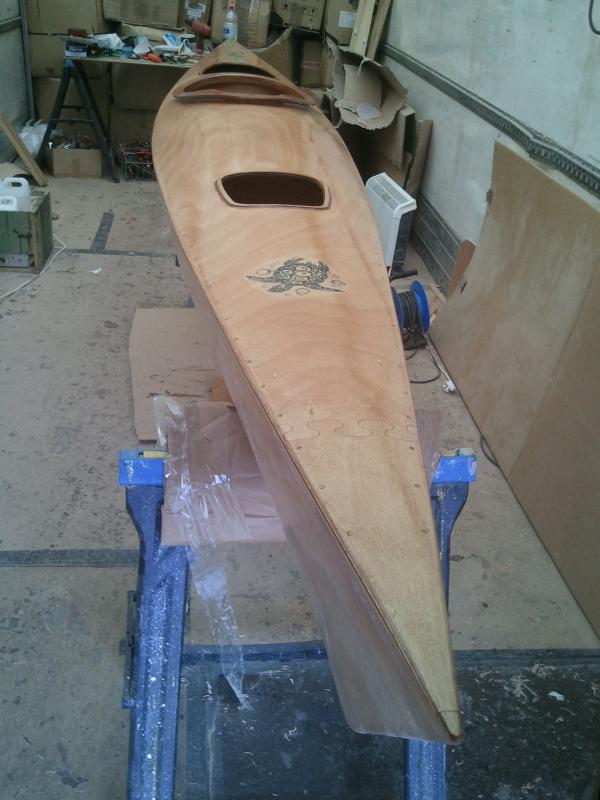
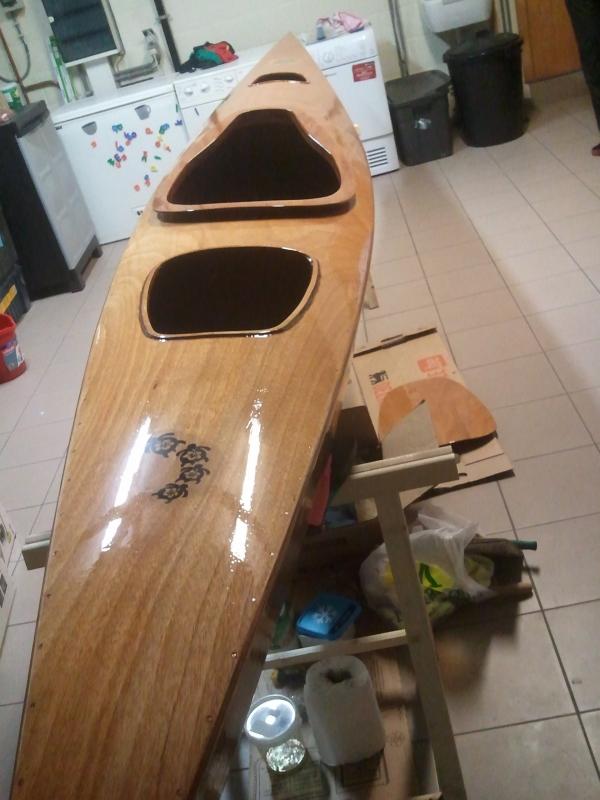
So, here's the final product:
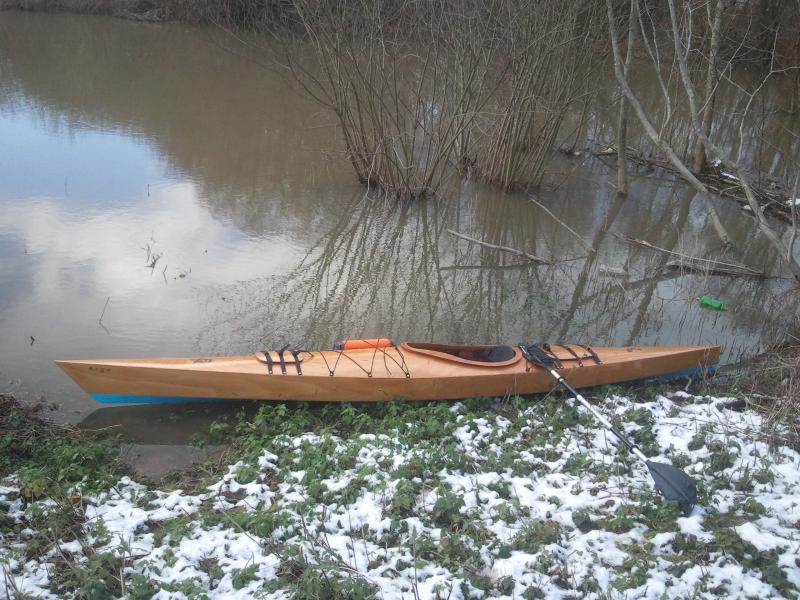
Makes me one happy owner! (Check out the boat lunch section for the first outing in the Argo.)
Last edited by Arne H (27 Jan 2016 9:23 pm)
Offline
#8 27 Jan 2016 9:41 pm
- Arne H
- Member
- Registered: 18 Dec 2015
- Posts: 21
Re: Chesapeake 16 build
Some comments on the rice paper on-lays that I used (I got the idea from Berger Boote's website):
- If placed in between a layer of fibre glass and the wood, these work very well and really go invisible. To be sure that everything gets well saturated with epoxy, I'd recommend applying a thin layer of epoxy to the wood, once that's dry to the touch add the printed rice paper that has been wetted out with epoxy before placing it, and then add the fibre glass and saturate everything well with epoxy. For the name on the side of my boat, this worked very well.
- I also used rice paper for a name plate with boat details and my name and contact details etc., which I put inside the cockpit. Also works very well there.
- For any artwork that is to go right on wood that only has epoxy and varnish on top, I'd think twice before using rice paper again. Unless it is possible to cut the rice paper right on the edge of the printed part, the edge remains visible in my experience. I'm not too bothered about immaculate surface, but even I notice that the rice on-lays I placed on the deck show the edge of where I cut out the paper (didn't pay a-too much attention to cutting it out very smoothly, expecting it to go completely invisible). It is pretty transparent, but it hasn't gone completely invisible.
I was told by Paul that acrylic or other techniques can be used. To achieve a perfect finish, it might be worth investigating the options for applying artwork more than I did.
Offline
#9 29 Jan 2016 4:48 pm
- Yambo
- Member
- Registered: 17 Jul 2014
- Posts: 36
Re: Chesapeake 16 build
Well done on a great job Arne! The boat looks fantastic. I'm currently building a Chesapeake 17 LT, on my own and from plans. Like you I have no workshop but I managed to build a Skerry 2 years ago so I think I'll manage. You've given me a couple of things to think about though and I think your experiences are going to help me. I'm still cutting bits of plywood at the moment and I'm nearly ready to cut the scarf joints and glue the hull panels together. I'll have to move some chairs . . .
Thanks for a great write up and tips!
Offline
#10 22 Feb 2016 9:26 am
- Arne H
- Member
- Registered: 18 Dec 2015
- Posts: 21
Re: Chesapeake 16 build
Thanks, Yambo.
Looking forward to seeing your 17LT develop soon as well, and to learning about your experiences. Your Skerry looks very nice indeed - with the experience of having built that already behind your back, I'd not imagine that the kayak poses many problems for you.
Offline
#11 25 Feb 2016 7:40 pm
- Yambo
- Member
- Registered: 17 Jul 2014
- Posts: 36
Re: Chesapeake 16 build
I started stitching the hull together today Arne. Got halfway down from the bow and was losing the light so will finish off tomorrow.
Offline
Pages: 1