A forum for discussing wooden boats and boat building
You are not logged in.
- Topics: Active | Unanswered
#1 16 Nov 2015 11:16 am
- Sam Taylor
- Member
- Registered: 22 Oct 2011
- Posts: 50
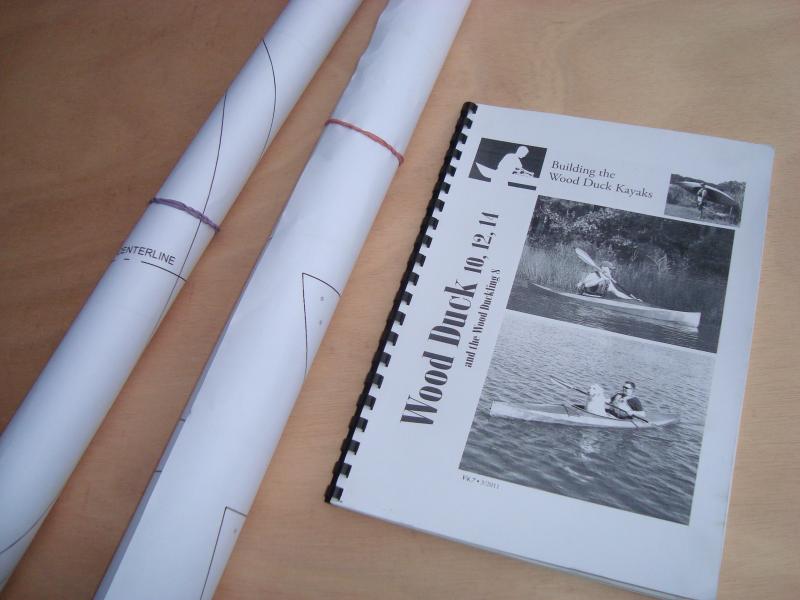
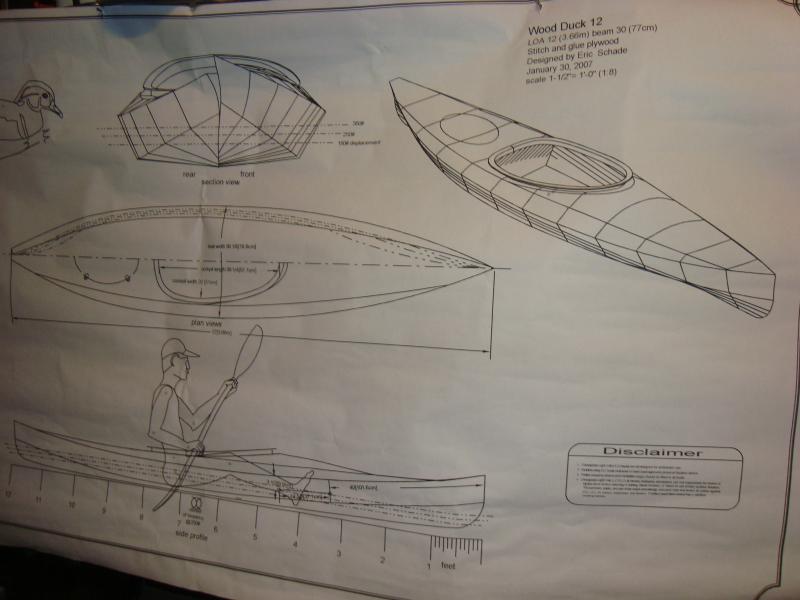
Building from plans .... Wood Duck 12'
Back in Oct 2012 my son and I started a Eureka 155 open canoe (see other thread) which was fully constructed from plans. What we skipped over in our race to get 'building was the fact that the plans actually came as scaled down A4 versions (2 pages) that required fully scaling-up and lofting out to produce the full size panels and parts required for the canoe. Plenty of head scratching but we did succeed and the completed canoe is still serving us well 3 seasons later.
The time has come to attempt another project as canoe building seems to be addictive so we have recently received a set of full-size plans from Fyne for a Wood Duck 12' - this time for my daughter. Rather than work from miniature plans we are now in receipt of the full-size templates (!) and will document our progress once again. I know the manufactured kits are a thing of beauty and certainly allow for quick progress to actual boat assembly ... but for those who perhaps want to get acquainted with their power-tools and 'make' the various parts....here we go again....
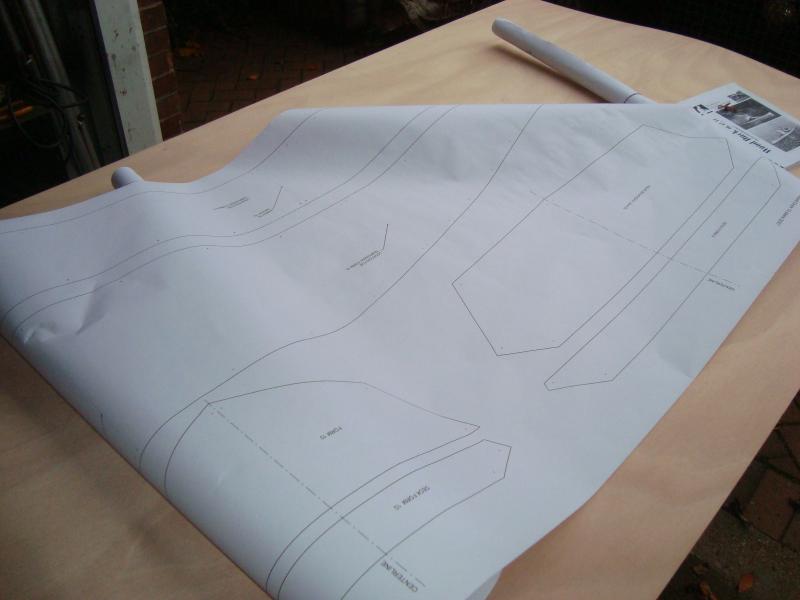
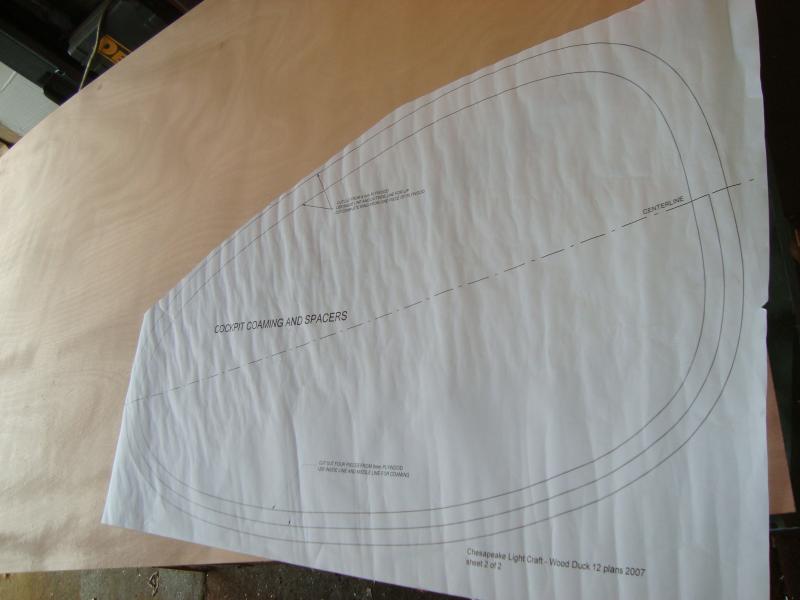
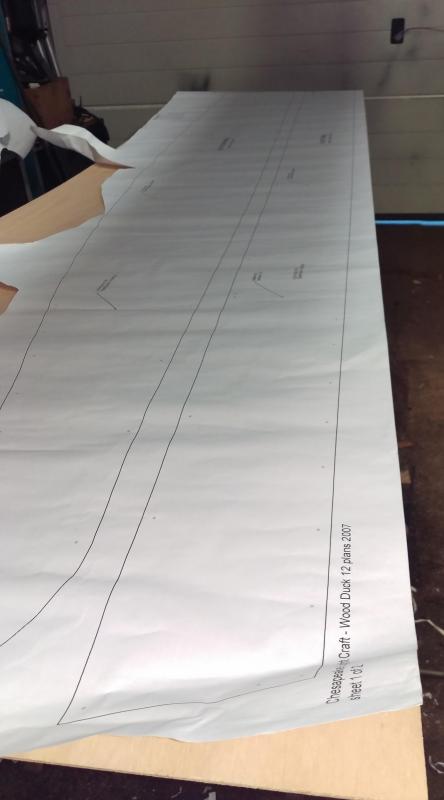
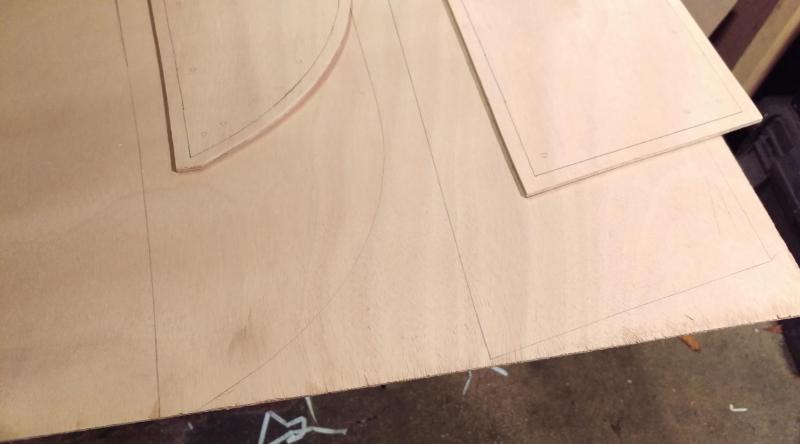
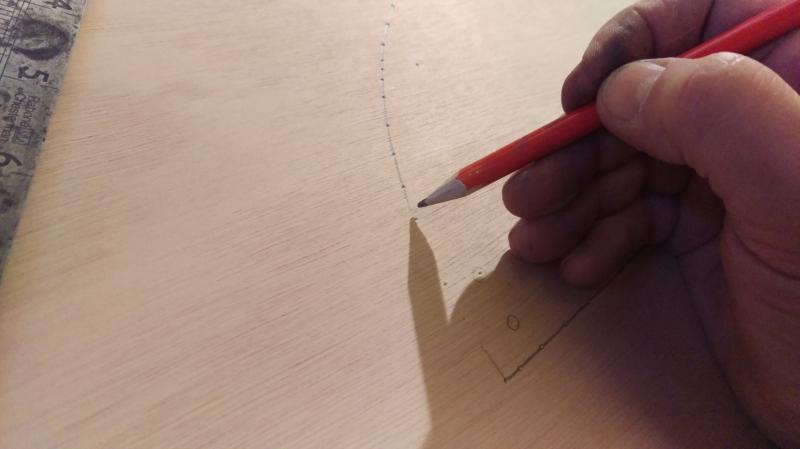
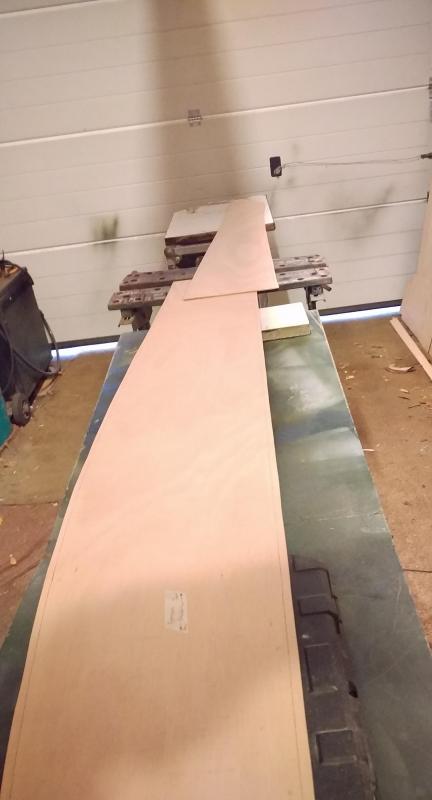
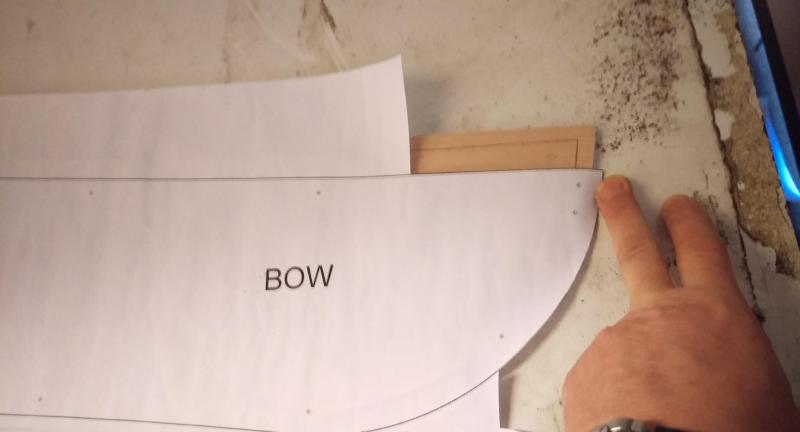
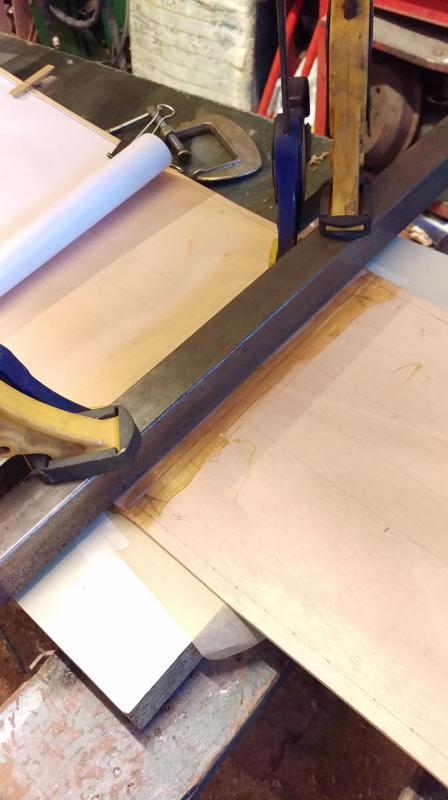
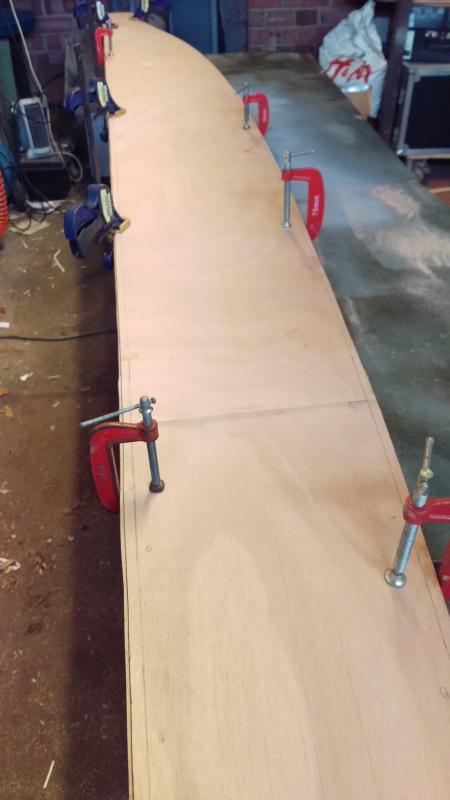
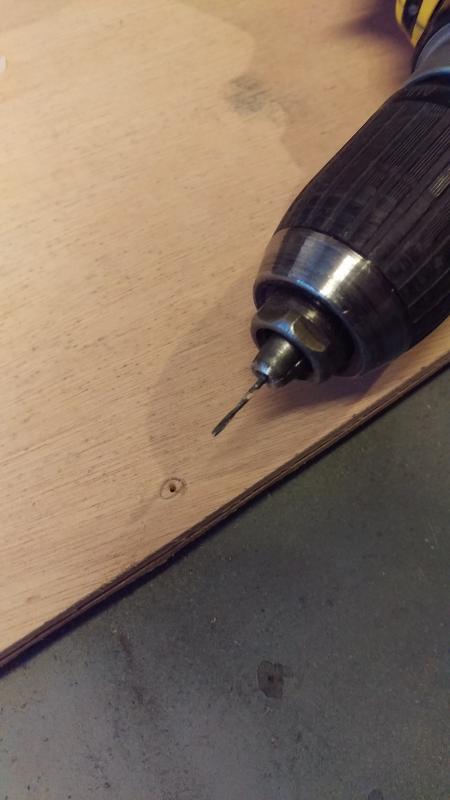
First thing to comment on is to remember that you need space to man-handle 3 sheets of 8 x 4, space to keep them and space to work with them ! The plans include a diagram of 'nesting' to best utilise the sheets prior to cutting begins and this is very helpful and suggest you keep this pinned up ! Just like dress making the first task has been to cut-out the simpler shapes and begin transferring the pattern detail onto the wood ready for jig sawing..... zzzz
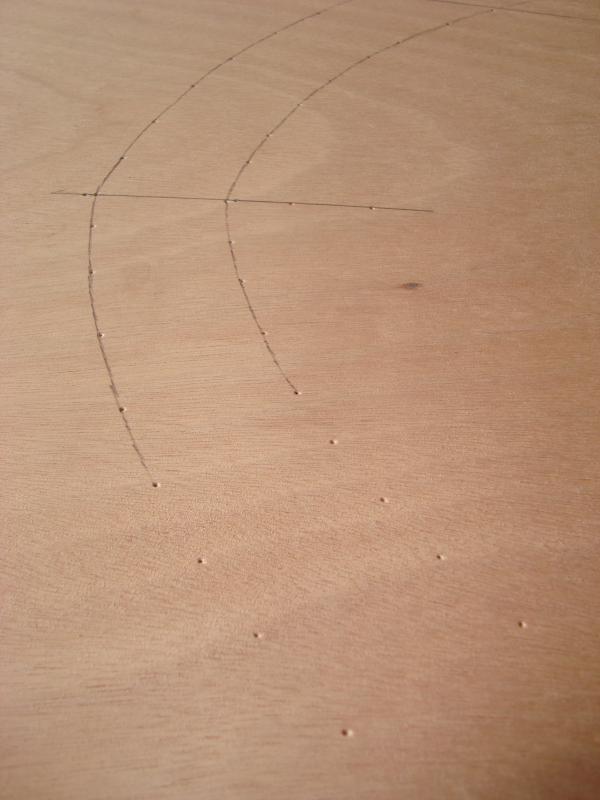
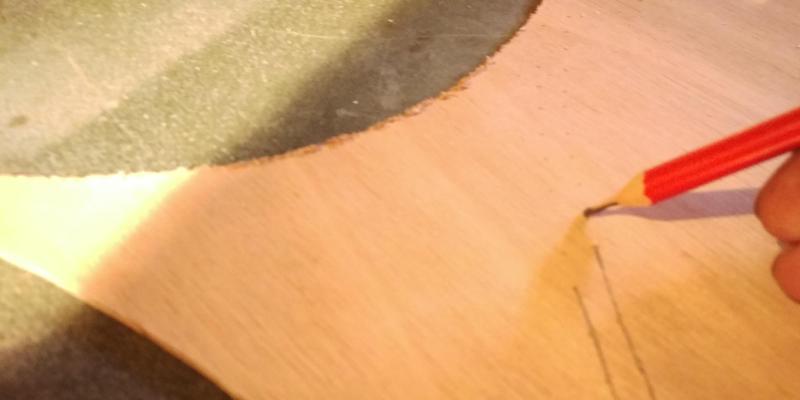
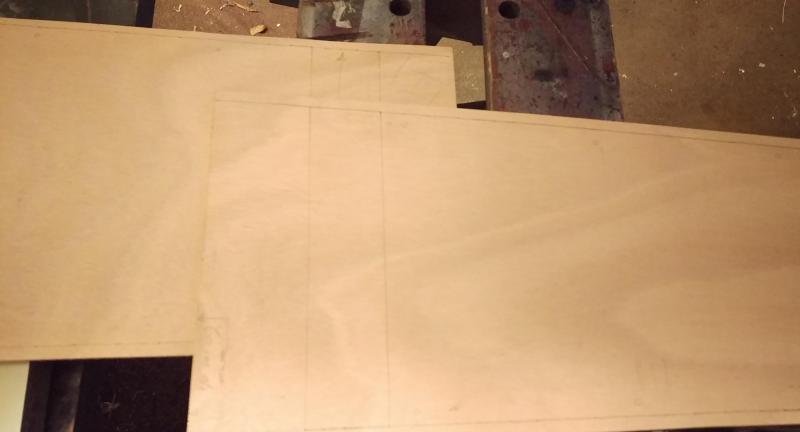
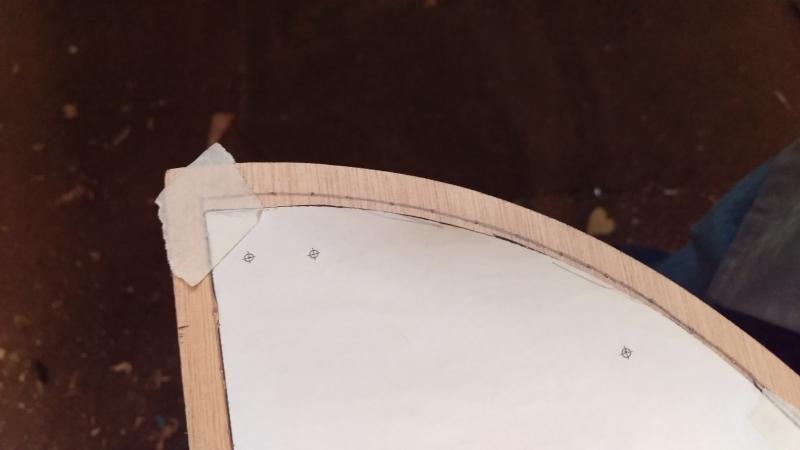
Attach your flattened template to the required position on the 8x4 and prepare for marking ...
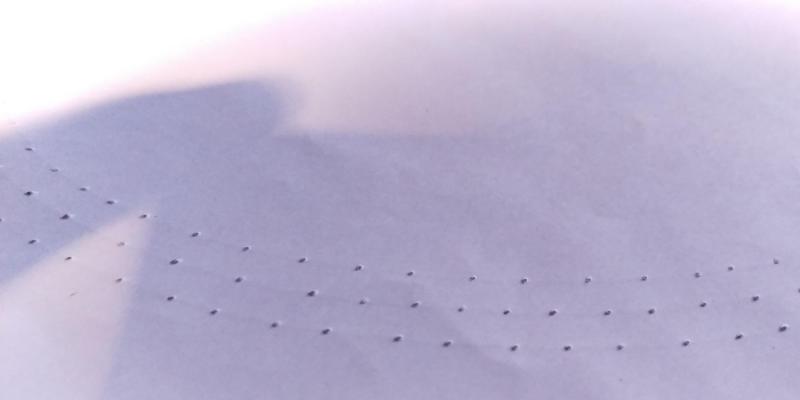
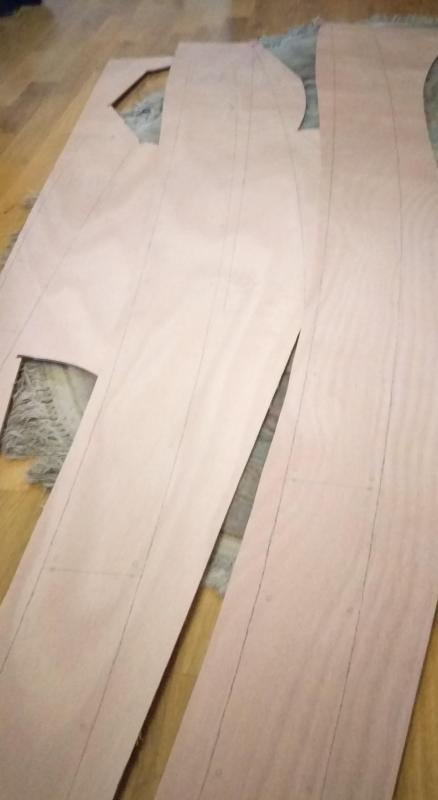
A long session of joining up the dots once you've transferred the pattern to the sheet ...
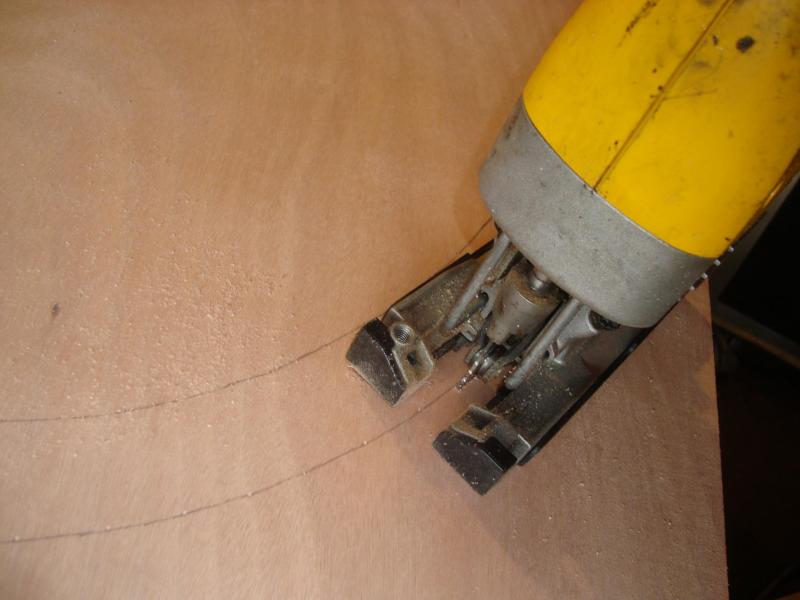
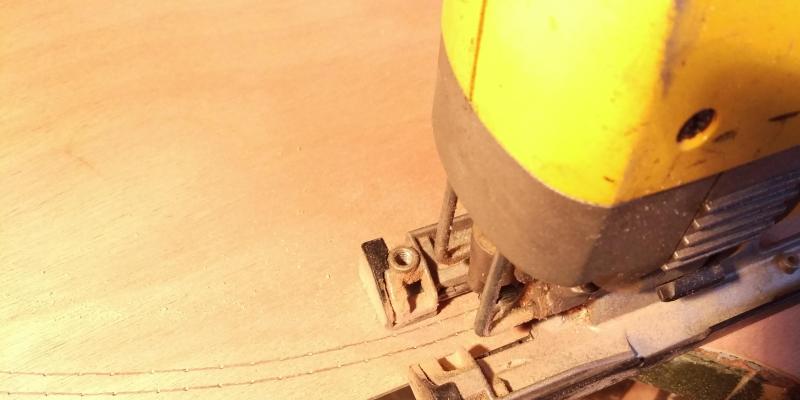
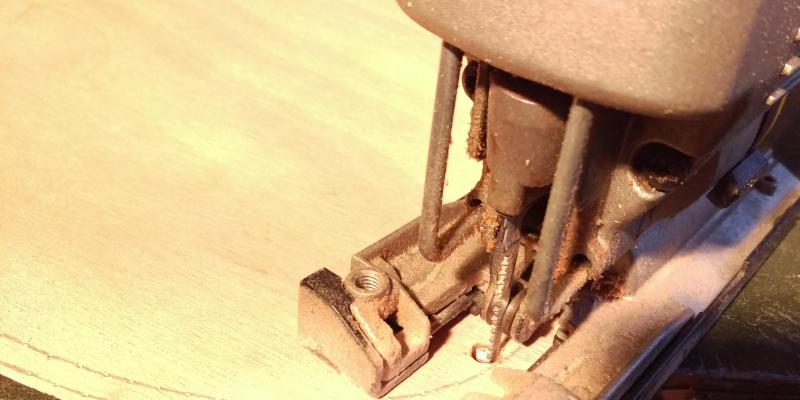
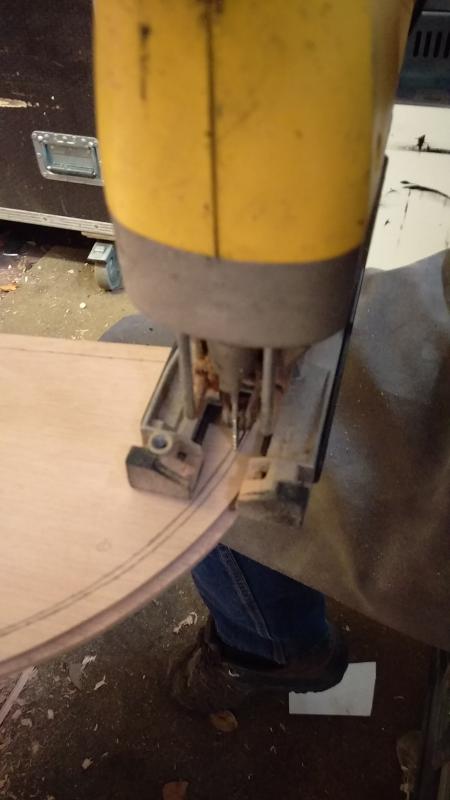
Make friends with your jig-saw because there is metres to cut ...
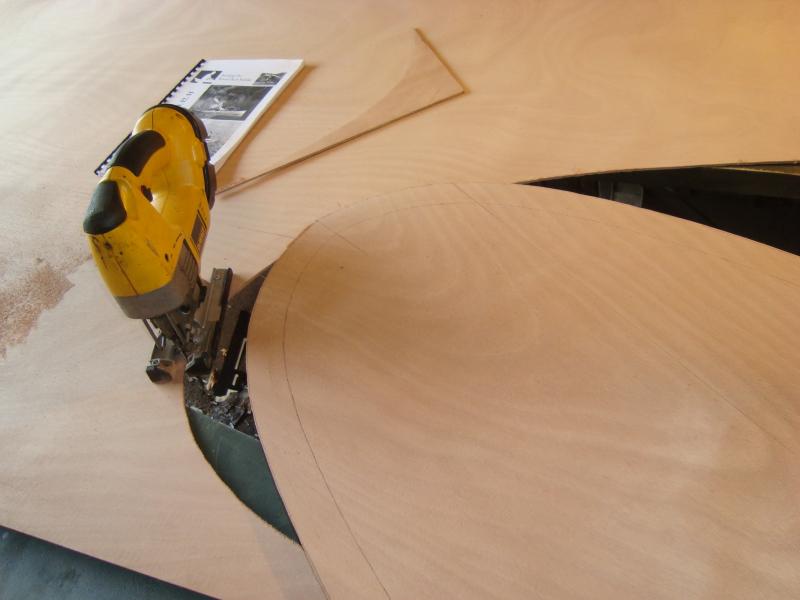
Keep as close to the line as possible, the more you leave... the more there is to sand..
You can save some sheet AND save sawing time once brave enough to cut in straight lines with patterns drawn out back-to-back...

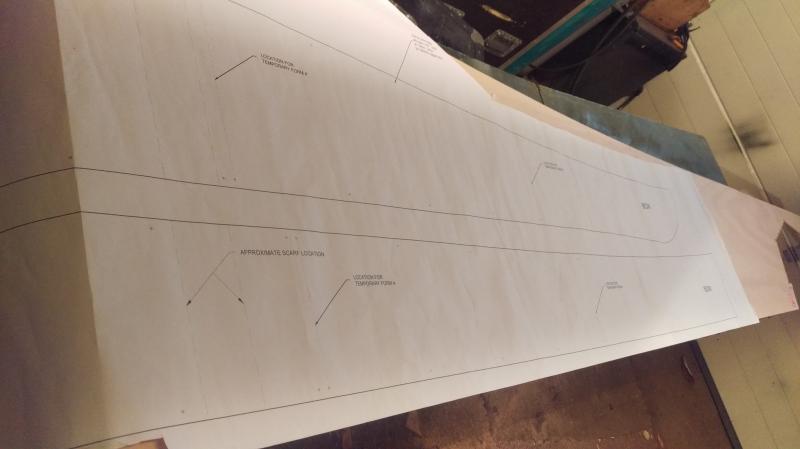
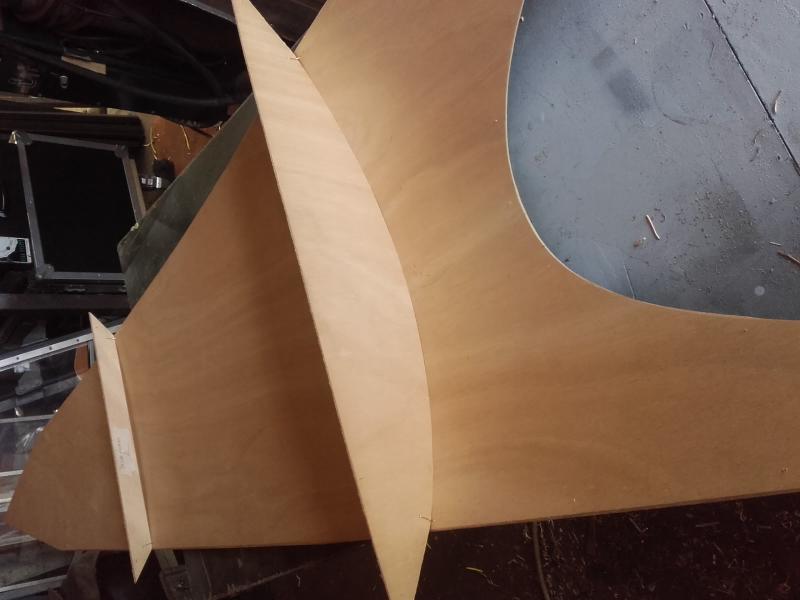
Heres a pic of the very useful nesting diagram. You can mark out your sheet cut into two manageable halves prior to marking individual references...
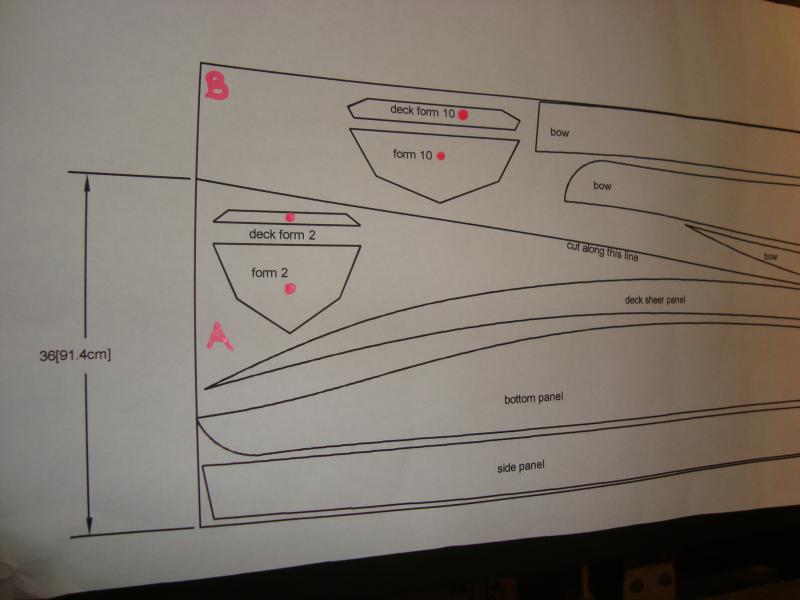
Another nesting diagram, this will be useful in ascertaining the best use of sheet for the decks, haven't got this far yet and concentrating on cutting the smaller items...
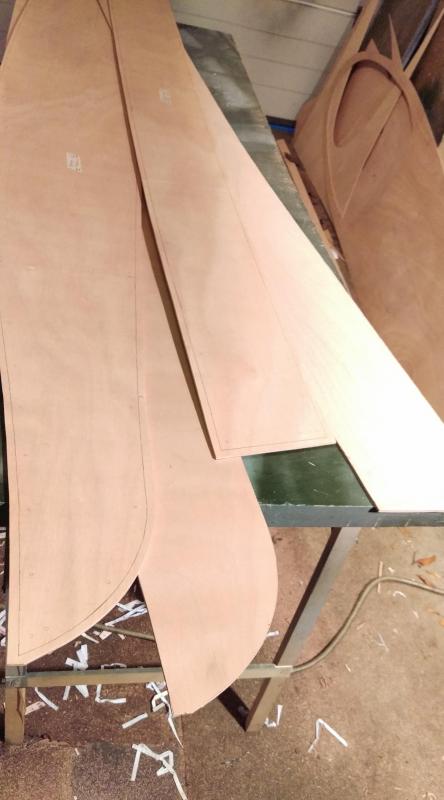
Once you cut out most of the smaller ref's, you can dispense with the templates....
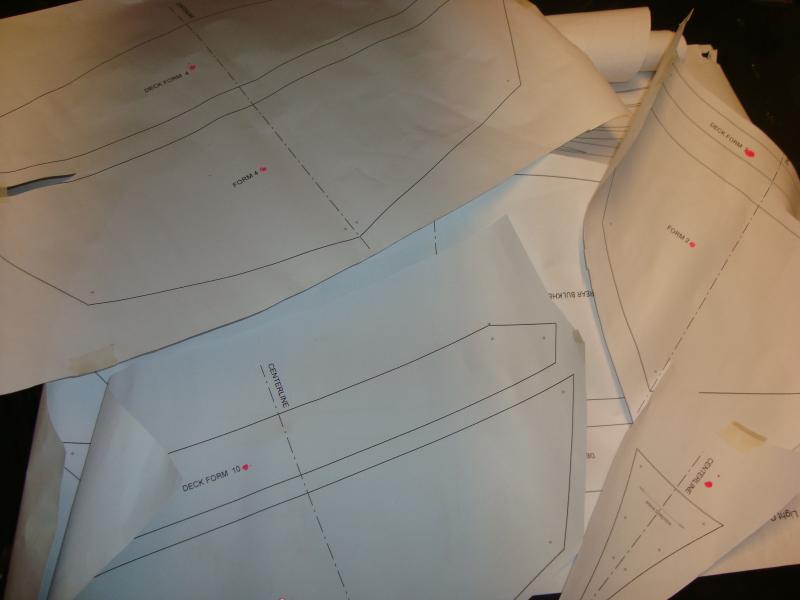
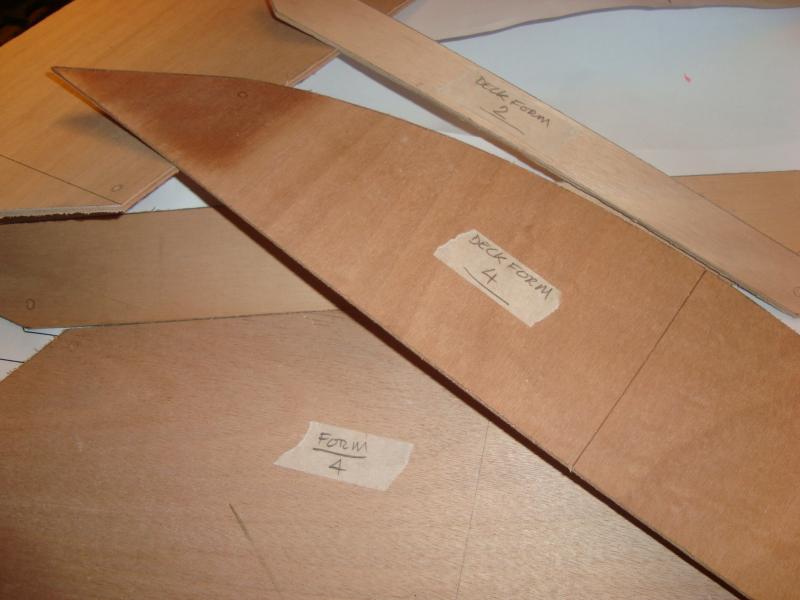
Once marked and cut, I've ended up with this little pile of results. DO check your cut results against the template. Symmetry is important.
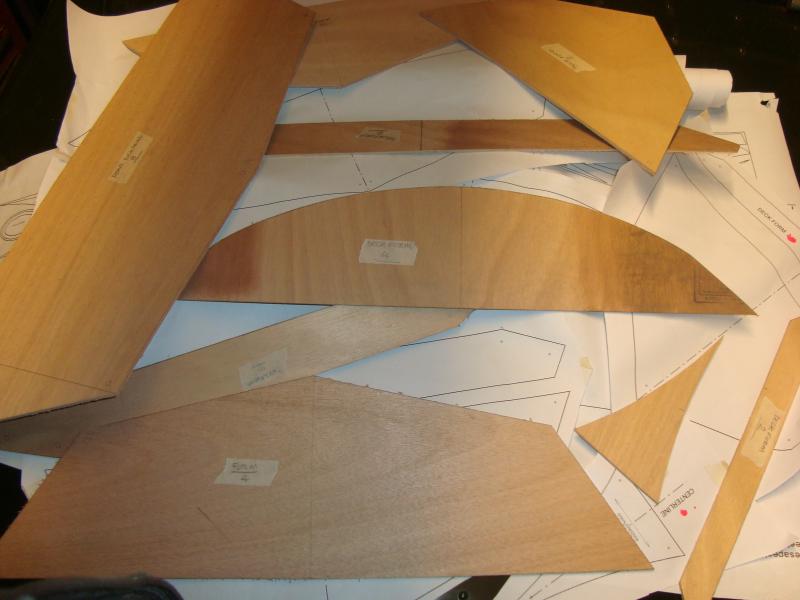
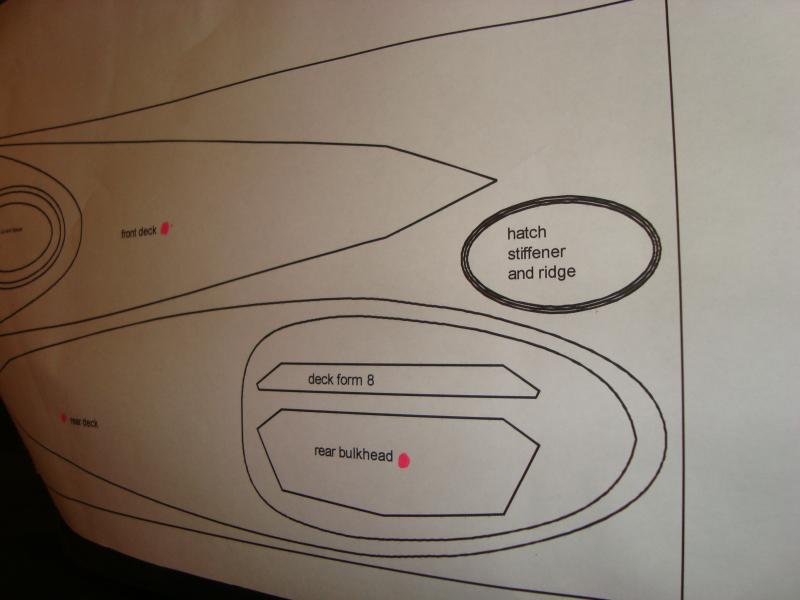
Putting labels to identify each ref is useful aswell. If I haven't mentioned already do read the manual and aquaint yourself with each and every ref / part name..
This included picture details part name and location etc and is useful to have on display at this manufacturing stage ...
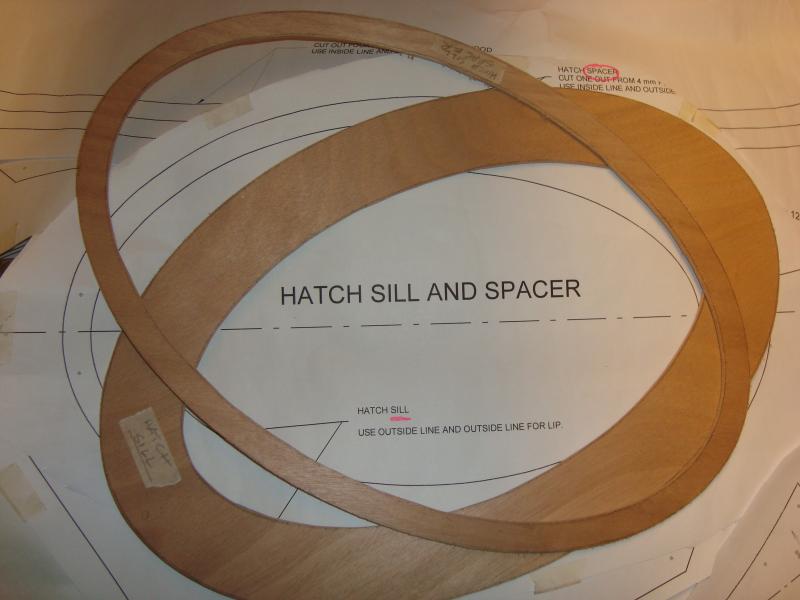
Some templates are drawn to include . make more than one ref - ie - hatch, spacer and sill - see this pic - so the template will get used, once, twice, three times - keep safe and in good condition...
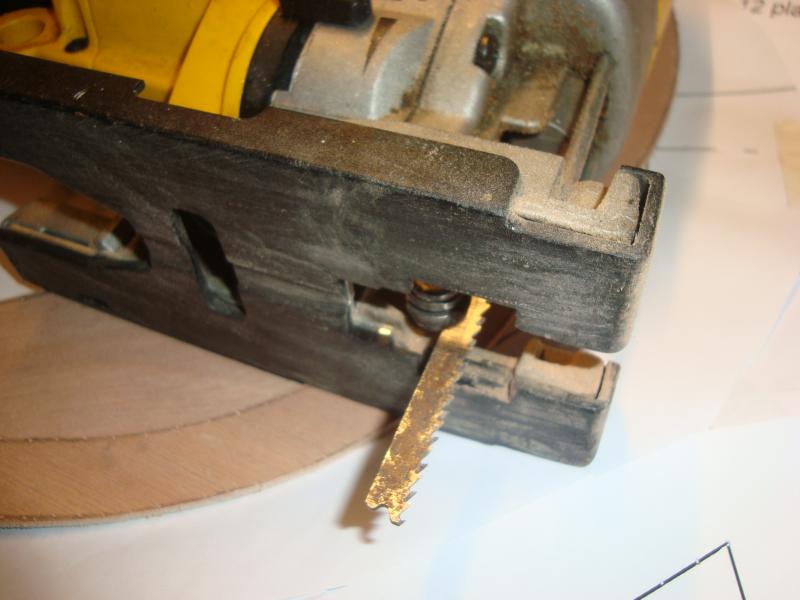
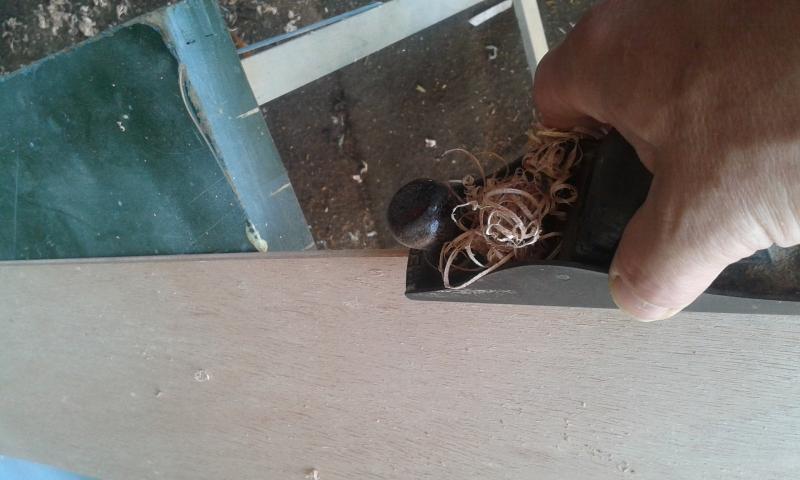
JIg-saw blade is up for re-newal already and might try a narrower type which might allow for improved agility...
Last edited by Sam Taylor (23 Nov 2015 5:12 pm)
Offline
#2 23 Nov 2015 5:25 pm
- Sam Taylor
- Member
- Registered: 22 Oct 2011
- Posts: 50
Re: Building from plans .... Wood Duck 12'
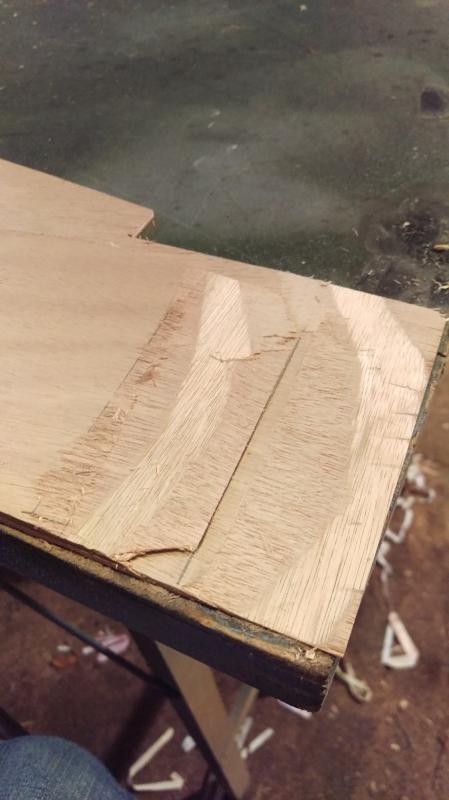
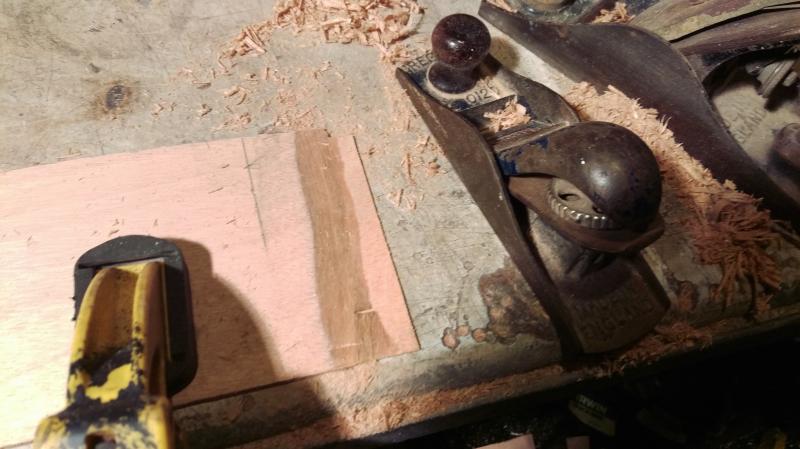
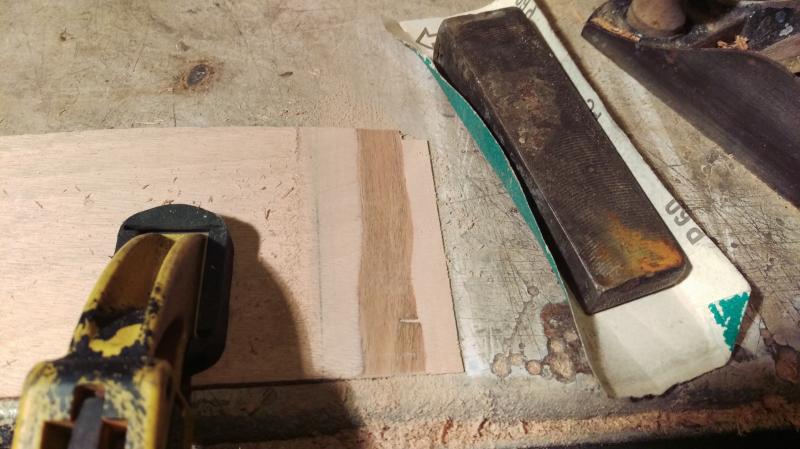
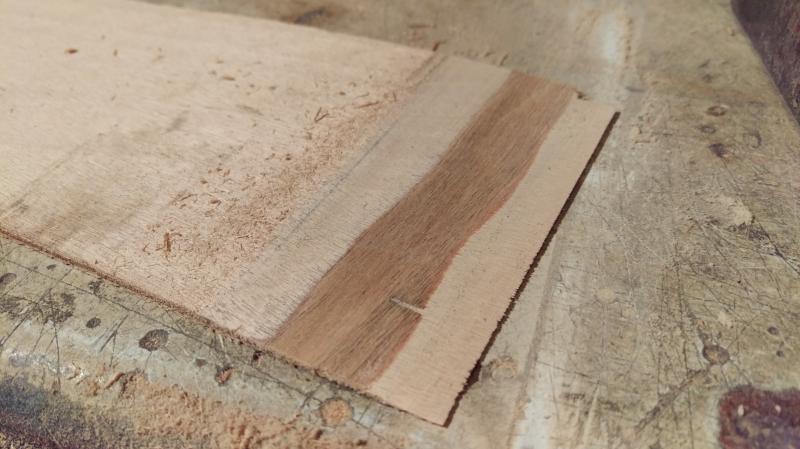
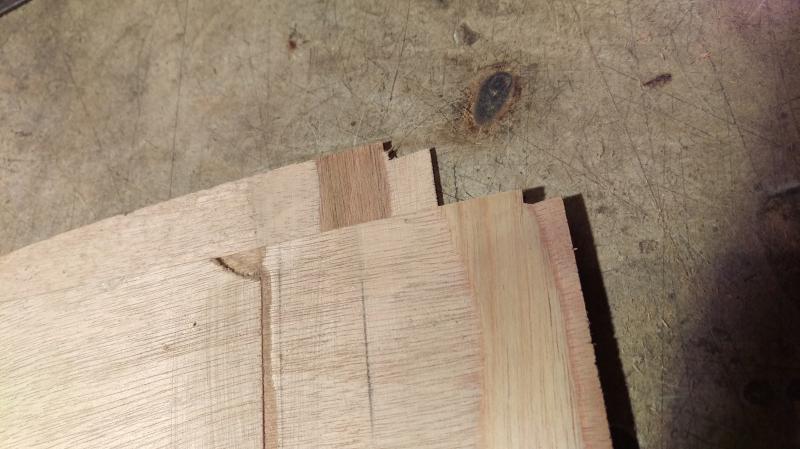
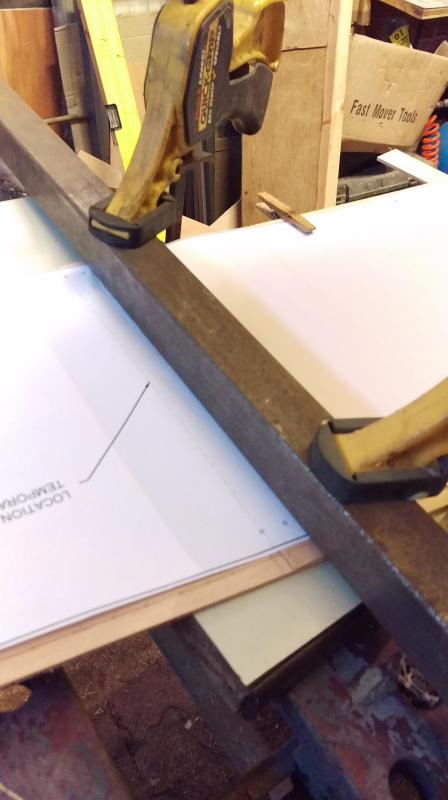
The Hatch Rim has been the most challenging item thus far to get right-first-time ! This item uses the template twice and given its width was made the jig-sawing slow ...
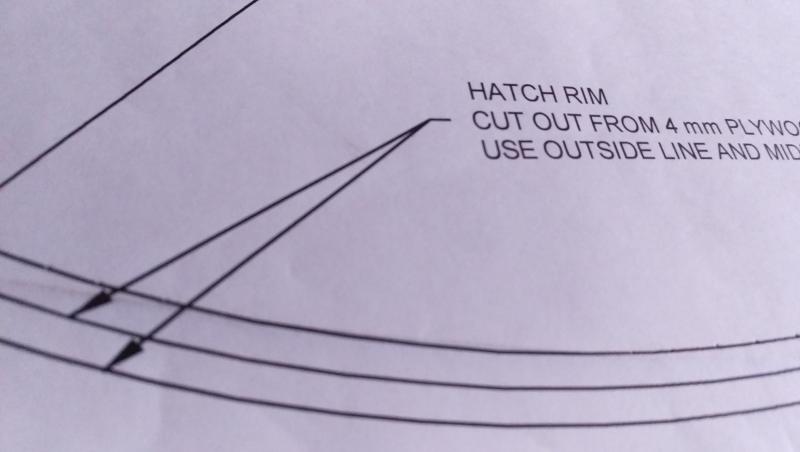
First thing was to make this narrow section out ensure best accuracy :
Once marked you can see that the templates will only survive a limited use :
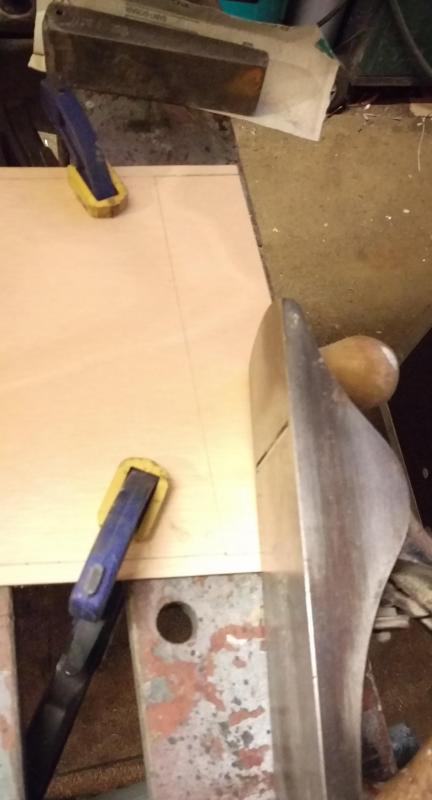
Decision to cut around the outside edge first as this gave something large and easier to hold on to :
Once around the outside it was time to drill a hole to allow the jigsaw into the inner edge. The new narrower blade giving me much agility :
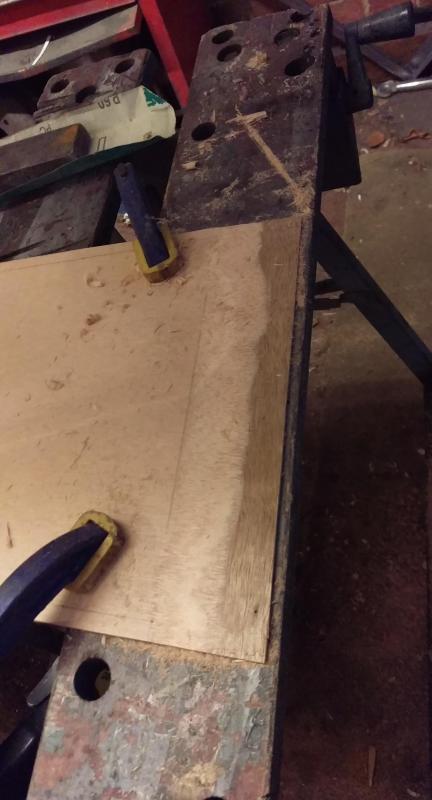
resting the read-end of the sole-plate on the bench so the weight of the saw is not all in your hand it almost became easier to 'push' the work piece against the saw rather than wrestle with the saw itself. Having a new blade really helped :
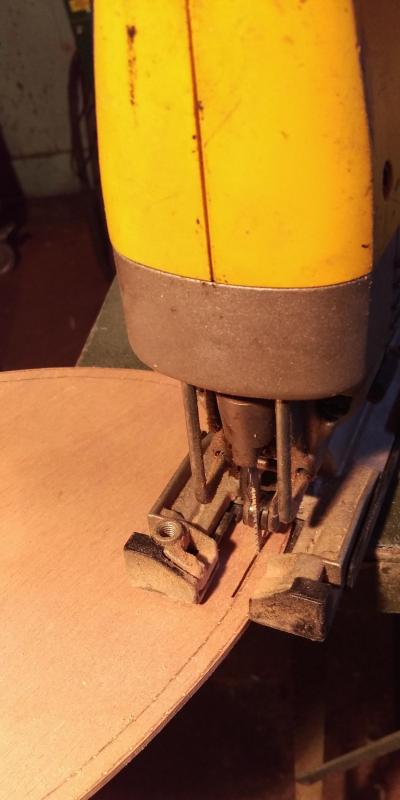
Slowly... I got there. success :
Last edited by Sam Taylor (23 Nov 2015 7:37 pm)
Offline
#3 25 Nov 2015 6:29 pm
- Derek Blay
- Member
- Registered: 16 Sep 2014
- Posts: 17
Re: Building from plans .... Wood Duck 12'
Sam
Very interesting post but it has just convinced me that building from a kit is best way to go for most of us.
If you want to say 'I built it' and enjoy the process then fine and the best of luck with your Wood duck
I built a hybrid (Strip deck) from kit and it is a beautiful boat. (This will be my 6th boat from Fyne Boats)
I have just ordered a Mystic open canoe and did consider building from plans but went for the kit for following reasons:
Cost: Kit costs £1230
To build from plans allowing for buying strong back/ forms from Fyne Boats £280
Estimated cost for approx 350 metres Cedar strip at average £13 per 10 metres £560
Seat and fittings £80
Glassfibre/Resin and glue £150
_____
£!070 Saving around £160
You also need to store and handle big floppy sheet of ply without damaging and marking.
The cutting process must be a bit nerve wracking and even the best sawyer cuts to waste and has to plane or sand to the line
The Fyne boat panels are beautifully cut and include where required precut puzzle or scarf joints.
Some kits even have wire holes predrilled all of which almost guarantees a first time perfect fit and your kits looks like a boat just hours after opening the boxes.
Its obvious that you know what you are doing but for a first timer with limited skills I would always recommend a kit for first boat.
Finally a little tip on labels - some peel off labels leave a mark from the adhesive when they are removed which is difficult to remove without leaving an area that is a darker colour and can be a problem if you re looking for a clear varnished finish.
You obviously enjoy a challenge and I wish you the best of luck with your project
Offline
#4 26 Nov 2015 9:55 pm
- Sam Taylor
- Member
- Registered: 22 Oct 2011
- Posts: 50
Re: Building from plans .... Wood Duck 12'
Any 'senior' boat/dinghy builder who can remember Barry Bucknell and his Mirror Dinghy will appreciate that time and technologies have moved on. CNC routers utilising CAD programmes for cutting from 3D drgs are far removed from pencil and paper designs of the past. Once upon a time builders of vessels like hours had no choice but to cut and make everything before assembly begins. I hope that posting my experiences will help potential builders to make an informed choice on which route to go and what suits them, at the end of the day (month, year) its about personal preference, skill, space, budget, time, ability.... Choice.
The supplied kits from Fyne are a thing of beauty and workmanship...and thats before you start assembly. The cost of a wood duck kit is £860 plus shipping and the reason for plans 'route' in my case is the ££££ outlay to get started. I've done as many calcs as possible on cost of ply, resin, supplies etc... And I would hope Im inside the £860 when all said and done, I'll keep you posted but its not a deal breaker... i just want a Kayak and this seemed the best route to go. Im certain I will end up building 'another' as one will not be enough...
If you're on your 6th project, then I need to speed up ! Lets hope I can nail the 'scarf' joint process... Never done that before.
Last edited by Sam Taylor (26 Nov 2015 9:59 pm)
Offline
#5 28 Nov 2015 11:34 pm
- David Wood
- Member
- From: South Devon
- Registered: 15 Apr 2015
- Posts: 25
Re: Building from plans .... Wood Duck 12'
I admire anyone like Sam, who is prepared to build from plans, but it's kits for me every time, particularly when building "clinker" designs. There's still plenty of work to be done.
Derek's Mystic open canoe sounds a worthwhile project - one I considered before buying the cheaper Sassafras kit.
Next project? A paddle board, maybe? Or perhaps the sectional Shearwater Sport.
Offline
#6 30 Nov 2015 11:47 am
- Sam Taylor
- Member
- Registered: 22 Oct 2011
- Posts: 50
Re: Building from plans .... Wood Duck 12'
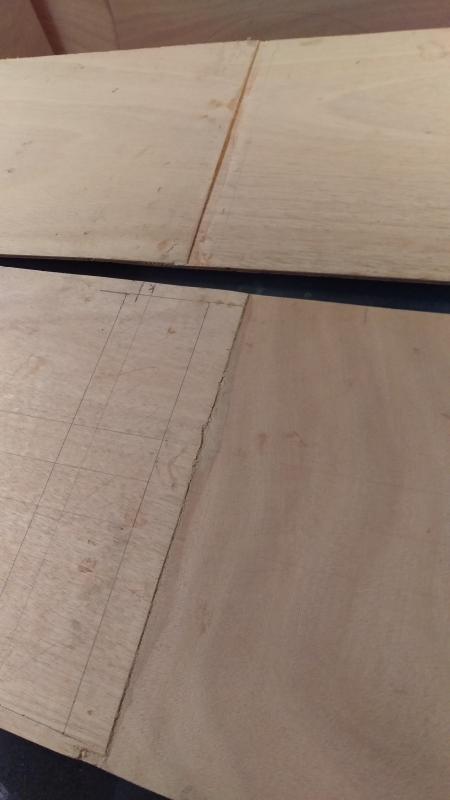
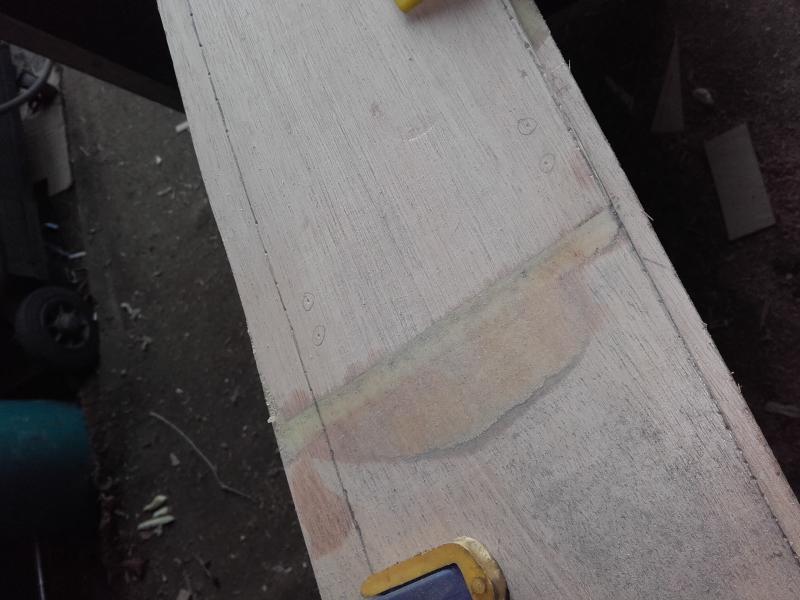
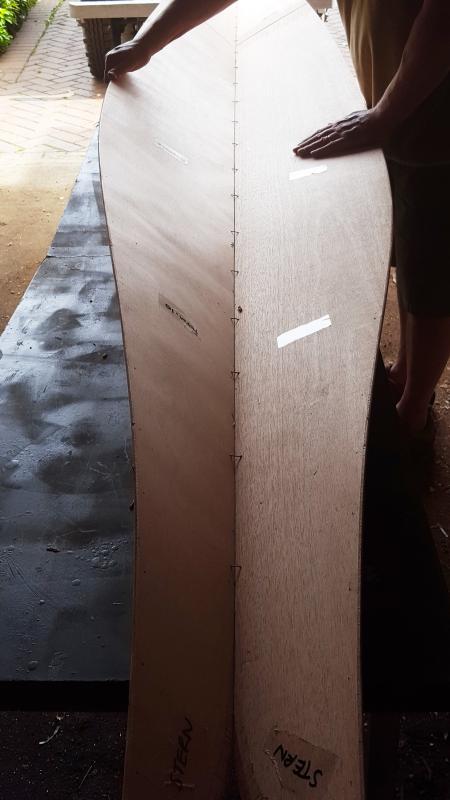
Made some progress with the larger / longer pieces of the Hull. Had a mammoth dot-to-dot session marking out the panels :
Completely marked and ready for cutting, these are not the full pieces as I'm yet to make the scarf joints (more on that later) :

I will need of course 2 of everything and not wanting to use the templates and go through this process again I generously cut the first pieces and then used those as a template for marking the required repeat pieces :
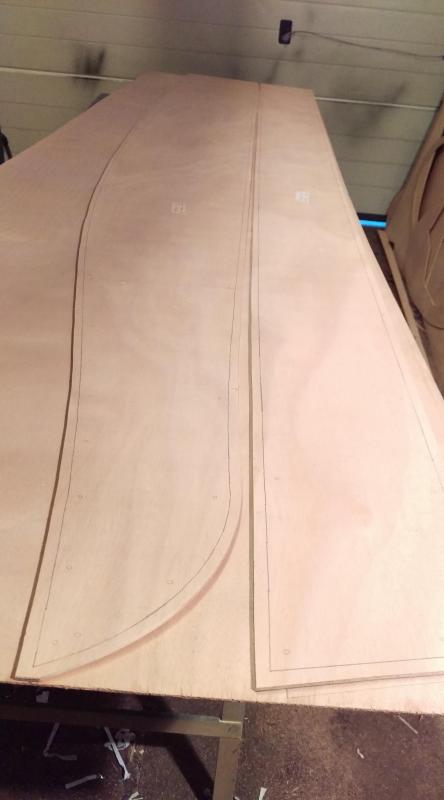
Once these were marked i managed to quickly cut again with a generous allowance all round :
it is my intended plan to make the required scarf joint on each piece hence the reason for leaving a generous cut at this stage. When (??) I've made the scarf joints I hope to then remark the whole panel (from bow-to-stern) check... and cut the the matched pair in one go. I'm of the opinion cutting each 'half' is too risky and potentially in-accurate. If I do cut them singularly I will at least clamp them together and sand / finish the shape as a matching pair. The reason for treating each panel individually is to try and scarf join the whole 8x4 sheet would difficulties in handling and storage. I'll keep you posted on how it goes.....
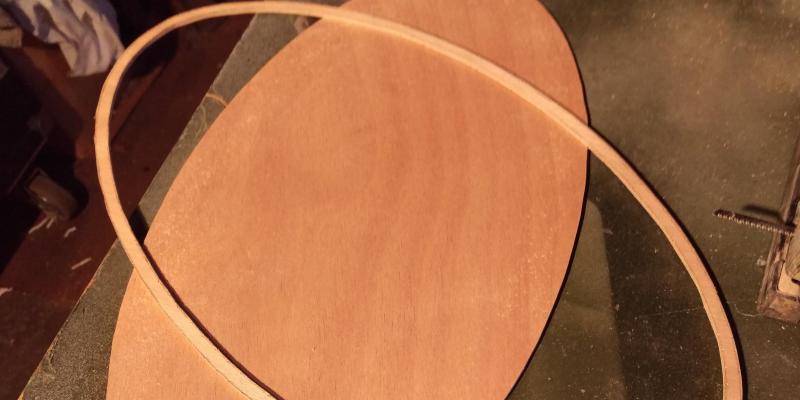
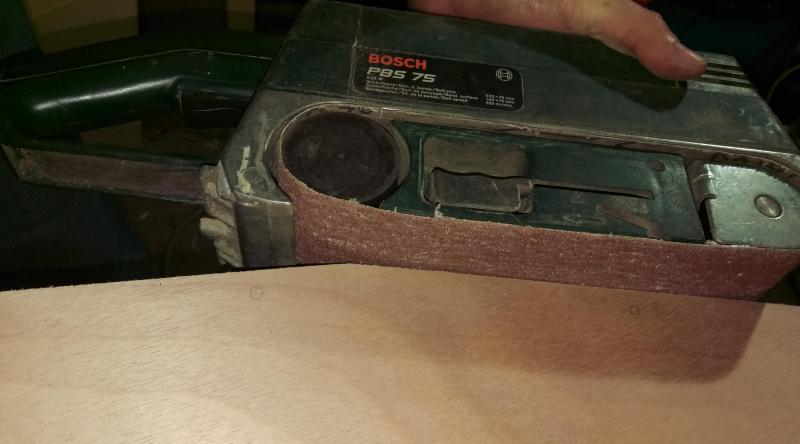
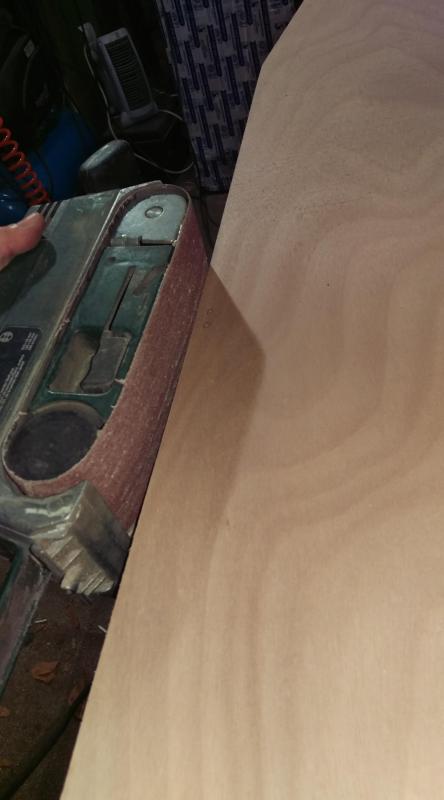
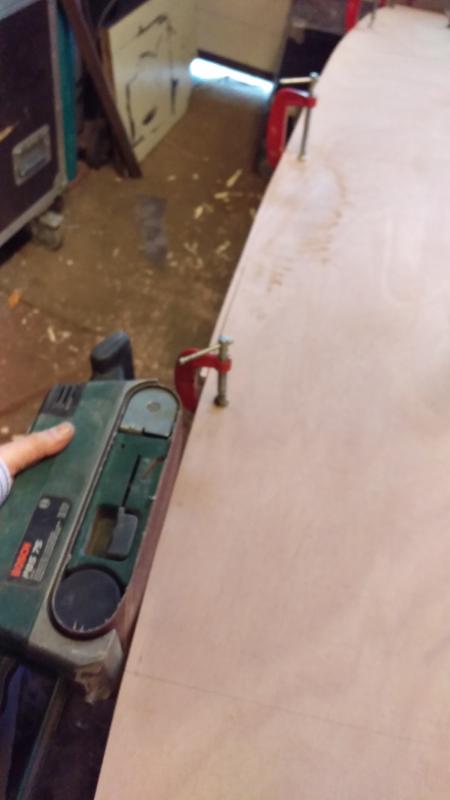
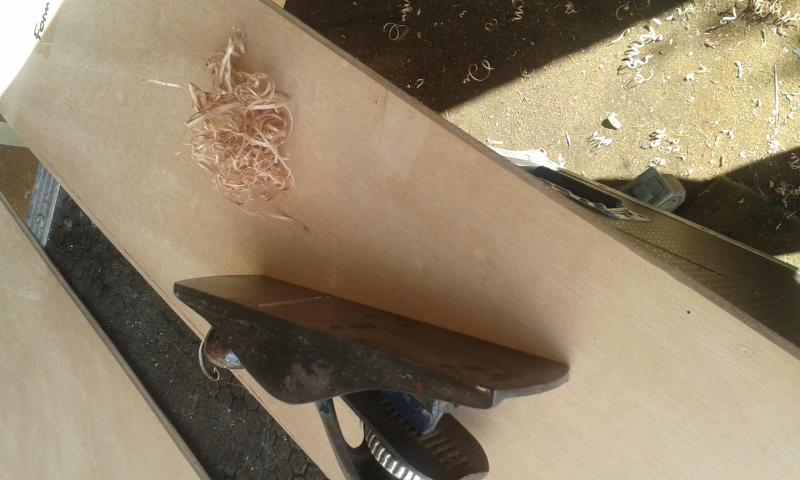
Dressing the cut edges has been quick and easy, by clamping my belt sander to the table i've got a ready made linishing machine :
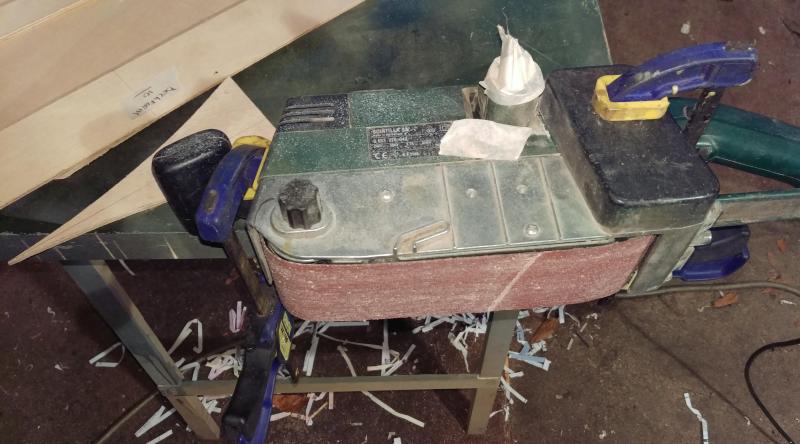
Very easy to dress and finish small item edges etc..
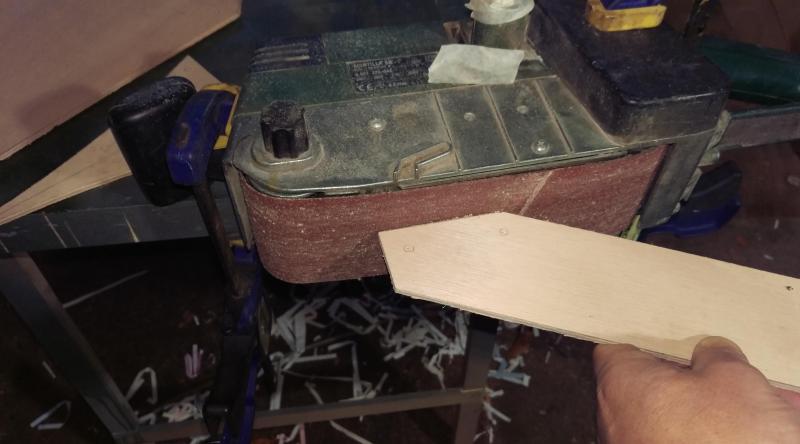
For larger pieces I prefer to clamp the piece to the table and hold the machine witht 2 hands and run round the edge, quite fast but very effective :
Offline
#7 5 Dec 2015 10:49 am
- Sam Taylor
- Member
- Registered: 22 Oct 2011
- Posts: 50
Re: Building from plans .... Wood Duck 12'
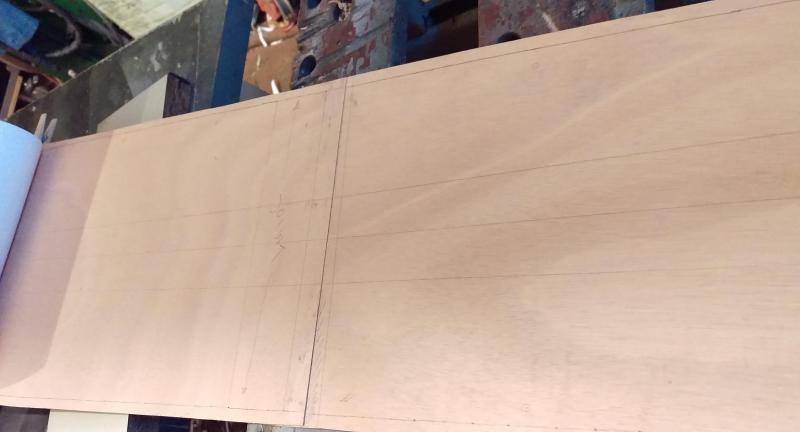
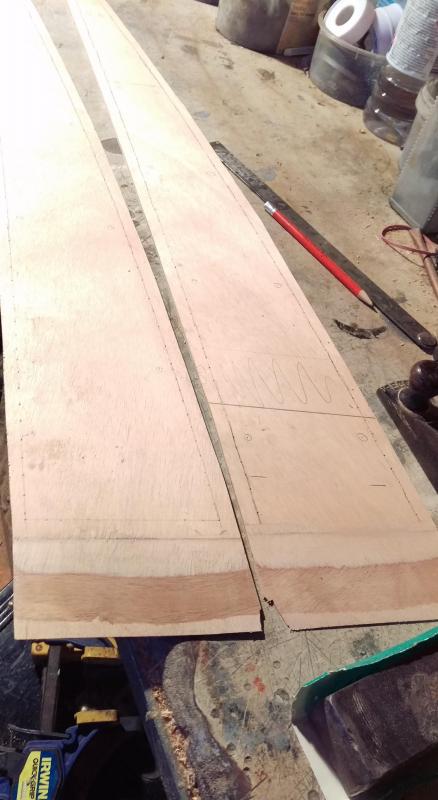
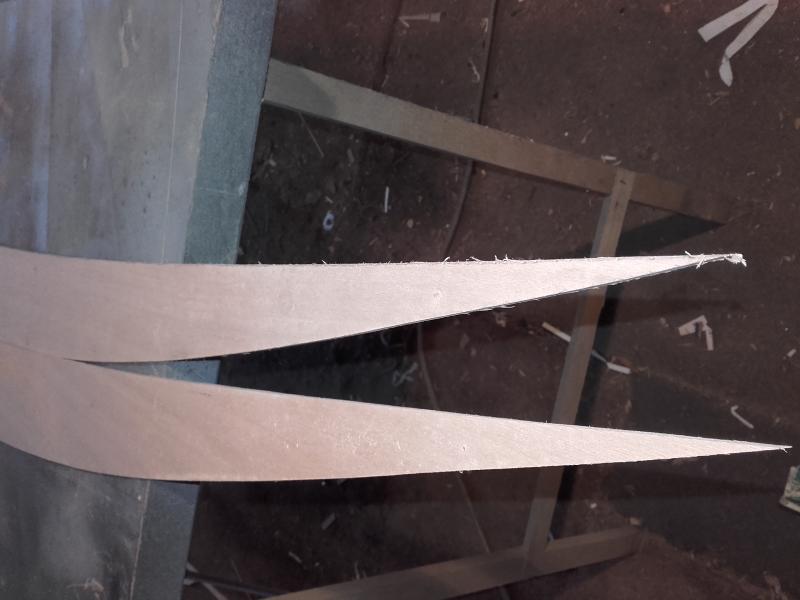
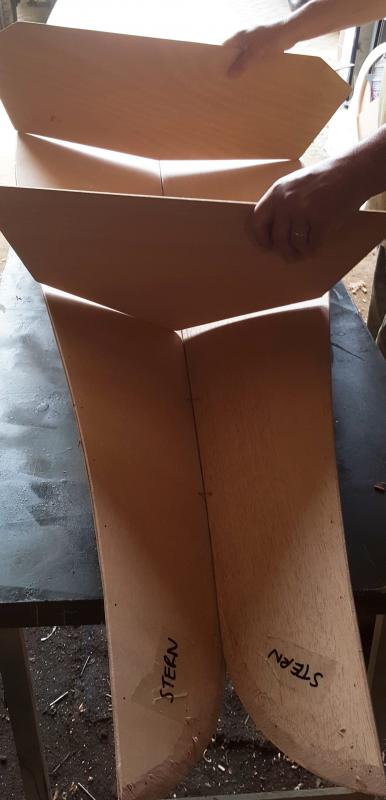
Moving onto the other 'halves' of the Hull sections and Side Panels, I copied our earlier technique of marking and cutting one panel and then using that as an oversize template for the opposite hand piece. Back to the full size pattern only needing the 'other' end to lay out and mark through :
The more punch marks made makes it easier to join up the dots :
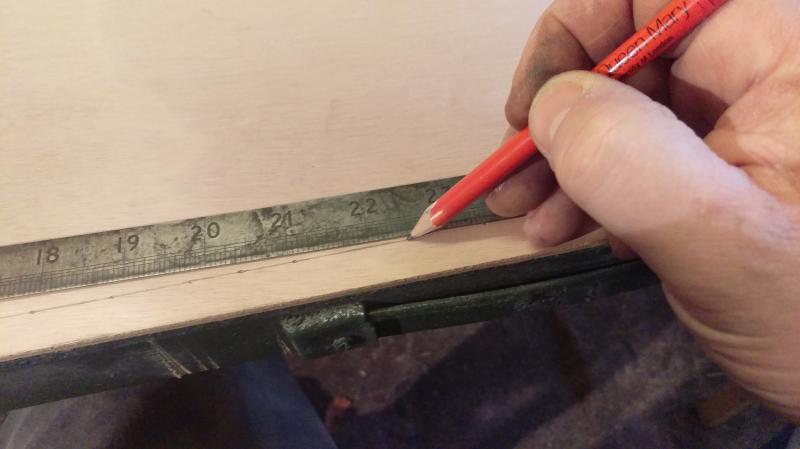
Marked and ready to cut but with a generous allowance all round :
Once cut you can use it as a template to mark and cut the opposite hand pieces :

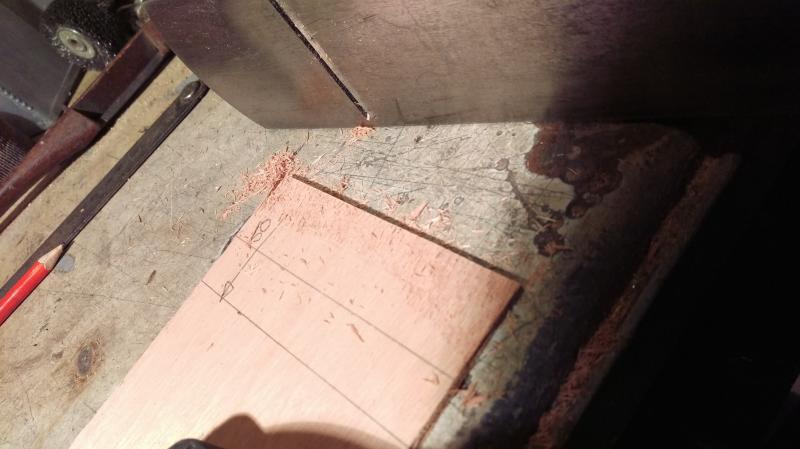
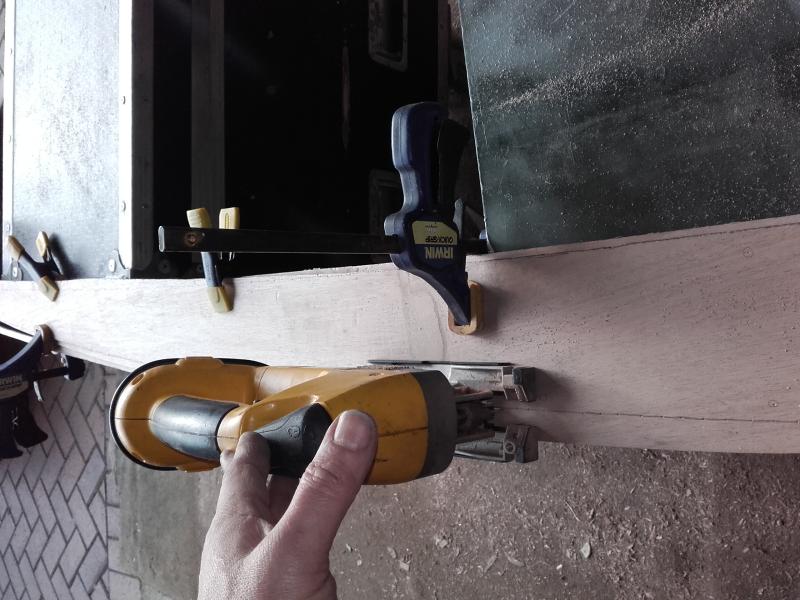
All pieces Hull and Side panels refs all cut. These sections will now need their respective 'scarf' joints completing. This is something I have never attempted before..... the instruction book gives some clear guidance but nothing like getting in some practise because I've only got one chance with my sections ....
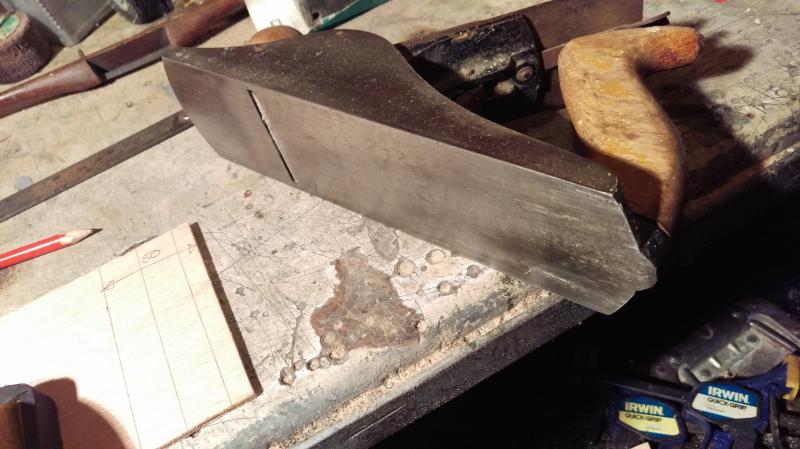
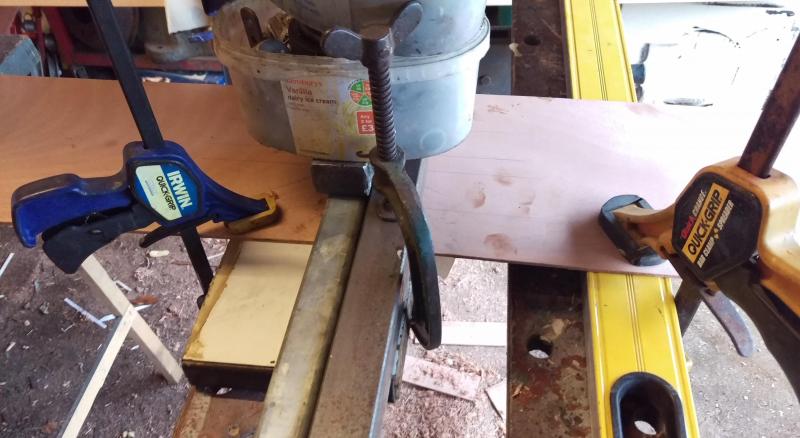
I cut a good 4" wide strip and clamped to the table. With freshly sharpened plane I managed to get this far... Started with one piece at a time and even attempted two clamped on on top to make a wider cut. Not good eneough though. Ensure your work table is rock-solid as you need 2 hands on the tool for steadiness. Changed bench and did one at a time ...
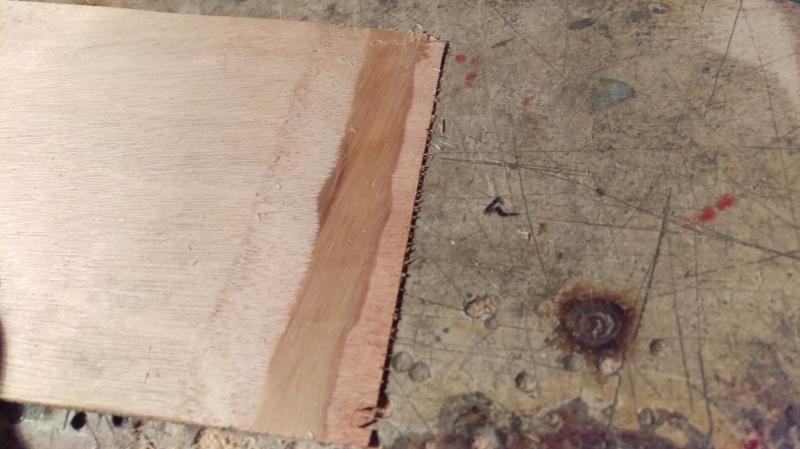
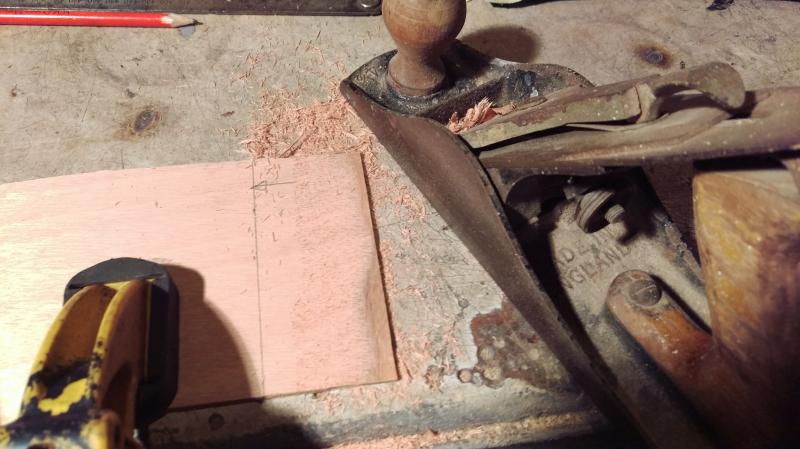
Still not as accurate as I think it needs to be... marking tram-lines across the width helps guidance and when tired of the plane a sanding sheet on a heavy metal block helped finish it off and improve the surface ...
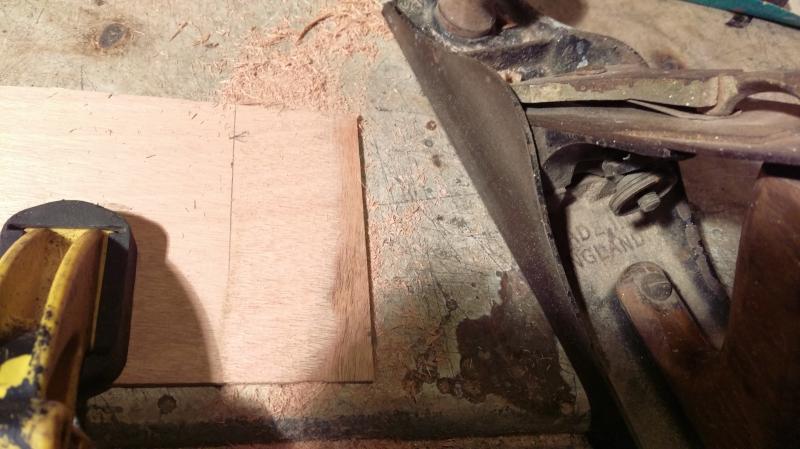
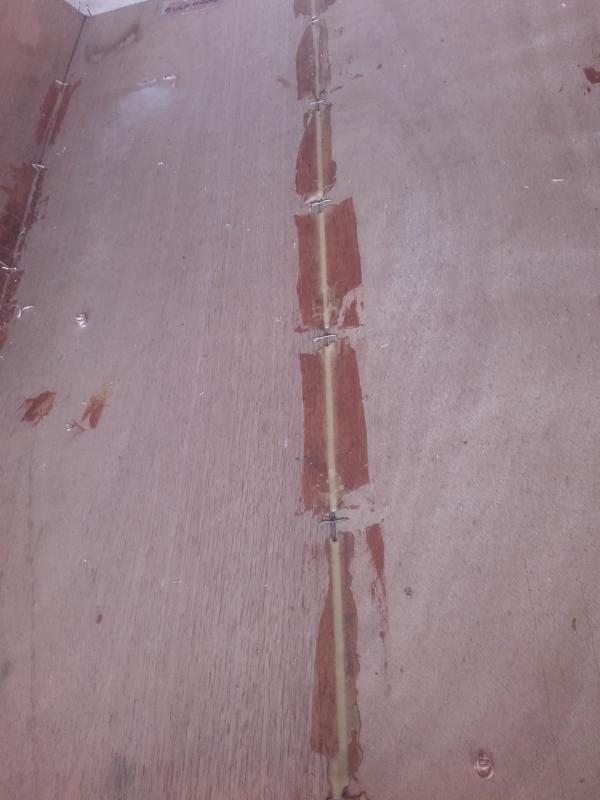
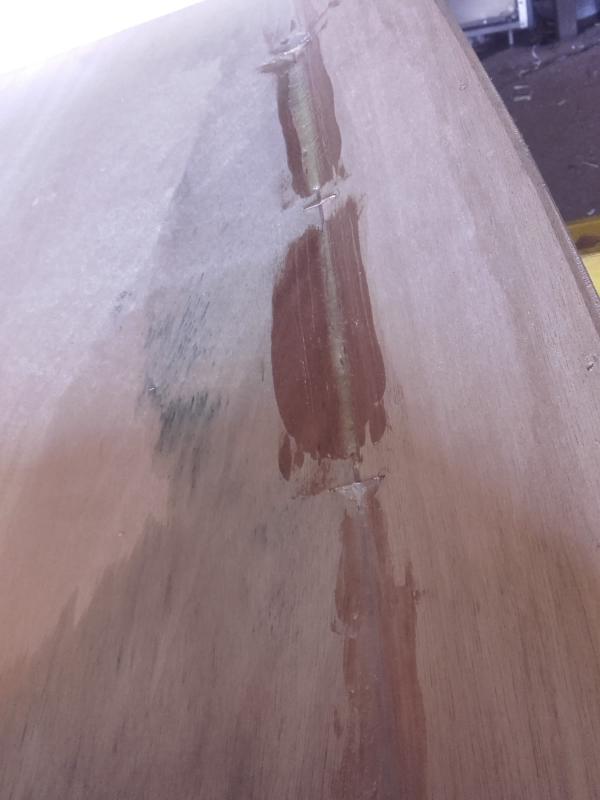
I did 3 more pieces all with an over-lap of approx 45/50 mm as recommended in the plans ... time to attempt some glue ..
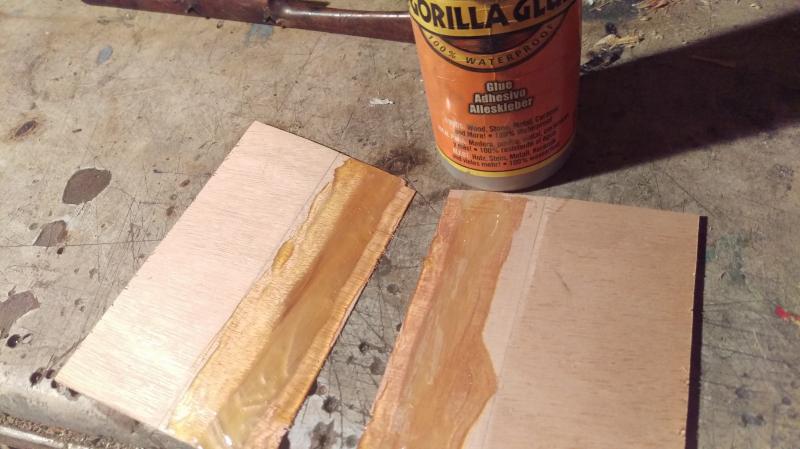
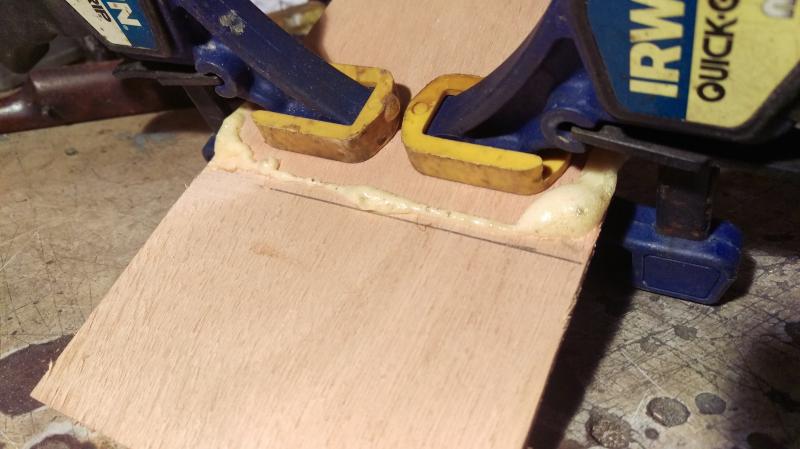
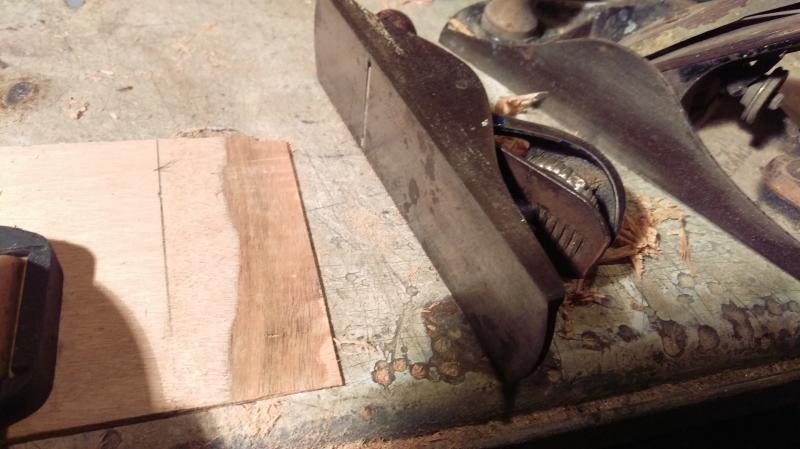
Clamped up as hard and even as possible ...
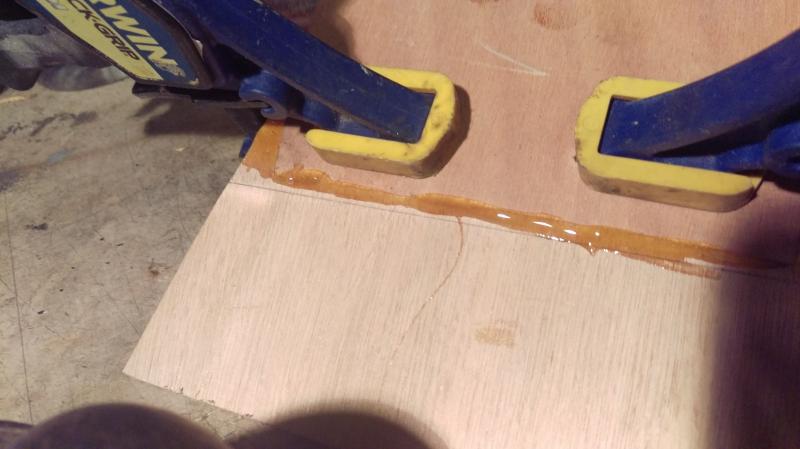
24 hrs of drying ...
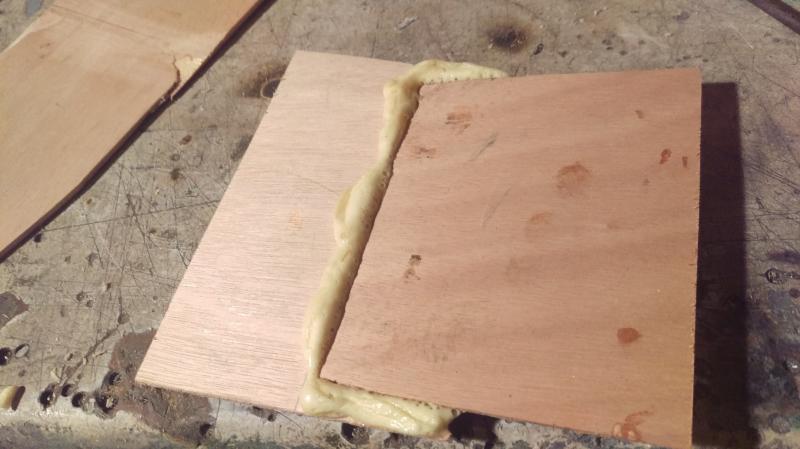
Version 1 is a bit wonky and remains twisted etc with visible steps where the edges needed more thinning, version 2 is improved and looks neater etc with decent edges ...
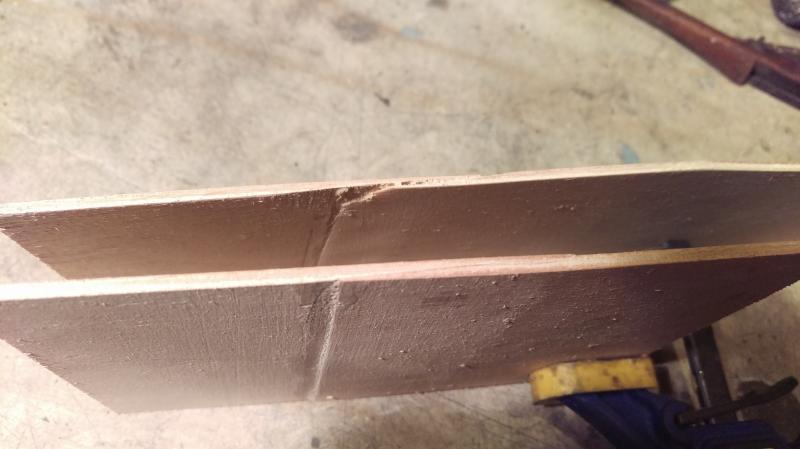
Interestingly the joint area with the extra adhesive has rigidized the plywood quite considerably, almost un-bendable going with the joint. Across the joint it remains typical of ply and still has some flex. When the joint is made and in the hull it will be covered with cloth and resin and tape both sides, so I have no concern about its structual integrity.

Next... think of a method to align the front and rear sections of the hull/sides so that the individual scarf joits can be made and then once joined they can be re-marked as a complete section for final cutting .... accurately ...
Last edited by Sam Taylor (6 Dec 2015 8:58 am)
Offline
#8 5 Dec 2015 11:32 am
- Derek Blay
- Member
- Registered: 16 Sep 2014
- Posts: 17
Re: Building from plans .... Wood Duck 12'
Hi
You seem to be bit apprehensive about cutting the scarf joints and with good reason - they are hard to do over the kind of widths you have to contend with, especially if you want a bright varnished finish.
Fyne Boats have supplied me with kits with 2 different methods of joining planks
a)Puzzle joints - like big jigsaw - mechanically excellent but poor appearance (In my personal view)
2) Stepped joints - here the plys are cut away to form a stepped appearance-gives a good gluing area, easy to align and virtually undetectable if carefully done.
Only snag is that the exposed ply on the first step is very vunerable to damage when handling the plank so I would make this my first job
Finally there is crude but effective method of a simple butt joint with a backing strip about 40mm wide.
If you arrange for the joints to be under the deck they are out of sight and anyway if carefully filleted and glassed over they are barely visible anyway.
Purists will shudder at this method but as I was once told 'You are building a pub and not a cathedral'
Hope this helps
Offline
#9 7 Dec 2015 4:18 pm
- Sam Taylor
- Member
- Registered: 22 Oct 2011
- Posts: 50
Re: Building from plans .... Wood Duck 12'
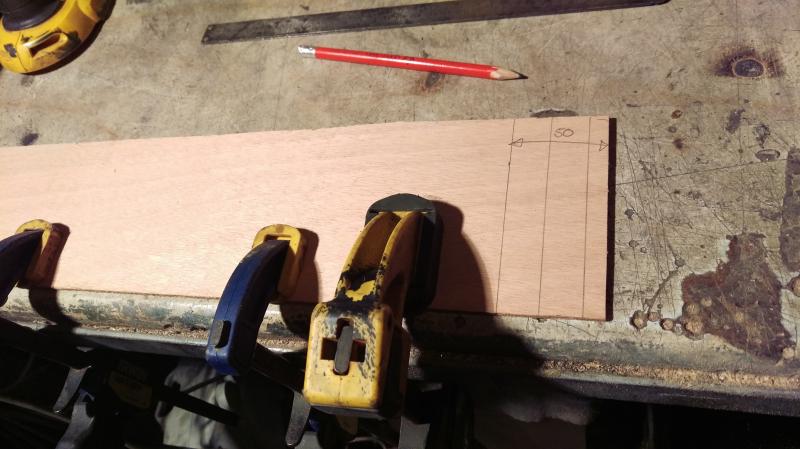
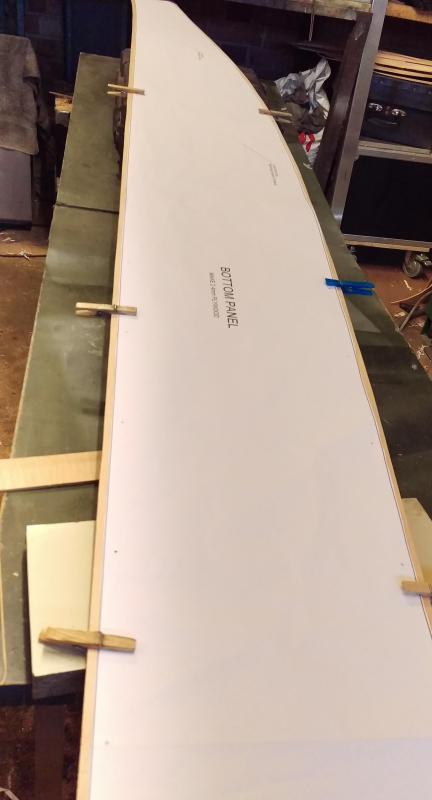
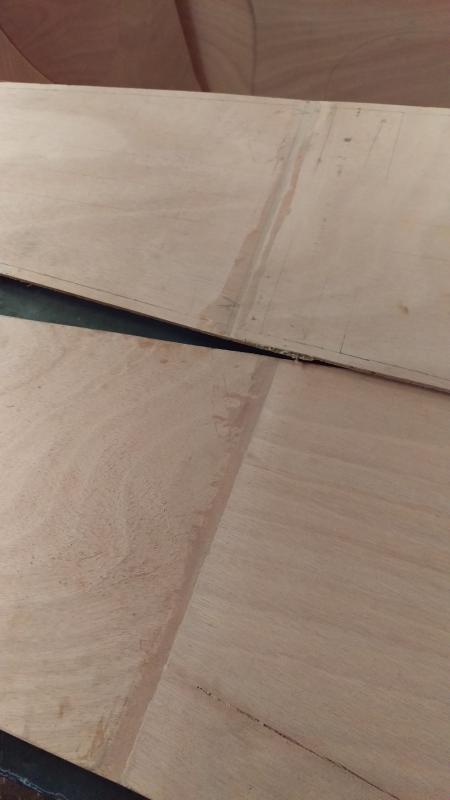
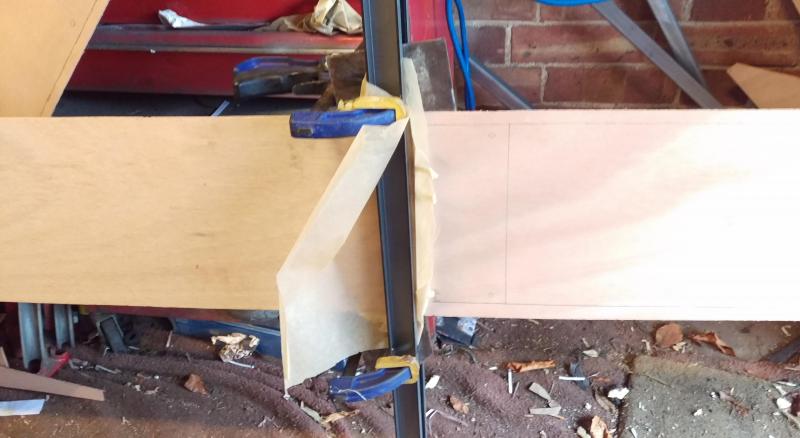
We've previously made our minds up that the Hull will be painted and the need for the ultimate finish across the scarf joint is thankfully diminished...but we appreciate the logic. Recent progress on actually joining our first complete hull-section from 2 pieces. Had to give this some thought on how to get the joint as exact as possible and still leave enough material all-around for the final template shape, but i think we've achieved something thats useable. Heres the issue, one piece is 8 ft long and 1 piece is 4 ft long ...
The joint areas are marked from the template but the final actual position can vary according to how wide and how well the scarf joint is made ...
A trial fit, first of many shows how it should all lie together ...
How we ensured the correct positioning was solved by over-laying the pattern and checking again. pegging the template ensured it laid flat and as accurate as possible ...
Shown at the bow end the potential for error is exagerated in this pic but a reminder of the need for accuracy where possible ..
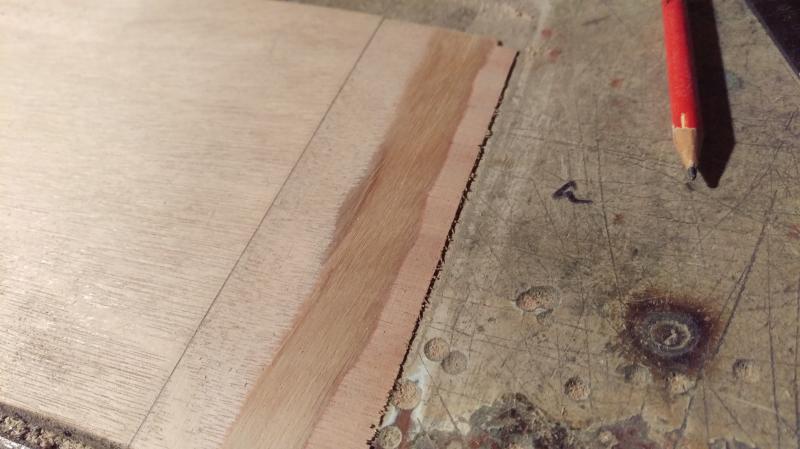
Marking some tram-lines across the panels helped with repeatability at the joint area ...
A test of the clamps intended for the joint ...
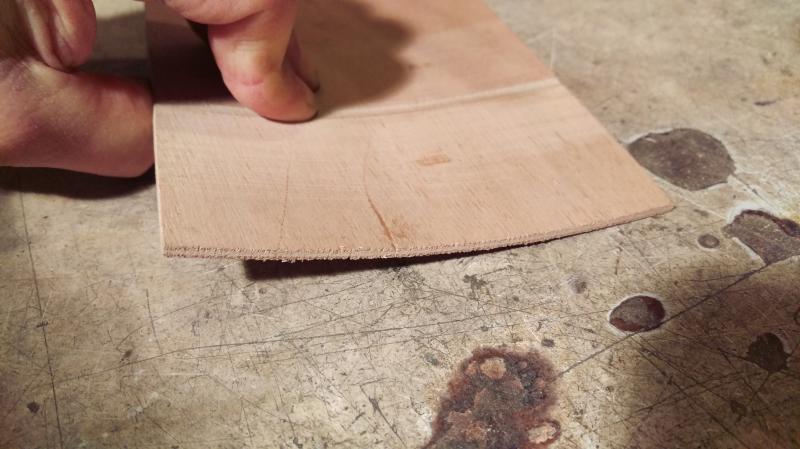
Jointing proved less stressful than I'd imagined, all the old tricks - keep the plane sharp, small cuts, slow and steady etc.. Once done, if there was a ragged edge then a quick trim with a sharp blade neatened the edge up considerably.


And finally our first joint is made ...
Offline
#10 8 Dec 2015 9:29 pm
- malalajan
- Member
- Registered: 8 Dec 2015
- Posts: 1
Re: Building from plans .... Wood Duck 12'
Hi Sam,
It looks like you are doing a great job, I am also starting on my first ever build which is also a Wood Duck 12, from plans. I have set up a blog site and can't be bothered to duplicate on this site. If you do, have a look for the bit about the transom size. On my plans it was wrong.
i hope you find something useful, I will definitely keep an eye on your site to see what I can learn.
regards
Jan

edit: The administrators have kindly allowed me to add the link to my build log:
Last edited by malalajan (9 Dec 2015 7:47 pm)
Offline
#11 9 Dec 2015 2:37 pm
- Fyne Boat Kits
- Administrator

- From: Cumbria, UK
- Registered: 22 May 2011
- Posts: 156
- Website
Re: Building from plans .... Wood Duck 12'
Jan,
Sorry about your problems with links but there is a temporary bar placed on links to help us keep the rubbish off the forum. We get in the region of 100 posts each day that are merely links to sites selling items that are totally unrelated to boats and are trying to filter these out. You should now be able to insert links.
Offline
#12 12 Dec 2015 11:11 am
- Sam Taylor
- Member
- Registered: 22 Oct 2011
- Posts: 50
Re: Building from plans .... Wood Duck 12'
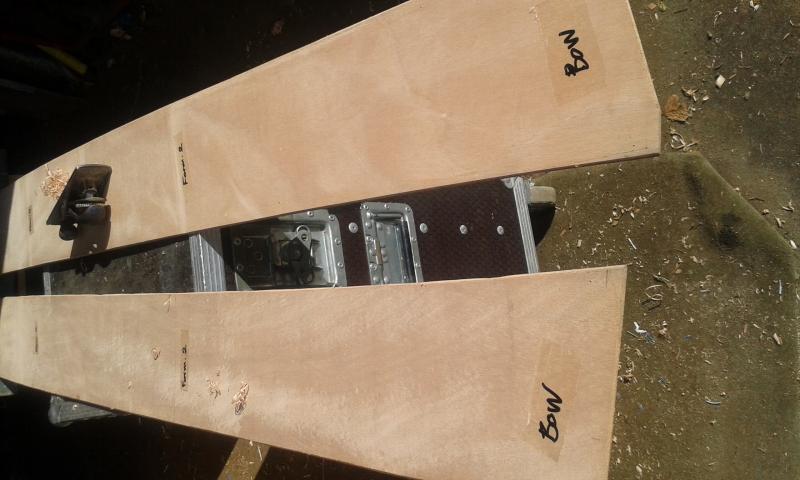
Thank you for the link to Jan's Wood Duck, always interesting to see how others approach the issues and find solutions. Very useful. Some progress on our first jointed / glued Hull sections, the completed joint as a distinct 'good' side and 'not-so-good' side, thankfully as a pair we can put the best side outermost. The good & not so good joins :
Refitting the template now lets us see how accurate the alignment was whilst joining and if we need to make any correction :
Thankfully, only this small correction to one end, might even been due to shrinkage of the paper template :
Clamped both halves together ready for a double cut all the way round :
Jigsaw made short work of both halves. I moved the clamps as required to avoid the saw :
Whilst clamped I used the belt sander to make the edges as neat as possible :
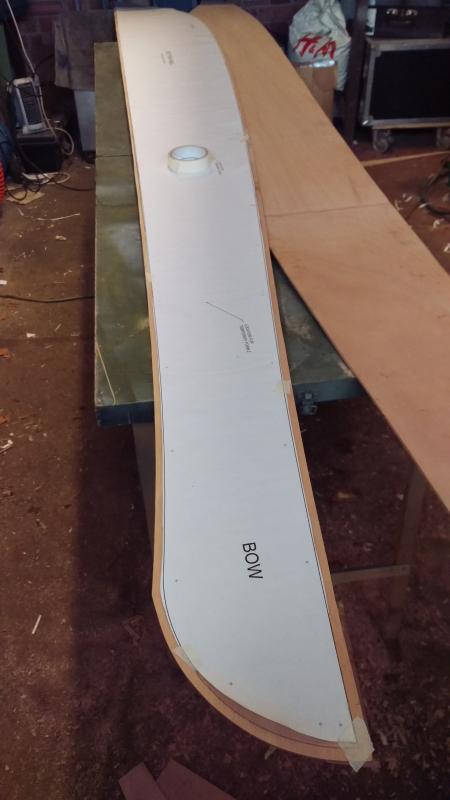
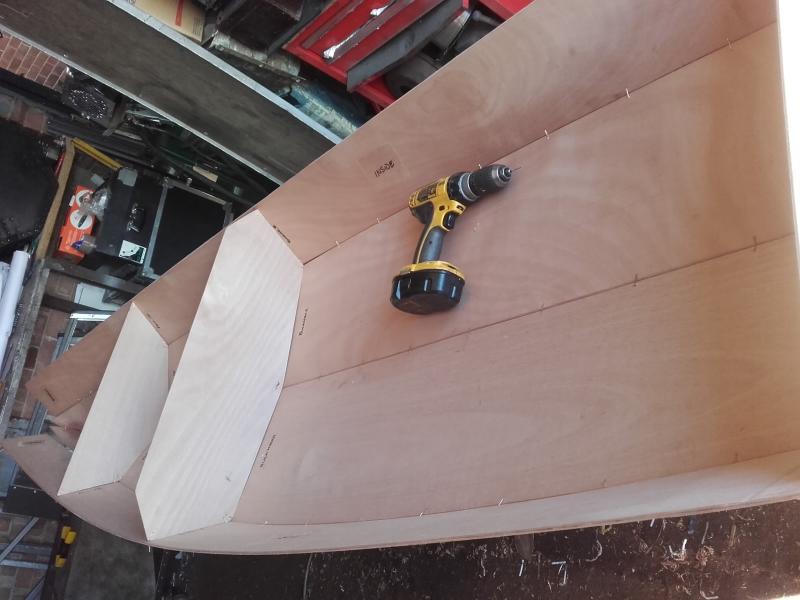
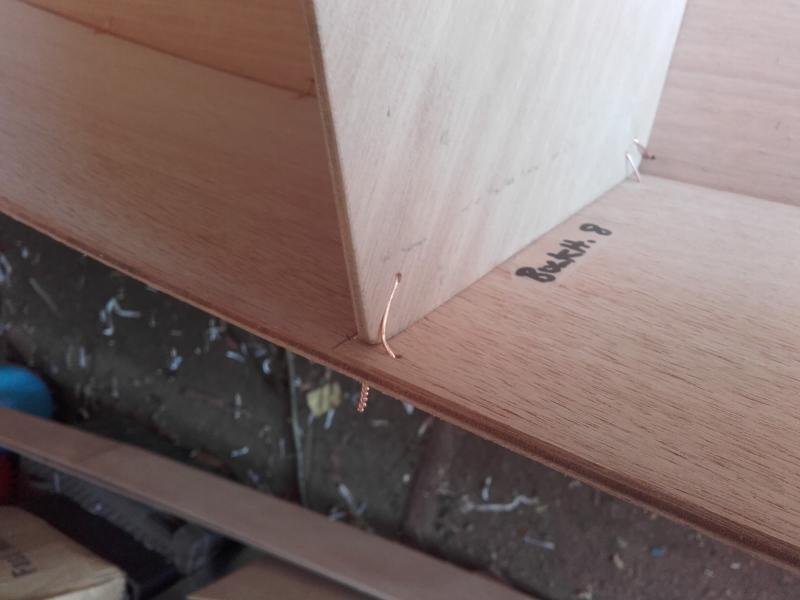
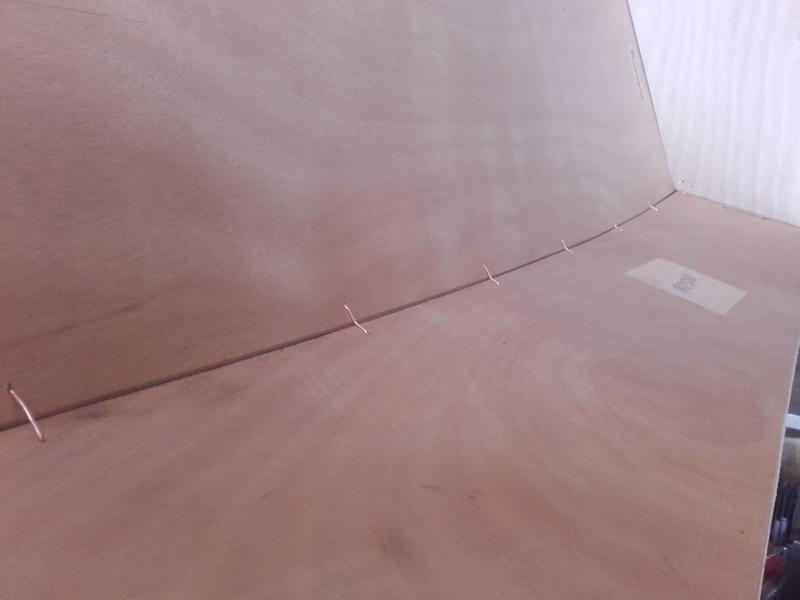
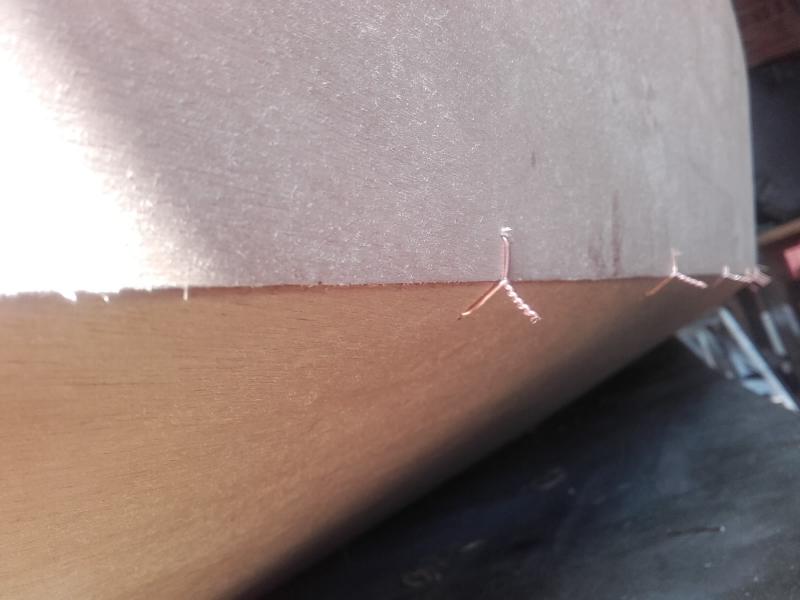
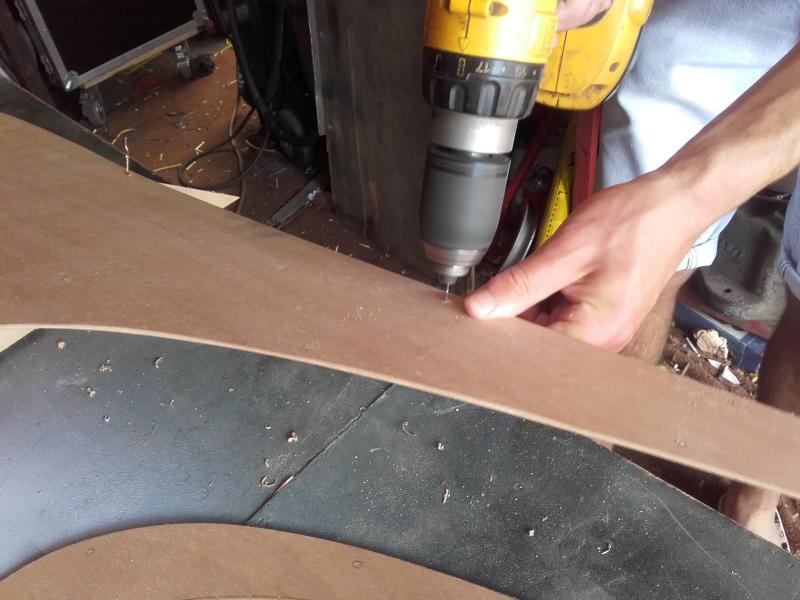
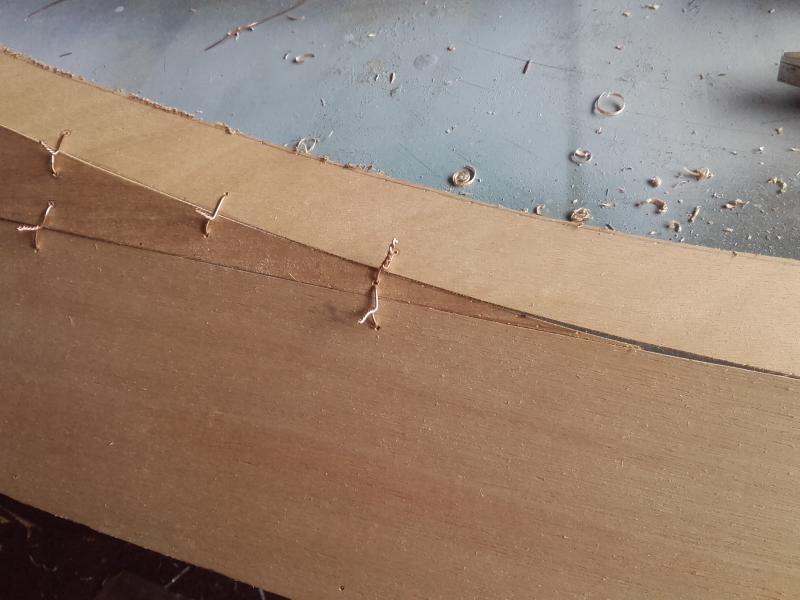
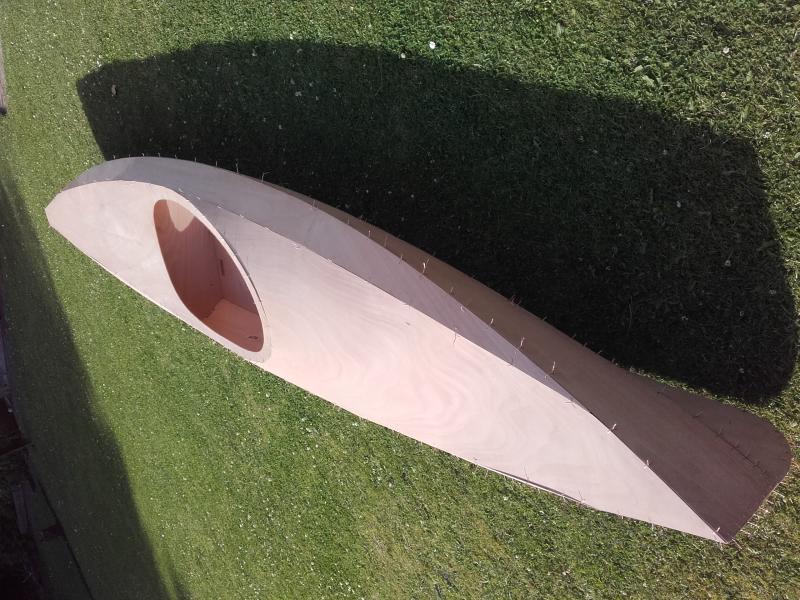
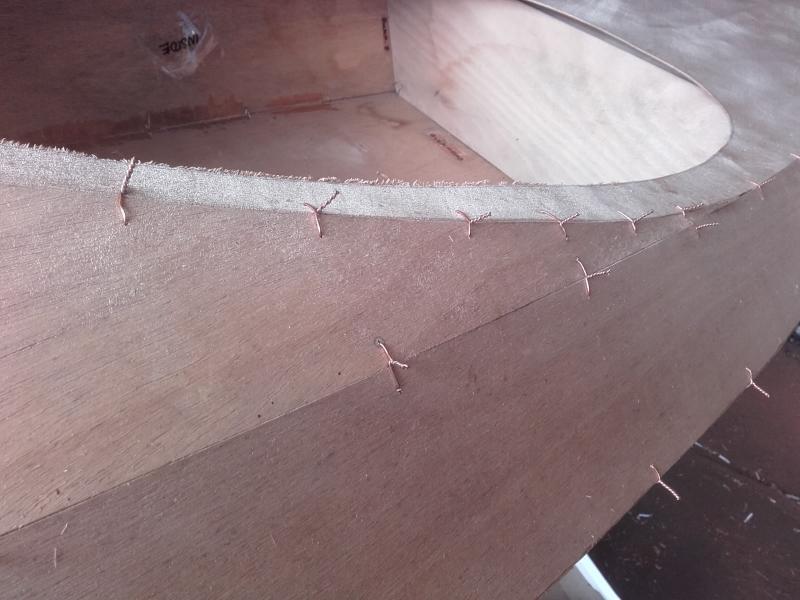
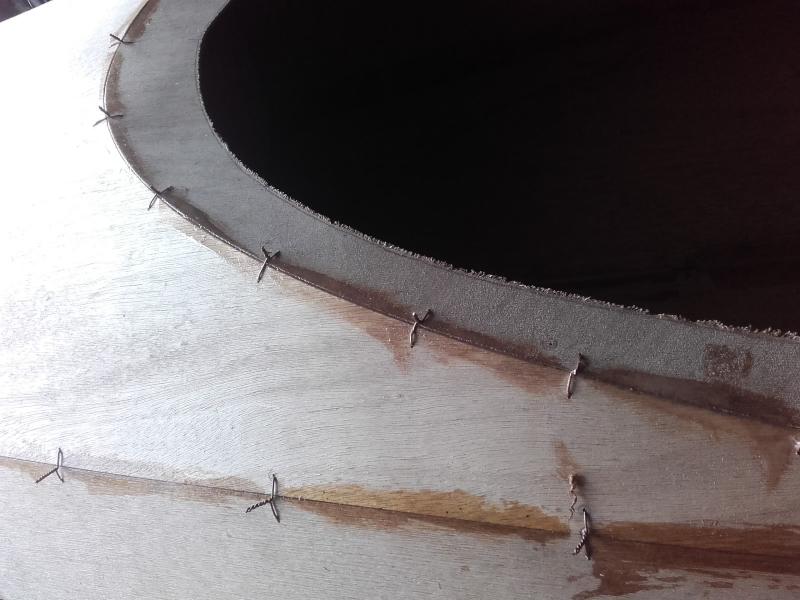
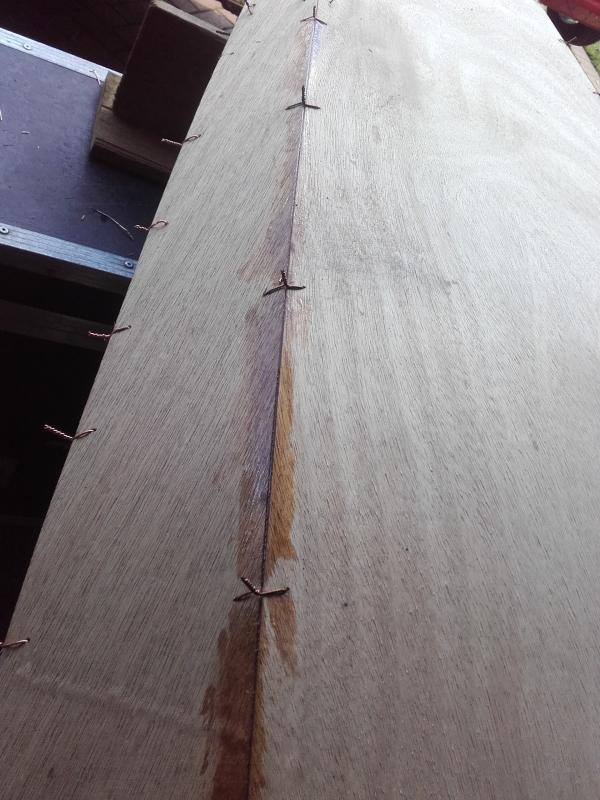
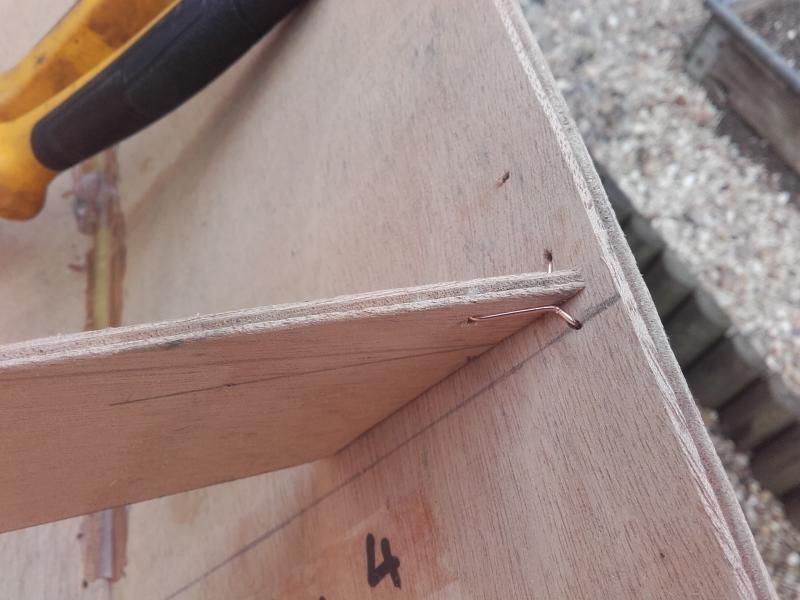
drilled the holes for the wires, so we have our first completed 'pair' of panels. so far so good :
Last edited by Sam Taylor (14 Dec 2015 1:26 pm)
Offline
#13 14 Dec 2015 4:35 pm
- Sam Taylor
- Member
- Registered: 22 Oct 2011
- Posts: 50
Re: Building from plans .... Wood Duck 12'
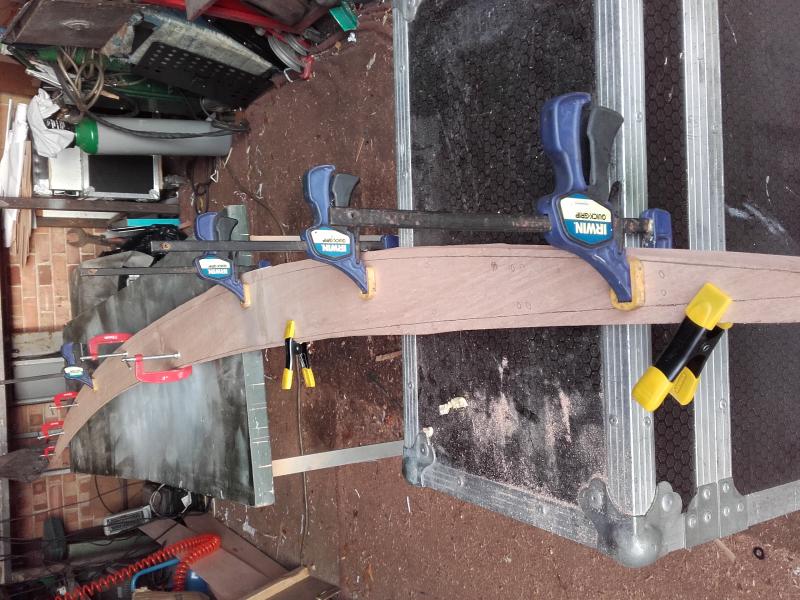
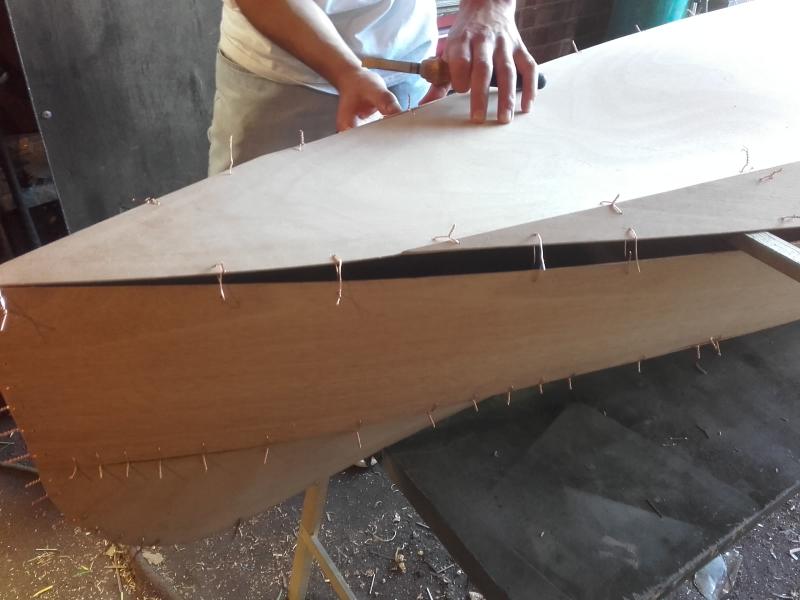
Moving on to the shear panels, successfully marked out using the remaining pieces of ply. Given their narrow and flimsy shape, I can see that cutting might need more than 2 hands :
On the subject of making scarf joints, again I achieved something useable here on the ends of these shear panels but a problem I've had to overcome at the gluing stage is the tendancy for the panels to want to slide apart as the clamping pressure is applied
I've managed to limit this by ensuring that the clamping of the lower half captures the bench and an additional clamp stops the top half from wanting to seperate away. Only when happy with the alignment (?) do I increase the pressure of the clamps at the joint and add a anything I can find thats heavy !
After a couple of hours and satisfied the join has taken / set I remove it from the bench and just reclamp with strips of metal / wood until fully dry - at least the next day. Although my impatience will likely mean I won't wait ....
As before, ensure that the refitted template has got plenty of material all around ready for a last re-mark and final cut. I intend to leave the 'ends' with an allowance to ensure they match with the lower sections when wiring begins ...

Offline
#14 20 Dec 2015 12:28 am
- David Wood
- Member
- From: South Devon
- Registered: 15 Apr 2015
- Posts: 25
Re: Building from plans .... Wood Duck 12'
Some fascinating and detailed photos here.
Clamping of scarf joints can indeed be annoying. I put firm barriers at the ends away from the joints to prevent slippage; it seems to work.
Offline
#15 20 Dec 2015 2:15 pm
- Yambo
- Member
- Registered: 17 Jul 2014
- Posts: 36
Re: Building from plans .... Wood Duck 12'
For a couple of scarph joints when I was building my Skerry I used cocktail sticks to prevent slippage. Before cutting the scarphs I lined everything up, drilled 8 or 9 holes (about 2 mm iirc) for the cocktail sticks - so they were a tight fit. After cutting the scarphs and lining up the panels again I popped the sticks in the holes and they kept the panels from slipping. Trim them off and clamp. I didn't use this method on all the panels but I was trying a few different methods as I too was a beginner and it worked OK. The boat hasn't fallen apart yet anyway . . .
Offline
#16 21 Dec 2015 2:32 pm
- Sam Taylor
- Member
- Registered: 22 Oct 2011
- Posts: 50
Re: Building from plans .... Wood Duck 12'
Thank you for that suggestion. I did contemplate using some nails (in the waste allowance around the edge) to avoid joint-slippage, but I guess whatever is easiest for each builder ... becomes their solution as I'm already short of bench space!
The 2 side-panels have now been de-clamped and again I have 2 good faces and 2-not-so-good, but all useable none the less.
Offline
#17 17 Jul 2016 9:24 pm
- Sam Taylor
- Member
- Registered: 22 Oct 2011
- Posts: 50
Re: Building from plans .... Wood Duck 12'
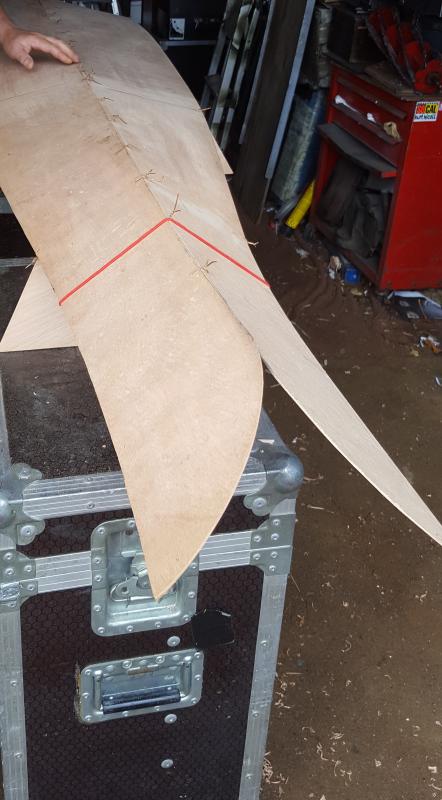
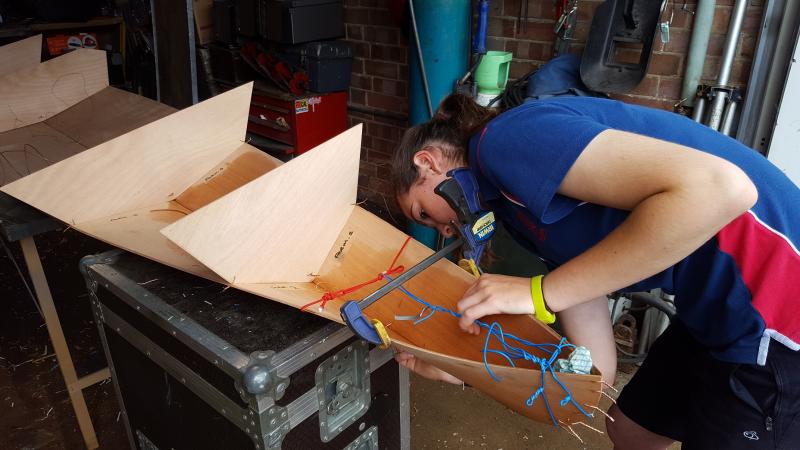
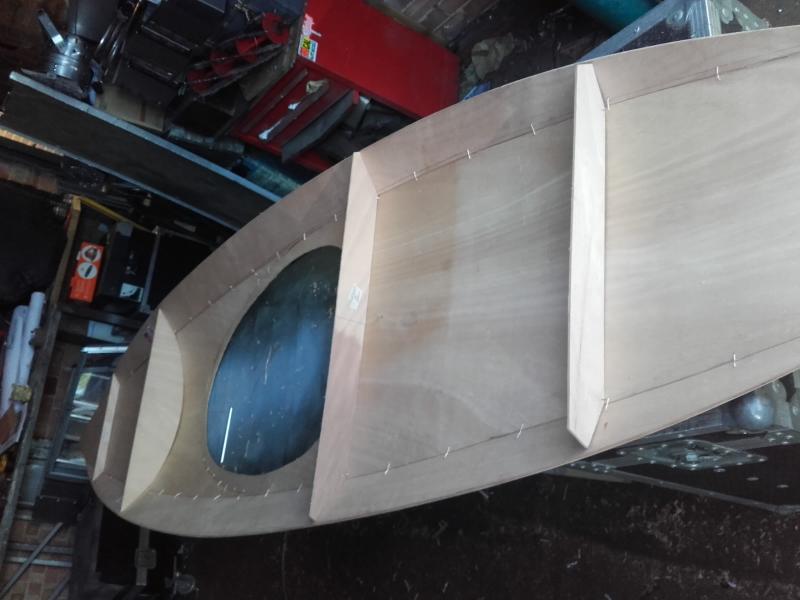
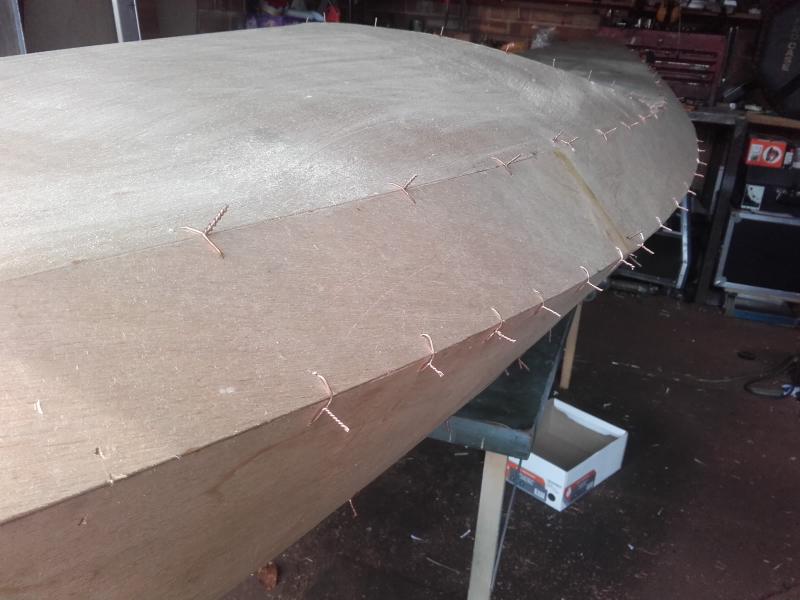
At last been able to make some progress and finish of the side in-fill pieces after completing all the scarf joints. These have been particularly flimsy and diffcult to handle / manourvre for final cutting and shaping but with patience we got there and we've ended up with something hopefully useable. With these last pieces shaped we are getting close to assembling things and wiring. 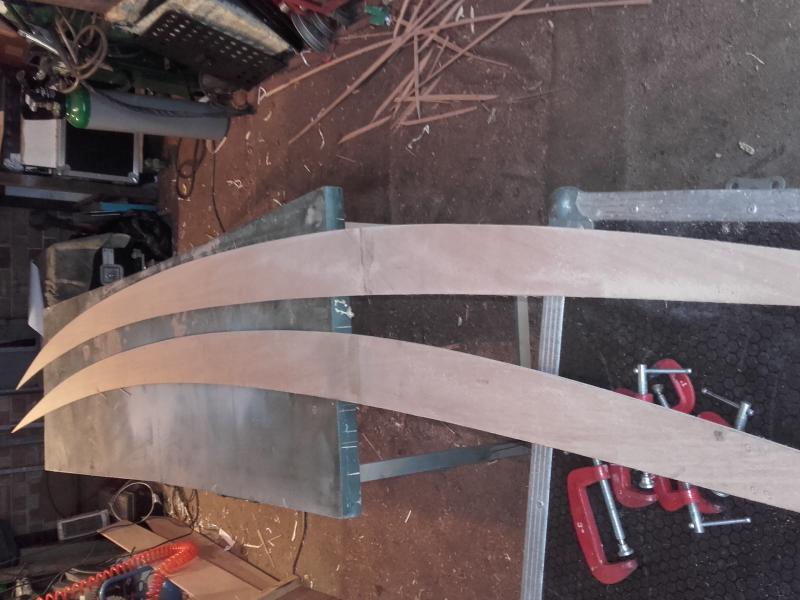
Time to make friends with your plane and as instructed chamfer all edges of all panels all the way round. Made a choice of which faces would become the inside and outside so everything becomes pairs. The plane makes quick work of the required angles. The bow and stern require more thinning as they need more bending and forming, but more of that to follow. Finally got to have the pair of hull panels wired together ready to open out to accept the formers.
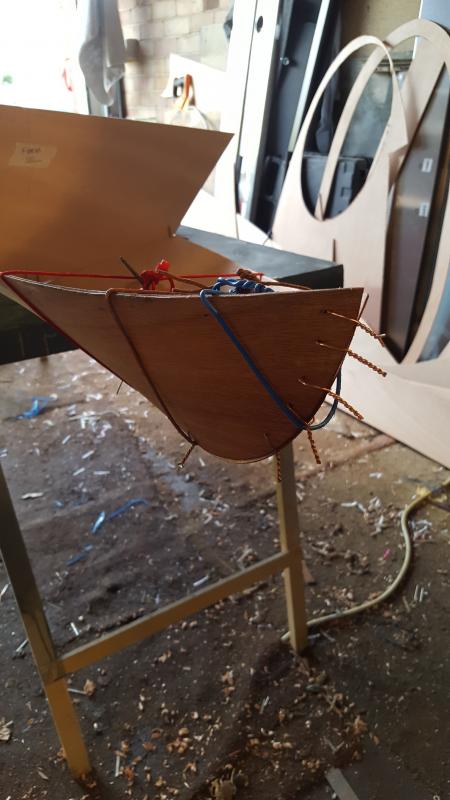
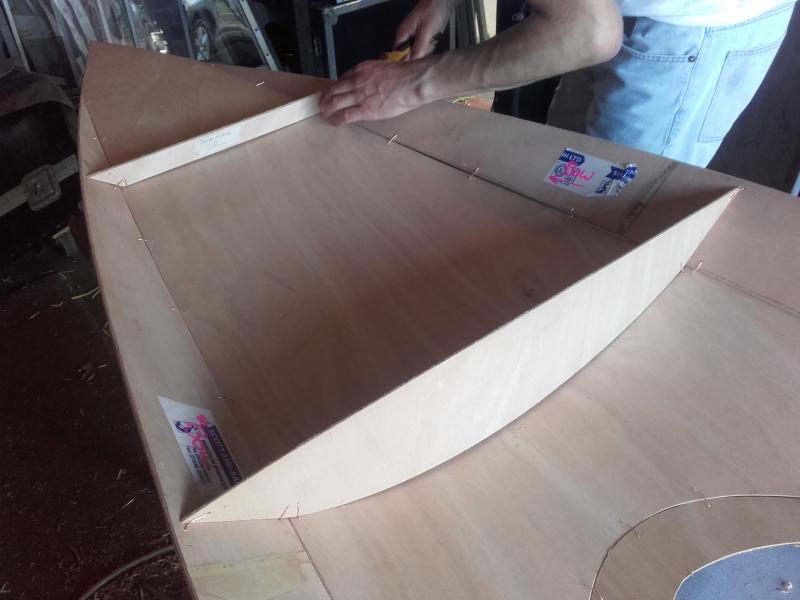
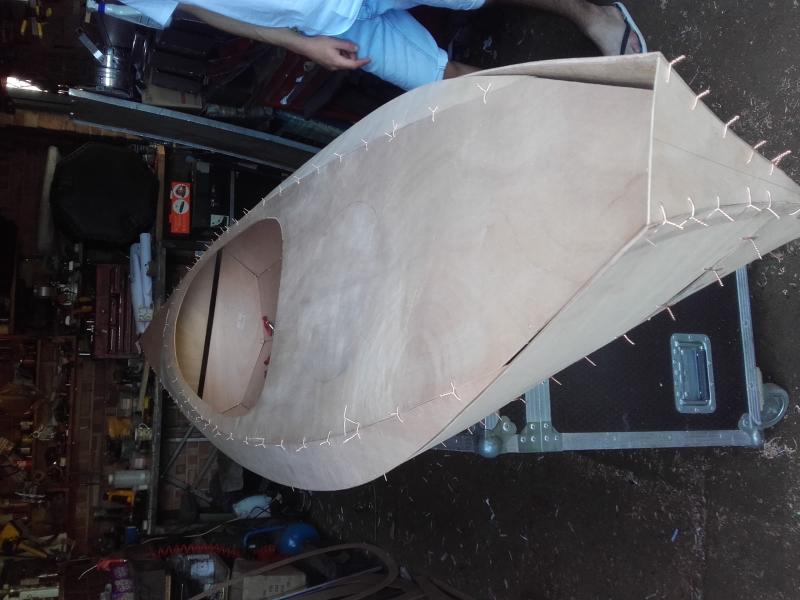
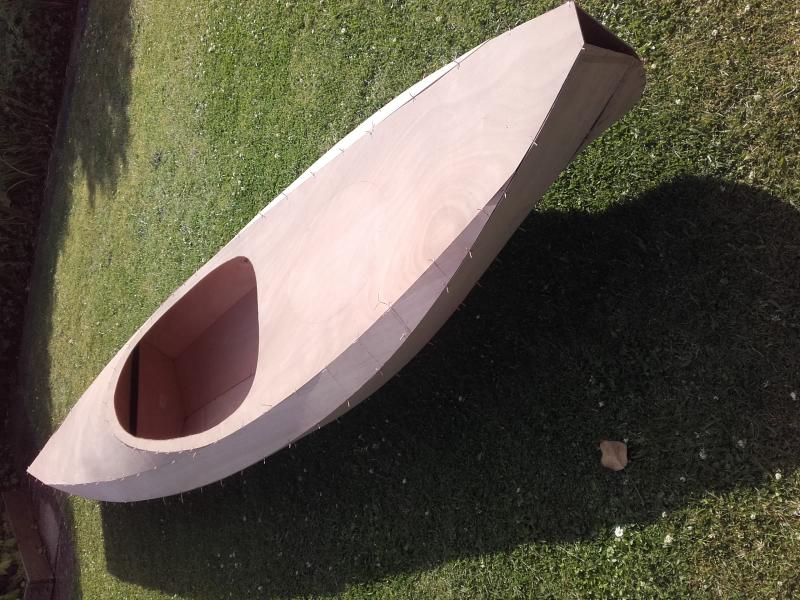
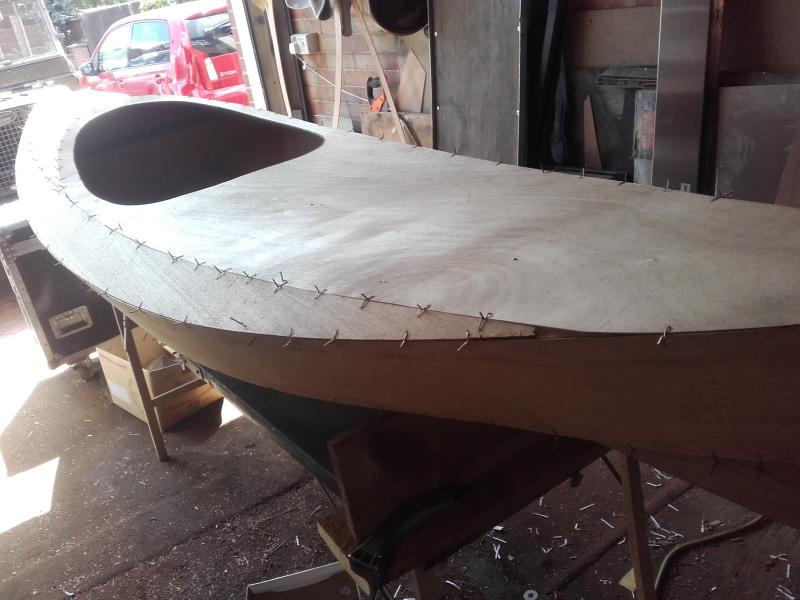
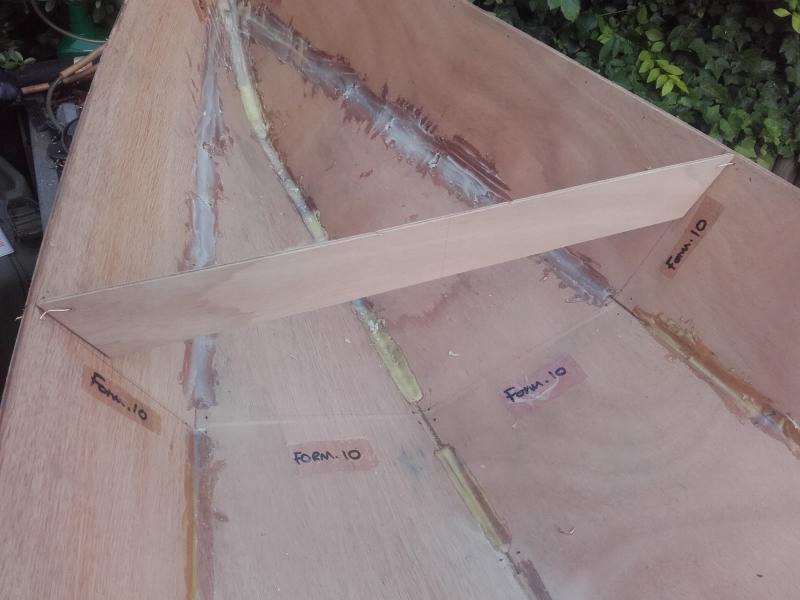
With the hull panels now wired together its time to wire together and open out to start the hull. Using the hull formers helps show the extent of the final shape. The stern and bow shaping look a bit daunting at this stage but the plan is to get the side panels on and finally get some shape into it.
With plenty of copper wires cut we soon reached this stage of hull panels together, side panels on and formers also wired in. Reasonably happy that things will come together at the bow but the stern did present a few questions. Going for a reasonably tight wire fixing it soon becomes rigid. The shaping & symmetry so far we are happy with, with no problems as the hull panels and side panels follow the outlines of the formers. Thankfully I think our accuracy in making the best matched pairs of all panels is paying dividends at this point.
Last edited by Sam Taylor (29 Jul 2016 8:48 pm)
Offline
#18 30 Jul 2016 9:11 pm
- Sam Taylor
- Member
- Registered: 22 Oct 2011
- Posts: 50
Re: Building from plans .... Wood Duck 12'
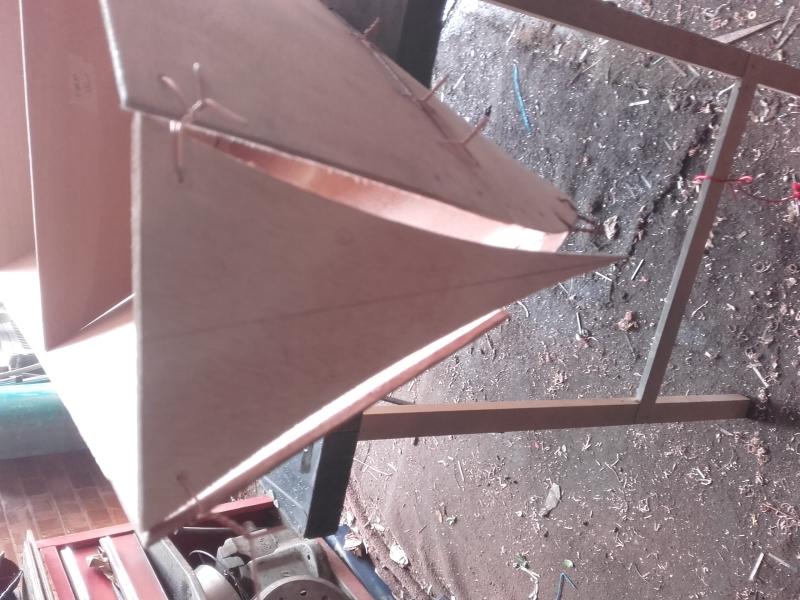
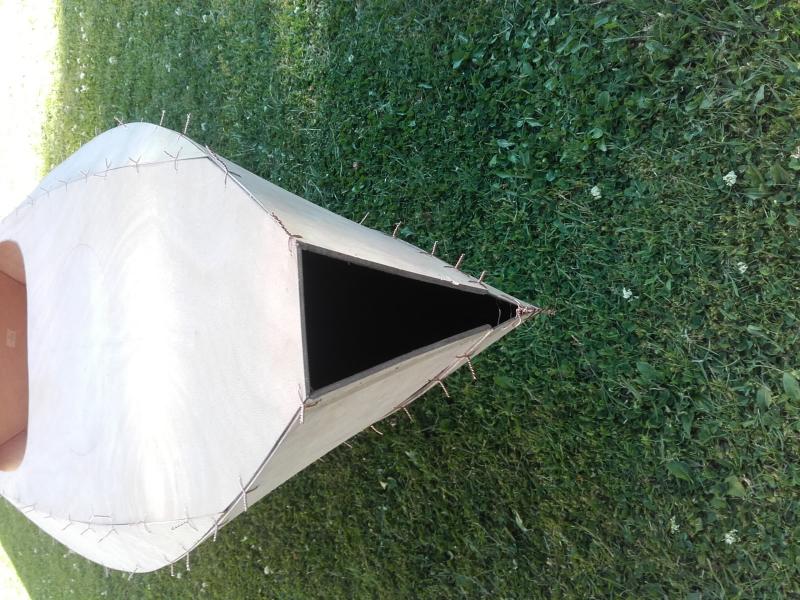
The upturned hull with the bow/stern ends jut to form up. What seems like an impossible gap to form/join
Lots of wetting and damps cloths it does start to come together..

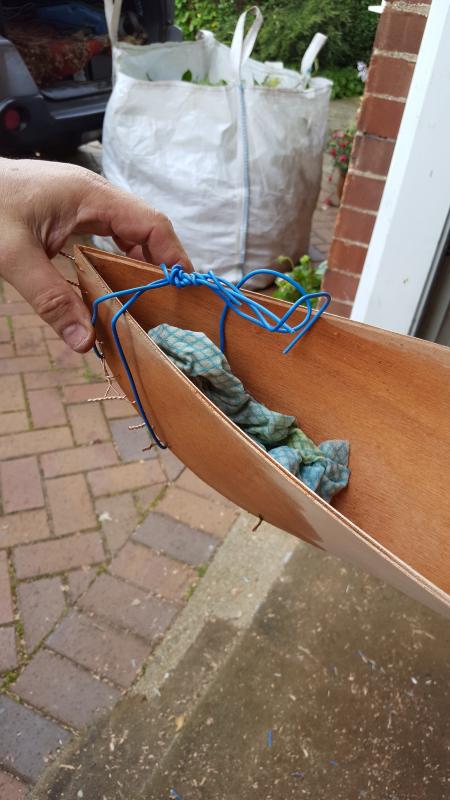
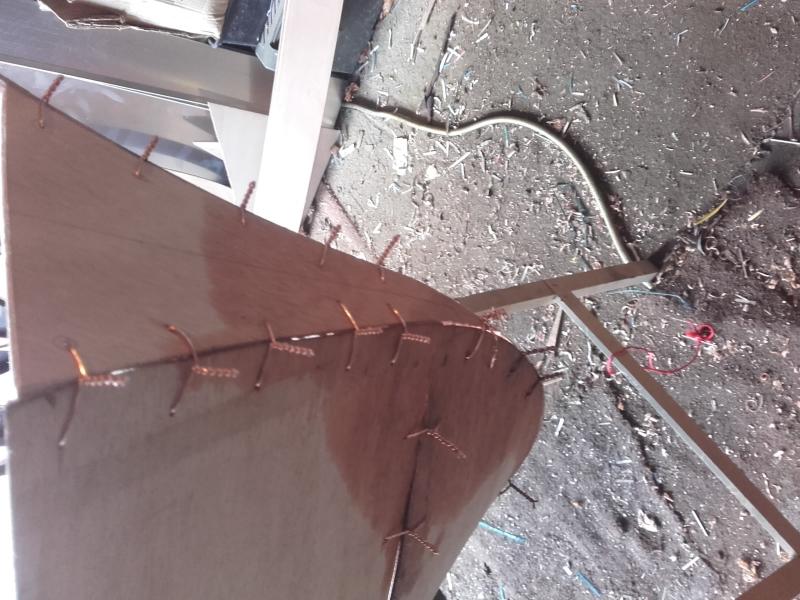
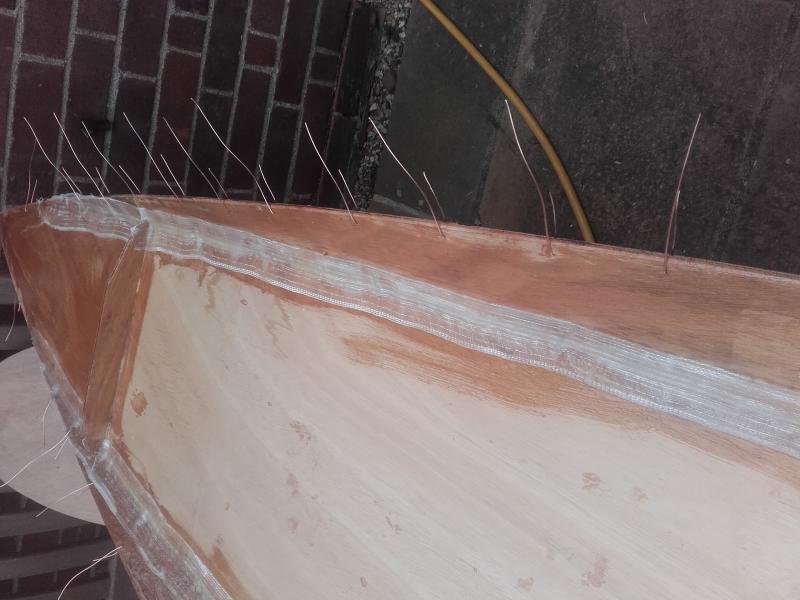
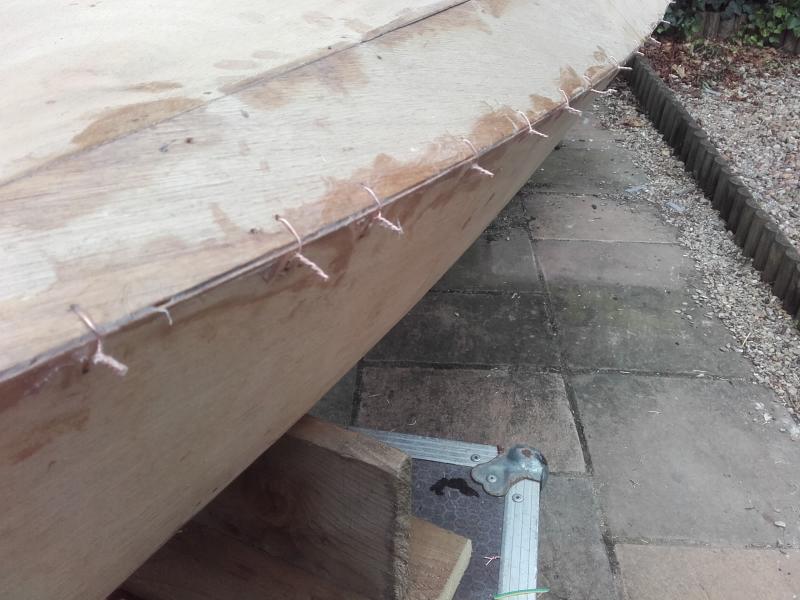
Lots of hands and wires/clamps but eventually all the wires were in place. A surprisingly hot day and the damp ply sooned dries out, so lots of wetting was required.
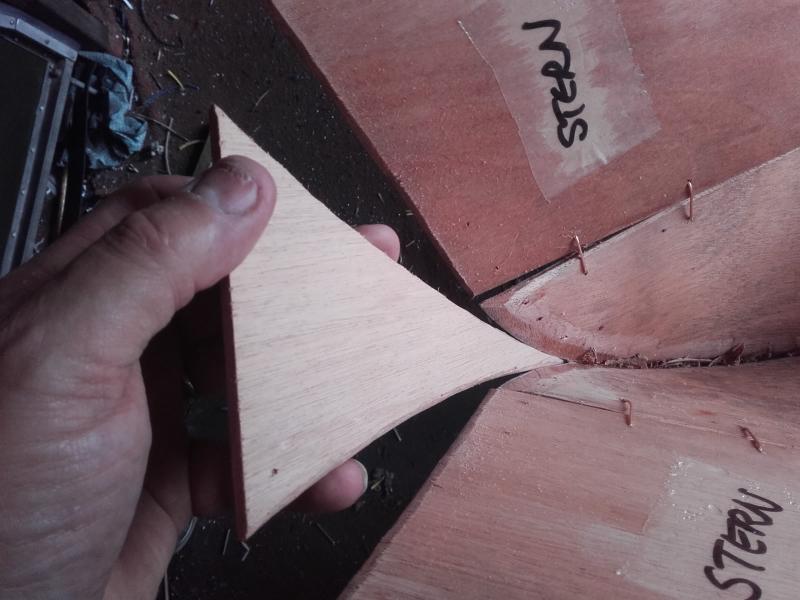
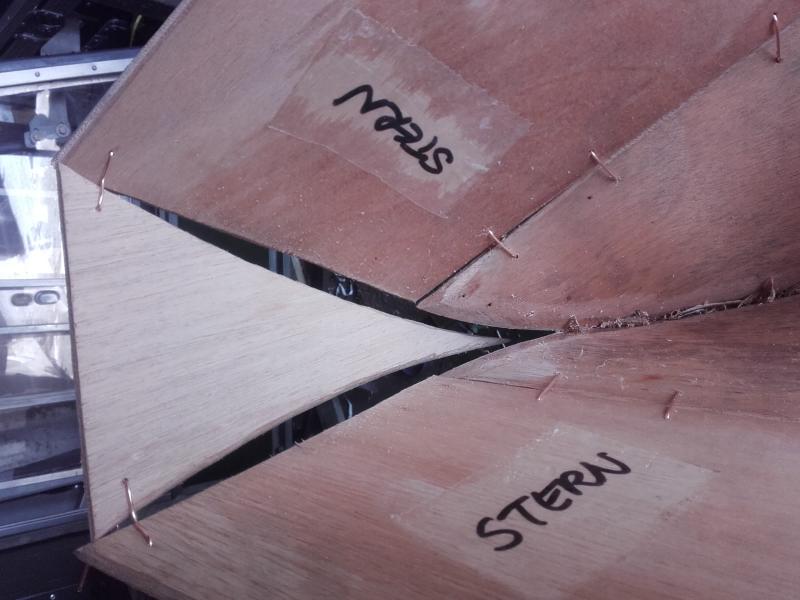
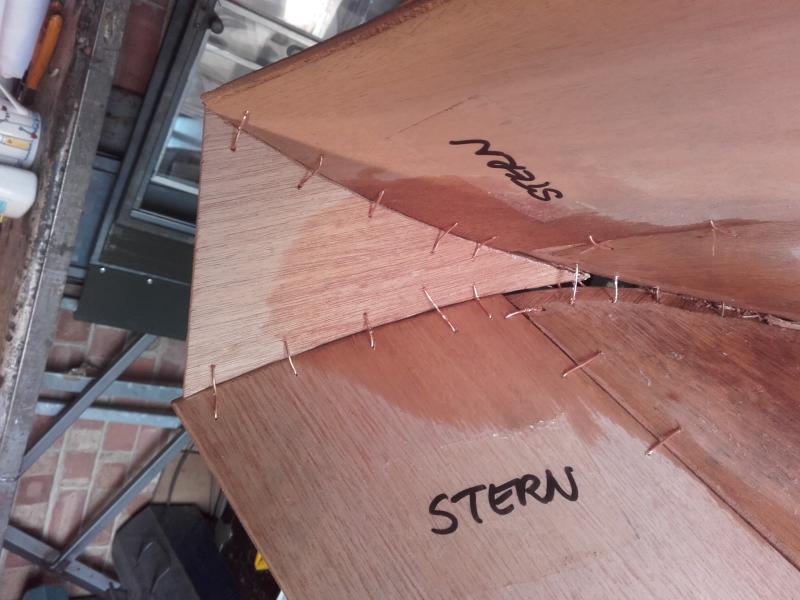
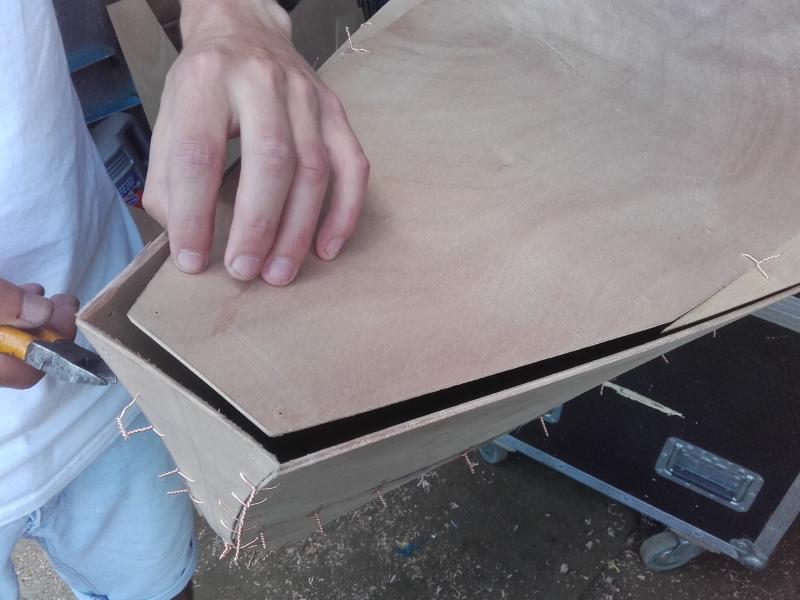
Hers a few pics of the Transom going in to complete the stern area. Not totally in vain .... but we did encounter a problem..
Following the instructions we turned our attention to the Deck and began wiring all the pieces together ... many hands make light work. Reasonably straightforward we soon got all the pieces together with forms in place although it remains a bit flimsy at this stage.


Finally with a complete Deck assy we got to match it with the Hull for the first time and make it look the Picture ! Spot the missing Transom .... we think there is an error in the plans as the Transom piece is clearly 20mm wider at the top join when next to the aft-deck. We removed it for the purpose of fitting the deck.

Last edited by Sam Taylor (30 Jul 2016 9:27 pm)
Offline
#19 8 Aug 2016 1:40 pm
- Sam Taylor
- Member
- Registered: 22 Oct 2011
- Posts: 50
Re: Building from plans .... Wood Duck 12'
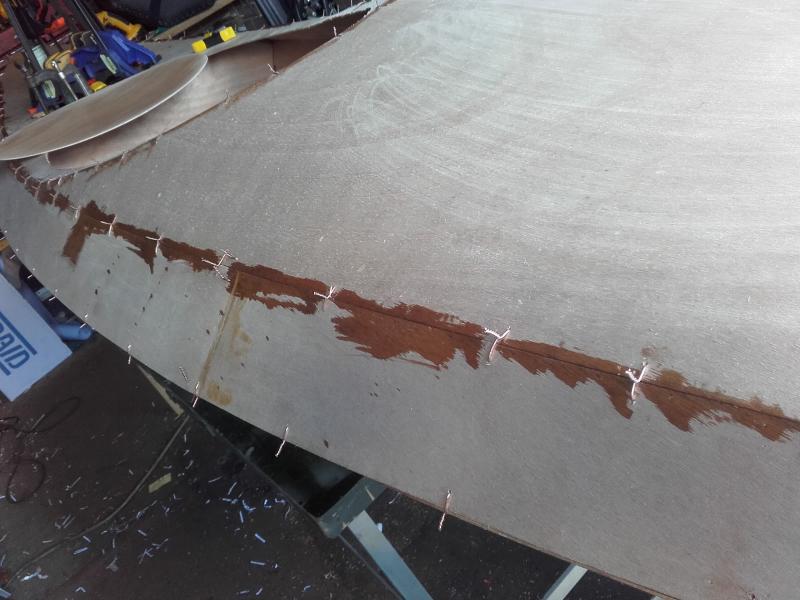
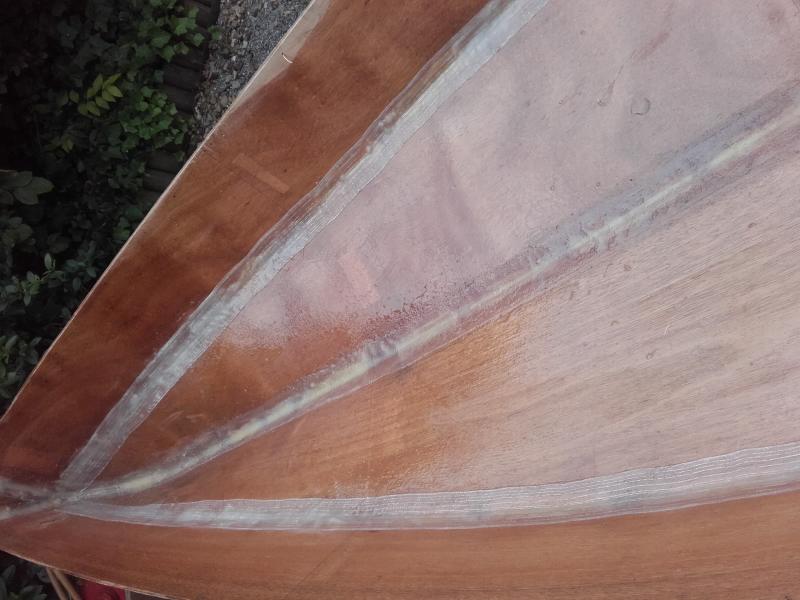
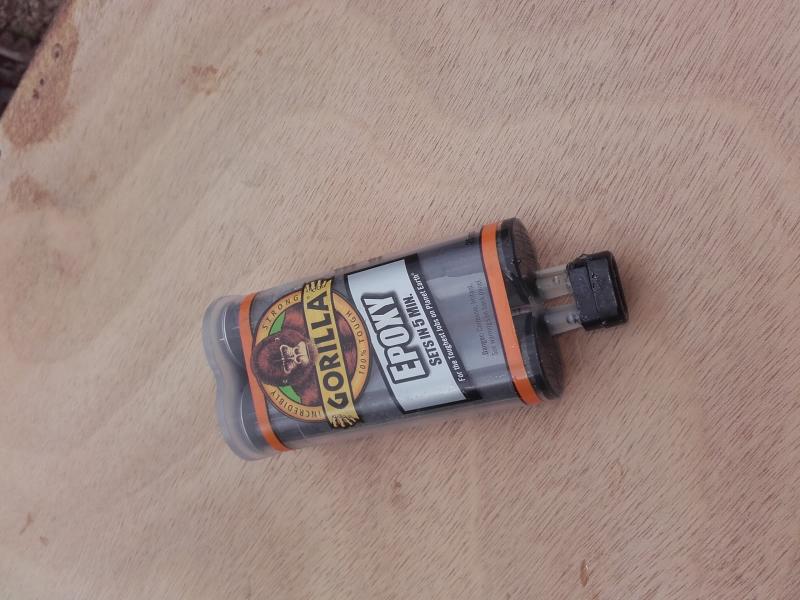
Following the instructions we have tacked as many of the Hull joints in between the wires and also on the Deck assy to start to get some strength and shape. Once again wiring the deck to the hull to allow it all to cure in 'shape' needs as many hands as poss. Applying thickened epoxy in between the wires as its intention to remove as many / all the wires.
We were concious of the fact that we had to apply the epoxy to the Hull and deck and then still re-wire everything so a plan of action was regulalry discussed !
Once rewired things were looking as they should, the shape & form all coming back quite easily without to much stress. The plywood after this amount of time is clearly starting to remember some of its shape...
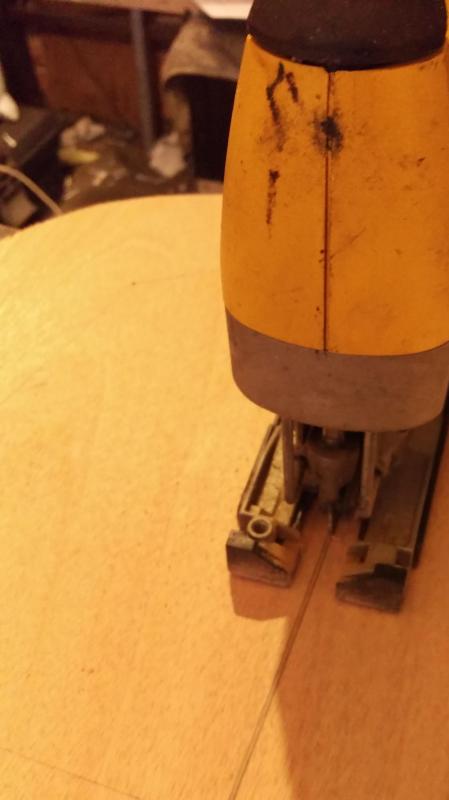
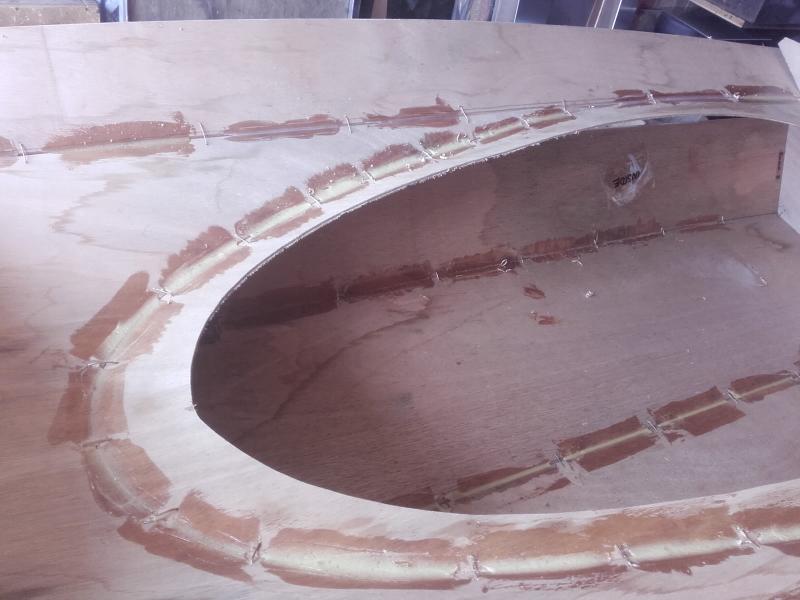
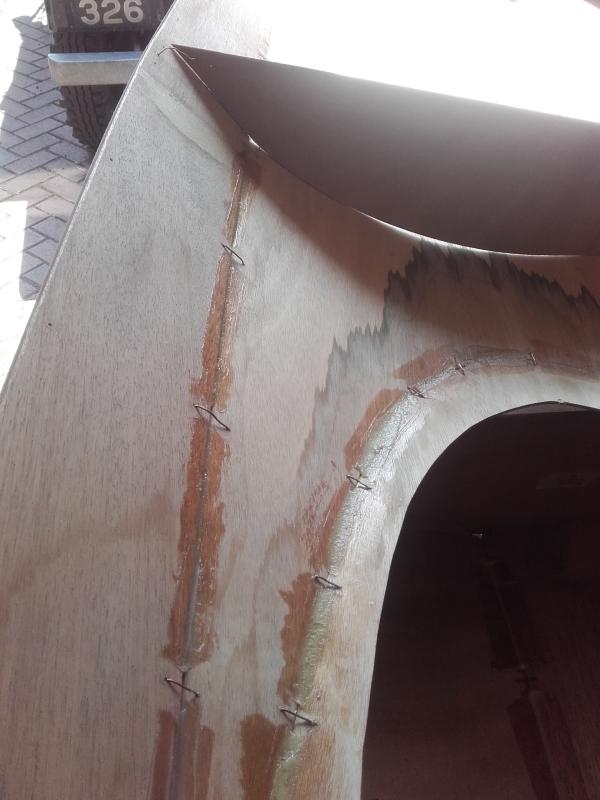
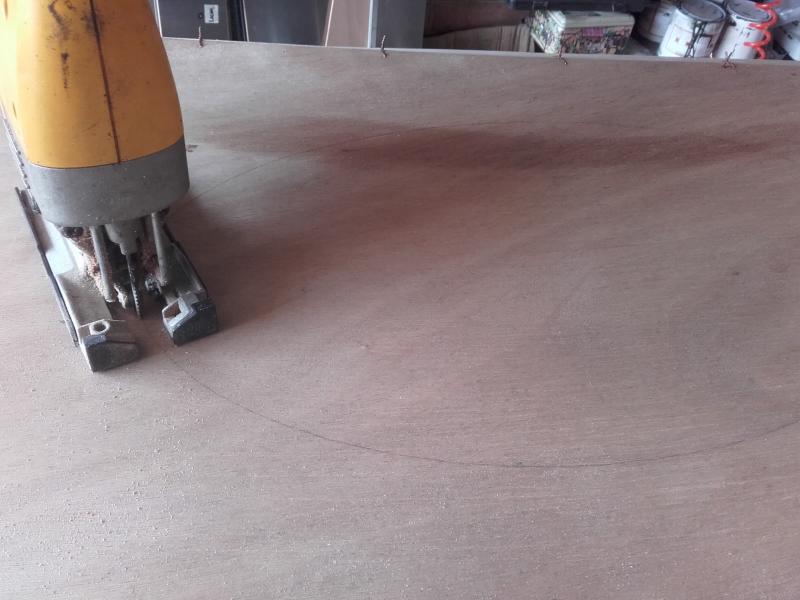
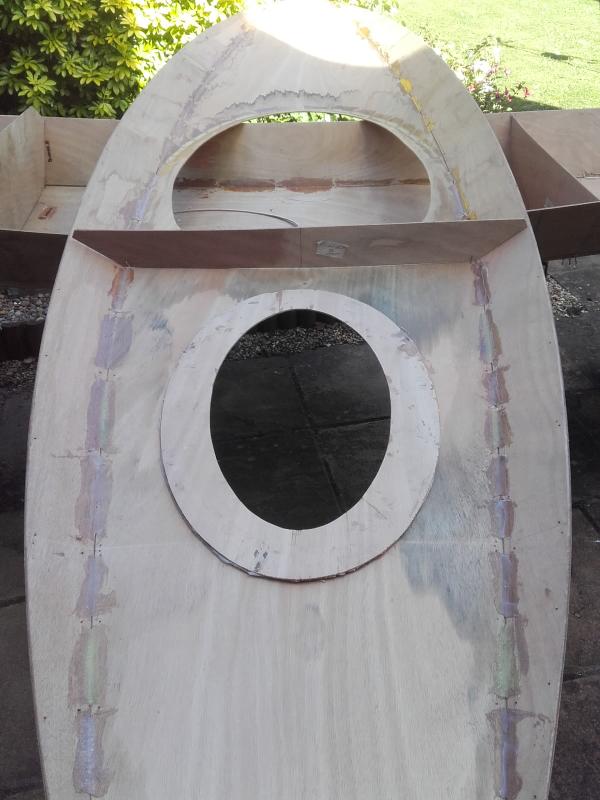
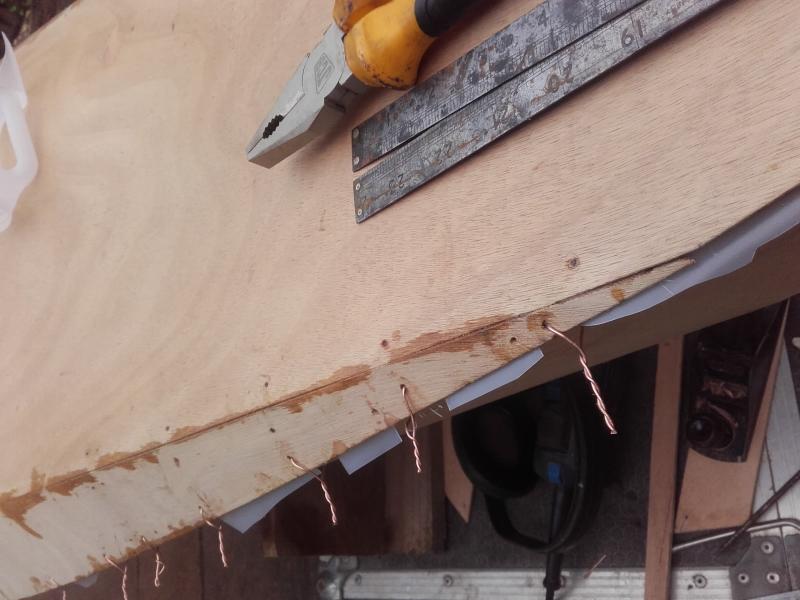
Next on the agenda while things are curing is to check, and cut the rear hatch. Already marked on the rear deck following the instructions made this straight forward.
Some drilled holes become a slot and thats enought for the jigsaw to go in and away we go. Slow and steady thankfully no dramas...
Checking that the hatch spacer is suitable and accurate enough ....
The spacer needed some adjustment, simply because how I cut it from the template and then compared to the hatch just cut in the aft-deck. The inside shape was soon re-cut and dressed to make it match the deck.
While the spacer was now clamped in place and curing some spare epoxy was teased into any joint gaps and seams around the exterior of the deck areas...
Everything now left to set....
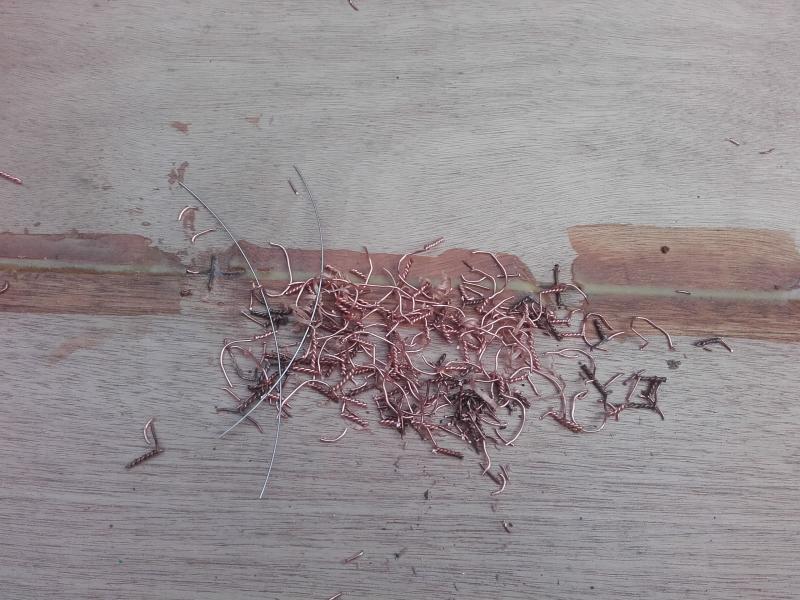
Finally with things cured it was time to seperate the deck / hull and remove the dreaded wires...
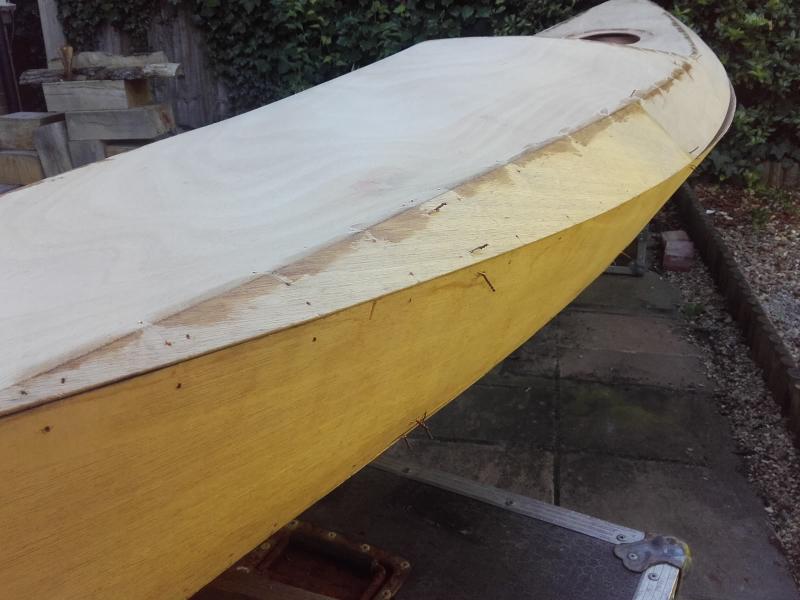
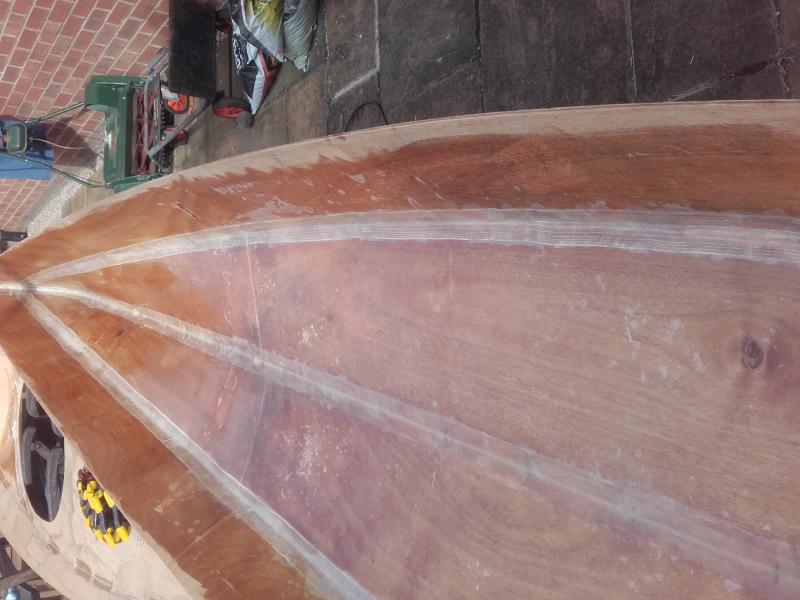
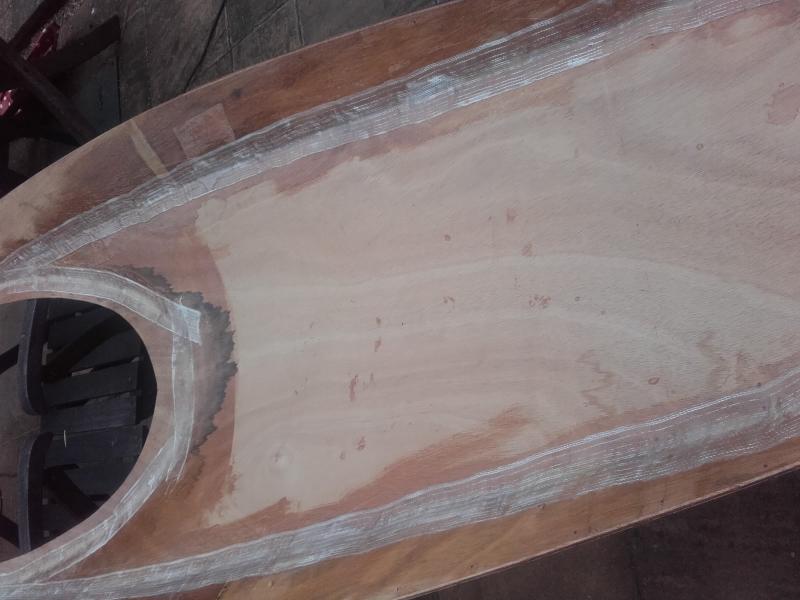
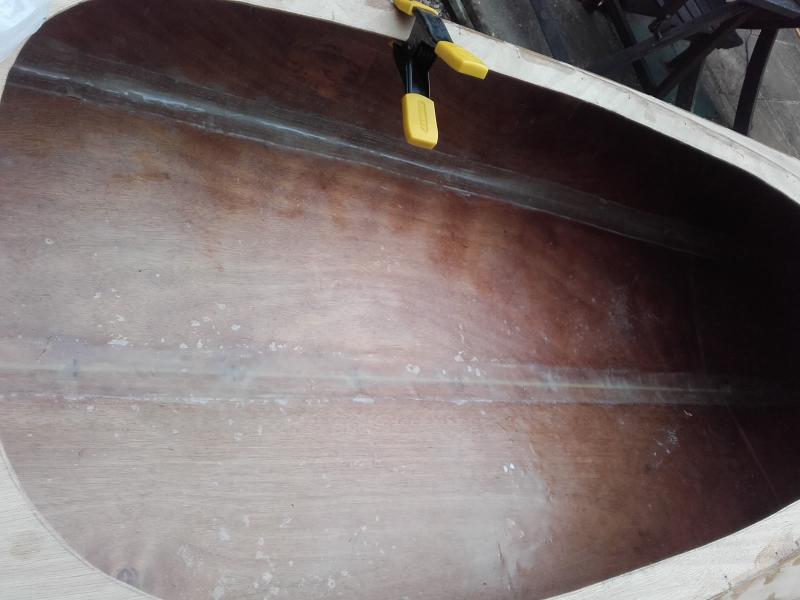
A check of the hull now without wires still shows its form and shape which we're happy with.
Looking at the inside of the deck, its a fragile thing at this stage but again we're happy with the shape.
Loosley fitting the deck & hull shows its natural shape and position which when its comes to the final re-wire there shouldn't be too much stress..
Witha another warm day we mixed some thickened epoxy to strengthen up the bow and stern areas prior to the next big session of taping the joints.

Last edited by Sam Taylor (8 Aug 2016 6:52 pm)
Offline
#20 15 Aug 2016 5:47 pm
- Sam Taylor
- Member
- Registered: 22 Oct 2011
- Posts: 50
Re: Building from plans .... Wood Duck 12'
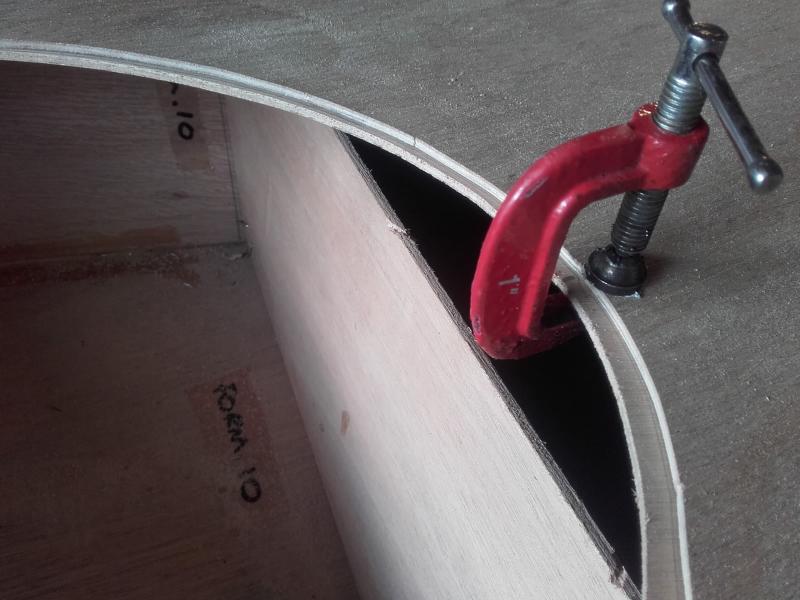
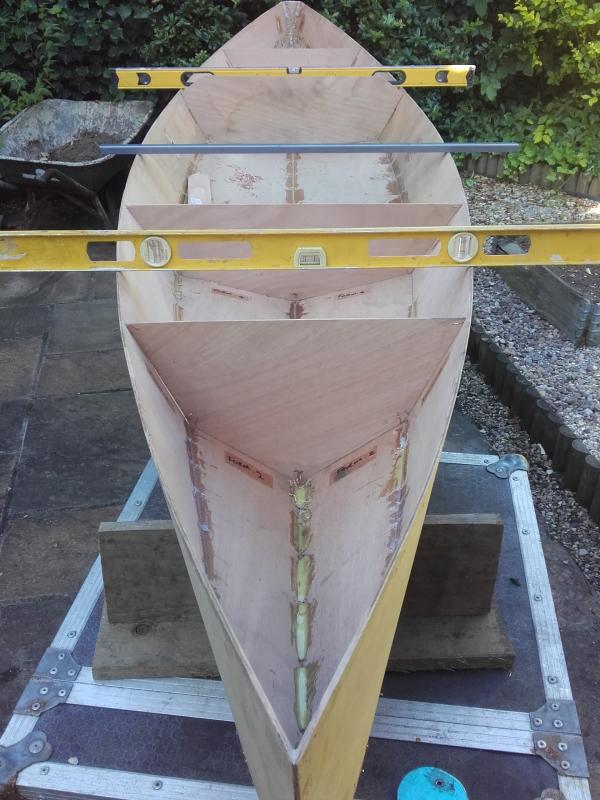
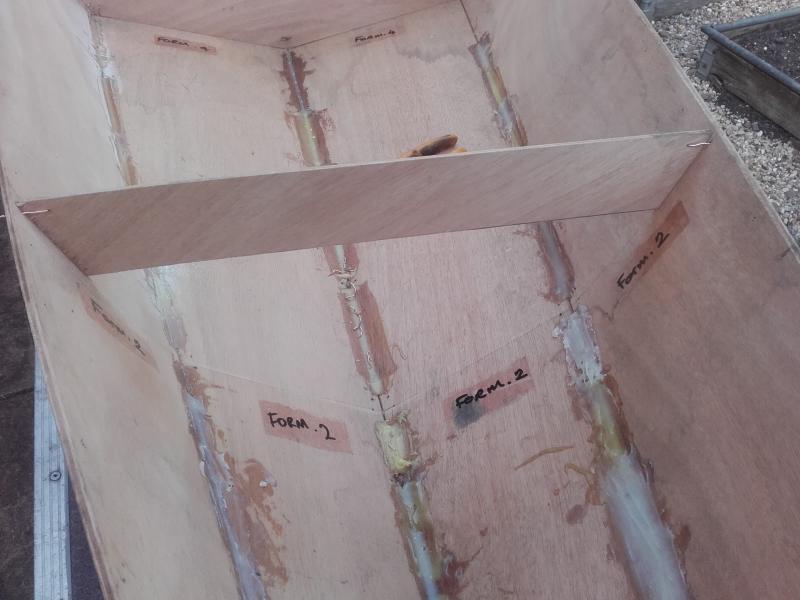
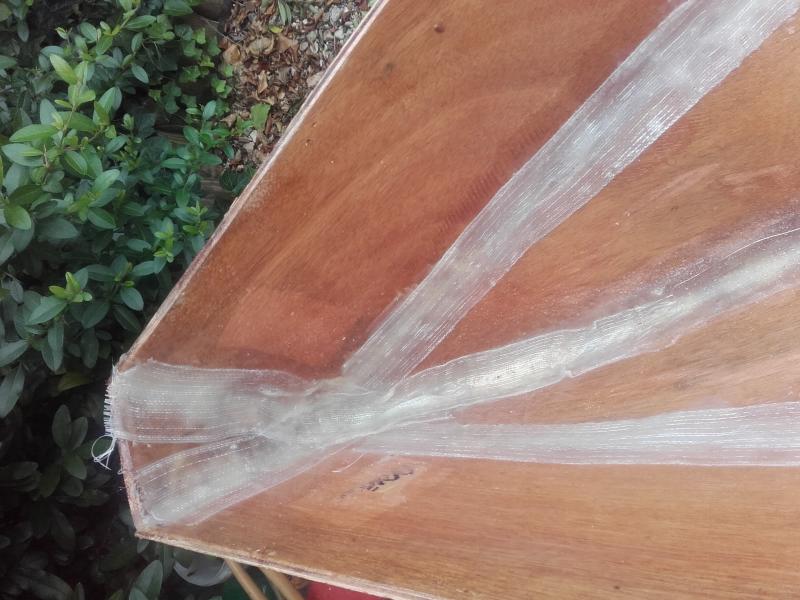
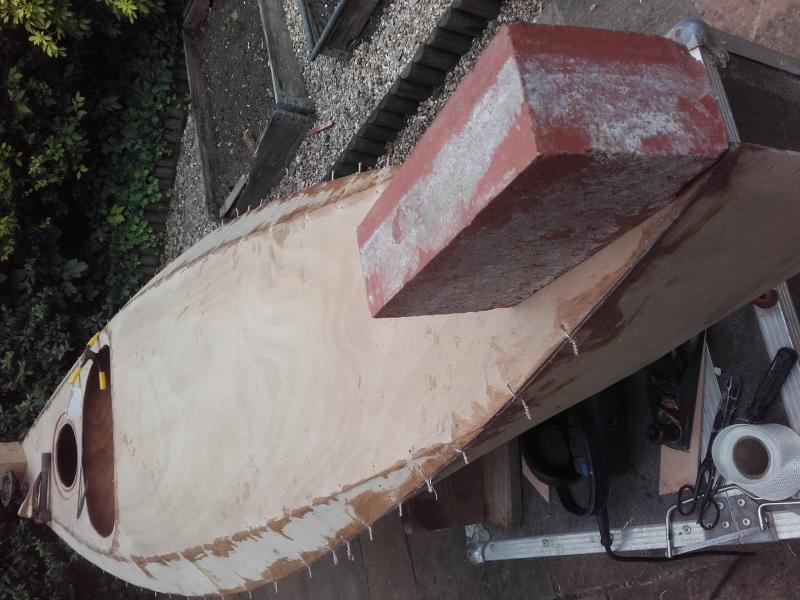
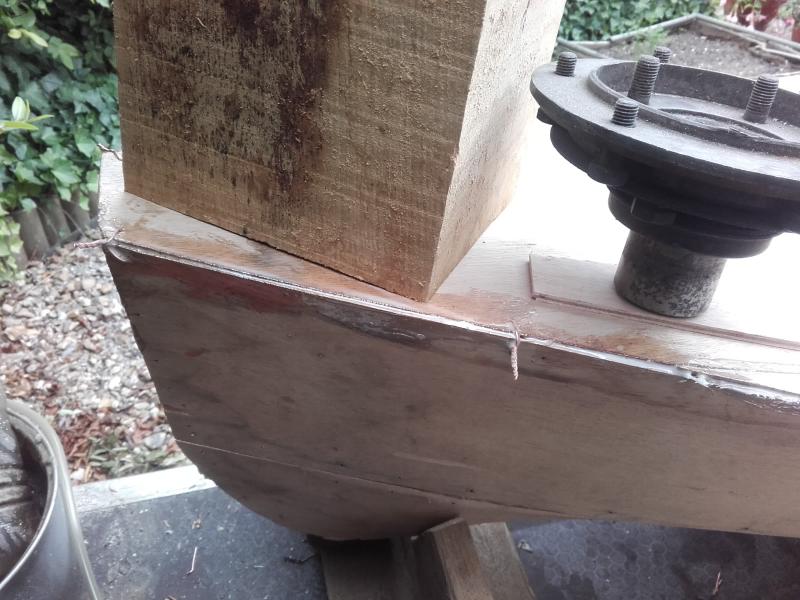
Moving towards the Hull & Deck Assembly next was to get some strength into the joins with the epoxy & tape but to aid this we needed to remove the forms. Noticeably the Hull springs 'in' so we decided to try and counter this.

Cutting the form into a reduced size we kept the widest section and refitted to keep as much shap as possible prior to rolling out the Tape over the joins, which this now allowed some access.
Nipping the copper wires are a good twisting also helps grab them and restore the Hull shape.
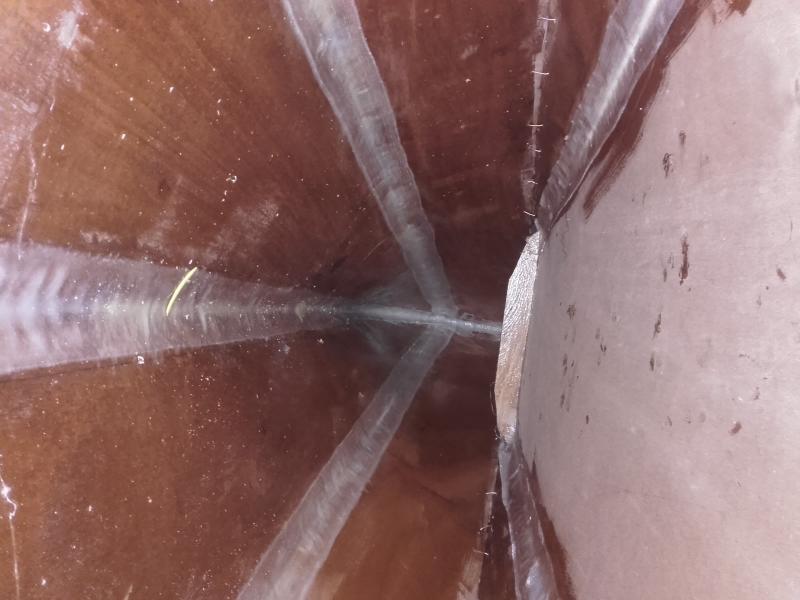
With the required access rolling out the wetted tape onto thickened epoxy as per the instructions was all relatively straght forward.
Once the Tape in the hull had all set we removed the formers.
Onto the Deck assy, wetted tapes and thickened epoxy to finally give some strength to this fragile part...
Remembering to strengthen the transom...
With the deck assy now curing we added a full set of wires to the deck in an attempt to aid the last and final joining of deck-to-hull..
adding thickened epoxy along a few sections at a time and then stopping to tighten the wires and check joint alignment was a trail but once started you simply cannot stop. To stop any unnecesary bonding a slipped in some plastic spacers until final alignment was done and wires twisted up..
Working from bow to stern finally all wires in place and nipped up. Some additional weights to ensure that things were where they needed to be..
The final shape was thankfully as before and we're happy with the symmetry ..
Still lots to do inside the seat area but did get one cloth sheet wetted and rolled out..
A look inside forward and a reminder that we still need to coat the underside of the deck. Top tip for all builders..don't run out of epoxy at a crutial stage... we did on the last leg of joining the deck and had to resort to some 'bought' epoxy ! Doh.
Last edited by Sam Taylor (15 Aug 2016 6:36 pm)
Offline