A forum for discussing wooden boats and boat building
You are not logged in.
- Topics: Active | Unanswered
#1 25 Jan 2015 9:12 pm
- richy.s1
- Member
- Registered: 4 Dec 2014
- Posts: 17
Double Shearwater Stitch and Glue
Hi,
Got the kit from fyne boats before christmas and have been meaning to post some progress for the last couple of weeks but have not got around to it. Here is the story this far
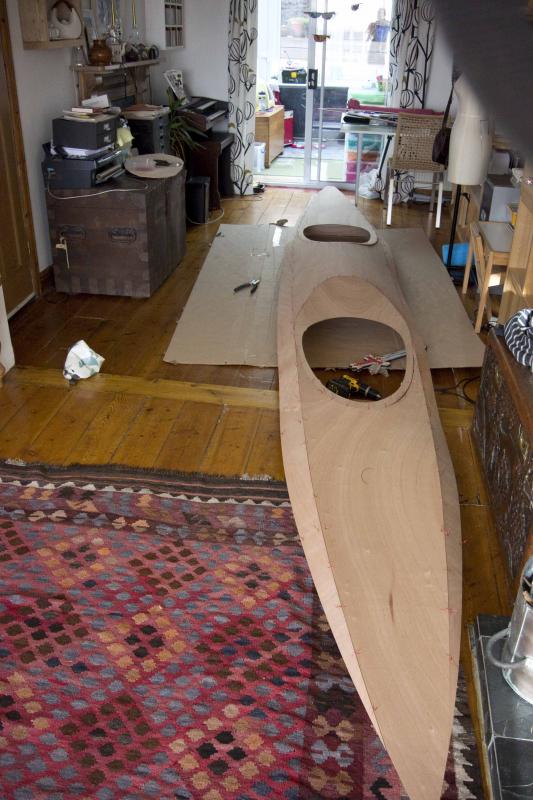
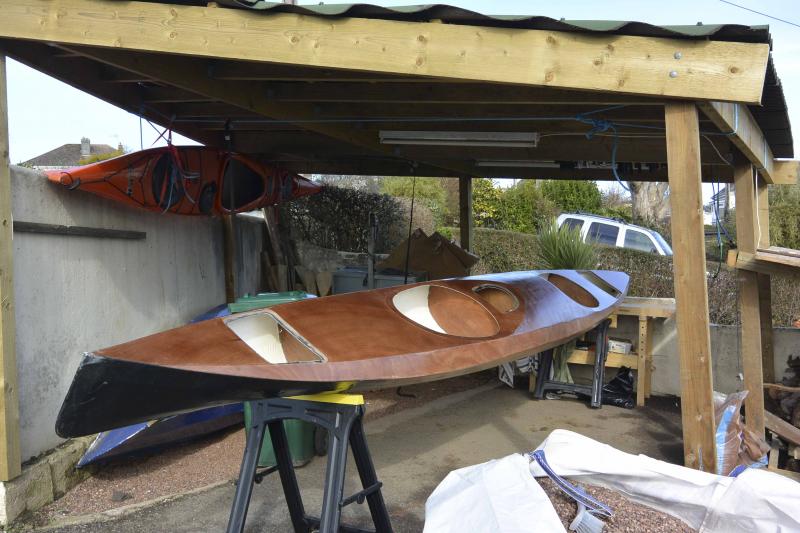
I wanted a double sea kayak for me and my son to paddle. I looked at the chesapeake double but it looked a little too large at 20ft so I opted for the shearwater. Having got to a stage when it looks like a kayak I am really glad I chose the shearwater.
I do not have an inside space large enough to make the kayak so I am making it in my carport which has a roof but will require some logistics to keep the kayak dry. I will also be limited to when I can work on it, the cornish weather can be a little unkind during the winter months.

I have made a couple of mistakes to date which I will share with you in the hope it may save someone a little time and effort.
I started by cleaning up the joints. Some of them were a little tight so I sanded a few down so they slotted together.


I then glued the joints together using some CA glue. (this was a glue used to secure picture framed but it seems to be the same as super glue)

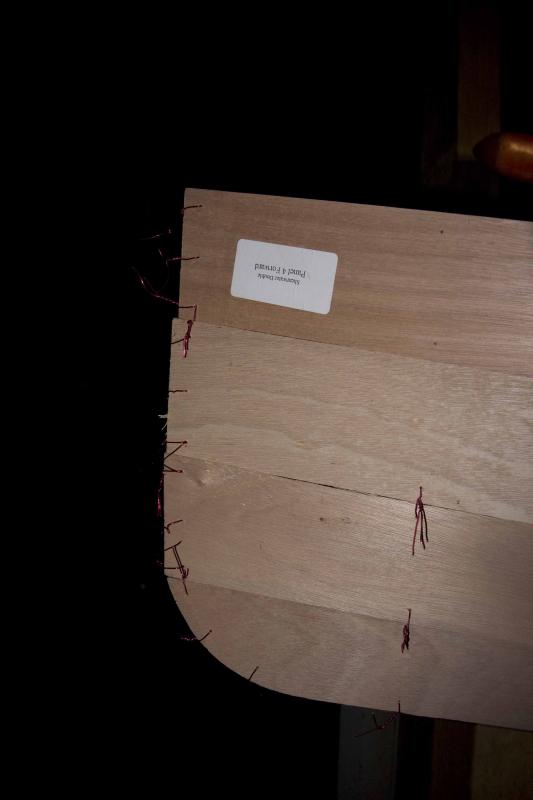
I sorted the panels so they were laid out in the order I was going to stitch them together. It was easy to get the panels in the right order but the third panel looks very similar irrespective of which way I laid it out. Predictable I got it the wrong way round which meant, when it came to stitching the hull, I had bevelled the wrong side of the panel.

I identified which side of each panel required a bevel and marked the panels left or right to ensure I did not get them mixed up

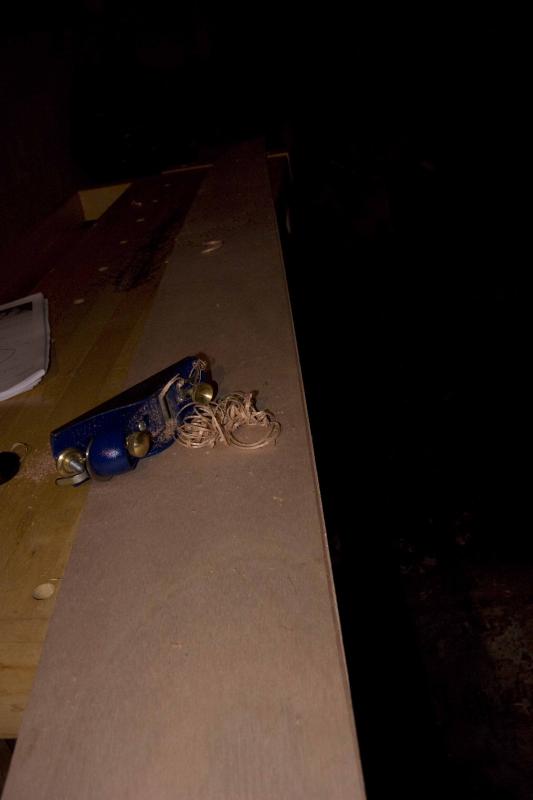
The next job was to bevel the edges. This was pretty easy apart from the panels are really long and unweildy. I kept the plane pretty sharp. Not really sure how often I should sharpen it but I thought plywood would dull it quite quickly so I sharpened after 3 or 4 panels.
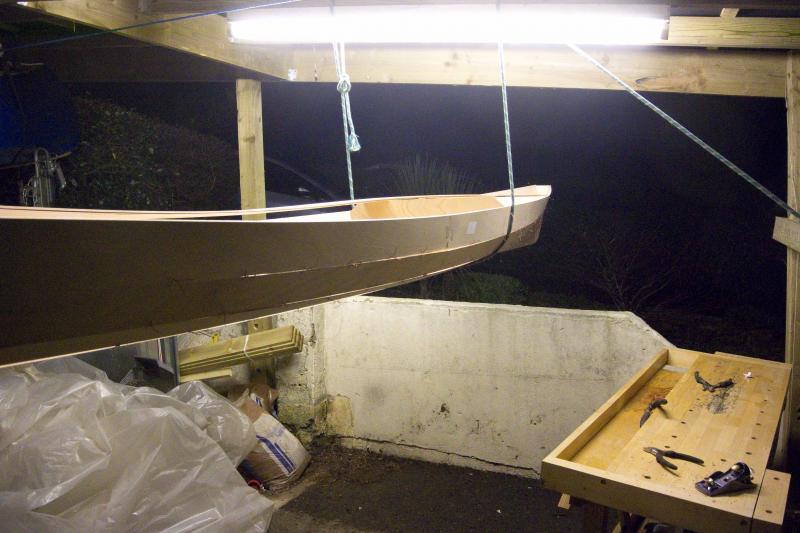
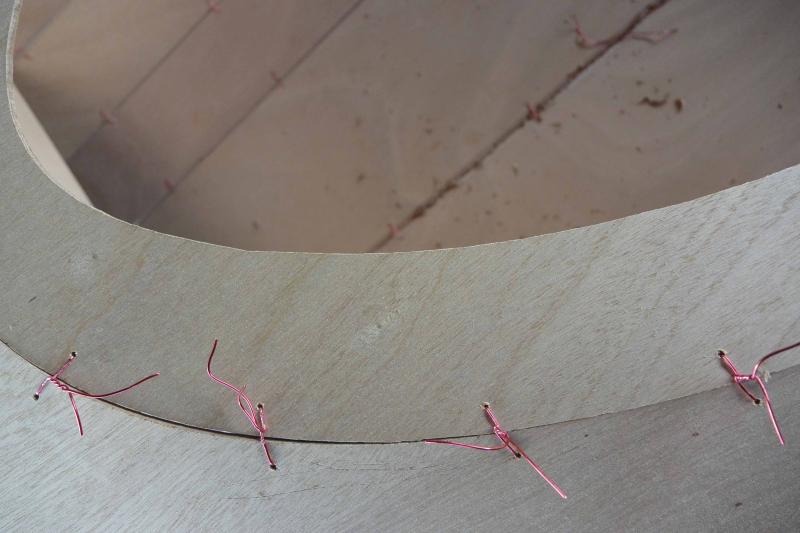
I chopped up some rolls of copper wire. I cut them into 3rds like the manual says but I found them too small and fiddle so I cut the next rolls in half which was a lot easy (and I had enough stitches left at the end). I then stitched the hull together exactly as it said in the manual. Once the hull was stitched I raised it up into some slings so I could tighten them without breaking my back. I found I had to widen the the holes in the hull and deck formers so I could fit two wires through during the stitching process.

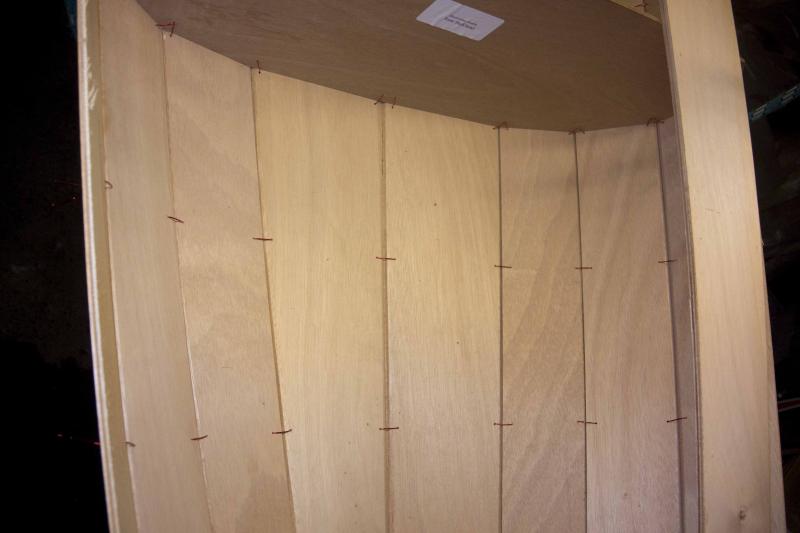
I had few problems trying to straighten the panels up. I restitched the top panel twice and I still couldn't get it to match. Not sure what to do about this. The rest of the kayak was fine
The next job was stitching the deck. This was pretty tricky. It required some bending of the panels and I found it very difficult to get all the panels to fit. I then realized I had forgotten to bevel the edges of the deck panels...oops
The fallout of this situation is.... I unstitched the deck and bevelled the edges that required it. I restitched half the deck, which fits ok but I cannot make the front cockpit match up. There are some areas which have reasonable sized gaps which I will probably fill with some slim slivers of wood and epoxy . I have also run out of copper wire now so will need to buy some more (I tried to use some old welding wire I had but it is unsuitable - too brittle). I will post some pictures of this when I have taken some.
Luckily the temperature outside has not reached double figures for a while and does not look like it is going to for a while so I have plenty of time to make sure the hull and deck are stitched properly and fit together. I have seen a little technique where you make a little tent over the kayak and put a heater in their to make the epoxy set. I may think about this if it does not warm up soon.
Offline
#2 28 Jan 2015 1:30 pm
- richy.s1
- Member
- Registered: 4 Dec 2014
- Posts: 17
Re: Double Shearwater Stitch and Glue
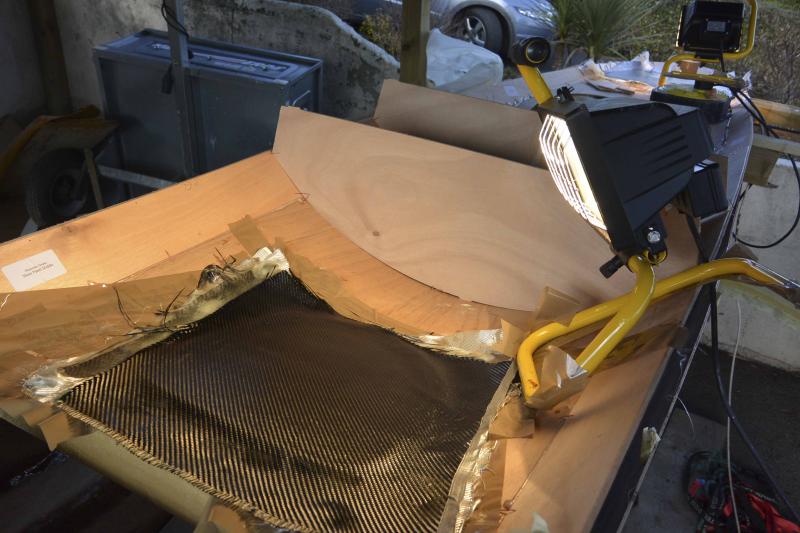
Not at work today but not much chance to work on the kayak due to the weather so I thought I would have a little practice with some epoxy. I got hold of some carbon fibre cloth a while ago so I thought I might try and do some of the detailing with it. From everything I have read, there does not seem to be any benefit from using it to reduce weight or structurally on a sea kayak (unless anyone thinks otherwise?)
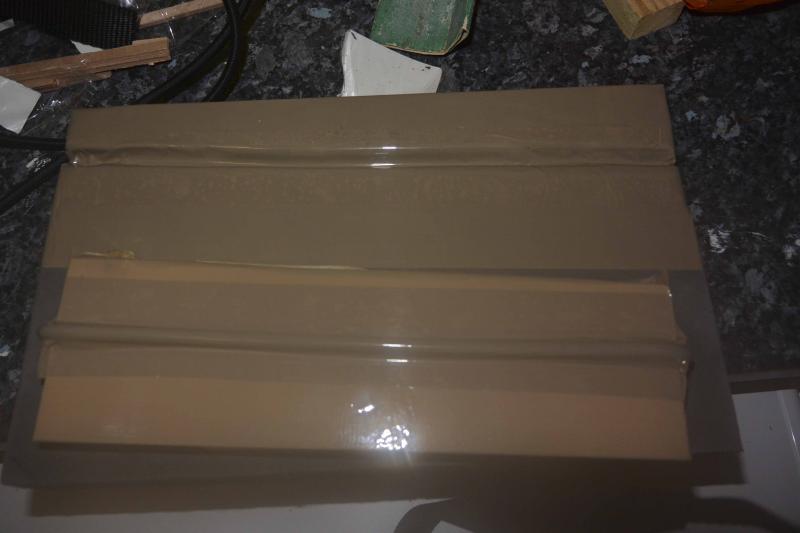
The first thing I am trying to make is the tabs which lock the hatch covers down.
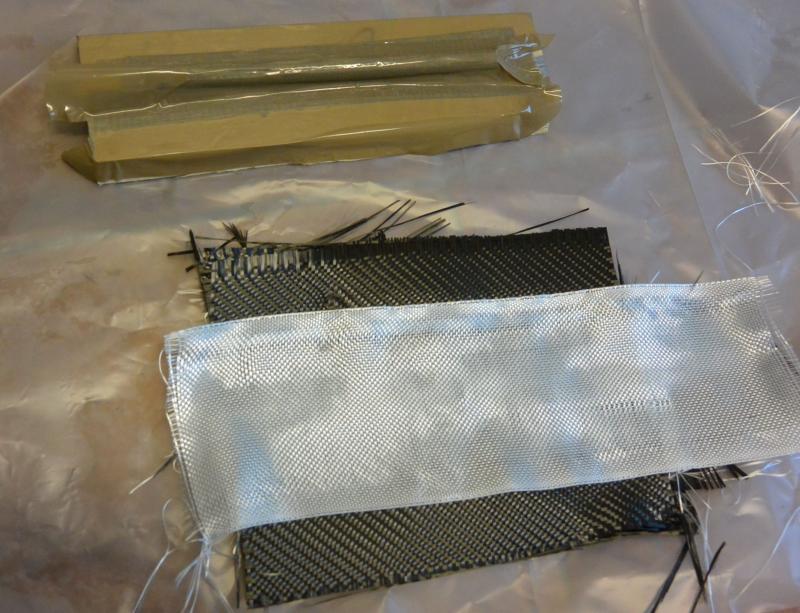
I used three layers of carbon fibre and six layers of glass which will hopefully give me a similar thickness to the wooden tabs. On one side I left a top layer of carbon and on the bottom I covered the carbon in some 4oz glass scraps I had from a previous project. My layup looked like this (starting from the bottom) 4oz glass, carbon, 4 sheets of 6oz glass, carbon, 6oz glass, carbon. I wet it out in two batches ( a 4 and a 5), and just to make sure I had wet it out all the way through I turned it over and wet out the bottom as well. I used the plastic squeegee which seemed to work very well at removing excess epoxy. I also left some excess glass at the edges to soak up any extra resin
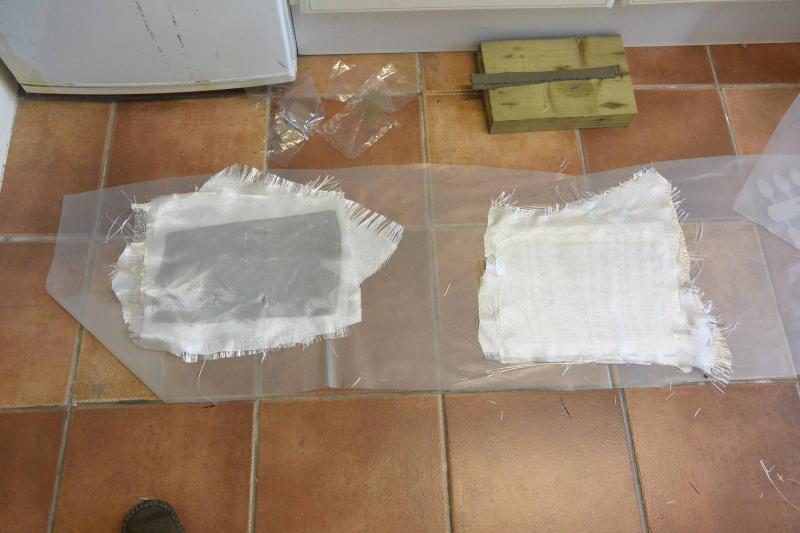
I have now trapped it under some plastic a peice of wood and a very heavy plant pot. Having never used epoxy in this way I have no idea what is going to happen. I am was slightly worried because when I wet the glass through you could not see the carbon weave underneath. I will find out tomorrow. If it works ok I will brush some epoxy on to fill the weave...fingers crossed!
If this works I am going to try and make some little hooks to tie the hatch covers down with elastic.
Offline
#3 31 Jan 2015 10:49 am
- richy.s1
- Member
- Registered: 4 Dec 2014
- Posts: 17
Re: Double Shearwater Stitch and Glue
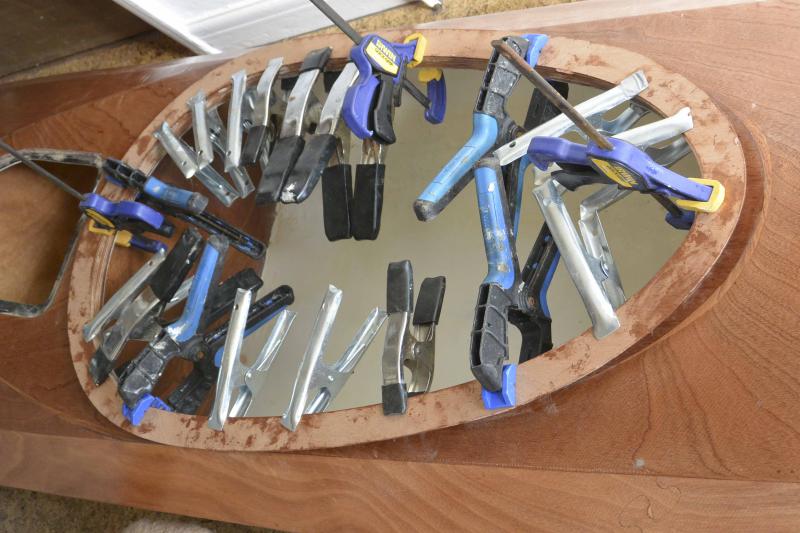
Completed a big job yesterday and had a few problems which I can tell you about. I finished off fitting the deck panels together and then tack welded the hull and deck (not together, just so I can take the stitches out)
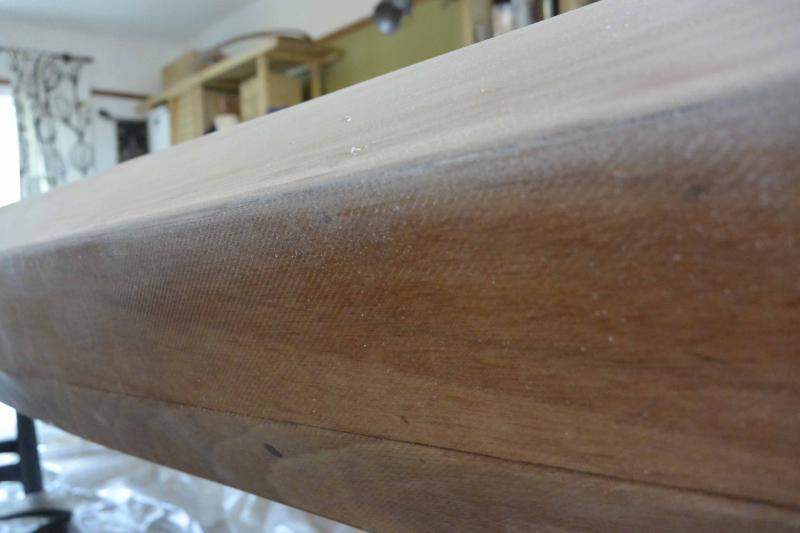
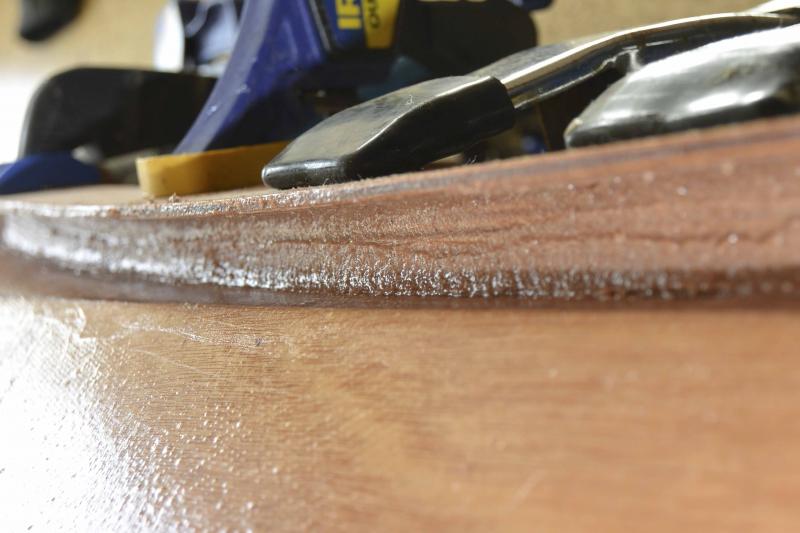
I bevelled all the edges of the deck to ensure as tight a fit as I could get. I couldn't get it exact but hopefully I got it close enough. I used a block plane to slightly reshape the cockpit area. I only took about 1mm off and it made a big difference.
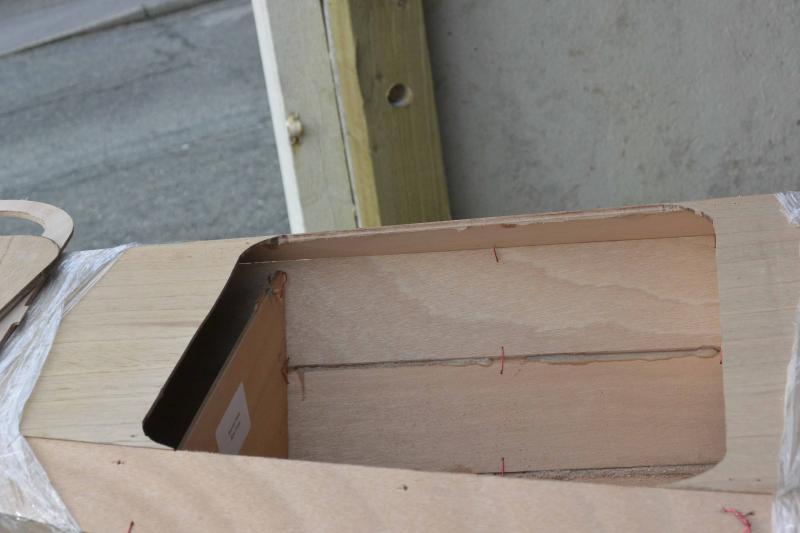
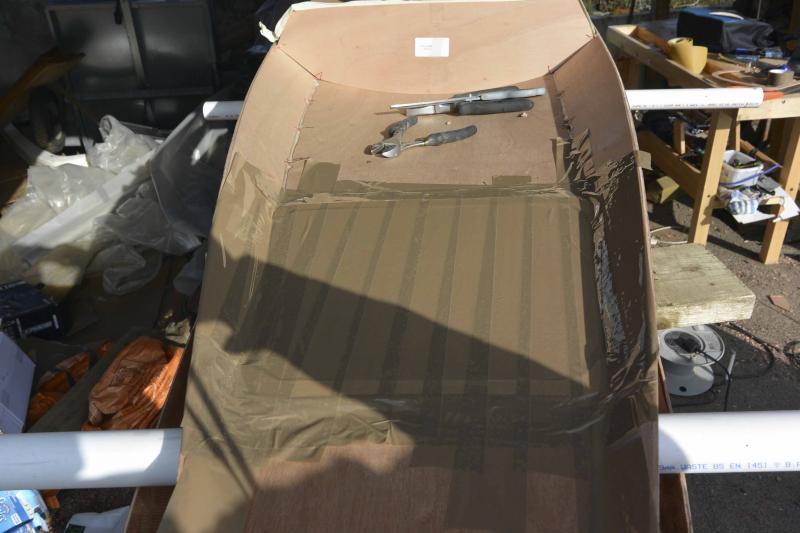
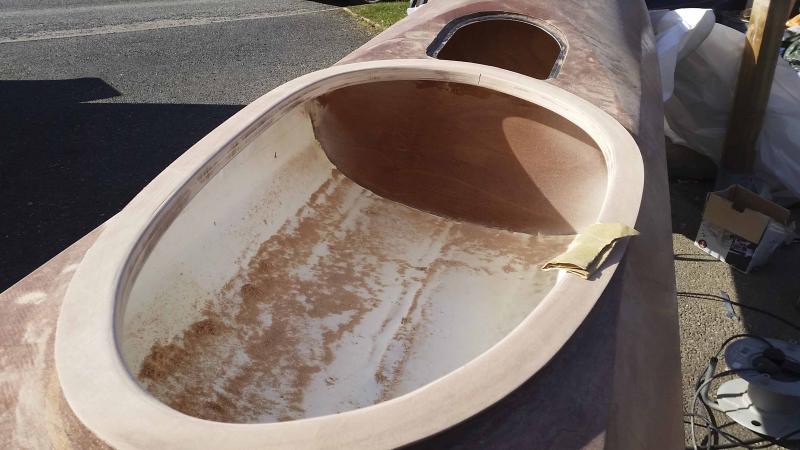
Here is the gap before I shaved some off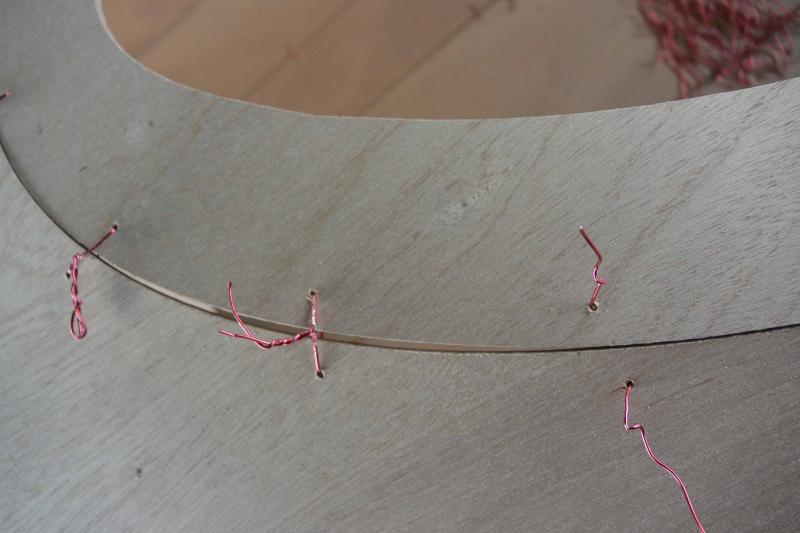
Here it is after a little planing (I was really careful not to take too much off because it would be tricky to stick it back on)
I didn 't get any picture of the next stages because it took way longer than I thought so I did not want to stop to take any photos. I made sure the hull was clean and free from old bits of wire and shavings. I then mixed up some epoxy and silica to tackweld (I think I was meant to use woodflour but I did not realise this till too late). To get a nice mustard consistency I used one scoop of silica for every pump of epoxy. I made up batches of 5 squirts (5 epoxy, 5 hardener).
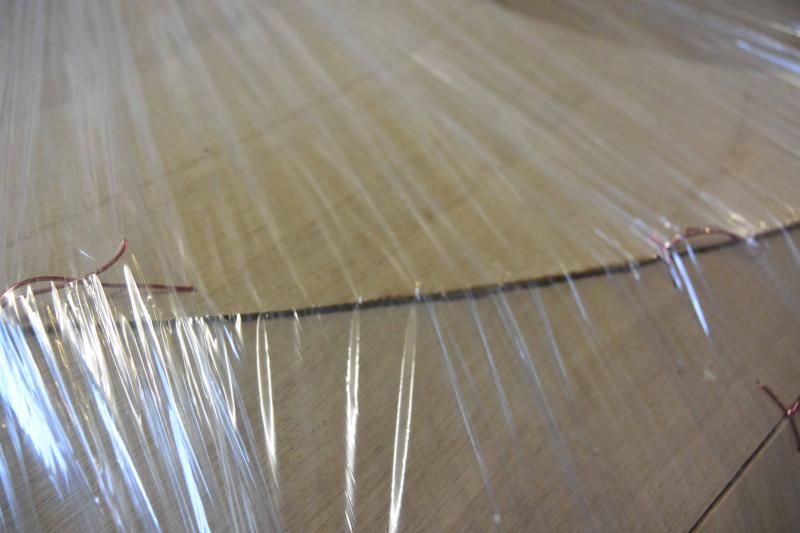
It took me about 3 batches of epoxy and 1.5 hours to tackweld the hull and the deck. Unfortunately (despite the forecast) there was a spell of rain and hail showers for about 45 minutes so I had to juggle tarpaulins and polythene to stop the kayak getting wet - not ideal. I joined the hull using some sticthes and some shrink wrap.
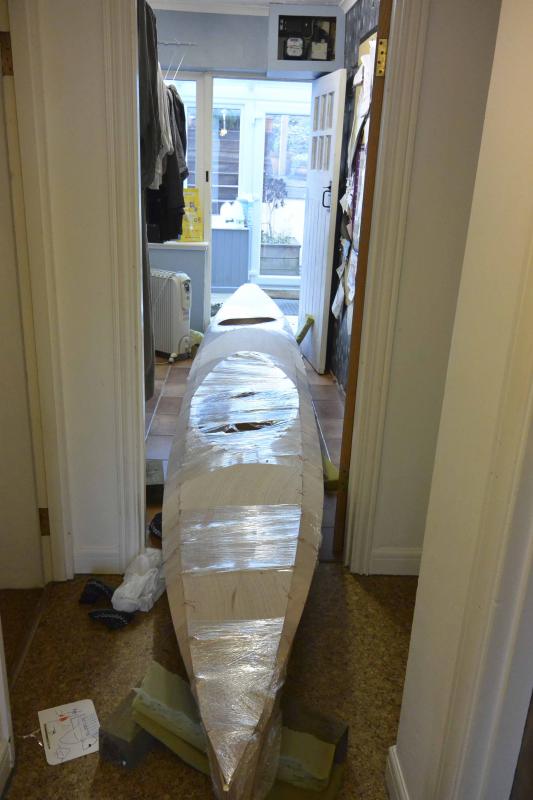
It is about 6 degrees outside so i carried the kayak inside and set it on a cradle in the hall to cure overnight. Unfortunately tis is where the problems really started. The epoxy was acting as a slight lubricant on some of the hull joints and they kept on slipping out of alignment. I could not push from the inside because the deck was in the way so I used a knife to re-align them. I also released some of the shrink wrap to reduce the pressure. I eventually got it to stay in place.
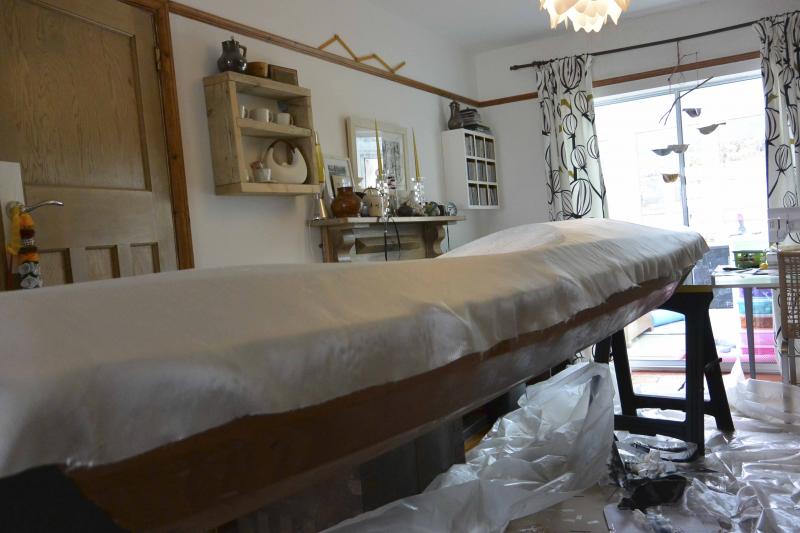
Here is the kayak in my hall the following morning. It is not straight because I have been inspecting the hull
Some areas slipped out of alignment overnight which is annoying. I will try to get some pictures of the hull but here is an area of the cockpit which popped out. I am not too worried about the cockpit but I would like to adjust the hull.
The epoxy is still a little soft so I may be able to cut it with a stanley knife. I will give you an update after I have thought about this.
The problem I had with the hull was I needed to apply a little pressure using the shrink wrap to hold the cockpit area in shape but this pressure also squeezed the hull. I did release the pressure a little by cutting the shrink wrap and re-applying less tightly but obviously to no avail.
The hull and deck are still square but I want to avoid having to sand off the overlapping joints too much. (the overlap is a couple of mm).
I will keep you posted.
Offline
#4 31 Jan 2015 11:24 am
- richy.s1
- Member
- Registered: 4 Dec 2014
- Posts: 17
Re: Double Shearwater Stitch and Glue
Good news, I have managed to part the panels which need re-alligning. I reckon I could have gotten away with not doing this but I would much prefer that it all lines up properly.
The epoxy had not fully cured and was still slightly tacky. I pushed a stanley knife through a tack and it cracked the epoxy. I did this in all the areas which need re-stitching.
I think I will epoxy these outside and warm it with a light/heater so I can definitely set it properly this time. I need to remove all the old epoxy from the joints to do this.. I did not think I would have to get the sander out this early in the build.
Offline
#5 1 Feb 2015 10:22 pm
- richy.s1
- Member
- Registered: 4 Dec 2014
- Posts: 17
Re: Double Shearwater Stitch and Glue
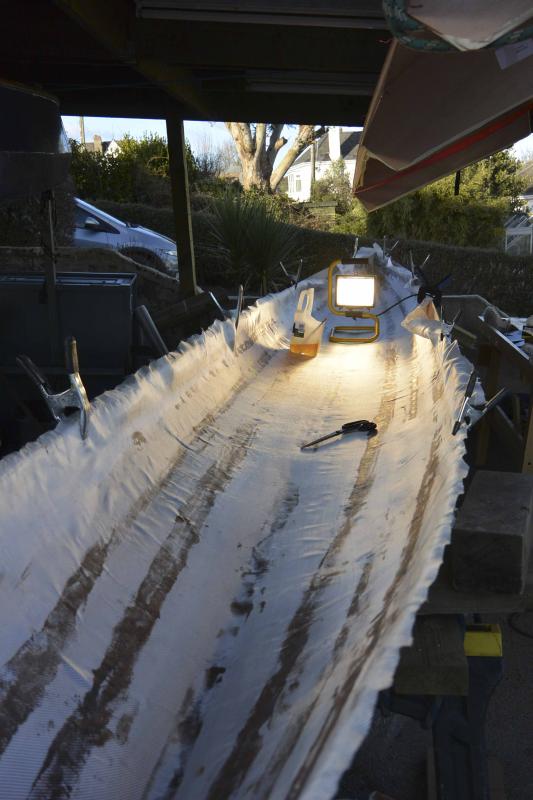
So I have managed to rectify some of the problem joints I had when tack welding the hull together. I scoured the joints clean with a round rasp and a stanley knife and got enough of the old epoxy out. I then reset the joints, added some epoxy and them kept it warm with a heater (The heater broke after about 20 mins so I put some work lights in the cockpits and wrapped the kayak up in blankets and a tarp)

I have had to leave the epoxy for a day or two because the boat is outside and it is very cold so in the meantime I thought I would carry on my experimentation with some carbon fibre. All of these things I am trying I found on the internet, I had no idea how to make anything with carbon fibre before.
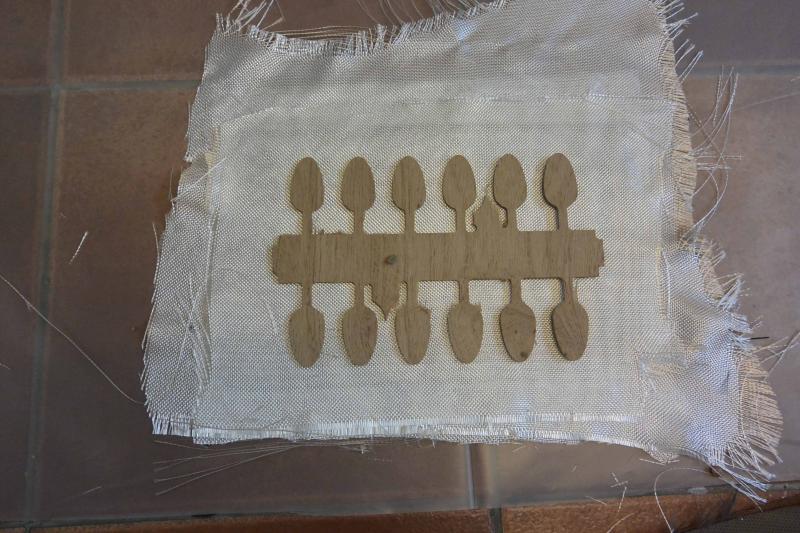
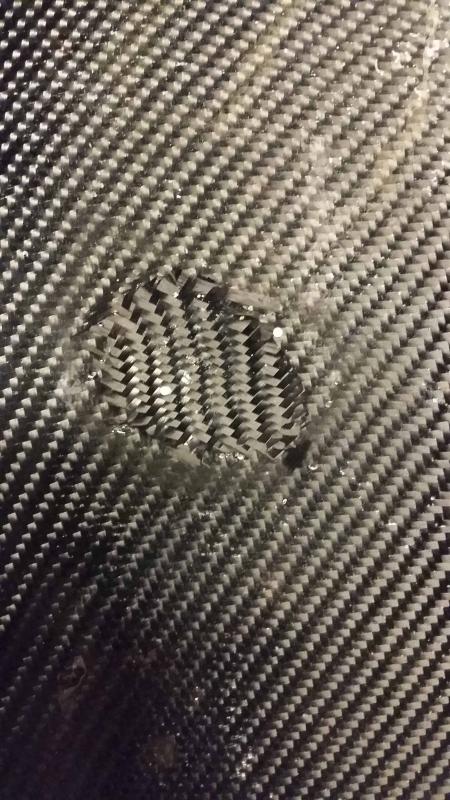
The first thing I did was fill the weave on my carbon fibre sheet which I will use to make the Hatch locking tabs. It looks like carbon fibre now and it is ridiculously strong, I cannot believe I was worried about it.
I am also making some little hooks so I can tie my hatch covers on. I made a mold out of an old piece of wood, some old dowelling and some packing tape. I then pre soaked 6 layers of glass tape and 3 layers of carbon fibre and put them onto the mold. I then wrapped it all up with a piece of foam and some tape to keep even pressure over the mould.
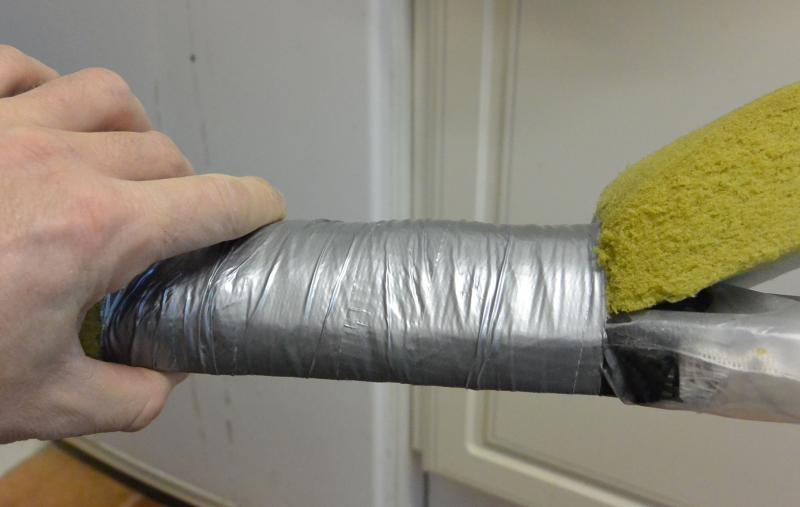
They are no setting by a radiator. I will see how they look tomorrow
Offline
#6 3 Feb 2015 2:46 pm
- Ian
- Employee

- Registered: 24 Nov 2014
- Posts: 103
Re: Double Shearwater Stitch and Glue
I was thinking of doing the same thing to tie my hatch covers on, but I haven't tried it yet. How have yours worked out?
Offline
#7 6 Feb 2015 8:55 pm
- richy.s1
- Member
- Registered: 4 Dec 2014
- Posts: 17
Re: Double Shearwater Stitch and Glue
HI Ian,
I took the hooks out of the mould and they have come out well. I will need to sand them a bit because I had a few creases in my plastic cover. Plenty strong enough. I have not taken any picture yet but I will post some up when I have. I think I need some thinner plastic to place over the top to stop any large creases, not sure what to use - may look into getting some peel-ply.
Offline
#8 6 Feb 2015 10:04 pm
- richy.s1
- Member
- Registered: 4 Dec 2014
- Posts: 17
Re: Double Shearwater Stitch and Glue
I have moved on a little bit since my last post including glassing the inside of the hull despite the cold.
First thing I did was cut out the hatches. This was pretty simple. I used jigsaw. By drilling three small pilot holes using a 3mm drill bit, I could slip a jigsaw blade in. I then cut out the hatches as neatly as possible.
Once this was done I could remove the deck. I had no where to put it so I suspended it above the boat from the roof. This meant I could lower it up and down when I had finished working.
Before I started the next job I gave the inside a good sand down to ensure there was no rough areas and removed all the stitches apart from at the bow and stern. I will snip these off later and then sand them down.
Next up filleting and glassing the hull. Because of the length of the boat, and the number of panels I had to do a lot of filleting. I would mix up batches of 7 squirts from the epoxy pump. I added the wood flour then, starting at the bow I start filleting. In a rare peice of foresight I had bought some filleting tools from Fyne. They were indispensable, especially due to the large range of angles the fillets went over. The picture of this stage were rubbish so I have not posted any
Despite spending a long time cleaning these fillets up they look nothing like the videos on youtube. Nevermind. I let these set up for an hour or so then started glassing the hull.
I lay the glass over the hull then spent a while smoothing it down and cutting away the excess. I made a dart at the bow and the stern.
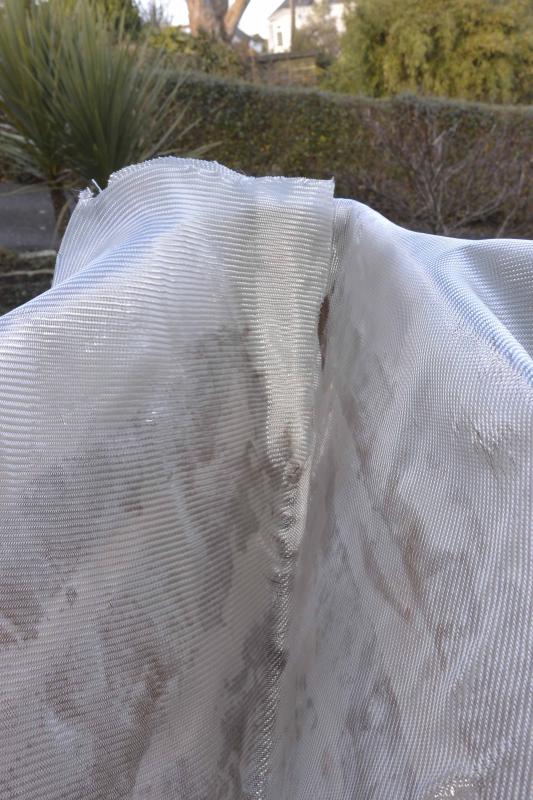
I used some spring clamps to hold the glass in position because it was a little breezy.
Because of the cold I used some work lamps to keep the hull warmish, I also left the epoxy in the airing cupboard to keep it really warm. Despite this it quickly thickened up and became a little difficult to work with. Despite this I eventually managed to wet out the cloth.
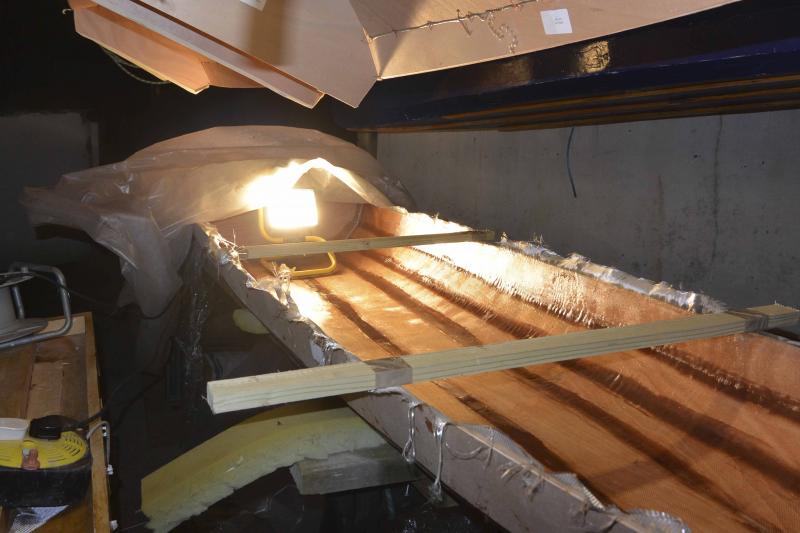
Following a chat with Fyne I was thinking about repositioning one of the bulkheads. Despite being persuaded otherwise on the phone I felt I would keep my option open and not install it. They recommended that if I did not put in the bulkhead I should put in a stretcher to keep the shape of the hull. That is what i did. I covered the ends with packing tape to stop them sticking. After this I trimmed the remianing glass off the sides. I should have done this earlier because I got me and my scissors covered in epoxy...oops!
I then put some worklights in the hull and dropped the deck ontop. I wrapped the whole thing in some old blankets and a tarp and left it to set.
I have inspected it after it has set and there re a few areas of concern. there a few bubbles. These are only in one area which will be under a seat so I have cut them out and will patch them up with a small piece of glass. The glass did not bond to the wood at the shear-line in some areas. Again, these will not be seen and that area is going to be covered by a fillet and some glass tape. So the surface is solid I have cut way any little bits which have not bonded.
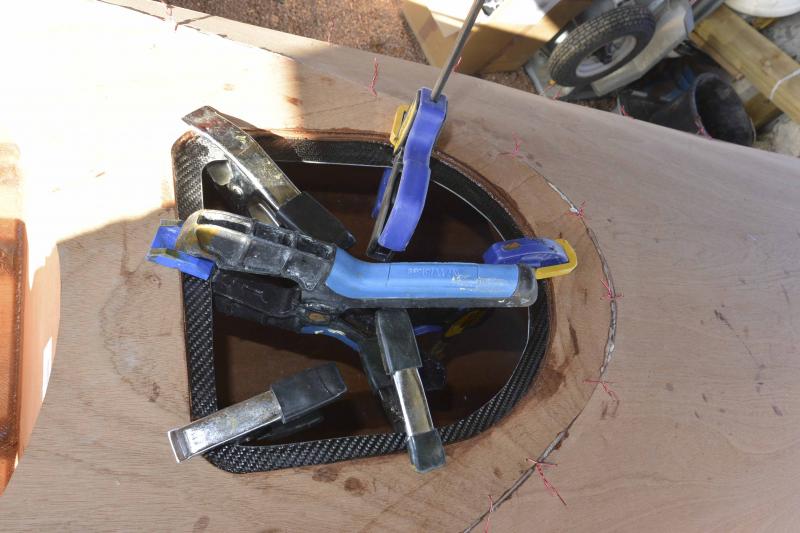
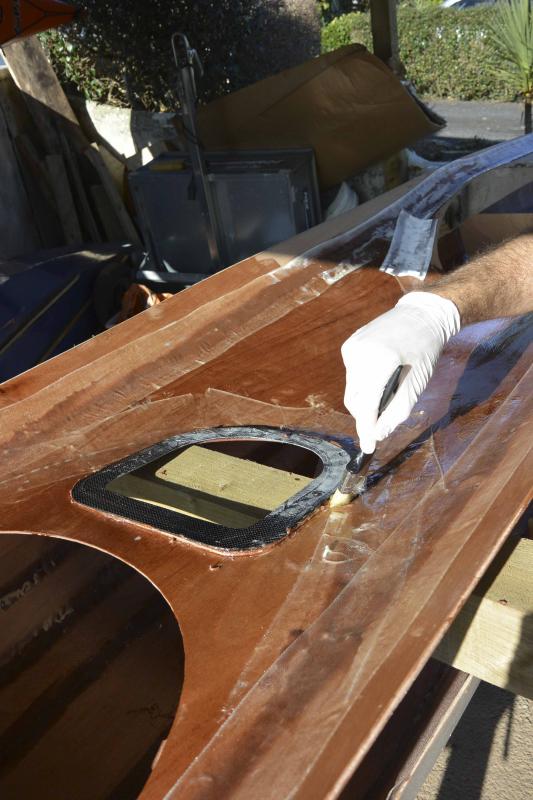
Whilst the hull is setting I decided to make some carbon hatch sills. I set this up on the underside of the deck. I read that the main cause of hatches leaking is due to gluing them in when the deck is twisted. Due to this I spent a while ensurng the deck is square and supported. I then taped in the wooden hatch sill, and hatch cover on the spacer then taped it all up with packing tape. I pre-soaked 2 layers of CF and 7 layers of glass and installed them on the deck. I am now going to wait for them to set overnight. Once they are set I will cut out the centres to use as doublers on the hatch covers and then epoxy the new CF hatch sills and spacers in as usual.
To soak the cloth in resin I warmed the resin in the airing cupboard and then soaked it in two batches.
I will see how these turn out tomorrow!!
Offline
#9 11 Feb 2015 9:59 pm
- richy.s1
- Member
- Registered: 4 Dec 2014
- Posts: 17
Re: Double Shearwater Stitch and Glue
Over the last couple of days I have been pootling around doing some little jobs and completed one job.
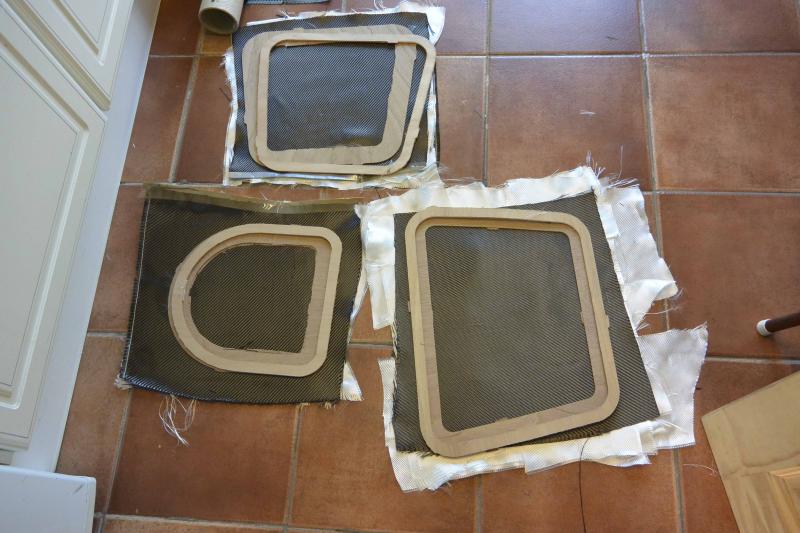
I stuck the CF rims on. This one was relatively easy but the other two were a little more tricky. If I was to do it again I would not mold them and stick them on, I would just laminate them straight onto the boat and cut them in situ.
I have also been working on molding some hooks for outfitting the deck and for the hatch panels. I made 2 molds, one is wood covered in packing tape and the other is minicell foam covered in packing tape.
I laminated 3 sheets of CF together and then clamped it between the two moulds. The results were quite good, for me anyway!
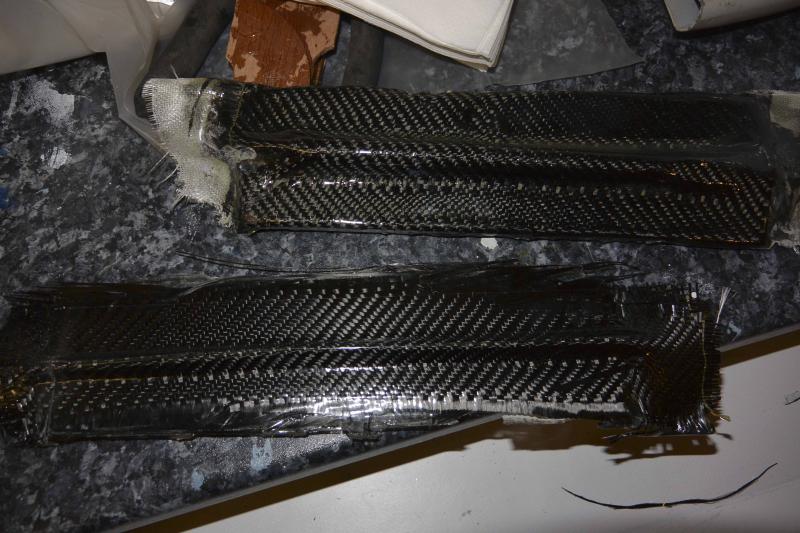
The top one was made a while ago using some upholstery foam clamped to a mold and some pvc plastic sheet as a mold release. I had to do a little sanding and an additional coat of epoxy which will need further sanding so I thnk the minicell foam is a much better method. You need to ensure the packing tape has no wrinkles in it because they are transfered into the finished product.
I filleted and glass taped the underside of the deck. I have been waiting to do this because the deck seems so fragile when it is just tack welded. For the first time on this build the sun had quite a lot of warmth and the epoxy flowed really nicely. having now experienced how well the epoxy works in the warmth I will not use it when it is cold - sunny days only.
The glass tape and fillets have since set and the deck is really solid feeling as is the hull. I was quite sceptical about how the stiff the boat was going to be but I am starting to believe!
Whilst the deck has been setting ( for two days) I started doing all the jobs required inside the hull before it is attached to the deck. I drilled oversize holes for the foot braces, rudder fittings and electric bilge pump (both cockpits will have an automatic bilge pump. My other kayak has a rule pump operated by a reed switch but as a treat, and to save on tricky wiring, I have invested in some automatic pumps. Seeing the size of the cockpit I was thinking of increasing the size of the pump but I have stuck with the rule 500.). The pump will be located behind the seat and will be attached using a clip attached to the bulkhead. The pump will be powered by an SLA battery in the day hatch.
 . The outlet will go through the shear panel.
I filled the oversized holes with epoxy and will drill the final holes after I have glassed the exterior.
I have decided to paint the interior (help hide my awful laminating skills). I started giving the inside a good sand and then cleaned it with thinners. I then put a coat of primer on. I am not painting the Bulkheads so they will be sanded and varnished. I have also left an area about two inches down from the shearline free from paint. I thought it best to allow the epoxy to bond to epoxy not to the paint. I will then patch it up when the hull has been joined.
I also started sanding the hull. This was actually quite satisfying. It made the kayak look far more finished. i will only rough sand it start with and will final sand it only just before I laminate the exterior.
Unfortunately I found a slight problem on the hull. The transom was not square which means when I attach the rudder it will not be straight - I will go round in circles. I have epoxied another piece of ply (from a deck form) shaped to the transom. When it is set I will plane or sand the end square. It will be painted anyway so no one will know (apart from you). I found the transom quite hard to keep in place when I was stitching the hull. I thought I had got it right but I must have moved.
Offline
#10 12 Feb 2015 8:19 pm
- richy.s1
- Member
- Registered: 4 Dec 2014
- Posts: 17
Re: Double Shearwater Stitch and Glue
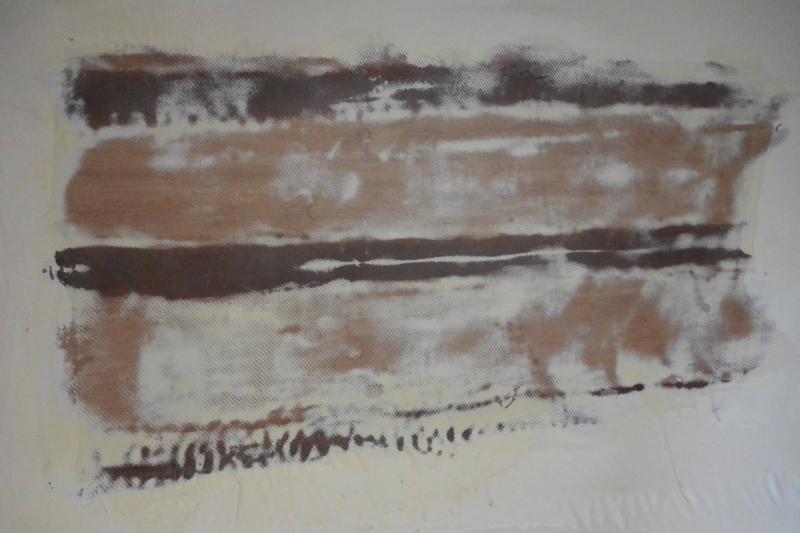
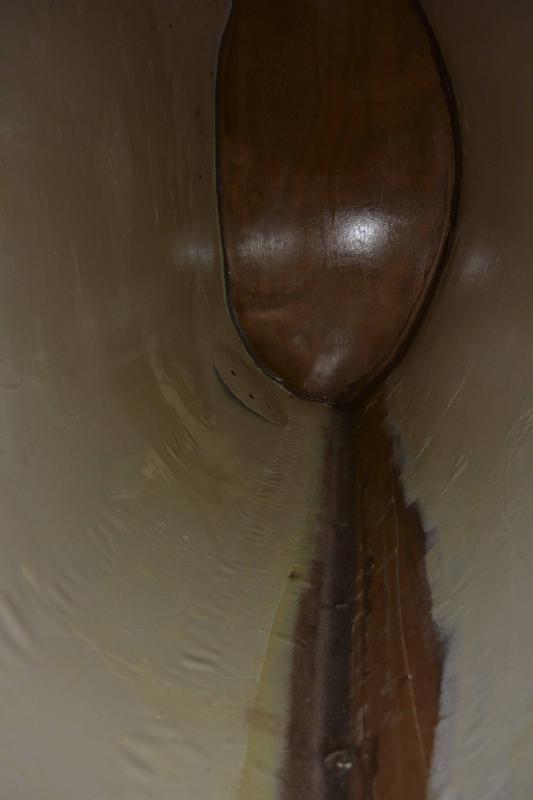
Quick update today. I only added another coat of undercoat to the interior but I took some pictures to share
Here are the pictures of the holes I drilled for the foot braces (despite the photo making them look funny they are round). I filled them with epoxy thickened with wood flour. I drilled the holes 10mm and the bolts are 6mm I think. Whilst I was doing this I also noticed a few tiny gaps in the puzzle joints so I filled these with thickened epoxy. The original wood flour would be too course to fill these gaps so I used some of the dust from my sander, this made a paste as smooth as car-body filler which was ideal for neatly plugging small gaps.
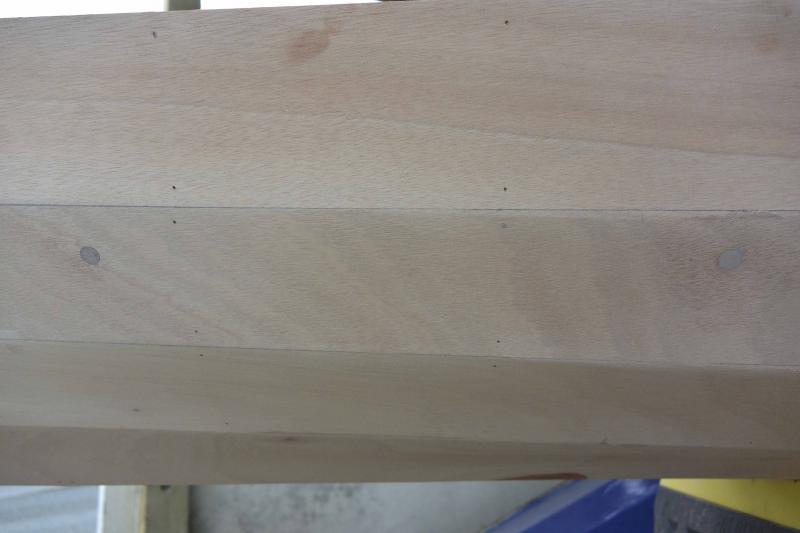
Here is a picture of the piece o ply to straighten the transom. It was only out by a few mm so I will trim it down till it is square. This area will be covered anyway so you will never know there is a repair

Next up - sanding the underside of the deck ready for priming and undercoating.
Offline
#11 23 Feb 2015 2:41 pm
- richy.s1
- Member
- Registered: 4 Dec 2014
- Posts: 17
Re: Double Shearwater Stitch and Glue
Just a quick update since the last post. I have not got any pictures because I have just been doing some fiddling about and attaching the deck.
I gave the underside of the deck a good sand and knocked off any sharp edges. I then painted the underside of the deck with two coats of undercoat and two coats of marine paint. (I have since then had to sand some paint off, marine paint is very tough).
Once this was dry I had a dry run of attaching the deck to the hull. It fits ok but there are a few areas I have had to work on. I had to trim the two central bulkheads a little and the hull did not fit the rear of the boat very well at all. I also found that it took quite a lot of pressure to mate the two peices together and the copper wire kept on breaking. Due to this I bought some steel wire and this worked a lot better and I managed to get quite a good fit. I left the kayak for a day or two without epoxying the two halves together then went back and tweaked any areas I was not happy with.
I then joined the two together by laying a fillet and rolling out some pre-soaked fibre glass tape which had be pre-cut. No real problems here bcause access is pretty good through the cockpits and hatch openings. Unfortunately, whilst doing the rear cockpit, I had the kayak on the floor so I could get right to the back of the footwell, and I put all my weight on the hull and it cracked the middle seam - bugger.
I thought I had better fix this immediately so I sanded an an area inside to remove most of the paint and then laid a length of fibreglass tape along the crack and then covered it with a patch of cloth about a foot by two foot. I was wandering if I should have sanded the fillet out and relaid some epoxy but I think this should do the trick (there is no cracking on the outside of the boat).
Needless to say, after this anytime the boat is on the floor I have used some cushioning.
Once it is dry I will sand it and repaint it - no one will ever know it happened.
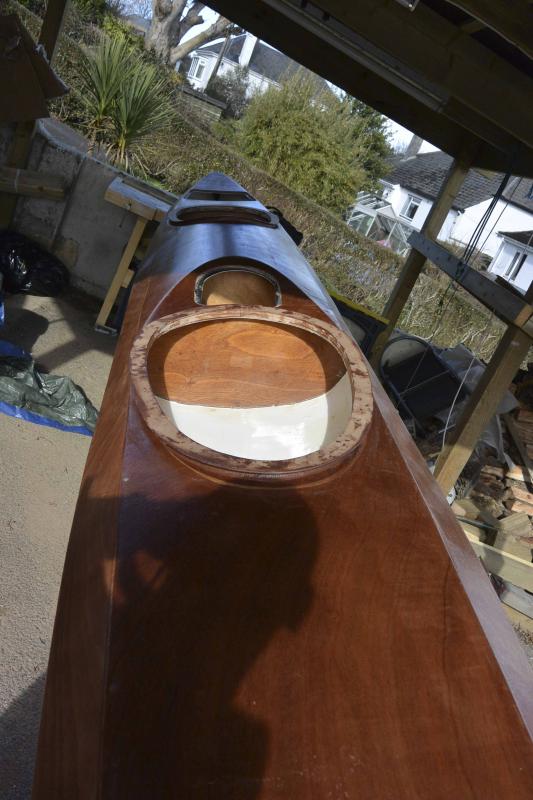
Here is a picture of the internal seams and the fillet around the bulkhead. I left the wires in until the fillets where hard then used a little bit of heat to pull them out. Because I needed to put some pressure on to make the two halves mate I did not want to simply glue it as per the instructions. This worked pretty well.
You can see where I left the wood bare to allow the epoxy to bond straight to the wood, I thought this would be stronger. Once this has set for a couple of days I will sand it all and give the inside a final coat of paint.
I have also filled most of the wire holes in the deck ready for sanding.
I have noticed that I have got epoxy everywhere, finger prints all over the hull, little globs stuck in odd places. This does not seem to be the case on any of the videos I have watched. I am not too worried because it will sand off. Does anyone else have these problems?
All going well I will start sanding the hull and deck tomorrow.
Offline
#12 5 Mar 2015 9:12 pm
- richy.s1
- Member
- Registered: 4 Dec 2014
- Posts: 17
Re: Double Shearwater Stitch and Glue
I have made some good progress since my last post but I have also had some significant problems. I had read about these problems on clc boats website but still could not avoid them. They will end up being comsetic only but they have been a bot of a pain.
Having sanded the hull and the deck fully with 80 grit and 120 grit I was ready to laminate the kayak. I found it difficult notto sand too much and had some problems with the chines. Because the shearwater is multi chined it seemed there was a lot of areas where I could (and did) over-sand. I cannot put the wood back on so hopefully it won't be too noticeable. The two areas which seem the worst are the bow and the stern. I was going to paint these but I had a roll of carbon fibre which I got on the cheap so I thought I would use it on these areas. Unfortunately this has also caused me some problems.
I decided to glass the kayak inside so I could increase the temperature. I also put the epoxy in the airing cupboard to make it nice and runny.
I read on the internet I should warm the kayak up and then laminate in a reducing temperature to stop air bubbles forming. I did this but unfortunately I got loads of air bubbles. I also found it quite difficult to wet out two layers of cloth.
To laminate the CF on the hull I wet the hull out first and draped the CF over it and smoothed it out getting rid of any wrinkles. I then laid the GF over the top and wet this out as usual. This worked well but, just as I got air bubbles in the GF, I also got air bubbles in the CF which will need cutting out
I had filled all the stitching holes in the deck because they would be more visible but left the ones in the hull unfilled. I had a number of bubbles form around these holes.
Having glassed the deck I cleaned up the shear with a knife and some sandpaperso it was nice and smooth to lay the deck glass over
I then glassed the deck leaving an inch or two overlapping the shear. The deck glassing went much more successfully and I did not get any airbubble at all. I think this was a combination of having filled the stitch holes, not having to laminate more than one layer of glass fibre and perhaps I was a little better at working the epoxy.
On the plus side I did not have any areas where the glass fibre was floating and I managed to get most of the excess resin out.
I only ever mixed up 7 pumps worth of epoxy at any one time and I never had a problem with work time. The temperature was about 22 degrees.
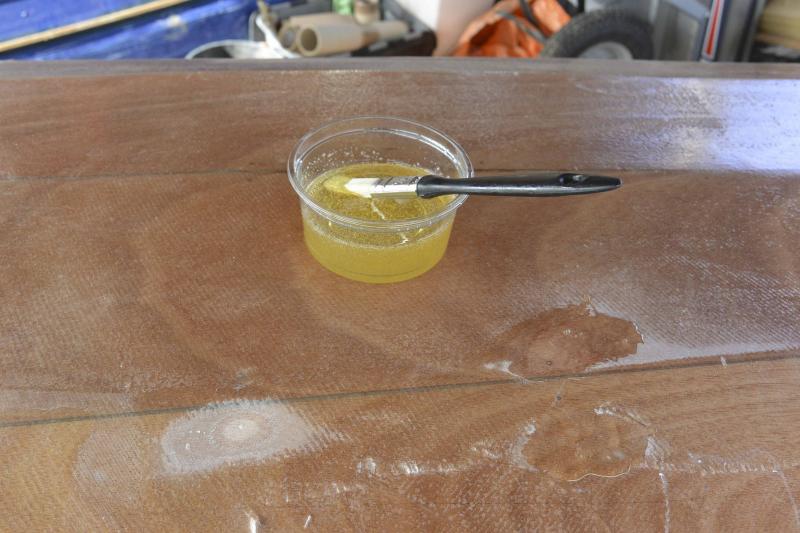
Before taking the boat outside I did a thin fill coat on the hull and the deck.
My next job was to deal with these air bubbles. I cut away the glass with a sharp knife then sanded the area smooth. I then placed a small patch of Glass fibre in the hole with a larger piece over the top. When this is hardened I will sand it down flush with the rest of the hull. I have tried to patch the carbon fibre using the same technique but it is quite obvious where the patches are. The epoxy over the carbon fibre is also a little milky, not sure why. I wills ee how it looks after I have sanded it and skimmed it with epoxy. I can still paint it if I do not like it.
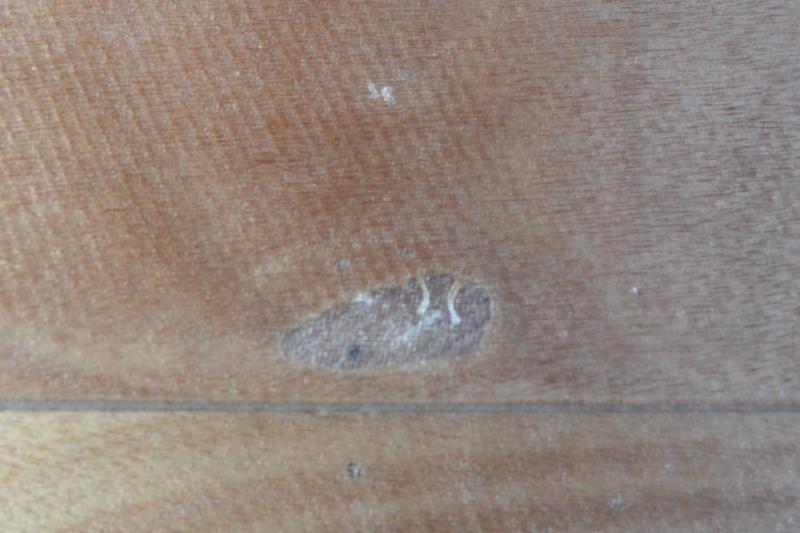
I had to do about 30 of these including the bubbles in the carbon fibre.
All in all the laminating was quite tricky and I only managed to do an average job, hopefully some time on the sander will fix it. If I had my time again I would not have put the carbon fibre but hindsight is a beautiful thing.
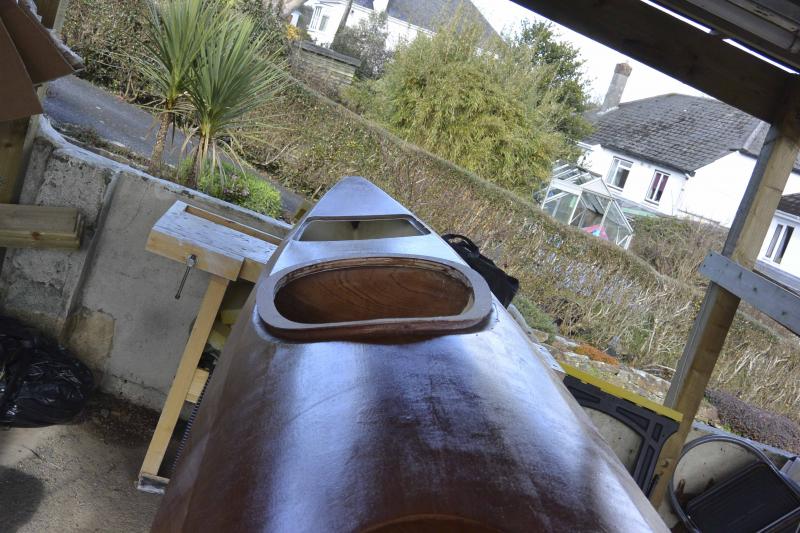
The next job I did was the cockpits. Before I put any epoxy on I did a test run to see how well they all went together. There are 5 peices, 4 peices of thicker ply which make the riser and a peice of 4 mm ply for the coaming. I clamped them in place and left them overnight. The next day I mixed up some thickened epoxy and stuck it all together. The coaming was slightly too long but once I have run the router around the inside it will not show.
 .
.
When clamping I only applied enough pressure to cloase up nay gaps and squidge a little epoxy out so the joint was not starved of glue.
I then put a little fillet around the cockpit. This was quite tricky to do because there is not much room so I applied the epoxy with a biro and then smoothed it with a gloved finger. I ended up having a fillet under the coaming as well.
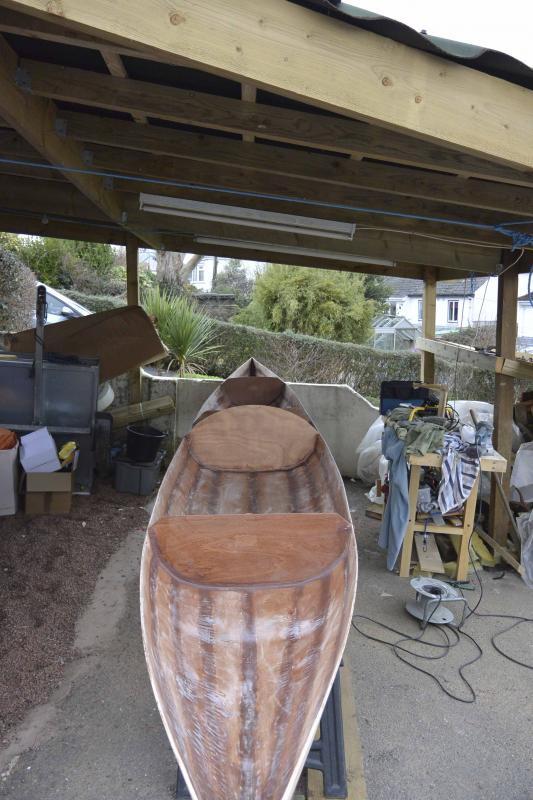
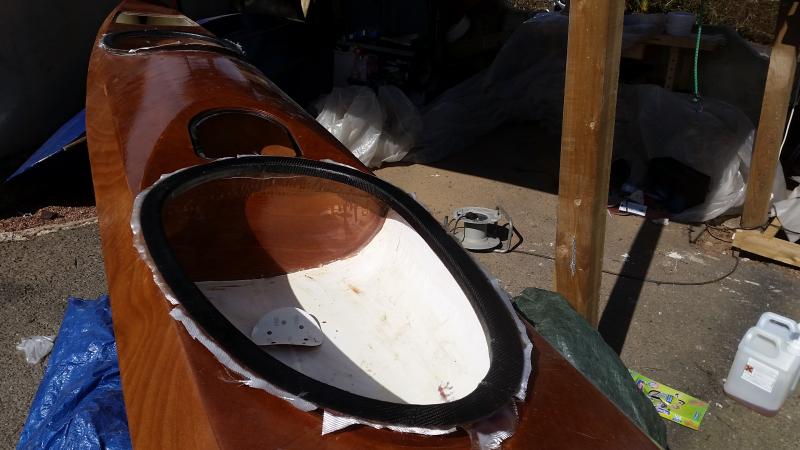
It has been interesting the difference each stage has made to the kayak during the build but it has never looked like a proper kayak.......that is until now. The cockpit seems to have really defined it as a kayak
Yesterday I spent three or four hours sanding the hull. Having read some info on CLC boats website I taped up my sleeves to my gloves and used a respirator. It was quite a windy day so most of the dust got blown away. I had to be really carefull near the chines again. I went through the glass once but only on a tiny patch so I am not too worried. I made sure I changed the sanding pad regularly to avoid heat build up. I used 6 sheets to do the bottom of the hull. The objective was to feather all the overlaps and patches and knock off any large imperfections ready for the final fill coat of epoxy.
Now the kayak is waterproof I do not have to be so meticulous when wrapping her up at night.
Offline
#13 6 Mar 2015 5:58 pm
- jbmerv
- Member
- Registered: 25 Mar 2014
- Posts: 24
Re: Double Shearwater Stitch and Glue
You really should not get bubbles like that with falling temperature, it's strange.
How long did you wait for it to warm up? - that can easily need a couple of hours.
Well done for taking this in your stride and keeping on going!
Offline
#14 6 Mar 2015 9:08 pm
- richy.s1
- Member
- Registered: 4 Dec 2014
- Posts: 17
Re: Double Shearwater Stitch and Glue
I left it for at least a couple of hours. As it was setting, I came back and checked it and noticed a few bubbles, I cut these with a utility knife and stuck them down again but in the morning most had re-sealed and risen again and some had set flat but were grey, like the cloth was starved of epoxy. Just means lots more sanding for me because my repairs where a bit messy and the carbon fibre looks scrappy because of the patches not blending in well. When I did the deck, which was the following day, I went through the same process and got no air bubbles at all. By this time the kayak had been inside for over 24 hours so maybe the wood had not got up to temperature by then. My hull design involves some paint and some bare wood and by luck quite a few of the bubbles will be painted over so as long as I am patient with my sanding it will be fine.
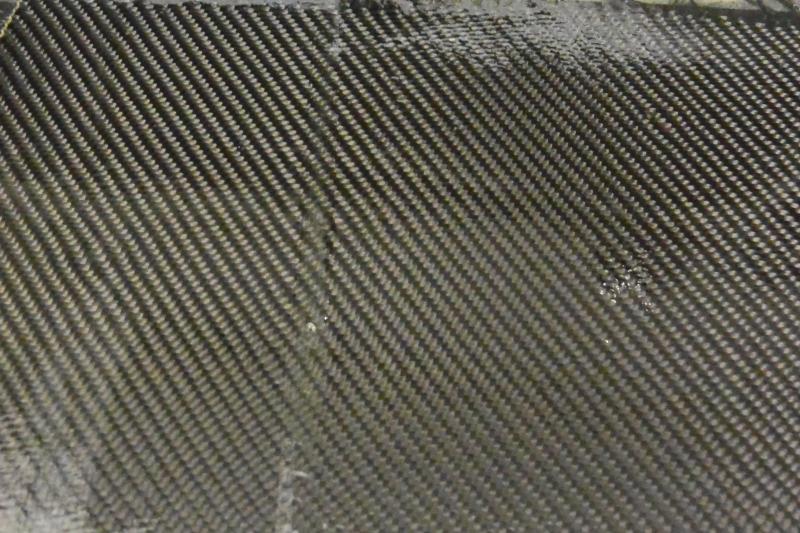
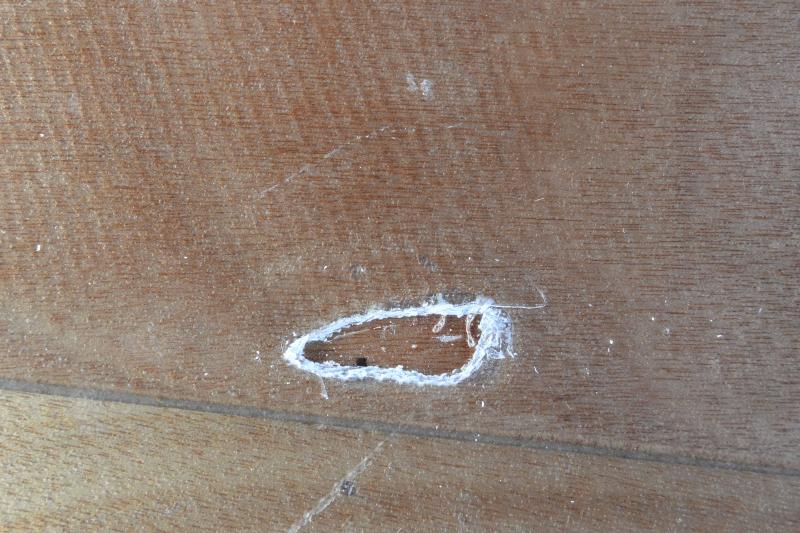
Here is a picture of the CF patch
It looks a little scrappy but as a story of my boat building oncompetence, I quite like it. I will continue to think about whether I will cover it up.
I have done a little work on the cockpit. I got together some sanding tools and a router and started cleaning them up
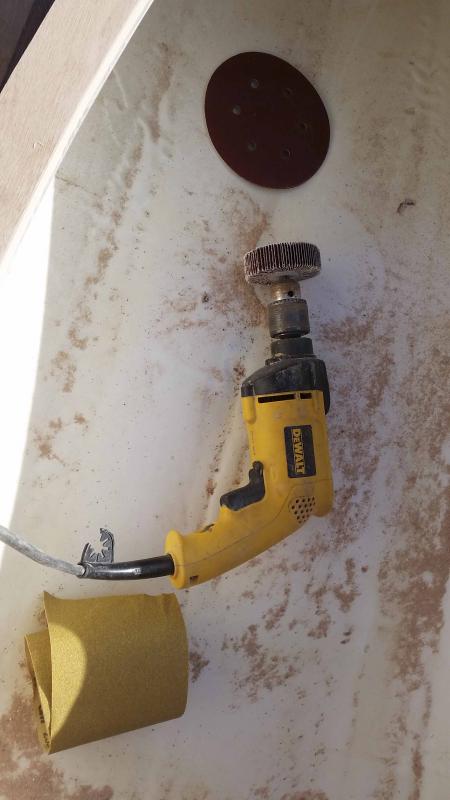
I am not a big fan of sanding and I will use any power tool I can if it stops me having to do much work. For this job I used my DA sander for the flat bits and had resigned myself to hand sanding the rest untill I discovered the flapper wheel you can see in my drill. It was awesome and meant sanding the curved sections was much easier. After getting it all sanded and square with no epoxy dribbles I used a router to round the edge over

Then finally I hand sanded the rest including underneath the cockpit so the glass fibre will bond to the epoxy.
It was a satisfying hour's work in the sunshine.
On a slightly different note I retrofitted a rudder to my single sea kayak (p&H scorpio) which gave me an opportunity to compare how much storage there is in the shearwater double in comparison. There is loads! I was a little concerned when I chose this boat over the chesapeake double that I would struggle with storage space but that will not be a problem. My scorpio has enough room for expedition style trips and I reckon I have another 30% or more than that....oh I cant wait to go kayaking
On another tack, last year I started making a cranked shaft wooden paddle which I couldn't finish because I did not have any epoxy. I will hopefully get it finished to use with this boat. I took a load of pictures of the build process but I cannot find them. When I do I will post another topic for people to have a look at. I think so far the project has cost about £40 (one sheet of ply, some premade 30mm carbon fibre tube and a lendal padlock widget). I am a little stuck because I need to stiffen the shaft by laminating it with glass fibre but I do not know how to do this. When I find out I will crack on. i was thinking of using some biaxial fibreglass sleeving but I do not know where to get some.
Offline
#15 6 Mar 2015 9:09 pm
- richy.s1
- Member
- Registered: 4 Dec 2014
- Posts: 17
Re: Double Shearwater Stitch and Glue
Sorry forgot to post a picture of the sanded cockpit
Offline
#16 28 Mar 2015 11:27 am
- richy.s1
- Member
- Registered: 4 Dec 2014
- Posts: 17
Re: Double Shearwater Stitch and Glue
Although it seems like I have made no progress I have done quite a bot of work, most of it on the sander.
After my last post I cleaned up both cockpits ready for laminating. Unfortunately I have been a little slack on taking photos so I will have to explain what I have done.
I laminated the cockpit coaming in CF. I wanted as few joins as possible so it looks neat so I did it in two peices. This meant I could not form the CF underneath the deck so I did it in two stages. Stage one was laying the CF and stage two was laying some glass fibre once the CF had cured.
laying the CF was quite easy. I did it in two halfs, left hand and right hand I coated the cockpit coaming in resin and then layed my piece of CF over it . I soaked the CF in resin and formed it to the cockpit. I cut any excess from the bottom rim of the cockpit to reduce the tension. I then squeezed all the excess resin off with my scraper. I did the same process for the other half of the cockpit. At the join I made a rough join which I would clean up after everything was layed up correctly. I allowed the resin to start to cure so it was a little tacky. I carefully lifted the edges at the join and cut a sharp edge so the join was sharp. I also cut any excess from around the edges. I let this set for 24 hours.
When it had been curing for 24 hours I used a stanley knife to cut the excess away from the inner and outer rims.
Initially I gave the underside of thedeck by the cockpit a good sand. I coated the cockpit coaming in glass fibre as per the instruction booklet. I cut a number of pieces of scrap fibre glass and wrapped it around the cockpit. The instructions showed a number of thin overlapping strips. Knowing my laminating skills I knew this would cause me trouble so I used about 10 larger pieces so I did not have to sand so much.
I let this cure for around six hours (the weather is definitely warming up). I then added a fill coat.
24 hours later I trimed off the excess with a knife and added another fill coat.
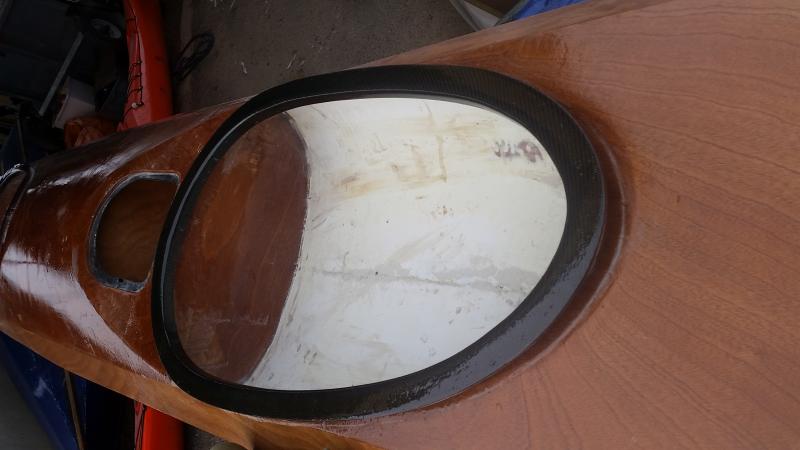
I am pleased with the results. I will leave it now till I sand the rest of the deck.
I had a small problem to fix before I start sanding. The bulk head behind the front cockpit does not meet the deck. it is just under 10mm short. I was not sure whether a epoxy fillet would bridge this so I decided to fillet and tape it just like the deck joins. I did this and it is now cured. I tested it by picking up the boat by the rear of the cockpit - not even a creak, happy days (throughout this build I have always taken the attitude of testing things I have been unsure of. I would rather it broke at home than on the water. So far everything has been very strong).
Just as an aside I can pick this kayak up easily. It is not finished yet but the only additions will be the deck and cockpit hardware and the end pours. I have a P & H scorpio and the double shearwater is currently much lighter. This is very pleasing. The other point is the additional width of the double gives a substantial amount of extra boat space around you. I think it will be very stable. My only concern is being able to control the kayak from so far back especially when my son will be in the front doing nothing. I reckon I will need some ballast in the front to ensure the boat is trimmed correctly.
There is a huge amount of free space in the cockpits. I will definitely be investing in some air bags and some foam.
Since completing the cockpit I have been sanding the hull. So far I have spent around 3 hours with about another hour to go. In one area, where I had to feather the extra layer of glass fibre, it was quite close to a chine and I sanded through the glass so I will need to patch this up. I will wait to do this till I have finished the hull just in case I do it somewhere else.
Rain forecast for the next week so probably wont make much progress....should have expected this from a Cornish Easter Hols.
I am started to feel confident the kayak will be ready for when the water warms up around June ready for some sumer adventures.
Offline
#17 7 Jul 2015 6:07 pm
- Evsco
- Member
- Registered: 6 Jul 2015
- Posts: 6
Re: Double Shearwater Stitch and Glue
Hi, I've just joined the forum and have enjoyed catching up on the build log.
Have you made it out on the water, yet?
Offline