A forum for discussing wooden boats and boat building
You are not logged in.
- Topics: Active | Unanswered
#1 25 Aug 2011 7:26 pm
- Navin
- Member
- Registered: 25 Aug 2011
- Posts: 39
Wood Duck 12
Hi,
I've just taken delivery of a Wood Duck 12 kit.
This should be an interesting, if slow build as I work away from home during the week and my weekends are filled with Ironman triathlon training, paddling and the usual family stuff.
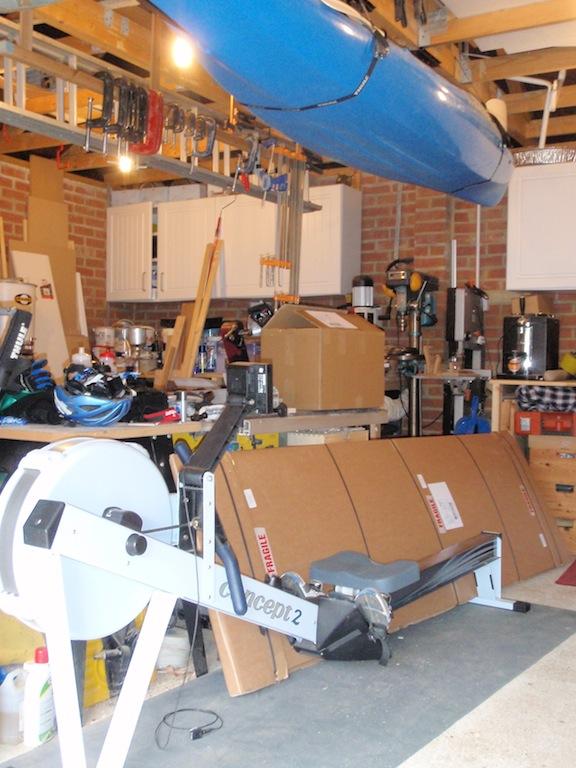
I'll have to rearrange my garage for the build, as you can see the parcels as delivered propped up by the indoor rower and under the plastic kayak,
Offline
#2 26 Aug 2011 11:09 am
- Paul
- Employee

- From: Gatebeck Cumbria
- Registered: 4 Aug 2011
- Posts: 134
Re: Wood Duck 12
Navin, I am looking forward to watching the boat progress.
If you are not going to be using it for a while I strongly recommend that you put the epoxy somewhere warm such as an airing cupboard. This will ensure that it is runny and ready for use when you start. It can be very frustrating to go out to your garage ready to start and find that you have to wait because the epoxy is not liquid enough to pump.
Thanks for posting.
Offline
#3 27 Aug 2011 12:18 am
- Navin
- Member
- Registered: 25 Aug 2011
- Posts: 39
Re: Wood Duck 12
Paul,
thanks for that. I was going to keep the resin and activator on a winemaking heat mat which should keep the chill off as the temperature starts to drop in the garage, and I'll keep it in the house during the week.
Offline
#4 31 Aug 2011 10:50 am
- Navin
- Member
- Registered: 25 Aug 2011
- Posts: 39
Re: Wood Duck 12
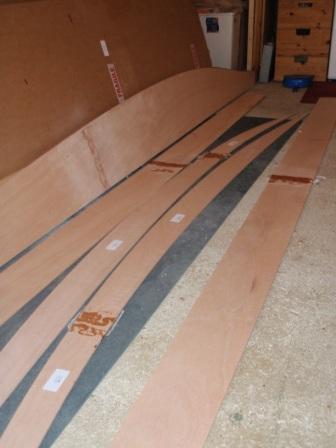
I made good progress at the weekend. I joined all of the long pieces together, my first time using epoxy. It seemed to go ok but I did have had excess oozing out from the joints to be cleaned up. Additionally the plastic sheeting I used between pieces left an interesting wave/crinkled pattern in the epoxy.
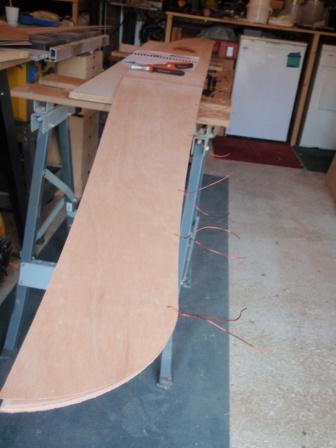
I bevelled all of the pieces per the instructions and I began stitching the hull to the forms, I reinforced the top of the forms by screwing scrap pine to them instead of using clamps, something I saw on the US forum.
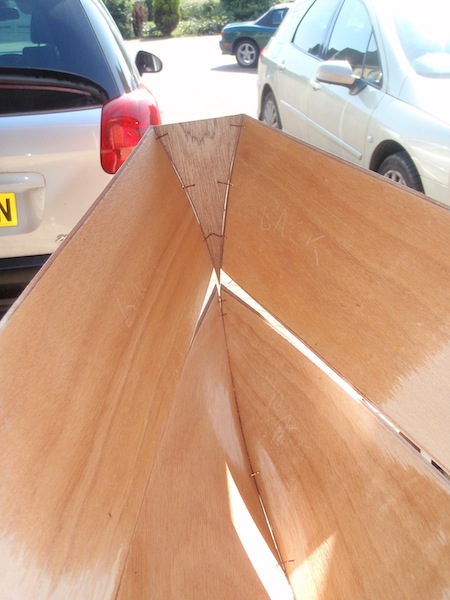
I had a go at bringing the bow and stern pieces together; it requires a lot of pressure.
I have loosely tied the pieces together at the bow and applied a clamp which I will leave on until I next get to the boat; I have left the stern unstitched. I will need to do something to assist in bending the ply at these areas, the manual suggests spraying water, has anyone tried steam? I have a wallpaper steamer and I’m wondering if this would be any good.
Cheers
Offline
#5 31 Aug 2011 3:11 pm
- Paul
- Employee
- From: Gatebeck Cumbria
- Registered: 4 Aug 2011
- Posts: 134
Re: Wood Duck 12
I was going to keep the resin and activator on a winemaking heat mat which should keep the chill off as the temperature starts to drop in the garage, and I'll keep it in the house during the week.
Your brewing mat is a good idea which we shall recommend to others. I think that it would also makes sense to insulate the bottles.
The crinkles left in the epoxy by the plastic are not unusual but you should sand them off as soon as possible since it is easier to sand when the panel is lying flat on the floor rather than on the boat later.
It is not always necessary to moisten the wood but it certainly works if it is needed. Using a steamer will make the job even quicker and a wallpaper steamer seems ideal although even a boiling kettle will work. You should also note when wood does not bend far enough if it is left overnight fixed as far as it will go it seems easier to bend it the whole way the next day. I am not sure why this is so – it is almost as though it gets used to being bent.
The labels should not leave a mark but if the wood has the sun shine on it the wood under the label will be a different colour. Once they are no-longer necessary you should remove the labels. I think that I shall put this in the help section since it applies to all of our boats.
You have made a rapid start!
Offline
#6 31 Aug 2011 4:35 pm
- Navin
- Member
- Registered: 25 Aug 2011
- Posts: 39
Re: Wood Duck 12
The crinkles sanded out OK.
Good suggestion about the identification labels, I'll remove them asap, I know what all the parts are now.
Offline
#7 4 Sep 2011 5:53 pm
- Navin
- Member
- Registered: 25 Aug 2011
- Posts: 39
Re: Wood Duck 12
Made some progress this weekend.
The bow and stern pieces came together ok; they had been left loosely clamped all week, and I used some water spray.
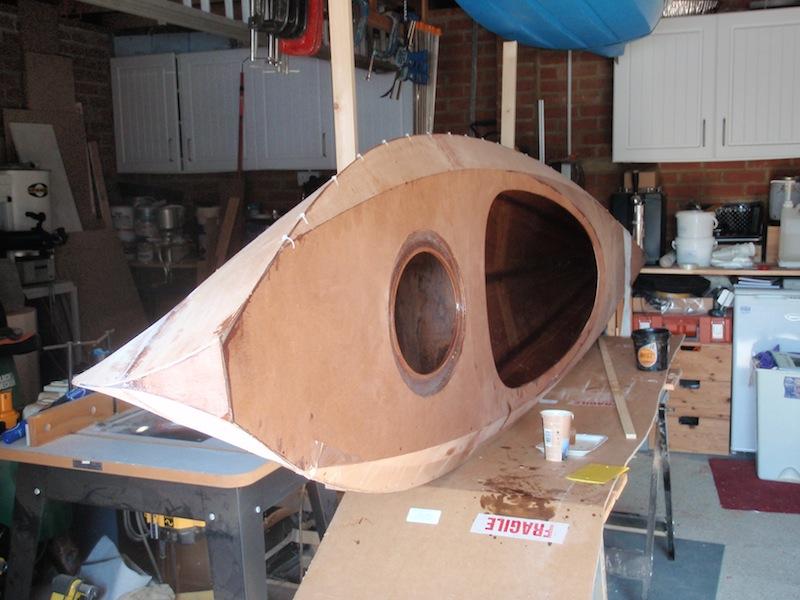
I tied in the sides and the transom, and I tied the deck and sheer panels.
With the deck sitting on top of the hull it's starting to look like a kayak.
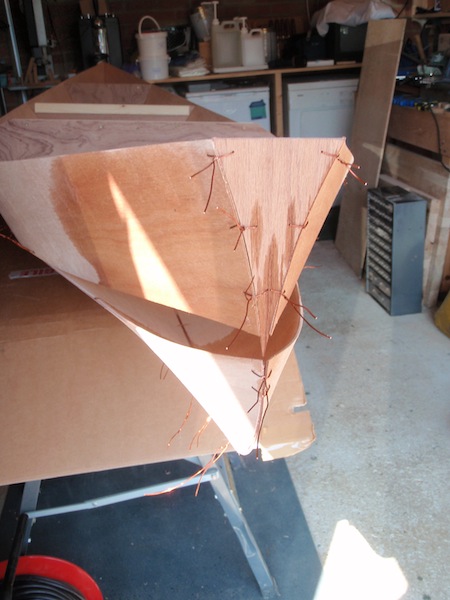

Closing up the stern where the transom projects downwards needs a bit of thought, the side pieces are tending to sit a bit low and inside the bottom panels at the stern, might need to unwire the last few ties at each side, then adjust the fit.
Offline
#8 8 Sep 2011 8:57 pm
- Mikey
- Member
- Registered: 10 Jun 2011
- Posts: 20
Re: Wood Duck 12
Hi Navin,
It looks like you are making good progress. How is itwith the hull and deck rejoining? I am keen to build the Shearwater which I think has a similar method, and keen to know any tips that will help.
I am thinking of starting one this winter as I plan to get on the water for Easter.
Good work. ![]()
Mikey
Mikey
Offline
#9 14 Sep 2011 12:18 am
- Navin
- Member
- Registered: 25 Aug 2011
- Posts: 39
Re: Wood Duck 12
Hi Mikey,
I have tack welded the hull parts and the deck parts and put the two together. It needs quite a bit of fettling to get a good fit. I am using web clamps and tie-down straps to get everything in position and then using some copper ties to hold it in place.
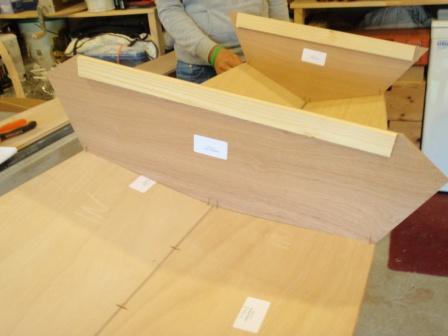
I've made some progress and I've cut out the hatch opening and glued in the sill
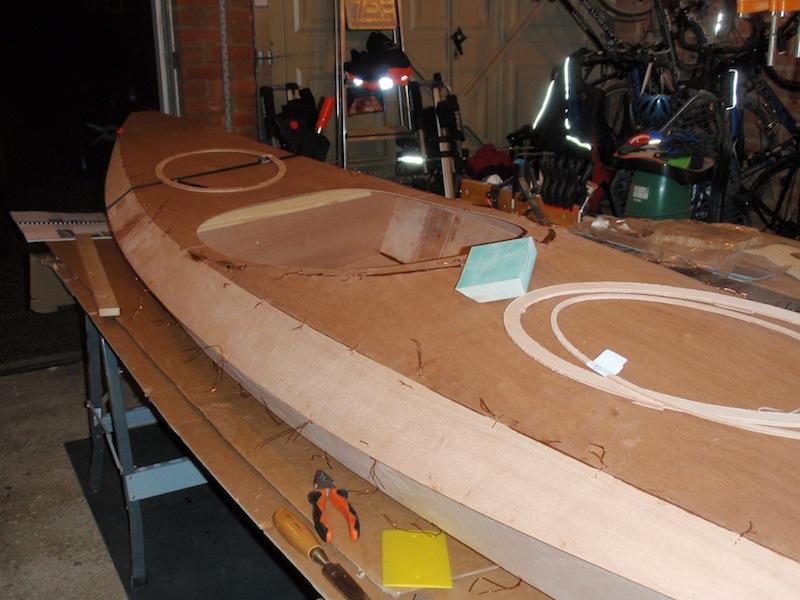
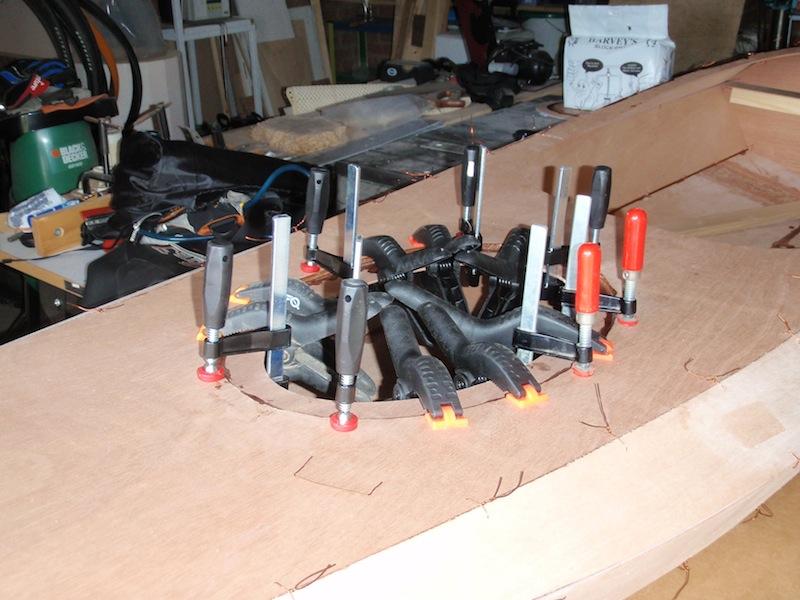
Next I'll move on to filleting.
Offline
#10 26 Sep 2011 1:52 pm
- Navin
- Member
- Registered: 25 Aug 2011
- Posts: 39
Re: Wood Duck 12
I have now filleted the joints in the hull and deck, taped up all the joints, glassed the cockpit area and epoxied all the interior surfaces. I removed all the wires before filleting.
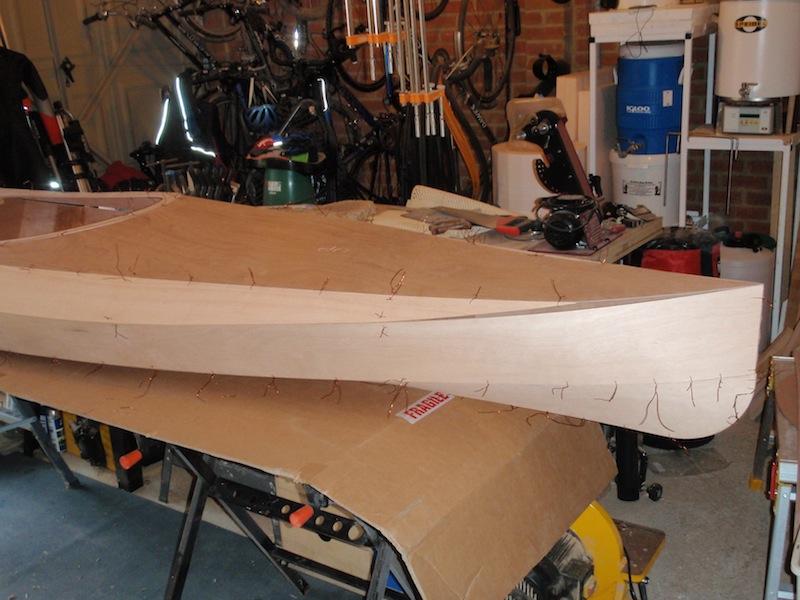
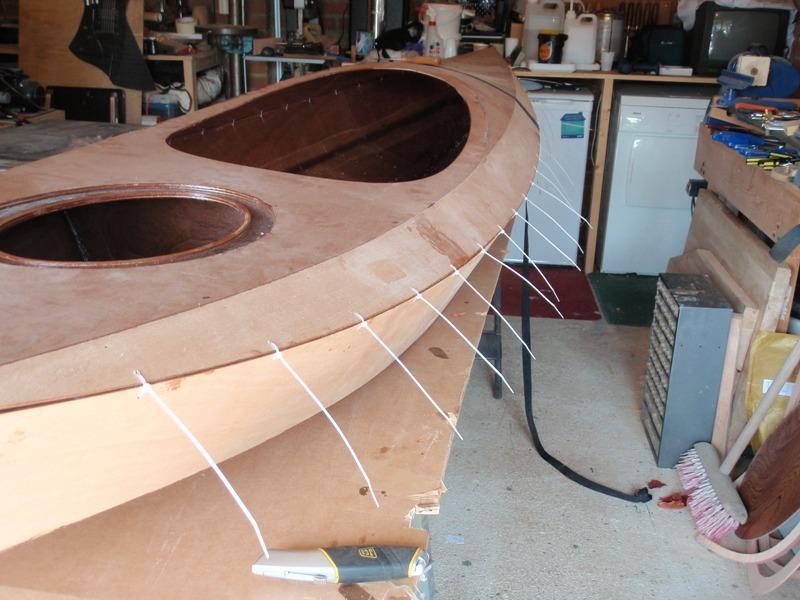
I spent yesterday attaching the deck to the hull and tack welded both together, the deck had sprung out quite a lot since removing the forms but with a little persuasion it has all gone together and looks fair. I used cable ties as I found these easier to use for single handed assembly; they were long enough to loosely thread with the deck and hull separated and easy to tighten with one hand whilst the other applied pressure and held the joint in alignment. I used a tensioning tool to tighten the ties to a consistent pressure and cut the ties. The disadvantage is that the holes are slightly larger (2.5mm) than the wire holes but they will be filled and don't look outrageous - we will see when the boat is finished if they are a distraction.
I am away from home for the rest of the week so the tacks should have cured by the weekend ready for filleting and taping the hull to deck joints on the inside.
On that point the remainingg roll of tape for the joints looked small so I unrolled it and there is only enogh to tape one side (3 metres or so) so I had to order some more. I checked the manual and I haven't taped anything I shouldn't and I haven't had any waste tape so far.
Offline
#11 26 Sep 2011 4:25 pm
- Phil
- Employee

- Registered: 8 Jun 2011
- Posts: 74
Re: Wood Duck 12
Hi Navin,
Thank you for the feedback. If we are not told we don't know, so despite plenty of these being built, things do occasionally get missed or overlooked. Appologies you were short on the tape. I have arranged for you to be reimbursed for tape you bought.
The boat is looking really good by the way, it looks a neat job.
Good luck!
Offline
#12 27 Sep 2011 5:04 pm
- Navin
- Member
- Registered: 25 Aug 2011
- Posts: 39
Re: Wood Duck 12
THanks Phil,
the tape wasn't very expensive, and I took the opportunty to order a few other bits at the same time.
I have a question about rounding over the edges before glassing the exterior - how much to round over? the manual says about 1/4 inch radius which is 1/2 inch diameter, does it need to be that much? it seems that this will remove a lot of material at the bow for example and rather negates the effort in getting neat bevels here. Also I quite like the line where the sheer panels meet the hull, could this be left sharper?
cheers
Offline
#13 27 Sep 2011 5:35 pm
- Phil
- Employee
- Registered: 8 Jun 2011
- Posts: 74
Re: Wood Duck 12
Navin,
I would round over to a radius you are happy with. The radius given is there as a guide and everyone likes a differnt radius - it's a personal thing. It does require a radius as otherwise the fabric will not lie flat making a bubble underneath.
Another thing to bear in mind, is a sharp edge will not keep the varnish or paint on as it is easily chipped off. It is, like most of the boat, down to personal preference for the finishing.
Offline
#14 28 Sep 2011 8:21 am
- Navin
- Member
- Registered: 25 Aug 2011
- Posts: 39
Re: Wood Duck 12
Thanks for your replies
Offline
#15 30 Sep 2011 11:33 am
- Navin
- Member
- Registered: 25 Aug 2011
- Posts: 39
Re: Wood Duck 12
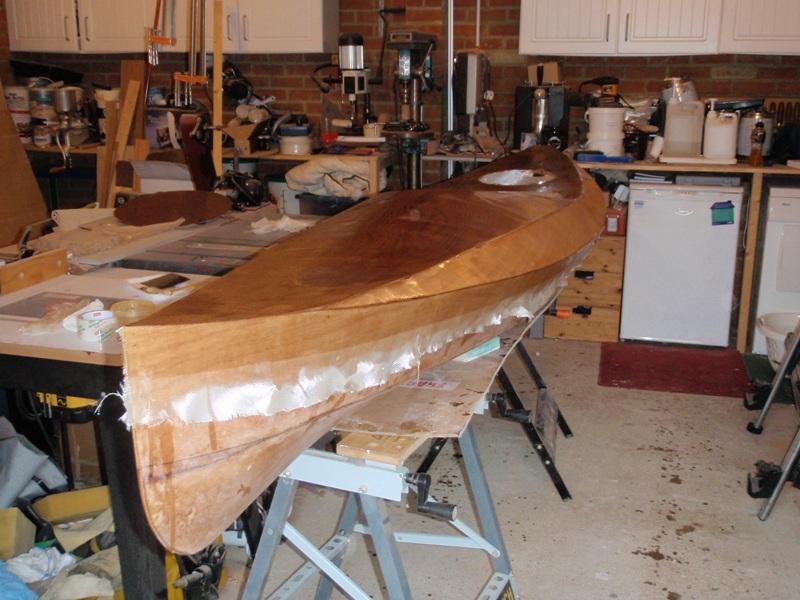
Well that wasn't as easy as it looked
I am joining the deck to the hull today. They were tied together and tacked last weekend and I am taking advantage of the higher temperatures toady to get this done.
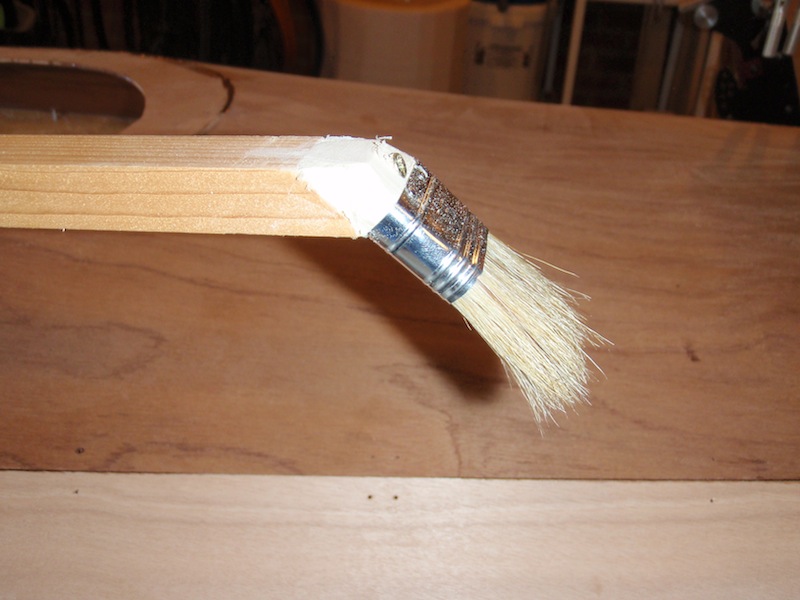
I made the angled brush tool as described in the manual and also a long stick with a curved end for the fillets.
I was able to fillet all the way to the bow and the fillets looked good.
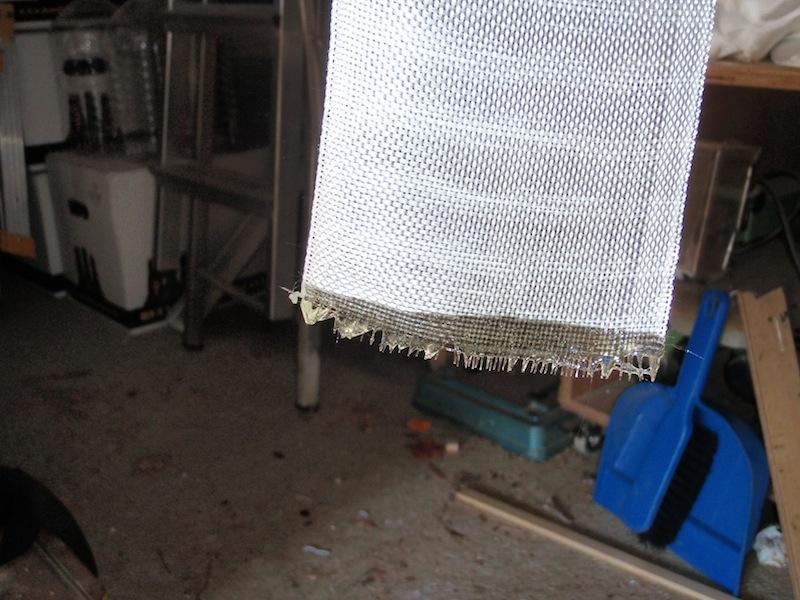
Taping was harder; first issue was saturating the tape, I wound it loosely before soaking in unthickened epoxy but it wasn't penetrating all the way through so I unwound it and re-wound it outside-in which seemed to work.
Second issue was a number of threads coming loose from the end of the tape and making unrolling inside the hull difficult. After much manoeuvring with the brush and poking with my filleting stick I got the tape unrolled to within six inches of the bow. There is a blob of unwound threads at the far end though.
Filleting and taping in the stern through the hatch was easier as I can reach all the way to the stern, although there is much less room to look in through the hatch.
I'll tape the other side later on, I have put a little epoxy on the end of the pre-cut tapes hopefully this will prevent he thread problems I had earlier.
Pictures and update to follow.
Offline
#16 30 Sep 2011 4:28 pm
- oak_roberts
- Member
- From: Lancaster
- Registered: 22 Sep 2011
- Posts: 9
Re: Wood Duck 12
Hi Navin, I haven't actually made a kayak yet, but I was thinking about your problem with the tape not unrolling, have you thought about cutting a long strip of polythene or something (maybe a length of black bin liner), and rolling the tape up with it, or at least towards the end of the tape. It would stop the layers of the spiral becoming tangled if that was the problem. Like I said I have no experience making kayaks as yet (I intend making two Pax 18s as soon as I can afford the materials and plans), but as far as I can picture the problem, it could work.
Fyne Staff, please correct me if I'm wrong though!
Good Luck!
Offline
#17 30 Sep 2011 5:41 pm
- Navin
- Member
- Registered: 25 Aug 2011
- Posts: 39
Re: Wood Duck 12
Good suggestion.
I epoxied the ends of the strips to stop the fraying and it worked a treat. The strips also seemed to unroll much more controllably, might just be that I've had more practice.
I used my angled brush tool and although sceptical when I saw it in the manual it is a really useful tool for taping and then epoxying over the tapes.
I was able to support the boat against uprights on two workmates so I haven't had to construct any trestles or saw horses although I think purpose built ones with webbing would be easier if I make any more boats.
Here's a view inside towards the bow, all taped up, not quite as neat as I would like but functional.
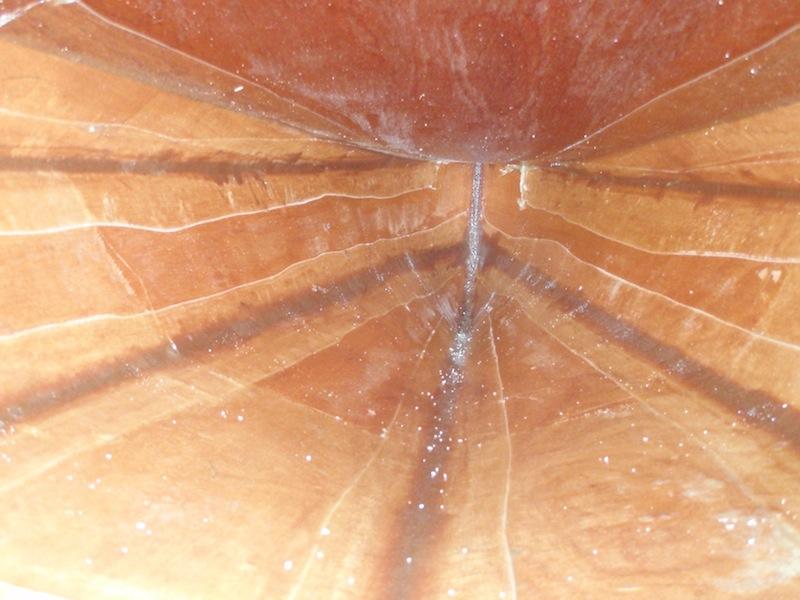
It's hot here today so this should cure quite quickly.
Offline
#18 1 Oct 2011 9:34 am
- oak_roberts
- Member
- From: Lancaster
- Registered: 22 Sep 2011
- Posts: 9
Re: Wood Duck 12
Looking good. Nice one.
Offline
#19 9 Oct 2011 8:12 pm
- Navin
- Member
- Registered: 25 Aug 2011
- Posts: 39
Re: Wood Duck 12
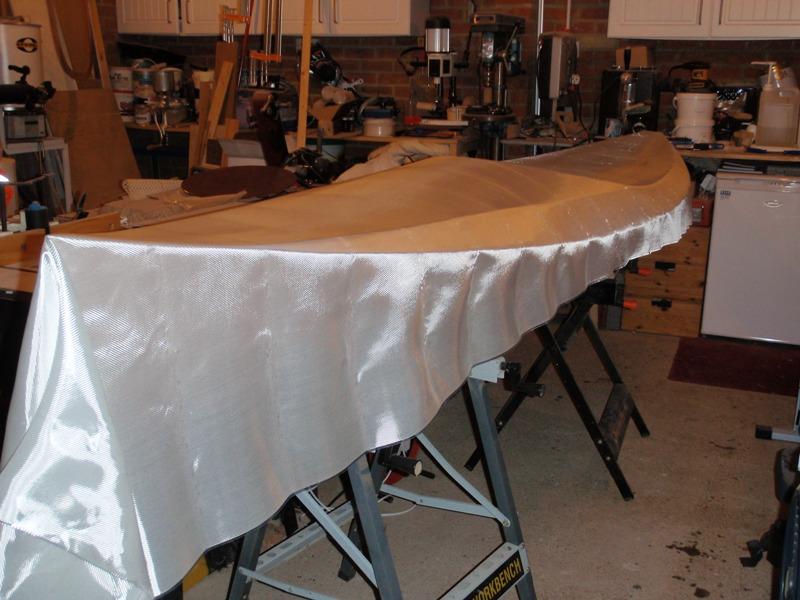
I've been sanding for ages, so finally got to glassing the hull.
I was surprised how compliant the fabric was and it lay on the hull without any trouble. I took my time smoothing it out from centre to the ends and down the sides, and it did seem to cling to the hull.
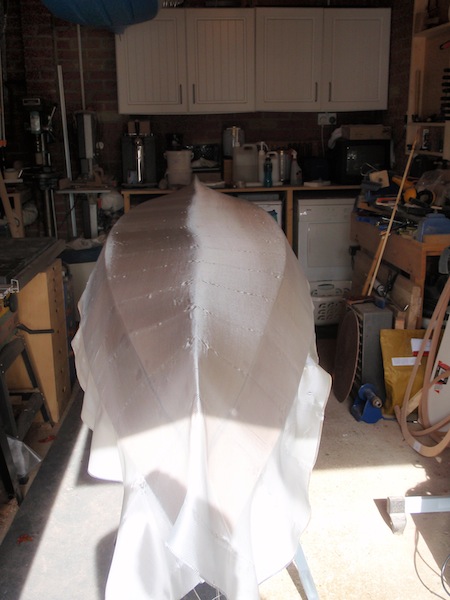
Wetting out with epoxy went well and the squeegee is definitely the right tool for the majority of the work. I switched to a brush at the bow and stern where my squeegee was too straight for the compound curves.
Back to work tomorrow, have to wait to continue filling the weave.
Offline
#20 13 Oct 2011 8:58 pm
- beaker
- Member
- Registered: 9 Oct 2011
- Posts: 81
Re: Wood Duck 12
Nice lines - looking good so far. The inside of your boat looks pretty neat to me - mine's hidden behind the airbag now, so I can't see the wavy tape! I had to hack off the thread ends so as not to leave any sharp bits.
Offline
#21 2 Nov 2011 9:06 am
- Navin
- Member
- Registered: 25 Aug 2011
- Posts: 39
Re: Wood Duck 12
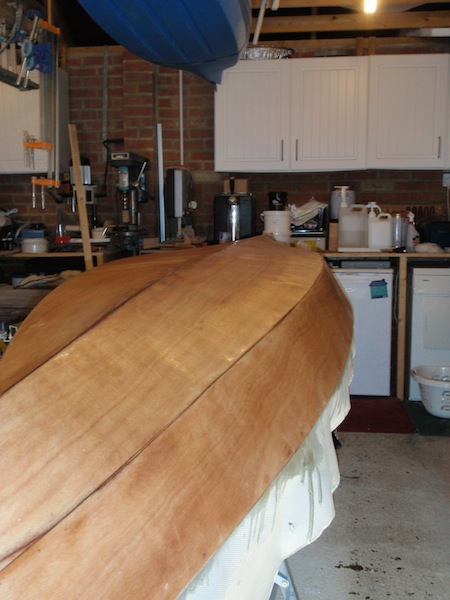
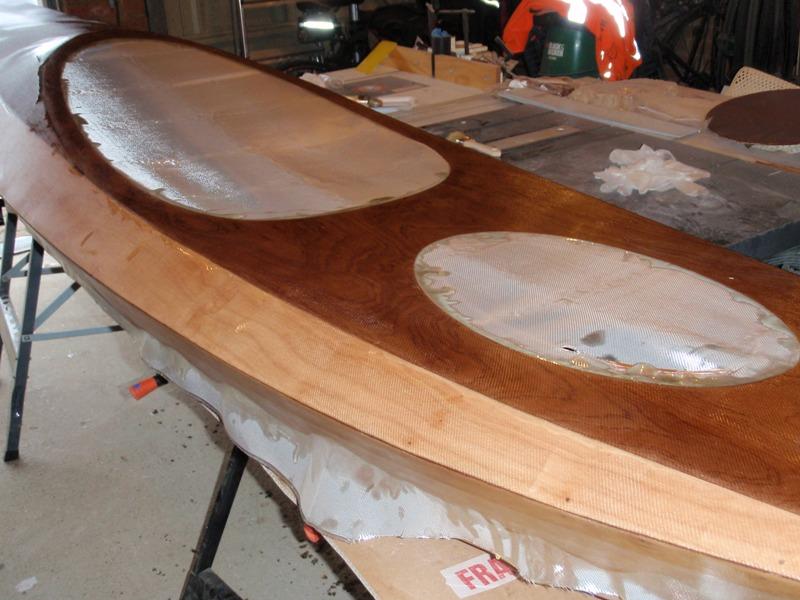
Managed to get round to glassing the deck at the weekend.
After lots of sanding of the hull (overdid the epoxy on the last coat) and sanding the deck to a good finish I taped the hull two inches below the shearline to get a clean line for the glass that overlaps the hull from the deck.
It went ok and as I have now had practice applying fibreglass (to the hull) I got a better finish on the deck with no bubbles.
Offline
#22 3 Nov 2011 5:25 pm
- fairplay
- Member
- Registered: 16 Jun 2011
- Posts: 109
Re: Wood Duck 12
...is the overlapping glass used to glue deck and hull together?...
...it does look very nice!...
'...so, how many kayaks do you really need?...' - '...one more!...'
Offline
#23 3 Nov 2011 8:54 pm
- beaker
- Member
- Registered: 9 Oct 2011
- Posts: 81
Re: Wood Duck 12
Looking very neat there.
I epoxied all the overlapping cloth down, which got blended in after lots of sanding so there was no line along the edge of the overlap. I'm interested to see how the masking approach comes out.
Offline
#24 6 Nov 2011 11:01 pm
- Navin
- Member
- Registered: 25 Aug 2011
- Posts: 39
Re: Wood Duck 12
Fairplay,
the glass from the deck overlaps the hull by a couple of inches and serves to further reinforce the hull to deck joint; the joint is glued edge to edge, then reinforced on the inside by filleting and running glass tape on the inside (see above) and then overlapped with the deck glass.
Beaker,
I saw the tape idea on another article on the net; once the epoxy has part cured the glass that overlaps the tape is pulled up as it doesn't stick to the tape, this gave a neat line to cut the excess off. It worked fine and the edge was easy to feather in. The downside is that the tape I used left quite a bit of residue that I had to scrape off (it wouldn't sand off).
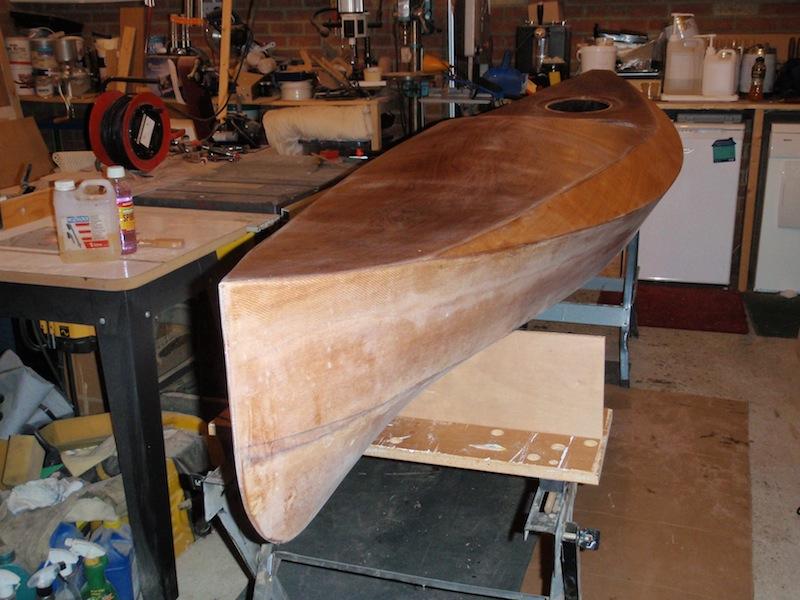
Sanded and feathered today and added a fill coat of epoxy.
Offline
#25 6 Nov 2011 11:22 pm
- Navin
- Member
- Registered: 25 Aug 2011
- Posts: 39
Re: Wood Duck 12
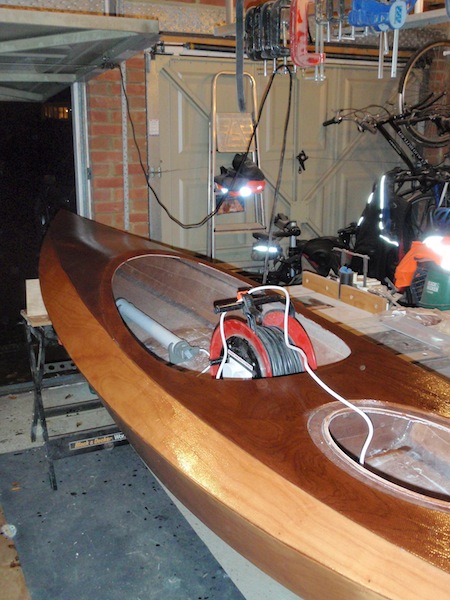
To add a bit of gentle warmth while the deck epoxy cures overnight I placed two tube heater within the kayak, one towards the bow and one towards the stern.
They are 120W each and just raise the temperature a little. The cables run in from above so they don'y contact the wet epoxy

Offline