A forum for discussing wooden boats and boat building
You are not logged in.
- Topics: Active | Unanswered
#51 13 Mar 2014 10:14 pm
- wilddog
- Member
- From: Devon
- Registered: 22 Dec 2013
- Posts: 143
Re: Guillemot build
This really is a very pretty boat! When do you hope to get her on the water? Can't be too long now surely?
Built a Skerry!
Offline
#52 16 Mar 2014 10:42 pm
- Rainbow
- Member
- From: East Devon
- Registered: 29 Sep 2012
- Posts: 75
Re: Guillemot build
Thanks Wilddog. The construction is complete so just finishing jobs to left to do. That involves getting the surface smooth and ready for varnishing. I'm currently building up the epoxy layer so I can sand level without cutting in to the glass fabric. Other jobs left to do include - installing the foot braces, seat, bulkheads and deck lines. If all goes well, I hope to have her on the water by the middle of summer.
Offline
#53 17 Mar 2014 4:38 pm
- wilddog
- Member
- From: Devon
- Registered: 22 Dec 2013
- Posts: 143
Re: Guillemot build
Well I hope to see you there! We'll be in an out of the water at Sidmouth, the Exe and the Dart this summer. Last one in the water is a squashed tomato!
Built a Skerry!
Offline
#54 22 Mar 2014 4:29 pm
- Rainbow
- Member
- From: East Devon
- Registered: 29 Sep 2012
- Posts: 75
Re: Guillemot build
I'll keep an eye open for a squashed tomato then! Lyme Regis to the Exe is my local area.
Last edited by Rainbow (22 Mar 2014 9:55 pm)
Offline
#55 22 Mar 2014 4:40 pm
- Rainbow
- Member
- From: East Devon
- Registered: 29 Sep 2012
- Posts: 75
Re: Guillemot build
I'm still in the process of preparing for varnishing. This Bahco 650 scraper tool is proving very useful for removing epoxy runs and burs. It has a double sided blade and I find it much easier to use than the standard carpenters scrapers. The edge is very long lasting. It would be a useful addition to the Fyne Boats product range.
I have slightly rounded the corners of the blade to minimise the risk of gouging.

Last edited by Rainbow (22 Mar 2014 9:46 pm)
Offline
#56 25 Mar 2014 11:17 am
- wilddog
- Member
- From: Devon
- Registered: 22 Dec 2013
- Posts: 143
Re: Guillemot build
A handy piece of kit. I have used a Sandvik boat scraper for years (before I even did any boating!) and they are brilliant. You can get replacement blades down at the ironmongers too. The really big ones have a toggle grip just above the scraper so you can get a lot of purchase on the tool. Careful not to rip through to the ply though, those things are pretty merciless when you get cracking with them.
Built a Skerry!
Offline
#57 12 Apr 2014 3:17 pm
- Rainbow
- Member
- From: East Devon
- Registered: 29 Sep 2012
- Posts: 75
Re: Guillemot build
Crabus Cedarus Kayakus, the kayak tree.
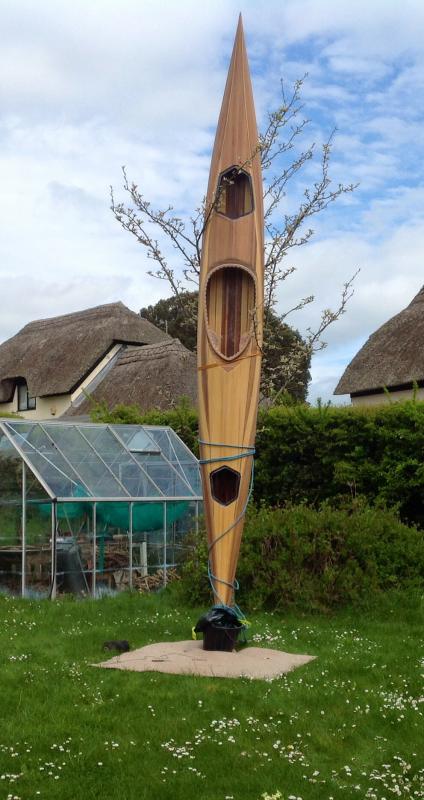
A convenient tree provides support while making an end pour of resin mixed with low density filler. This will provide strength where the seam tapes cannot make it into the narrow ends. The bucket is filled with water to help dissipate the heat of the mass of resin.
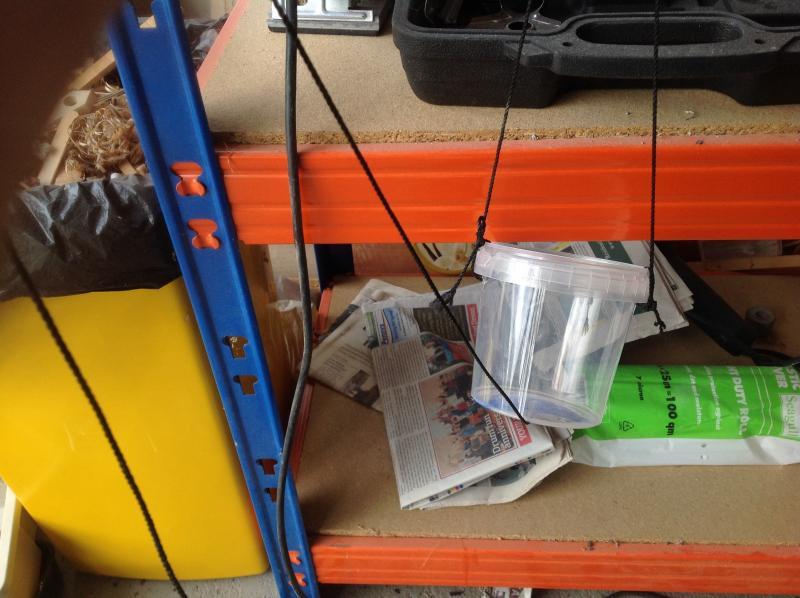
Here is the setup used to lower the resin down to the end then upend the container. It avoids dripping resin on unintended areas.
Last edited by Rainbow (12 Apr 2014 9:08 pm)
Offline
#58 14 Apr 2014 12:08 pm
- wilddog
- Member
- From: Devon
- Registered: 22 Dec 2013
- Posts: 143
Re: Guillemot build
Hmm...All I can ever manage to grow are your common or garden apples and cherries. A kayak tree would look well next to the money tree I am hoping to plant.
Built a Skerry!
Offline
#59 14 Apr 2014 4:16 pm
- Dinky Doris
- Member
- From: Wales
- Registered: 25 Aug 2011
- Posts: 23
Re: Guillemot build
It looks ripe enough to be picked. I understand that the eu have re-classified this fruit as a vegetable and is now demanding that only straight sided ones are grown.
DD
Offline
#60 14 Apr 2014 4:45 pm
- marlinspike
- Member
- From: Derby
- Registered: 9 Apr 2014
- Posts: 3
Re: Guillemot build
What size are the bees that pollenate it and are they regulated byt the eu?
Offline
#61 21 Apr 2014 10:42 pm
- Rainbow
- Member
- From: East Devon
- Registered: 29 Sep 2012
- Posts: 75
Re: Guillemot build
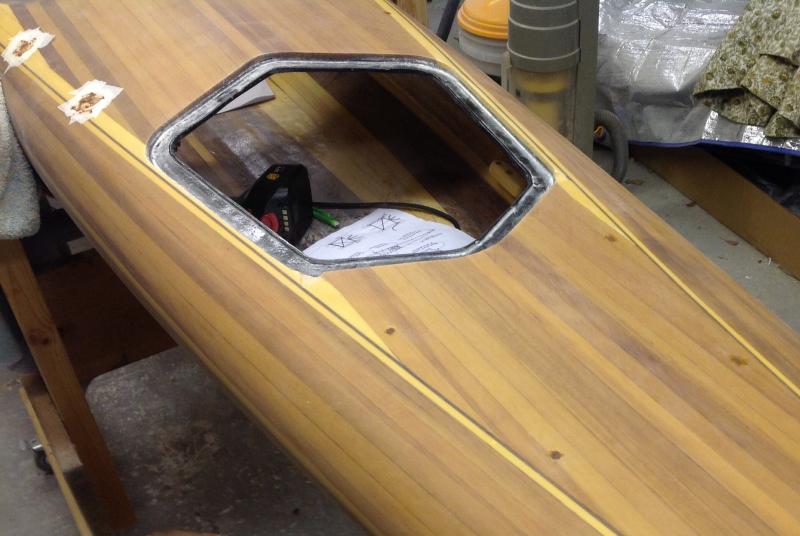
A few jobs completed in preparation for varnishing. Touching up with resin where needed and sanding down to get a really smooth surface. Holes drilled in the deck for the rigging. The holes have been drilled and filled with thickened epoxy. This seals the exposed wood. A smaller diameter hole will be drilled through the resin plug later.
Offline
#62 4 May 2014 6:06 pm
- Rainbow
- Member
- From: East Devon
- Registered: 29 Sep 2012
- Posts: 75
Re: Guillemot build
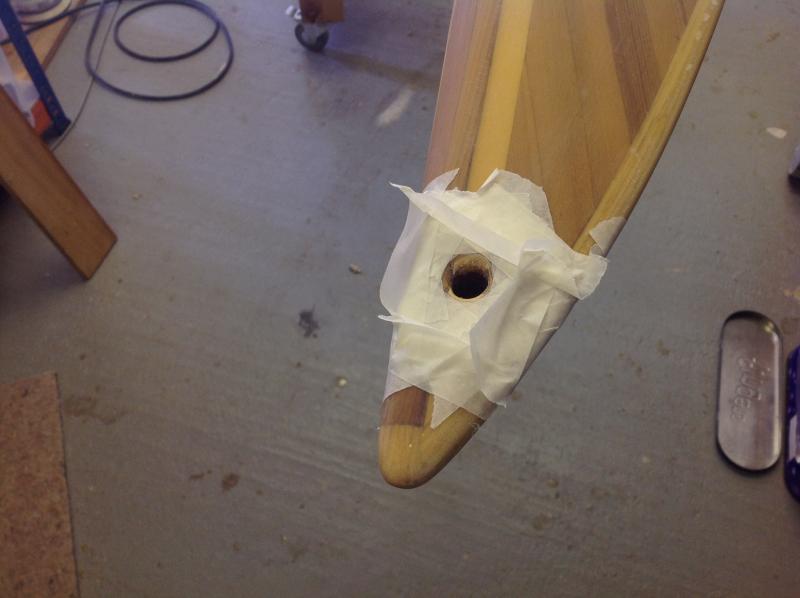
I've taken advantage of very little wind this weekend to do the remaining pour of resin into the stern end. Holes have been drilled through the end pours for the carry handles. Here, just about to fill the hole with resin to seal the exposed wood.
Last edited by Rainbow (4 May 2014 6:07 pm)
Offline
#63 24 May 2014 6:03 pm
- Rainbow
- Member
- From: East Devon
- Registered: 29 Sep 2012
- Posts: 75
Re: Guillemot build
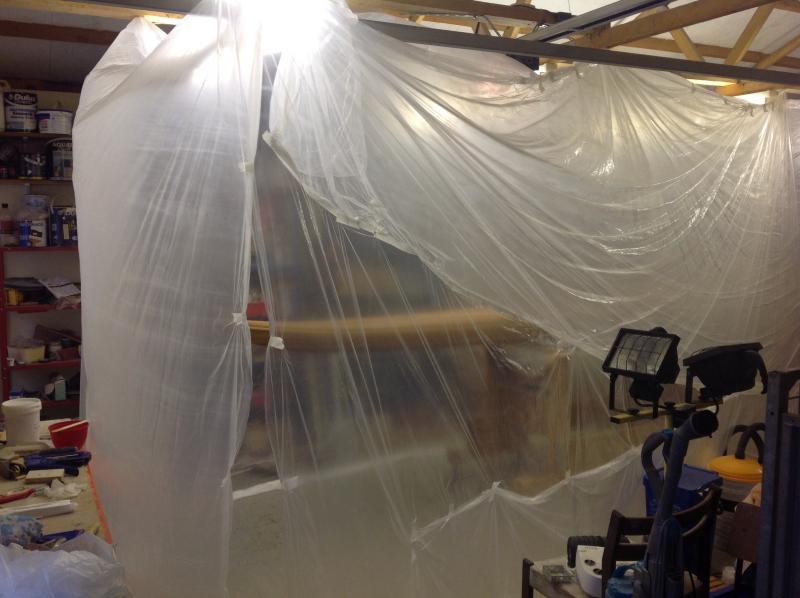
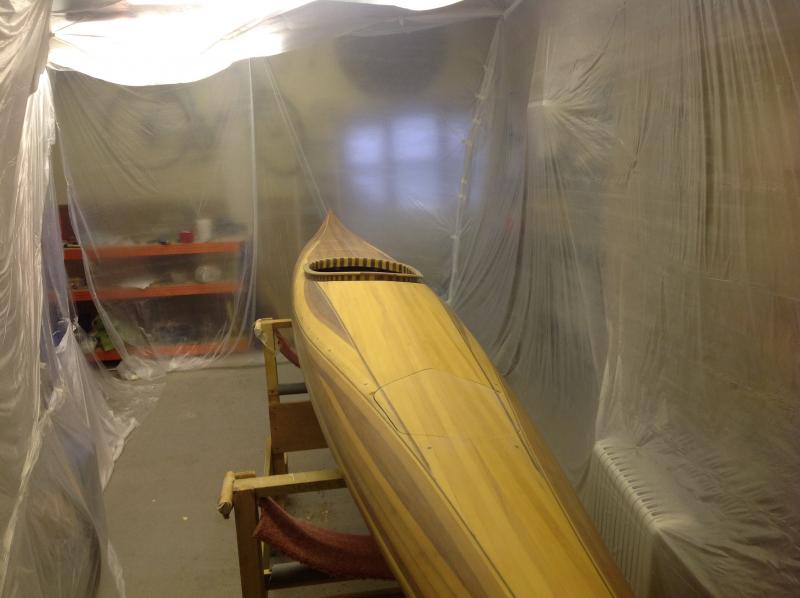
All set for varnishing. How to avoid dust spoiling the finish seems to be a heavily debated topic, with a myriad of techniques. I've tried to sweep and blow as much of the crud out of my garage but it is still very dusty. One comment I have seen frequently regards the heat of lighting causing dust to start moving. I've got a number of lights over my work area so that could be a problem. I've also got garage doors that will let in a large volume of moving air which is likely to set dust moving when I enter and leave. A tent made out of polythene decorators dust sheets is my attempt to minimise the dust reaching the varnish. As my contribution to the kayak building community research into varnishing techniques, I'm going to leave a small ioniser inside the tent, the theory being this will help any airborne dust to settle. Prior to varnishing I intend to spray the ground around the kayak with water to further reduce dust circulation. There will hopefully be minimal air circulation within the tent so I'll be wearing a respirator.
Offline
#64 24 May 2014 6:52 pm
- wilddog
- Member
- From: Devon
- Registered: 22 Dec 2013
- Posts: 143
Re: Guillemot build
Bonkers...but in a good way...!
Built a Skerry!
Offline
#65 24 May 2014 9:40 pm
- mtompson
- Member
- From: Dartmouth UK
- Registered: 23 Apr 2013
- Posts: 28
Re: Guillemot build
Yes, I'm going to make up a tent like this when I get to the varnishing, I would never be able to get my garage clean, really good idea.
Building a Skerry
Offline
#66 24 May 2014 10:27 pm
- Rainbow
- Member
- From: East Devon
- Registered: 29 Sep 2012
- Posts: 75
Re: Guillemot build
You don't have to be bonkers but it definitely helps ![]()
Offline
#67 25 May 2014 10:52 am
- waterwing
- Member
- Registered: 19 Apr 2013
- Posts: 10
Re: Guillemot build
It maybe that I am wrong but I was under the imprression that ventilation is needed to make the varnish go off. I was told that heat is less important than air circulation.
Offline
#68 25 May 2014 12:22 pm
- wilddog
- Member
- From: Devon
- Registered: 22 Dec 2013
- Posts: 143
Re: Guillemot build
The plastic tent reminds me of that scene in ET.
As to dust, well there's very little that i can do about that in my garage! I'll give the place a sweep out before I varnish, but any extraneous material or flies in the ointment won;t sink the old barque, so I am not too worried! I shall rub it off with a loose mix of fish gut, captain's rum tot and rubber boot when under sail...and hope that the speck-of-dust-in-your-varnish police are not watching...
Built a Skerry!
Offline
#69 25 May 2014 8:43 pm
- Rainbow
- Member
- From: East Devon
- Registered: 29 Sep 2012
- Posts: 75
Re: Guillemot build
@waterwing, the tent is not hermetically sealed. The varnish I will be using is solvent based so the curing process will involve the evaporation of the solvents. I don't envisage there being any issue with the varnish going off, it may cure marginally slower. Working in a fume saturated atmosphere will need a respirator though I feel.
Offline
#70 1 Jun 2014 9:16 am
- Rainbow
- Member
- From: East Devon
- Registered: 29 Sep 2012
- Posts: 75
Re: Guillemot build
The first coat of varnish is on. Only the occasional speck of dust on the surface despite entering and exiting on one breezy day. Before and after - shiny!
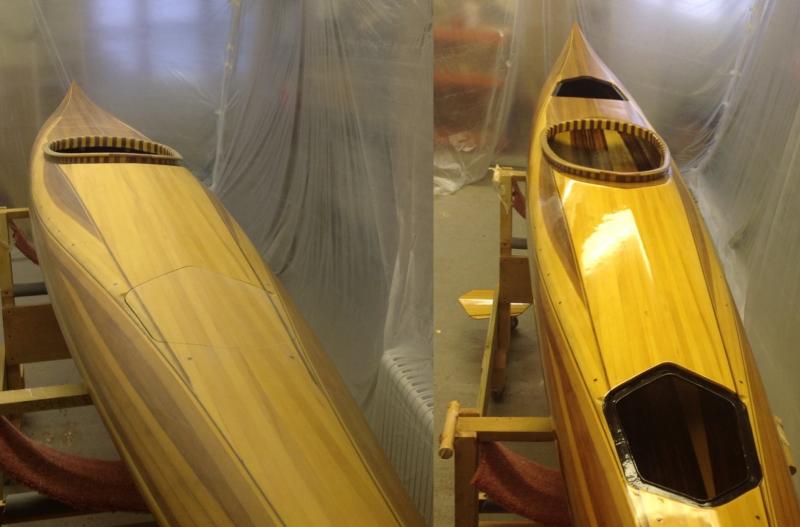
Officer Particle of the Dust Police raided the premises and found no evidence that could lead to an arrest.
Last edited by Rainbow (27 Nov 2014 2:29 am)
Offline
#71 15 Jun 2014 2:55 pm
- Rainbow
- Member
- From: East Devon
- Registered: 29 Sep 2012
- Posts: 75
Re: Guillemot build
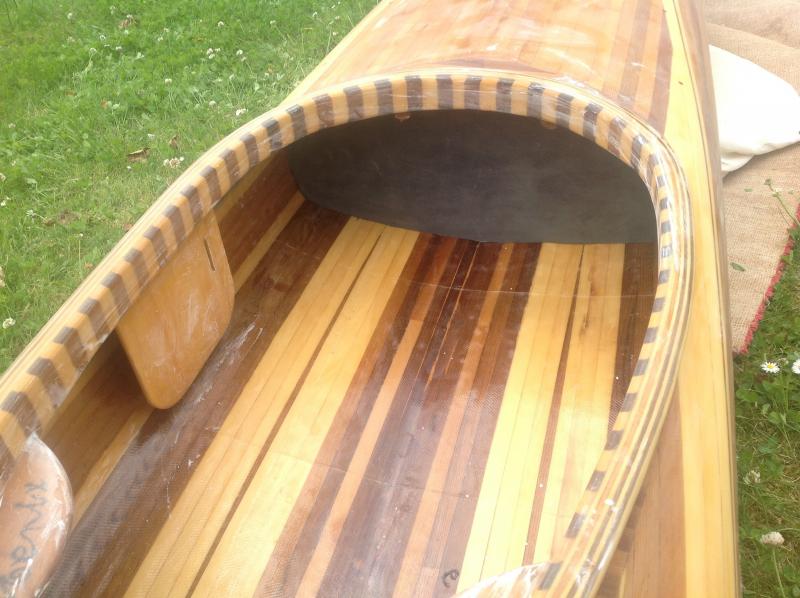
Just fitted the bulkheads. After putting in position, a bead of Sikaflex 291i marine adhesive was applied between the foam and the kayak as an extra seal.
Offline
#72 4 Jul 2014 9:43 pm
- neil
- New Member
- Registered: 4 Jul 2014
- Posts: 1
Re: Guillemot build
Hi Rainbow I have just finished a Petrel and I am just down the coast from you, my usual stomping ground is Dartmouth and salcombe perhaps we could meet up for a paddle sometime?
Offline
#73 16 Jul 2014 6:30 pm
- Rainbow
- Member
- From: East Devon
- Registered: 29 Sep 2012
- Posts: 75
Re: Guillemot build
I'd definitely be up for that Neil.
Offline
#74 25 Nov 2014 12:45 am
- Rainbow
- Member
- From: East Devon
- Registered: 29 Sep 2012
- Posts: 75
Re: Guillemot build
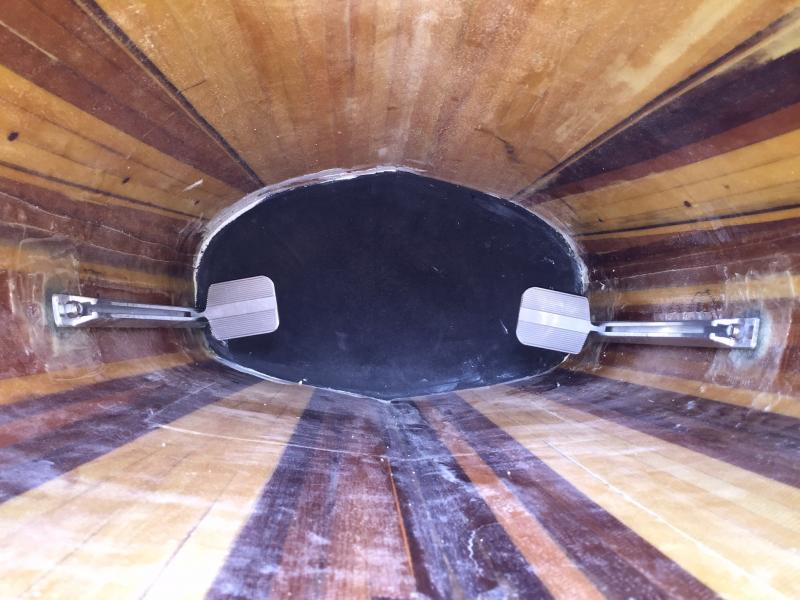
After a long break due to other family priorities, I'm getting some time back on the kayak. The foot braces are now in place, bolted onto the Footbrace pegs kit sold by Fyne Boat Kits. I've also completed a couple of coats of varnish.
Offline
#75 11 Jan 2015 11:51 pm
- Rainbow
- Member
- From: East Devon
- Registered: 29 Sep 2012
- Posts: 75
Re: Guillemot build
I'd missed a couple of spots on the last coat of varnish this weekend. I tried using jewellers rouge powder with a damp cloth to polish the dull spots. Worked a treat. Certainly beats doing another coat.
Offline