A forum for discussing wooden boats and boat building
You are not logged in.
- Topics: Active | Unanswered
#1 2 Feb 2013 6:09 pm
- Jason Gillingham
- Member
- Registered: 1 Feb 2013
- Posts: 31
Houdini Build
I have been building a John Welsford Houdini sailing dinghy from a set of plans bought from Fyne Boats. I am going to attempt to upload some photos of the build and highlight the issues that I had in getting to the stage I am at now (undercoat on the exterior, hopefully the first gloss topcoat tomorrow). I aim to get the boat on the water for the end of April (work permitting).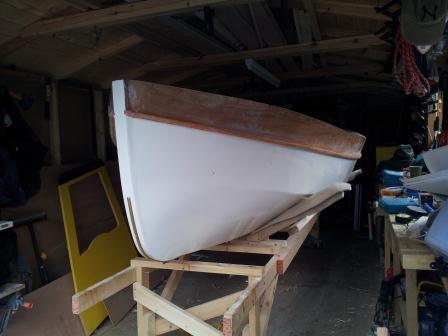
Last edited by Jason Gillingham (25 Feb 2013 2:36 pm)
Offline
#2 2 Feb 2013 6:29 pm
- Jason Gillingham
- Member
- Registered: 1 Feb 2013
- Posts: 31
Re: Houdini Build
I think Ihave got the hang of reducing the photo file size to the correct level. The first issue I had with the build was that the shed I had used to build my canoe in was too short to build the dinghy in so I had to lengthen it. This meant moving the greenhouse and removing a large tree stump to put the extended shed base down. This took longer than expected and ate into the available build time. The width of the shed (9ft) meant I had to put the build frame on wheels so that I could work on either side of the boat.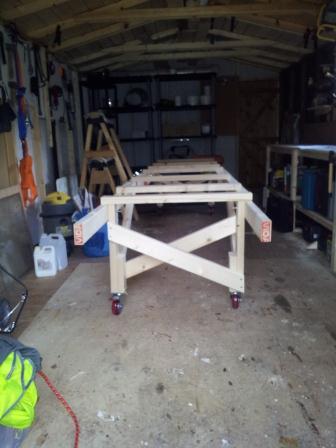

Offline
#3 2 Feb 2013 6:35 pm
- Jason Gillingham
- Member
- Registered: 1 Feb 2013
- Posts: 31
Re: Houdini Build
The boat is quick to set up with a flat bottom panel scarfed together, and then the frames erected on this panel. John recommends making as many of the parts as possible prior to filling the shed with the boat itself (this was particularly important for me with very limited build space. So the rudder assy, centreboard and centreboard case, stem post along with all the frames were put together prior to the main build.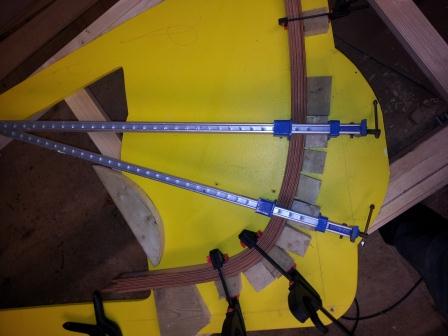
Offline
#4 2 Feb 2013 6:43 pm
- Jason Gillingham
- Member
- Registered: 1 Feb 2013
- Posts: 31
Re: Houdini Build
 The permanent and temporary frames were straightforward to plot out and cut. Once erected on teh bottom panel and screwed through from beneath the topsides planking could be fitted (I scarfed these rather than use butt joints as I think it looks neater) they were temporarily fastened into position and then cut down to size, followed by the rear decking (cut over size again and then used a flush cutting router to trim them to size) ahead of fitting to give the boat some rigidity. This enabled the temporary frames to be knocked out and the centreboard case fitted.
Last edited by Jason Gillingham (18 Feb 2013 4:56 pm)
Offline
#5 3 Feb 2013 1:40 pm
- Jason Gillingham
- Member
- Registered: 1 Feb 2013
- Posts: 31
Re: Houdini Build
Fitting the lower planking was a bit more of a task as there is a fair amount of twist where it meets the bottom panel and stem post. I scarfed the plank prior to fitting rather than fit the rear section and then butt joint the fwd part (as described in the build notes) as I thought it would take the curve better. To get it approximatley to shape I used a spiling batten of sorts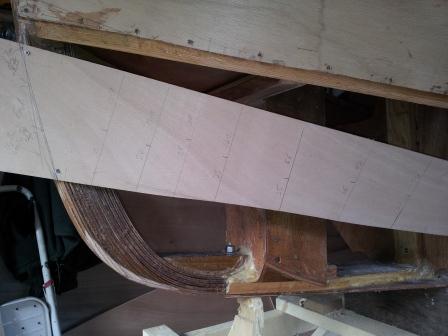
and cut it slightly over size. I soaked the lower plank overnight, and then temporarily fixed the stern to mid part of the plank pulled the remainder into shape as best I could and then fitted a heavy duty rubble sack over the last 1m, duct taped it on and ran the wallpaper steamer into it for an hour to get a bit more flex in the plank. Using a combination of temporary screws and clamps it pulled into shape quite nicely.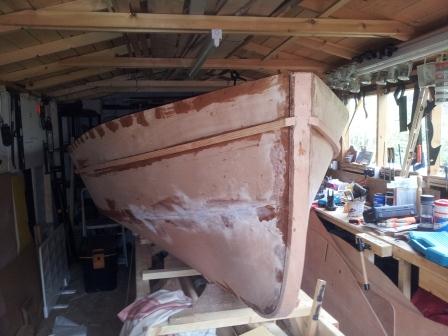
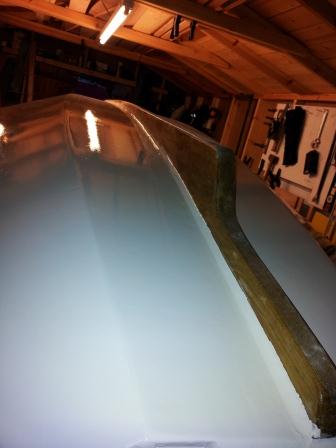
With the bottom plank fitted, the rub rails and stem cap went on prior to turning the hull over to fit the skeg
Last edited by Jason Gillingham (18 Feb 2013 4:50 pm)
Offline
#6 3 Feb 2013 1:51 pm
- Jason Gillingham
- Member
- Registered: 1 Feb 2013
- Posts: 31
Re: Houdini Build
The boat wasnt as easy as I thought to turn over, although not particulary heavy there isnt a lot to grab hold of. I also had to take it out of the shed to do this, which involved the classic boat building issue of doors too small, boat too big ( I did know this at the outset honest! and knew that I would have to enlarge the door by altering the shed frame and putting a new lintel in at some point). It was even more difficult to work around it upside down in the limited space available. If I worked tidier it would have helped. There were only so many times I could trip over the same extension cable before the penny dropped and I actually moved it.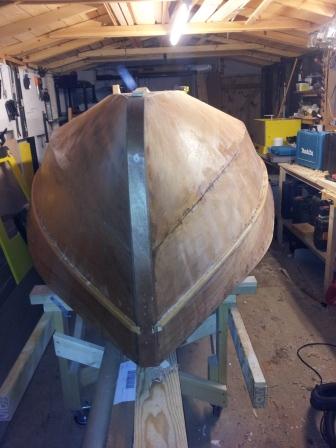
Offline
#7 3 Feb 2013 1:56 pm
- Jason Gillingham
- Member
- Registered: 1 Feb 2013
- Posts: 31
Re: Houdini Build
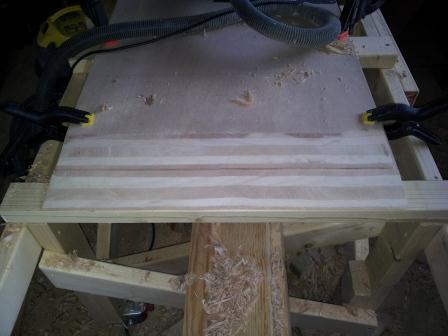
To make the skeg I had a nice piece of oak available and the only issue was getting teh curve of the bottom plank accurately transposed onto the piece of wood. I over engineered the solution by making a "curve-ometer" out of some left over cls timber and dowelling. It did make the job really easy though, and if ever I need a wooden tv aerial I have now got one!
The photos below, show finding the curve, initial first cut of the skeg and then the final shaping.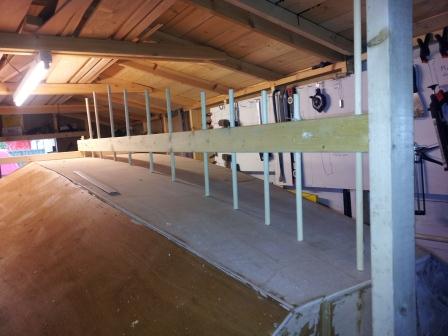

Once the skeg was fitted I needed to put on the exterior glass fibre cloth. I decided to cut the cloth in two sections and hide the edges under the rub rail at the top and skeg fillet at the bottom. It needed a couple of darts to lose excess cloth at the bow.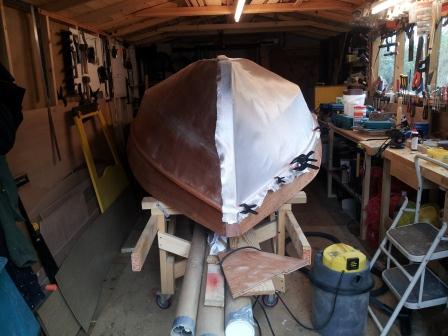
Last edited by Jason Gillingham (7 Feb 2013 12:12 pm)
Offline
#8 3 Feb 2013 2:06 pm
- Jason Gillingham
- Member
- Registered: 1 Feb 2013
- Posts: 31
Re: Houdini Build
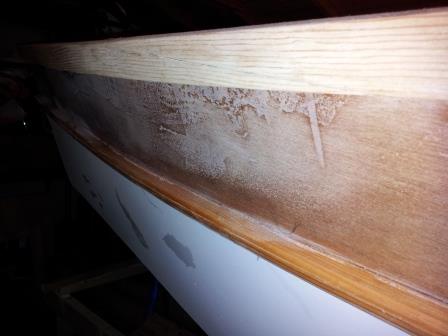
The fairing of the hull took a while with a number of fairing coats applied and then sanded down, eventually it looked good enough to undercoat. The flat white coat really showed up the imperfections in the hull so more sanding and re-painting until I was happy (ier) with the result. This brings me up to date with the hull undercoated and ready for the gloss coats.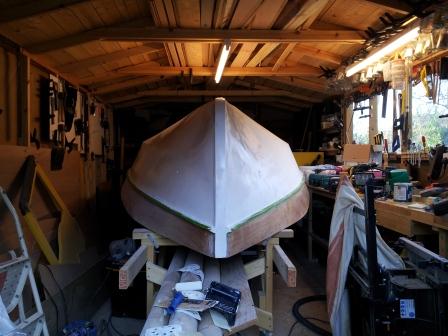
Offline
#9 7 Feb 2013 12:19 pm
- Jason Gillingham
- Member
- Registered: 1 Feb 2013
- Posts: 31
Re: Houdini Build
I have added an additional photo which shows how I got the bottom plank to shape and another to show how I glass clothed the exterior.
Offline
#10 9 Feb 2013 2:29 pm
- Jason Gillingham
- Member
- Registered: 1 Feb 2013
- Posts: 31
Re: Houdini Build
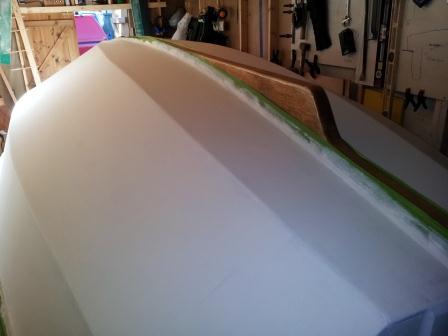
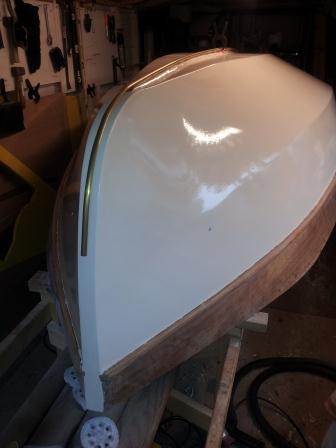
I put two base coats and two gloss coats on the boat over the last few days and peeled off the masking tape last night. The resutls were pretty good with only occasional areas of bleeding of the paint onto the rub rails. I used the Fyne paints as i painted a lapstrake canoe over two years ago now and it is still in good condition, so I am sticking with something I know I'll get good adhesion and abrasion resistance. I really enjoy this part of the build process when the structure goes from looking like two pallets nailed together to something sleek and boat like. I have formed the brass keel band along the skeg and bow but it has not yet been fitted.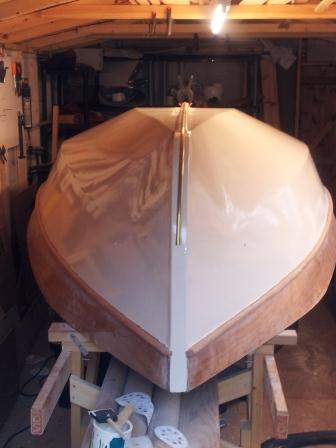
Offline
#11 11 Feb 2013 5:35 pm
- Paul
- Employee

- From: Gatebeck Cumbria
- Registered: 4 Aug 2011
- Posts: 134
Re: Houdini Build
She really does look good.
Offline
#12 11 Feb 2013 10:55 pm
- Dinky Doris
- Member
- From: Wales
- Registered: 25 Aug 2011
- Posts: 23
Re: Houdini Build
....by making a "curve-ometer" out of some left over cls timber and dowelling. It did make the job really easy though, and if ever I need a wooden tv aerial I have now got one!
This is a brilliant idea! I am certainly going to remember it
DD
Offline
#13 12 Feb 2013 11:00 am
- Jason Gillingham
- Member
- Registered: 1 Feb 2013
- Posts: 31
Re: Houdini Build
Thanks for the comments, much appreciated.
I have attached the keel band now and have made a cradle of sorts to turn the boat back over. I am hoping it will avoid any damage to the paint work. I just need to tempt unsuspecting friends around to help with the lift!
Offline
#14 14 Feb 2013 8:42 pm
- Jason Gillingham
- Member
- Registered: 1 Feb 2013
- Posts: 31
Re: Houdini Build
I persuaded a friend to help turn the hull over today, so created a cradle last night out of some left over timber and carpet.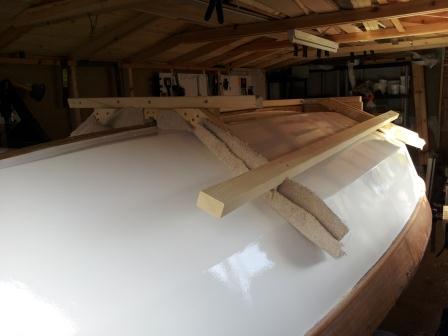
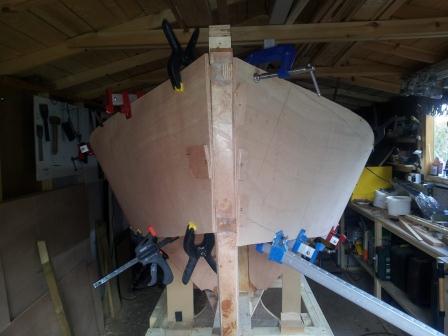
I took the doors and off the shed and was struck by the limited space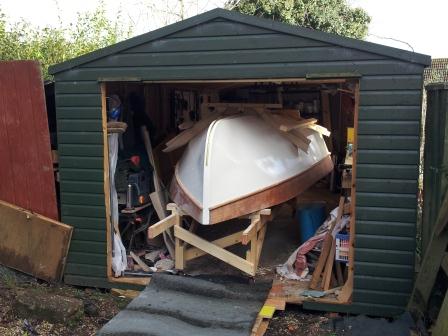
It was the first time I had seen the boat outside and painted. I was fairly pleased with the lines, although daylight did show up a couple of runs.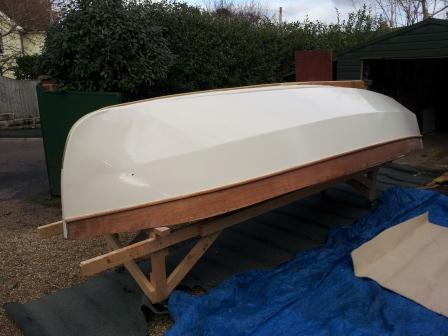
With a bit of brute force and the recognition that neither of us were as fit as we once were we eventually got it back on the build frame squeezed it back in the shed, screwed the doors and framework back in and started to plan the next stage of the build.
Offline
#15 22 Feb 2013 5:33 pm
- Jason Gillingham
- Member
- Registered: 1 Feb 2013
- Posts: 31
Re: Houdini Build
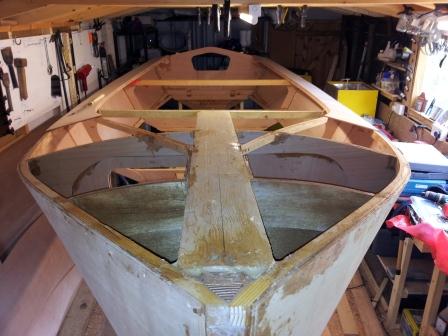
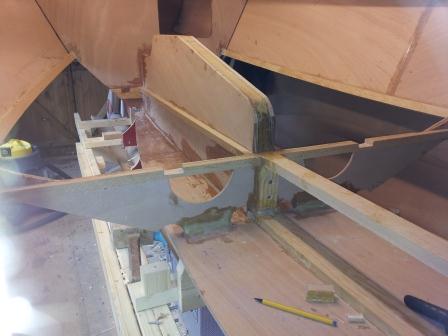
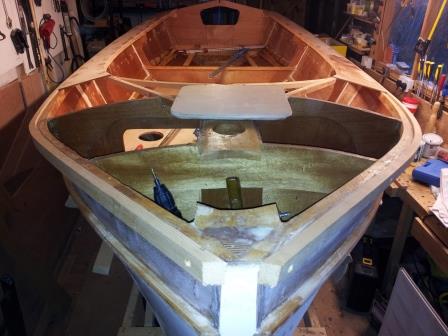
I fitted the d bolt through the stem post, which should have been easier than it was. I built the boat two inches shorter than it should have been (by accident!) and corrected this once discovered (pre stringers and planking) by adding further laminations to the stem post, which then meant it was pretty much impossible to get a D bolt with long enough legs to fit through. I ended up routing part of the back of the stem post out drilling and fitting the bolt and then filling the routed slot with thickened epoxy.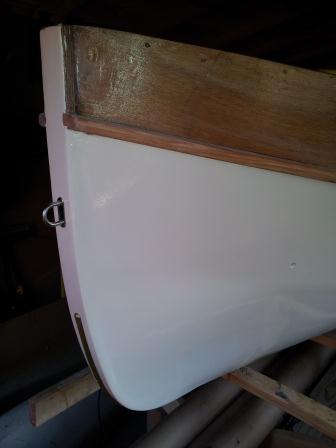
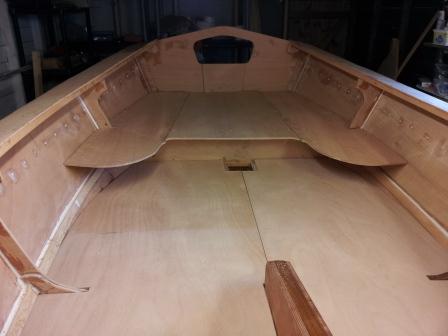
While I was waiting for epoxy fillets between the frames and planking to cure I wanted to cut the floor panels to size. I had previously cut them from 6mm ply and then realised when I looked at the plans it should have been from 9mm ply. This wasnt a huge problem as I could use the 6mm sections for the decking and it gave me the opportunity to improve the fit of the floor panels. Previously I cut them with a perpendicular blade when in fact the boat sides are angled, so this time I angled the bed of the jigsaw to replicate this. I finshed off the angles by planing it with a block plane. I am fairly happy with the result. I also dry fitted the rear seat tops to make sure they were ok.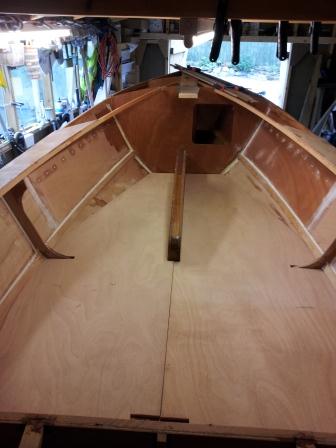
Offline
#16 1 Mar 2013 4:08 pm
- Jason Gillingham
- Member
- Registered: 1 Feb 2013
- Posts: 31
Re: Houdini Build
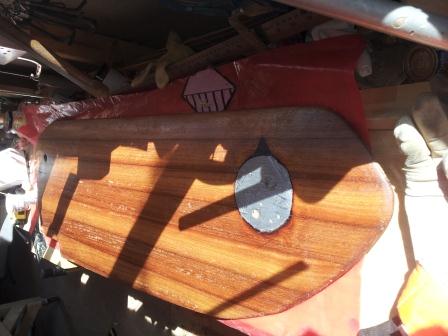
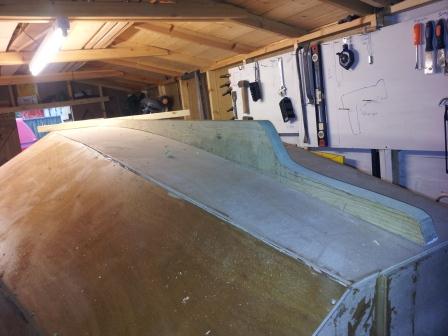
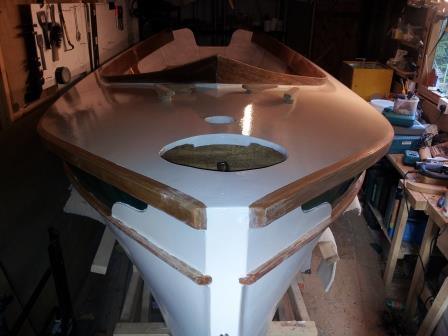
I had a bit of time this morning to escape into the shed. My objective was to cut the fwd sections of deck roughly to size for finishing off at a later date. I planned to do this in two halves joined along the king plank (I have an idea that I want to do some inlay work between the two but might shelve this idea) I offered them up and clamped them into place and ensuring that the join with the rear side decks was as accurate as possible, gave myself a margin of approx 10 to 15mm oversize (apart from the centre line). The cutting went to plan and I temporarily screwed them into position. I had a bit of spare time, so I thought I might was well sharpen the plane and take the outside edge down to the planking. I kept the angle of the planking going along the side of the deck, as I hope this will get the gunwale to fit snugly to both the deck and planking. This went surprisingly well too and was done in short order. It left me enough time to get the palm router out with a flush cutting bit on it to tackle the inside edge of the deck. A job I had been slightly daunted by ended up only taking 2.5hrs. I came away from it thinking my block plane had always been my favourite tool but now the palm router was vying for first place!!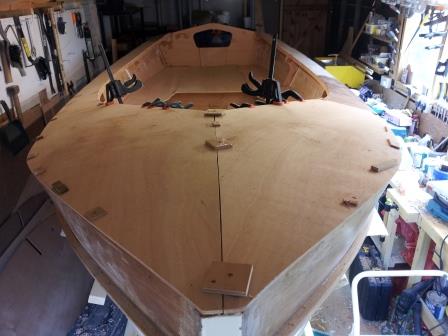
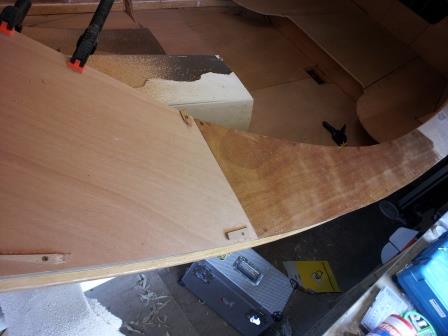
The only downside from my perspective was that I was hoping to keep the topsides as brightwork however I havent aligned the grain from the rear side decks to the front section. With a bit more thought I could have had the curve of the grain matching.
Offline
#17 14 Mar 2013 11:05 am
- Jason Gillingham
- Member
- Registered: 1 Feb 2013
- Posts: 31
Re: Houdini Build
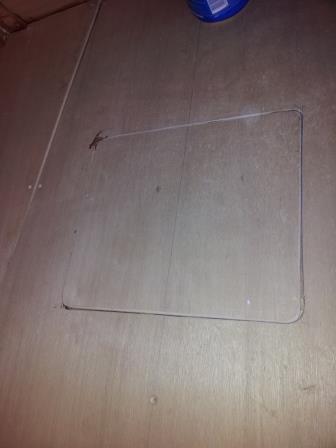
While waiting for various epoxied bits to set in the cold weather, I thought I would make the fwd and seat top hatches. I used a rebate cutter to remove some of the bulkhead from in front of the doubler for the fwd hatch so the hatch cover sits flush with the face of the bulk head. I actually cut it 2mm deeper than the cover so there is space for seal of some kind.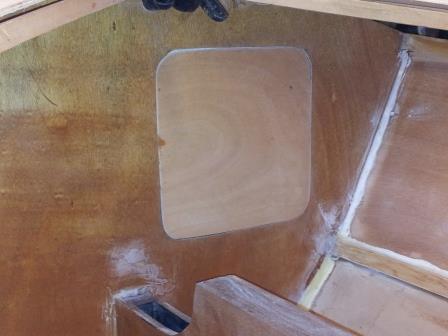
For the rear seat top hatch I wanted something big enough to enable me to get a decent sized battery in to run the bilge pump, so I cut a 300mm square hole in the seat top, cut a doubler to sit beneath the opening with an overhang of approx 10mm around the edge for the hatch cover (and seal) to sit on. In hindsight I should have moved the hatch forward to the seat edge and created a self draining water proof arrangement however too late for that. I am sure this will work I just mustnt open it during wet weather or in anything above a dead calm.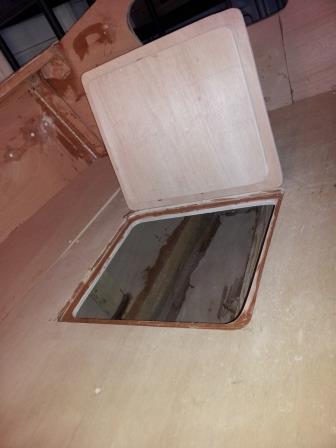
I was going to fasten them with white nylon strap hinges (the boat will be painted white inside so I am hoping it will look better than it sounds) and locked with cam action catches (x2) for each hatch. DOes anyone have any other ideas for hinges and catches?
Last edited by Jason Gillingham (14 Mar 2013 2:51 pm)
Offline
#18 25 Mar 2013 9:25 pm
- Jason Gillingham
- Member
- Registered: 1 Feb 2013
- Posts: 31
Re: Houdini Build
I was putting the gunwales on yesterday (20mm by 40mm by just under 5 metres), steamed them for 1.5hrs, put the first one on relatively easily and could feel the effects of the steaming process in the pliability of the Douglas fir. While it was held in place by clamps I got the second one out which had been out of the steam for 15mins (can you see where this is going?). I clamped it at the stern and formed the bend along the sheerstrake, it wasnt feeling quite as rubbery as the first one, but thought to myself Douglas fir can take a bend steamed or not, and gave it an extra bit of a push to get the shape at the bow. It snapped with quite a crack, nearly impaled me and left me holding about 2 ft of the gunwale in my hand. I was mildly peeved as I buy all my wood rough sawn, thickness it, and then run it through the table saw to get the right width etc. In this instance I had also matched the gunwales from the same plank with what I thought was a lovely grain to it. What I hadnt noticed was a sappy grain line which is where the thing broke. I have scarfed the two bits this evening, so looking at the forecast temperatures the epoxy should be set in about May, when I can attempt to re-fit it, this time perhaps with a bit more steam and less of a delay in stressing it. Boat building can be fun. I must keep repeating that!
Offline
#19 26 Mar 2013 1:18 pm
- Paul
- Employee
- From: Gatebeck Cumbria
- Registered: 4 Aug 2011
- Posts: 134
Re: Houdini Build
Jason,
I was sorry to hear about the problem. The gunwales that are on this boat are close to the largest that is easily bent. On your next boat you may want to consider putting the gunwales on in two pieces. I do not mean one half for the bow end and one half for the stern end, rather that you should cut the thickness in half so that you have two long but more flexible lengths which you can laminate together. You glue one length onto the boat and then, later, glue the other length over the top of the first length The chances are that you will not have to steam the wood.
The boat is looking lovely.
Offline
#20 27 Mar 2013 12:13 pm
- Jason Gillingham
- Member
- Registered: 1 Feb 2013
- Posts: 31
Re: Houdini Build
Paul,
Thanks for the input. You are right it would have been the sensible option (I did this for the internal stringer to enable the bend over frame #1 and it made for a literally stress free process). I think optimism got the better of me this time. I am not sure how the epoxied scarf joint will take steaming so I am going to flip the gunwale so the scarf is at the less stressed stern end. If it doesnt work this time I am going to treat myself to a fresh plank of Douglas fir and go with your recommendation.
I am still hopeful of getting the boat on the water by May.
Offline
#21 4 Apr 2013 5:40 pm
- Jason Gillingham
- Member
- Registered: 1 Feb 2013
- Posts: 31
Re: Houdini Build
I had another "crack" at getting the gunwales on after scarfing a repair 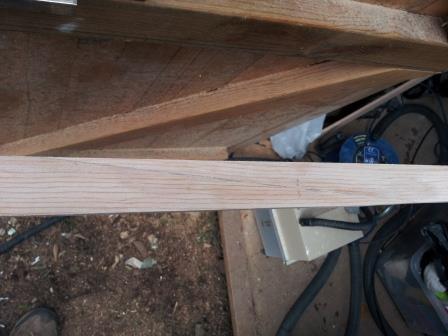
I was pleased with the joint, let it set for four days and then had another go at fitting it. I flipped it to keep the stress off the joint, steamed it for 1hr, and poured kettles of boiling water over it to help it take the bend, and got to this point
The joint looked neat and was holding up well, and from the front it looked like this
I was in the throes of patting myself on the back when I looked at the point of most stress and realised that the wood was pulling apart along the grain. It really brought home how variable wood can be as the other gunwale was solid and in great condition but this one was not going to pass muster. I have since been to the timber store and ordered another plank to cut two fresh gunwales from. This time I will be taking Paul's advice and laminate them in two 10mm strips.
Last edited by Jason Gillingham (4 Apr 2013 5:41 pm)
Offline
#22 20 May 2013 8:17 pm
- Jason Gillingham
- Member
- Registered: 1 Feb 2013
- Posts: 31
Re: Houdini Build
Work has got in the way of boat progress but I did eventually manage to get the gunwales fitted without breaking them, decks fitted and glued and reached the milestone tonight of getting the coamings cut to shape and dry fitted which I think is the last woodworking element of the build.
I made hardboard patterns to minimise cost in ply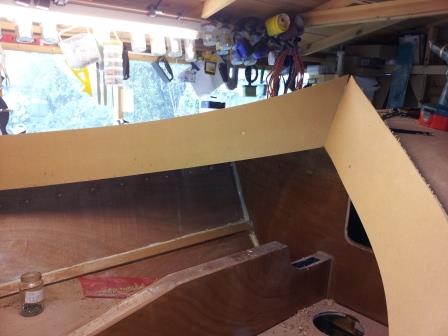
I then transferred the offsets to a scarfed 30 cm wide strip of 6mm ply
Once cut I offered them up for fit being a bit concerned about the compound mitre on where they meet at the front, but it looks ok IMHO but I dont set my standards too high!!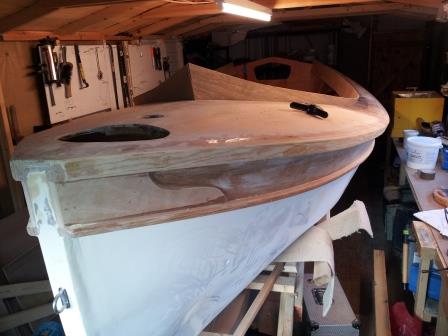
Lessons Ive learnt from this exercise include: dont waste time with cheap ply as I first tried scarfing a cheap piece of 6mm ply with thin outer veneers and the rest filler wood, cutting it to shape and had it break at the slightest stress. I then obtained a piece of reasonable quality ply from Buildbase (the coamings arent going to take a lot of stick (I hope) so didnt want to go to the expense of buying full 1088 spec) with five laminates and it scarfed up really well and took the stress of pulling into shape without the snapping sound I had become accustomed to.
Peter Deck who built Dexterity (another Houdini dinghy) in Tasmania two years ago or so has given great advice to me throughout the build process the latest gem being to screw and epoxy 6mm coamings into place and then laminate this with another sheet of 6mm ply using epoxy only so that none of the screw heads are on show. I have since done this and it looks pretty good.
I think I now have a week or so worth of painting and sanding to finish it off followed by launch in June (I hope).
Last edited by Jason Gillingham (23 May 2013 3:05 pm)
Offline
#23 16 Jun 2013 12:14 pm
- Jason Gillingham
- Member
- Registered: 1 Feb 2013
- Posts: 31
Re: Houdini Build
Painting progress as been steady and the boat is looking like this now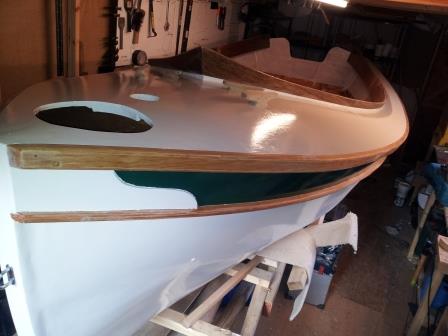
I am attempting to put the mast together today (Al tube with a few monel rivets and hardwood plug at the bottom and a soft wood hollowed out plug for the top, I did mean to post some photos of making these but got too involved in the process and then they were finished).
The cleats on the deck are not fitted yet, and were made from left over scraps of oak from the skeg. I have made a couple of jam cleats and four standard ones (the pattern was in a book called the Marlin Spike Sailor (I will check to make sure I have got that right)).
Offline
#24 21 Jul 2013 6:22 pm
- Jason Gillingham
- Member
- Registered: 1 Feb 2013
- Posts: 31
Re: Houdini Build
Have just taken the boat out of the build shed for the last time (hopefully) to finish off the painting and rigging. The mast fitted really nicely into the box and seems relatively steady.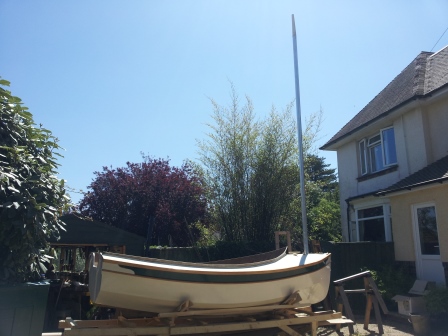
My trailer will be ready next week so hopefully launch date soon work permitting.
Offline
#25 30 Jul 2013 4:23 pm
- Jason Gillingham
- Member
- Registered: 1 Feb 2013
- Posts: 31
Re: Houdini Build
Picked up the trailer at the weekend from Vandercraft. Really pleased with the way they got the supports to fit the boat (I left them the rear temporary build frame to help). Its under the gazebo so I can finish off last minute painting and varnishing.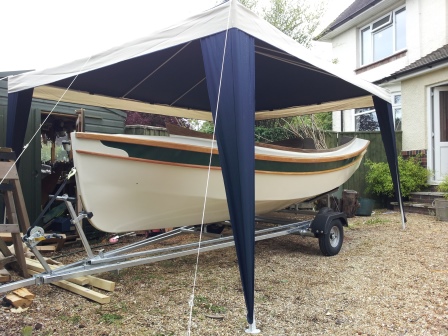
Offline