A forum for discussing wooden boats and boat building
You are not logged in.
- Topics: Active | Unanswered
#1 20 Sep 2023 2:39 pm
- Rob
- Member
- From: England
- Registered: 29 Jun 2021
- Posts: 66
Skerry built from plans (build log)
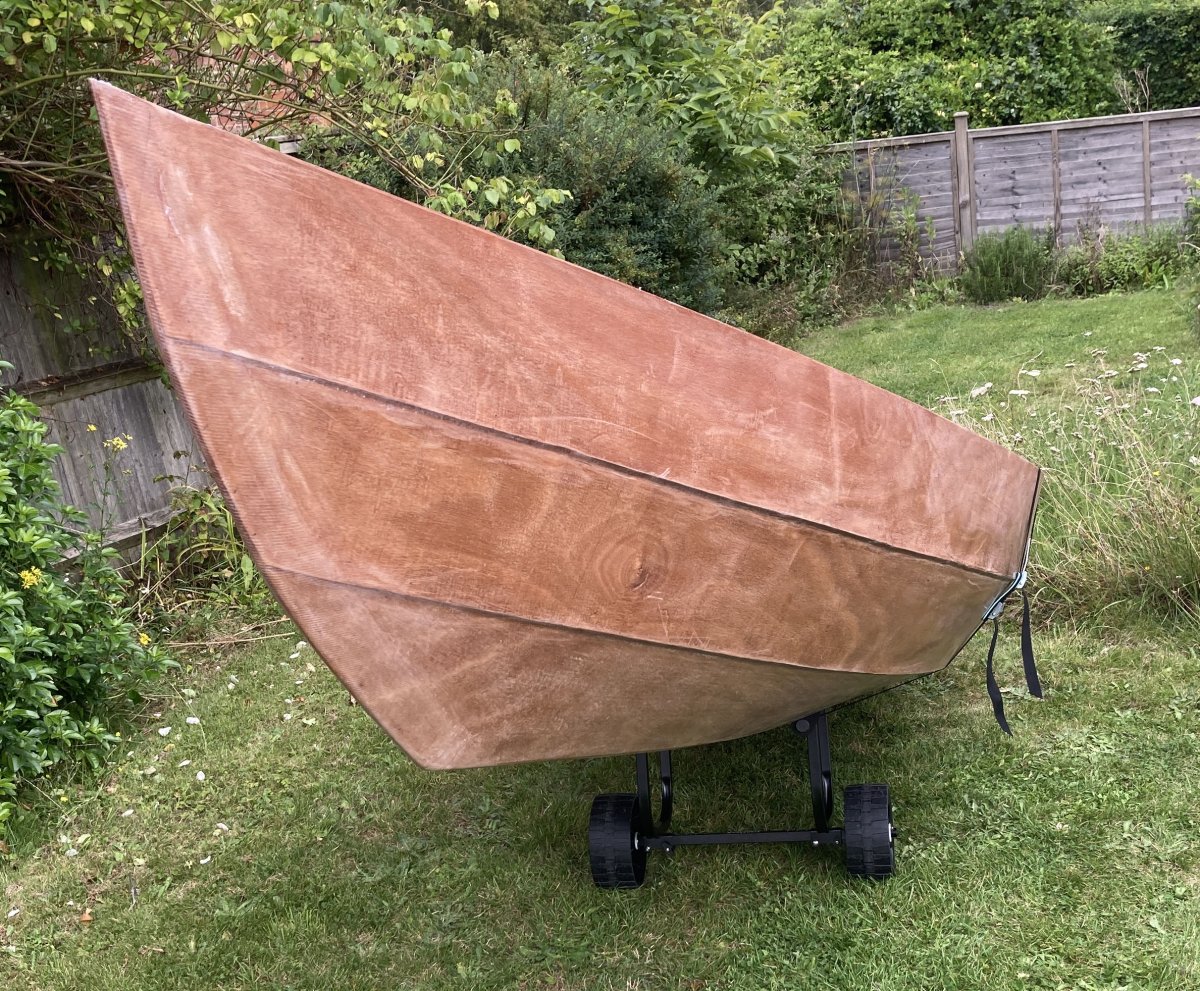
I thought I would add to the already excellent, helpful and inspiring logs and posts on this forum, and share some images and progress of my skerry which I’m building from plans. I chose to build it from plans as opposed to a kit for several reasons, one of which is the challenge. It’s my first boat build, but felt the skerry, as with most stitch and glue boats, is forgiving enough that any imperfections should be well hidden…but we’ll see! I would like to thank Phil at Fyne who has given me lots of advice whenever I asked for it, and been very helpful in supplying me with everything I need. I’m also extremely grateful to a friend who has let me build the boat in his garage, his tips on stitch and glue boatbuilding, and his help in moving the boat about. Likewise my much better half, who has helped me move the boat about too, and provided endless encouragement and support.
Since I was a boy I’ve wanted my own boat, and to build it myself. I even tried to make one out of some old tongued and grooved pine planks I found in my parents shed, which I caulked with some roofing tar I also found there - I was only about 10 or 11. Needless to say it was a failure, and looked more like half a barrel dipped in pitch than a boat, but I enjoyed the process nonetheless. So instead I made a couple of little model galleons to play with, out of random pieces of wood, but they all looked like ugly prison hulks rather than elegant 17th or 18th century ships from the golden age of sail. I then started on the Airfix ship models, HMS Victory, The Wappen von Hamburg, I can't remember them all, but I must have made at least a dozen. They were all lined up along the top of a long bookshelf in my bedroom, and whenever the window was open a breeze would always knock them all over like dominoes, so I was endlessly repairing them.
At secondary school I remember making a model sailing yacht with a radio controlled rudder. The hull and deck were vacuum formed from a mould the teacher had made. I remember how fun the vacuum forming was, and also the fun I had casting a metal keel with a lead weight cast onto it. There were a few of us making them, after which we all took them to a nearby lake to sail them around. Several sank (not mine thankfully) and I remember a chap rowing about in the lake with a boat hook fishing them out for their disappointed builders. I think I filled my one with polystyrene chips for extra buoyancy. Some years later I bought a wooden kit model of HMS Bounty, which looked (and still looks) much better...but would look better still if I actually finished it...perhaps after the skerry I will complete it, it's only the rigging left I think...but I've been working on it for nearly thirty years, so there's no rush!
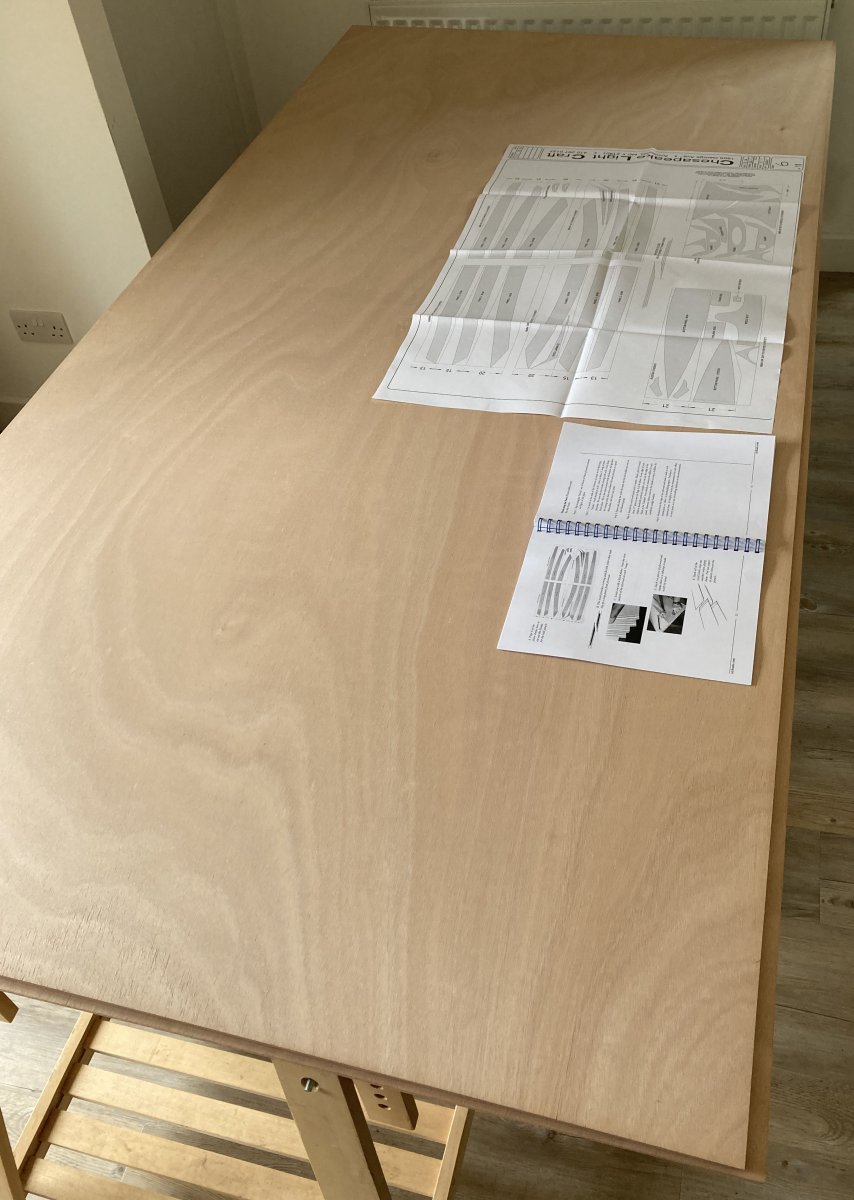
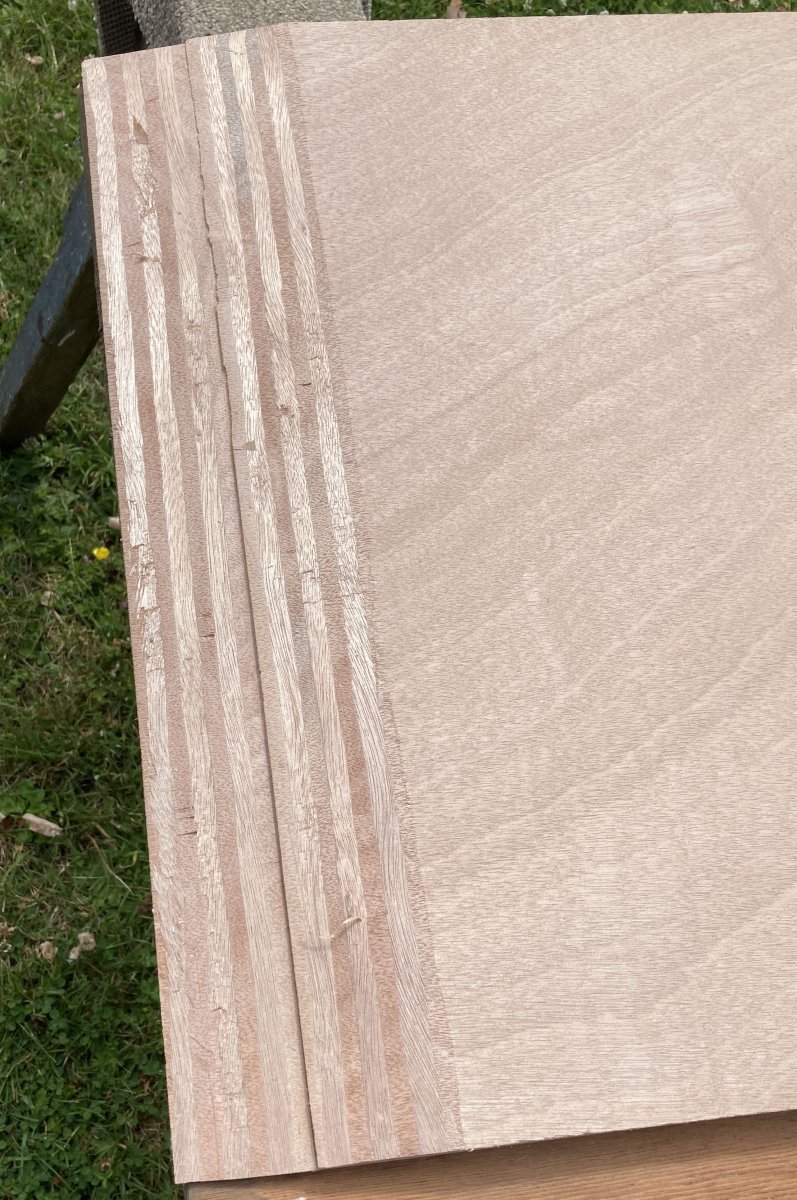
As an adult, I've spent many many years looking at Fyne's website, wishing I could build one of the boats, and trying to decide which one. Eventually the day came, and I purchased the plywood from Fyne back in June 2021, and made paper patterns from the plans, which I then transferred to the ply to cut out. 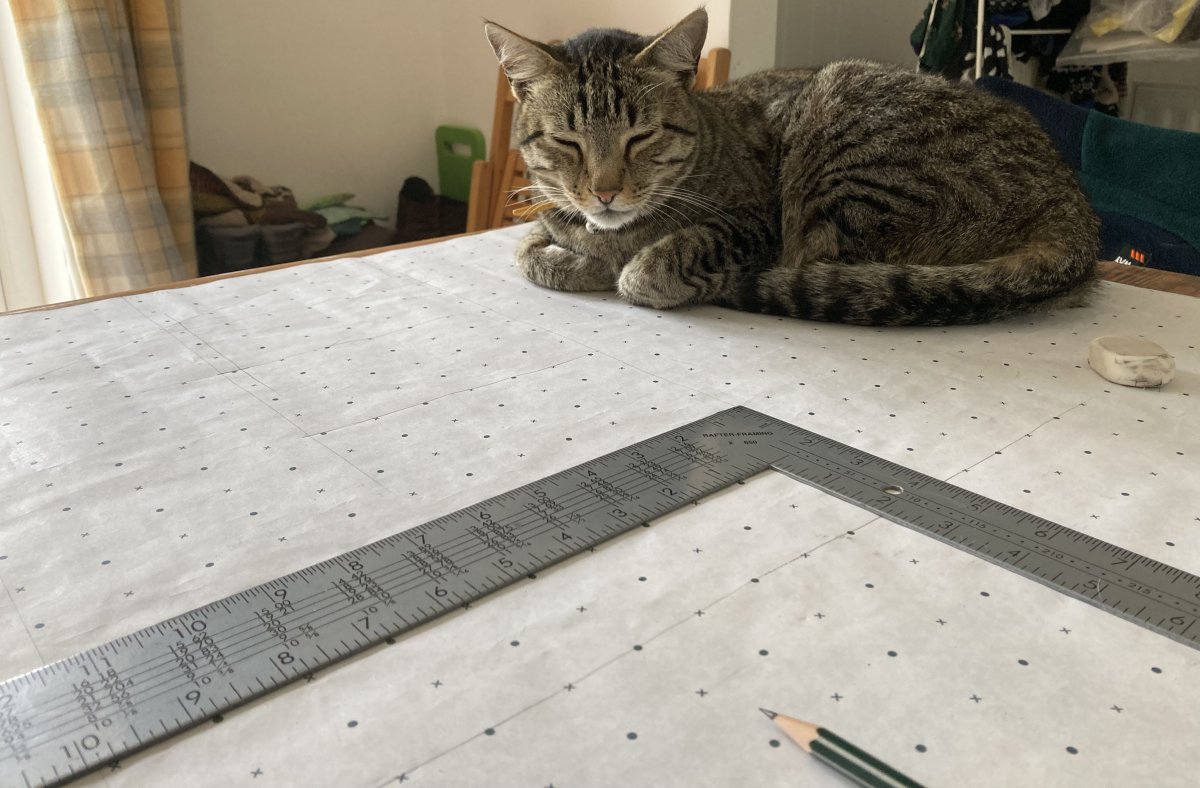
The neighbour's cat kindly offered to supervise as I made the paper patterns.
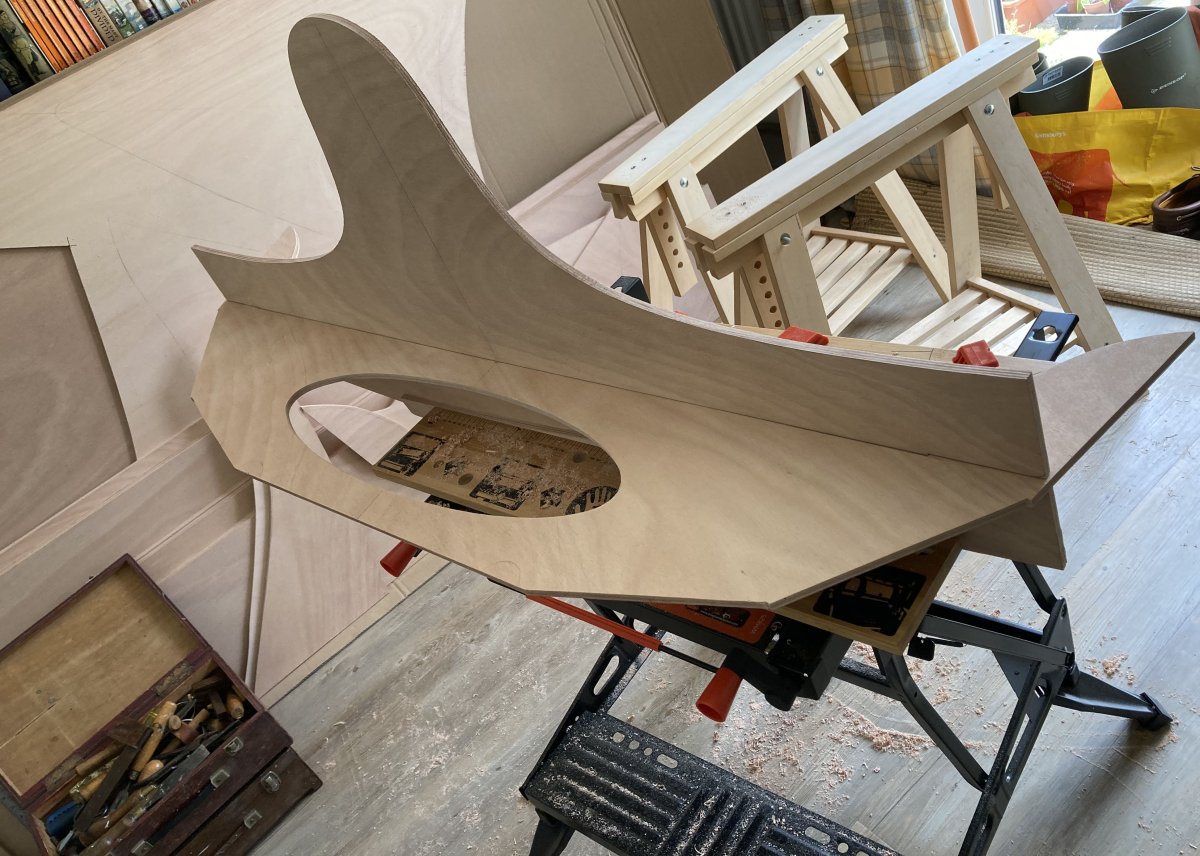
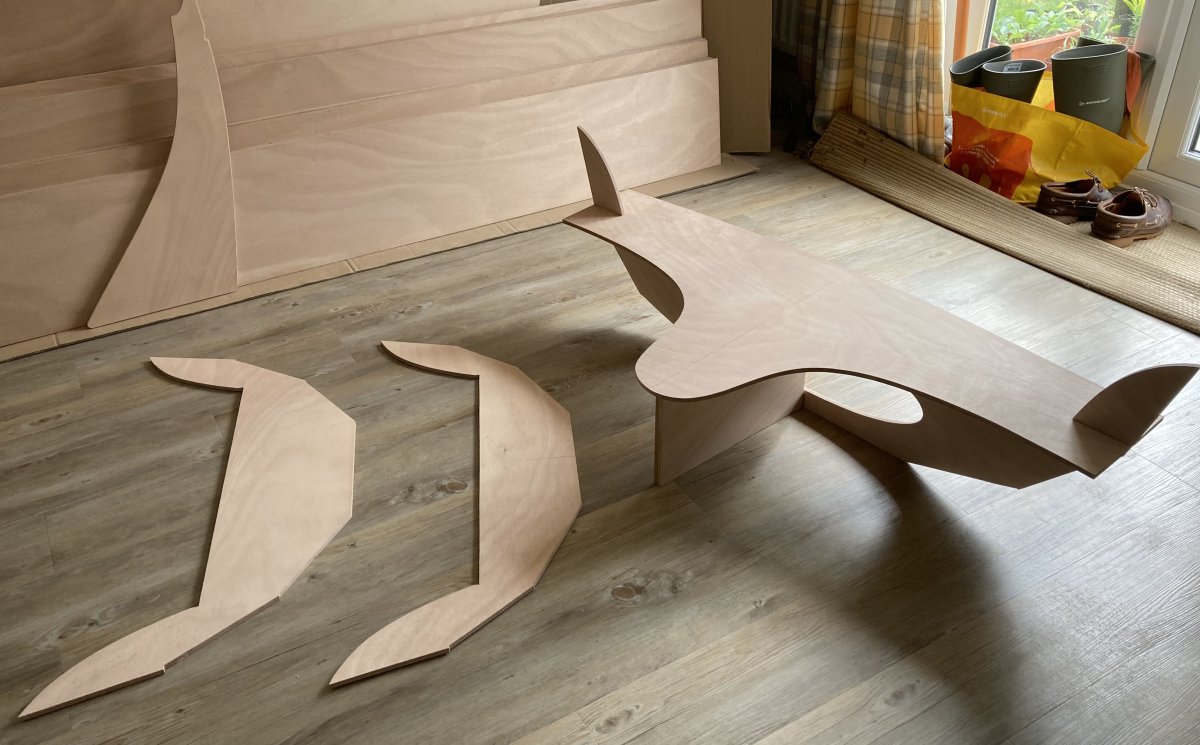
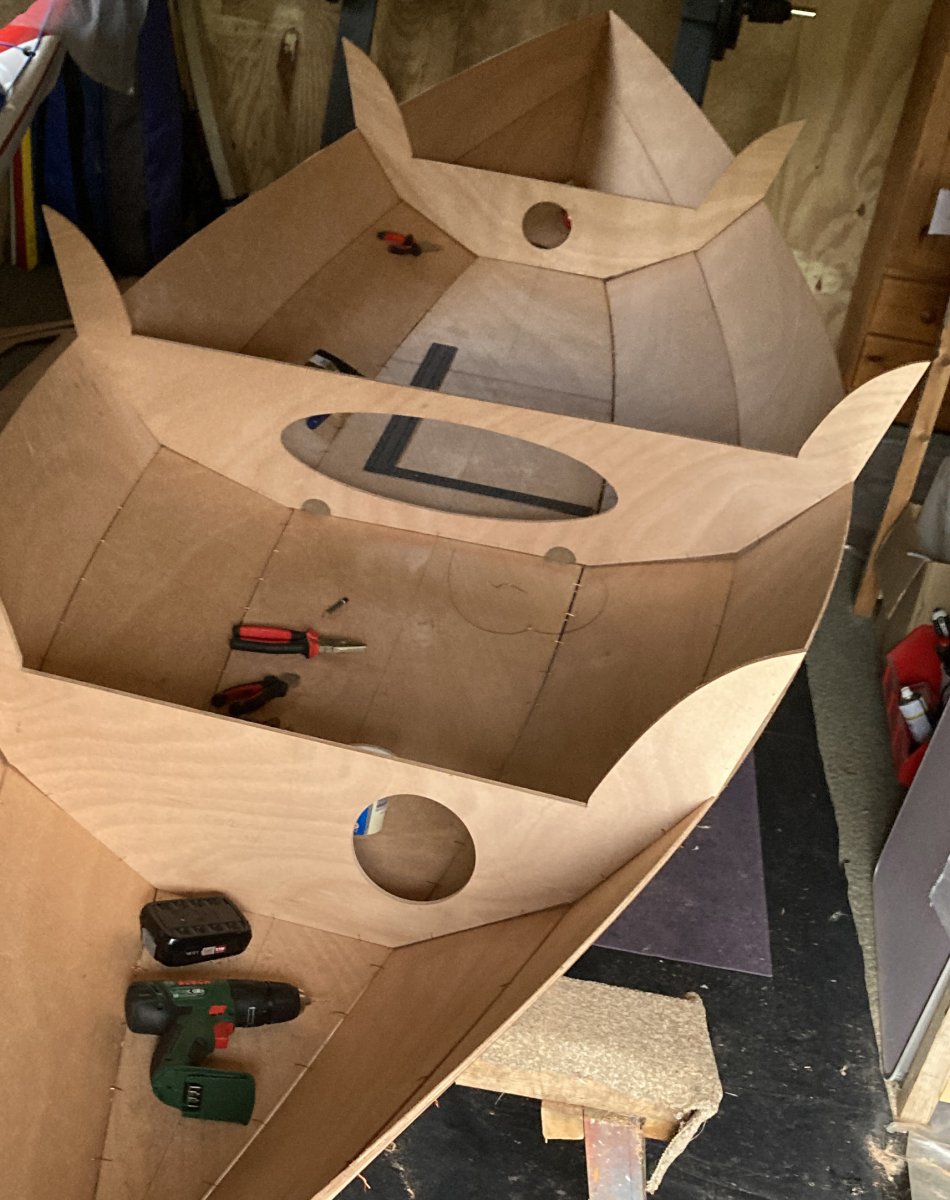
I cut out most things, bulkheads and centre seat, daggerboard trunk and rudder parts. I also cut the blanks for the hull planking. I didn’t cut the bow and stern seats, I will do that nearer the time of installation, but have kept the cardboard which the plywood was packaged in to make templates of those, to help ensure a perfect fit when it comes to it. I am also going to make a round mast, so will make the necessary adjustments to the bow seat.
The beginning...
I found the centre seat and frame didn’t quite fit each other perfectly on the sides, but a little adjustment brought it all together nicely.
Centre seat doesn't quite align with frame.
After adjustments, all is good.
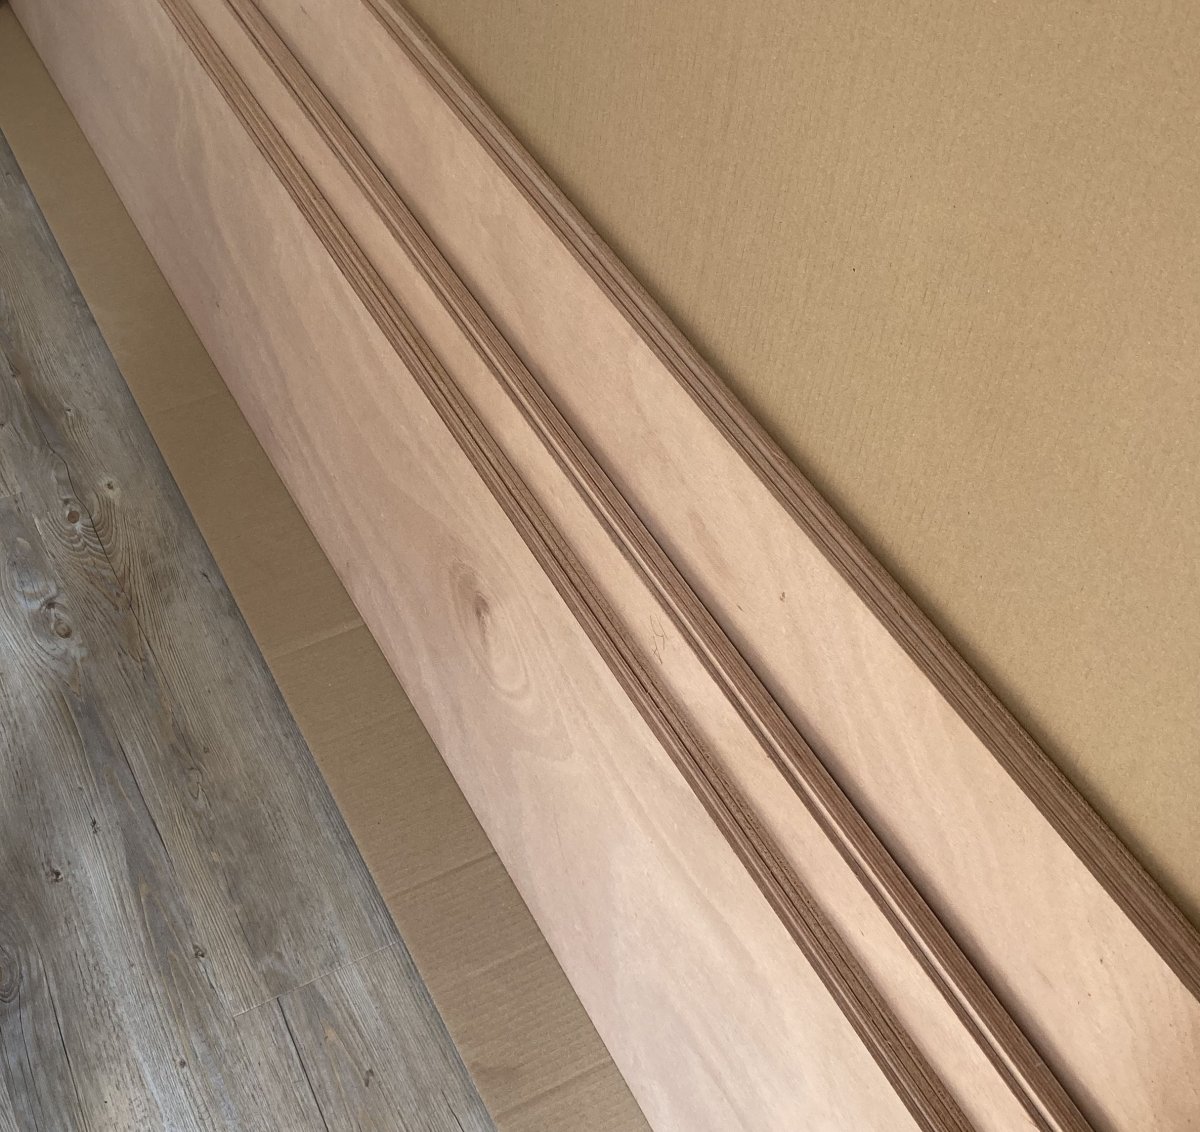
Plank blanks ready for scarf joints.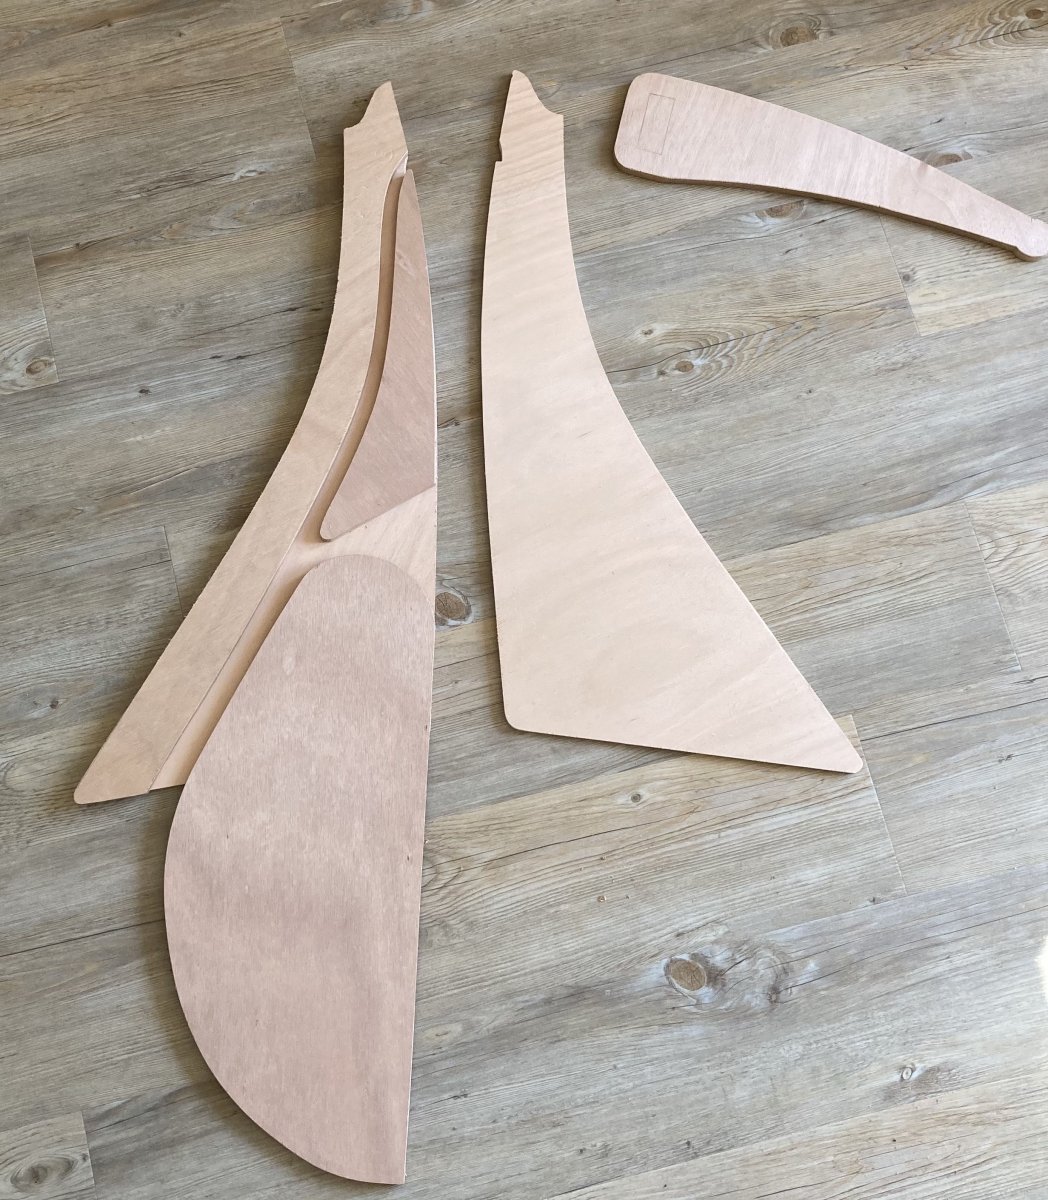
Rudder parts.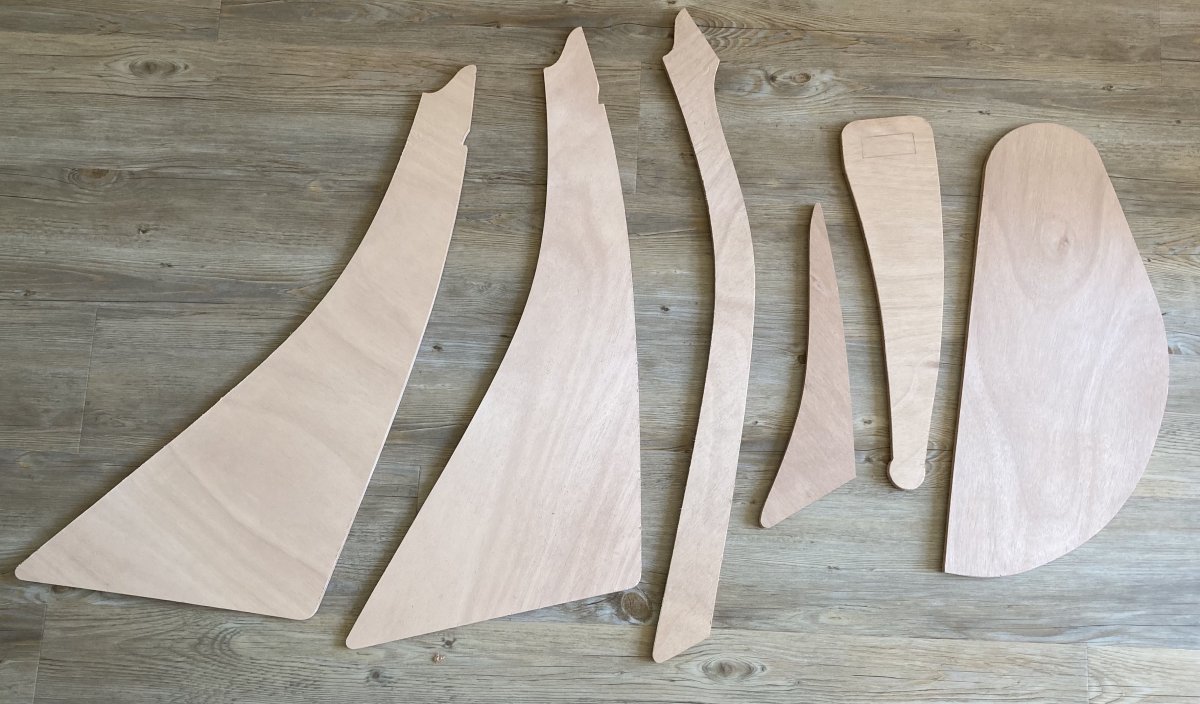
Rudder assembly. I have not cut out the side thickeners yet as they come out of the plank blanks. 
I have not cut out the handles for the daggerboard either, as they also come out of the plank blanks.
That was as far as I got for that year due to other commitments. 2022 didn’t bring me any boatbuilding, so it was not until this year, 2023, that I hauled anchor on it once again, and set upon completing it as a rowing boat this year. I will make the mast etc next year.
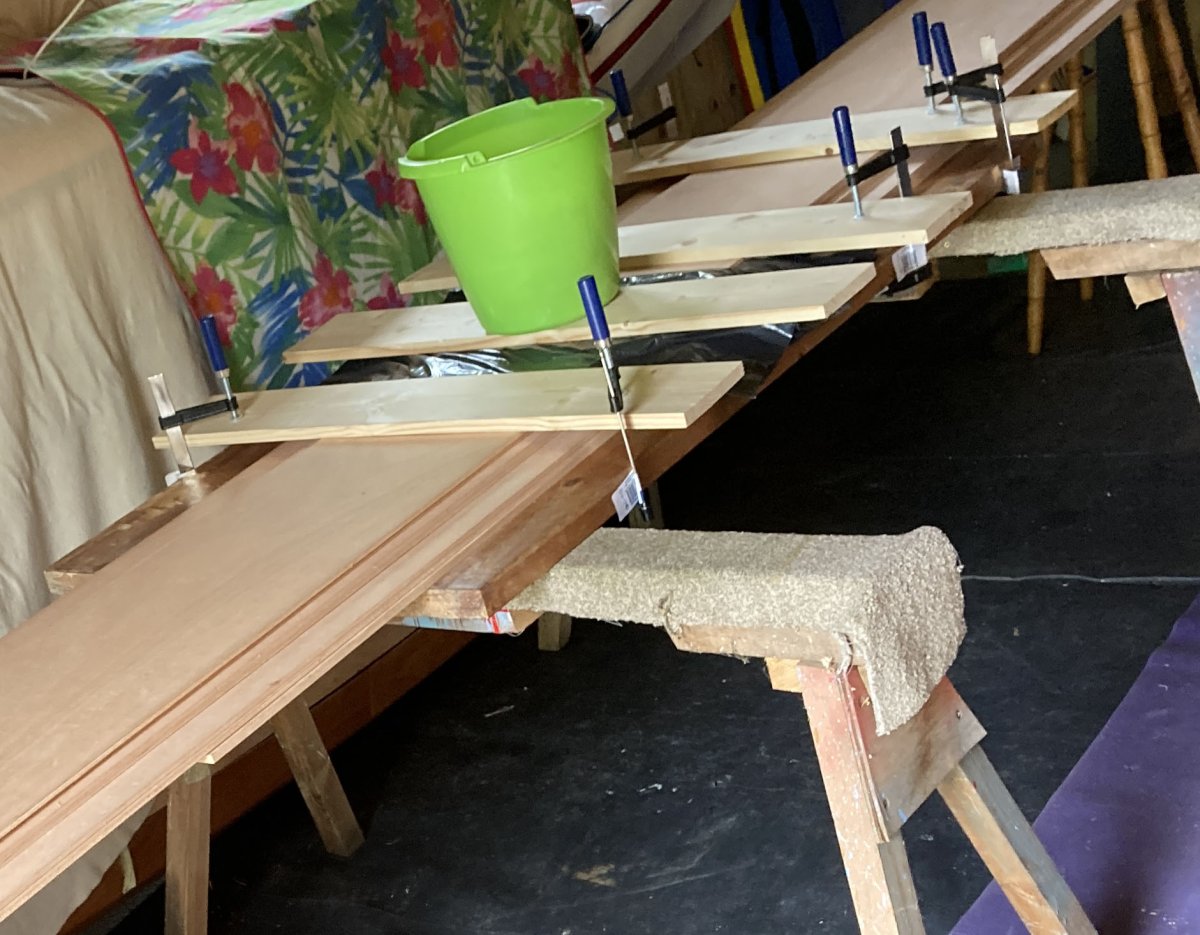
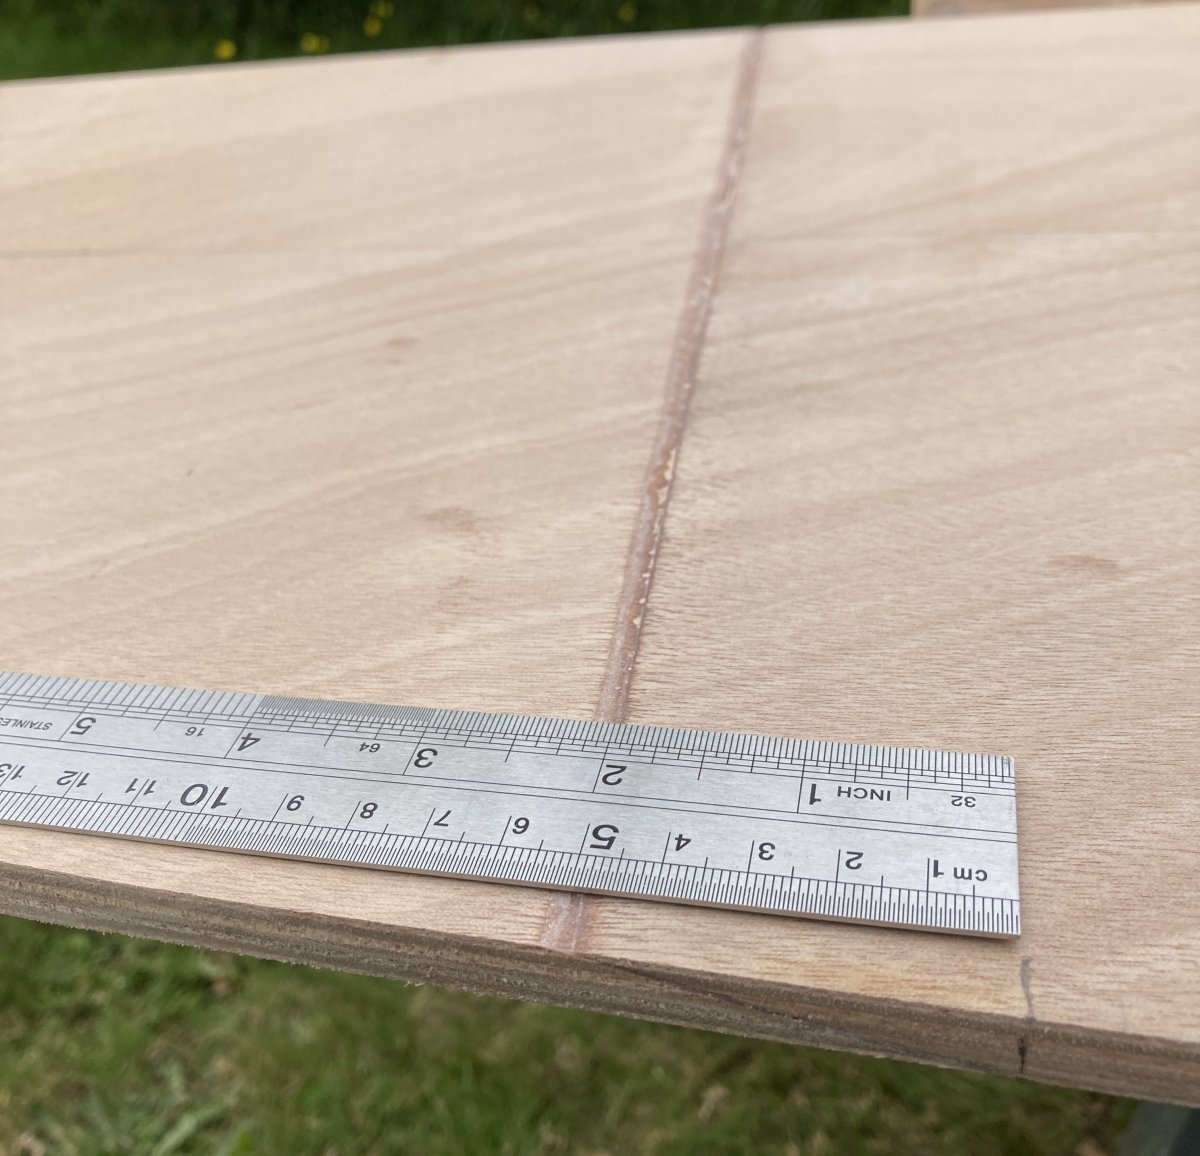
Having already cut out the blanks for the hull planking, I was feeling somewhat apprehensive about cutting the scarf joints to make them into their full lengths. However, with a well sharpened block plane I set upon it, and found them surprisingly straightforward.
The only issue I had was slippage while glueing them up. I did the whole lot in a stack, but in hindsight I should have just done one pair at a time. Although I clamped them to a board to prevent them from slipping and sliding away from each other, they still managed it. It looked worse than it actually was however, and once the cured joints had been sanded up, they had only slipped a small amount, so I’m not worried about it now.
Once they had all cured, I lofted and cut the bottom panel out, so the neighbours probably thought I was making a surfboard! 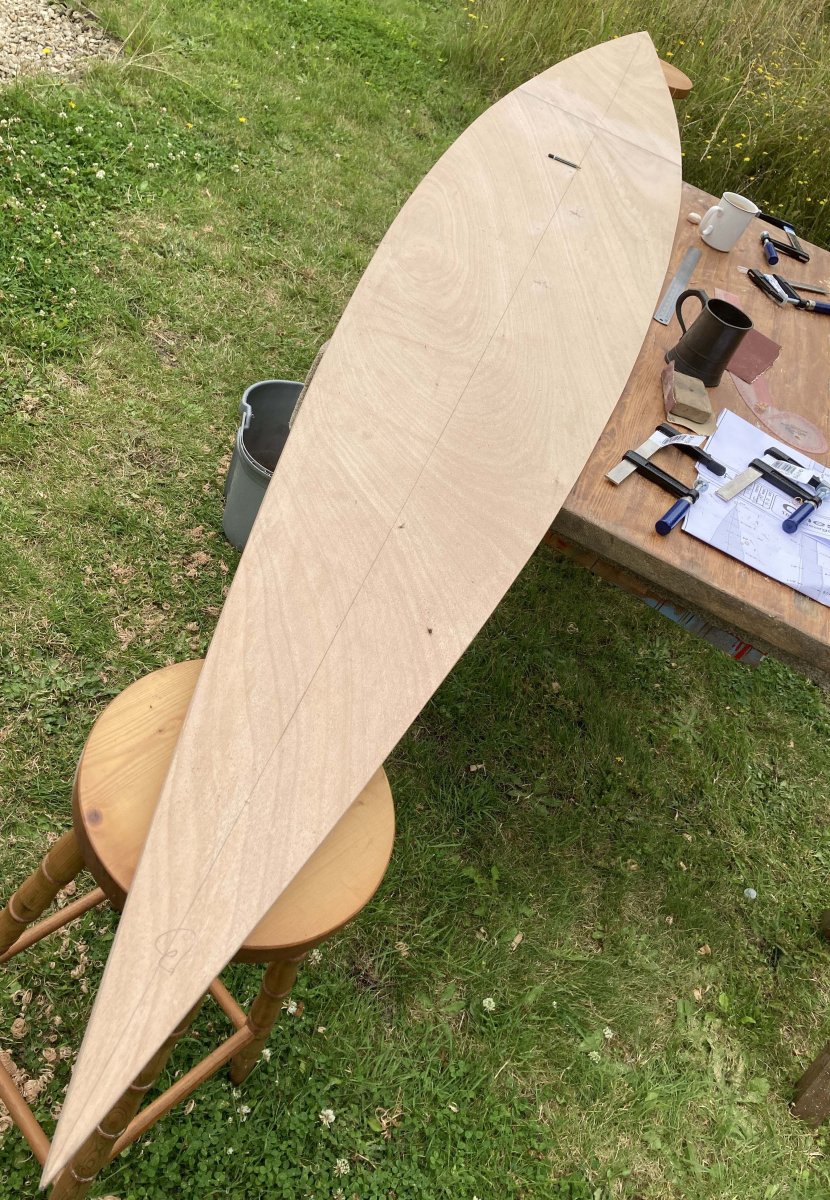
On then to the side panels, which I lofted easily enough, making sure to triple check all measurements before roughing them out with a jig saw. I then used a block plane and spokeshaves to bring them to their final shape. I used my twenty year old router to cut the rebates, and my lovely little rebate plane to cut the gains. I found a combination of Black and Decker workmate and a couple of stools to hold and balance everything worked well.

With those done, and ready for assembly, the inevitable happened…I got Covid, but once recovered – I pressed on!
The gains needed some final planing as I assembled the panels, which was effortless with the rebate plane, and very satisfying seeing them come together nicely at the bow and stern - I felt like a real boatbuilder!
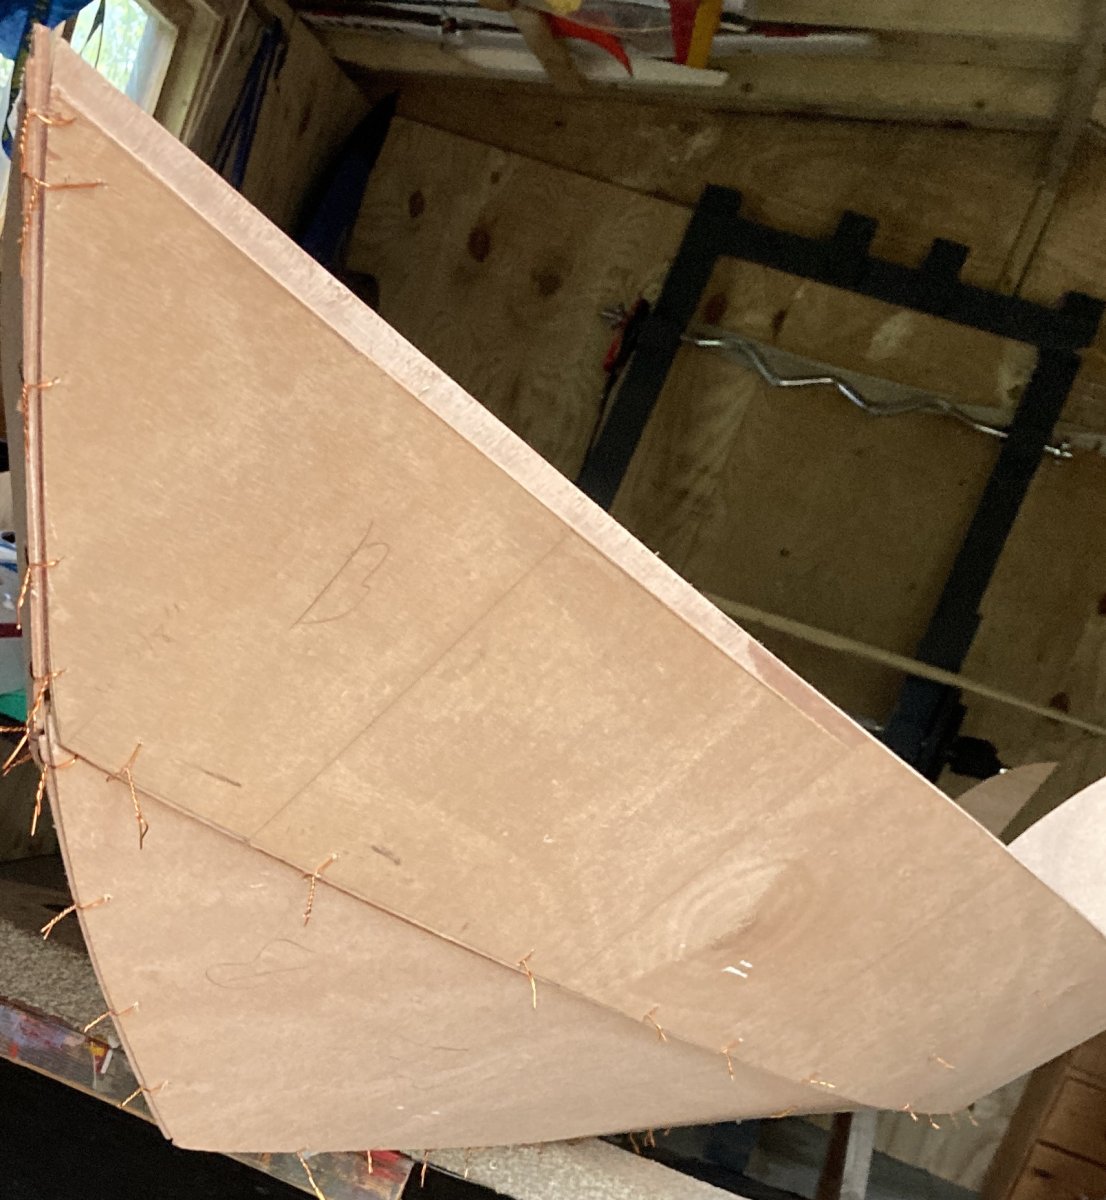
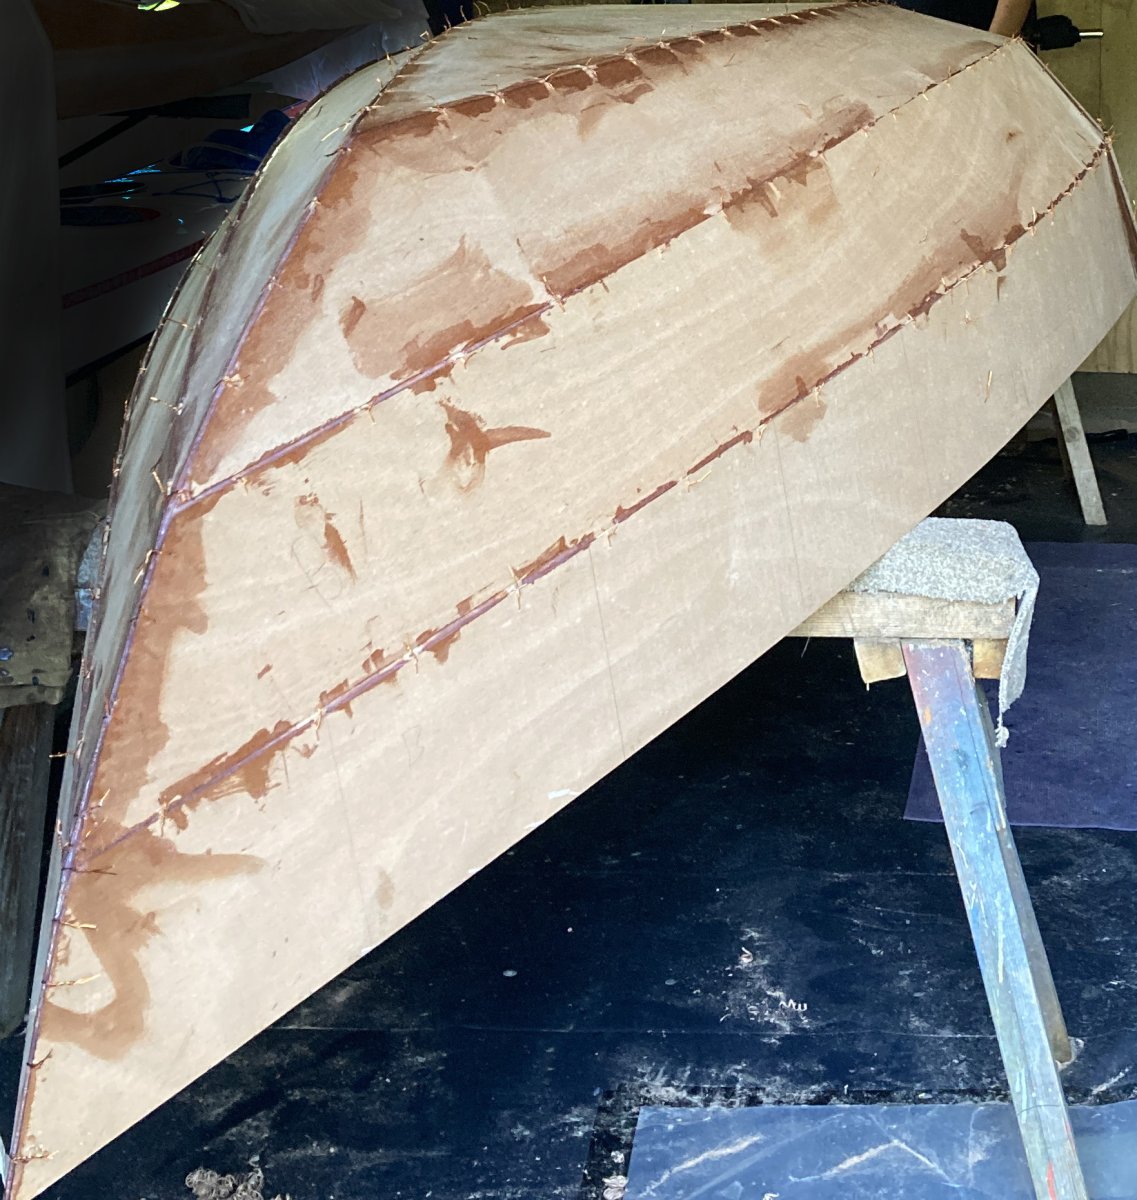
Epoxy added between copper wires.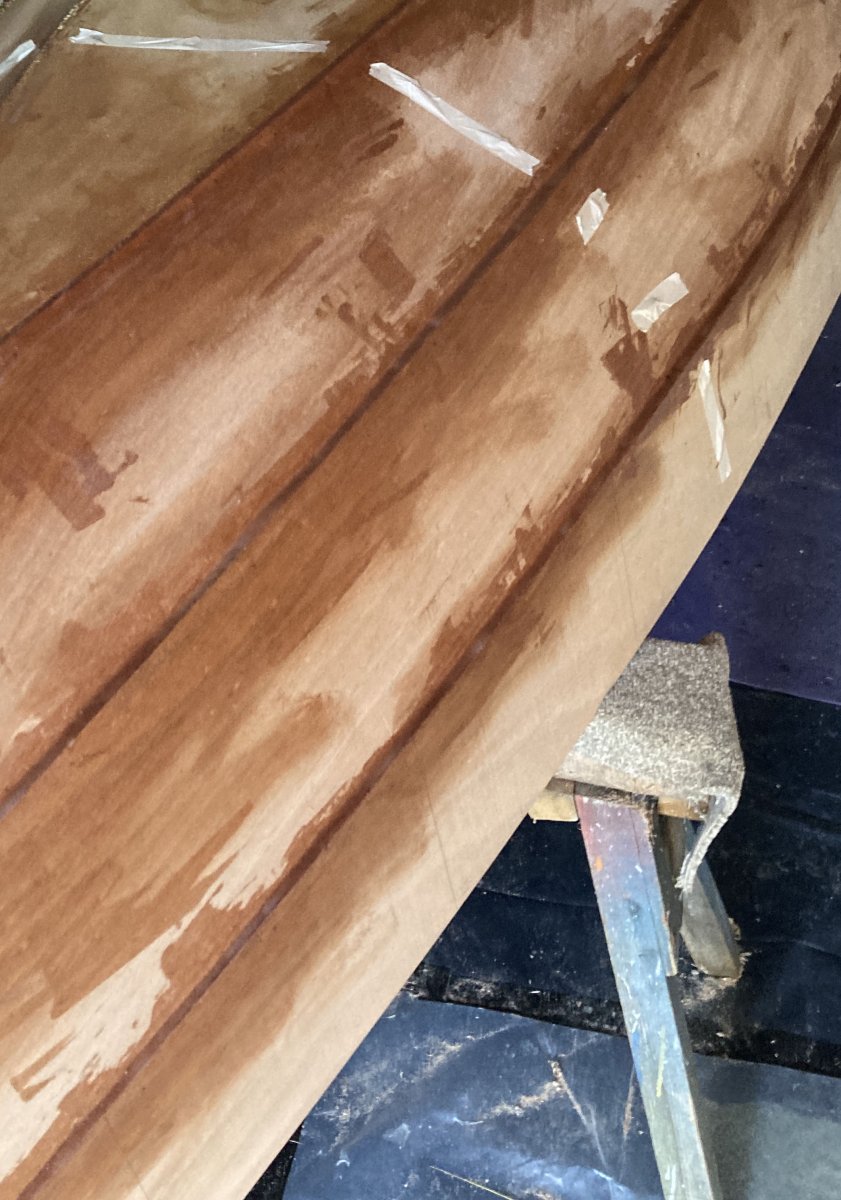
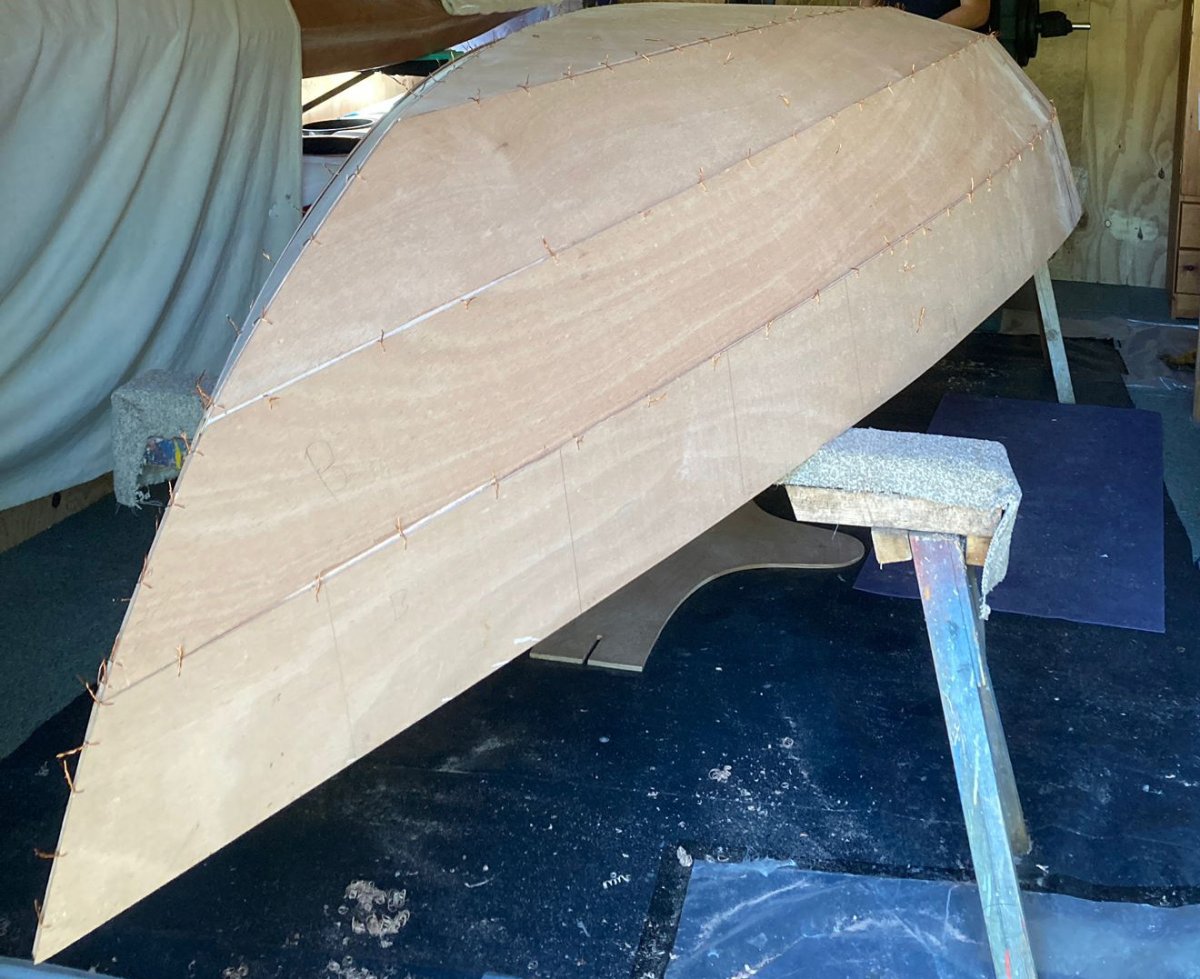
Then outside filets done.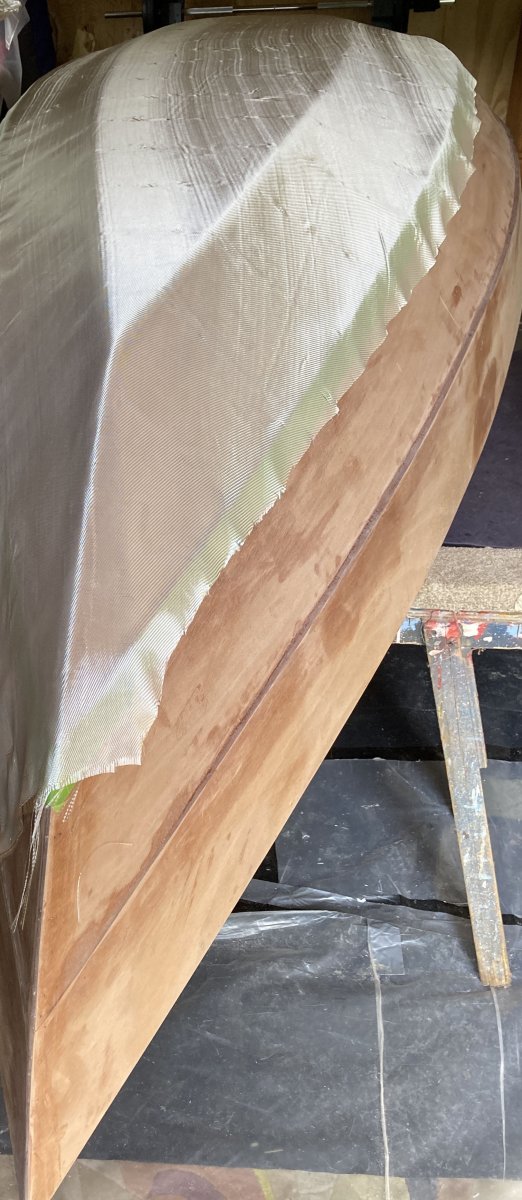
Glassing the hull.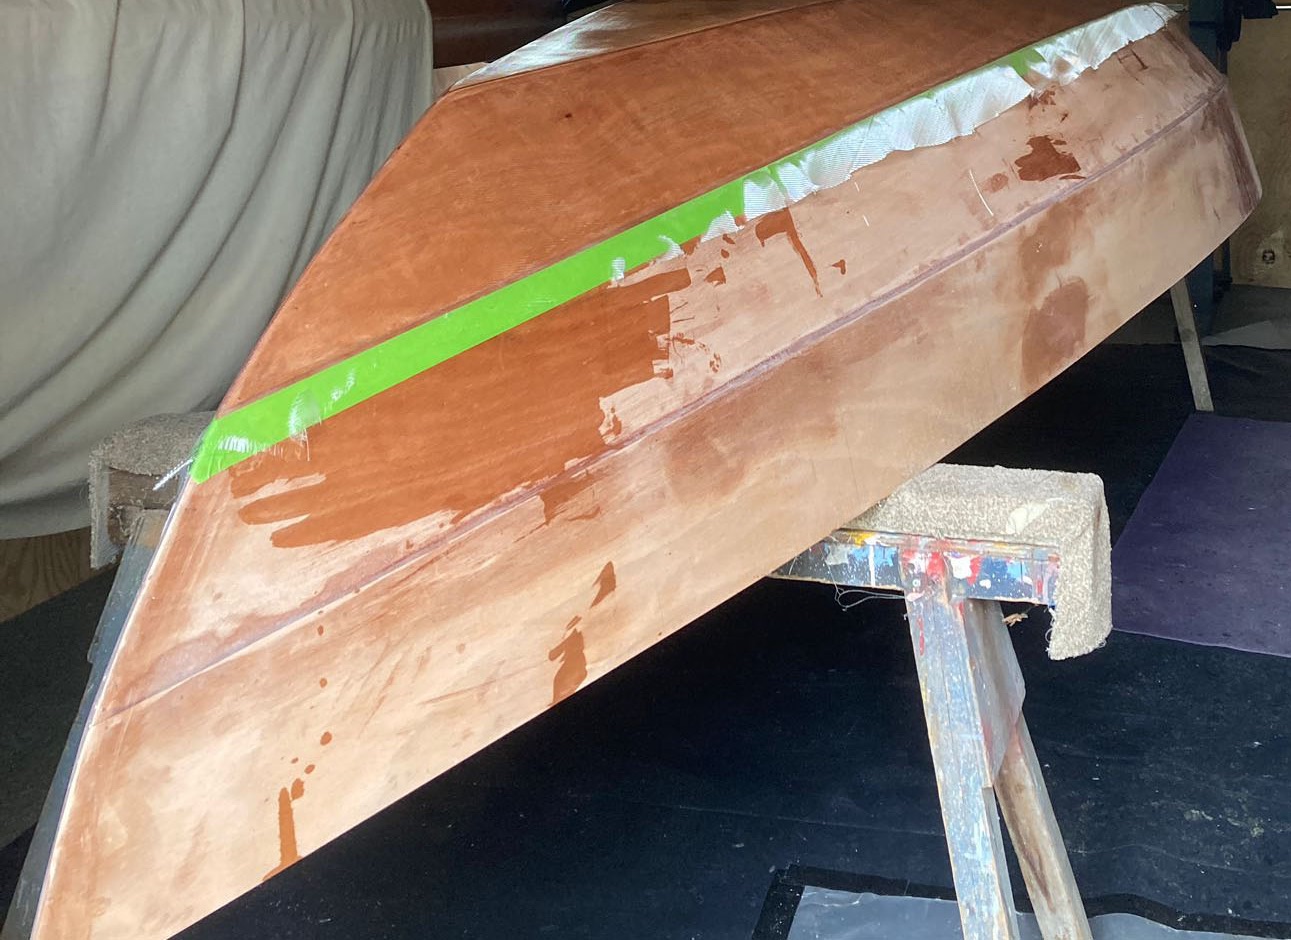
Everyone says it, but it is magical how the glass cloth becomes invisible and the wood grain starts to show through.
Bow and stern glass strips on, the glass has now had two coats and the un-glassed wooden sides one coat.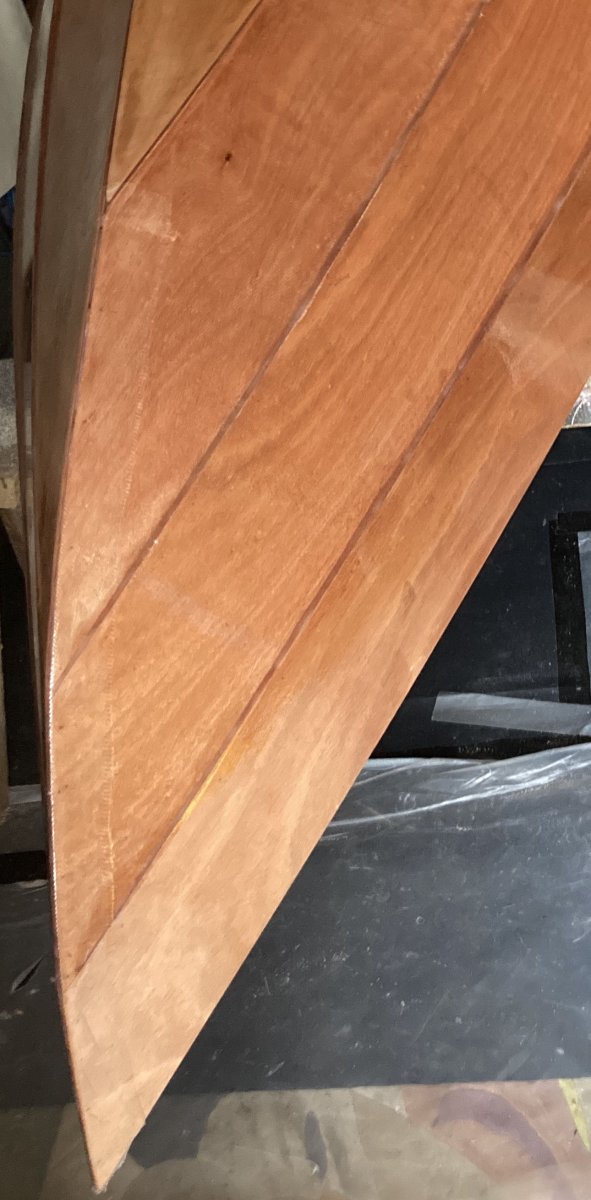
With the hull now fully epoxied, I'm doing what we all do, and contemplating not painting it. I'm happy with my woodworking skills visible on the outside, and feel it would look respectable if it was varnished only. But I will paint it, as it's more practical in the long run, and I like the look of a white hull.
While all that cured, I glued up the rails. I got the sapele from Fyne, who kindly cut the scarf joints for me, which should speed things up. I am also adding a lower bump rail to the outside, as I like the look of it, and they add a little more woodiness. I will also be installing broken inwales, which I also got from Fyne. I tapered the rails as the plans suggest, and it's surprising how it really does improve the look of them. I also tapered the bump rail.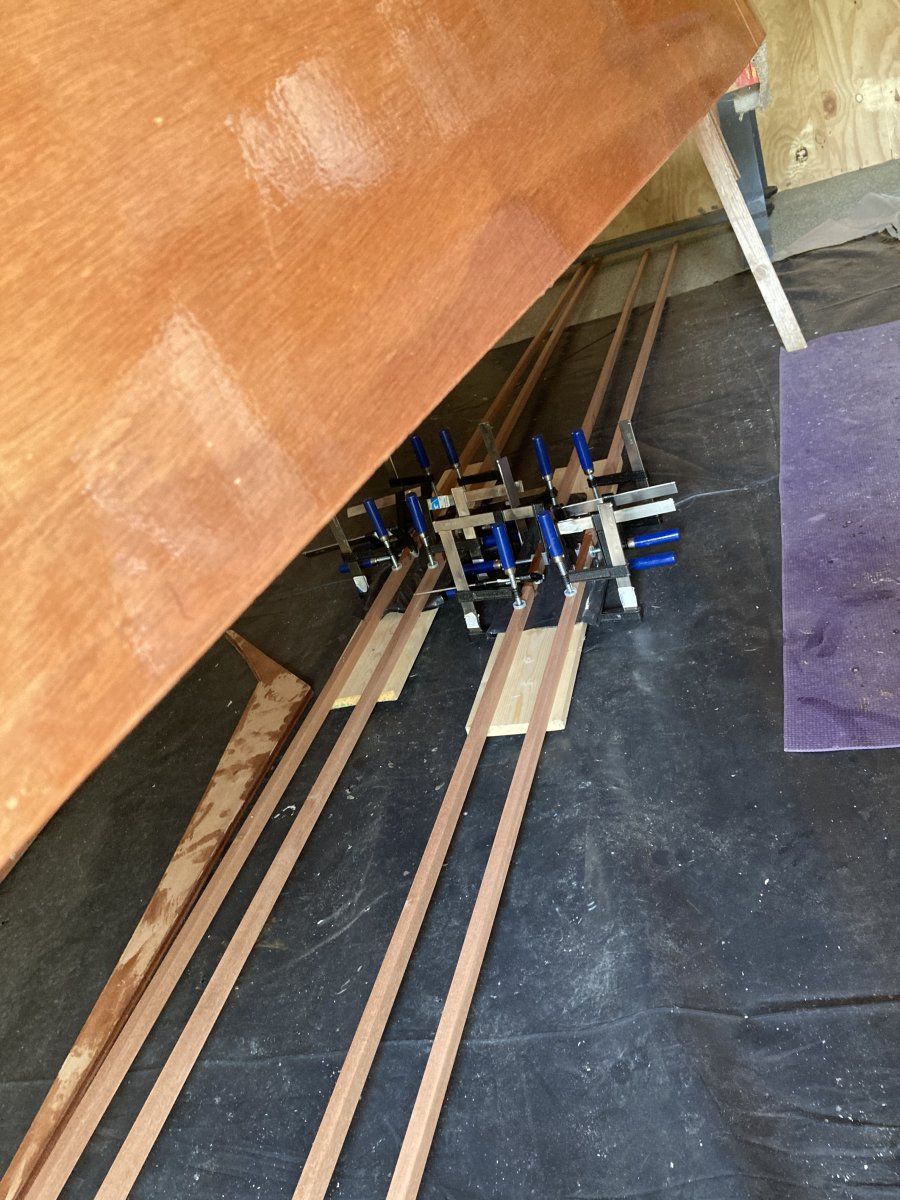
I then got the sander out, and sanded the entire exterior.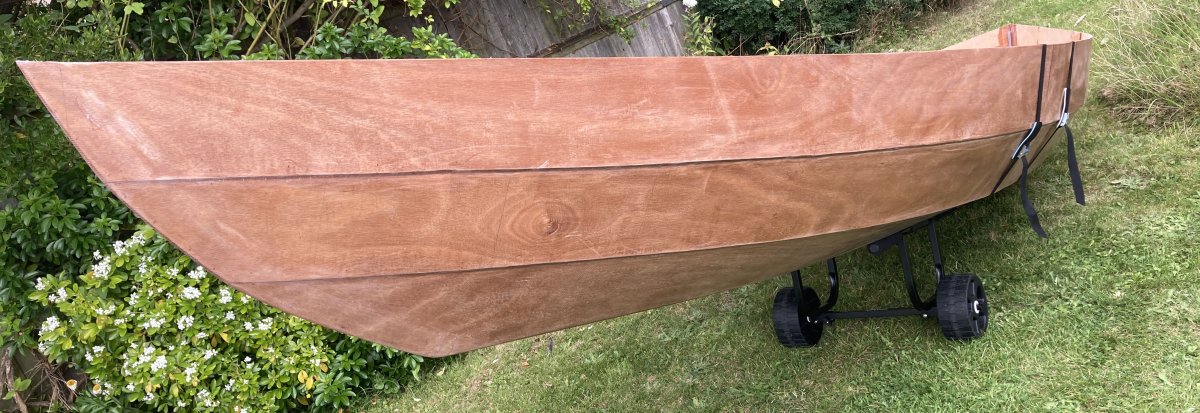
Then a final coat of epoxy.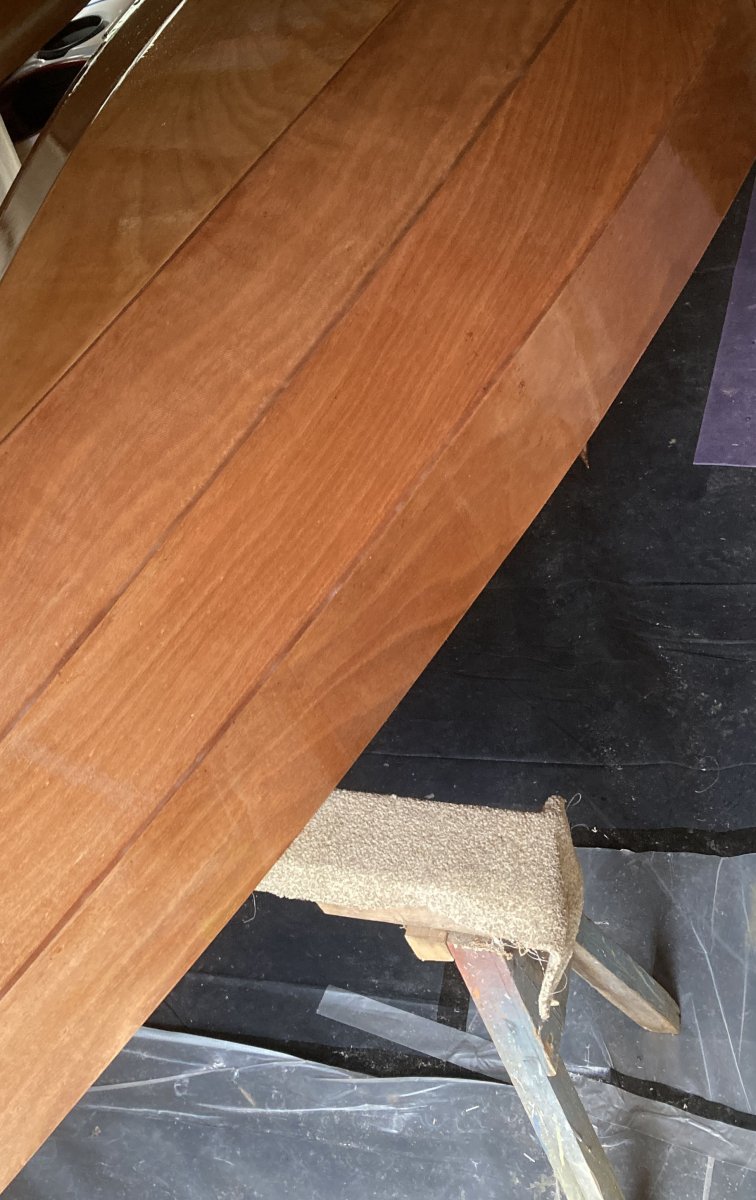
Rails cured, boat flipped over, it was time to install them, so I gave the area they would be glued to a really good sand to key the surface.
**********************************************
Ye boatbuilders beware. Crushing sweat and grief.
Soaked with meths, and un-keyed beneath.
**********************************************
Who got 'The Goonies' reference there?
It was all going so well wasn't it?
There is always that big mistake in a project, the one that should have been so obvious to avoid, and yet you didn't. In my case it was a combination of methylated spirits (no I didn't drink it), and 220 grit sanding discs. If you look at the above pictures after it all had a sand, the pictures of the boat in the garden, you will notice how woody and not at all white it all looks. That's because I sanded the whole thing in 220 grit between the second and third coats of epoxy. I should have read the manual, I should have thought about the logic of using 80-150 grit to key the surface for a 'mechanical bond', but I didn't. I remember sanding the hull BEFORE I applied any epoxy in 220 grit and so just did the same again. Stupid I know. I also washed the whole thing with meths to get the dust off, which, I suspect, left a residue. What was the result you ask? Well, this was.
The final coat of epoxy did not adhere to the one beneath, it just peeled off. Thankfully, when I glued the rails on, I sanded well enough for it not to be a problem there, and they are glued well. Though I do intend to put some oak dowels from the inside of the hull into the rails as belt and braces. These will be hidden by the breasthooks and the broken inwales.
So there was nothing left for it but to sand the whole lot off. I wasn't happy, but it was my punishment for being so foolish. Lesson learned! I did sand through the glass cloth in a few places doing this, not much, hardly at all really, but for peace of mind I glassed the bottom again, so it should be super strong now, having two coats of glass on the outside. Once that glass had cured, I sanded it all, and no, not with 220 grit this time, but 80 grit on the glass and 100 grit everywhere else. Now it looks like it should do. 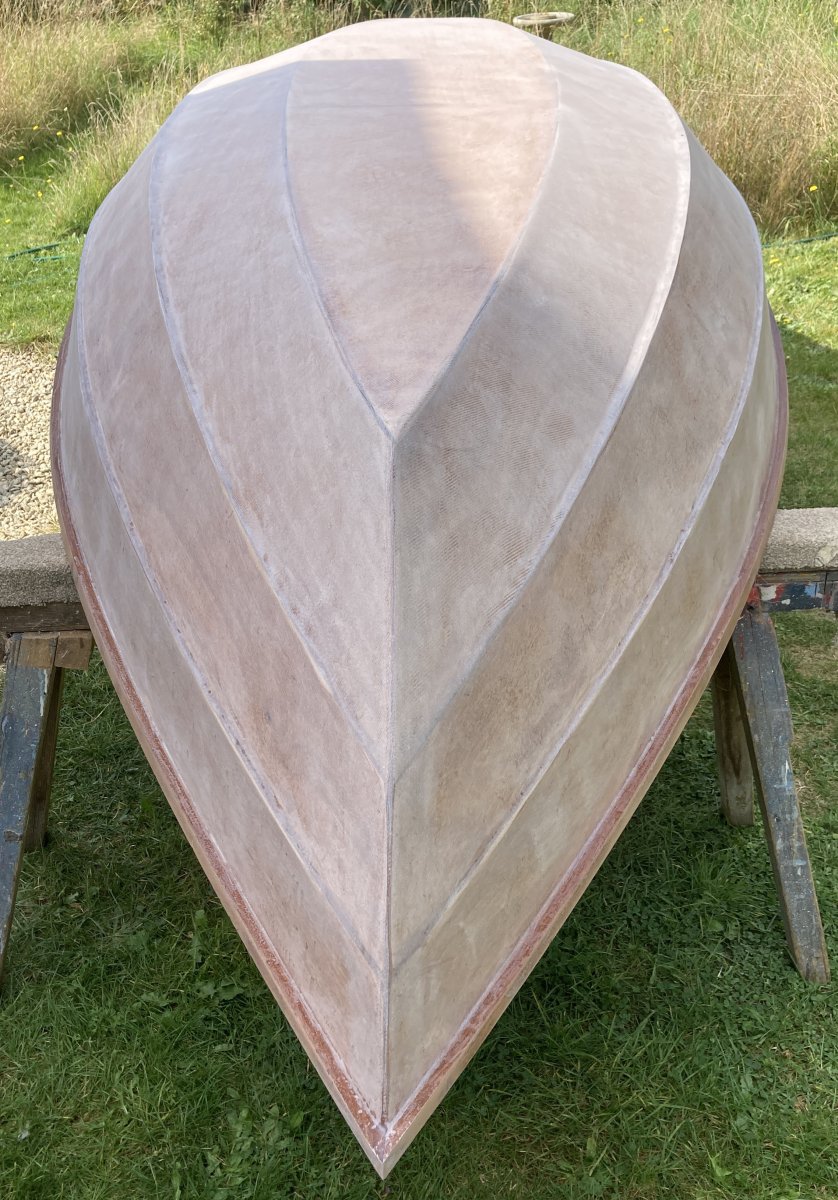

Hmmmm...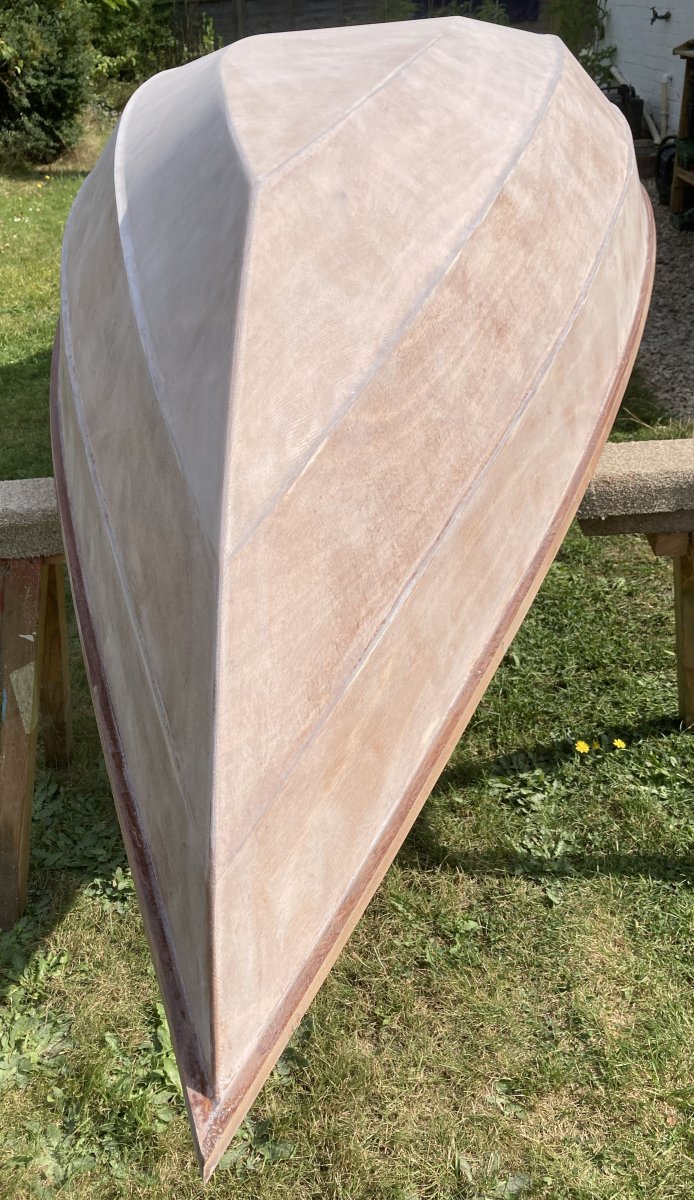
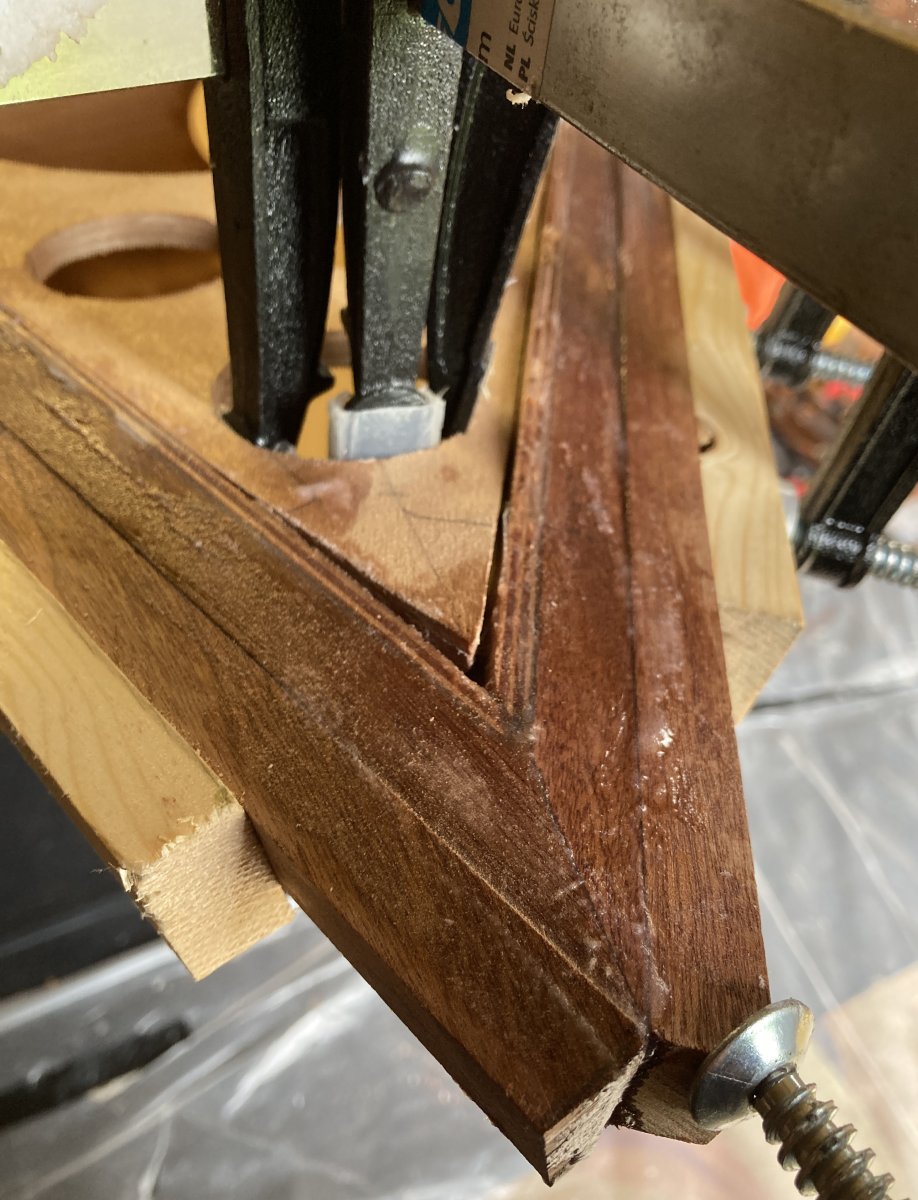
You'll notice how I extended the rail past the bow, instead of curving them off as the plans suggest. Although there are some practical reasons for doing it the way the plans state, I personally prefer the look of them extending a little past the bow and stern. I will round these off once the second rail layer is glued on.
I made a sample bump rail end from an off-cut to get an idea of placement, which I think looks good. This picture was taken before I sanded off the dreaded un-keyed epoxy layer.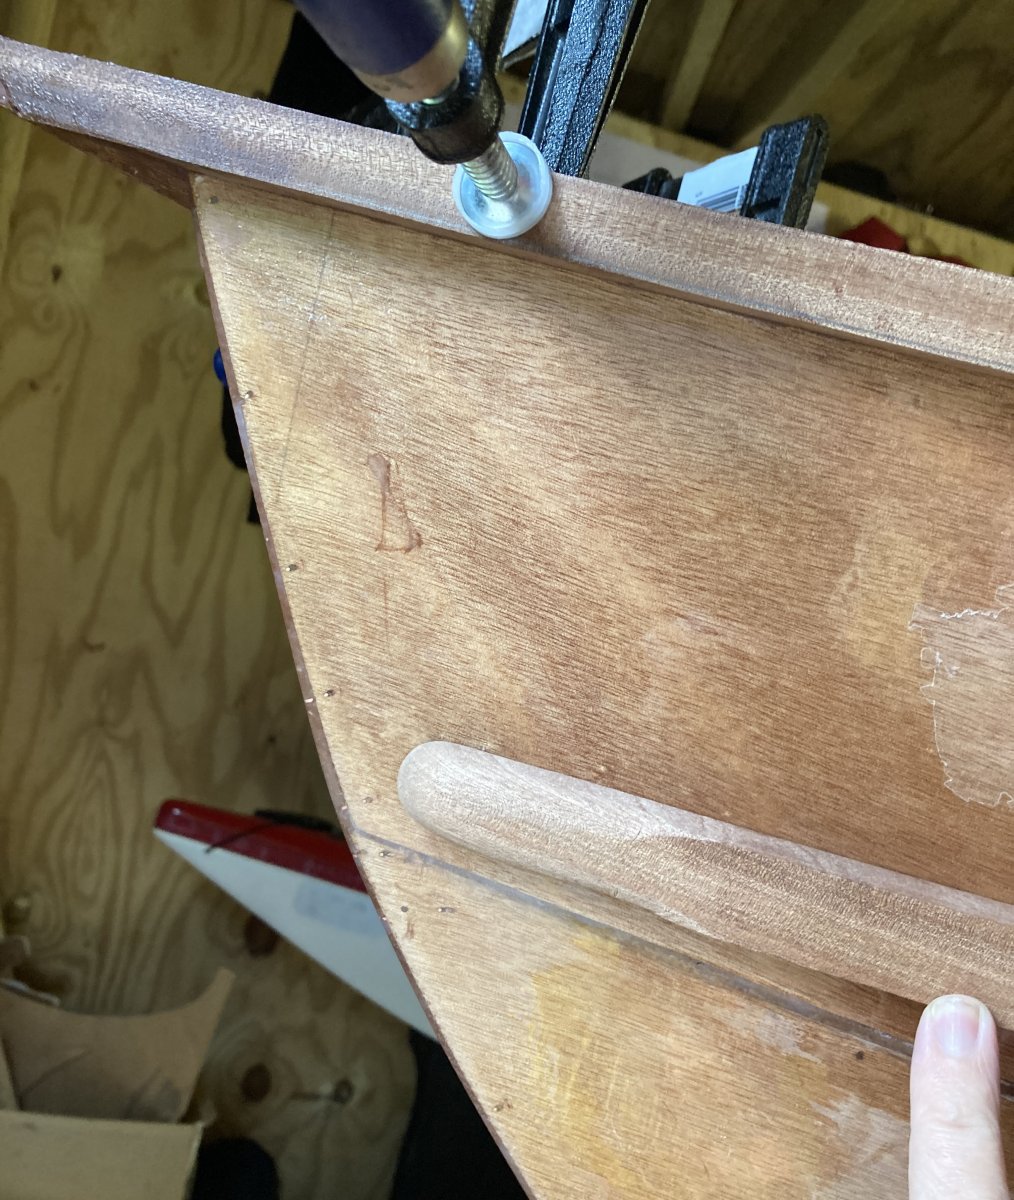
I decided not to put the final coat of epoxy on the hull just yet, but instead to take advantage of the well sanded hull and glue the bump rails and final upper rails on. I will then add the skeg, which I will glass. Then, once the skeg has been glassed and sanded, and the rails shaped, I will epoxy the whole thing in one go. For the bump rails, I shaped and rounded the ends before installing, and will round off all the other edges once they have cured. I spent a lot of nights thinking how I was going to clamp the bump rails on, even considering drilling holes and using the copper wire to hold them in place, but realised I was overthinking it, and just split up some pine boards to extend the clamping pressure. Because of this I put the first top rail layer on, then the bump rail (to enable my clamping method), and once cured will glue the final top rail layer.
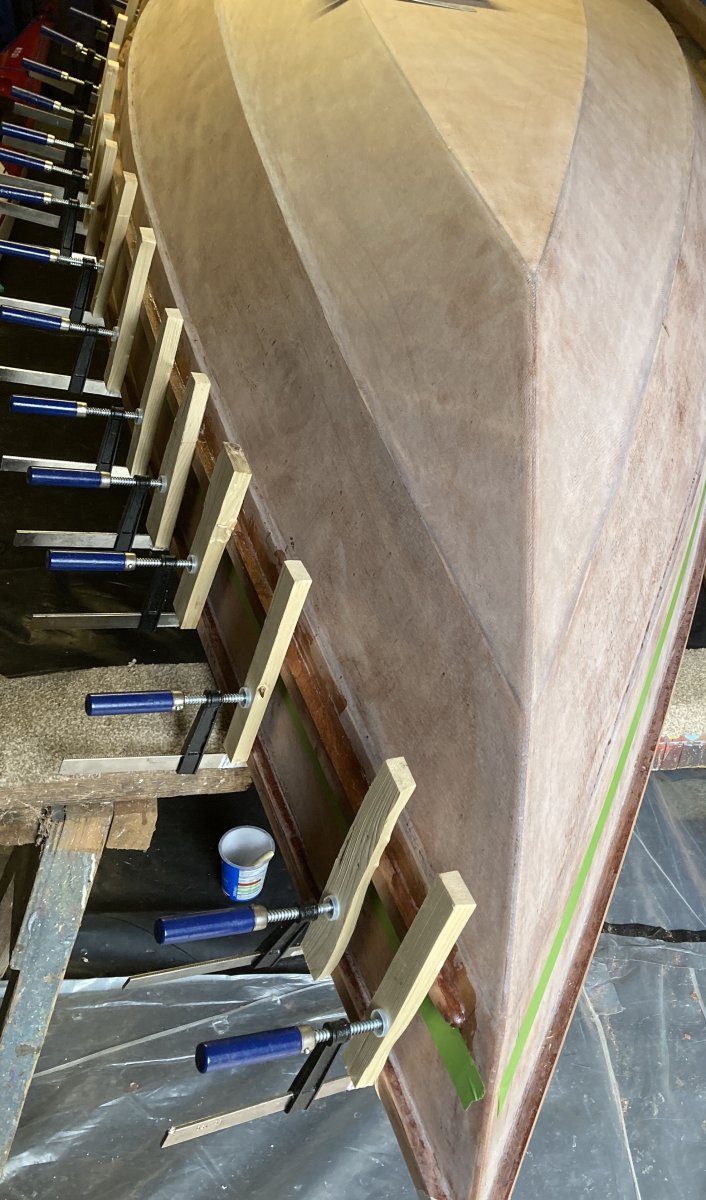
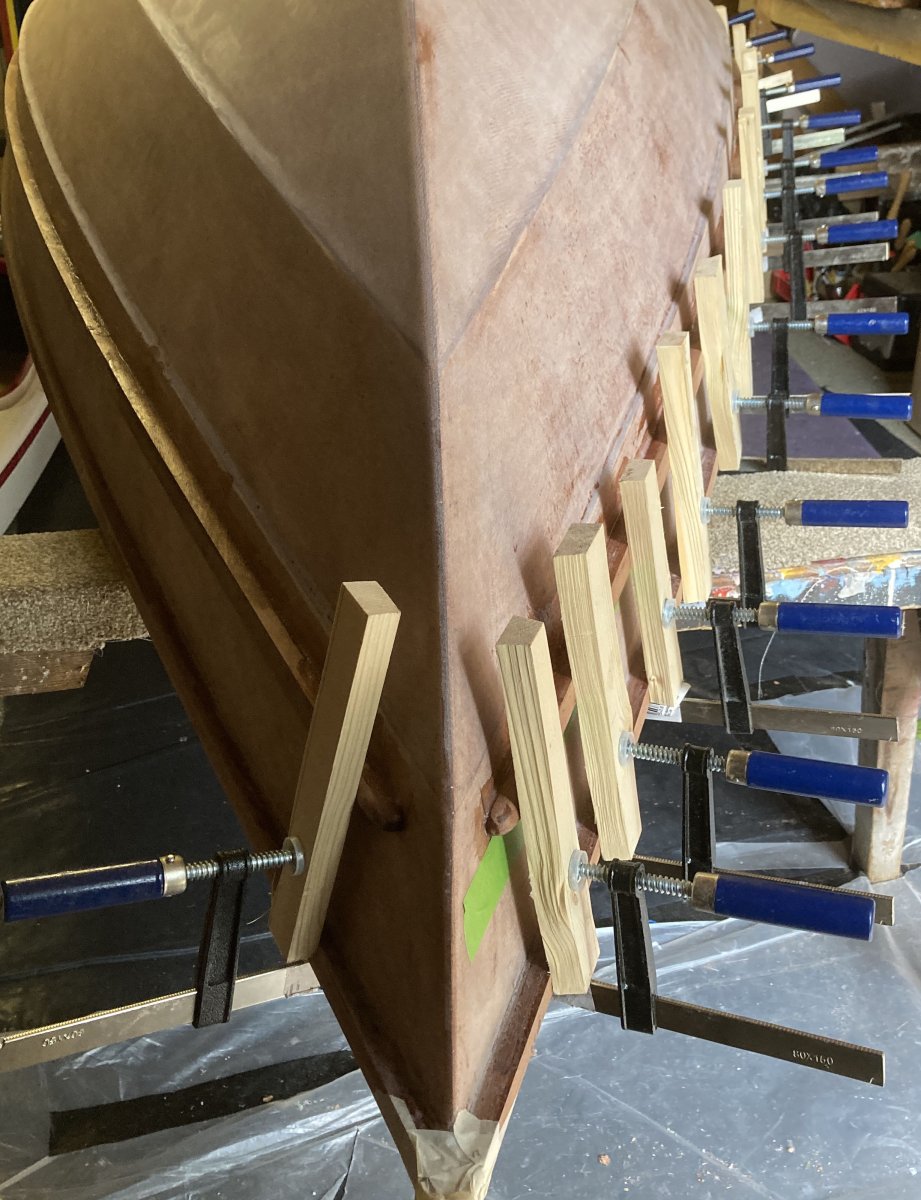
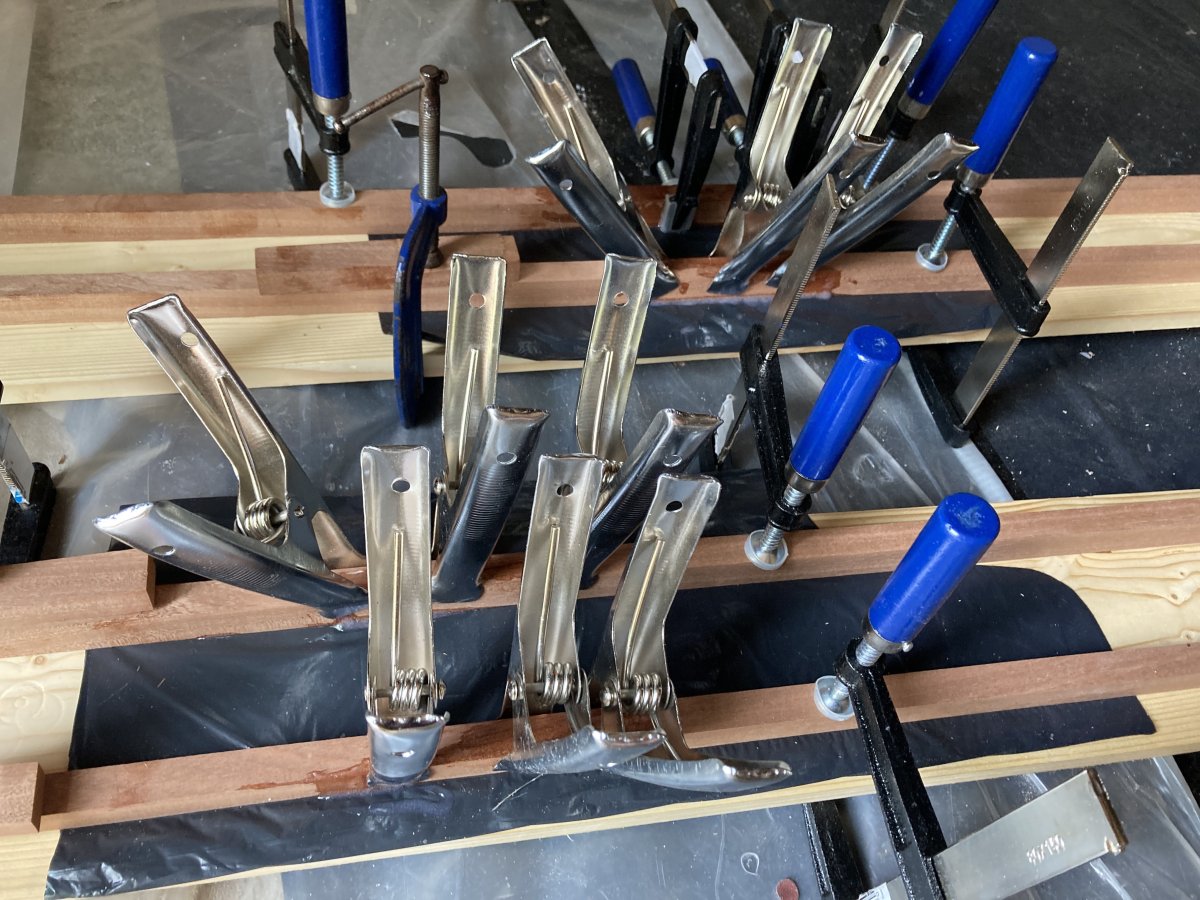
I used a space of four inches for the bump rail, so four inches of space below the bottom of the top rail and the top of the bump rail. I am now waiting for those to fully cure, and will start glueing the final top rails on next. Due to the amount of clamps, of which we can never, ever, EVER have enough off, I am gluing one rail at a time.
Last edited by Rob (5 Oct 2023 8:46 am)
Offline
#2 21 Sep 2023 7:38 am
- Paul
- Employee

- From: Gatebeck Cumbria
- Registered: 4 Aug 2011
- Posts: 134
Re: Skerry built from plans (build log)
Your hull looks perfect.
Please don't use meths to clean the wood. With the epoxy we supply you should not use any solvents. Remove the dust with a brush and cloth. Telephone us for more advice.
Offline
#3 21 Sep 2023 8:10 am
- Rob
- Member
- From: England
- Registered: 29 Jun 2021
- Posts: 66
Re: Skerry built from plans (build log)
Thank you Paul, I'm very happy with how the hull turned out. I certainly won't be using meths again, only for cleaning tools and hands – I've learned my lesson there.
Offline
#4 22 Sep 2023 4:18 pm
- Rob
- Member
- From: England
- Registered: 29 Jun 2021
- Posts: 66
Re: Skerry built from plans (build log)
I glued the last of the outside rails on today. Once they've all fully cured, I will round them off at the bow and stern. I like the look of the rails extending over the bow like this. Although I've done the same at the stern, I suspect I won't leave as much on the stern as I need to allow for the rudder.
View of the bow with the final outside rail glued in place.
Last edited by Rob (22 Sep 2023 4:18 pm)
Offline
#5 24 Sep 2023 11:34 am
- Rob
- Member
- From: England
- Registered: 29 Jun 2021
- Posts: 66
Re: Skerry built from plans (build log)
Clamps taken off today, and it’s surprising how solid the boat feels with the second (final) outside rails on. Once the inside rails are on too it will be even stronger. Next job is to turn the boat over and shave the outer rail taper down to match the inner, round the corners etc and inevitably more sanding. Then the skeg. Once the skeg is done it will time to work on the inside, which I’m looking forward to now, as that will be the final constructional stages.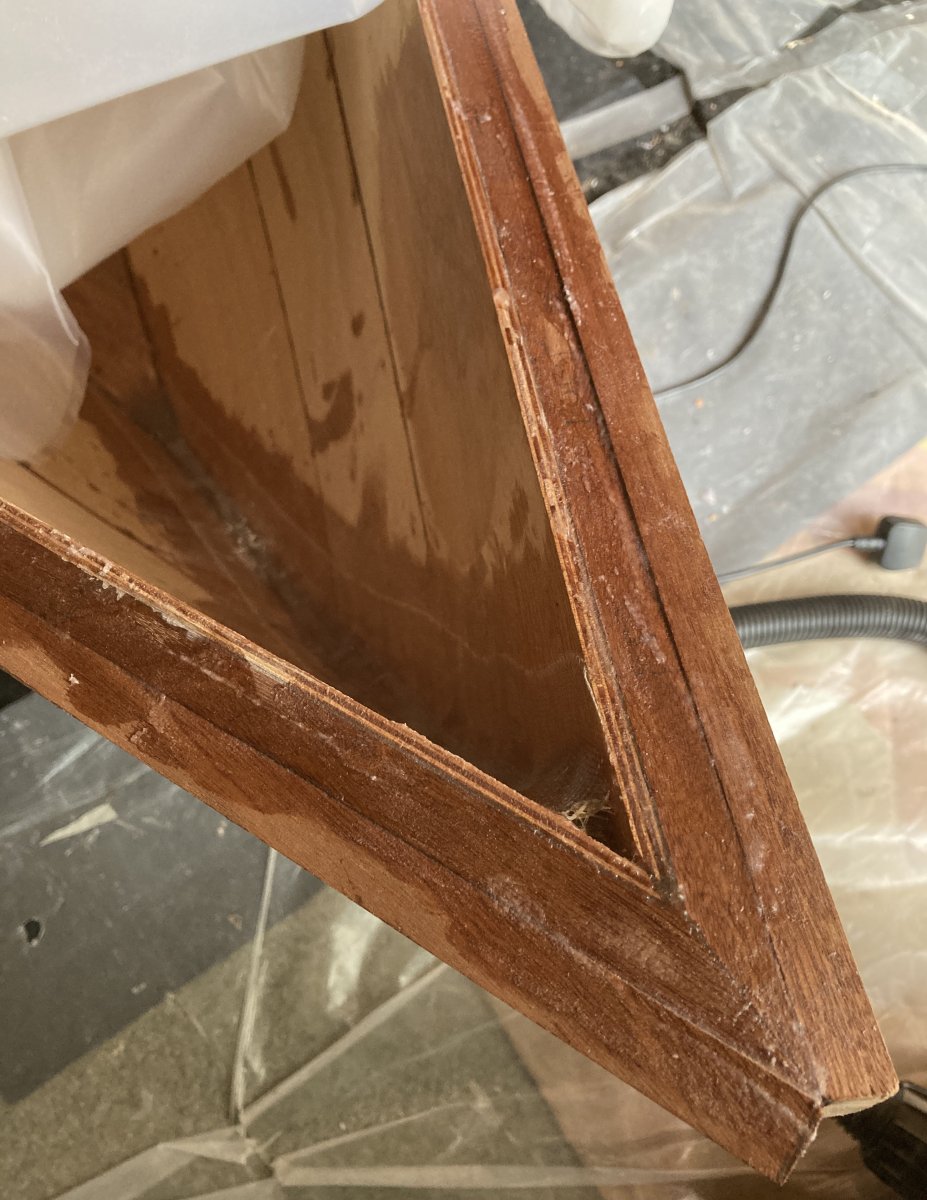
Bow view.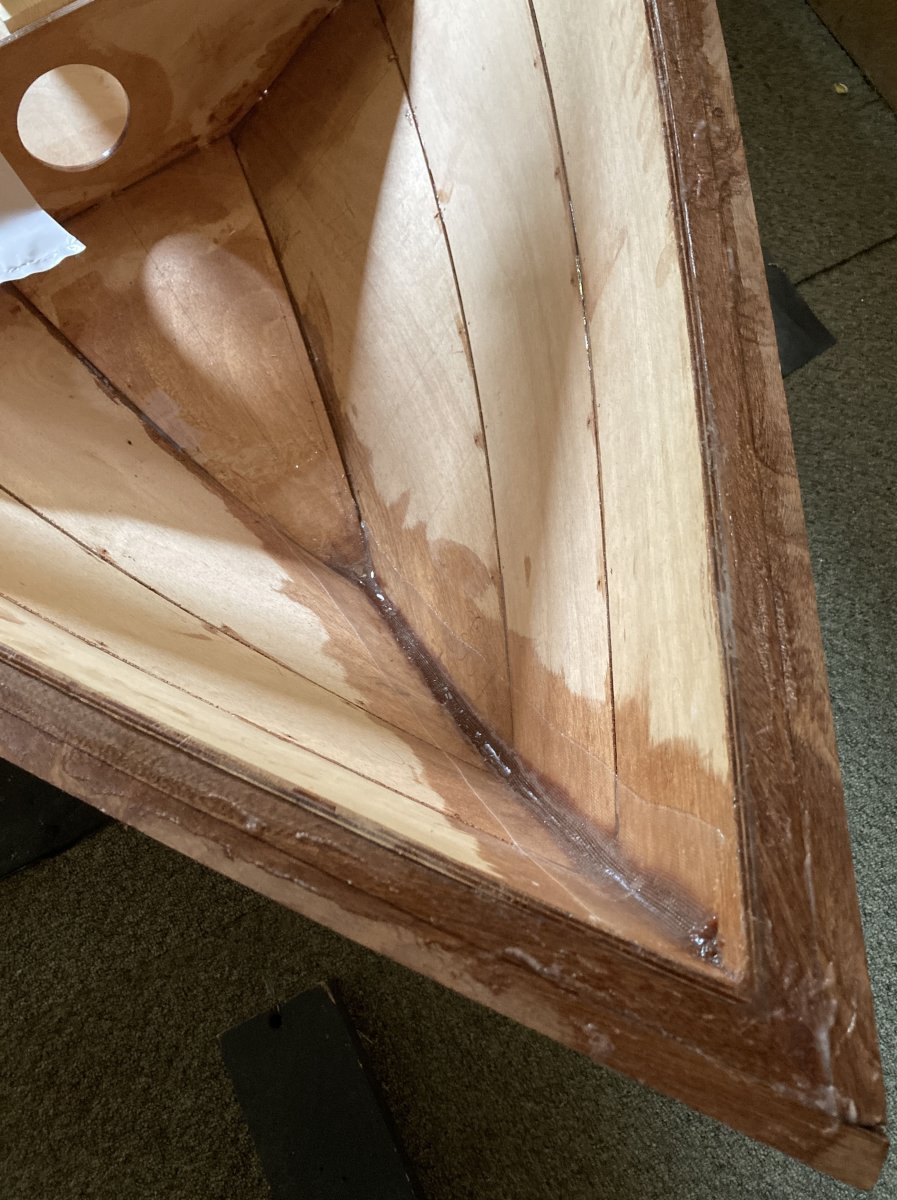
Stern view.
Last edited by Rob (24 Sep 2023 12:21 pm)
Offline
#6 25 Sep 2023 3:07 pm
- Rob
- Member
- From: England
- Registered: 29 Jun 2021
- Posts: 66
Re: Skerry built from plans (build log)
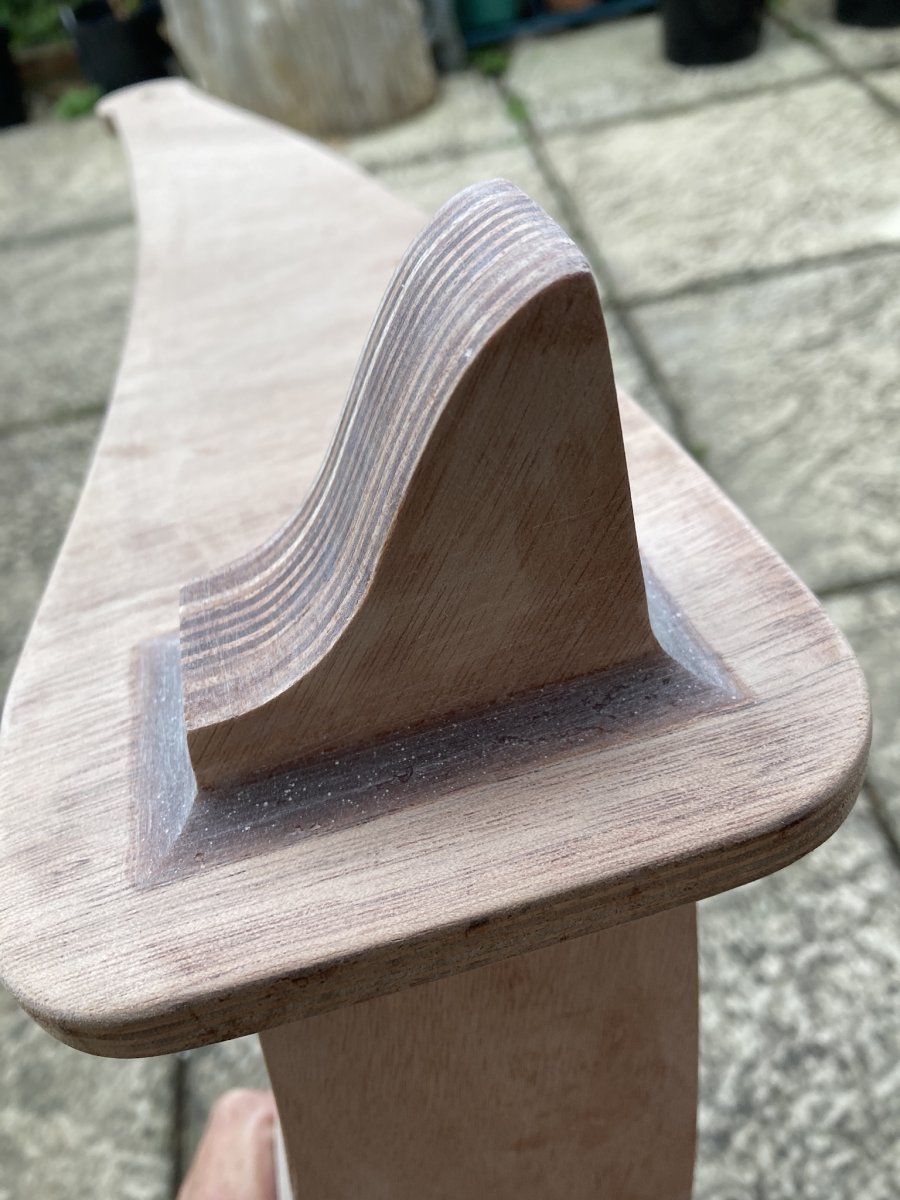
Continued working on the rudder today, which I’ve been doing on and off, in between other jobs on the boat. Here is the shaped rudder blade, which will be painted eventually.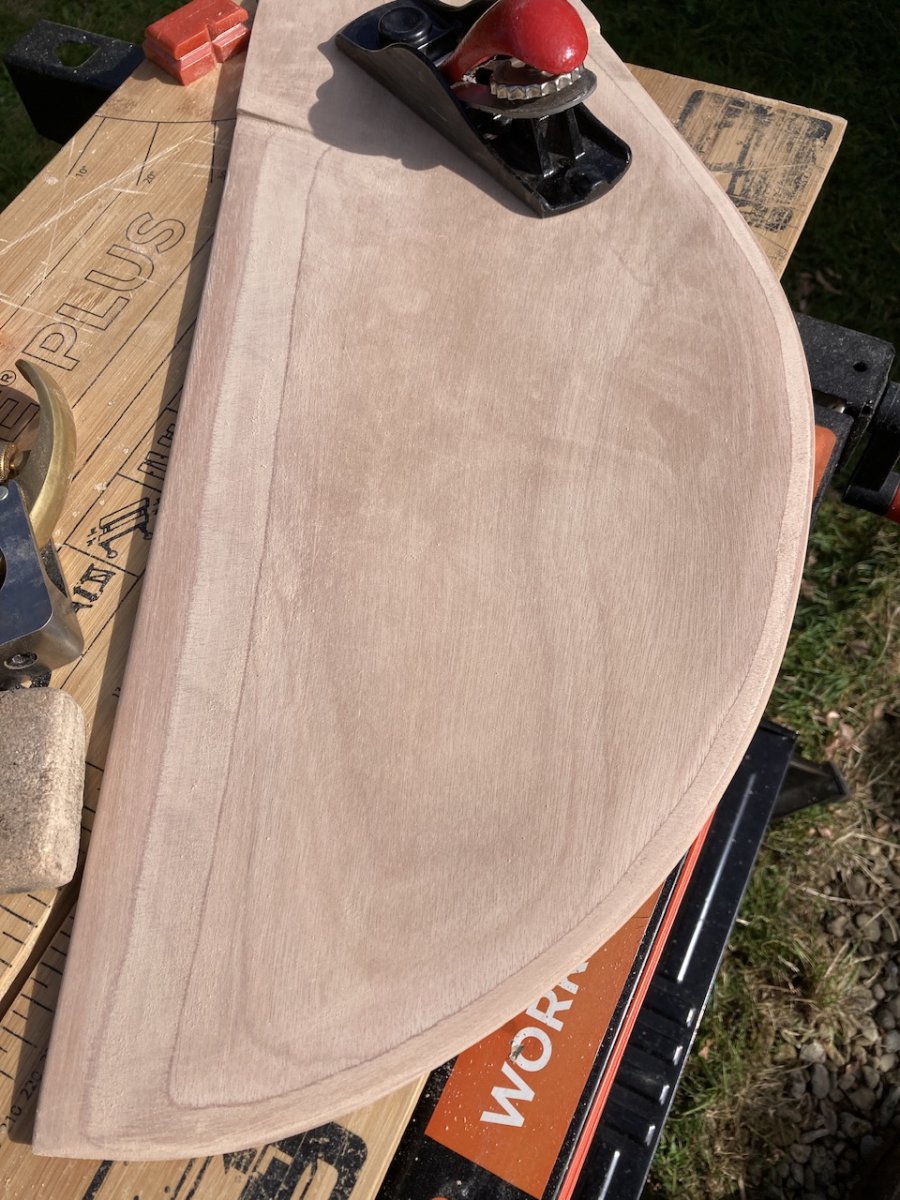
Last edited by Rob (25 Sep 2023 3:09 pm)
Offline
#7 28 Sep 2023 4:37 pm
- Rob
- Member
- From: England
- Registered: 29 Jun 2021
- Posts: 66
Re: Skerry built from plans (build log)
Ive been working a bit more on the rudder and daggerboard this week. Once I’ve done these it will be back to boat itself and the installation of the skeg.
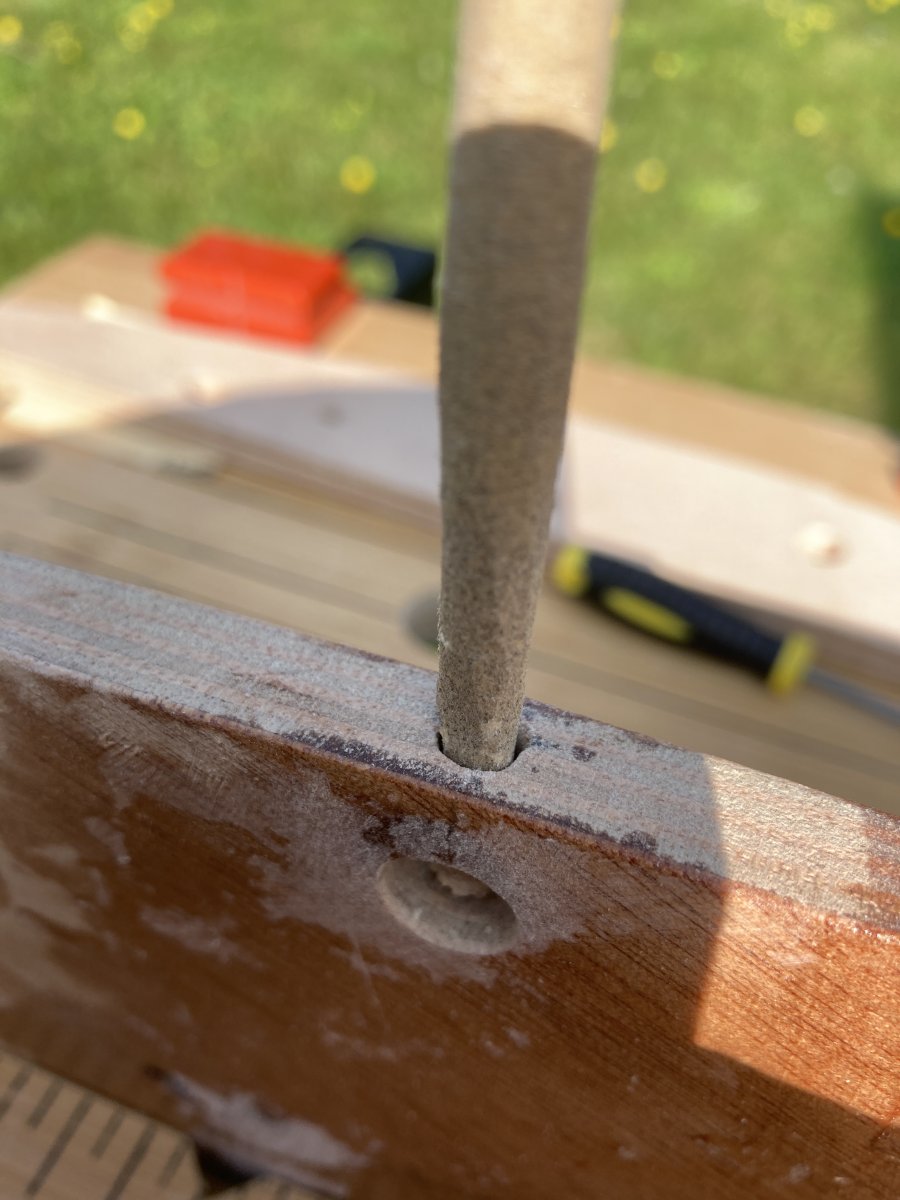
Cleaning the hole for the downhaul cord on the rudder blade. The knot sits in the larger hole and the cord feeds out of the smaller hole the sandpaper is in. I’ve done the same on the opposite side for an uphaul cord.
Here I am glueing the yoke to the rudder.
Here I am glueing the outer handles to the daggerboard. The outer handles are cut roughly to shape, so I will shape them to their final profile once the epoxy has set.
I had originally planned to paint the rudder blade and the daggerboard blade, but as the wood looks so nice, I might varnish them instead.
Last edited by Rob (29 Sep 2023 8:37 am)
Offline
#8 1 Oct 2023 8:56 pm
- Rob
- Member
- From: England
- Registered: 29 Jun 2021
- Posts: 66
Re: Skerry built from plans (build log)
I’ve sanded the epoxy fillets around the top of the rudder and yoke, but still need to apply the fillets on the underside. I’m happy with how these turned out, but the sanding required to get them smooth like this proved ominous portents for the vast number of fillets I need to do on the inside of the boat.
Last edited by Rob (2 Oct 2023 11:19 am)
Offline
#9 2 Oct 2023 2:41 pm
- Rob
- Member
- From: England
- Registered: 29 Jun 2021
- Posts: 66
Re: Skerry built from plans (build log)
Last week the daggerboard handles were shaped and sanded, today they had their second coat of epoxy. I've also applied the epoxy fillets to the underside of the rudder, which will be sanded tomorrow.
I noticed the epoxy was going a bit dull about 20 minutes after being applied to the daggerboard, which could be the dreaded 'amine blush'. If it is, I will wash the daggerboard with warm soapy water and a scouring pad, which should do the trick. Over the last couple of weeks I've been foolishly keeping the epoxy bottles on the floor, so I wonder if they are getting too cool? It was fine before, but now the weather is getting a bit cooler in the evening, that might be the problem. So I've moved them up and into a bubblewrap lined cardboard box, which I hope will help to keep them warm...time will tell. There are times in this project when I feel like an absolute blundering amateur, which of course I am, but one never wants it proved, does one!?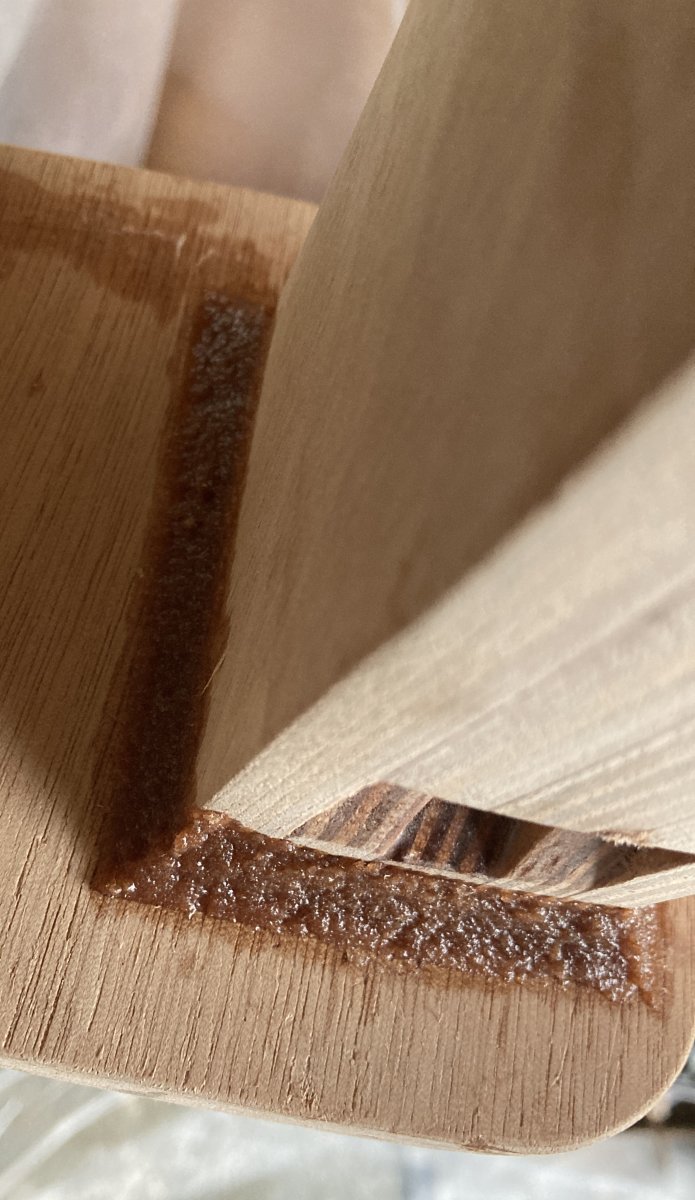
Last edited by Rob (2 Oct 2023 2:42 pm)
Offline
#10 3 Oct 2023 7:54 pm
- Rob
- Member
- From: England
- Registered: 29 Jun 2021
- Posts: 66
Re: Skerry built from plans (build log)
Todays I sanded the final fillets on the rudder and gave the whole thing a coat of epoxy. 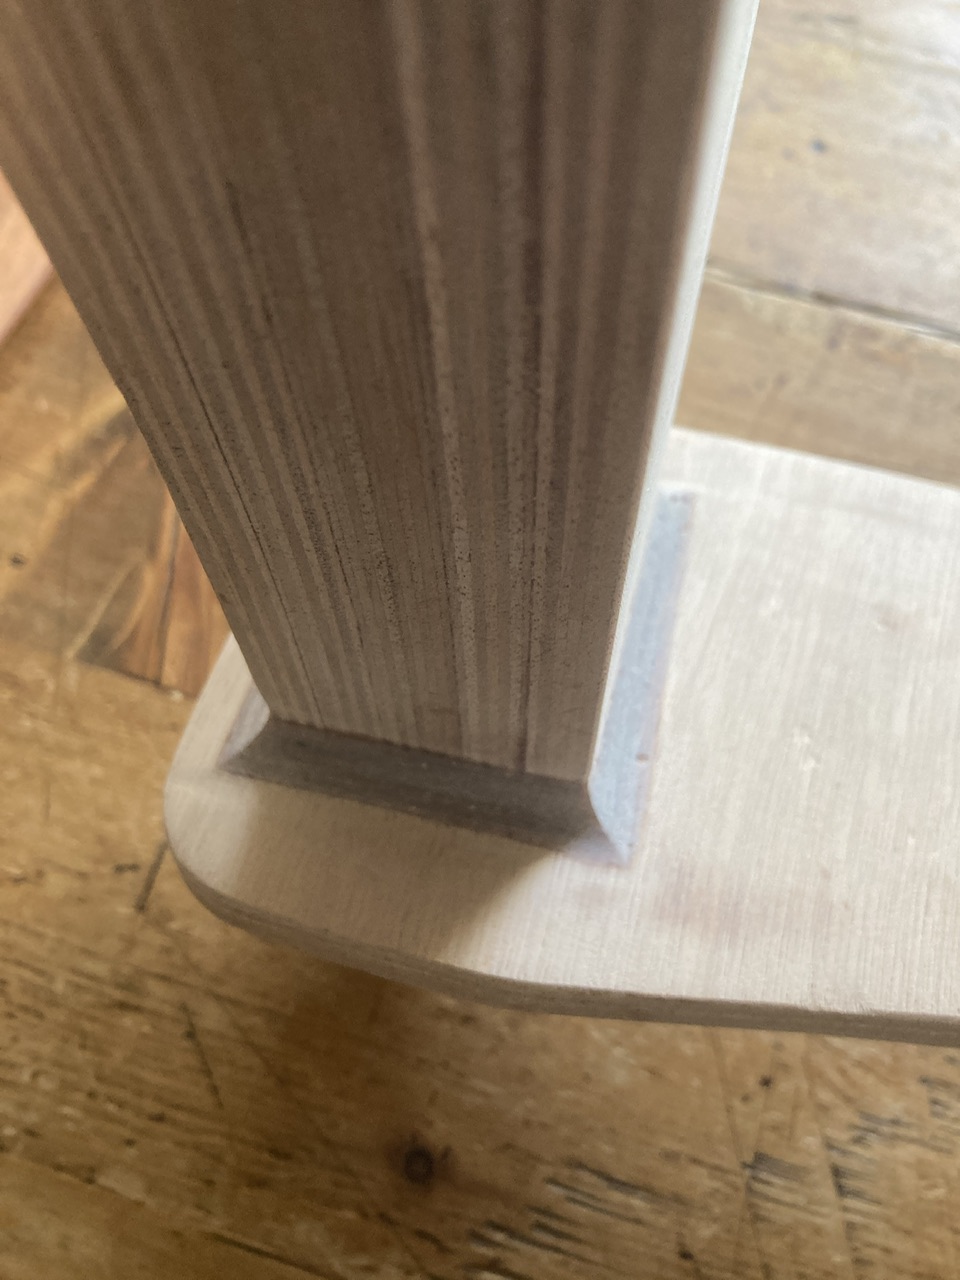
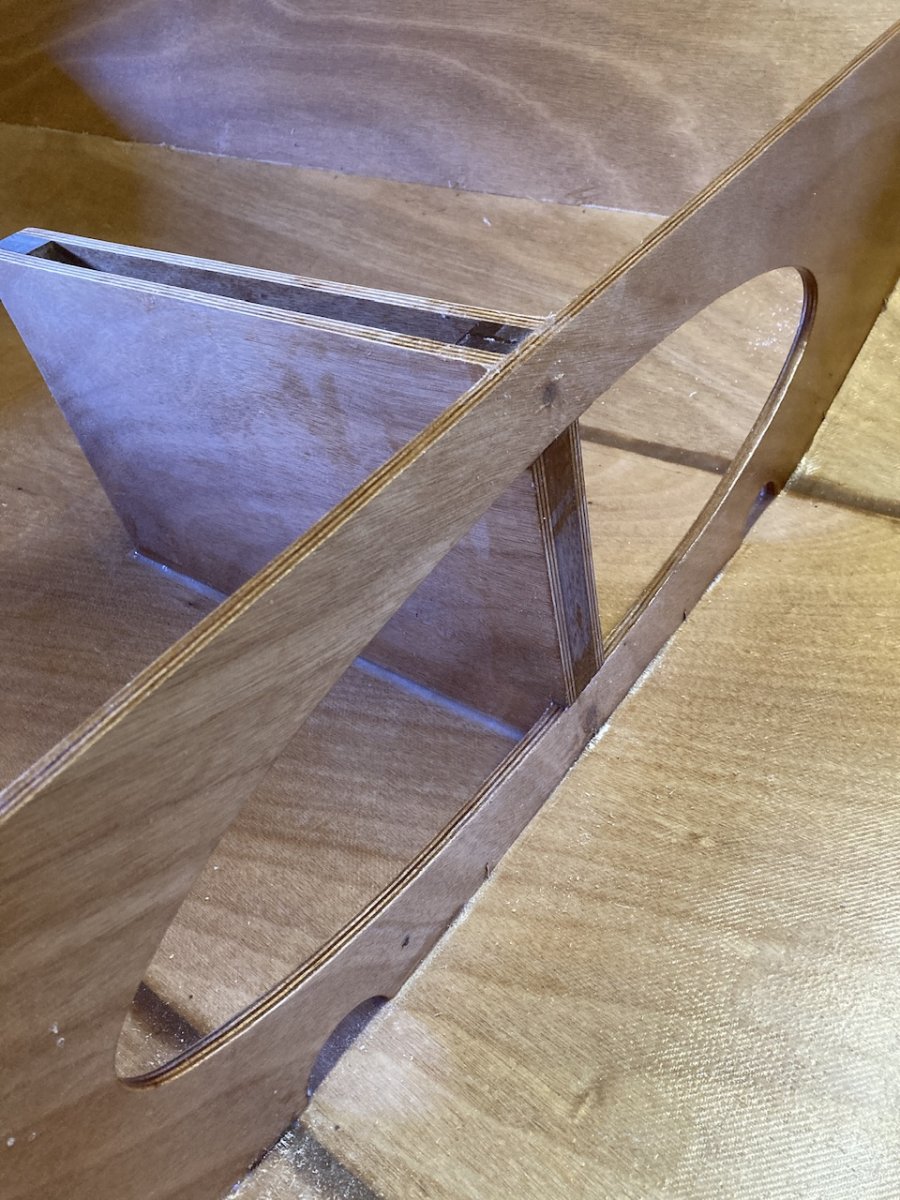
I also made cardboard templates of the bow and stern tank tops/seats. As I’m going to make a round mast, as opposed to the square section mast in the plans, I’ve altered the edge/line of the bow seat to allow for this, which you can see in the picture. I’m also going to use belay pins instead of cleats, which will go on the extended piece too. The centre seat and daggerboard trunk aren’t glued, they’re just there to get a feel of how it will look. 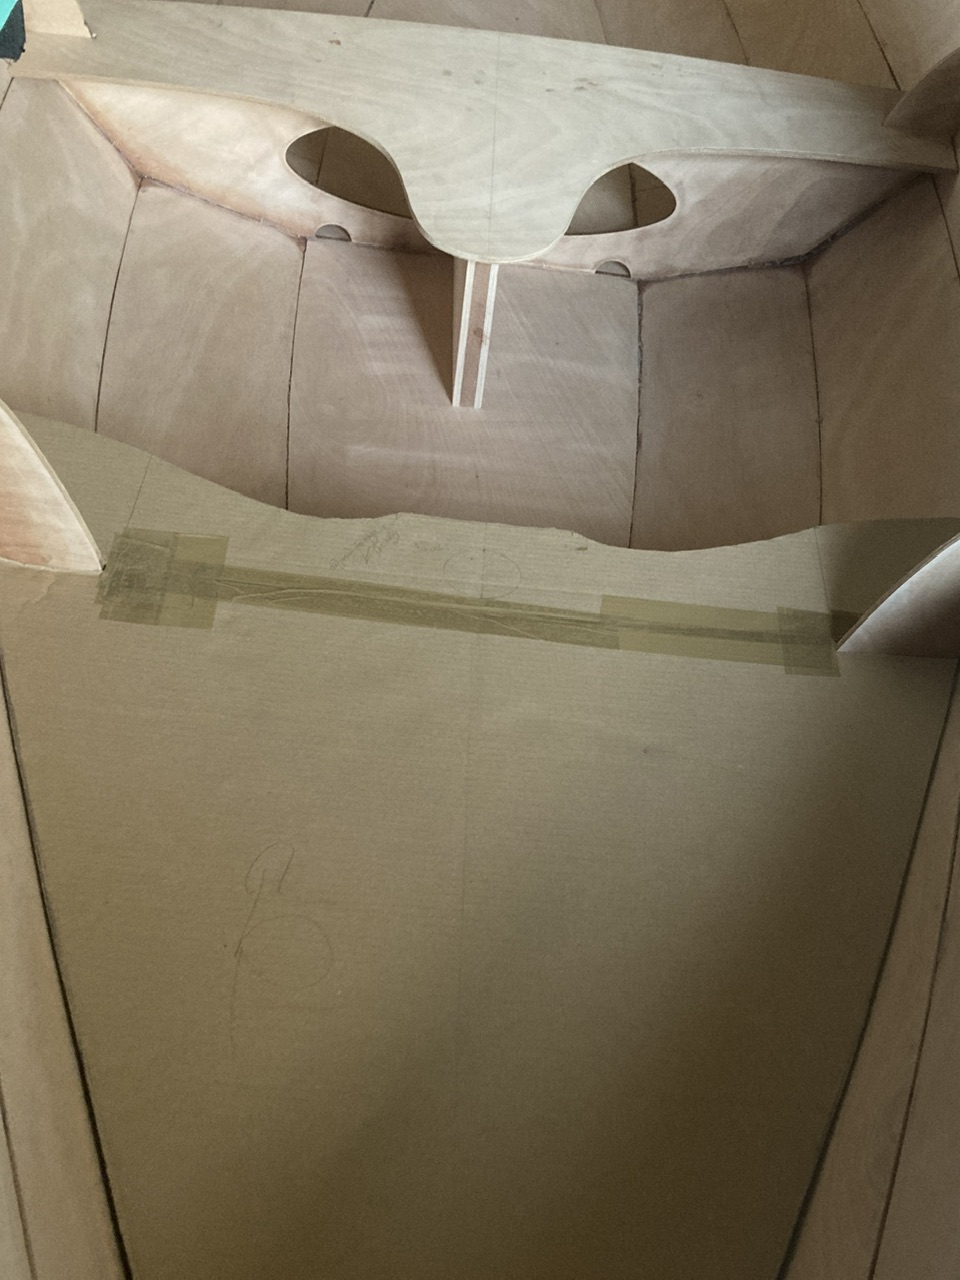
Last edited by Rob (3 Oct 2023 8:49 pm)
Offline
#11 4 Oct 2023 4:34 pm
- Rob
- Member
- From: England
- Registered: 29 Jun 2021
- Posts: 66
Re: Skerry built from plans (build log)
Cut out the bow and stern tank tops/seats today. The stern one is done, but I still need to cut the edge shape, mast and belay pin holes on the bow. Despite the cardboard templates, it took a lot of work to get them to fit perfectly, with practically no gap, but I’m pleased with what I’ve achieved today - absolutely knackered though, so there may have to be some ale in my tankard tonight!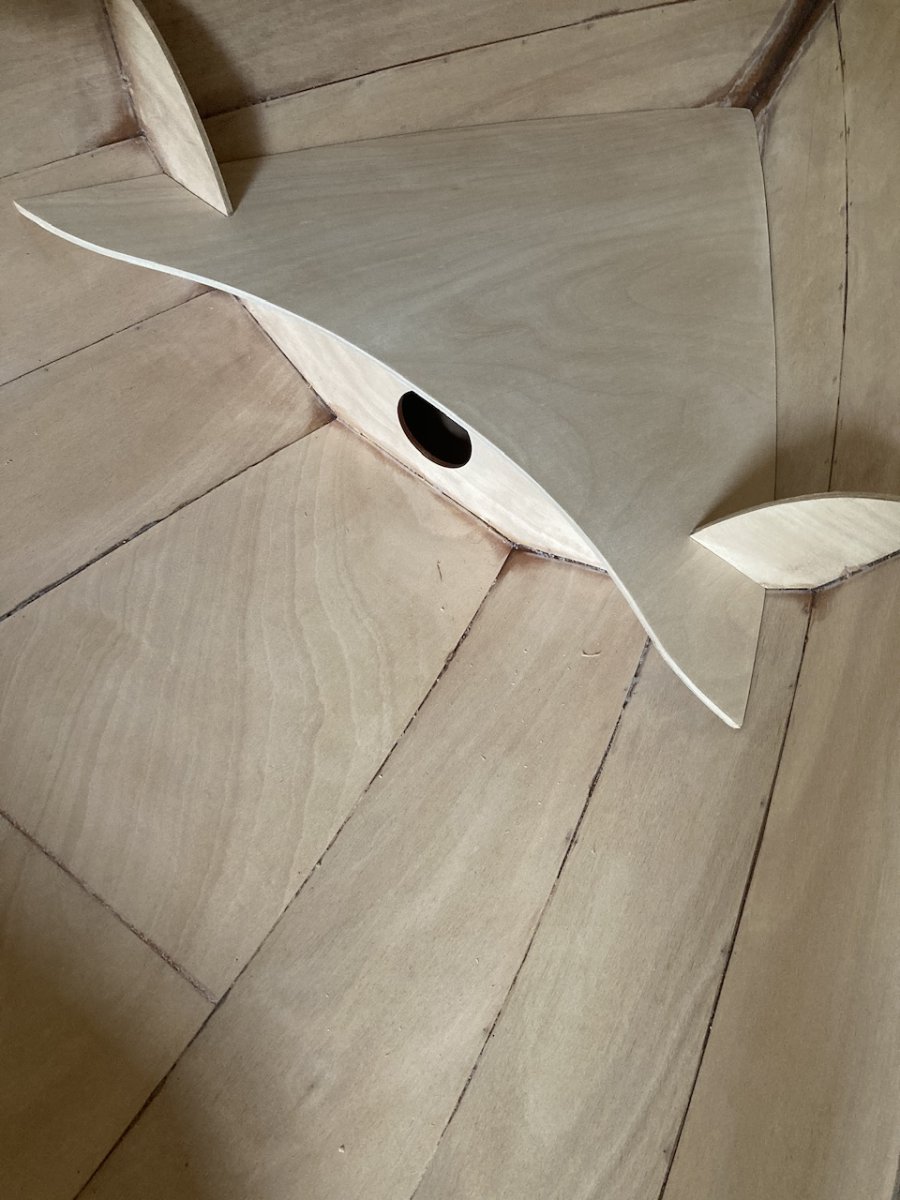
Last edited by Rob (4 Oct 2023 4:36 pm)
Offline
#12 5 Oct 2023 12:13 pm
- Rob
- Member
- From: England
- Registered: 29 Jun 2021
- Posts: 66
Re: Skerry built from plans (build log)
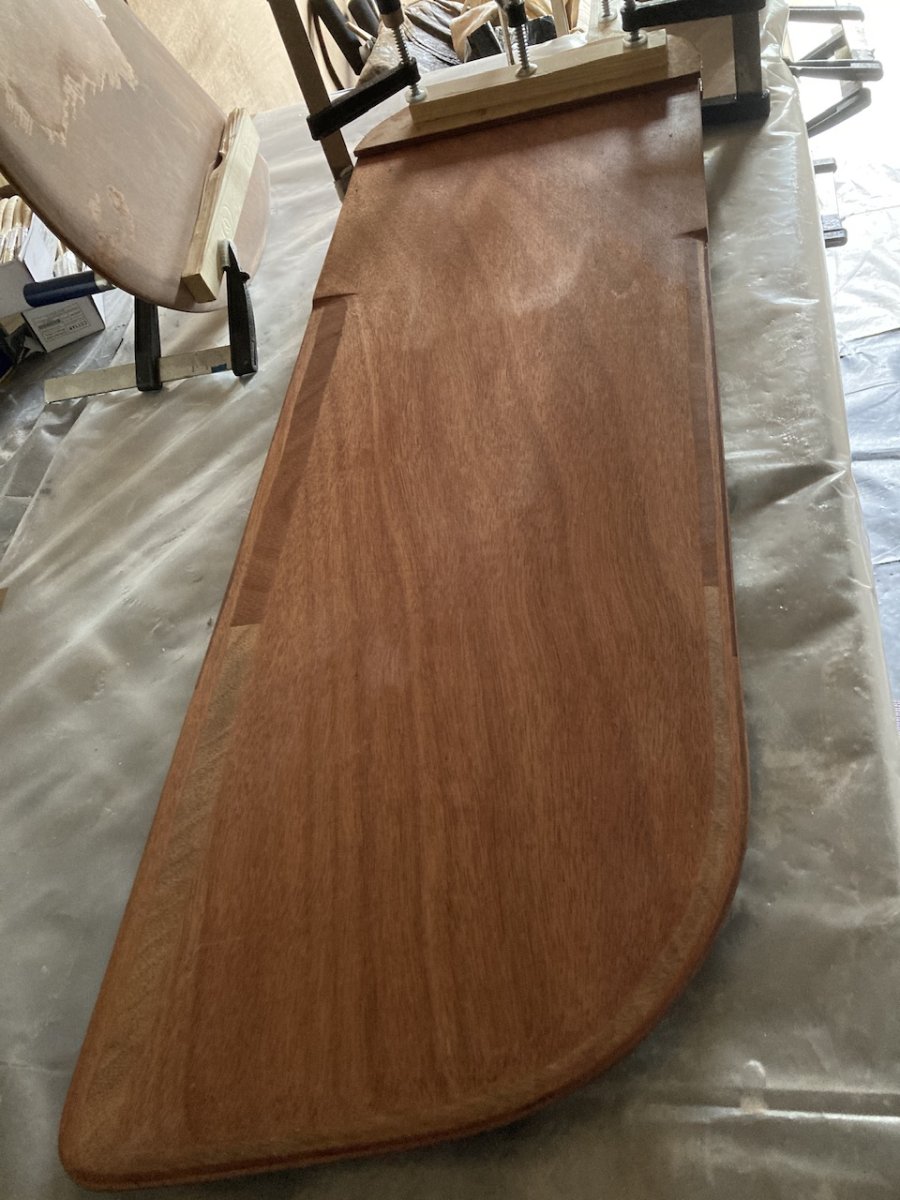
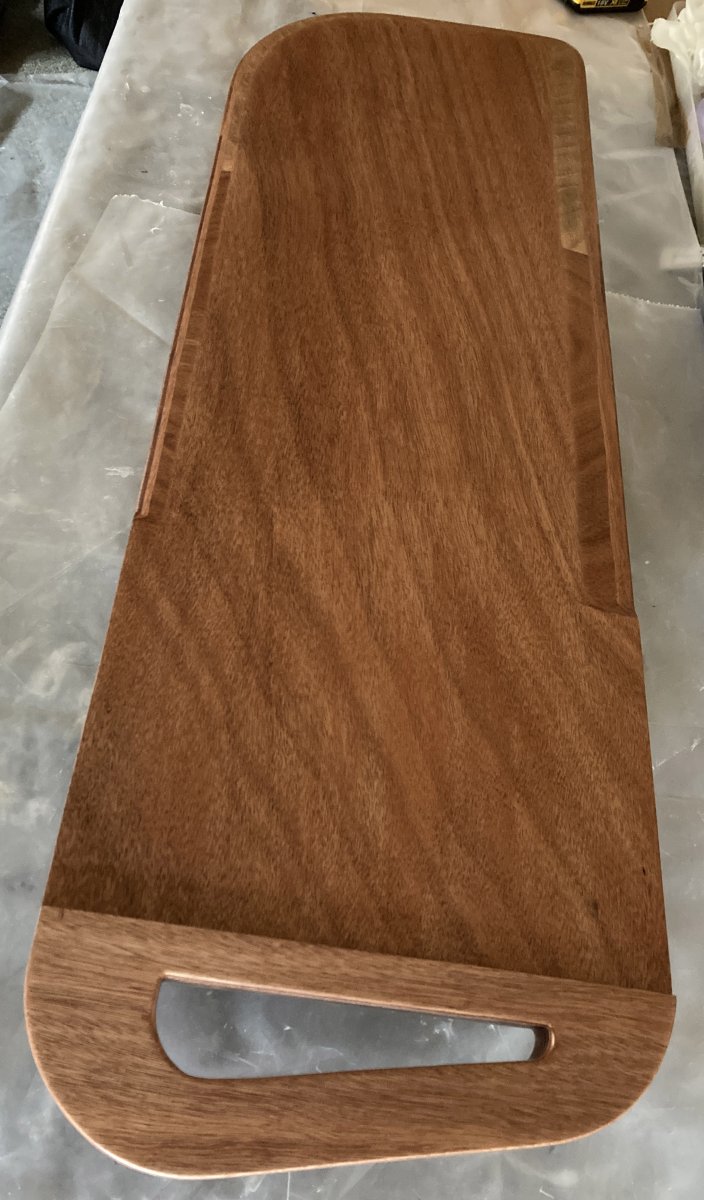
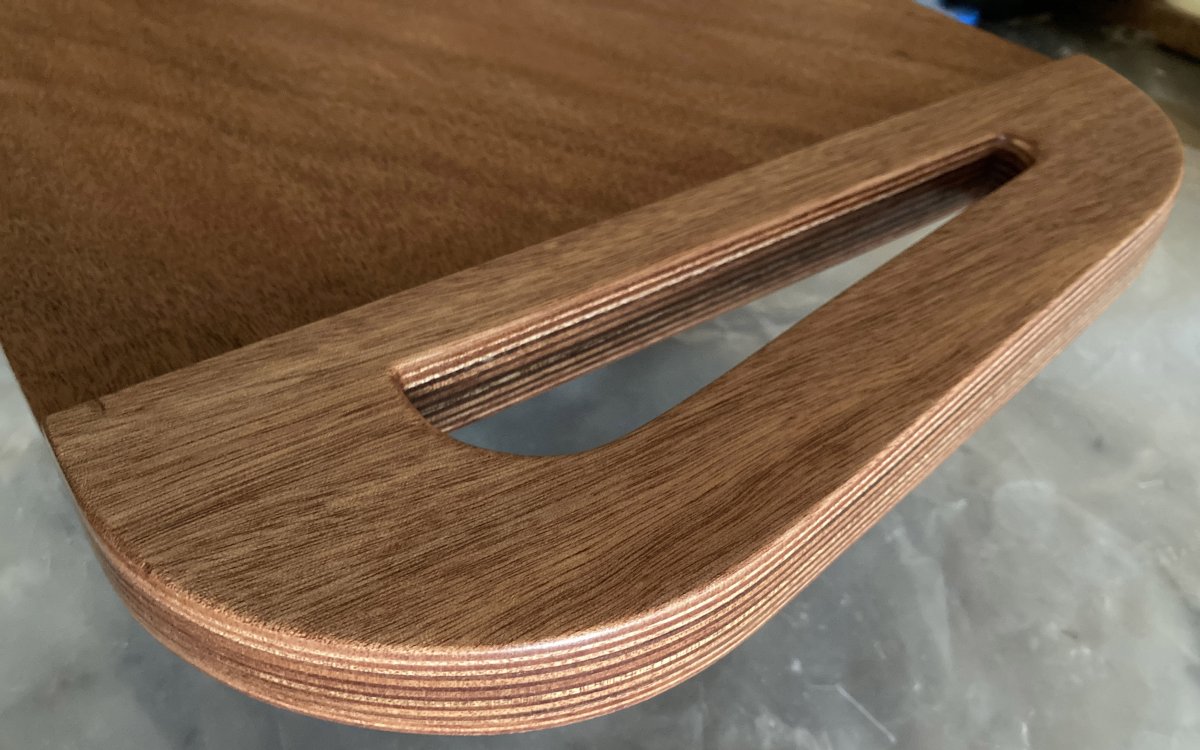
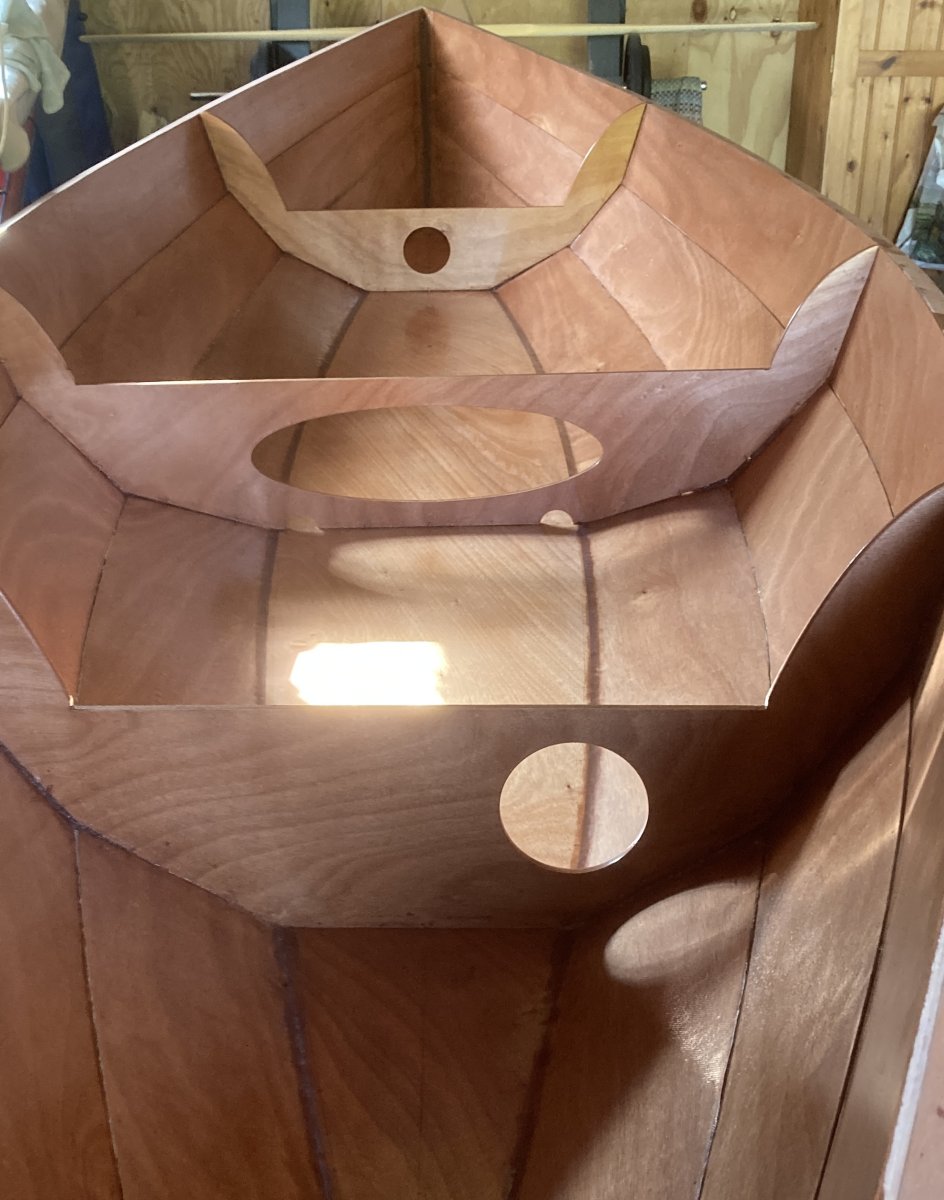
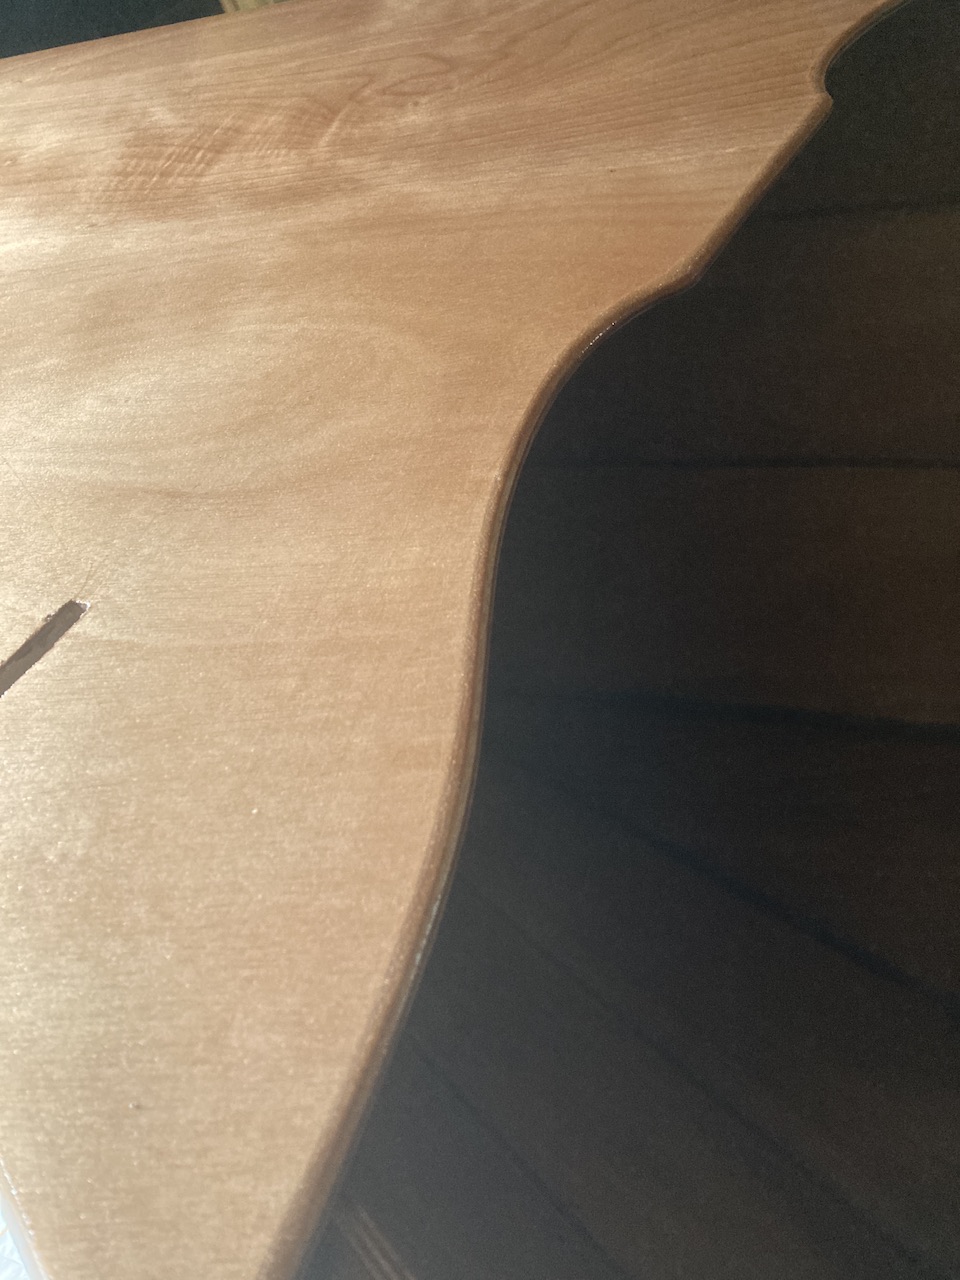
Cut the edge shape on the bow seat top this morning, which I’m very happy with, it’s an attractive shape that feels reminiscent of traditional wooden boats.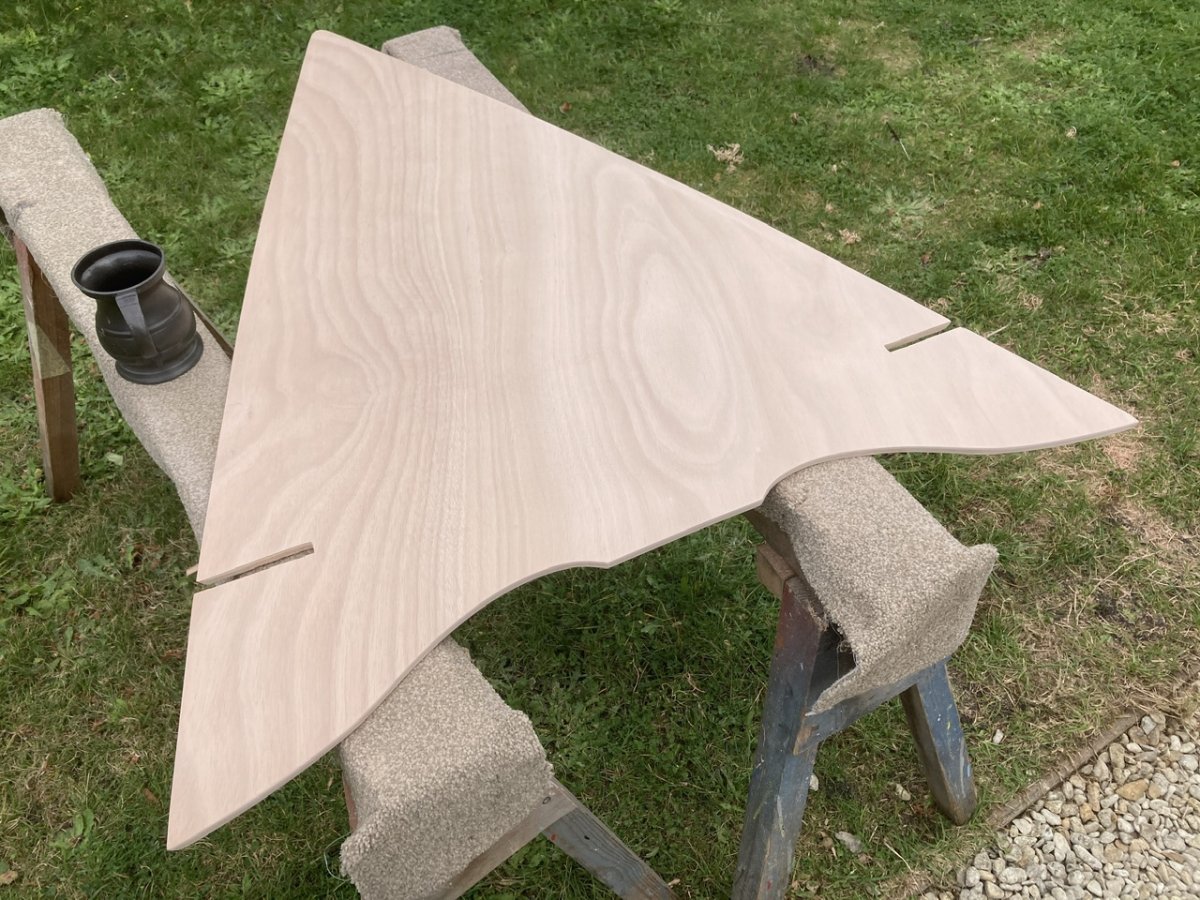
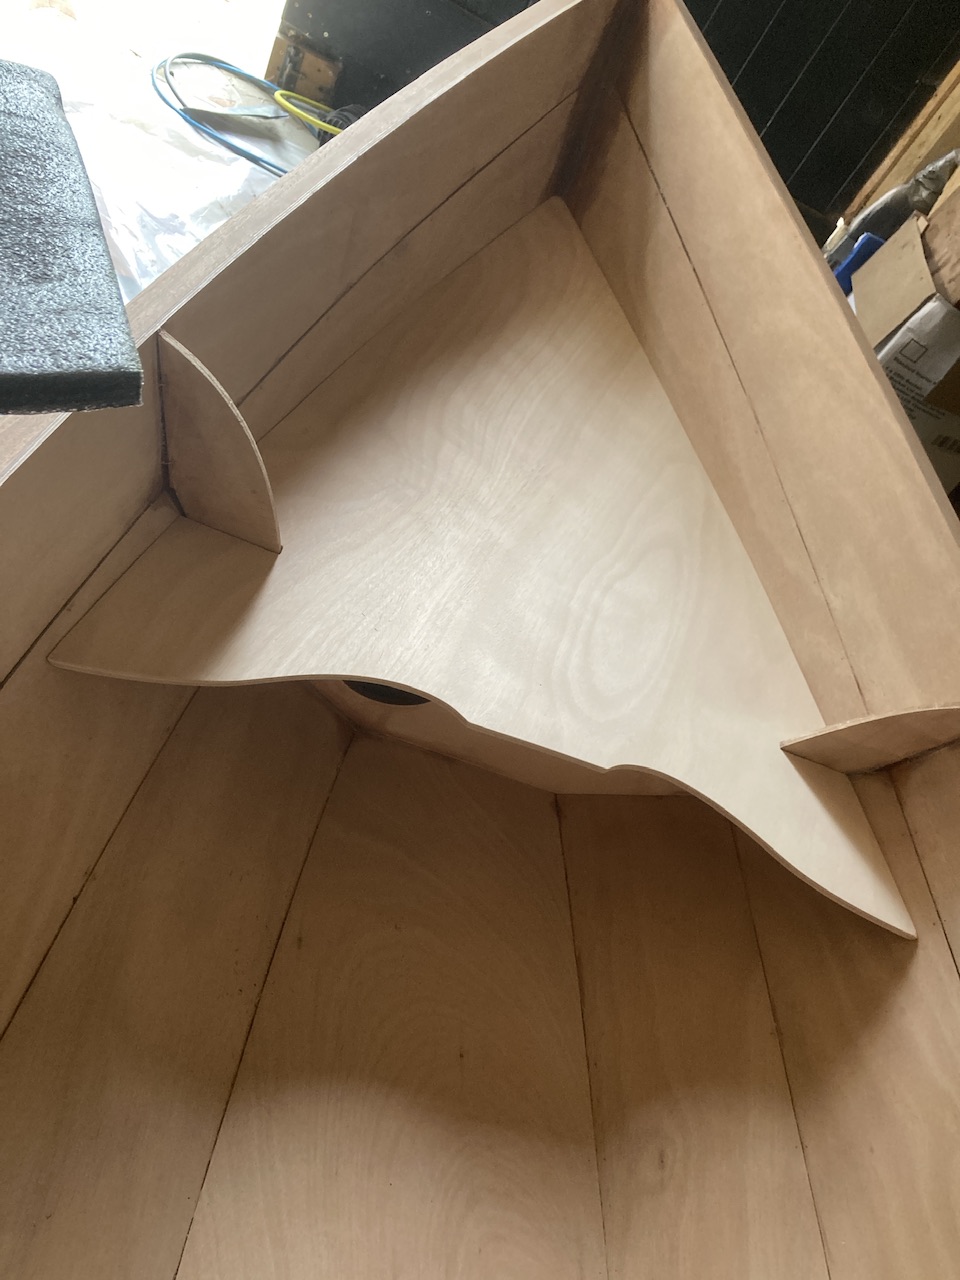
Below: looking forward from the stern seat. The gaps close up when the seat is pushed down to its correct position. 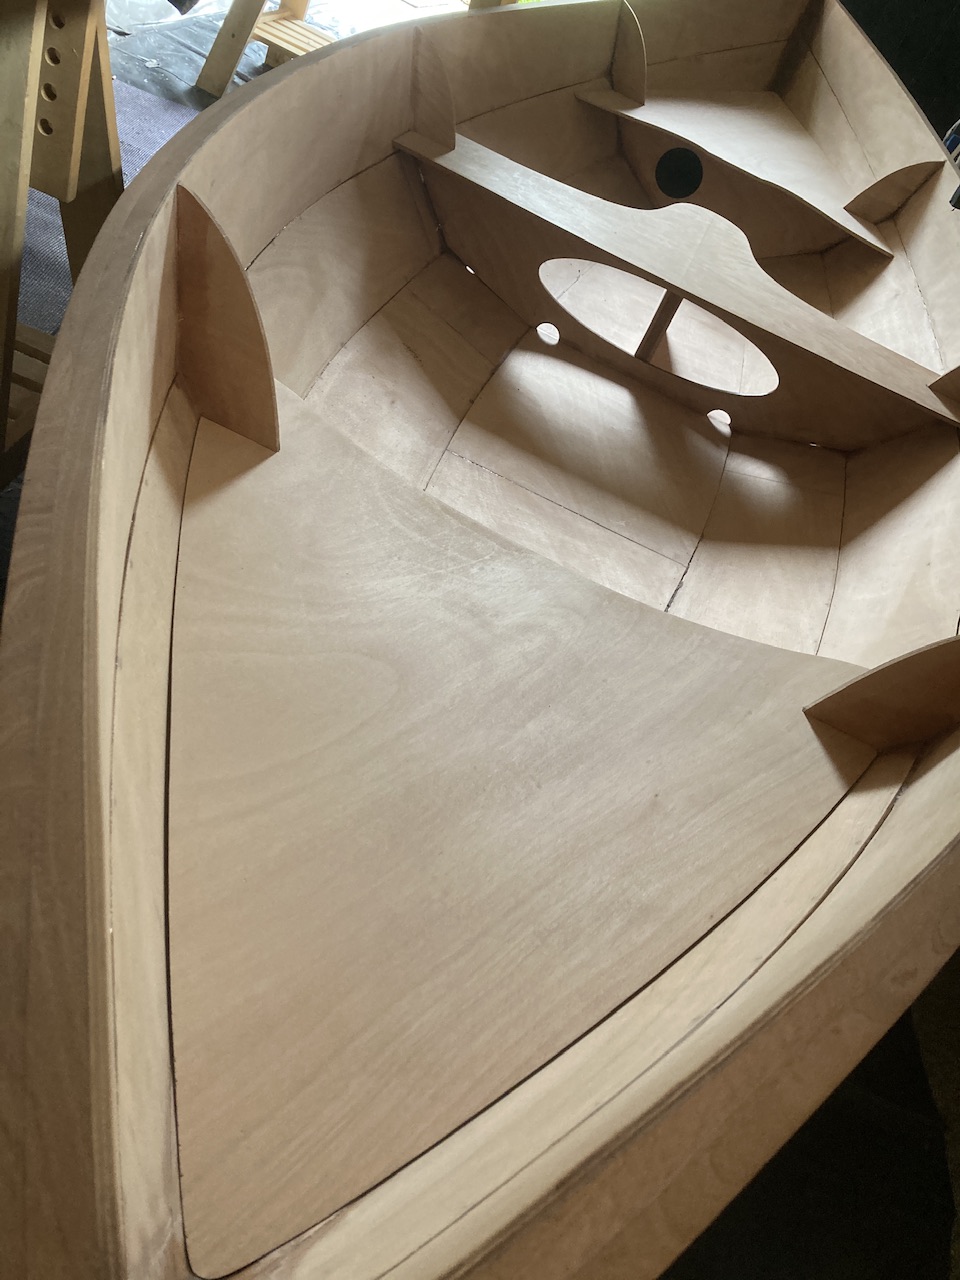
Last edited by Rob (5 Oct 2023 5:13 pm)
Offline
#13 20 Oct 2023 4:10 pm
- Rob
- Member
- From: England
- Registered: 29 Jun 2021
- Posts: 66
Re: Skerry built from plans (build log)
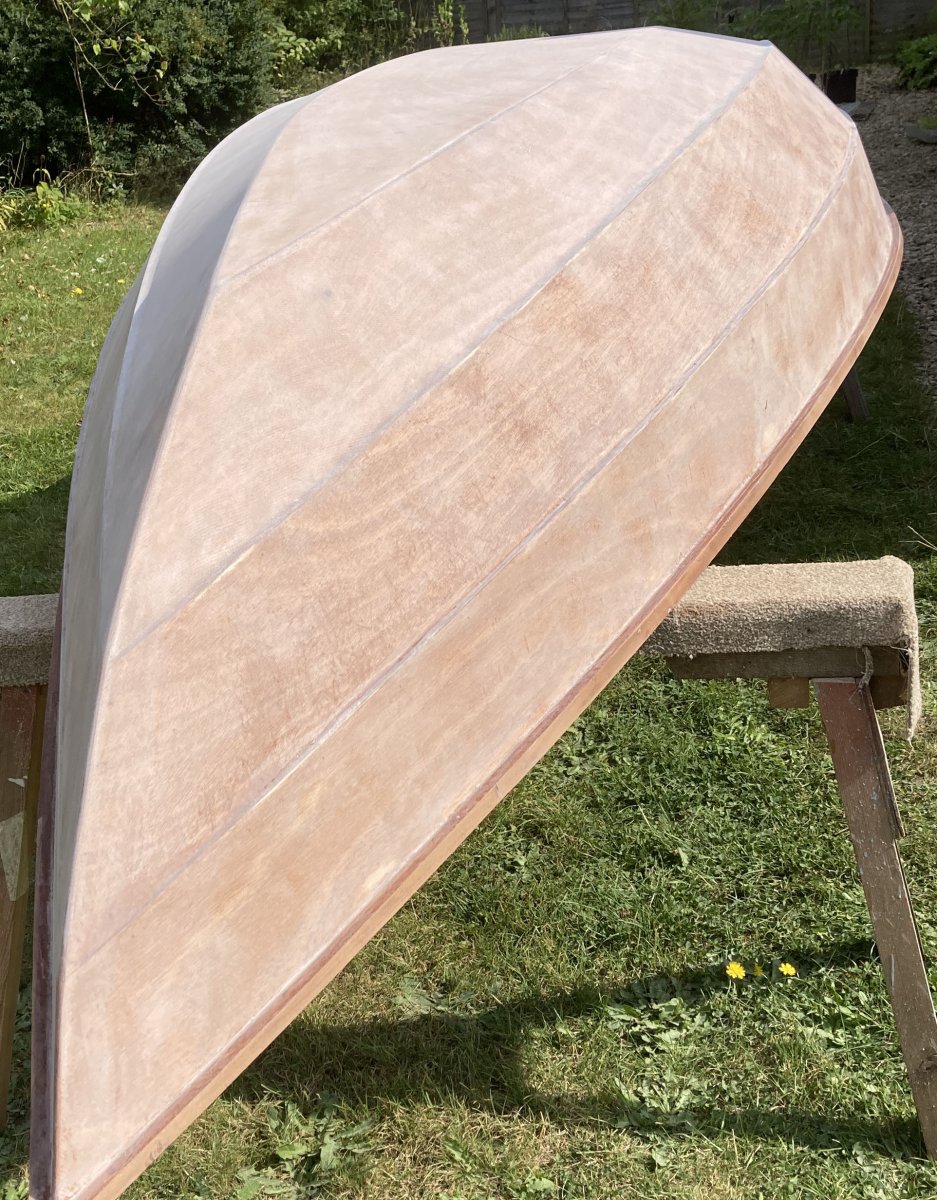
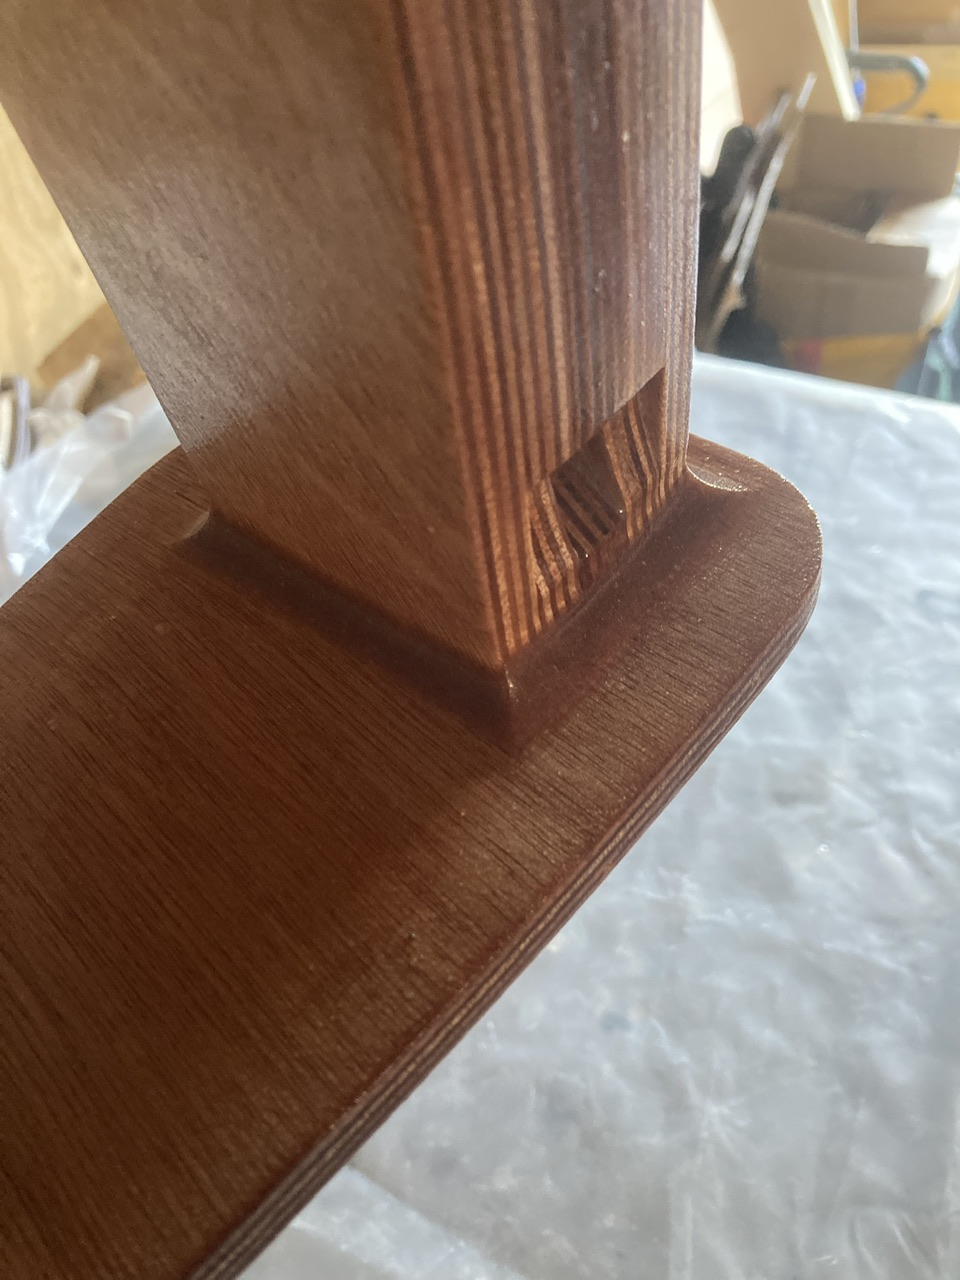
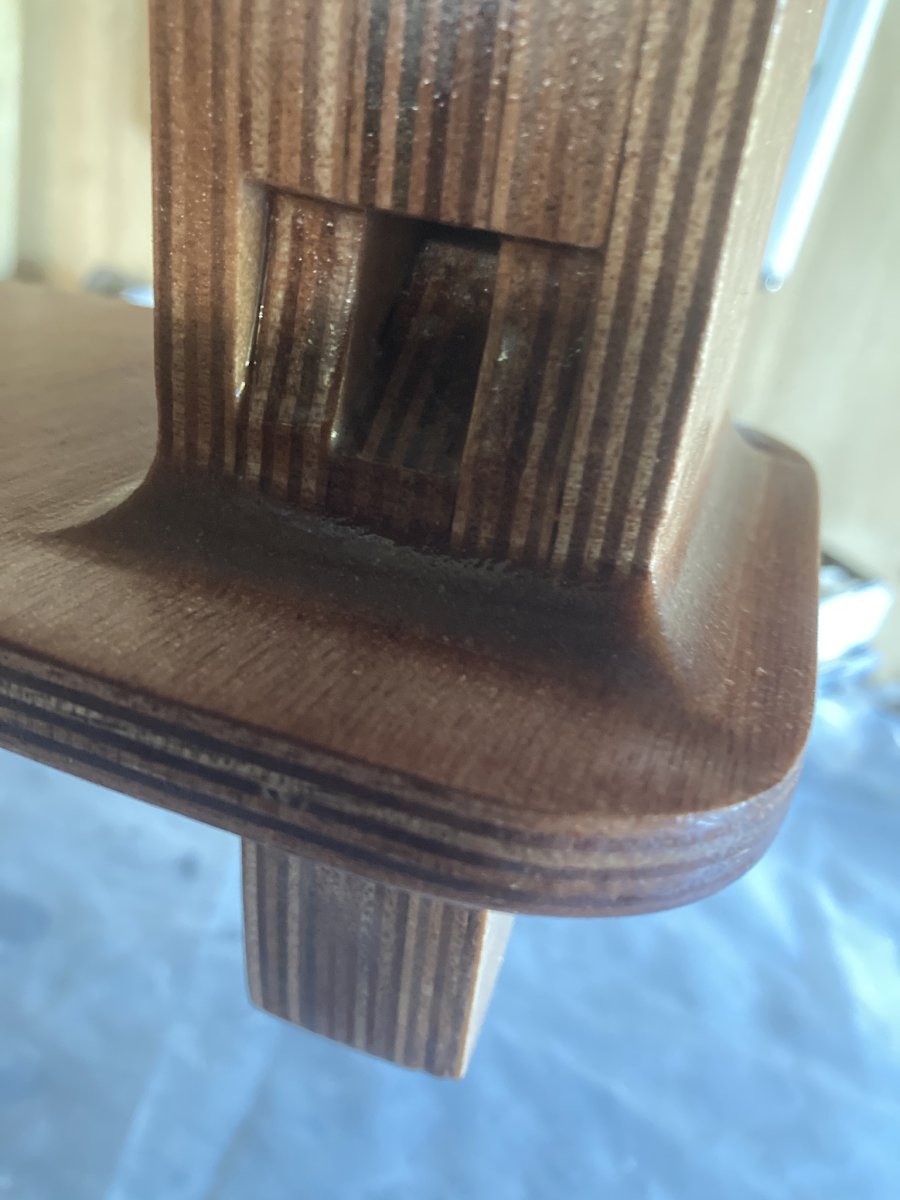
Skeg is on, and it’s been glassed, filleted and the wornshoe has been installed. It needs a good sand and some more epoxy on the wormshoe, then it’s time to work on the inside…finally!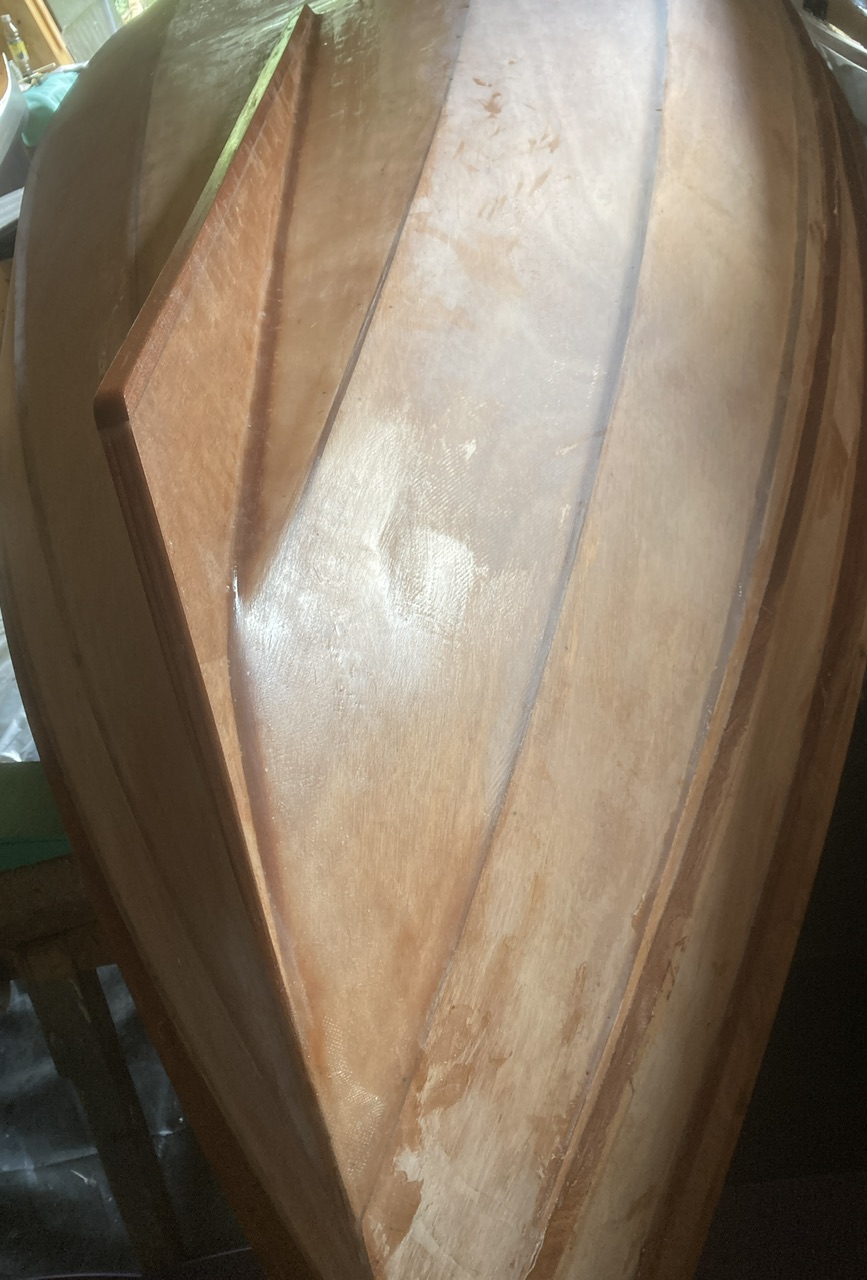
Offline
#14 20 Oct 2023 7:24 pm
- Rob
- Member
- From: England
- Registered: 29 Jun 2021
- Posts: 66
Re: Skerry built from plans (build log)
Although an imminent decision isn't required, I’m trying to decide whether to leave the wormshoe ‘bright’ and just varnish it, the rest of the hull being painted, or paint it with the hull. The latter would be easier, certainly. A bronze, brass or stainless steel strip over the wooden wormshoe would be very good, which I will think about once the actual build is completed.
Last edited by Rob (21 Oct 2023 9:07 am)
Offline
#15 25 Oct 2023 4:02 pm
- Rob
- Member
- From: England
- Registered: 29 Jun 2021
- Posts: 66
Re: Skerry built from plans (build log)
Work has continued after a weekend off. I shaped the bump rail by hand today, with the block plane and 80 grit paper, so it still needs some 220 grit, which is a job for a different day as I need to move onto the inside now. I will shape the top rail exterior when I have installed the interior broken inwales, as I will need to clamp those on, so I don't want to crush a nicely shaped outer rail, even with pads. I'm so glad I tapered the bump rail fore and aft, the same way as with the upper rails, it make a HUGE difference it really does.
Some very nice curves aft...as the sailor said to the mermaid. 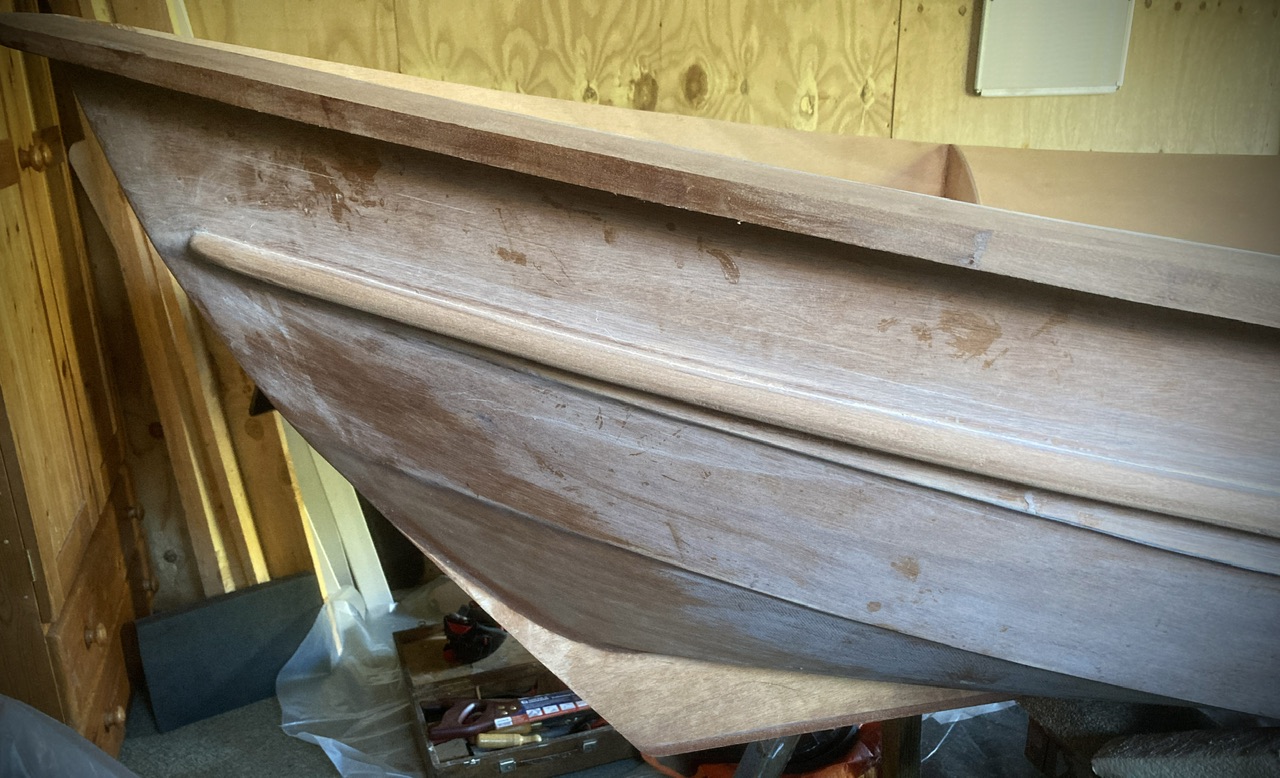
I've prepped the interior and plan to start early on the glassing tomorrow, that way I should be able to get the second coat on late afternoon, we'll see.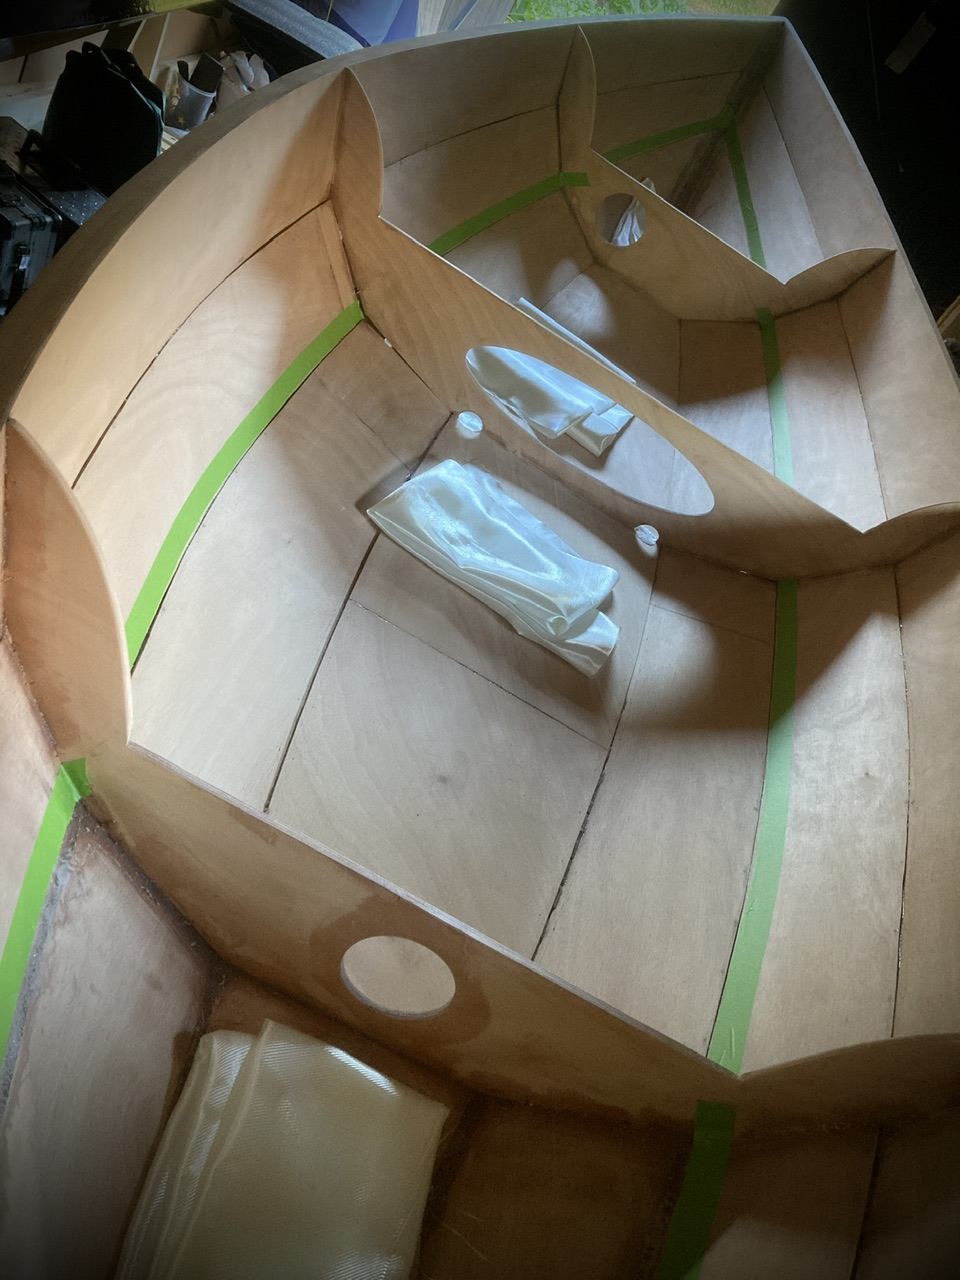
Last edited by Rob (25 Oct 2023 6:19 pm)
Offline
#16 27 Oct 2023 12:59 pm
- Rob
- Member
- From: England
- Registered: 29 Jun 2021
- Posts: 66
Re: Skerry built from plans (build log)
Interior has now been glassed, and needs a lot of sanding before it gets another coat. I’m considering doing the fillets after it’s sanded but before the final coat, so the fillets get a clear coat to help tidy them up. Next year I will make some sapele duckboards, which will hide any imperfections on the bottom panel. It does look a bit scruffy on the inside now, but hopefully it will improve after sanding and filleting etc. 
Last edited by Rob (27 Oct 2023 5:32 pm)
Offline
#17 29 Oct 2023 4:16 pm
- Rob
- Member
- From: England
- Registered: 29 Jun 2021
- Posts: 66
Re: Skerry built from plans (build log)
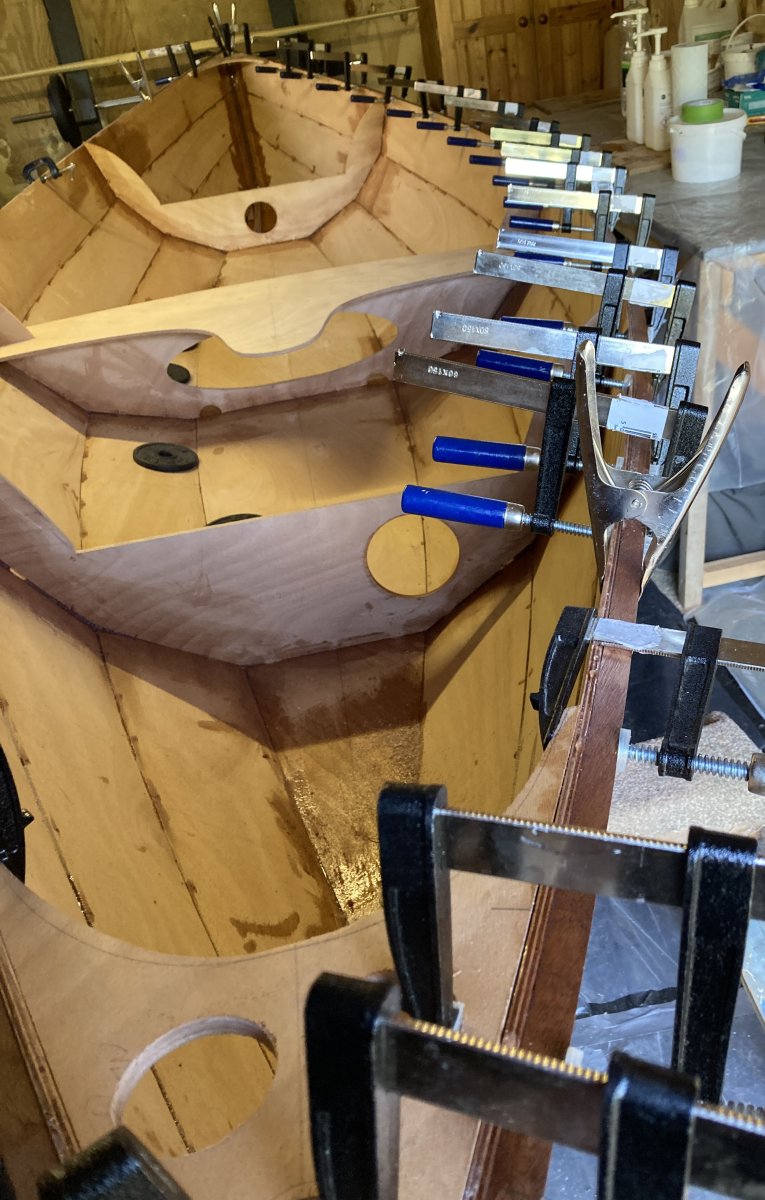
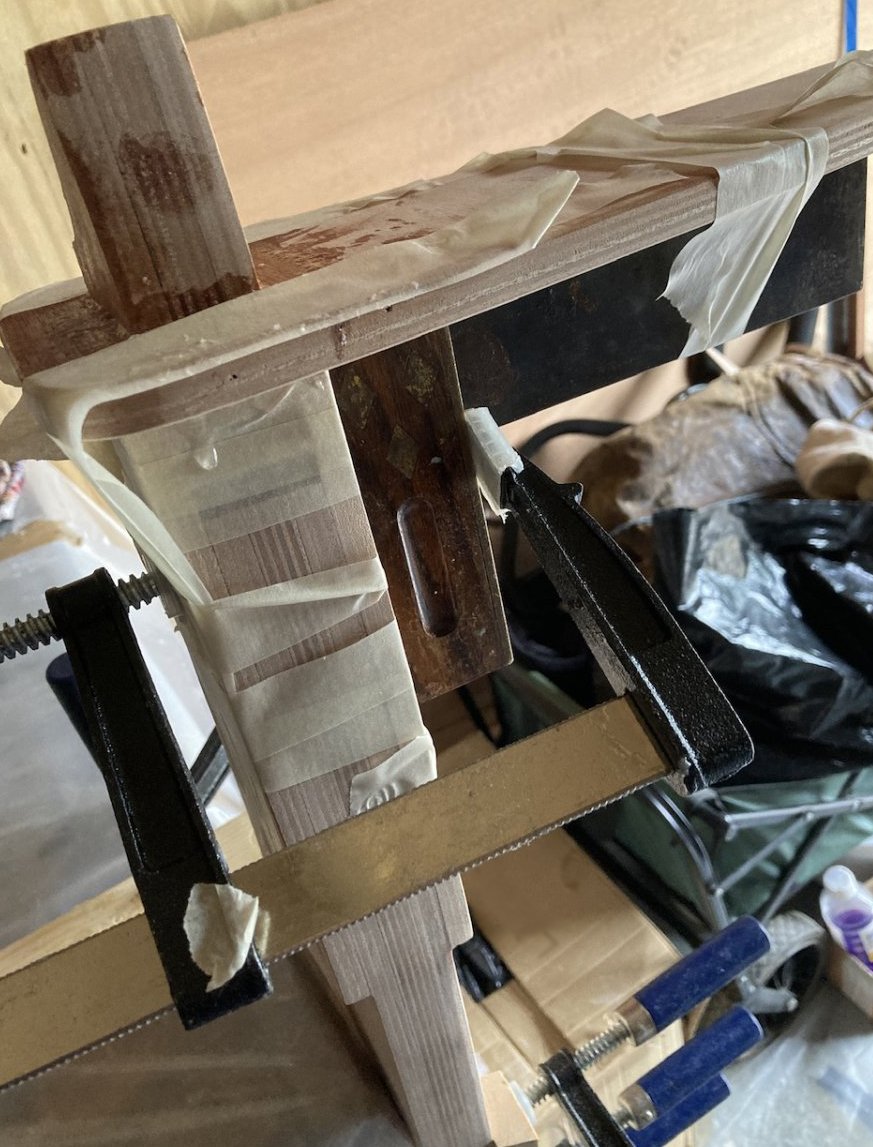
The weather being somewhat wet this morning, instead of sanding the interior I thought I’d install the daggerboard trunk. Not as straightforward as I had expected, but then it never is, and broke a screw when hand screwing the trunk in from underneath the hull, so I drilled out the screw half stuck inside the wood and did it again, and the screw broke again! Drilled that one out and third time a charm. It wasn’t as perfect a fit as I’d hoped, but nothing some fillets won’t sort out later, and it does appear to be straight, so hopefully I won’t be sailing round in a circle. I also filled a few wire holes on the inside, as I had some epoxy thickened with wood flour left over from covering the screws. 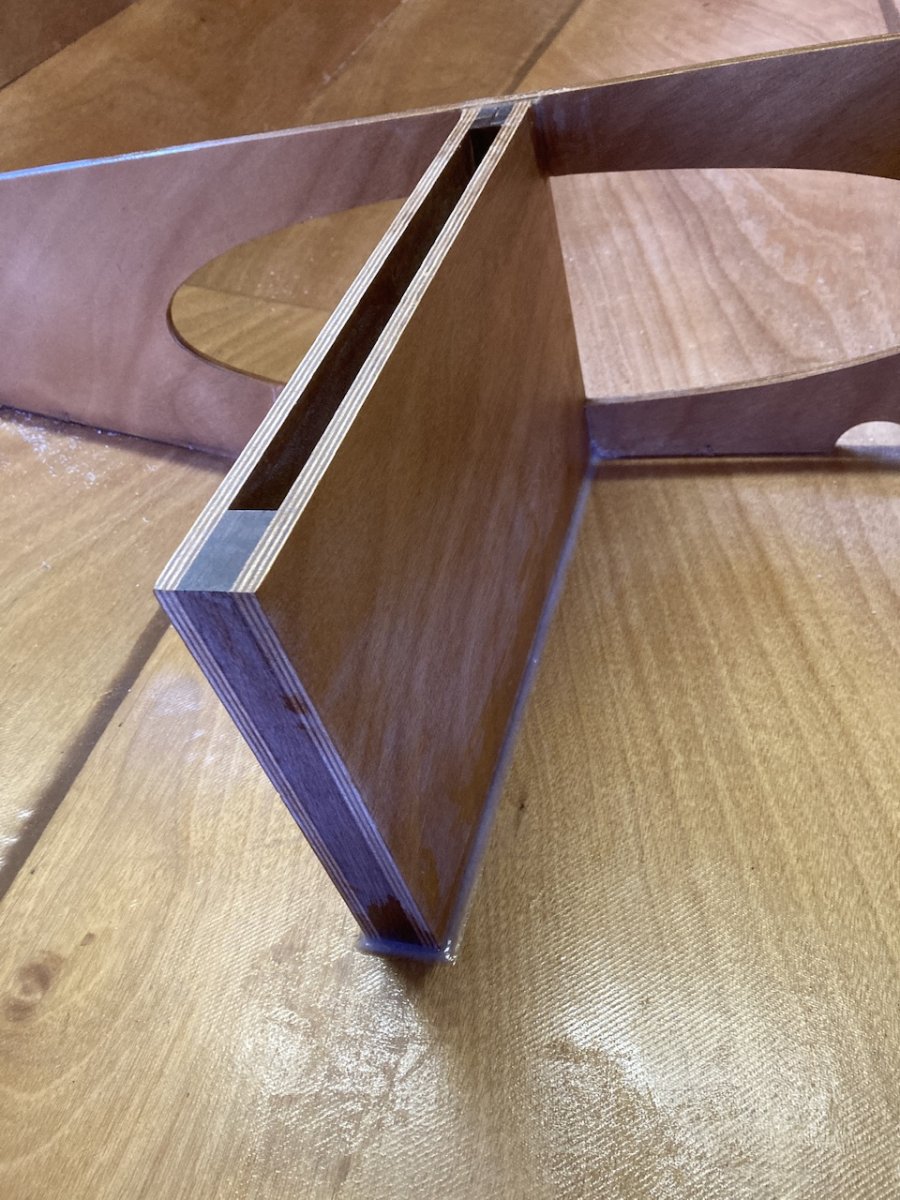
Last edited by Rob (29 Oct 2023 4:25 pm)
Offline
#18 30 Oct 2023 4:41 pm
- Rob
- Member
- From: England
- Registered: 29 Jun 2021
- Posts: 66
Re: Skerry built from plans (build log)
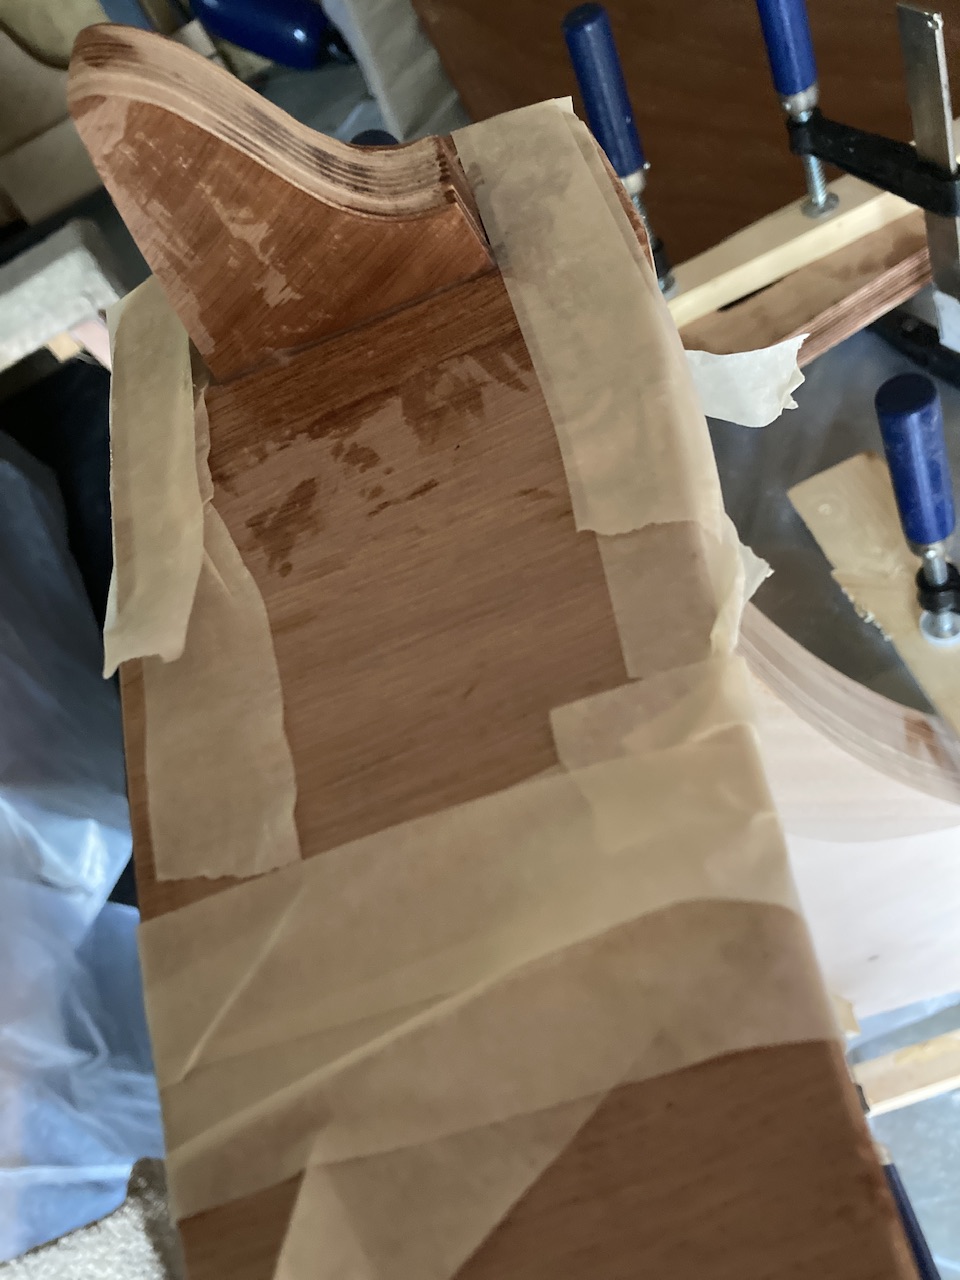
I’ve been prepping for filleting today. I sanded the areas to be filleted, and masked them off, hopefully I can make the fillets neat and tidy. 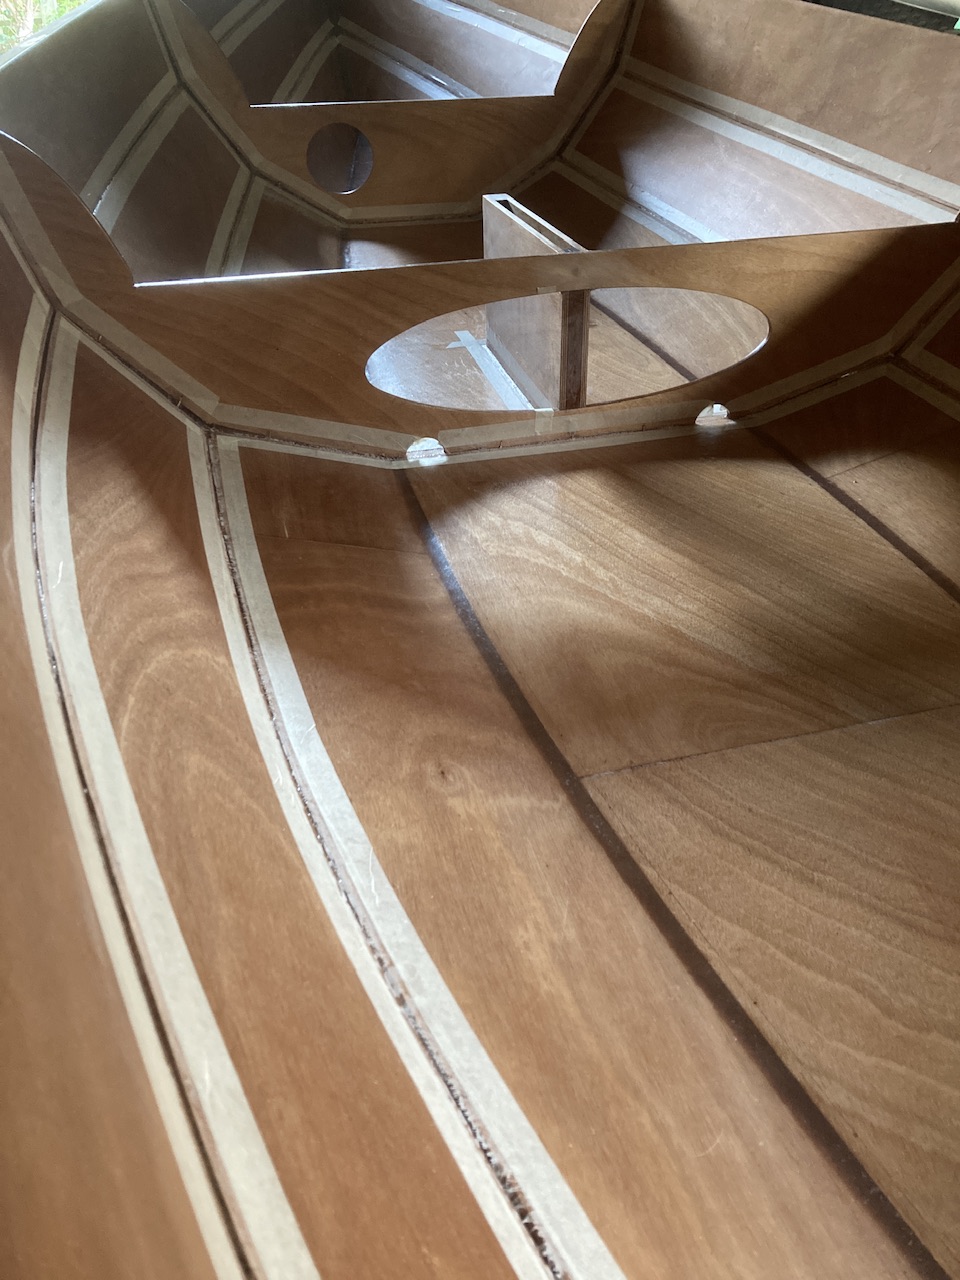
Last edited by Rob (30 Oct 2023 5:10 pm)
Offline
#19 6 Nov 2023 4:43 pm
- Rob
- Member
- From: England
- Registered: 29 Jun 2021
- Posts: 66
Re: Skerry built from plans (build log)
Fillets are done, though I may fiddle a bit with a couple, to tidy them up. Problem I had was that I removed the masking tape too late in the process, the resin cured a bit quicker than I’d expected, so I had to cut the tape out with a knife. That resulted in fillets with a ridged edge, which despite some sanding, still remain. However, I’m hoping that another overall coat of resin and several coats of varnish should fair them in. 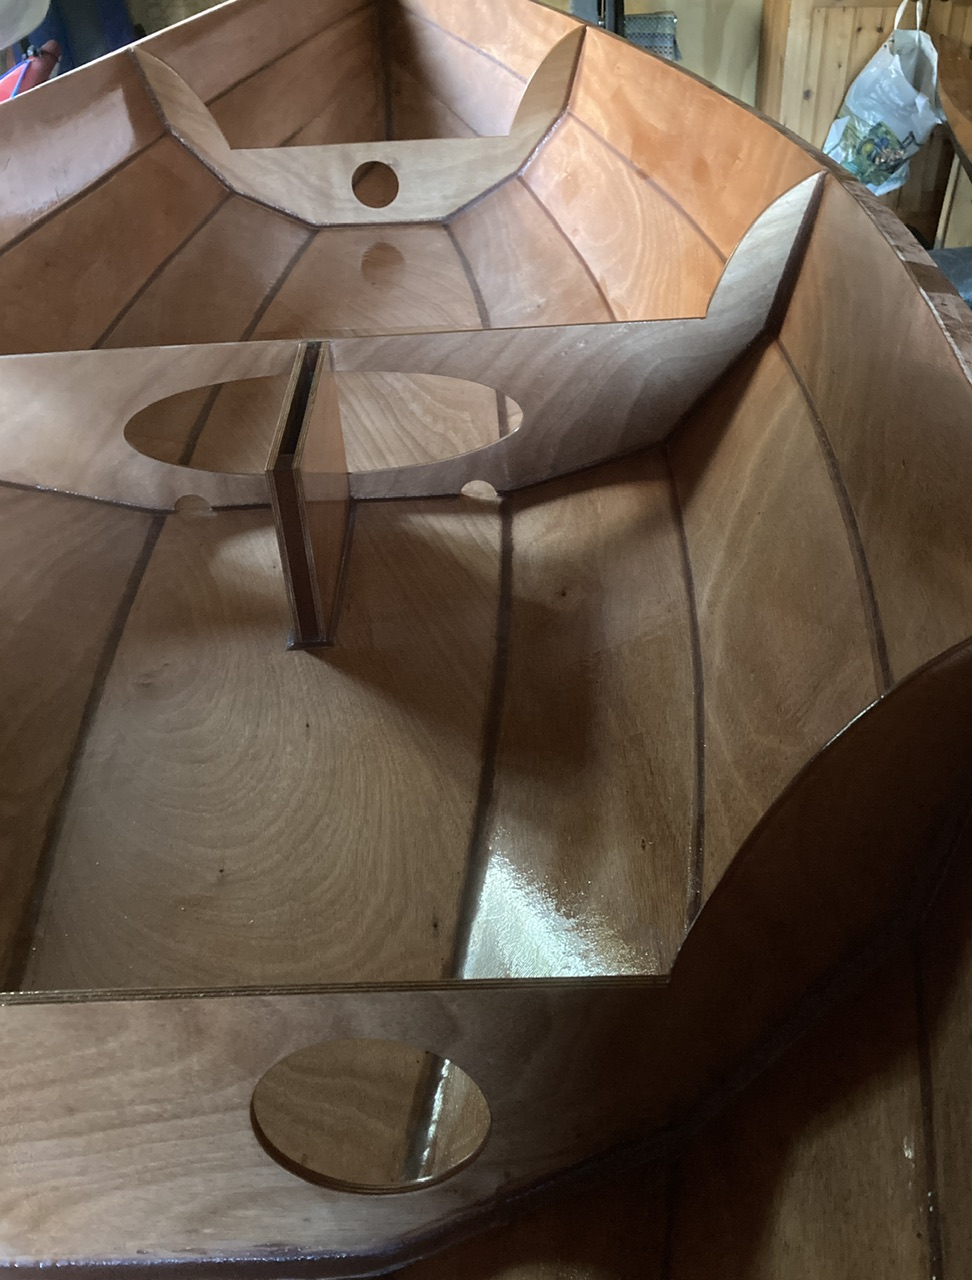
Last edited by Rob (6 Nov 2023 4:46 pm)
Offline
#20 7 Nov 2023 4:56 pm
- Rob
- Member
- From: England
- Registered: 29 Jun 2021
- Posts: 66
Re: Skerry built from plans (build log)
I put another coat of epoxy over the entire interior today, and it’s looking much better now.
My next job is to get the centre seat installed, and the bow and stern tank/seat tops. The've had a single coat of epoxy on their undersides, and a sand, and I will give the undersides one more coat before installation. I also rounded the edges, which although a small thing, make a surprisingly big difference. I still need to drill a hole in the bow tank top for the mast and two for the belay pins, plus a couple of holes in the centre seat for the block attachment, which I will drill larger, fill with thickened epoxy, then drill smaller, or I might just drill them and use un-thickened epoxy in there for speed and laziness, I will see. 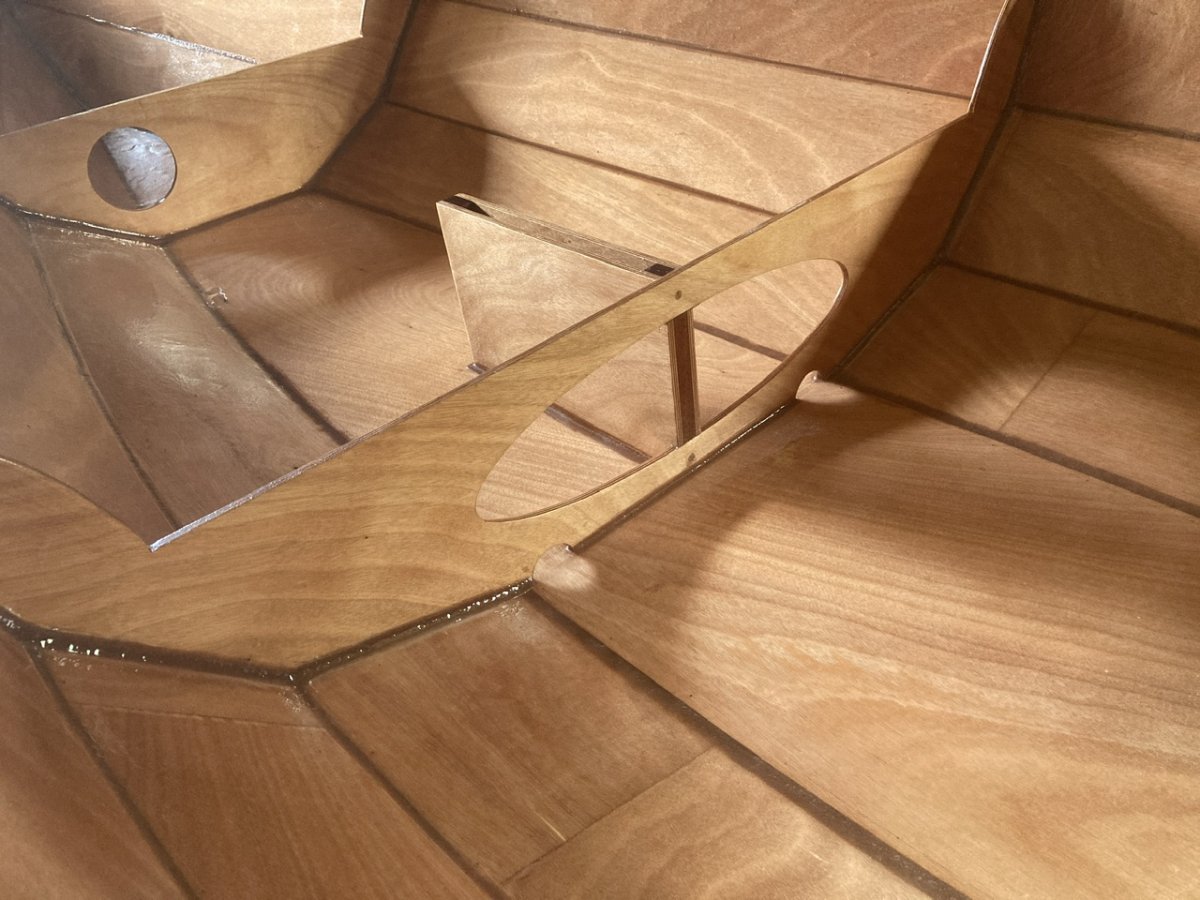
Last edited by Rob (8 Nov 2023 10:31 am)
Offline
#21 8 Nov 2023 3:44 pm
- Rob
- Member
- From: England
- Registered: 29 Jun 2021
- Posts: 66
Re: Skerry built from plans (build log)
I gave the undersides of the seats another coat today. Tomorrow I plan to install the centre seat. 
Last edited by Rob (8 Nov 2023 3:45 pm)
Offline
#22 10 Nov 2023 2:41 pm
- Rob
- Member
- From: England
- Registered: 29 Jun 2021
- Posts: 66
Re: Skerry built from plans (build log)
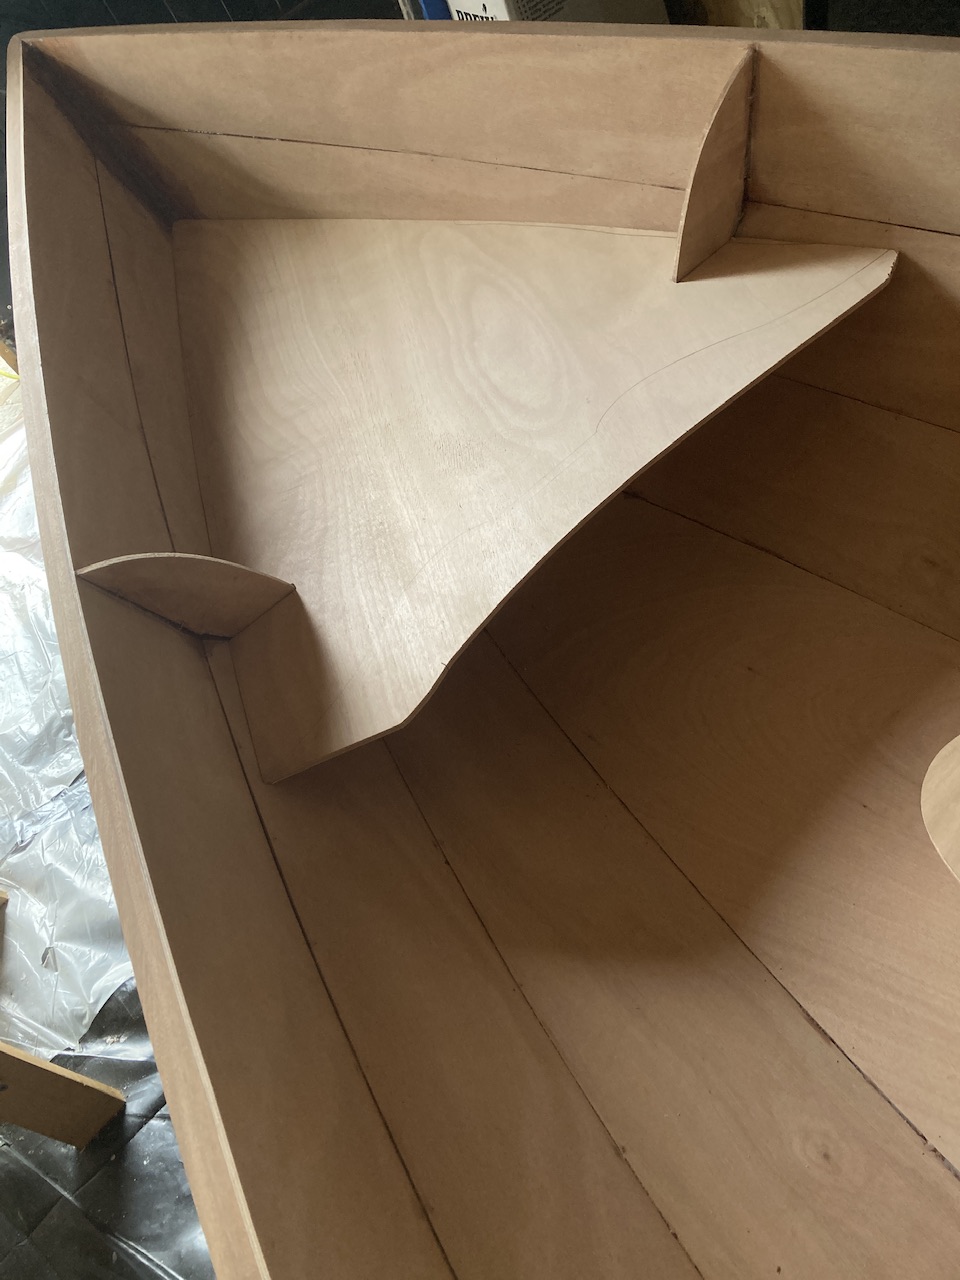
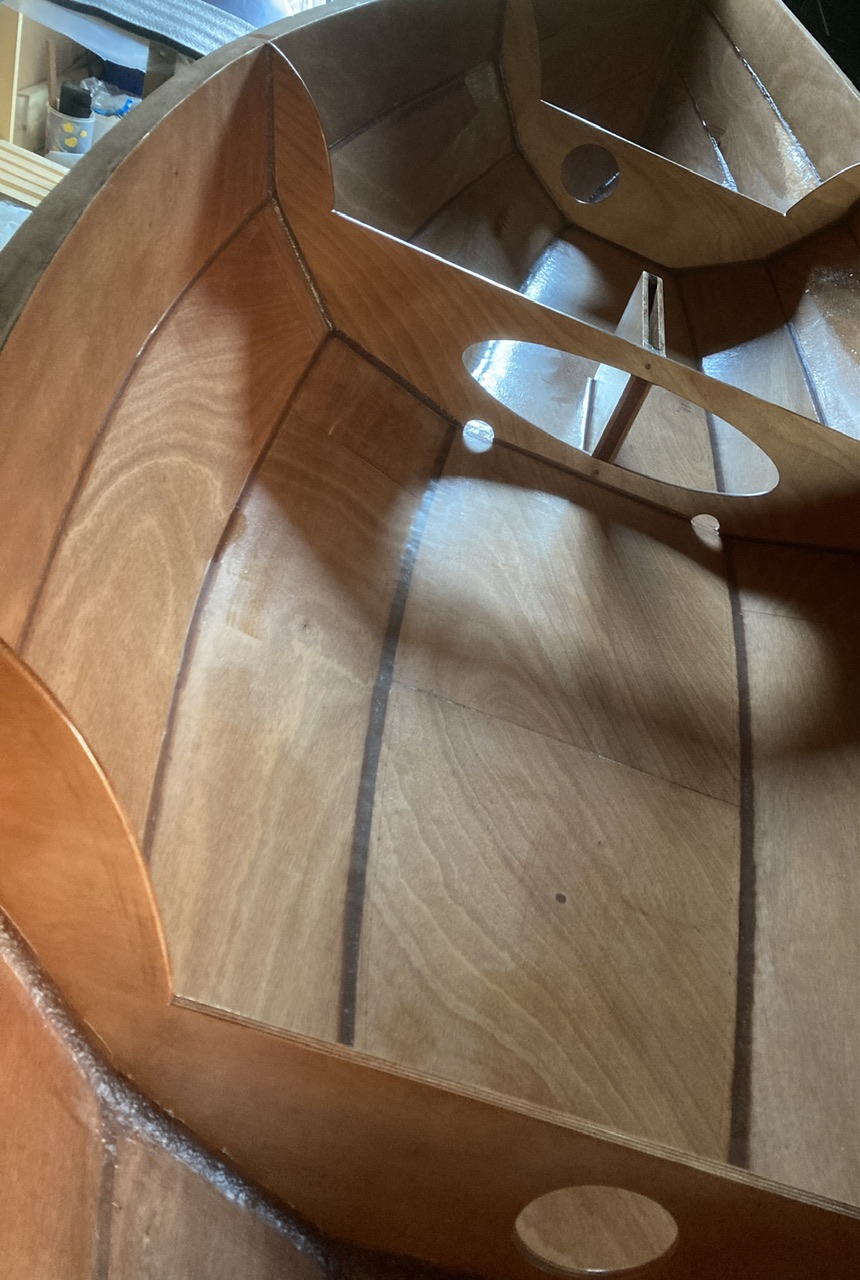
More progress over the last few days. I’ve installed all three seats, and plan to fillet the tops tomorrow. I decided not to cut the mast hole before I installed the bow seat, the reason for this is to ensure the mast is placed dead centre. 
Another little modification I have done are two small pieces of ply on the inside of the stern. These will be on the inside of where the upper gudgeon will be screwed. I’ve read of a few people experiencing issues when screwing the gudgeon into the wood, as the planking is quite thin. So to head off any such issue, these extra bits should do the trick. I’ve done the same behind the stern frame also, as I intend to screw a brass builder’s plaque onto it when it’s complete, and as with the gudgeon, I want to ensure the chambers are not breached. They look scruffy, but nobody will ever see them, including me now the seats are on.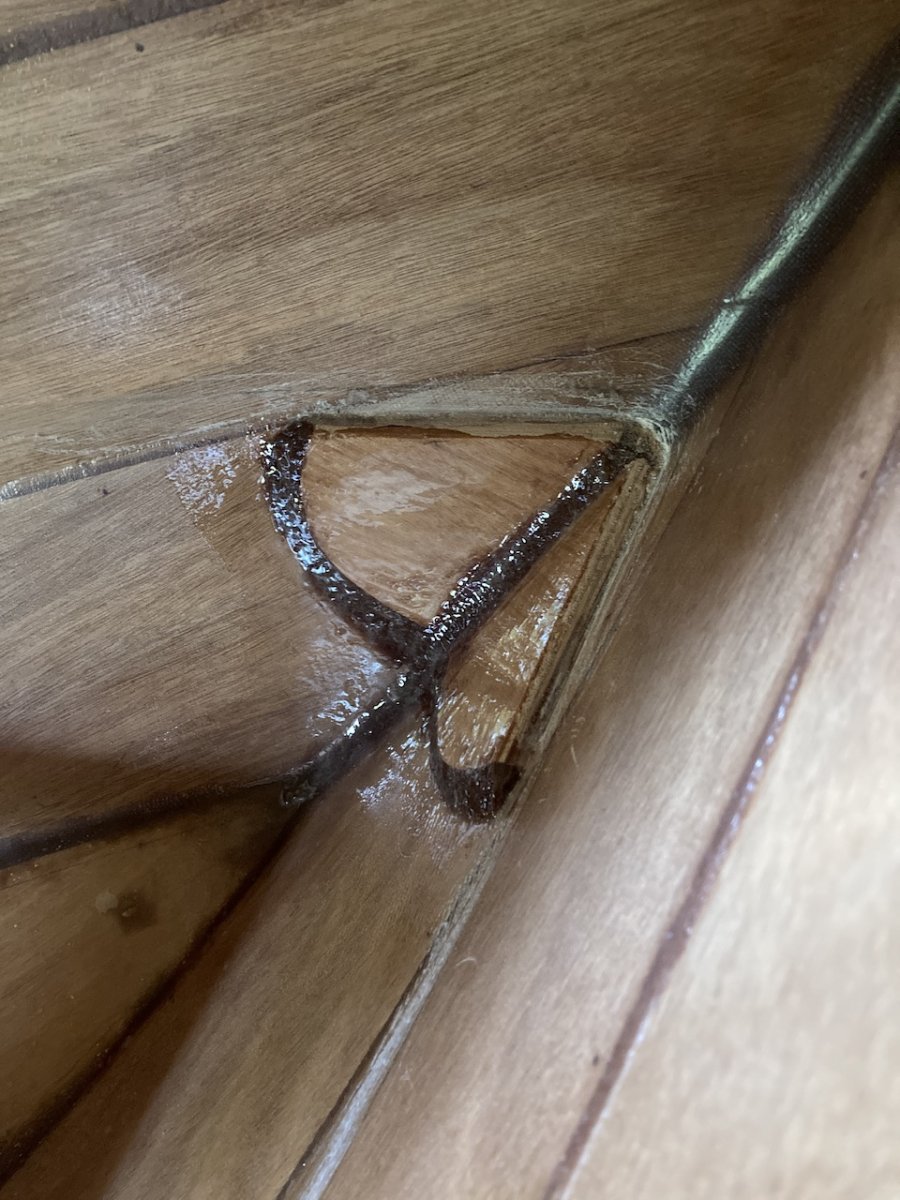
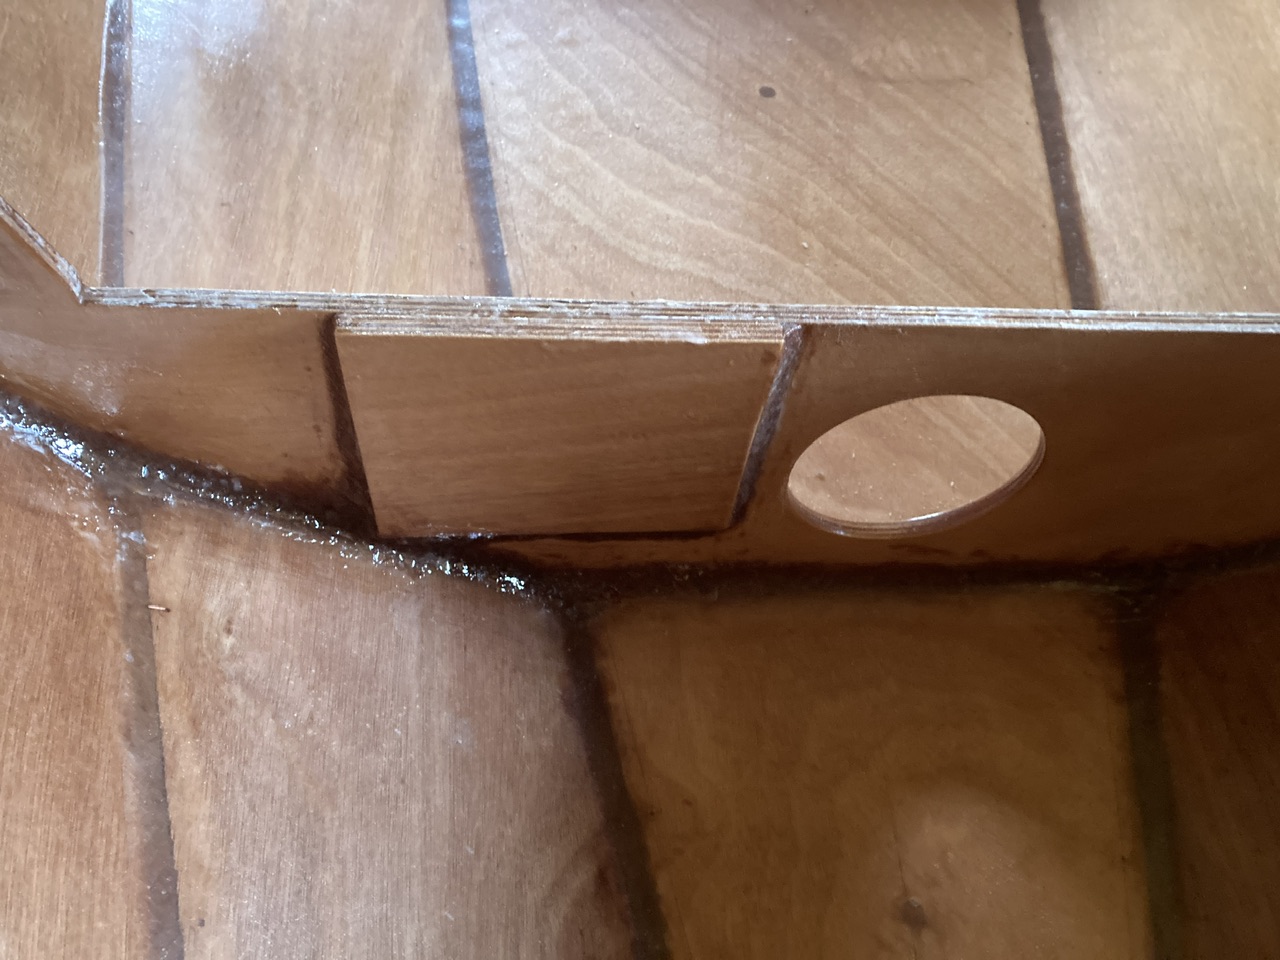
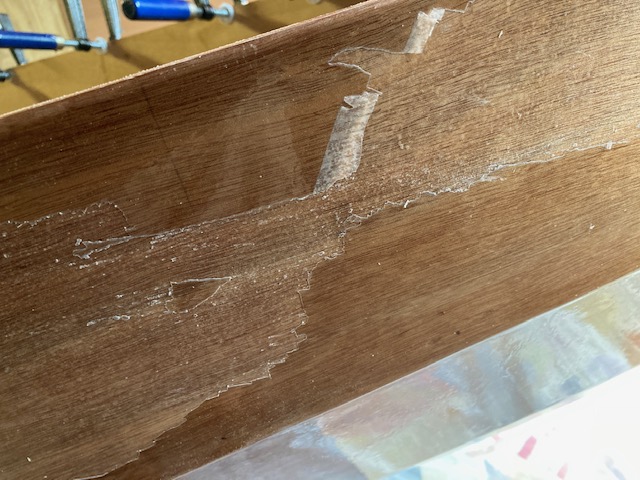
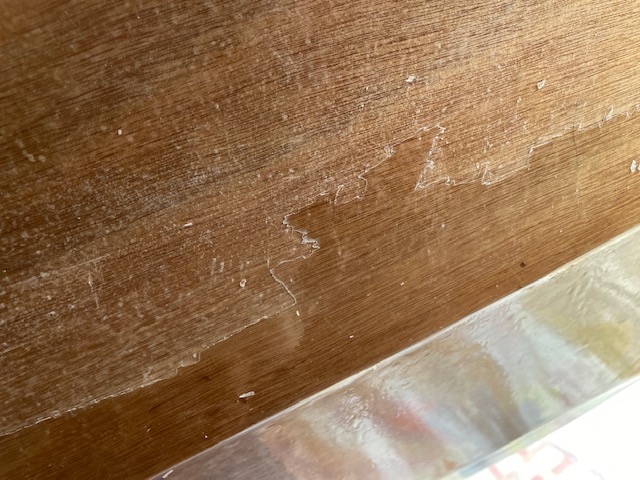
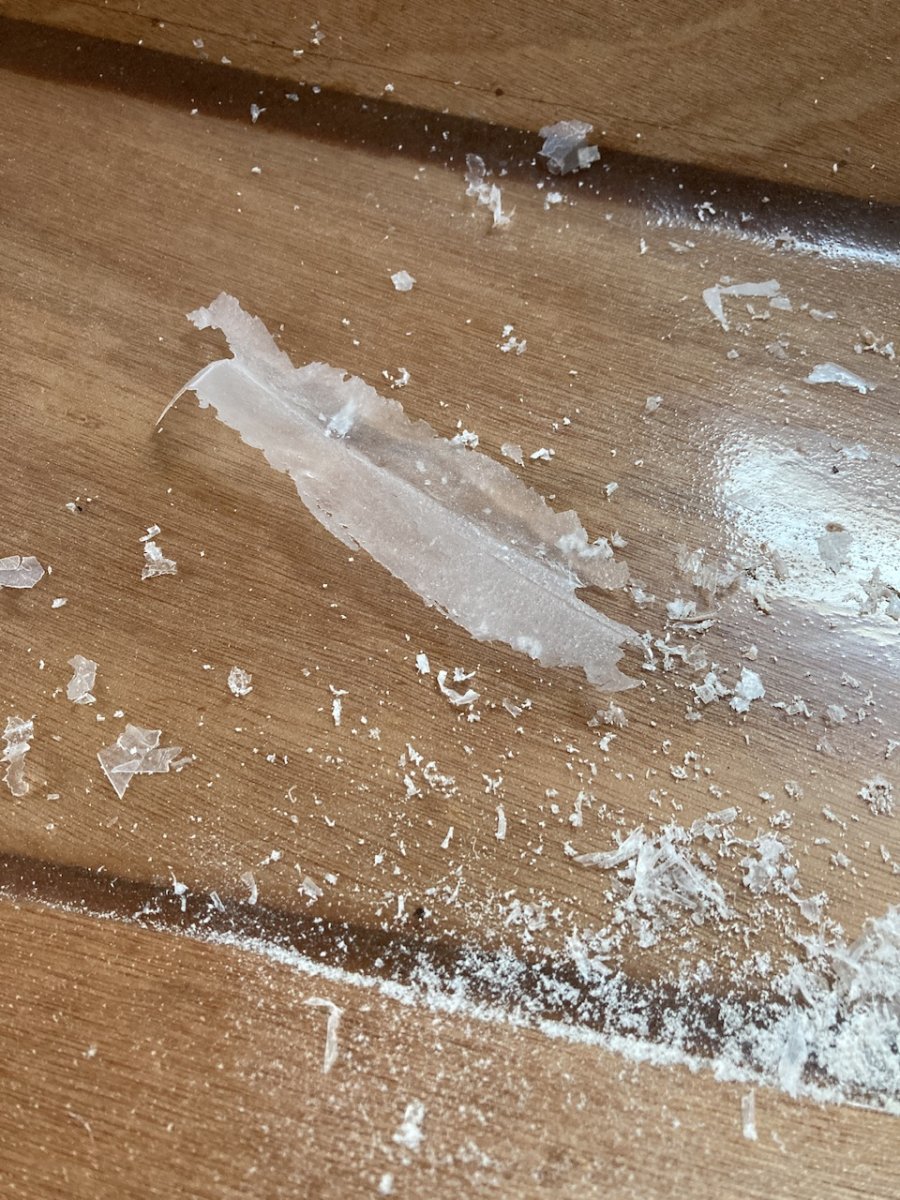
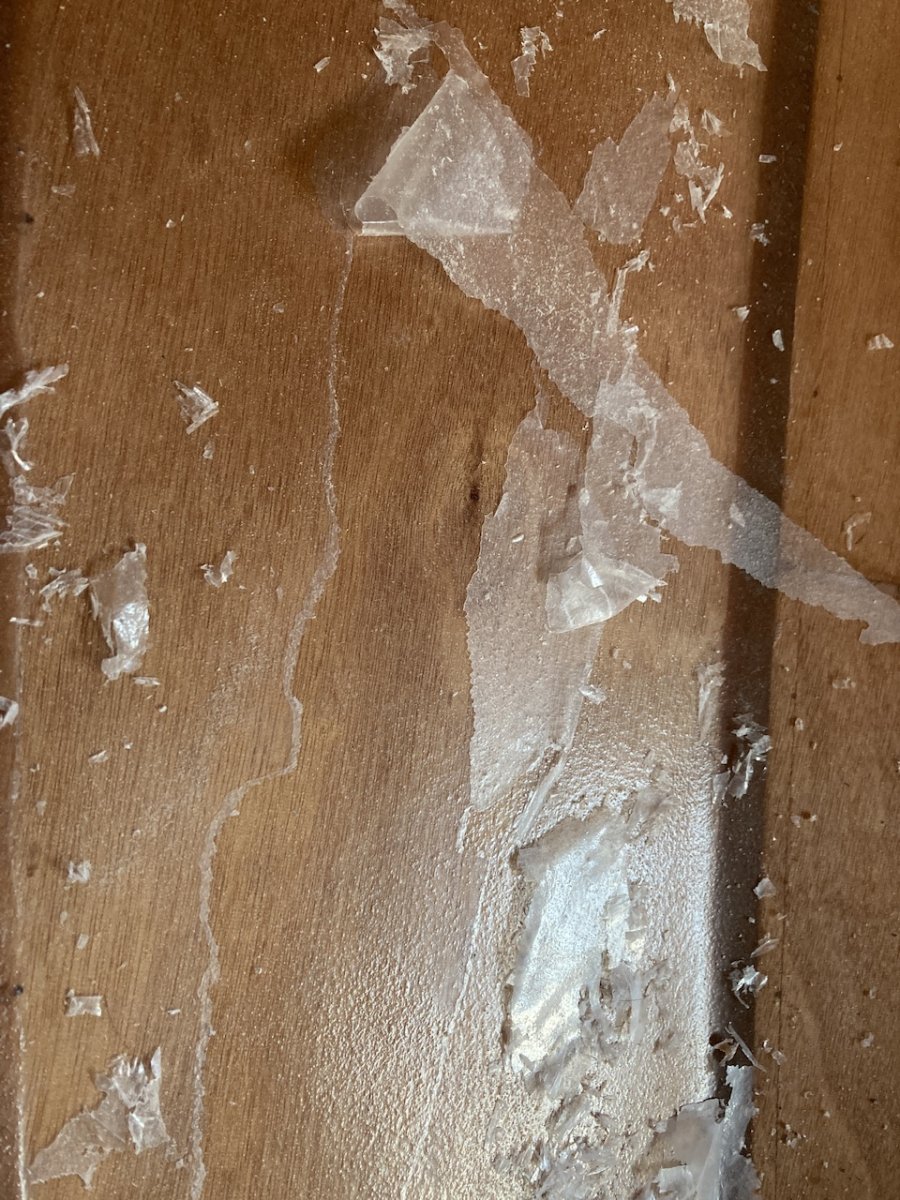
Another concern I have is my old enemy, you know, that word we don’t say out loud, and even when we do say it it’s in hushed voices to prevent inviting it into our lives…yes… that’s the one – ‘Delamination’. Now it might not be, but this is the story so far. You know how when using the disposable foam rollers, you get about half way through the epoxy rolling process with one when they start to break down, and bits of the foam fall off onto your work. Not a huge problem, you just have to ensure you pick off any bits before the epoxy has cured, which I do diligently. So, on went the last coat on the hull’s interior on Tuesday (see #20), and yesterday, Thursday, I noticed a spec of black roller foam I had missed, set into the epoxy. So I picked at it with my fingernail in the hope to remove it, nothing happened, so I picked harder, and then a blister appeared around the foam, about the size of a five pence piece. It looked reminiscent of the delamination problem I had before, but hoping it was just not fully cured, as it is getting cool in the garage now, I tried to cut the piece out so I could fill it with more epoxy. A bit more peeled off, and so the patch got bigger, and it got bigger, and bigger some more. Devil be damned, said I, and I got out the Stanley knife and cut a large circle around the area, about 8 inches in diameter, so I could peel of the interior, leaving a neat edge. After which I splashed a lot of unthickned epoxy over it, and will sand it in a week or so and top up with more epoxy, and with luck it should be invisible.
Now the question is this, is that simply because the epoxy hasn’t yet achieved its full cure, and thus not yet fully bonded to the layer underneath, or is it my old enemy back again? No meths was used, so it cannot be that. It is certainly a lot cooler in the garage now, and epoxy which would otherwise cure solidly overnight now takes at least two days, or longer. So let’s hope it’s that. If not, I am not sanding it all off now, I cannot face that again this year. So if it is that dreadful issue again, the boat will get covered in a tarp in the garden, regardless of UV or weather, and I will sand it all off next summer, or the summer after that one, or fill the whole blasted thing with soil and plant potatoes in it!
Last edited by Rob (11 Nov 2023 9:33 am)
Offline
#23 11 Nov 2023 11:54 am
- Rob
- Member
- From: England
- Registered: 29 Jun 2021
- Posts: 66
Re: Skerry built from plans (build log)
Potato planter it is! Today, epoxy doesn’t have the ‘E’ in front. 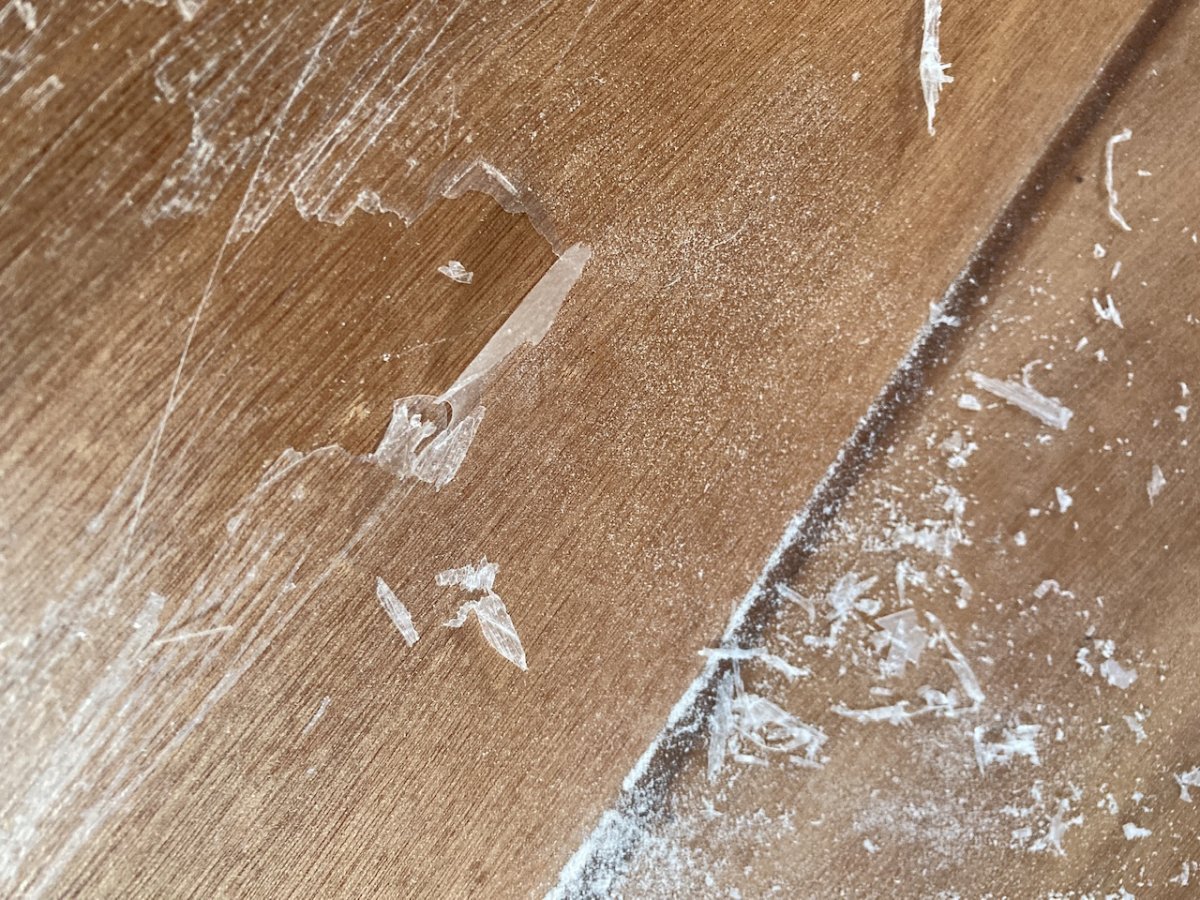
Last edited by Rob (11 Nov 2023 12:24 pm)
Offline
#24 11 Nov 2023 2:40 pm
- sailingfree
- Member
- From: Wareham, Dorset
- Registered: 15 Feb 2022
- Posts: 35
- Website
Re: Skerry built from plans (build log)
Hi Rob, commiserations on the peeling epoxy, I do know it can be a bit disheartening. I had something similar happen when I was building my wood duck hybrid and I reported it on this forum. What I found best was to use a good quality Bahco scraper and very sharp chisels to peel the layer off, it came away quite easily in large sheets and only needed a little sanding where it had decided to bond properly, and where it was truly stuck I just left it and theres no sign of any problems to date. I'm no expert but from the pictures the bottom layer looks quite glossy, so maybe it needed a wash down with water to remove any unreacted amine left on the surface and then a light sand with 80 grit to take the gloss off, and as Nick Schade says give it some tooth.
BTW, I've been following your build and I think it looks great, your attention to detail and the finish so make this a far far better boat than veg planter, so keep at it!
Offline
#25 12 Nov 2023 10:21 am
- Rob
- Member
- From: England
- Registered: 29 Jun 2021
- Posts: 66
Re: Skerry built from plans (build log)
Thank you, they say the Devil is in the details, but in fact he’s in the epoxy. The boat won’t become a veg planter though, and I will battle through. A friend helped scrape some of it off yesterday, and between us we’ve broken the back of it. I’m having a day off from it today but will crack on tomorrow and get as much off as I can with a scraper, before sanding later in the week. It come off quite easily, as on yours, in large sheets. I will give it a wash down too, before sanding with 80 grit. Interestingly, the piece I had cut out a few days ago and filled with epoxy is solid as anything, and not coming off, so whatever I did there was the right thing. Thanks again for the encouragement, and I will keep the blog updated.
Offline