A forum for discussing wooden boats and boat building
You are not logged in.
- Topics: Active | Unanswered
Pages: 1
#1 22 Jul 2023 10:06 pm
- sailingfree
- Member
- Registered: 15 Feb 2022
- Posts: 31
Building a Petrel Play
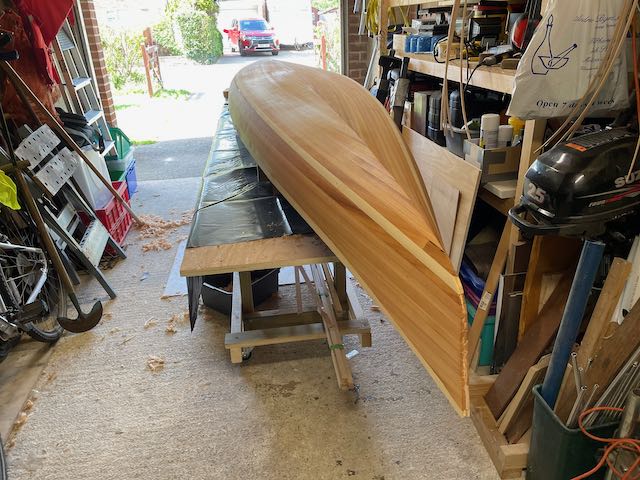
After building the wood duck 12 hybrid last year and finding it a very satisfying project, as well as having a nice little kayak to explore Poole harbour and the surrounding rivers, I felt I wanted a slightly larger sea kayak to venture further and start to take part in longer paddles with the local club. The petrel play looked like a suitable project as it would fit in the garage and give me something more challenging to build. I started the project in March and to make it a bit more of a challenge I decided to build from plans. As always Nick Schade's videos and book have been invaluable and watching other people document their builds on this forum and YouTube has also been a great help and encouragement.
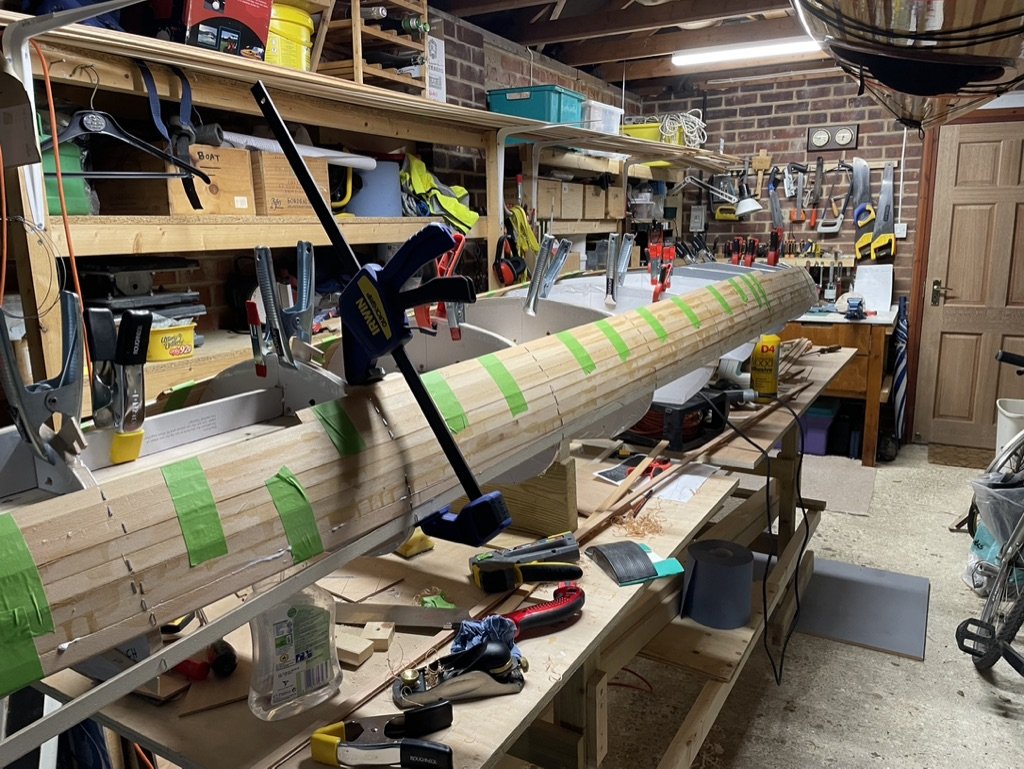
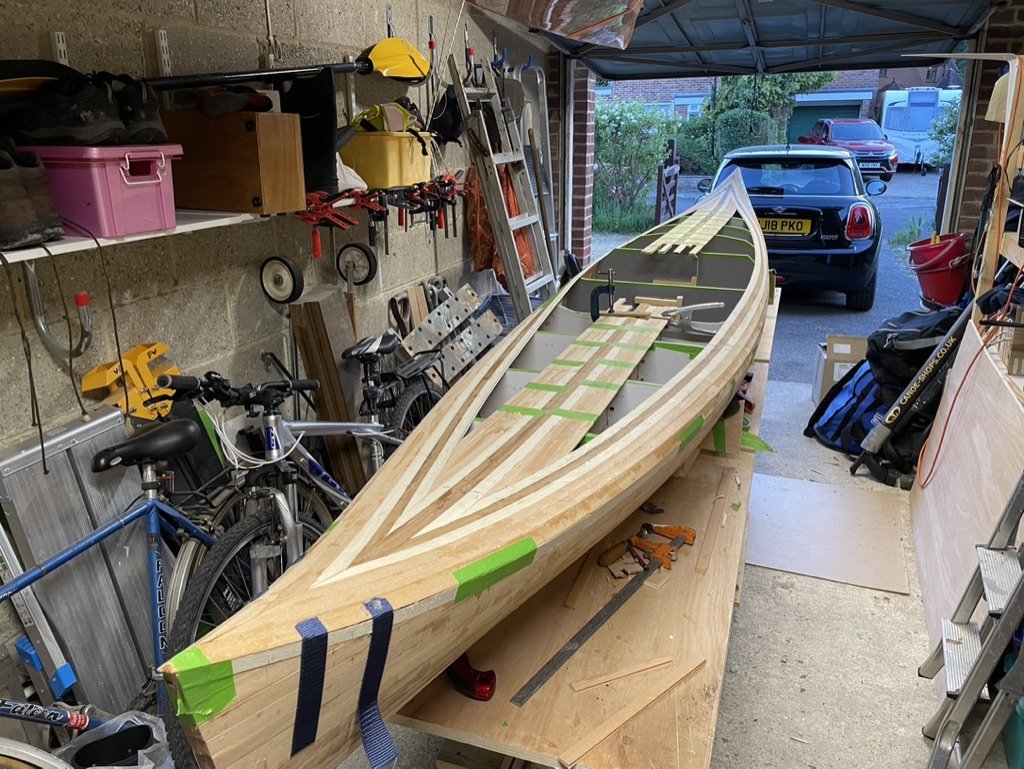
The strongback and the two longitudinal forms were made from 12mm plywood and the transverse forms from 12mm MDF which was going cheap at a local DIY store. The latter maybe was not that good an idea - I found staples would not really bite and I had problems with keeping the strips against the forms in some places, ply would have been better. Anyway, here's a couple of pictures of the strongback and forms. The inner stems were also made from 12mm plywood.
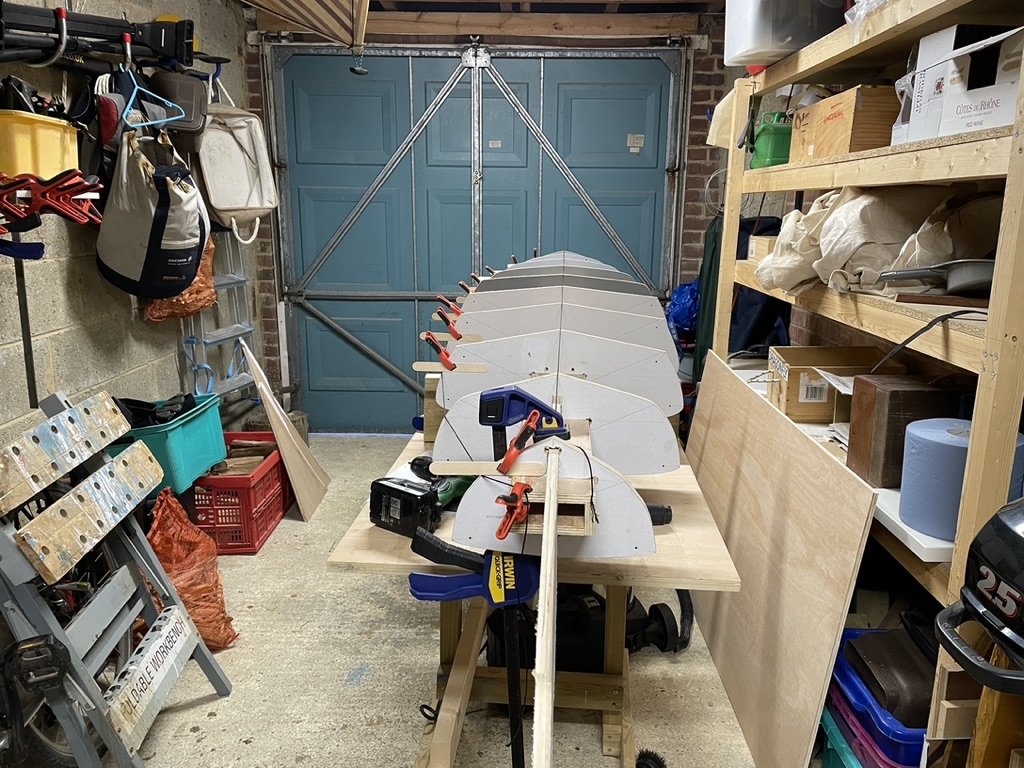
I used cleats to fasten the forms rather than make the spacers that Nick suggests, without a table saw I felt that trying to cut all those bits square would end up in tears. That worked pretty well and once well screwed down the forms stayed put.
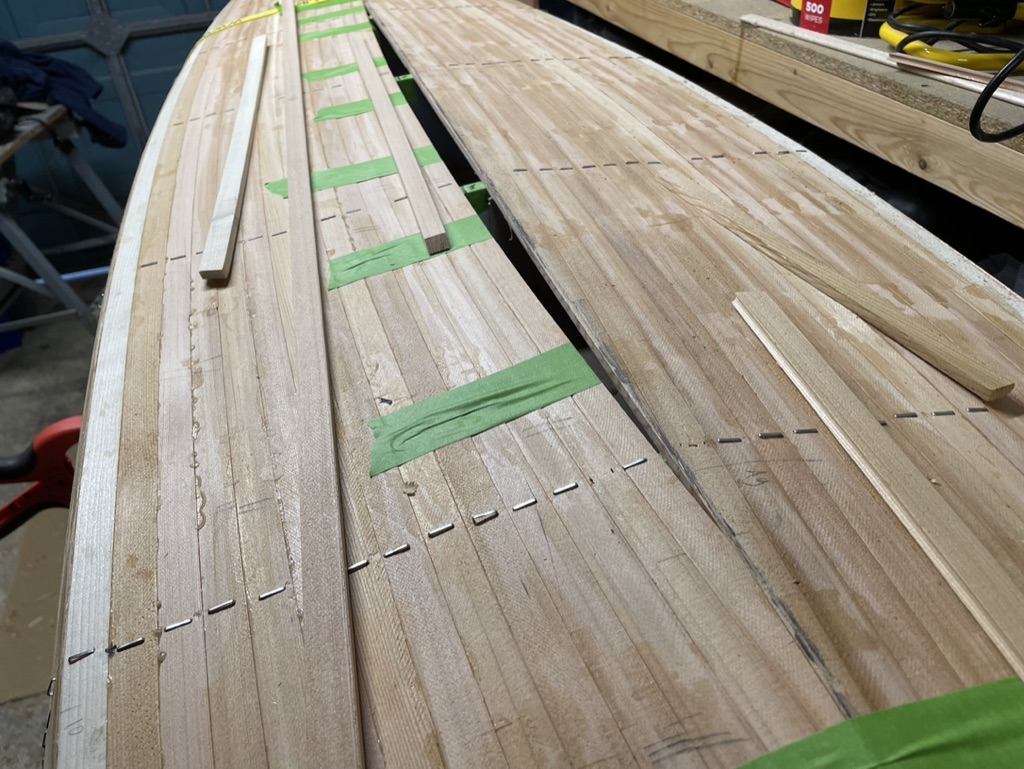
I obtained the cedar from a supplier in Kent and we drove over there as part of a short break and brought it back on the roof rack which was in itself a bit of an adventure. The wood was long enough so that for most of the boat I could use single full length strips.

Last edited by sailingfree (23 Jul 2023 6:15 am)
Offline
#2 25 Jul 2023 9:03 pm
- sailingfree
- Member
- Registered: 15 Feb 2022
- Posts: 31
Re: Building a Petrel Play
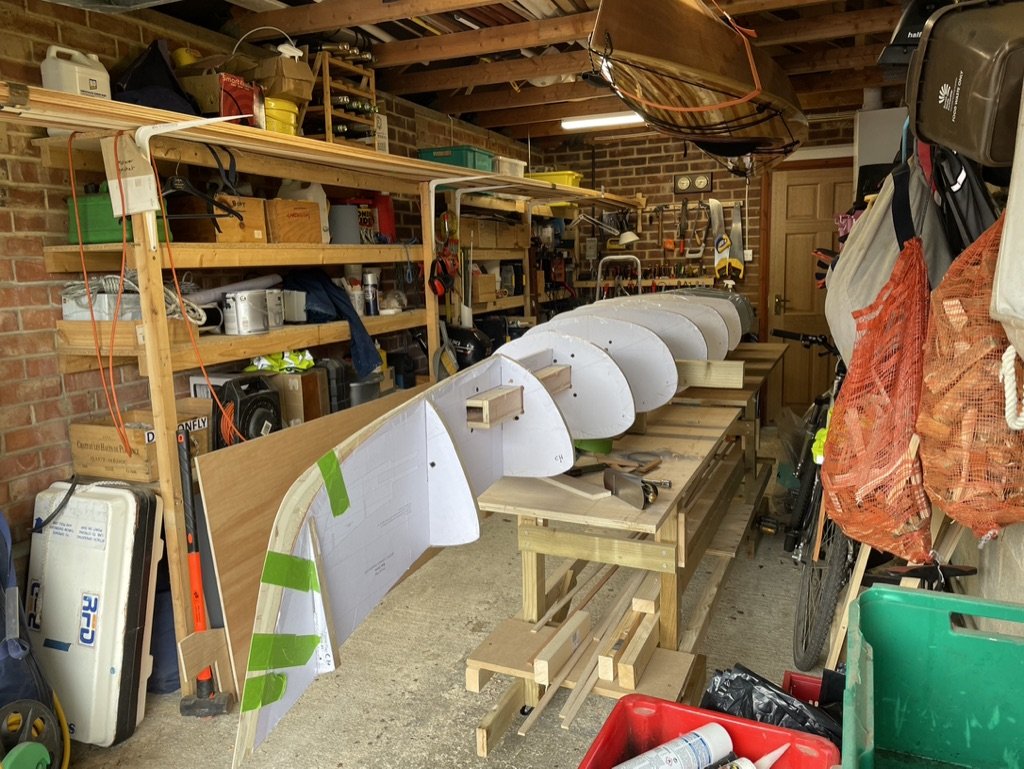
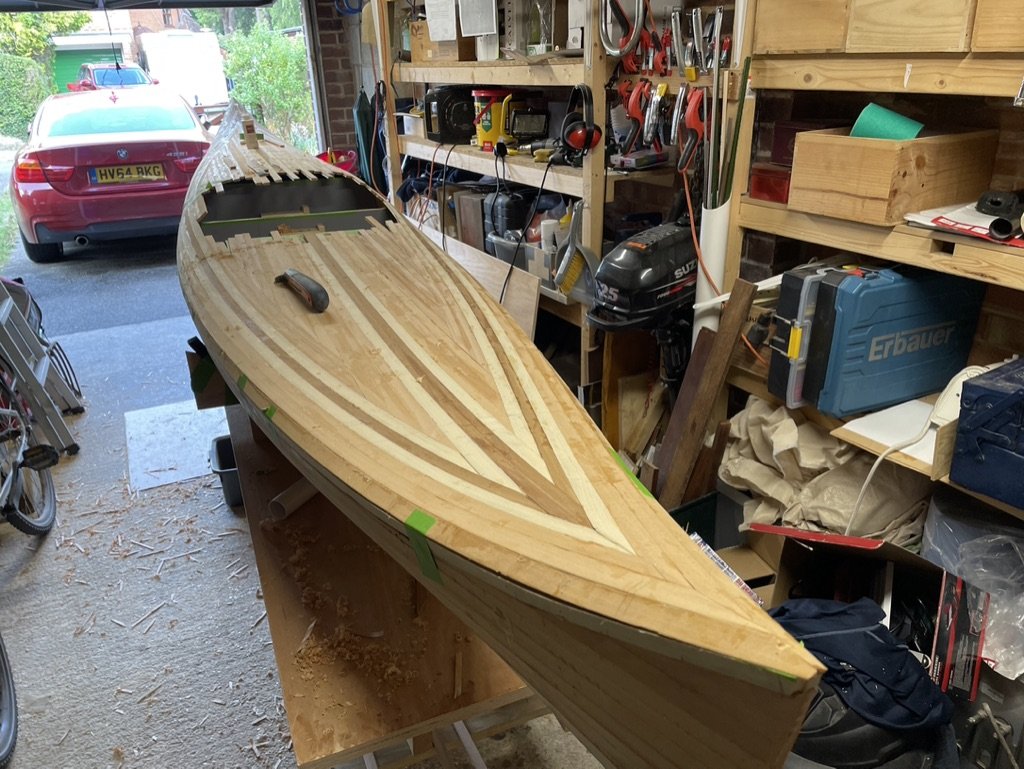
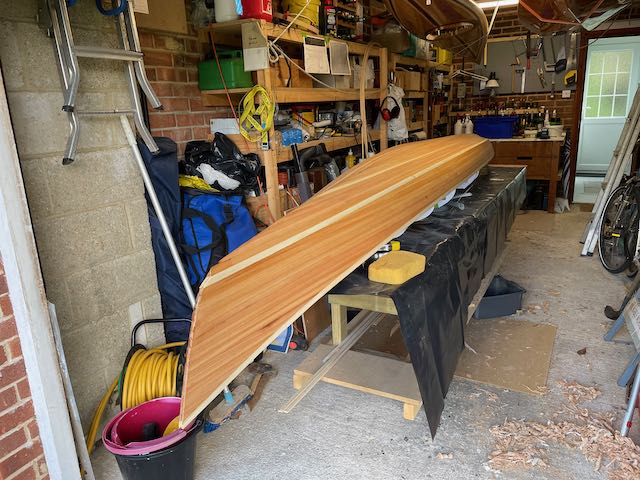
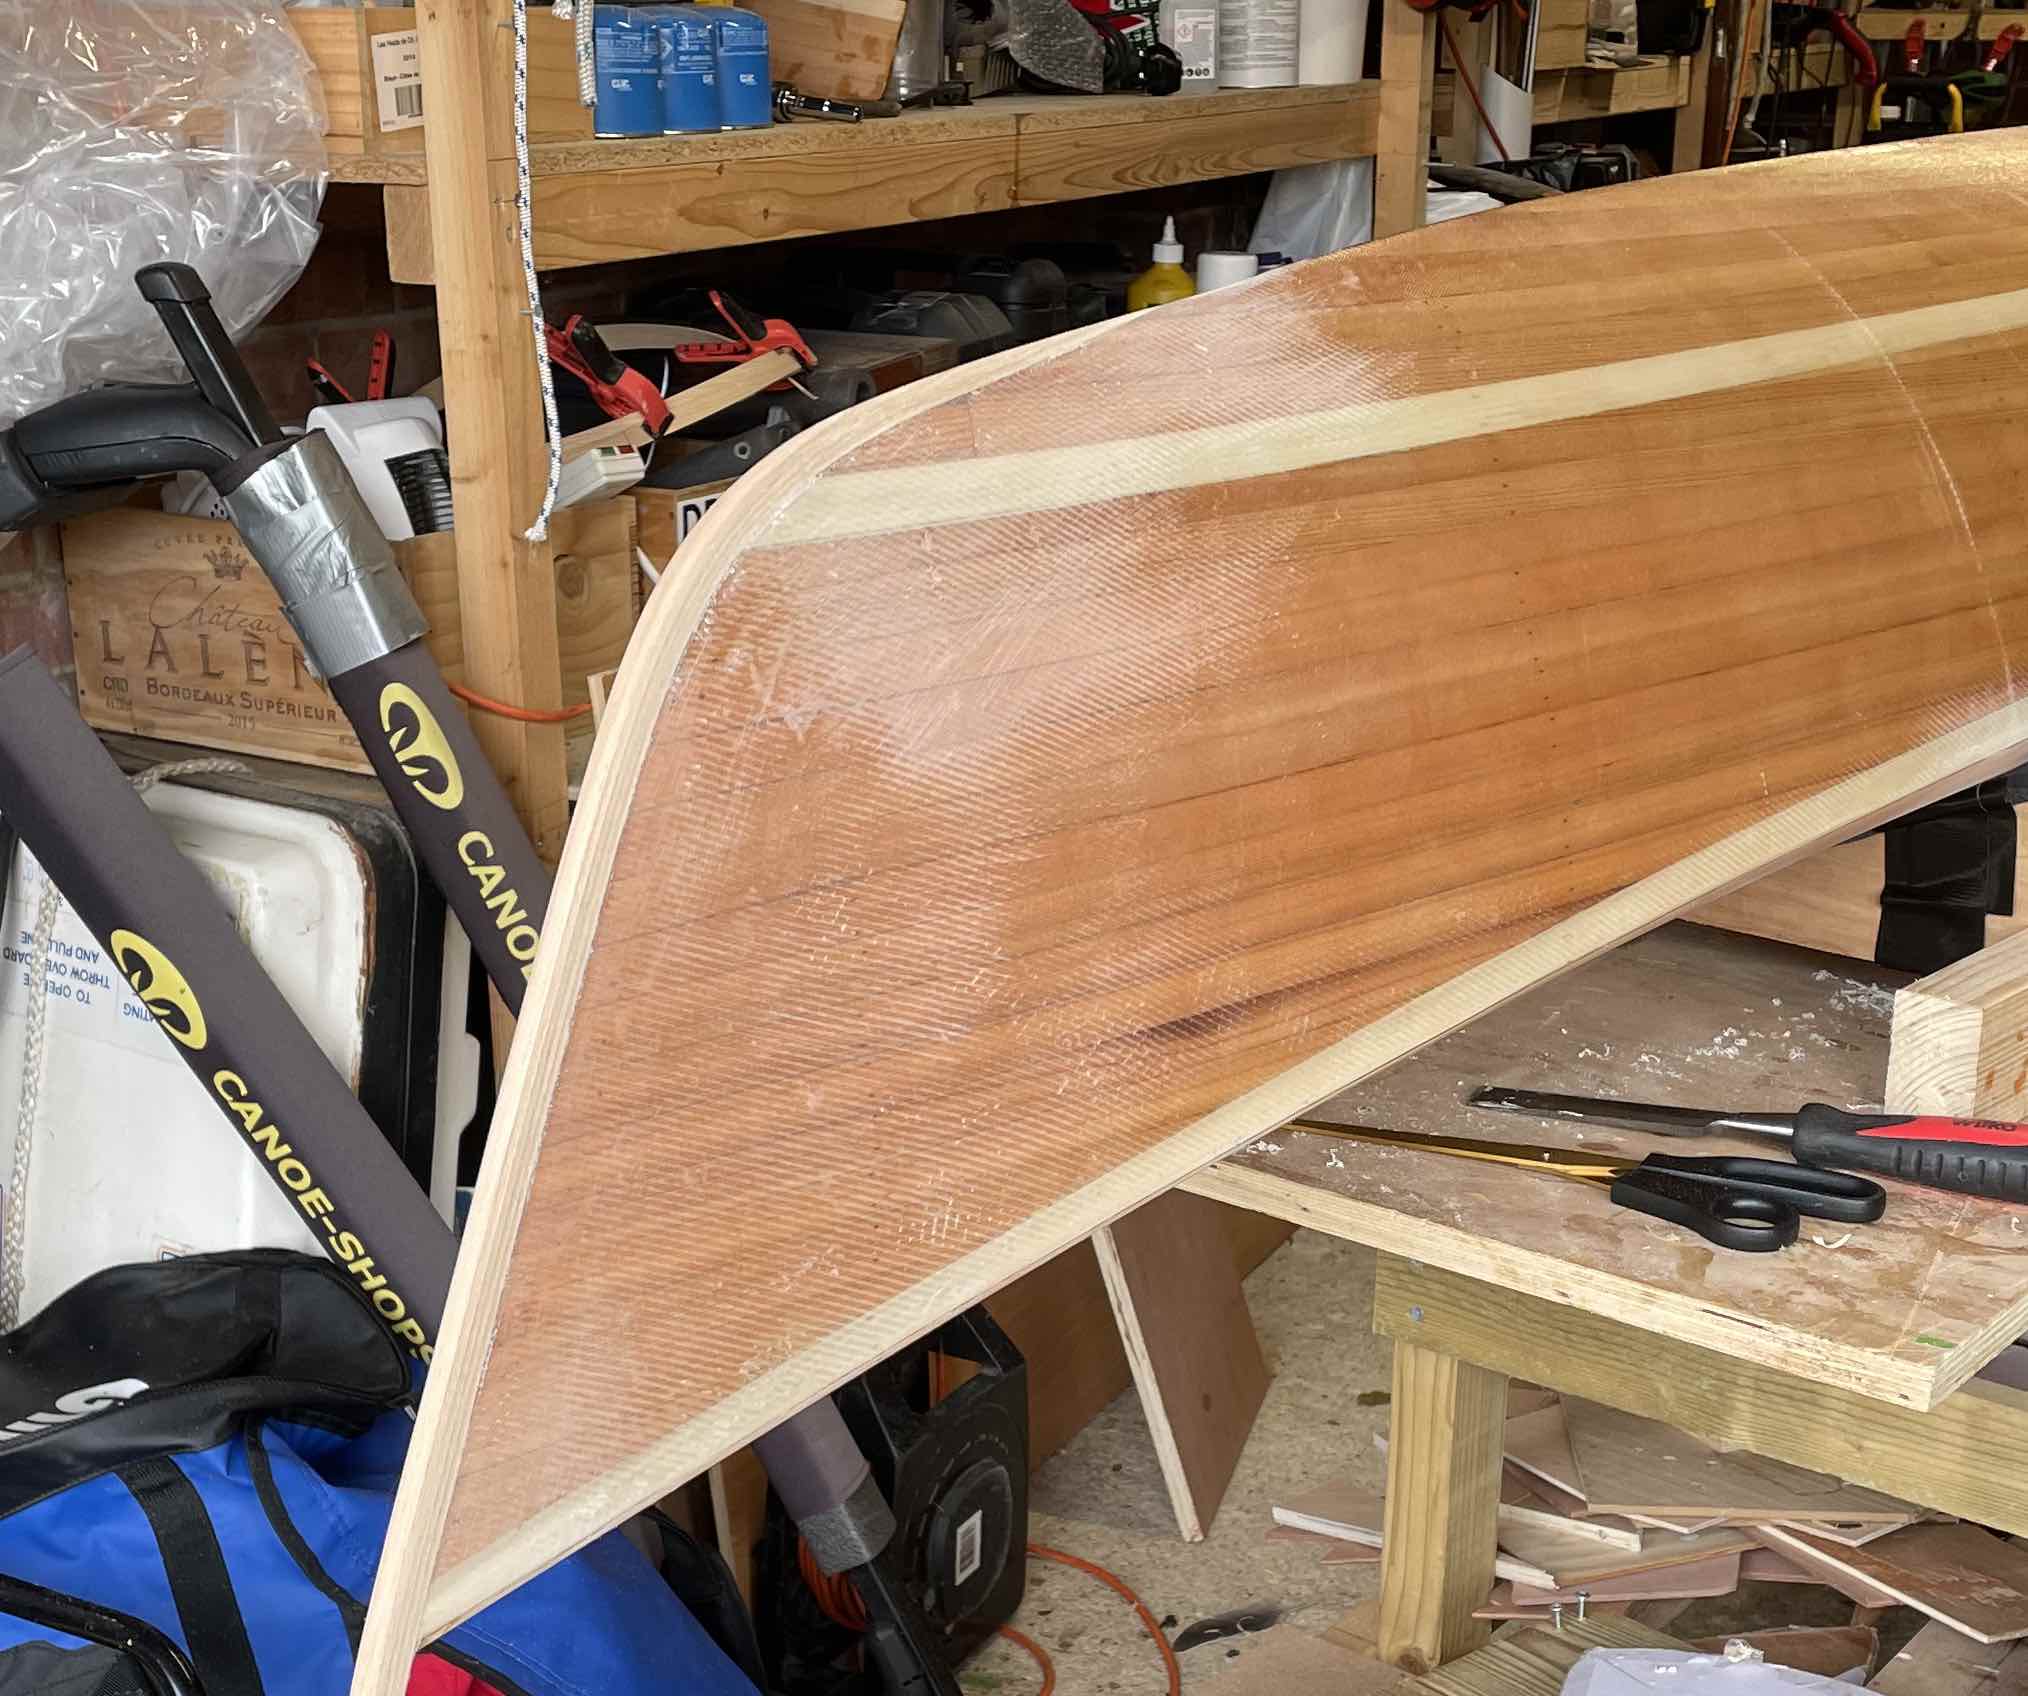
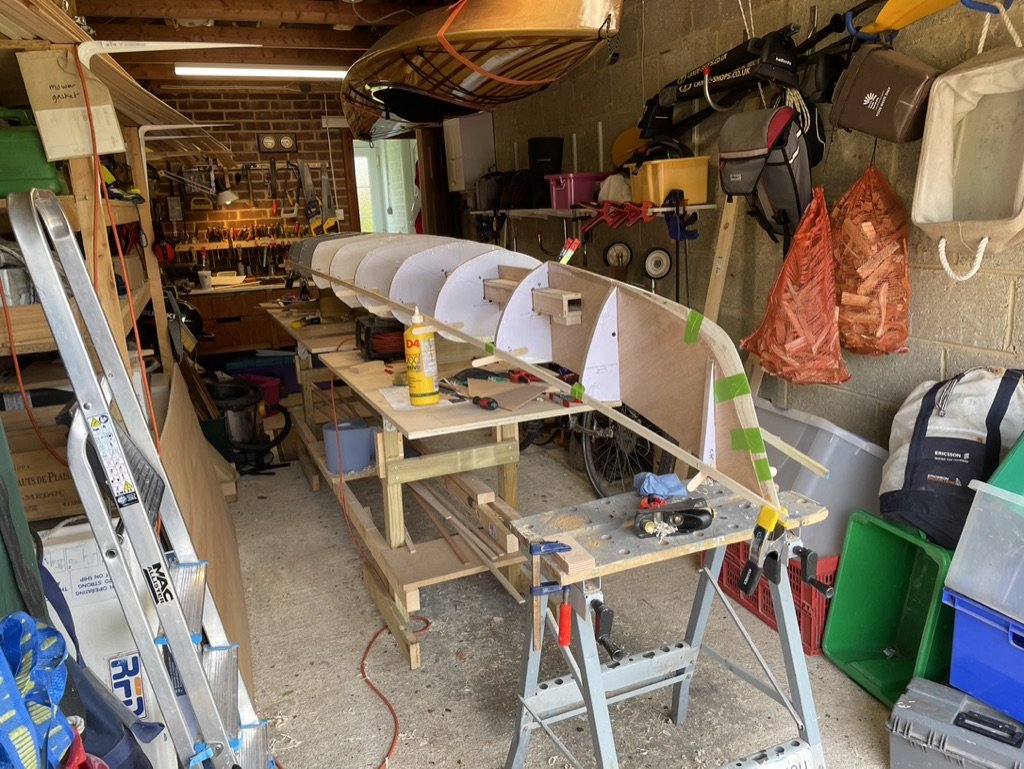 Building followed the suggested order that Nick and others have used. The gunwale is tulip wood which has a nice pale colour though it is harder than the cedar to more difficult to work with, especially with the tight twists near the stern. Using a heat gun, steam and an old steam iron all helped to get most of the strips in place.
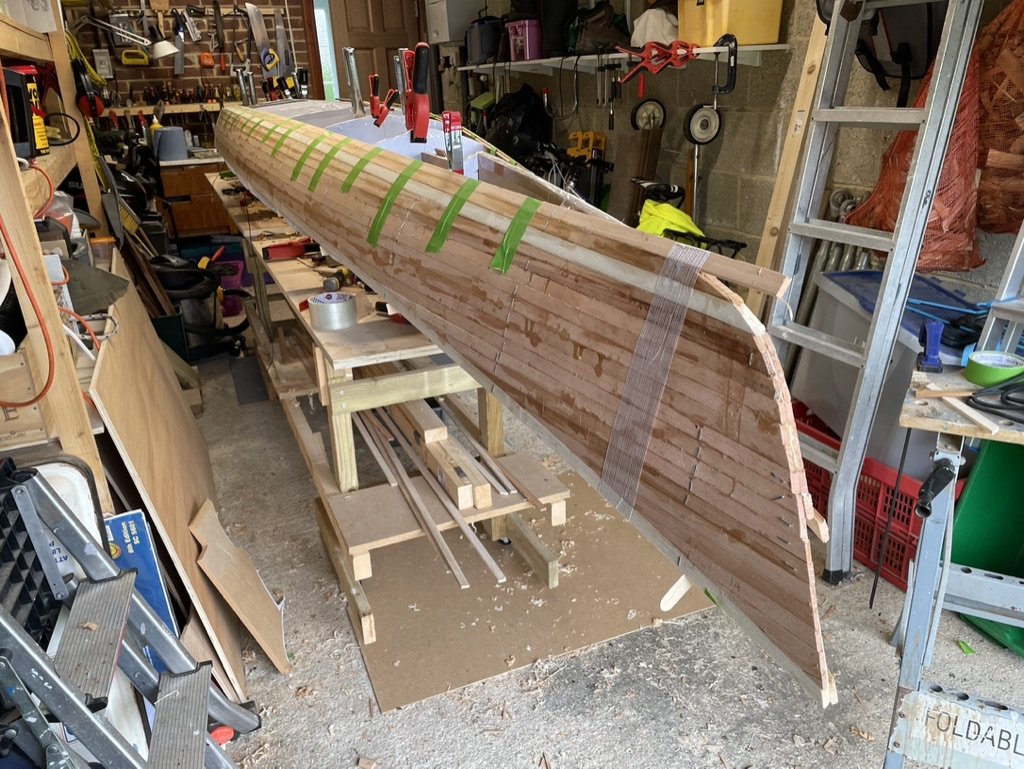
I found an old Record 2506 side rabbet plan on eBay which needed some work, but once fettled and fitted with a home made double sided fence worked great for trimming the strips.
And finally fitting the last piece in the hull...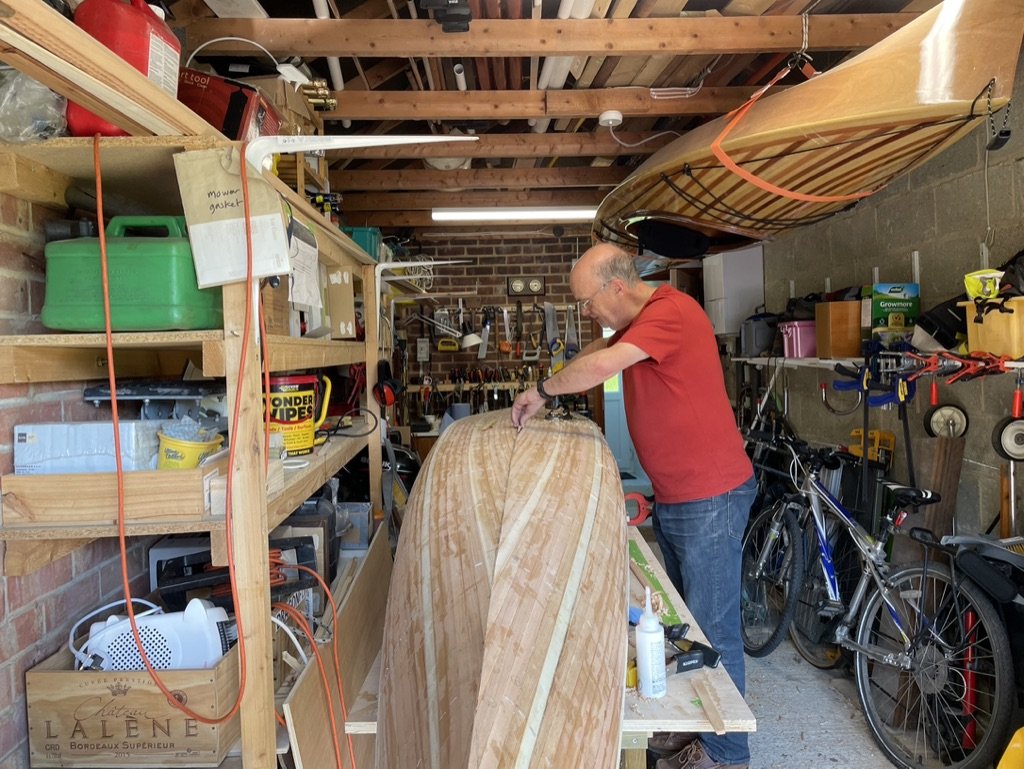
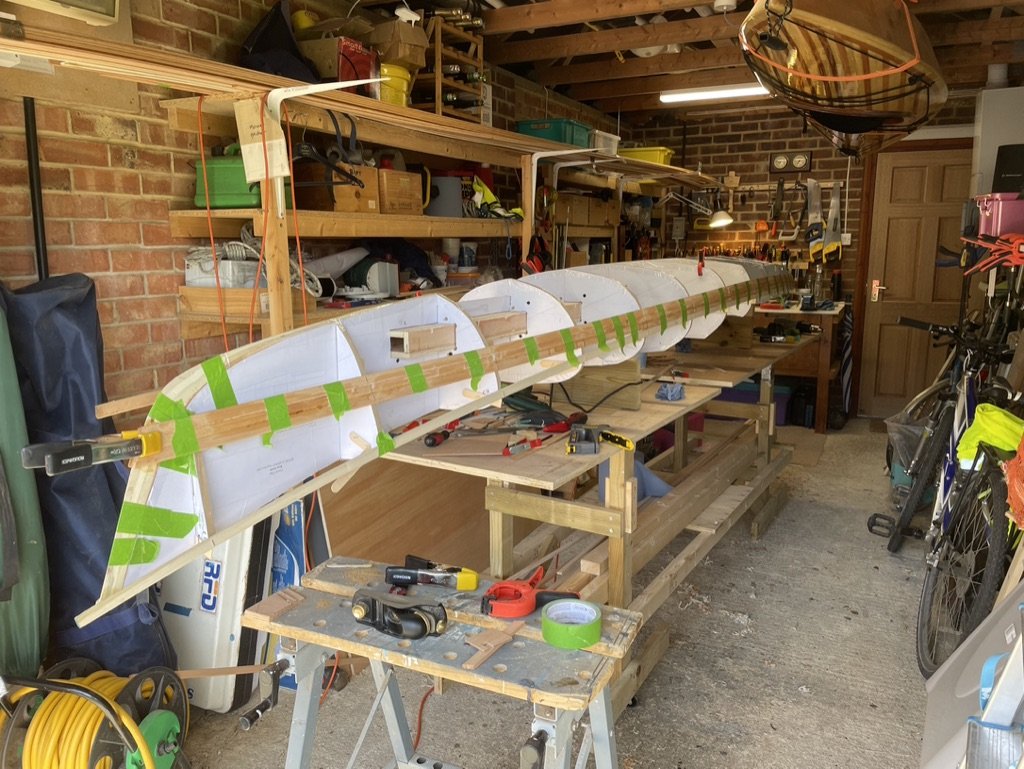
The hull all done for now at least, and despite several large gaps near the chine I'm pretty pleased with the hull now its finished.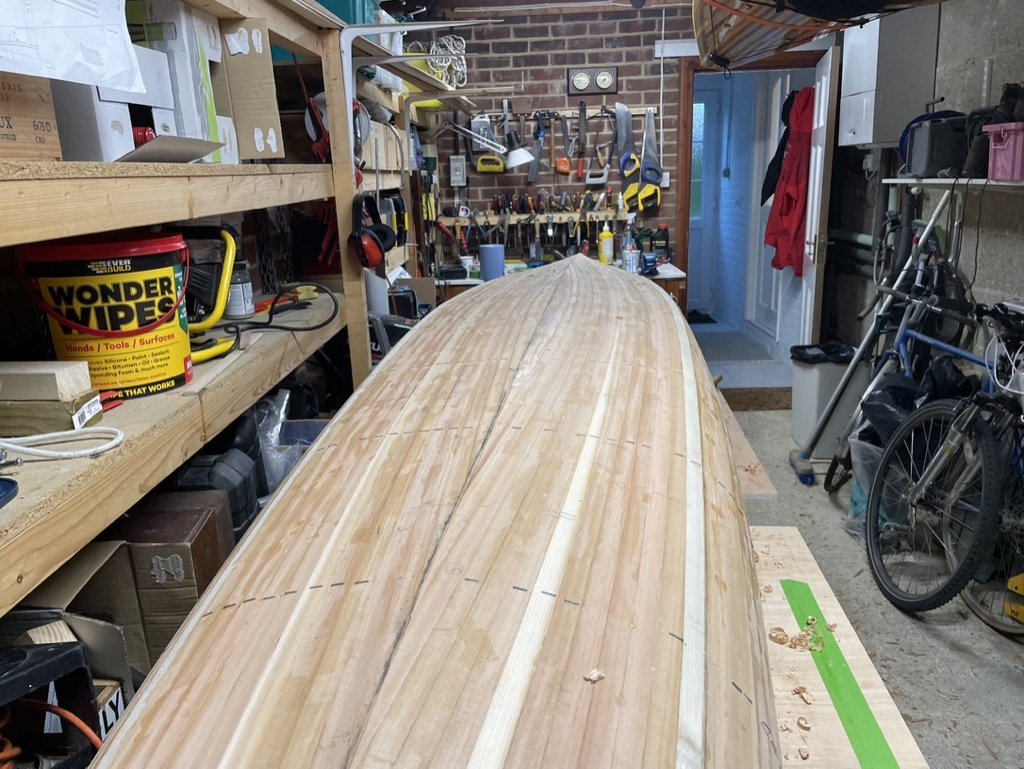
Last edited by sailingfree (25 Jul 2023 9:35 pm)
Offline
#3 25 Jul 2023 9:46 pm
- sailingfree
- Member
- Registered: 15 Feb 2022
- Posts: 31
Re: Building a Petrel Play
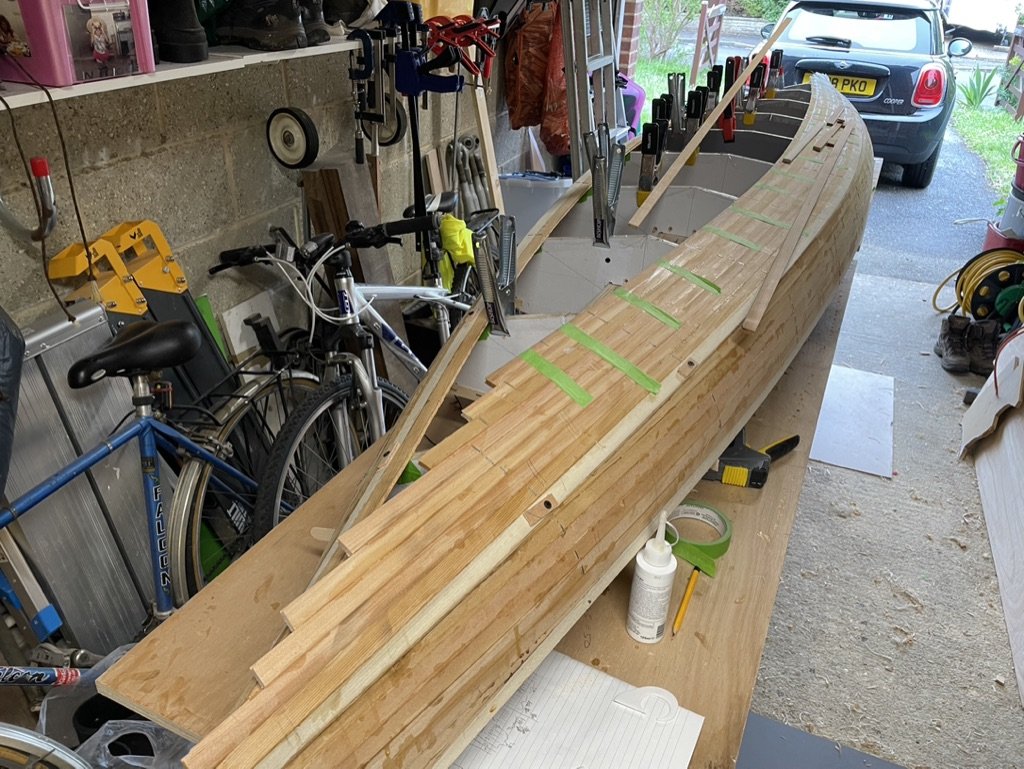
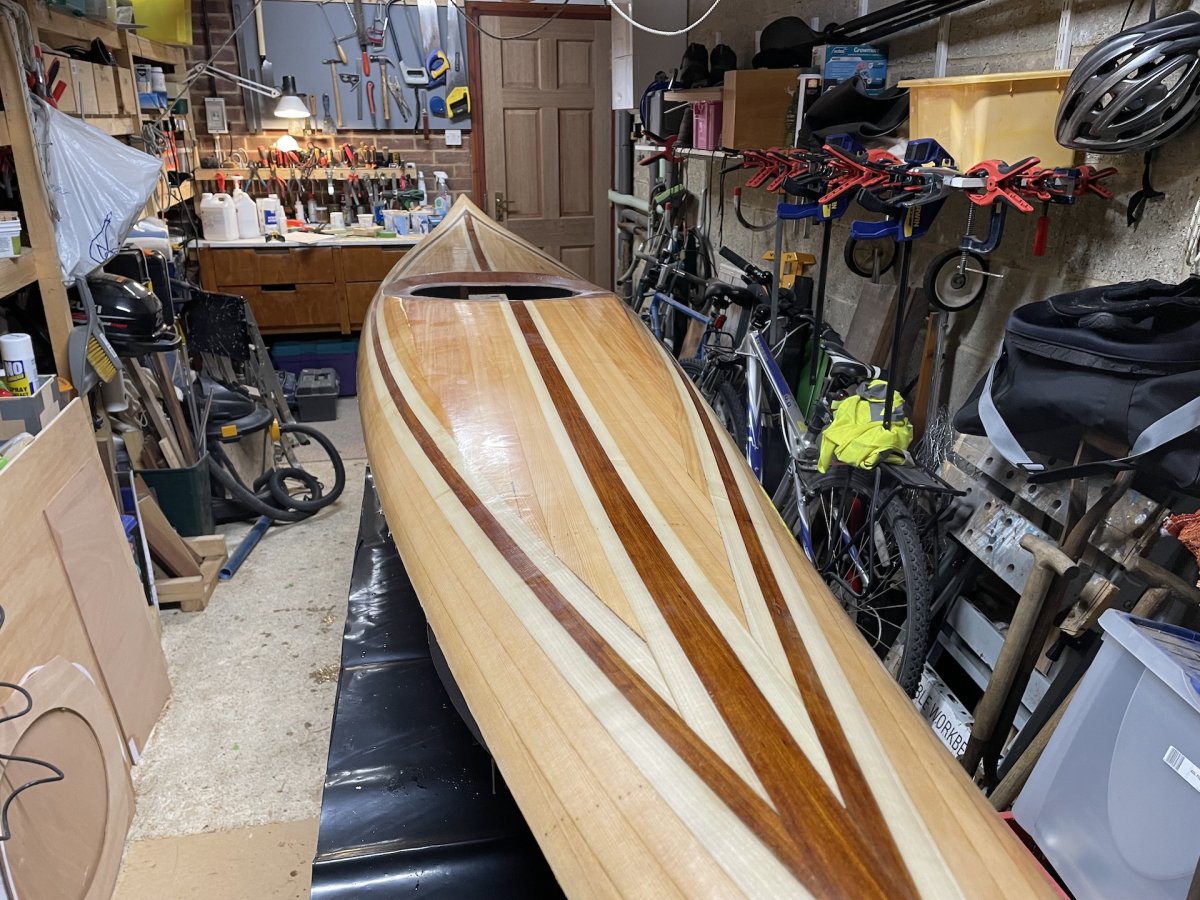
On the deck I wanted a simple pattern with some pale strips and highlights in a darker wood. For this I again used the tulip wood and some old growth cedar which is very dark.
And after an initial scraping and sanding it is starting to look quite nice. This is with some water sprayed onto the surface to show the contrast.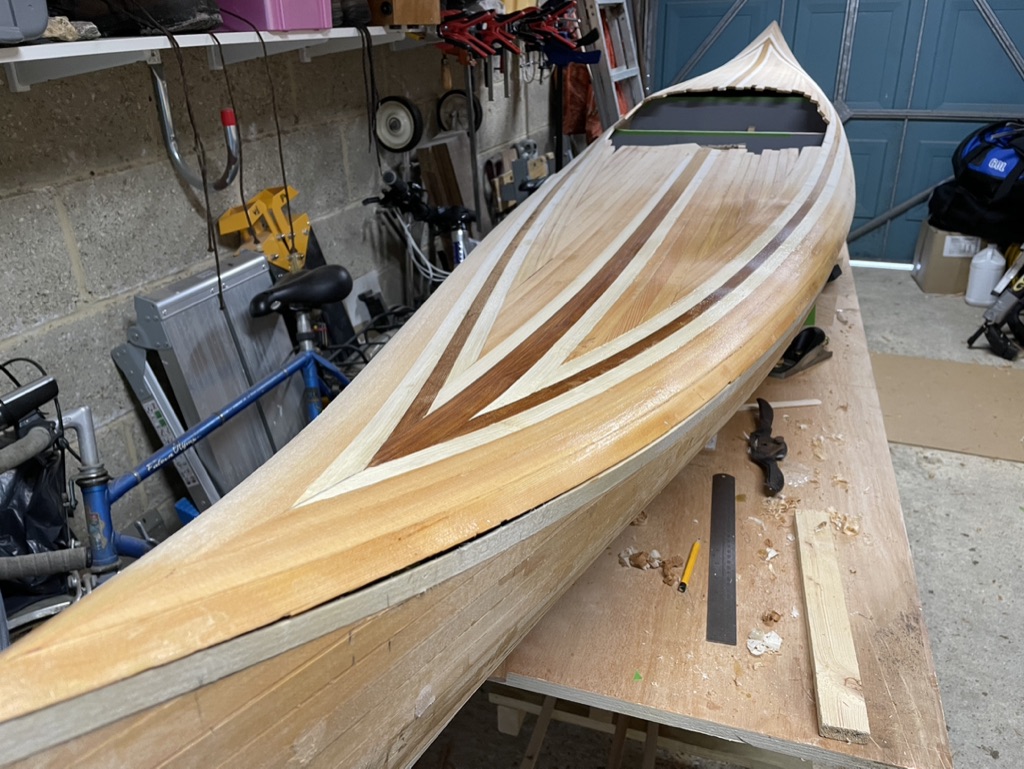
Offline
#4 13 Aug 2023 6:27 pm
- sailingfree
- Member
- Registered: 15 Feb 2022
- Posts: 31
Re: Building a Petrel Play
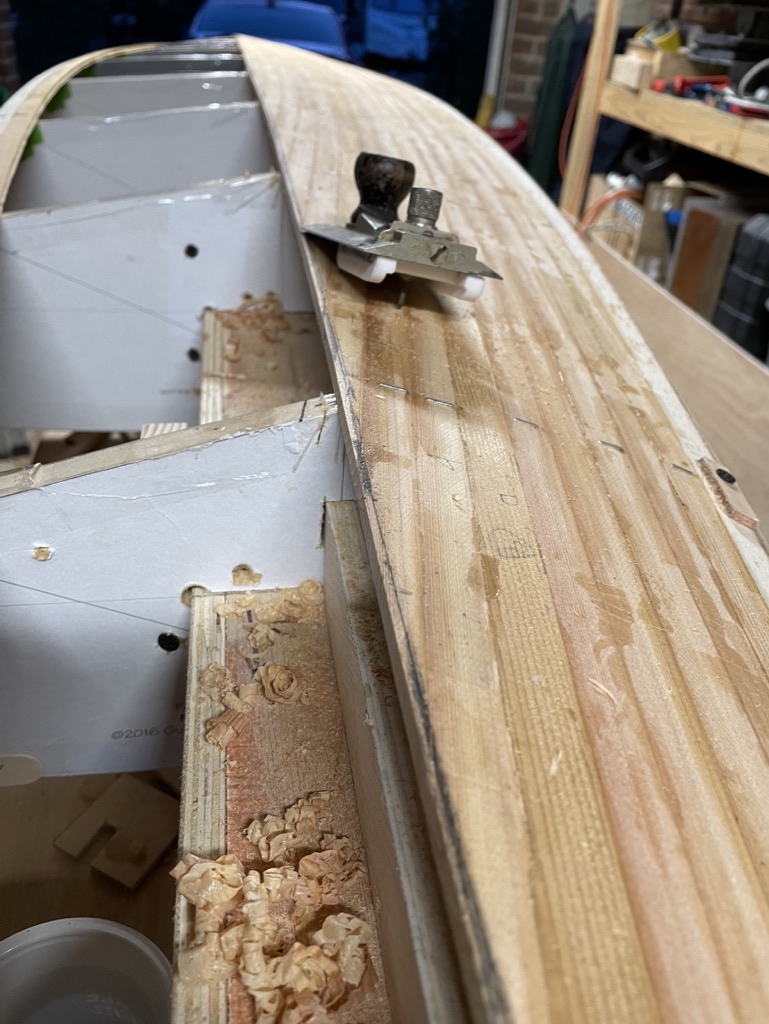
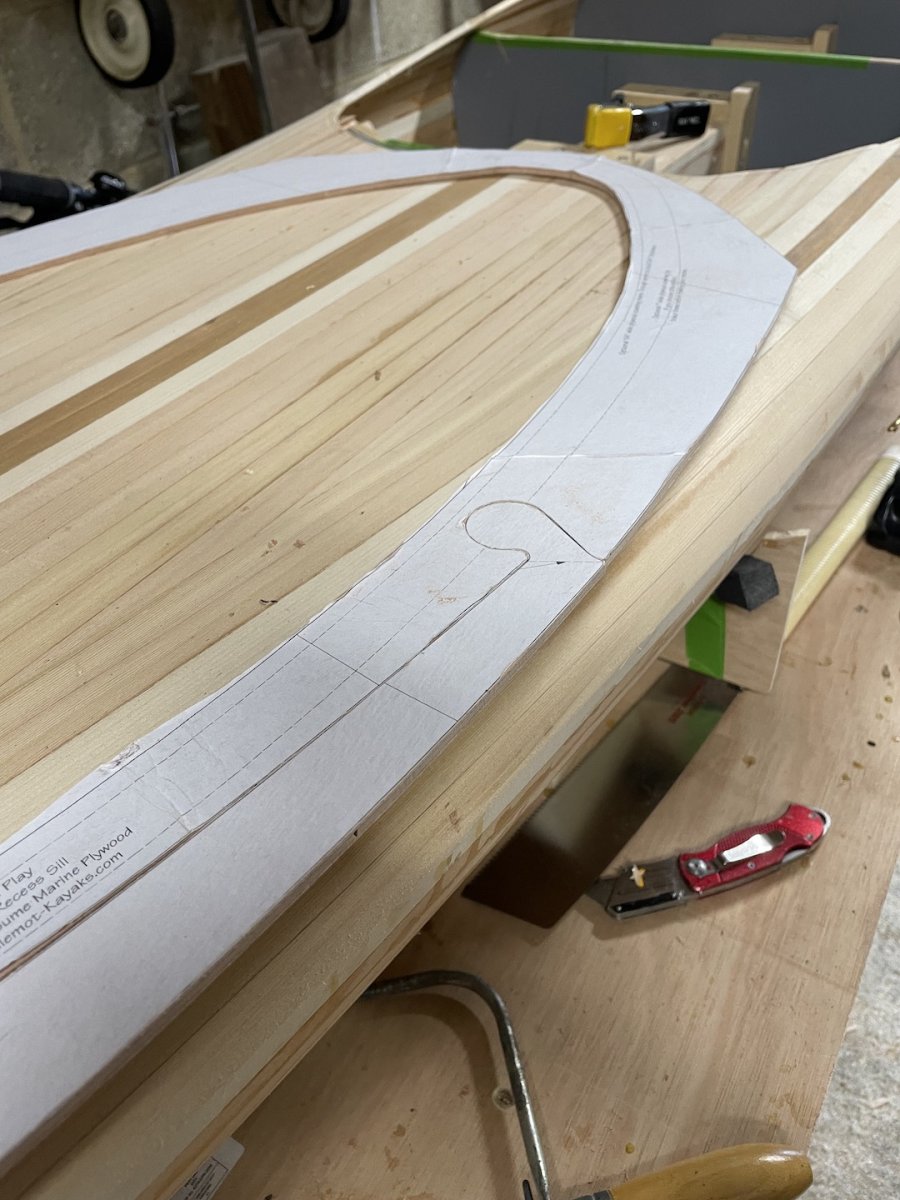
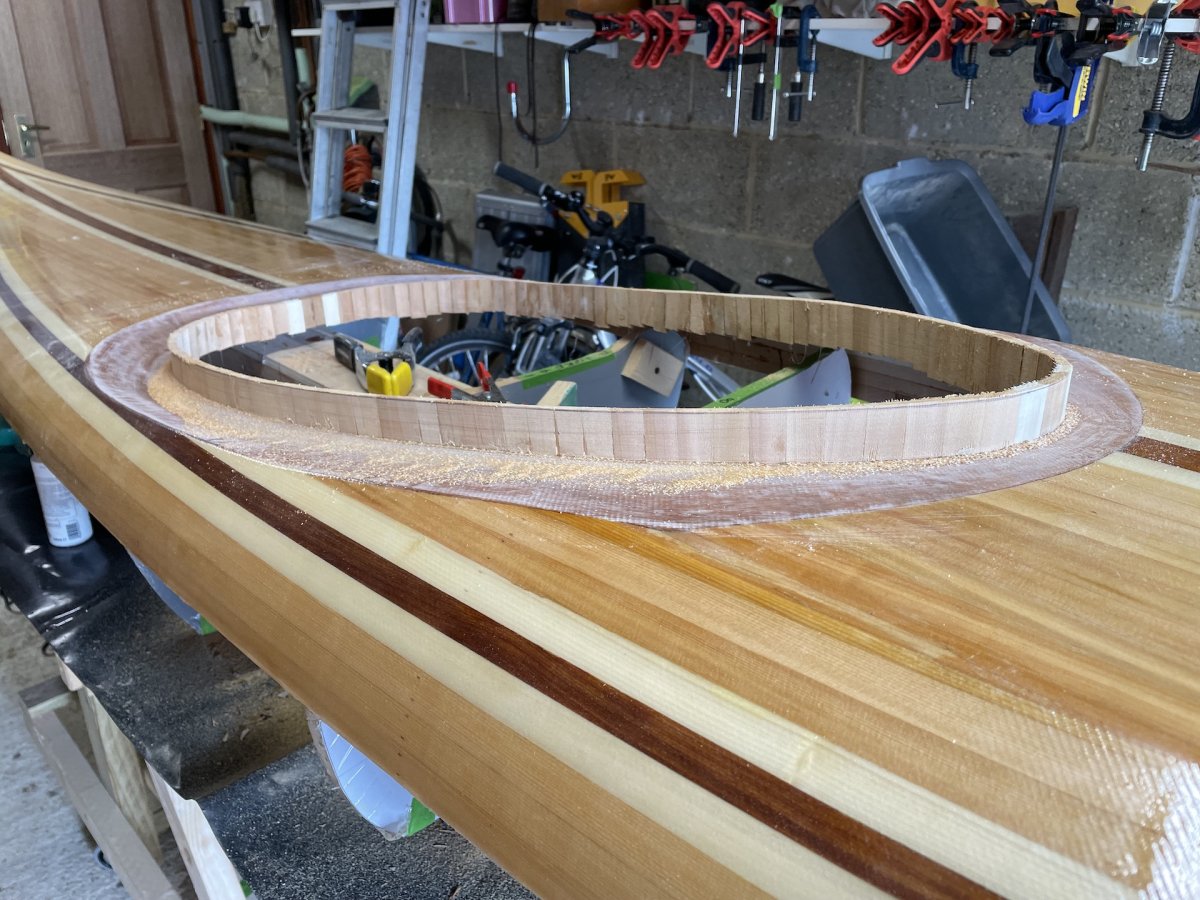
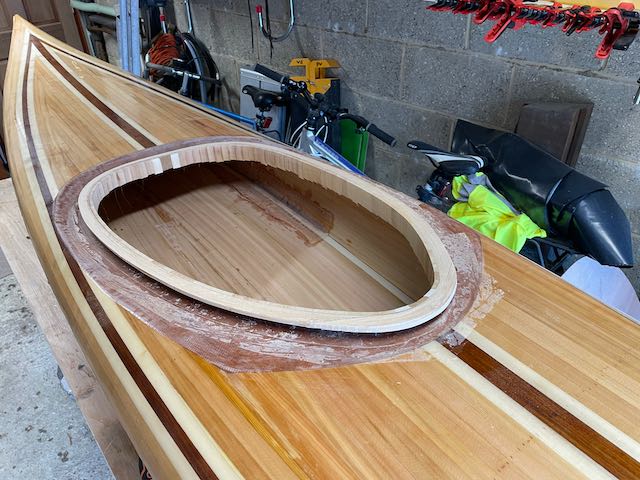
Well I found some time to make a little more progress in the past couple of weeks. I cut the cockpit recess using the paper patterns and they didn't turn out too bad. The little puzzle joint makes lining them up very easy, though getting the joint between the two pieces was not easy.
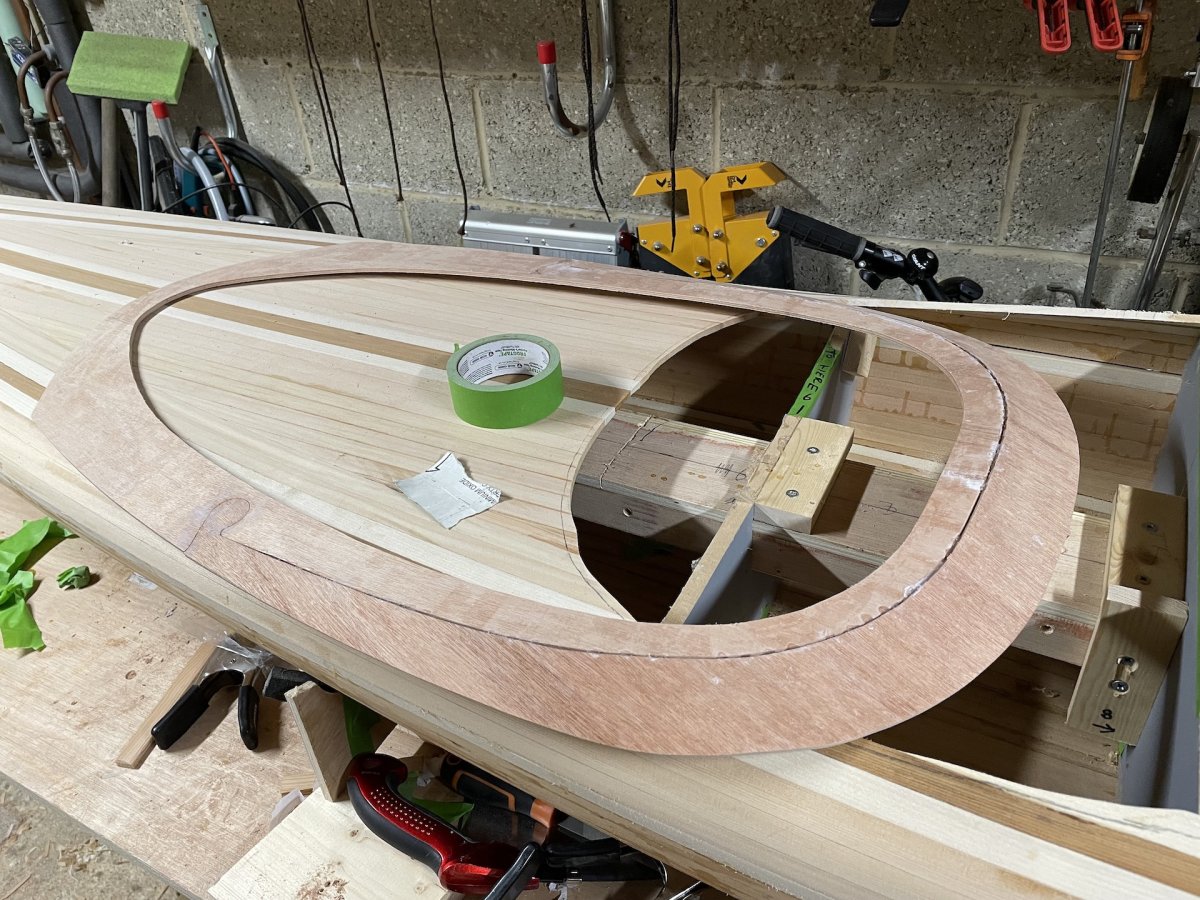
Fitting to the hull though was a struggle, and even though I tried hard, I ended up with a small gap at the back which I filled with a small piece of ash edging. 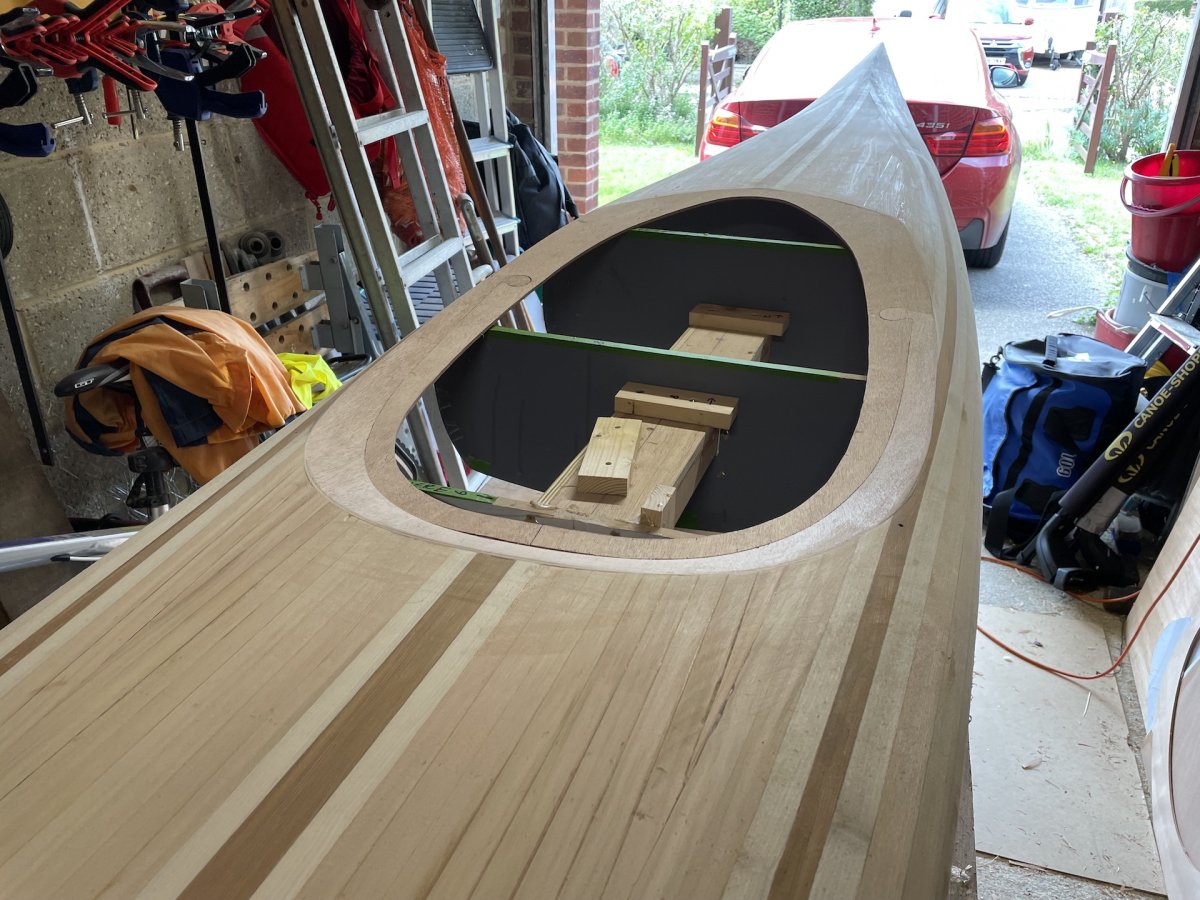
One slightly dissapoininting thing I found though was that the accent line at the front didn't line up with the knuckle in the recess. I'm guessing I had too steep an angle when I transferred the lines from the pattern to the deck while stripping the deck, and looking back it would have helped to have the cockpit recess to hand while trimming the accent.
First glass and epoxy went on with no problem and I managed to get the coaming riser in place and trimmed ready for the next steps.
Offline
#5 15 Aug 2023 2:38 pm
- sailingfree
- Member
- Registered: 15 Feb 2022
- Posts: 31
Re: Building a Petrel Play
I have a question for anyone reading this who has built a similar kayak. What do people think about fitting a skeg? I've seen some builds with and some without. On my limited paddling in other, mainly moulded plastic kayaks, the skeg is useful in windy conditions, but on the other hand is one more thing to go wrong.
So, is it worth fitting the skeg to the petrel play?
Pete
Offline
#6 21 Sep 2023 8:13 pm
- Bills Boy
- Member
- From: Egremont
- Registered: 3 Jan 2023
- Posts: 6
Re: Building a Petrel Play
Hi, I fitted a skeg to my Petrel Play, very glad I did. Had it in some serious rough stuff, weather cocking isnt normally a problem but with a stiff cross wind it really helps. I've had no issues with reliability
Offline
#7 3 Oct 2023 1:23 pm
- sailingfree
- Member
- Registered: 15 Feb 2022
- Posts: 31
Re: Building a Petrel Play
Thanks for that, that chimes with the replies I got on the CLC forum as well, and talking to other members of my local club the consensus was that I'd be daft not to add one. So yes, I'm adding a skeg.
After the fun of stripping the deck and hull and seeing real progress, things appear to slow down a lot with loads of smaller tasks and waiting for small epoxy jobs to harden before I can proceed with the next steps. Maybe a bit more planning would have let me do several things at once, but in a small garage there is only limited room and of course in the summer paddling, sailing and generally being outdoors take priority to working indoors.
The hull was glassed and a thin fill coat added and the inside similarly coated.
Very happy with how that turned out.
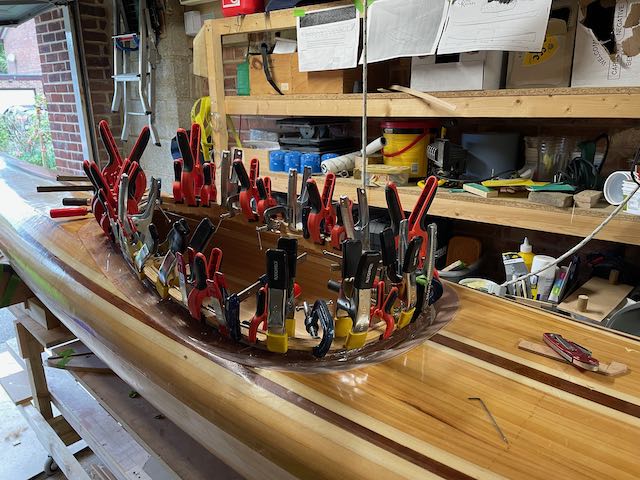
Here is the usual picture of all the clamps in my workshop being used lamniating the coaming lip. I used some 2mm birch edging I found on ebay which looks quite nice.
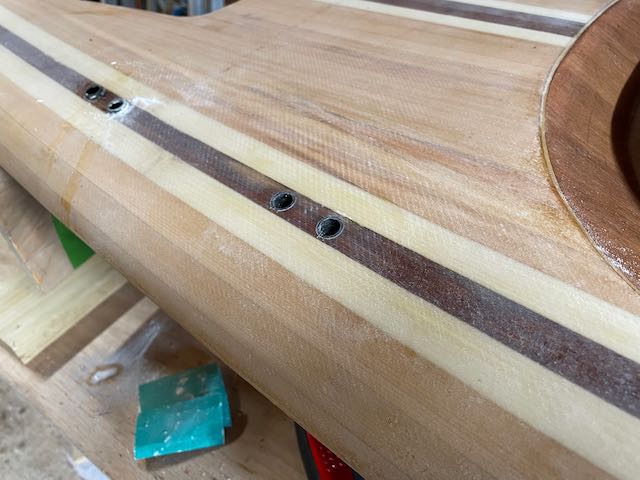
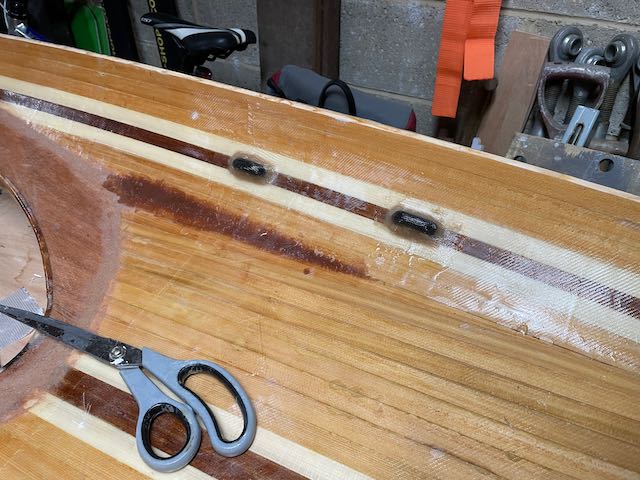
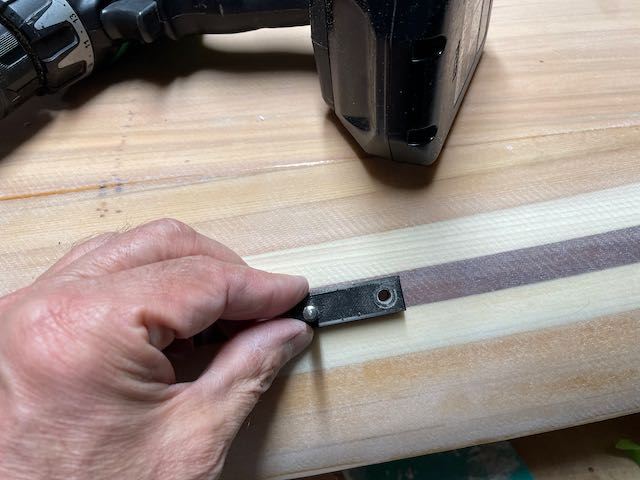
I decided to use some Maroske deck fittings for the bungee and deck lines, so rather than buying parts or using the glass cloth kits I did a simple 3D cad design and printed them up in PLA. I asked WEST what epoxy bonds with PLA and they suggested the G-flex epoxy. I'm happy with how they look on the deck as part of the dark strips. I made them big enough for two 5mm leads, either some polyester line or dynemma covered bungee.
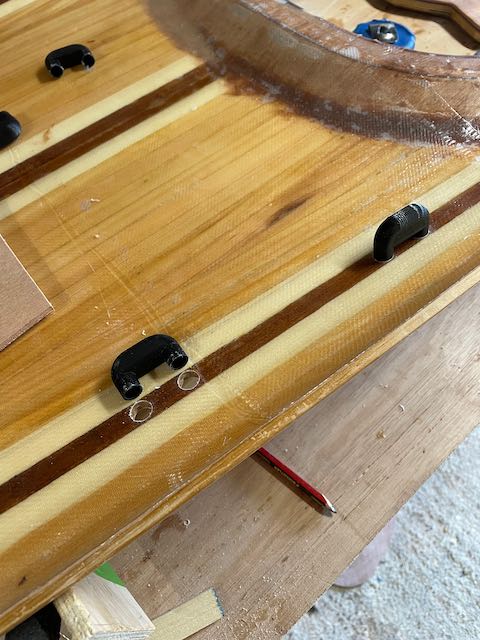
A handy 3d printed guide made sure that the hole spacing was consistent.
Offline
#8 4 Oct 2023 9:46 pm
- sailingfree
- Member
- Registered: 15 Feb 2022
- Posts: 31
Re: Building a Petrel Play
If anyone is interested I’ve uploaded the design files for the Maroske deck fitting to thingiverse.
https://www.thingiverse.com/thing:6249762
Pete
Offline
#9 19 Nov 2023 11:00 pm
- sailingfree
- Member
- Registered: 15 Feb 2022
- Posts: 31
Re: Building a Petrel Play
Well things have really slowed down now, but some progress anyway.
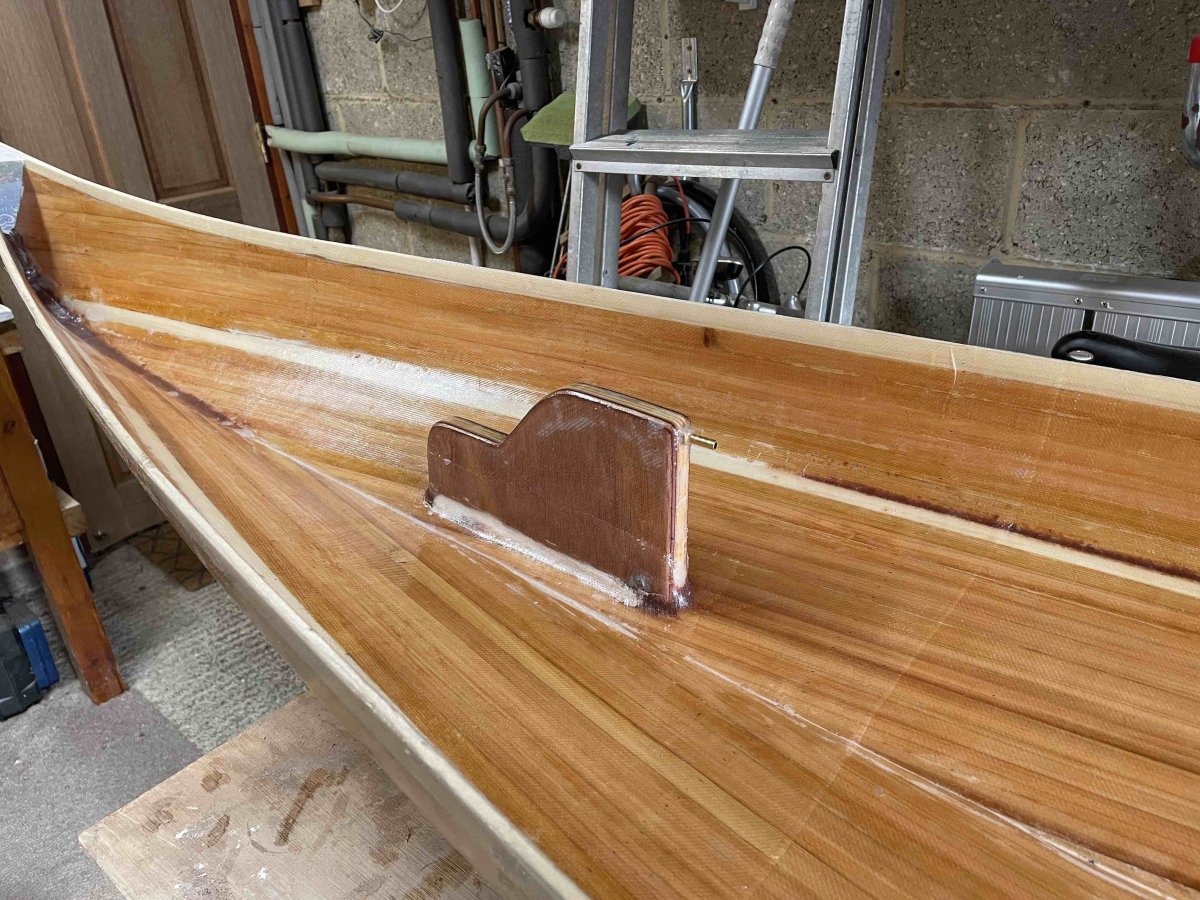
I used the skeg design from Nick Schade which was fairly straightforward to make from playwood for the body and some 4mm okume offcuts I had. Here I'm making sure it is square to the hull.

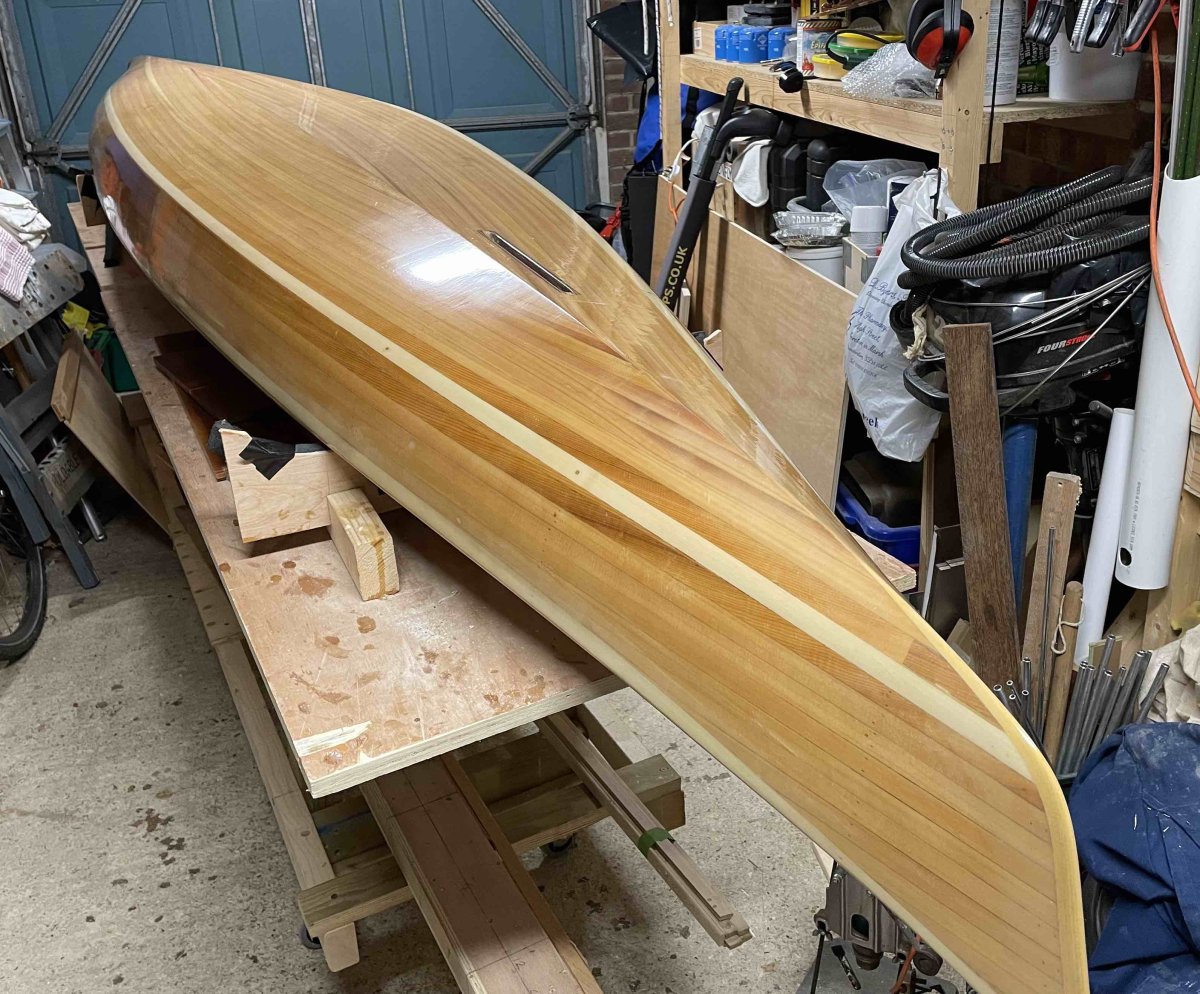
and after filleting and glassing and a final fill coat on the hull interior. I also varnished the inside of the hull and deck for added long term protection.
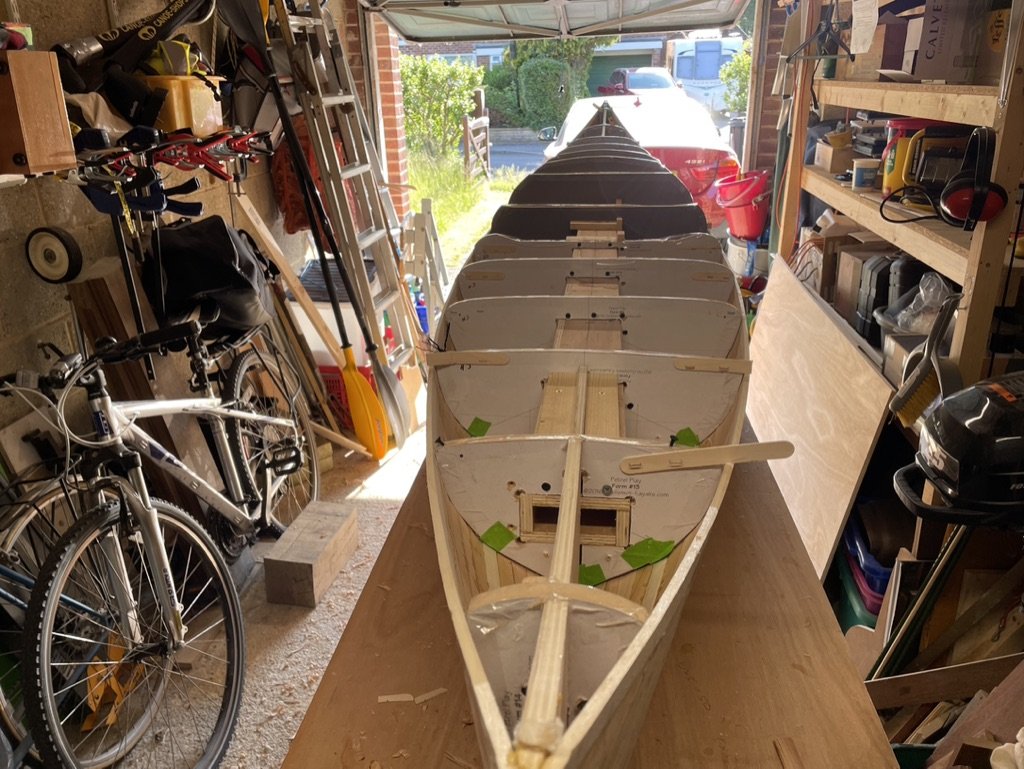
The hull and deck were finally united and here is a picture of the whole thing encased in wrapping tape ready for the internal taping session.
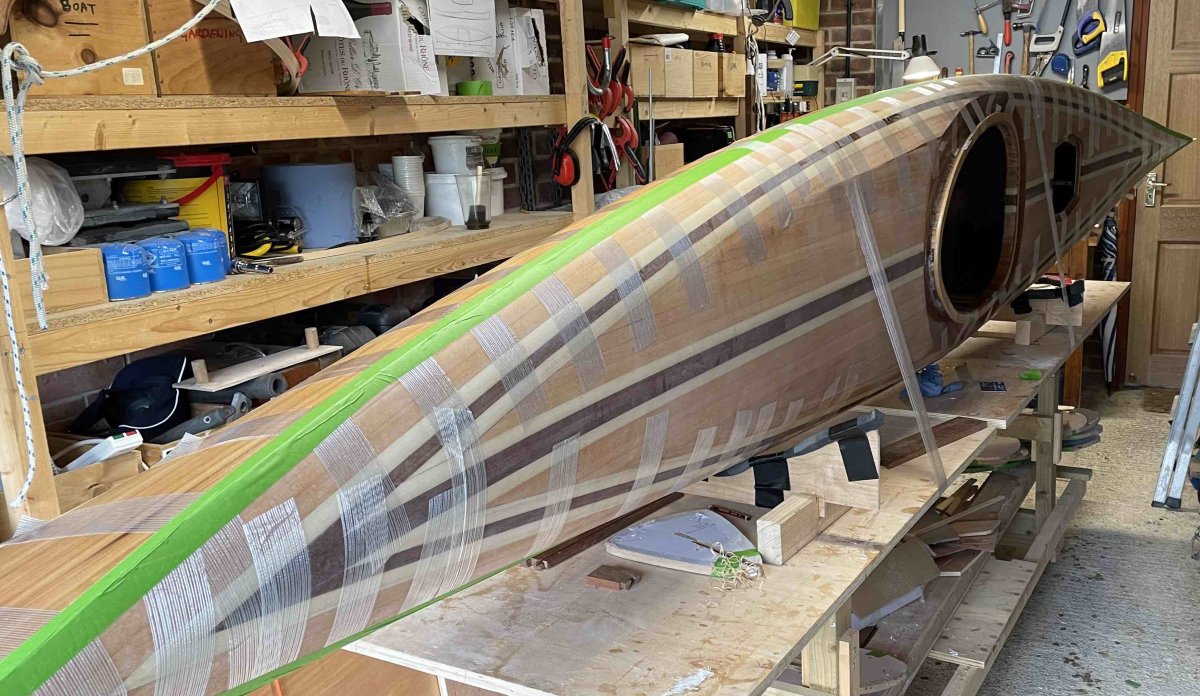
Getting the hull to deck joint tight was a real struggle and even now there are some obvious places where light can be seen at the join from inside, but of course no one is going to see that except me, and as other builders have reported the areas near the ends were hard, especially as it had been a month or so since the hull and deck were glassed and I neglected to put the forms back in the hull when I was storing it in slings in the roof. I ended up sanding a mm or so of the deck edge away at the ends to get a smooth join, but with the outer glass on is completely invisible.
I used some more of the 2mm ash edging for the outer stems and loads of packing tape to hold it while it set. 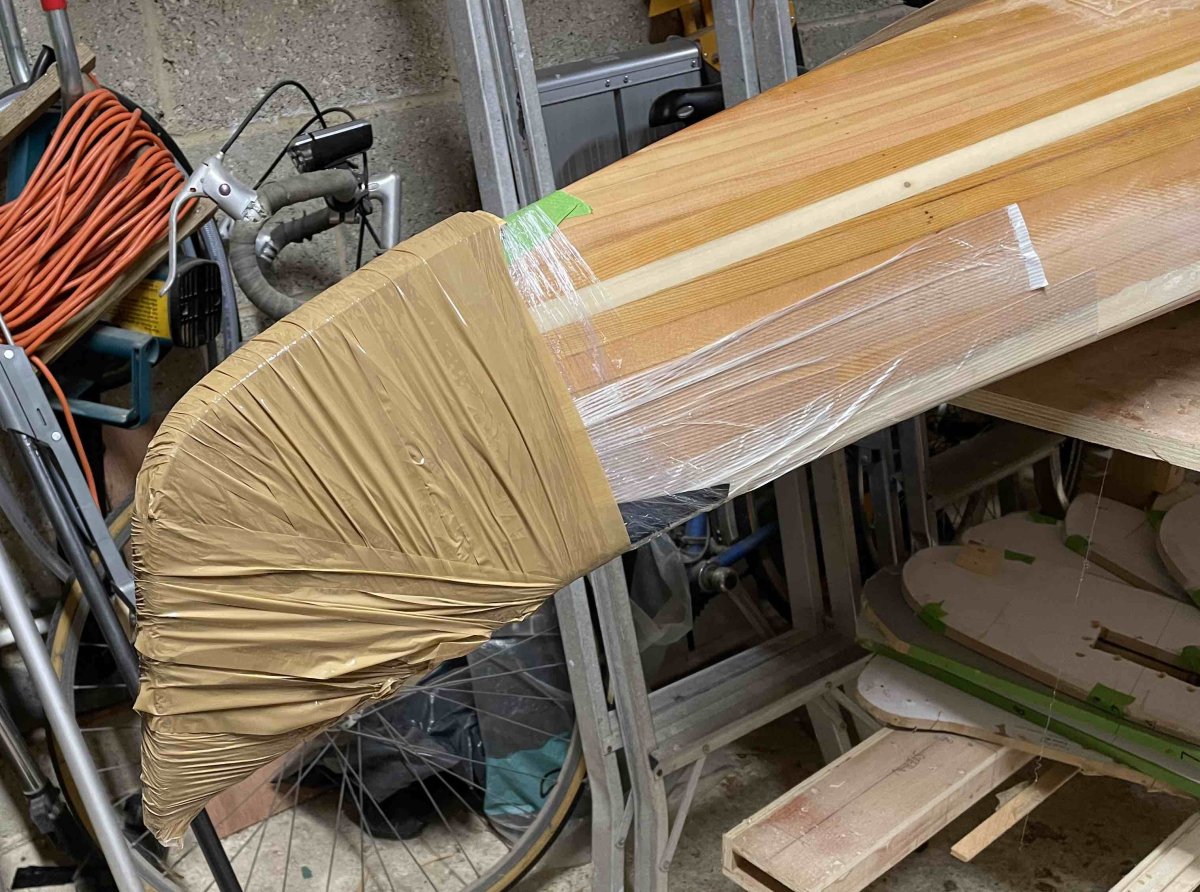
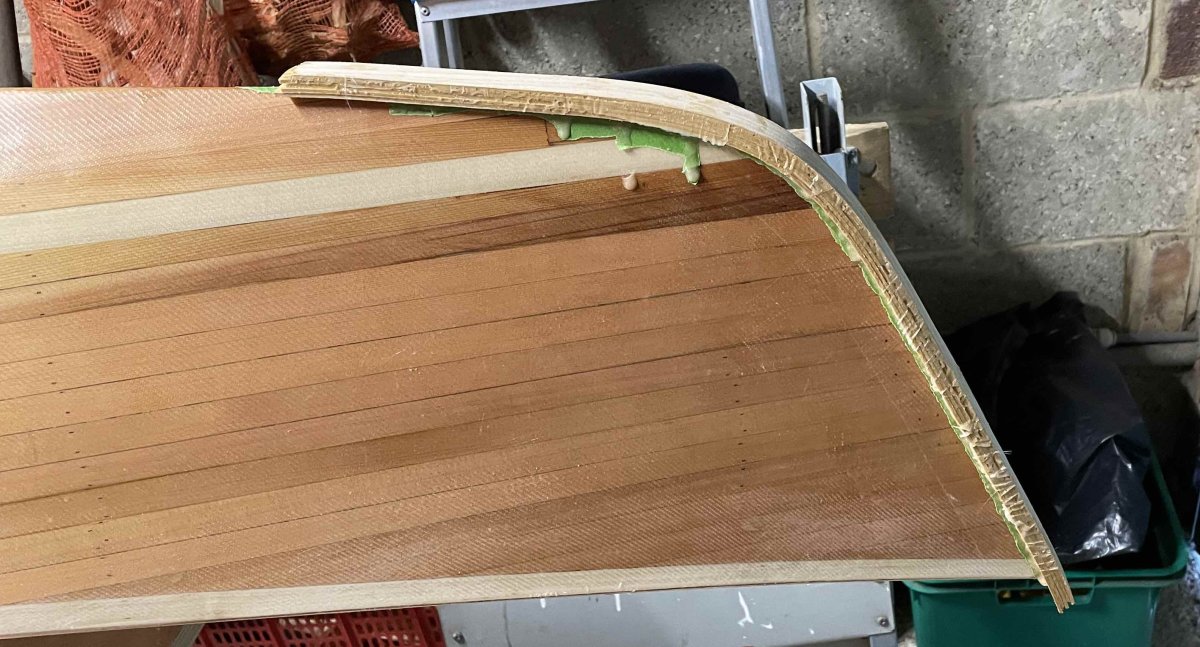
and finally after shaping which I think looks OK.
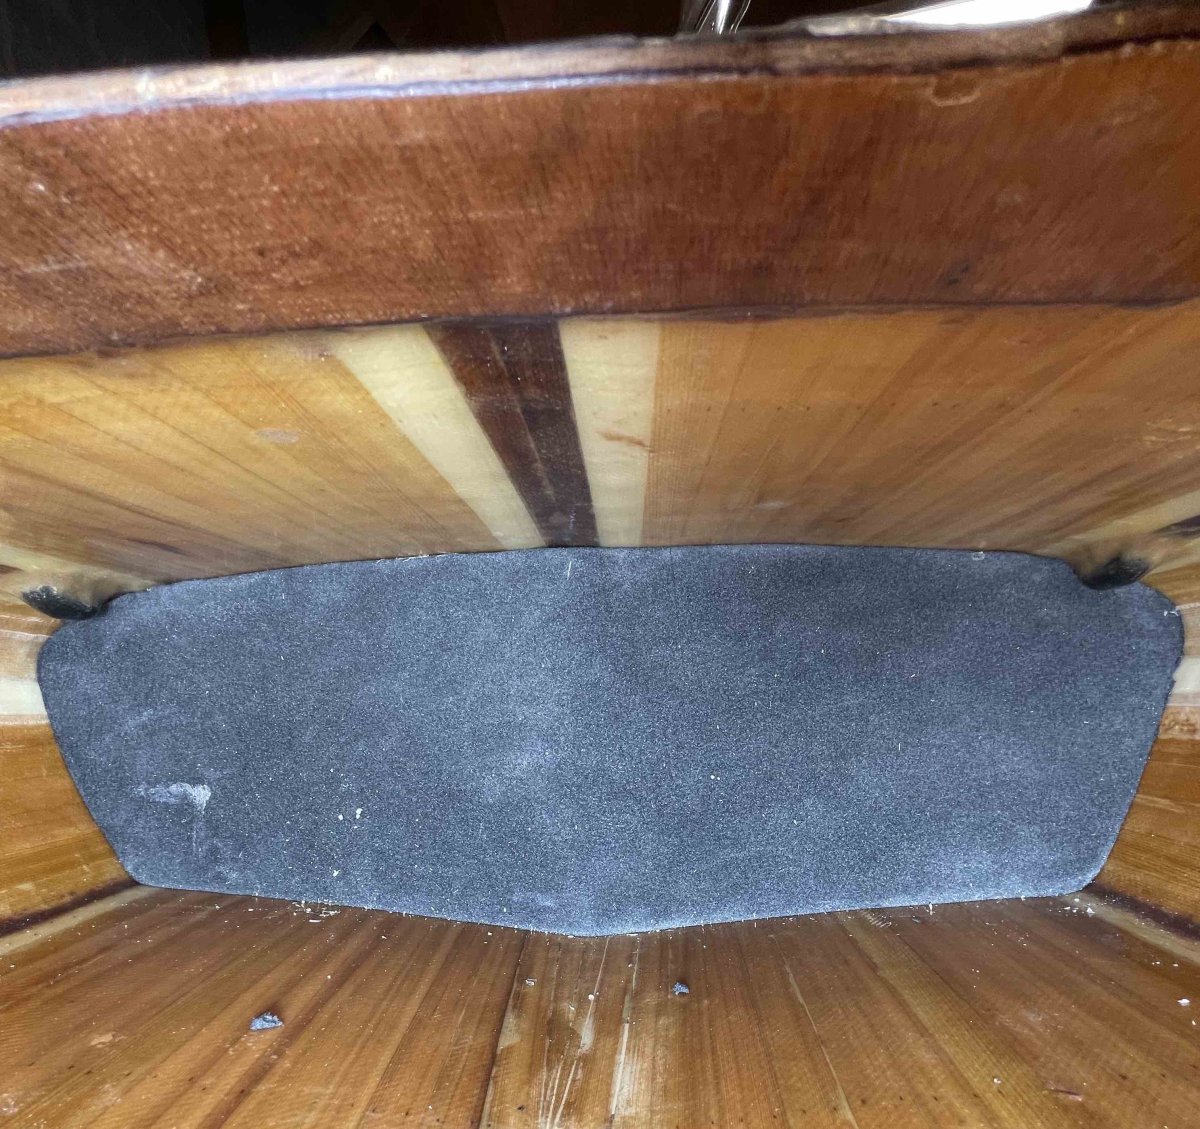
This is the rear bulkhead made from closed cell foam.
I've applied an outer layer of glass over the hull to deck join and am in the process of applying fill coats, sanding and cleaning up the hull and deck now. This is after what I hope is the final fill coat on the hull but before final sanding.
Its getting cold and damp and I've switched to West fast setting epoxy which sets in colder weather but does have a real amine problem which needs a good washing to get a sandable finish.
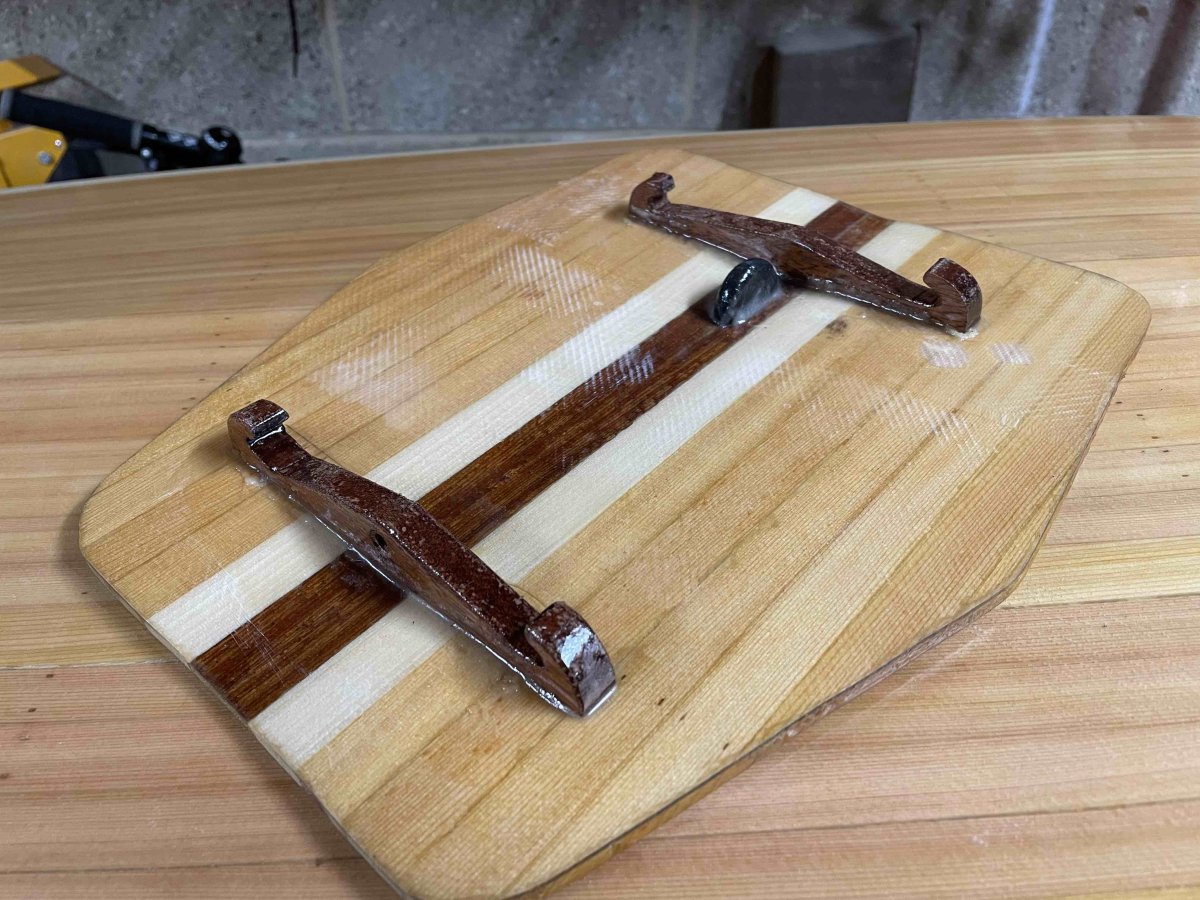
Other little jobs have been making fittings for a bungee deck hatch hold down which I hope is going to work as well as others say it does. I used some mahogony from some old furniture for the hooks on the hatch and the bungee cleats in the hull. Oh and a minature maroske fitting for a small loop to open the hatch.
Offline
Pages: 1