A forum for discussing wooden boats and boat building
You are not logged in.
- Topics: Active | Unanswered
#1 9 Sep 2020 11:10 pm
- Simpsonboater
- Member
- Registered: 26 Jun 2020
- Posts: 29
CLC Annapolis Wherry Tandem "Libelle"
So some background to begin with...
I was after a project which would engage me fully to stop me from bringing work home and relive some stress. My partner is a rower and coach so a boat build seemed like the perfect idea. We went for the tandem as it offered two seats plus space for the family and would be cartable up to the canal about 100 metres from where we live.
This is my first boat and my first experience using fibreglass and epoxy resin. I would call myself a competent DIYer but on nothing remotely like this.
The build started with a couple of hiccups, several sections were damaged in transit - broken joints which Fyne rapidly replaced.
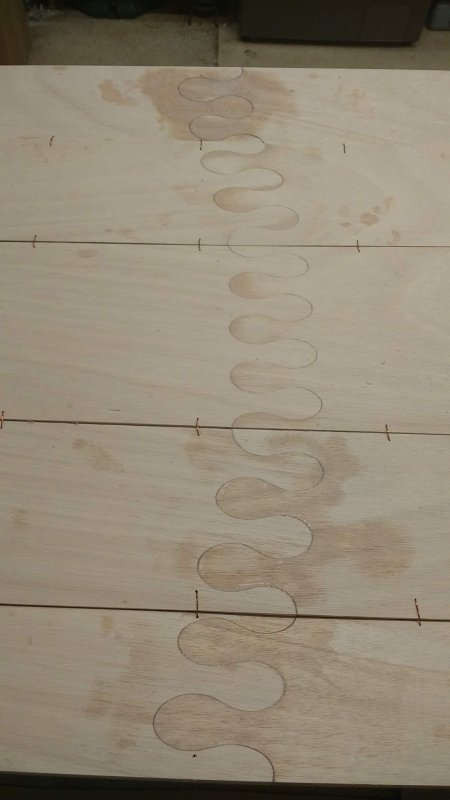
I started with gluing the bulkheads as they are easily manageable pieces and could be set aside while the panels were jointed. I did over-tighten the clamps which left a mark in the wood- first error. Moving on to to the panels, I used some concrete blocks to weigh down the joints which worked well.
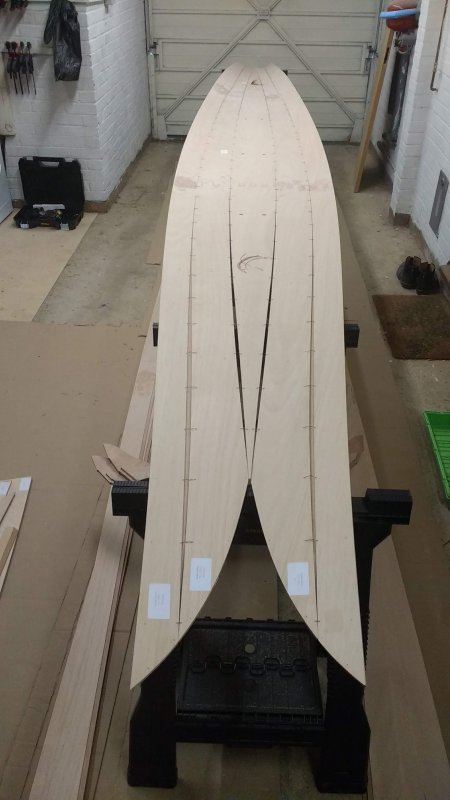
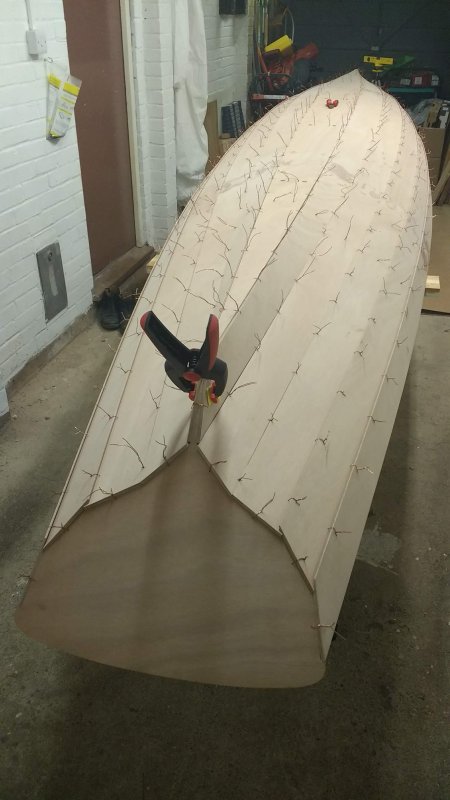
Stitching up the panels and inserting the bulkheads was straightforward, not enough wire though, probably down to me miss-cutting the rolls. I stripped some old mains lighting cable for the rest.

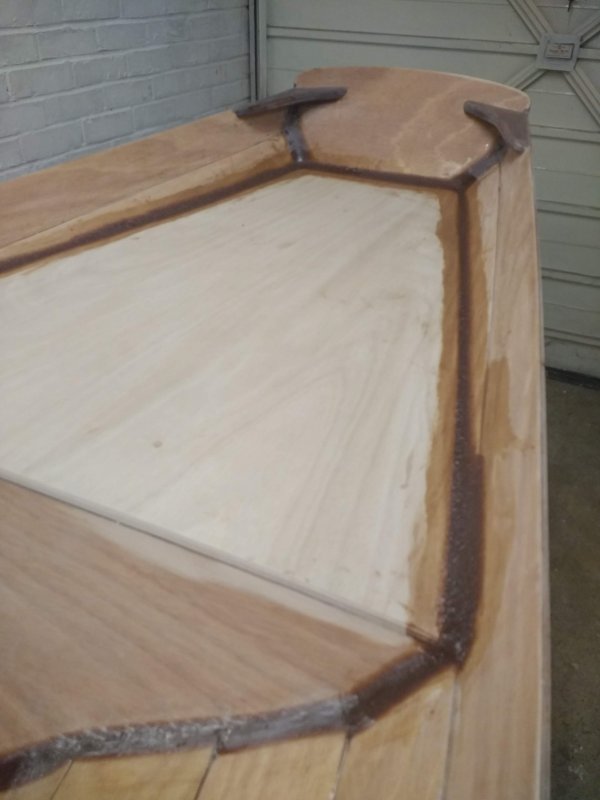
The real fun started with the fillets. I'm not sure I've ever got these right but the consistency was as described but oh my, what to do when they go off!? I spent ages sanding them smooth and as a result, put a lot of deep sanding scratches in the boat. If only i'd known then that I could have added an unthickened coat over the top it would smooth them out. Something I didn't find until I got to glassing and coating the inner hull.
The full length fillet which softens the curve for the fibreglass inside took a couple of passes, using a silicone grout tool gave better results and left less work for sanding.
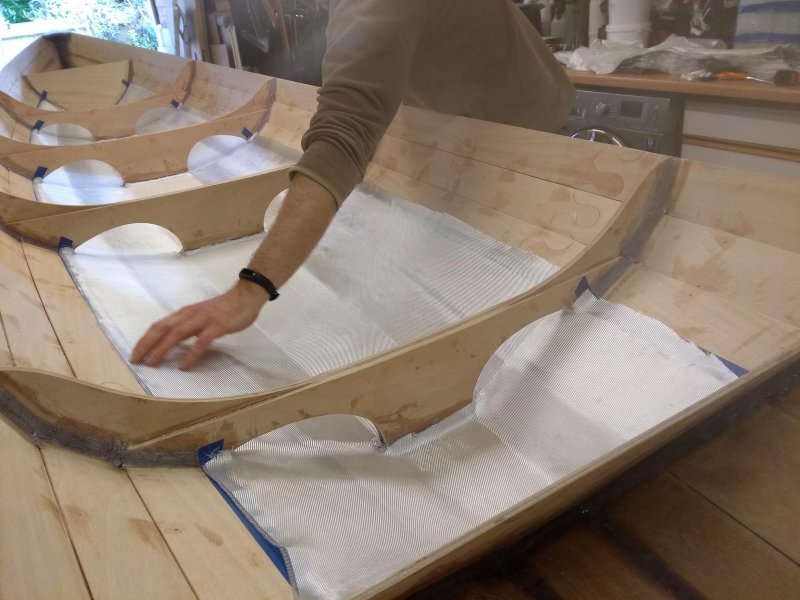
Then I got on to fibre-glassing the inner hull. I wasn't looking forward to this one bit and so decided to start with the stern compartment rather than tackle the whole thing in one go. I had cut the fibreglass fine but (following the instructions) mixed waaaay too much epoxy and it all became a big mess. I cleaned it up and started again the next day using about a fifth of the epoxy. This went much better and looked great, I was confident enough to move on to the bow compartment and left the main section over winter until warmer weather and I had enough time.

I finally got to fibreglassing the main inner hull in April this year, it wasn't 100% perfect, a few tiny bubbles where the wood had gassed, I know where the errors are and they haven't affected the boat. It was obvious following the initial error in the stern compartment that there is a lot of mileage in putting down a seal coat of epoxy before laying the fibreglass as this looked much better. It stops the wood soaking up the epoxy from the fabric and prevents the wood out-gassing. There may be a loss in chemical bond strength over mechanical strength though. Others I'm sure will have an opinion on this.

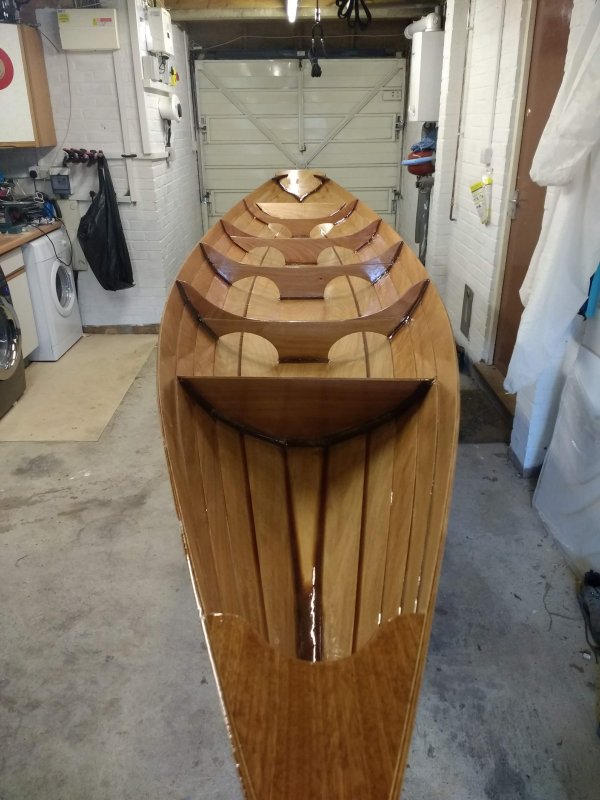
Knees and breasthook went in without any drama. Held with silicon bronze screws after being shaped with the router.

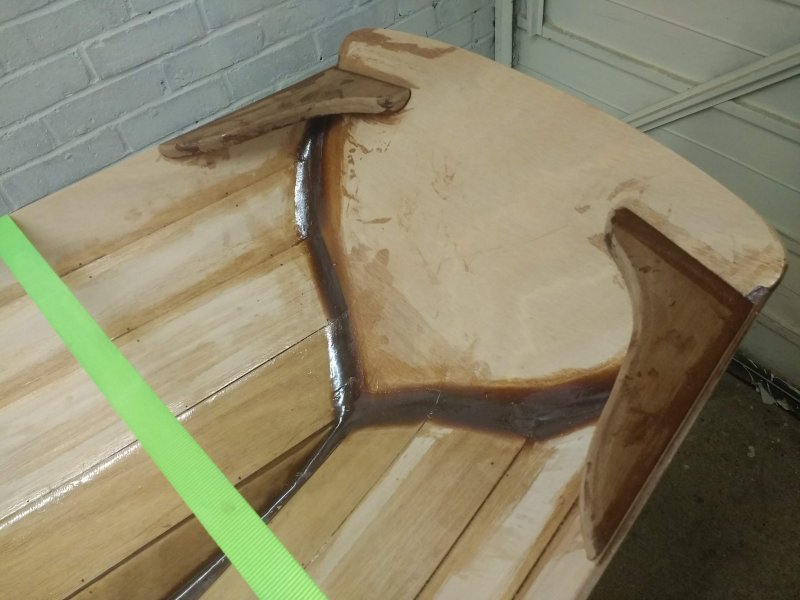
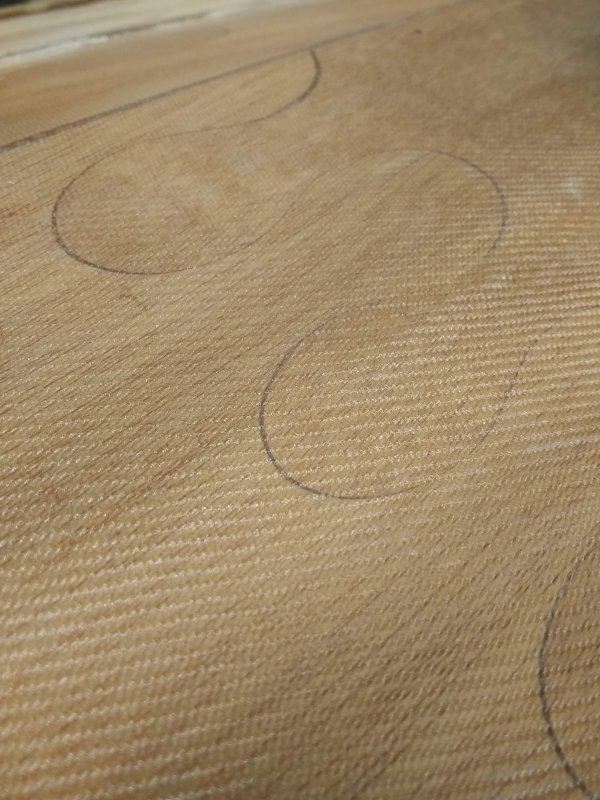
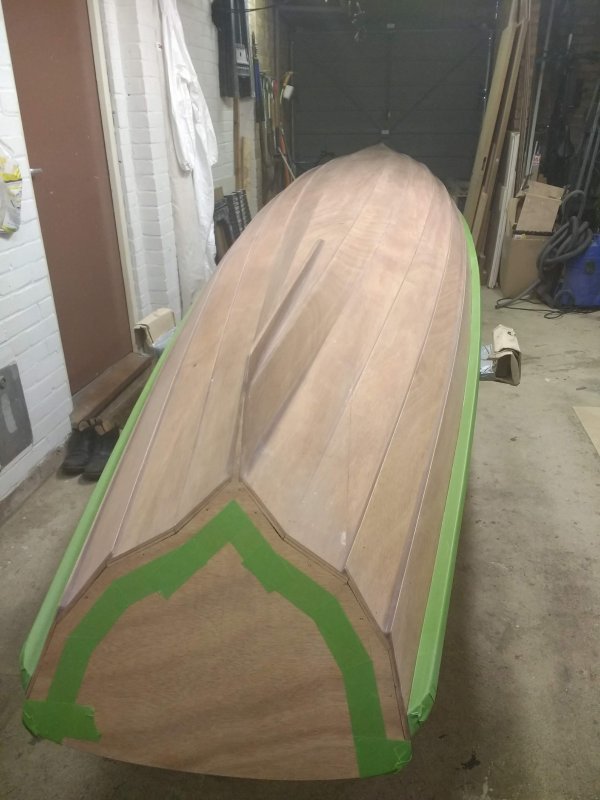
I then flipped the hull and fillted and shaped around the bow, transom and filled the lapstrakes. I found some rubber sanding moulds on ebay which were great for sanding curves but it did take a while to get the hull smooth. Then I ran out of sandpaper and the only stuff I could get (due to Covid lockdown) was Mirka Abranet, expensive but a revelation. What took days before with paper backed paper (16 hours on one pass) was now taking only a couple of hours. Highly Recommended! especially with dust collection.
I then did the bottom glassing (couple of big bubbles this time, an inch or so, which I carefully cut out and patched). Filled the weave and fared in at the bow and stern

Back to the interior and tank tops. It doesn't say it in the instructions but I'd recommend carefully sanding to finish, choosing the best side and adding a coat of epoxy both sides before applying them to the hull, that way you won't find yourself under the upturned hull reaching into the compartment hatch to coat the underside of the tank top (like me).

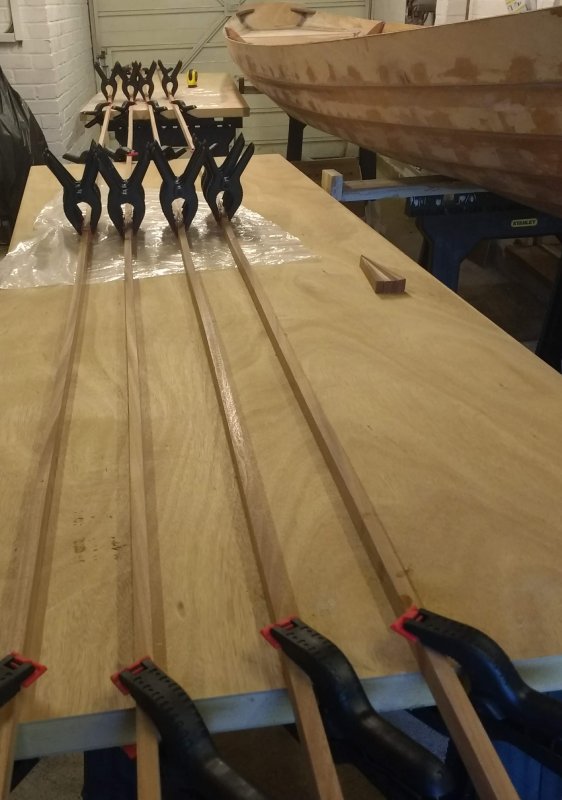
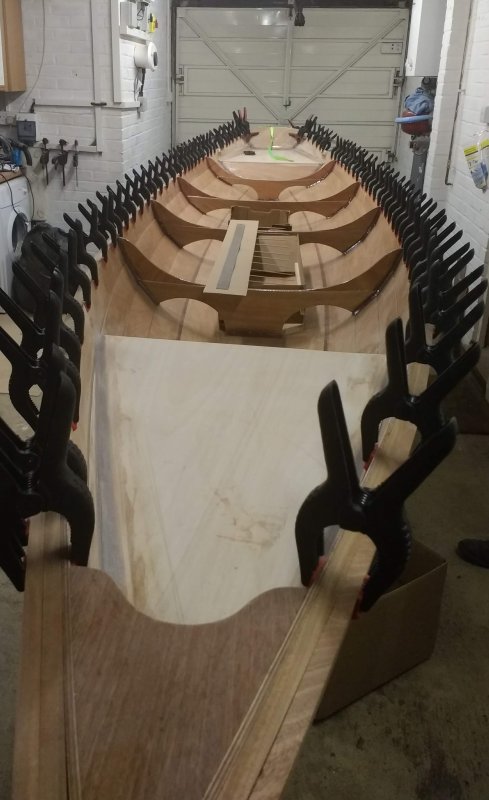
With the rails, I think I could have done a better job in matching the strips up but they look ok, no real dramas getting them on as I had about 80 spring clamps waiting!
After shaping the rails I applied a further couple of coats of epoxy to the interior.
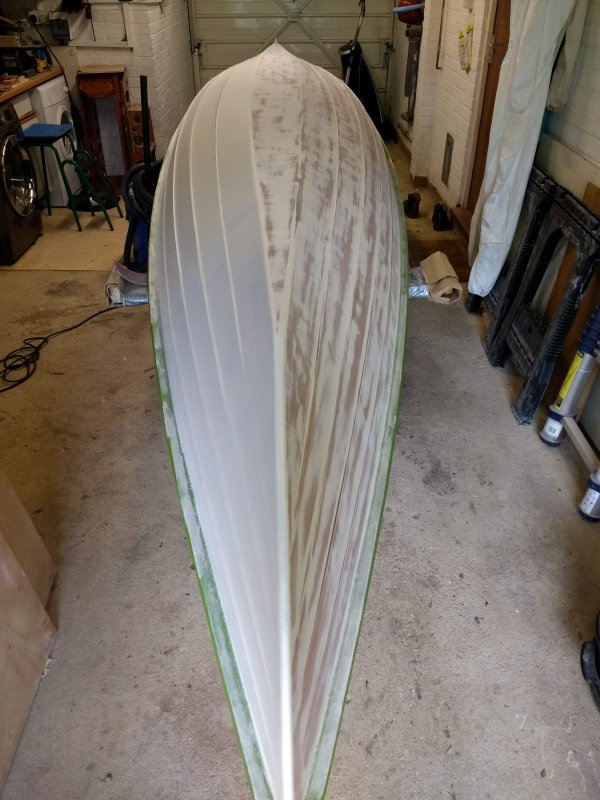
Back to the bottom again, final couple of epoxy coats then three coats of International Pre-kote and three of Toplac Mediterranean white. A 750ml tin of each is just enough if you thin it as prescribed. I really hated applying this, didn't feel like it was going on as I'd like but that's probably poor technique, finish is ok if you don't get too close.

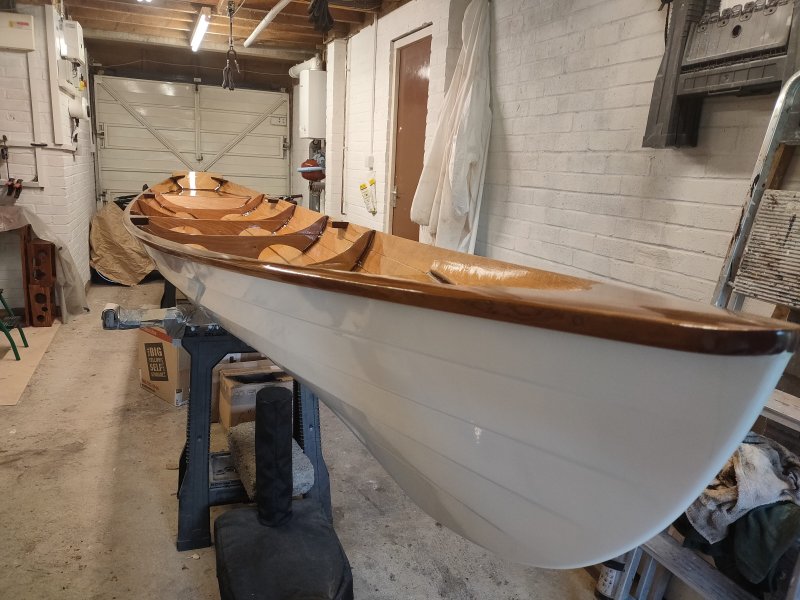
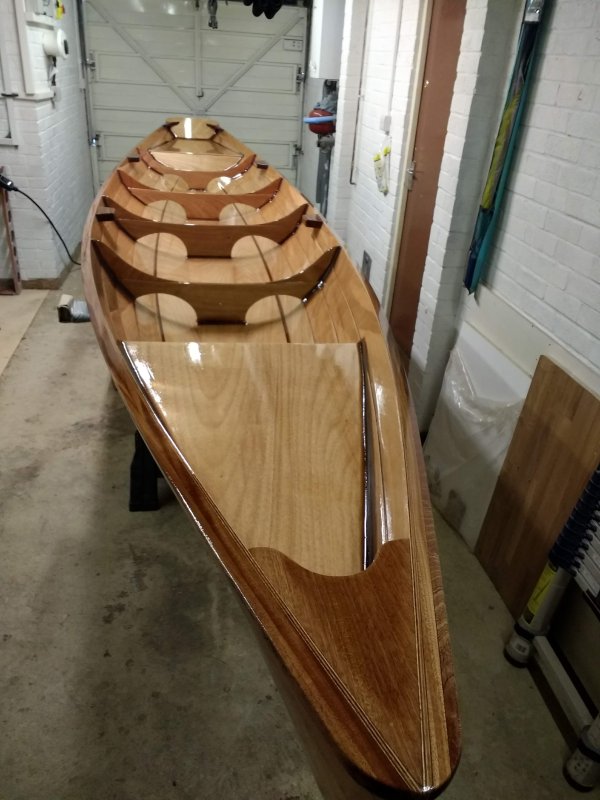
I've finished the transom, rails and interior in International Compass varnish, which has given the wood a nice warmth, you'll need the 2.5ltr tin of that.
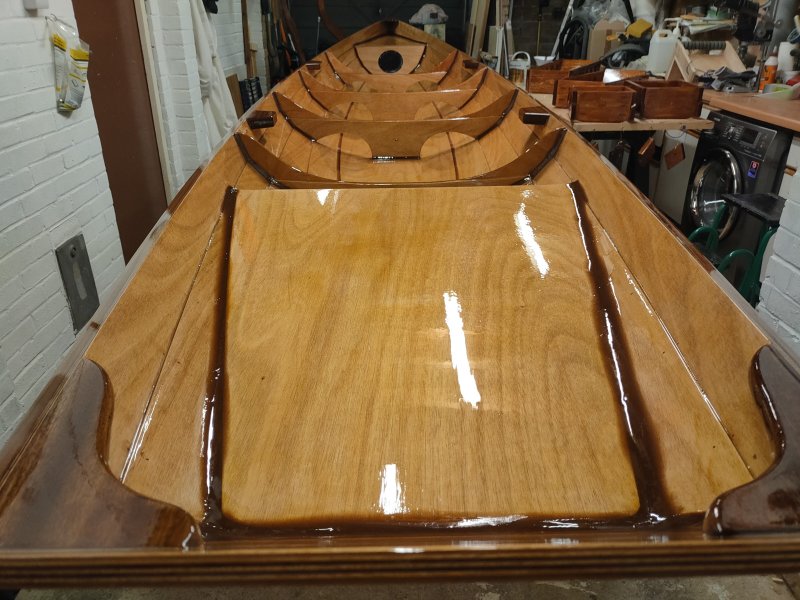
Comparison of the epoxy finish and varnished finish under the same light:

I then completed the sliding seats, I won't go into that here, contact Colin Angus at Angus Rowboats if you want to include that option. It adds quite a bit of time to the build as they have to be shaped to fit your boat, then there is the dying, epoxy coating and lots of geometry and fitting out. Though they are cheaper and lighter than the drop in units.
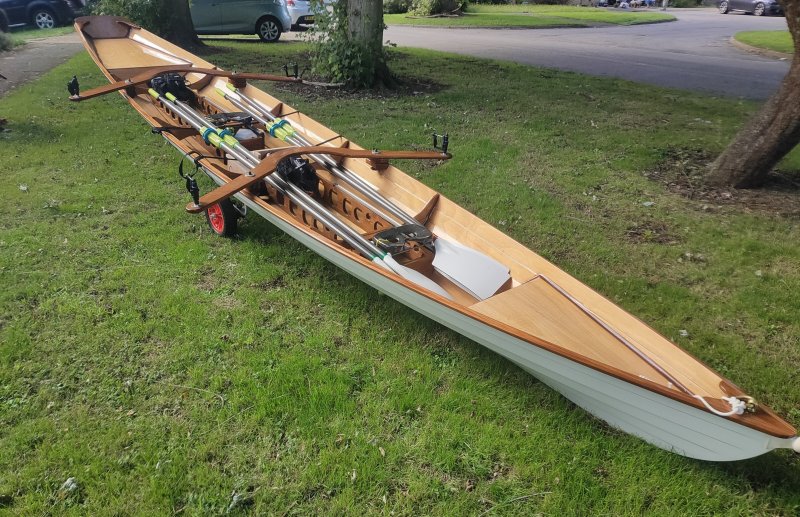
The boat rows well, we have tried it out once on the canal (now back inside for more coats of varnish) will be great when we get it dialled in but that will have to wait until we welcome the new crew member next month!
Libelle - (German) Dragonfly.
Last edited by Simpsonboater (10 Sep 2020 12:00 am)
Offline
#2 11 Sep 2020 10:31 am
- Bergen_Guy
- Member
- Registered: 6 Feb 2020
- Posts: 353
Re: CLC Annapolis Wherry Tandem "Libelle"
Stunning - what a beautiful build! Well done indeed. I hope you get lots of fun from it out on the water.
Offline
#3 1 Oct 2020 4:51 pm
- Simpsonboater
- Member
- Registered: 26 Jun 2020
- Posts: 29
Re: CLC Annapolis Wherry Tandem "Libelle"
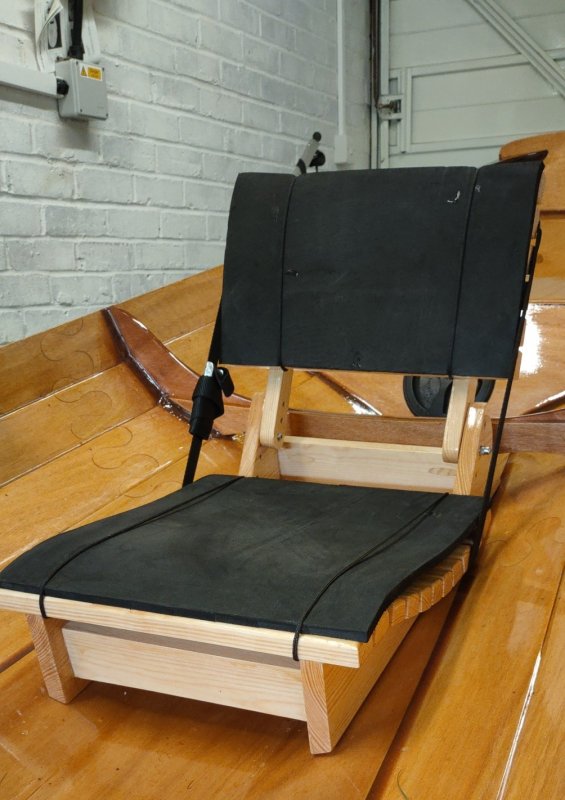
I've also added a passenger seat to swap with the stern rowing position.
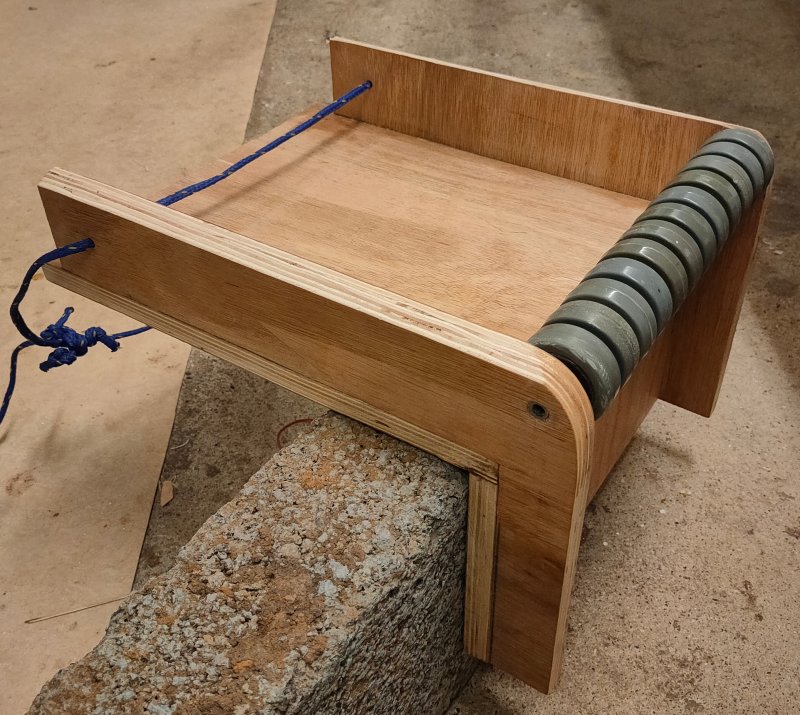
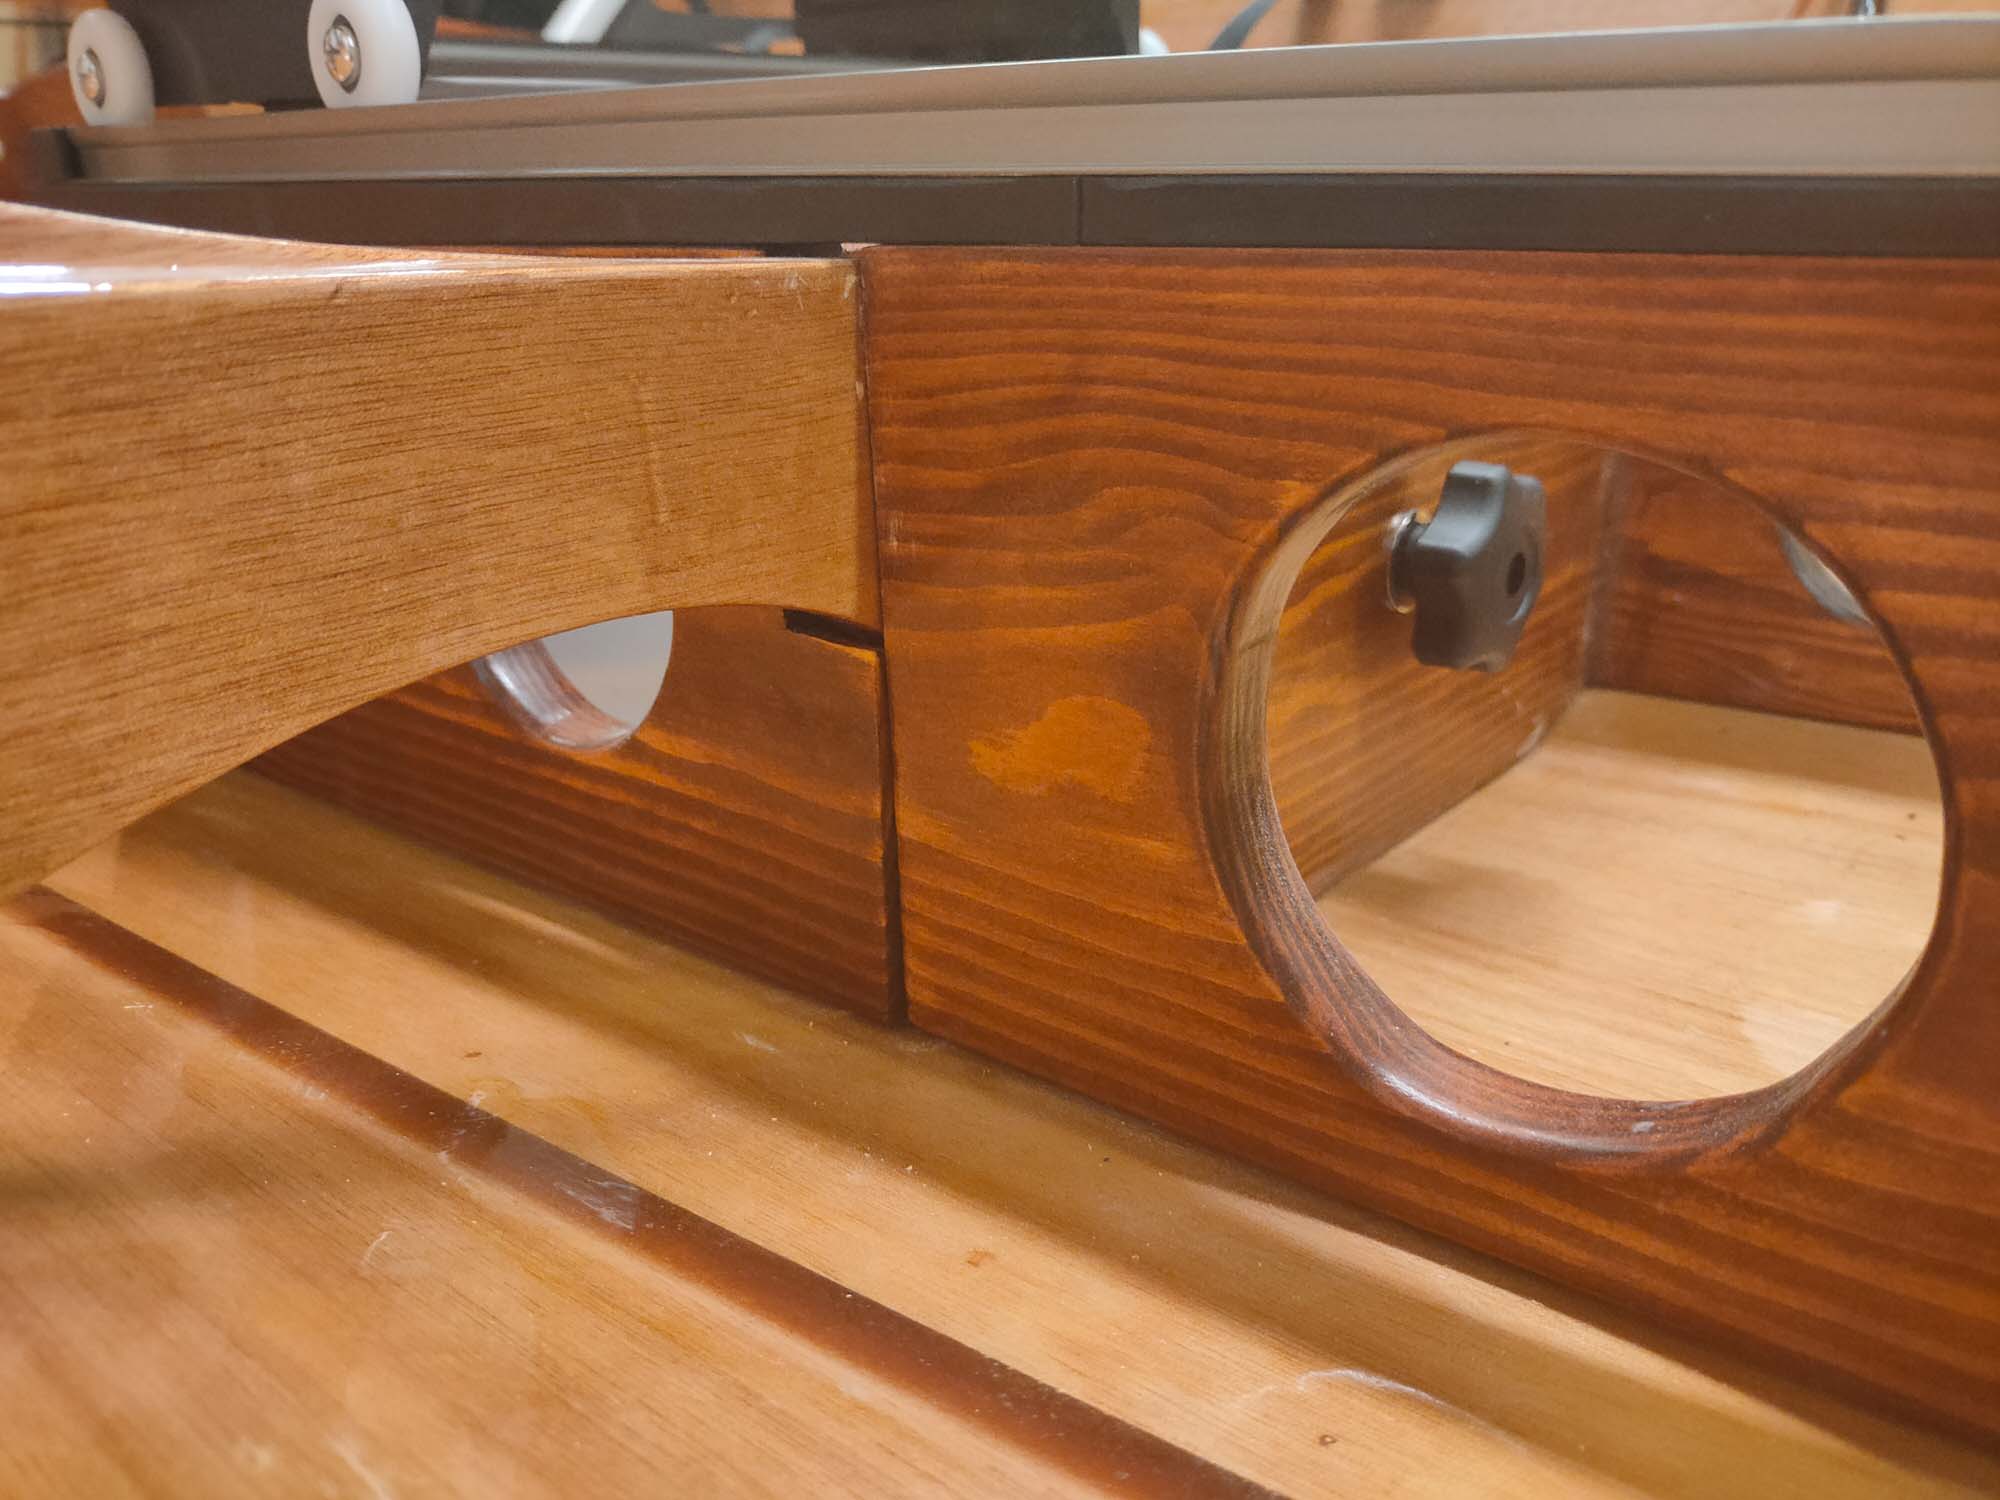
In order to to launch off the canal bank, I've made a wooden frame with rollers which hooks on the concrete bankside and which doubles as a second seat for smaller family members.
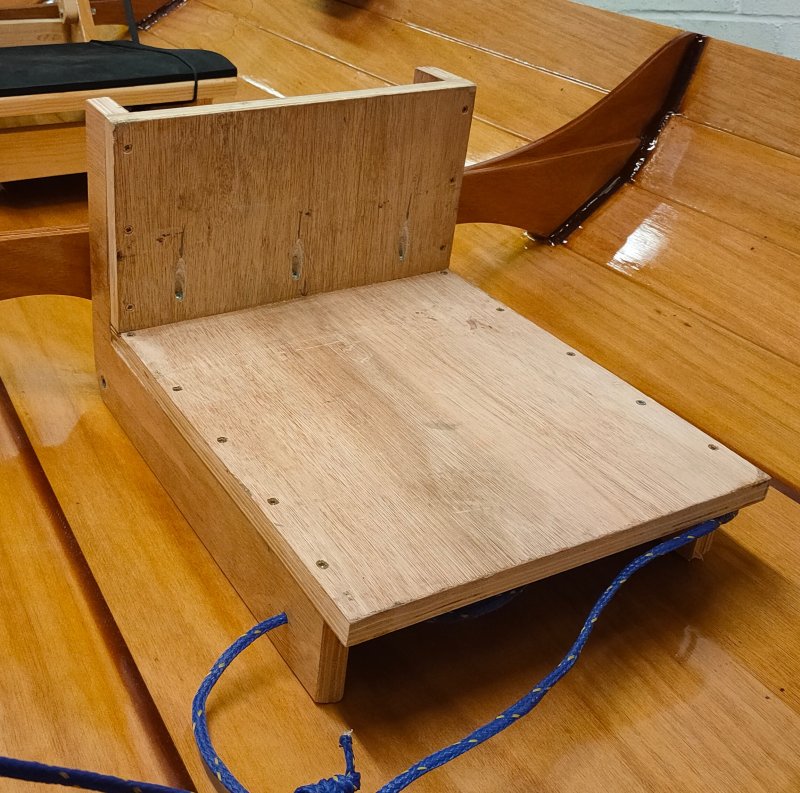
The boat runs very nicely loaded even without the second rower working or sitting the boat.
Last edited by Simpsonboater (2 Oct 2020 2:37 pm)
Offline
#4 2 Oct 2020 6:39 pm
- Johannes
- Member
- Registered: 18 Feb 2020
- Posts: 3
Re: CLC Annapolis Wherry Tandem "Libelle"
That roller device is a genius idea, thank you for sharing! I have similar infrastructure where I'd like to launch, and might borrow that idea ![]()
Also congrats on that very nice boat!
Offline
#5 2 Oct 2020 7:36 pm
- Simpsonboater
- Member
- Registered: 26 Jun 2020
- Posts: 29
Re: CLC Annapolis Wherry Tandem "Libelle"
Thanks Johannes,
I saw something like this for dock launching but it was fixed in place and I don't think I'd get away with drilling into the bridge support ?.
The rollers are just some castor wheels I had spare on a 10mm stainless tube with washer separators. It's a bit of a work in progress and could do with some extra lateral support to help the boat stay straight as it goes in but it does the job.
Offline
#6 25 May 2021 7:02 pm
- charboatman2010
- Member
- Registered: 20 May 2021
- Posts: 9
Re: CLC Annapolis Wherry Tandem "Libelle"
thanks for the build log, we are just finshing our tandem wherry and are struggling to work out how to fit the sliding seat frames around the bulk heads.
would you have any more pictures of how you fitted the frames around the bulk heads please?
Also whats best to transport the boat, we've been looking at a modified jet ski trailer which will give us about a metre overhang at the back?
thankyou
Offline
#7 25 May 2021 8:43 pm
- Simpsonboater
- Member
- Registered: 26 Jun 2020
- Posts: 29
Re: CLC Annapolis Wherry Tandem "Libelle"
Hi Charboatman,
We don't have a road trailer, just a dolly.
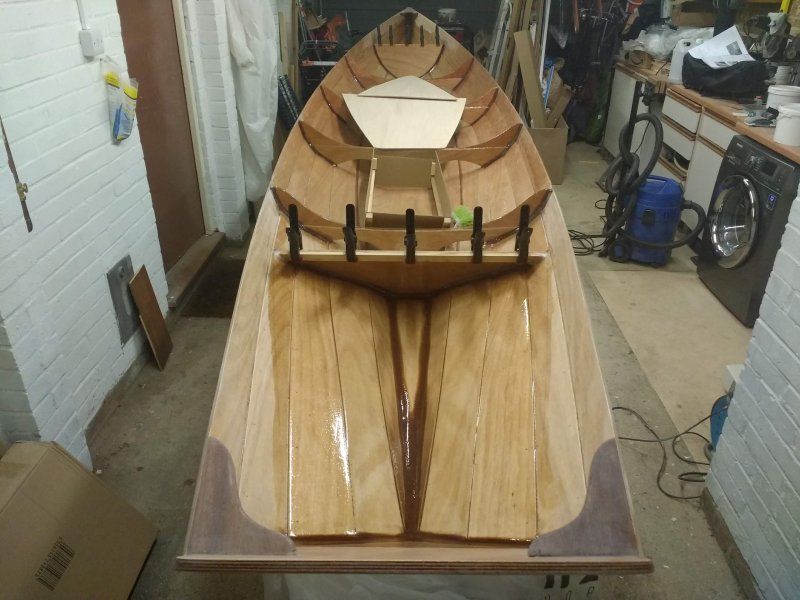
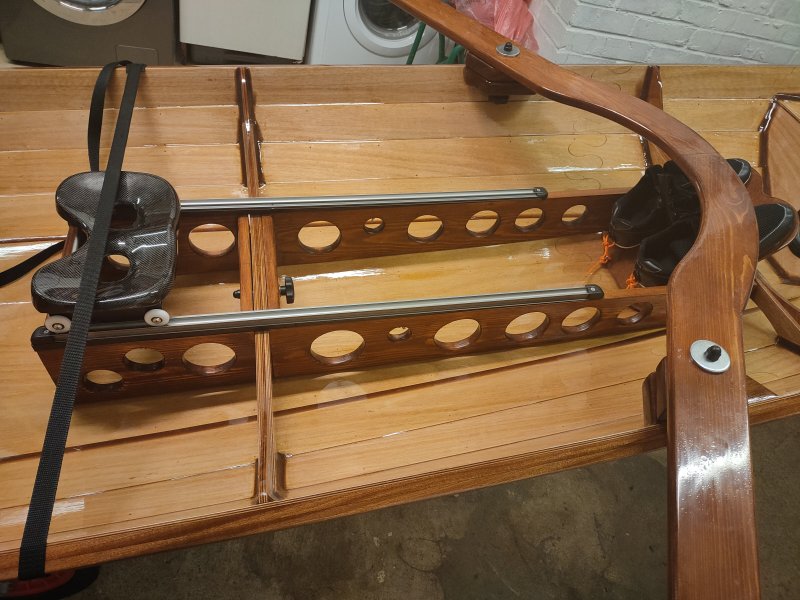
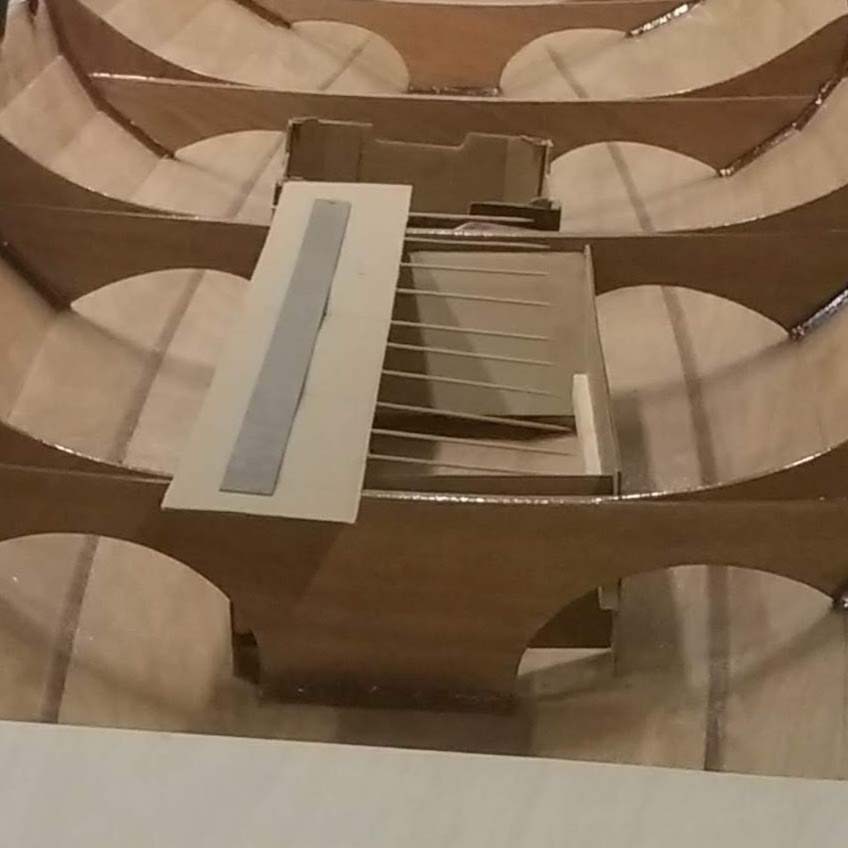
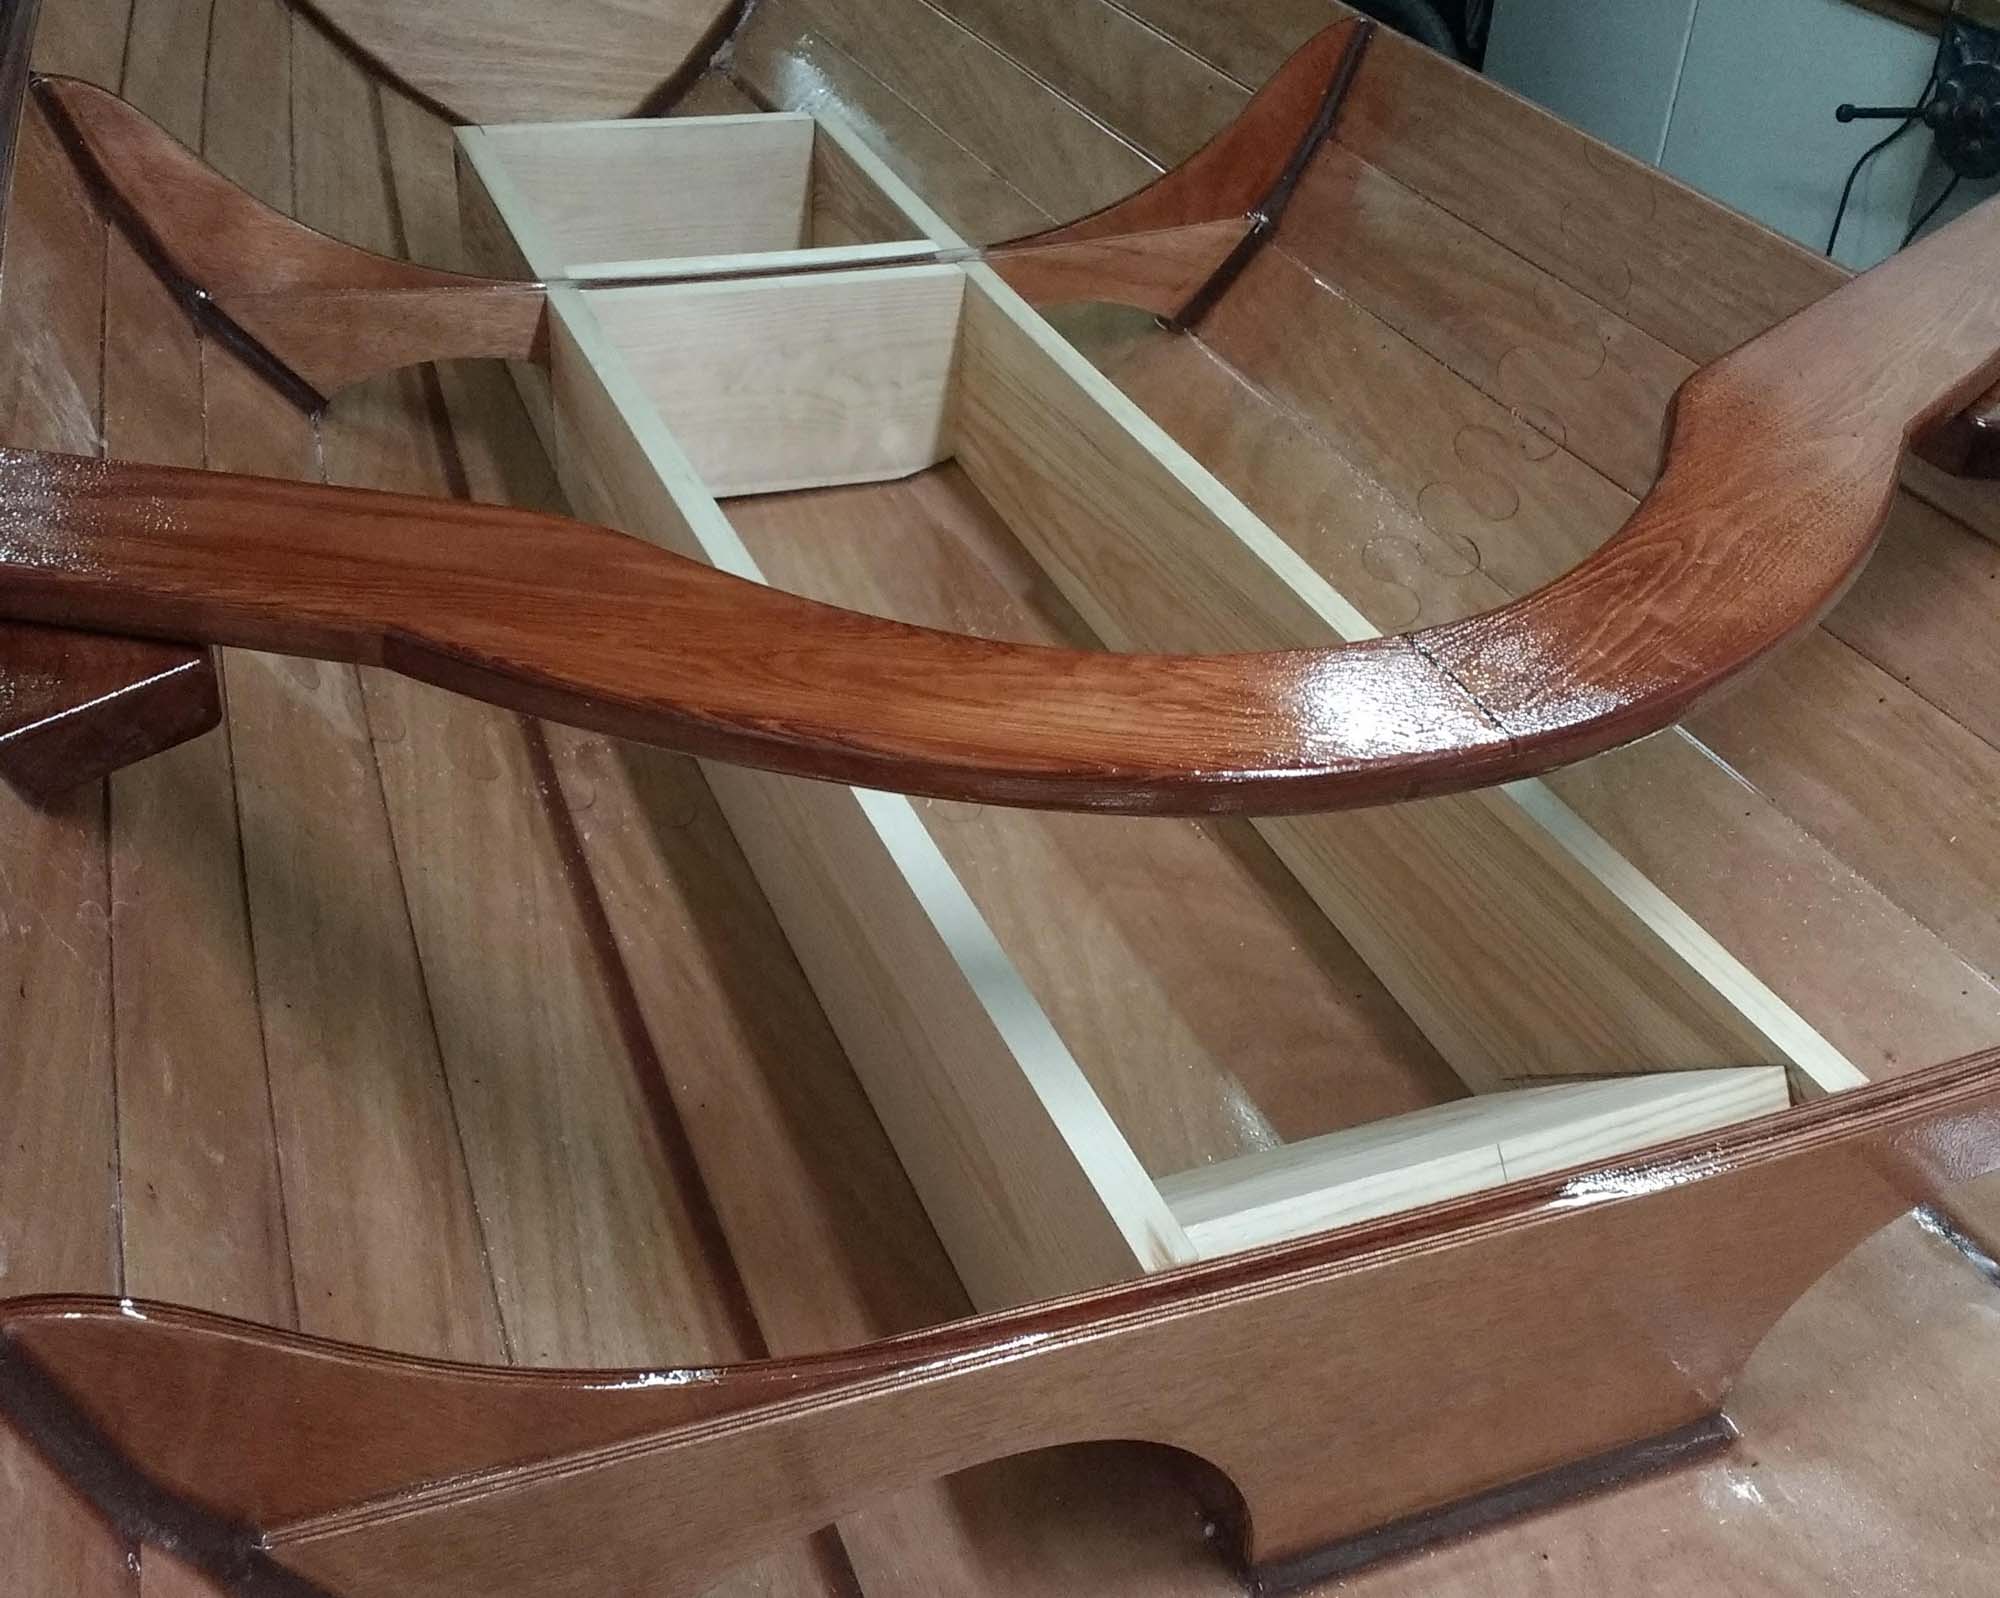
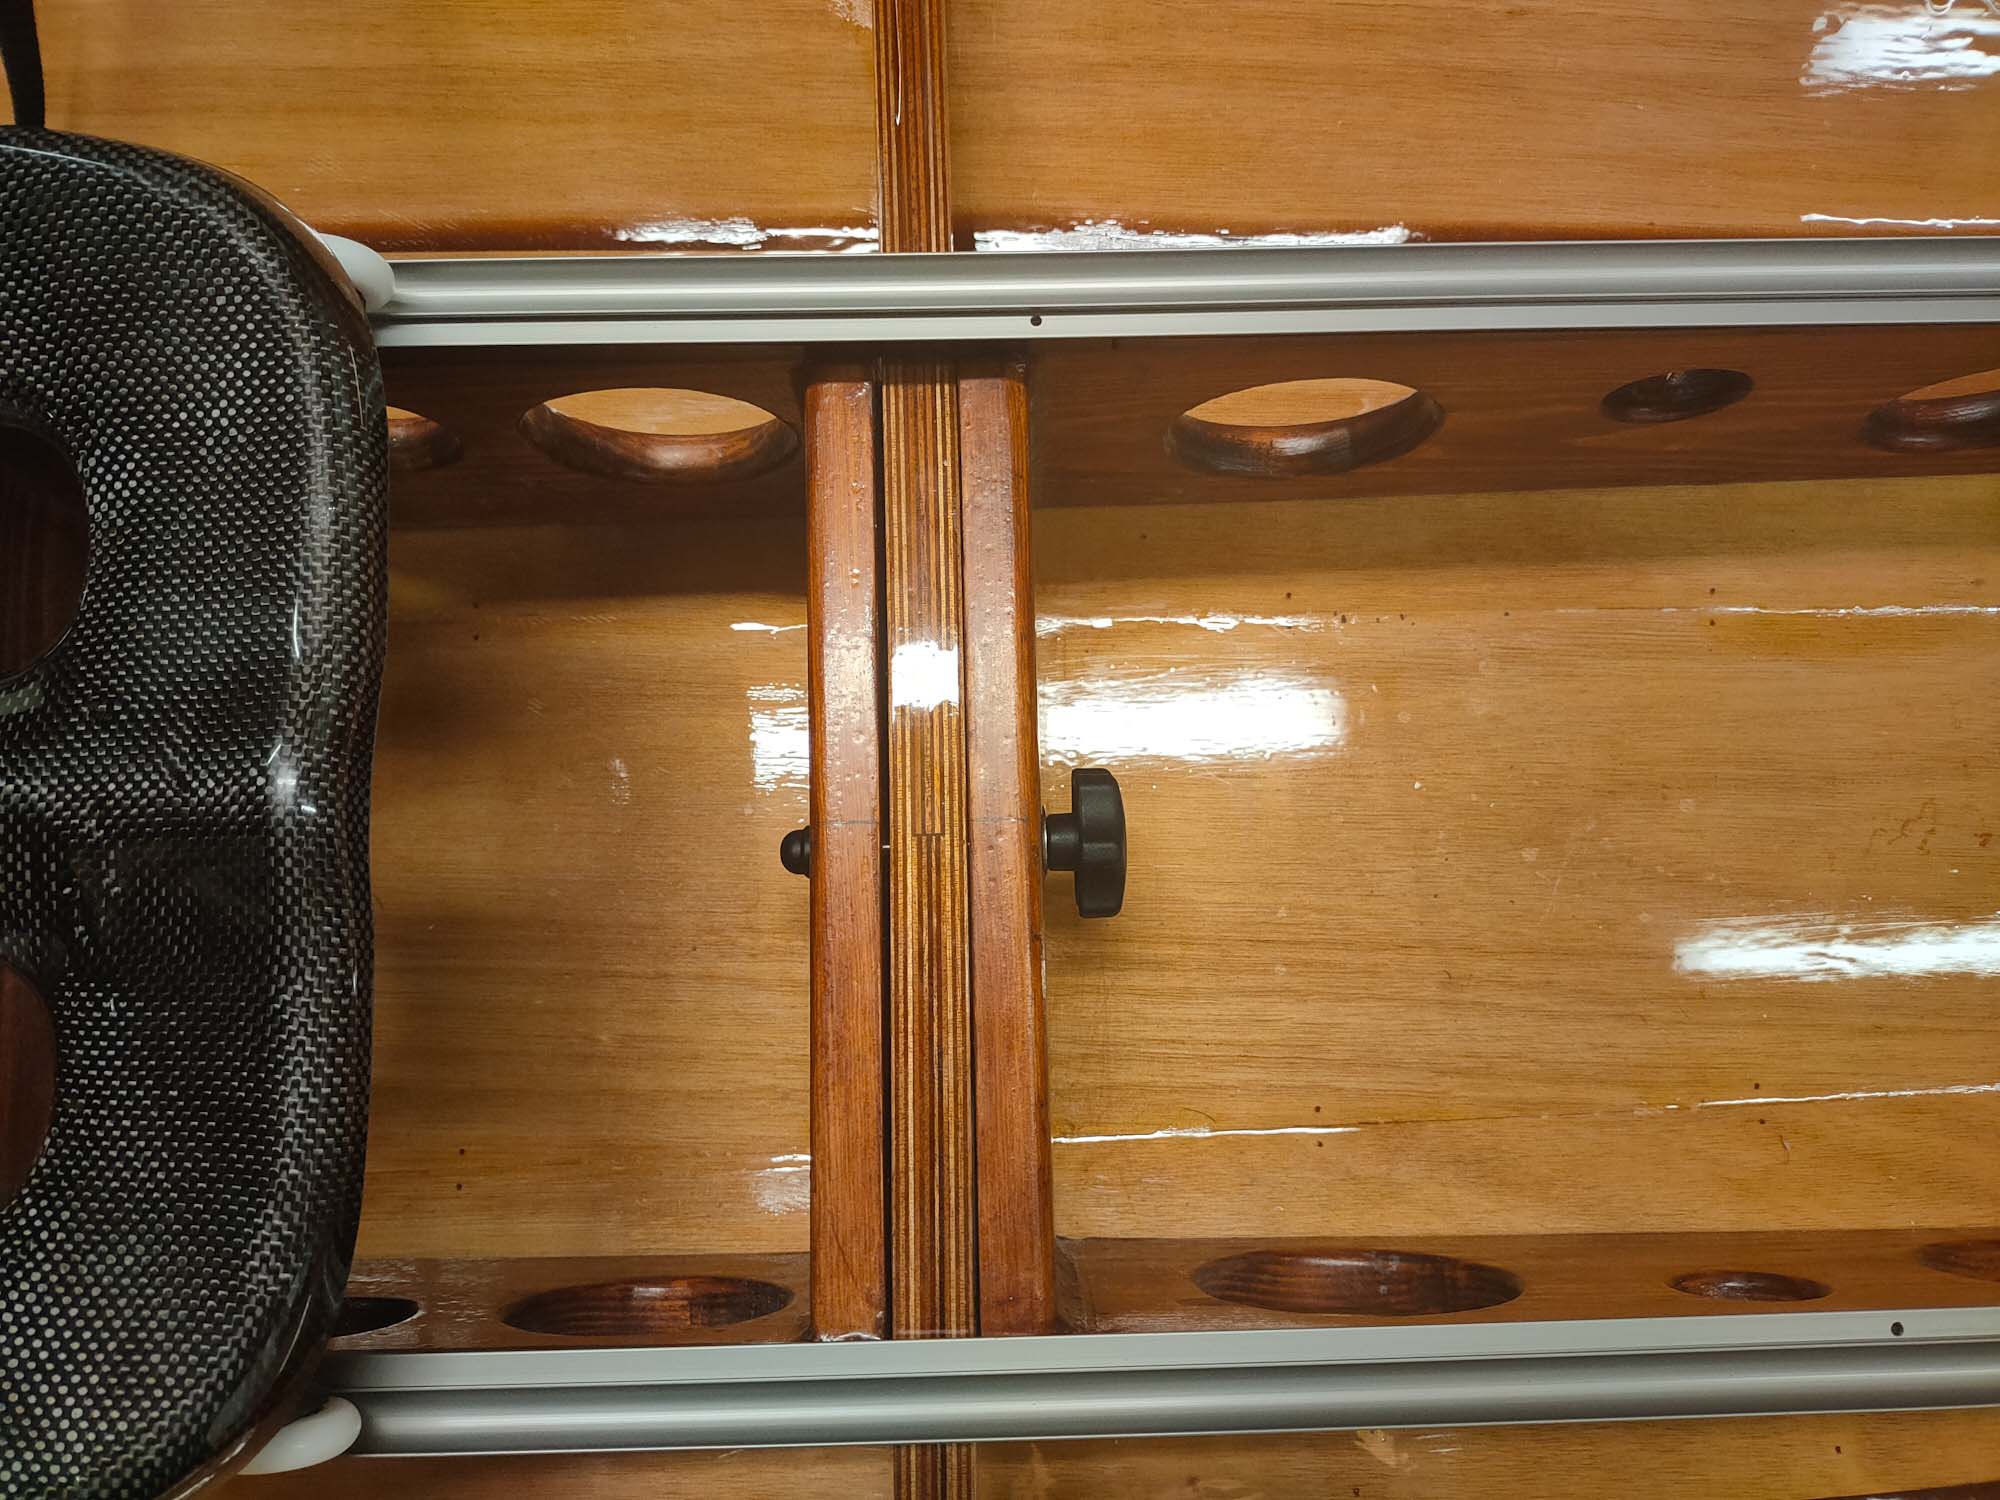
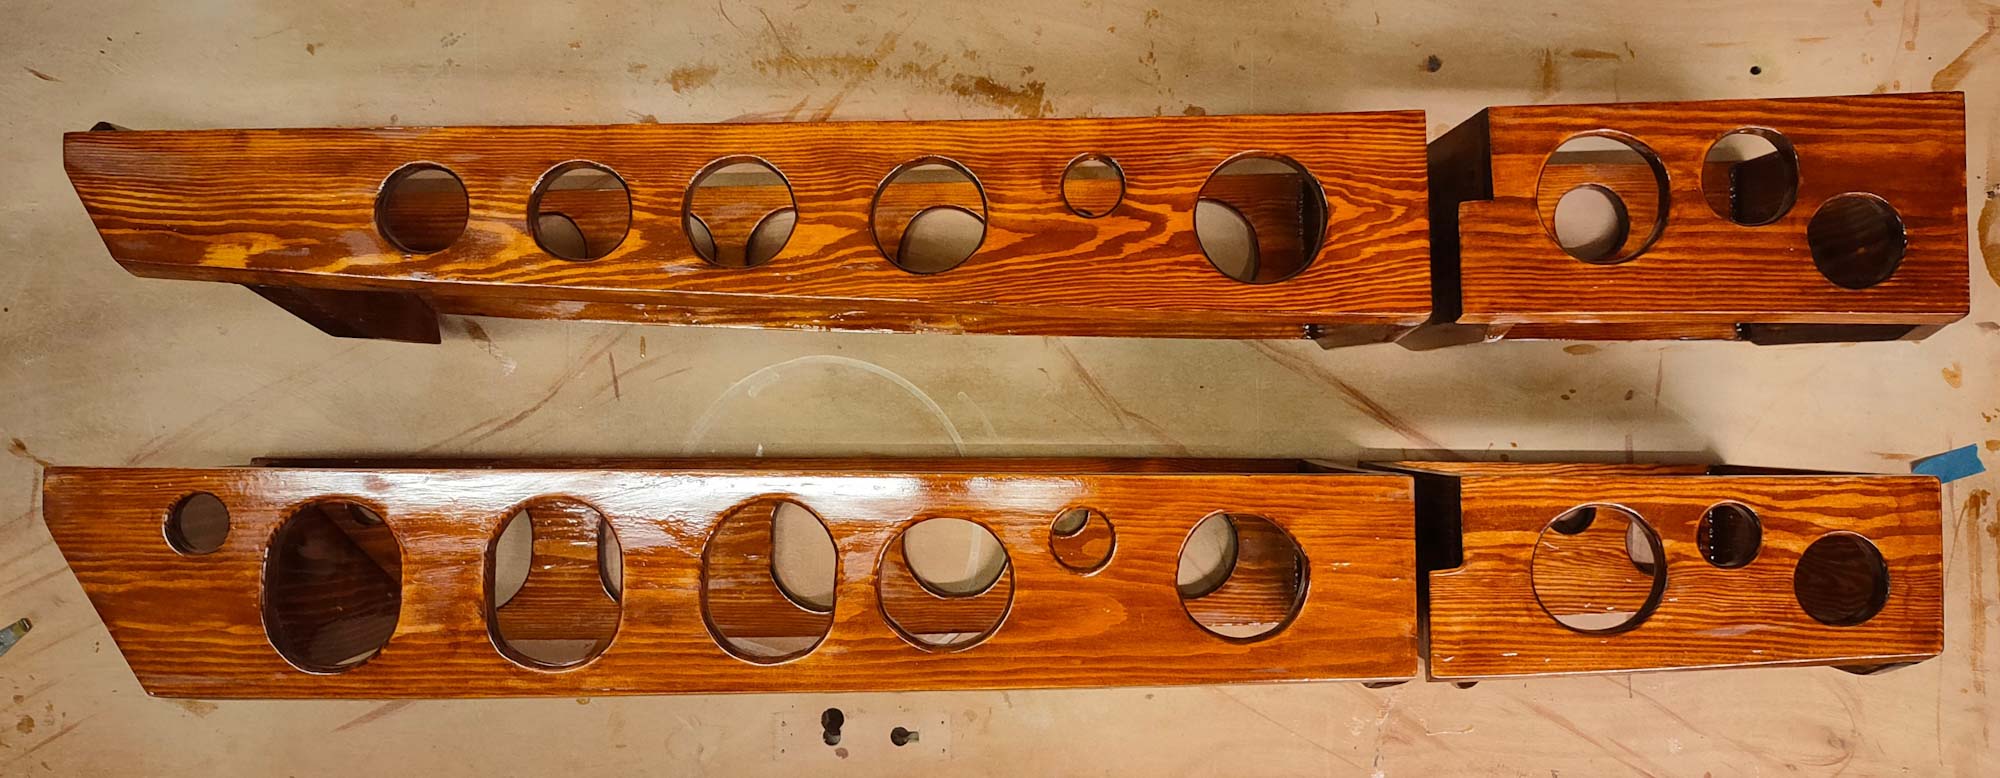
For the Colin Angus design seat, I chose to make the frames in two parts, fitted around the bulkhead with a single central bolt. This works very well with no movement and can be removed easily, we often just take it out with one rower and passengers in the stern.
You'll need to profile the frames for each seat, I used some kebab skewers through the corrugations in some cardboard to make a profile guage across the top of the bulkheads. I mocked up both seats in cardboard before committing to wood. Profiles of the frames on the bottom need to be planed fore and aft as well as up the sides so make sure you measure to the lowest point in the hull along the length for the sides so you have something to plane off! The top of the frames run level with the top of the bulkheads which gives enough room for heel height with a small riser on the rigger mounting blocks.
Frame bottoms have a strip of thin 2mm foam on them to save any wear on the hull.
Best wishes for your build, it's a lovely craft.
Colin Angus has more pics.
Offline
#8 26 May 2021 8:25 am
- charboatman2010
- Member
- Registered: 20 May 2021
- Posts: 9
Re: CLC Annapolis Wherry Tandem "Libelle"
Many thanks for the pictures and advice, that is very useful.
I had actually ordered plans from Angus but they never arrived so we are making it up as we go along!
Offline
#9 9 Jun 2021 8:45 pm
- Simpsonboater
- Member
- Registered: 26 Jun 2020
- Posts: 29
Re: CLC Annapolis Wherry Tandem "Libelle"
Couple of pics of an addition I've made which may be useful for others - fender hooks for the wherry rails.
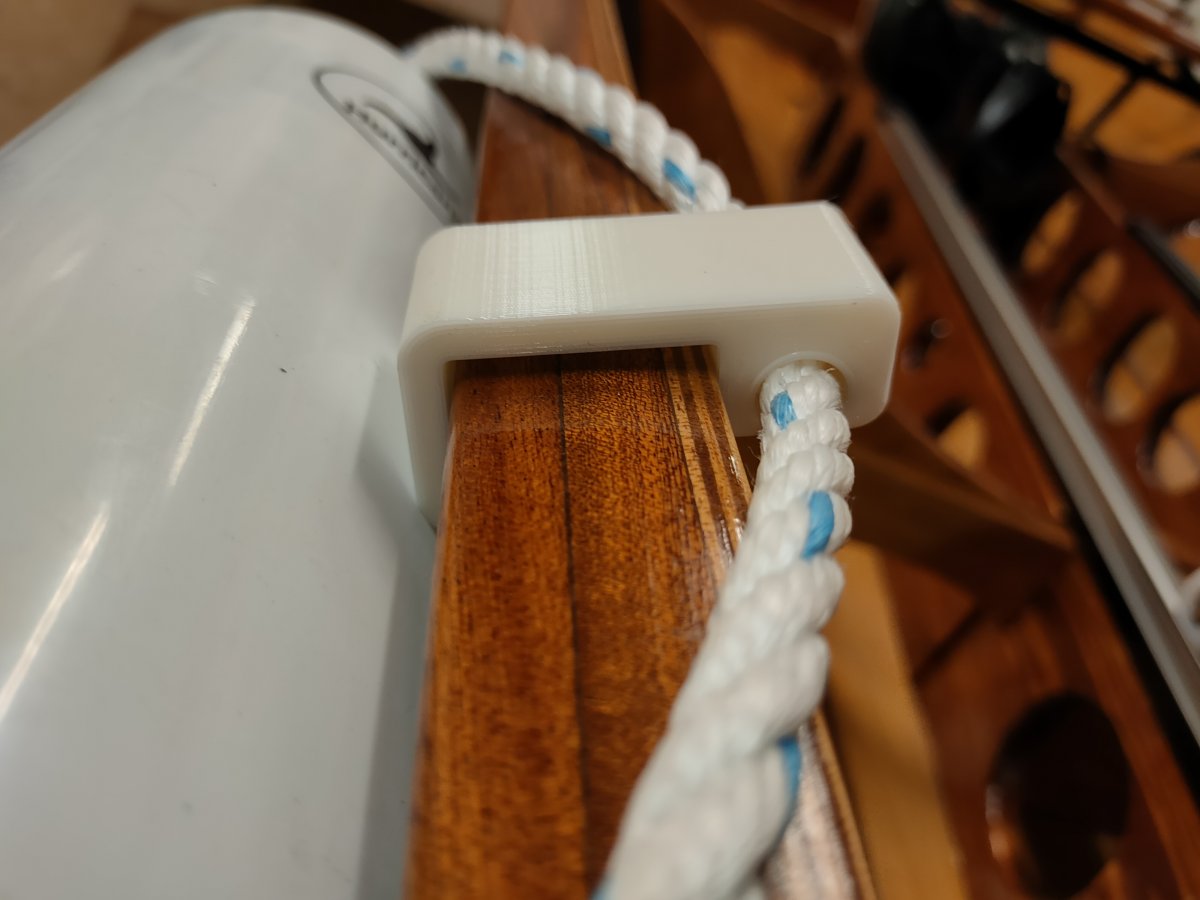
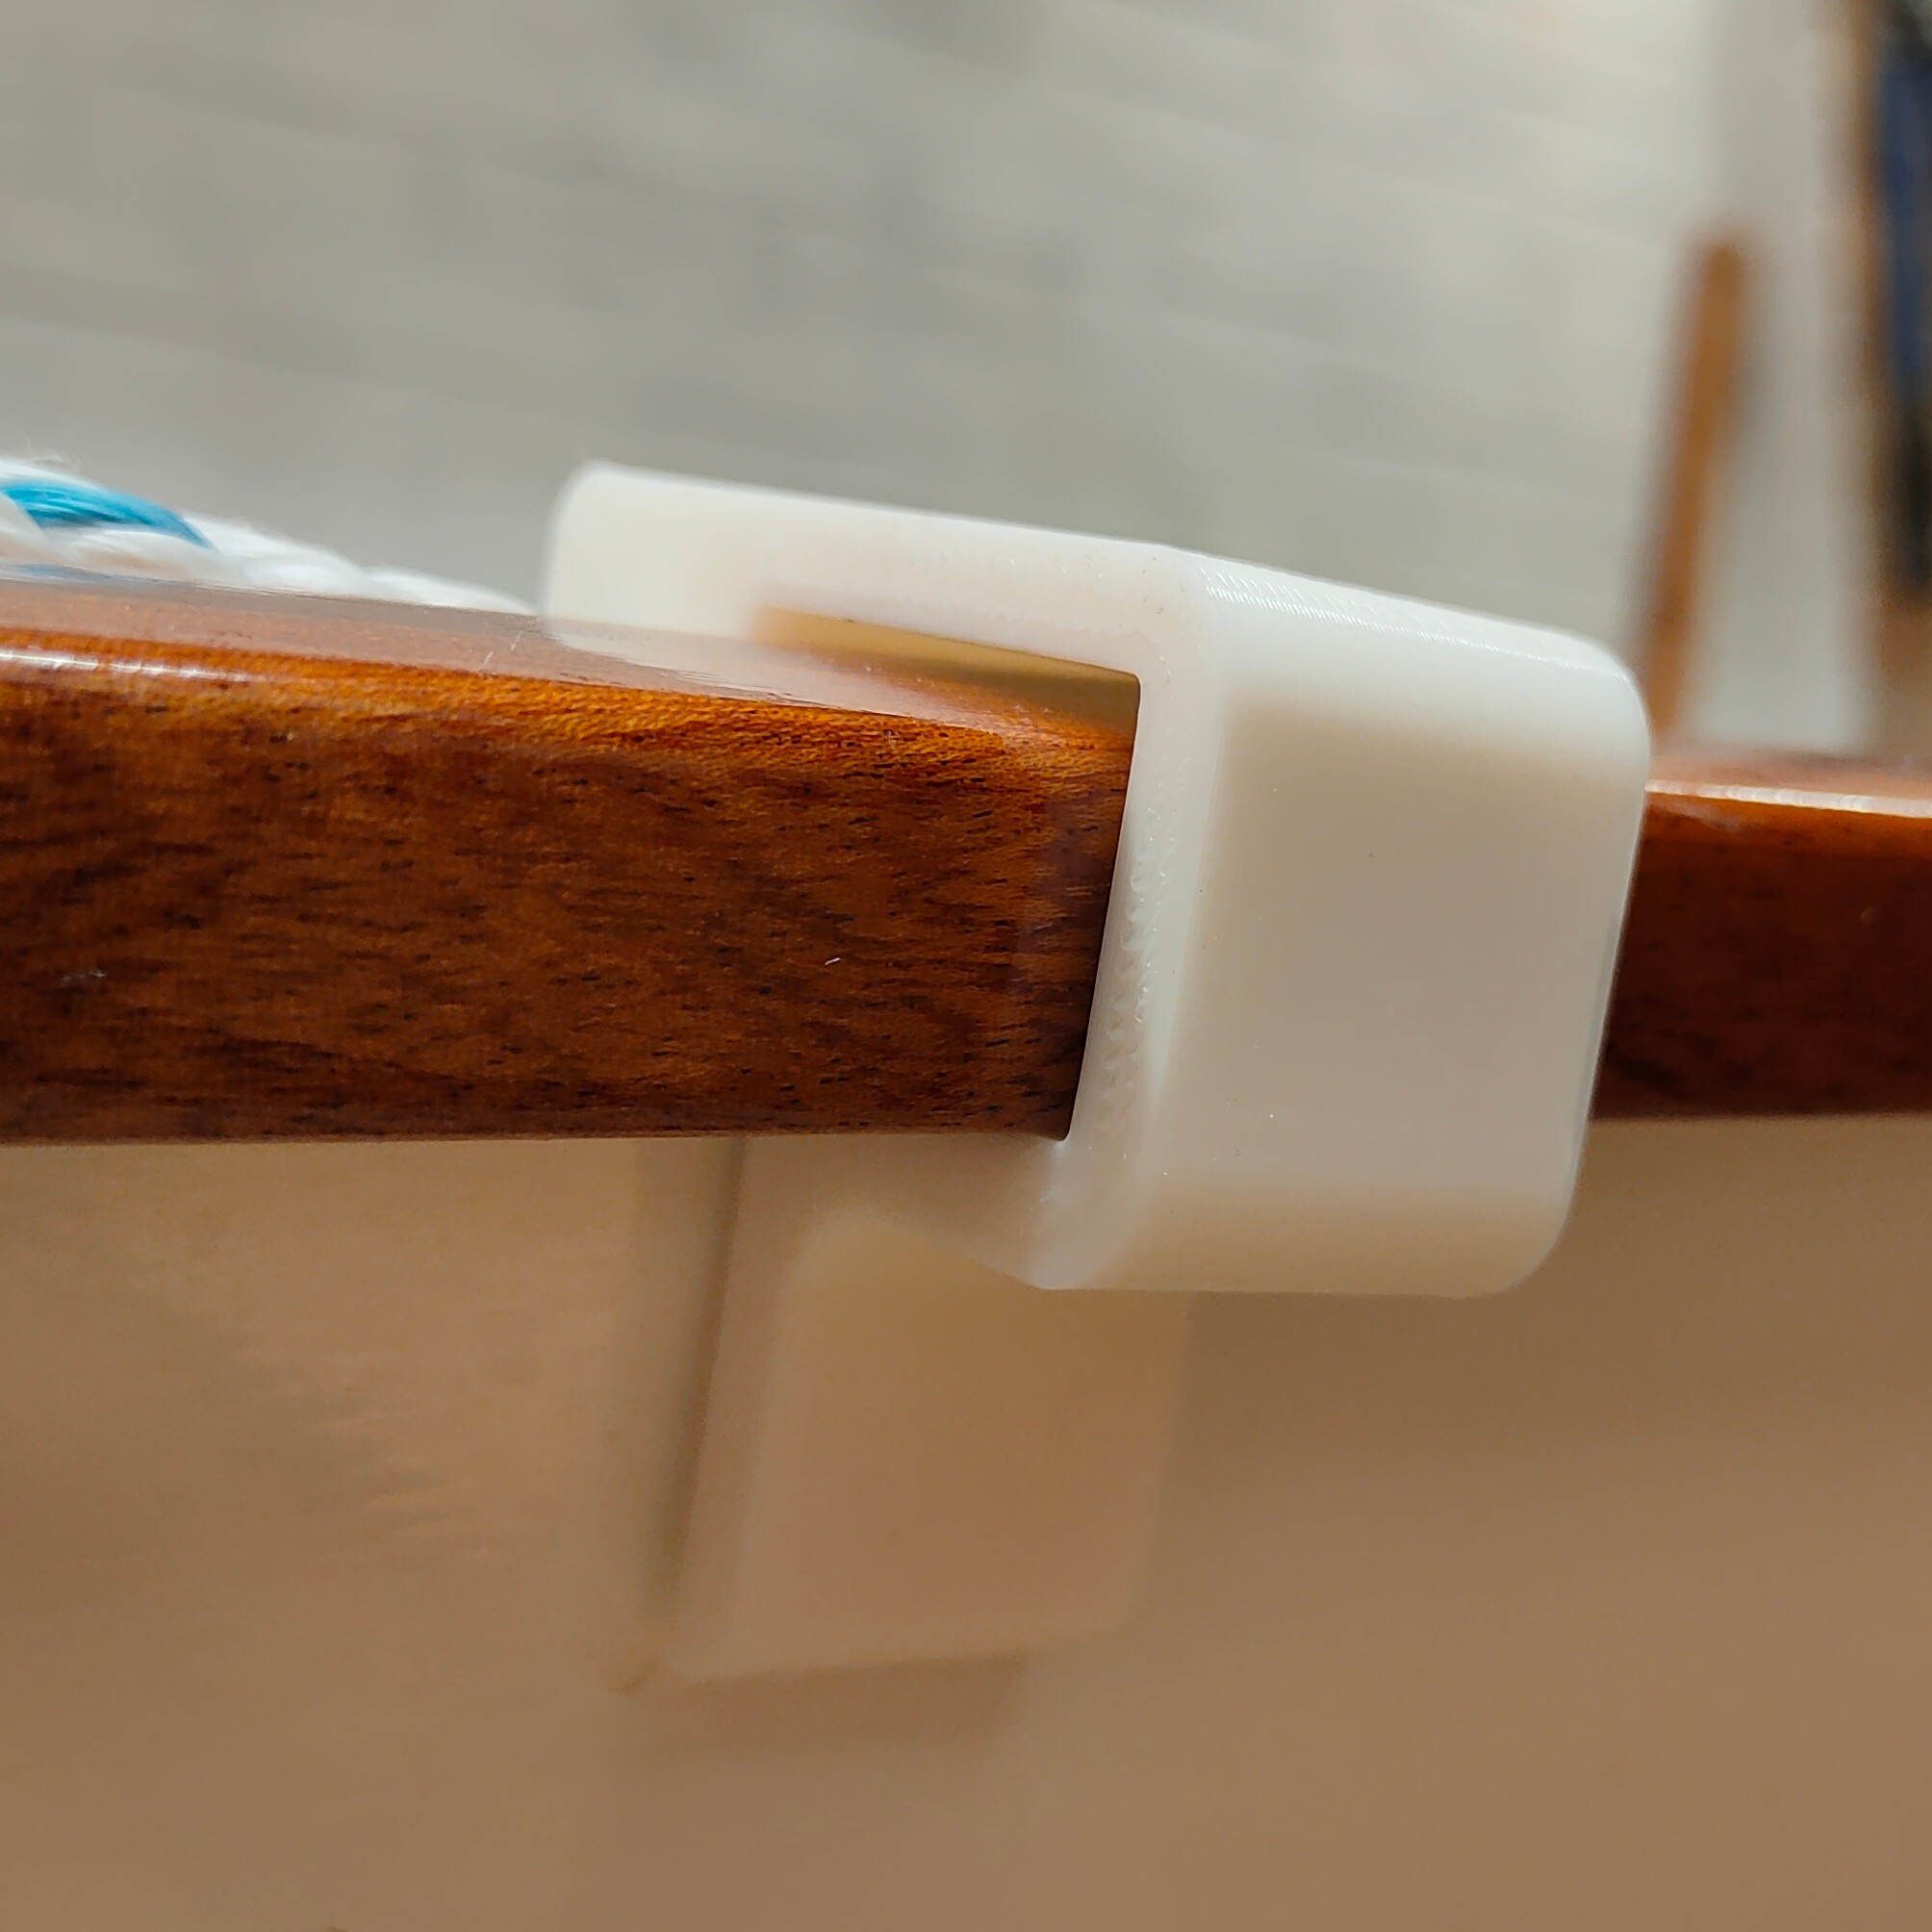
I've just started tinkering with a 3d printer and have designed and made these hooks to attach some small fenders without having to have anything permanent. The canal we row on is lined with sheet piling and I'm constantly avoiding dents and scratches.
Not tested in anger yet but they look like they'll do the job once they've had a lick of epoxy to seal them. They just clip over the rail.
If there is a demand, I'll put the .stl file on Thingiverse.
Offline
#10 11 Nov 2024 2:52 pm
- sretrinity
- Member
- Registered: 11 Nov 2024
- Posts: 2
Re: CLC Annapolis Wherry Tandem "Libelle"
Thanks, for posting this. I'm planning on doing the same build. How did you figure out the location of the Angus rig?
Did you also make the Angus oars?
Offline
#11 11 Nov 2024 6:55 pm
- Simpsonboater
- Member
- Registered: 26 Jun 2020
- Posts: 29
Re: CLC Annapolis Wherry Tandem "Libelle"
The rowing geometry is on the Angus Rowboats sliding seat geometry page and there are other resources out there. As the foot plate is fixed, you can work everything back from that.
We went for Concept II big blades rather than start another build.
I have made those at 1/9 scale though!
Last edited by Simpsonboater (14 Nov 2024 5:16 pm)
Offline
#12 11 Nov 2024 9:40 pm
- sretrinity
- Member
- Registered: 11 Nov 2024
- Posts: 2
Re: CLC Annapolis Wherry Tandem "Libelle"
Did the wherry plans give you a location for the feet?
Offline
#13 11 Nov 2024 9:54 pm
- Simpsonboater
- Member
- Registered: 26 Jun 2020
- Posts: 29
Re: CLC Annapolis Wherry Tandem "Libelle"
There's no option as to where the feet go, see the plans for the position of the drop-in riggers on p 4 of the manual. Bulkheads 3 and 5. Are you building as a single or double? That's the only deciding factor. If a single then bulkhead 4.
Offline