A forum for discussing wooden boats and boat building
You are not logged in.
- Topics: Active | Unanswered
Pages: 1
#1 16 May 2020 6:01 pm
- Longshot
- Member
- From: Knutsford
- Registered: 3 Jun 2019
- Posts: 15
Petrel Play Build
I have almost finished the Petrel Play Kayak, I have taken shots throughout the build so intend to create a log after the event, highlighting the mistakes I made and how I sorted them out or not as the case maybe. I am new to this forum so I need to get myself up to speed with uploading photos etc. Hopefully this will be of interest and help those thinking of building this beautiful Kayak
Offline
#2 18 May 2020 12:46 pm
- Ian
- Employee

- Registered: 24 Nov 2014
- Posts: 103
Re: Petrel Play Build
Welcome to the forum! I'm interested in seeing some photos of the build and hearing about the problems solved along the way. Are you building the cedar-strip version or the stitch-and-glue version?
Offline
#3 21 May 2020 6:21 pm
- Longshot
- Member
- From: Knutsford
- Registered: 3 Jun 2019
- Posts: 15
Re: Petrel Play Build
Cedar Strip, it's been a really interesting build, hopefully my log will highlight the problems encountered, Can anyone tell me how to include a photo, I've uploaded them to 'uploads' but cannot see how to get them into my posts?
Last edited by Longshot (21 May 2020 6:49 pm)
Offline
#4 22 May 2020 4:02 am
- spclark
- Member
- From: "Driftless" Wisconsin USA
- Registered: 19 Mar 2020
- Posts: 478
Re: Petrel Play Build
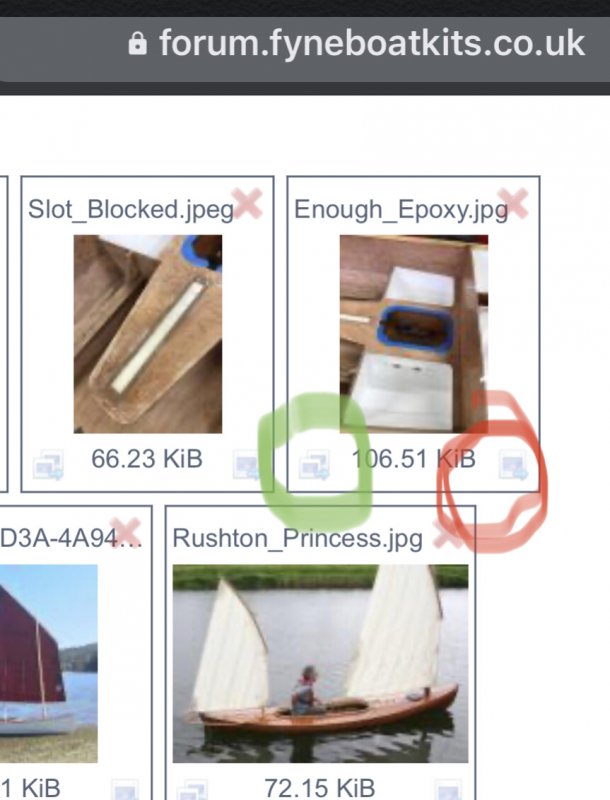
Look at the ‘thumbnail’ version of the image(s) you’ve uploaded.
At the bottom of the box that surrounds each one is a small icon.
Click on the icon at lower left adds a link to a small thumbnail preview of that image to the post you’re drafting, while clicking on the right icon will add a link to display the full-size image ‘in line’ with what you’ve written:
Last edited by spclark (22 May 2020 4:03 am)
Offline
#5 22 May 2020 2:27 pm
- Longshot
- Member
- From: Knutsford
- Registered: 3 Jun 2019
- Posts: 15
Re: Petrel Play Build
Great, very helpful, thanks
Offline
#6 22 May 2020 2:50 pm
- Longshot
- Member
- From: Knutsford
- Registered: 3 Jun 2019
- Posts: 15
Re: Petrel Play Build
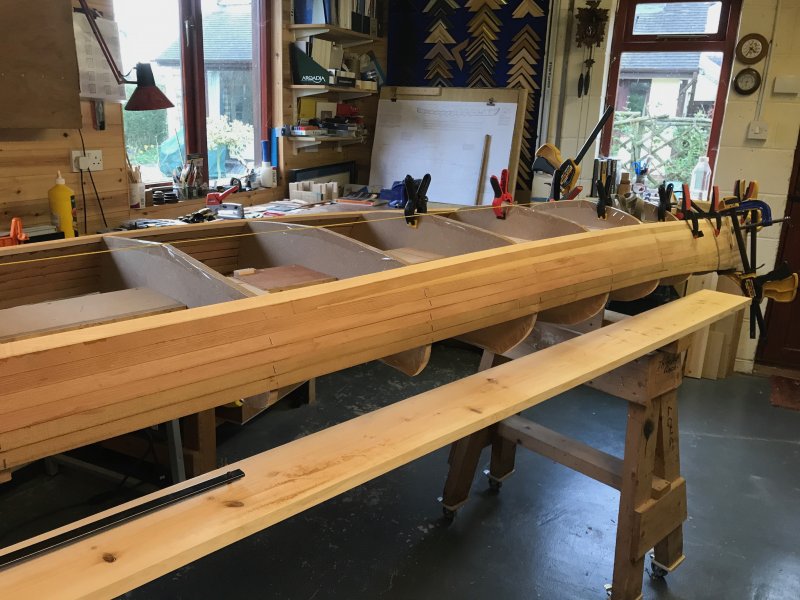
First job to unpack and assemble the strong back and the forms all pre-cut and marked out with guide lines for the shear strip angle etc. The strong back supplied was constructed from MDF suitably rebated for easy assembly, it came in eight pieces, four long and four short, to aid strength I staggered the joints, i.e two short at one end and two at the other, glued and screwed the whole together. the forms were added and spacers which I had to make out of various pieces of scrap ply and mdf around my workshop. the bow and stern pieces are added which I hot glued into position and wedged them with softwood to ensure they were central and rigid. I had some concerns that the strong back sagged a little over it's length, so added a central support which remained in place until several cedar strips had been added on each side. Getting all the forms perfectly aligned required some care with the aid of a string line. AS you can see from the picture I used small clamps to hold short pieces along the sheer line for the first strip, in retrospect the clamps were not really strong enough so the sheer line angle on the first trips were not quite right, a small dab of hot glue on each stick would have resolved that, and or stronger clamps.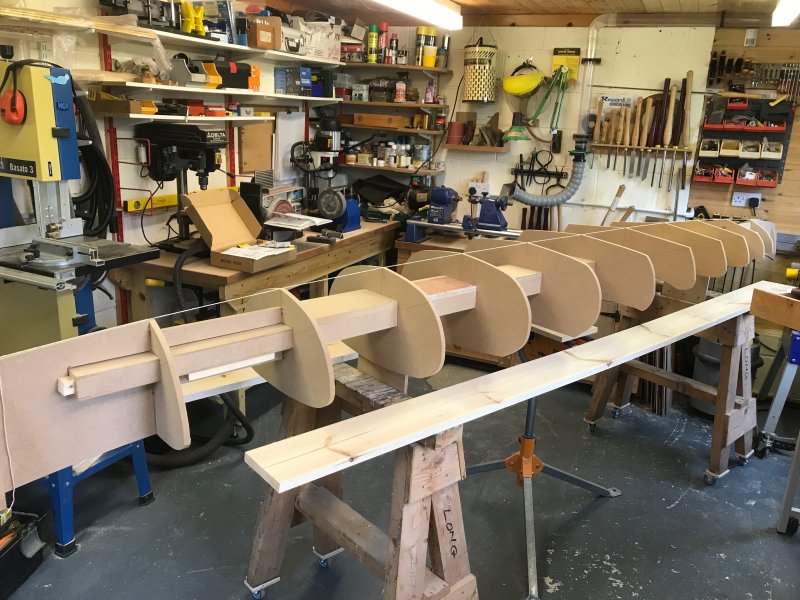

Offline
#7 22 May 2020 3:04 pm
- Longshot
- Member
- From: Knutsford
- Registered: 3 Jun 2019
- Posts: 15
Re: Petrel Play Build
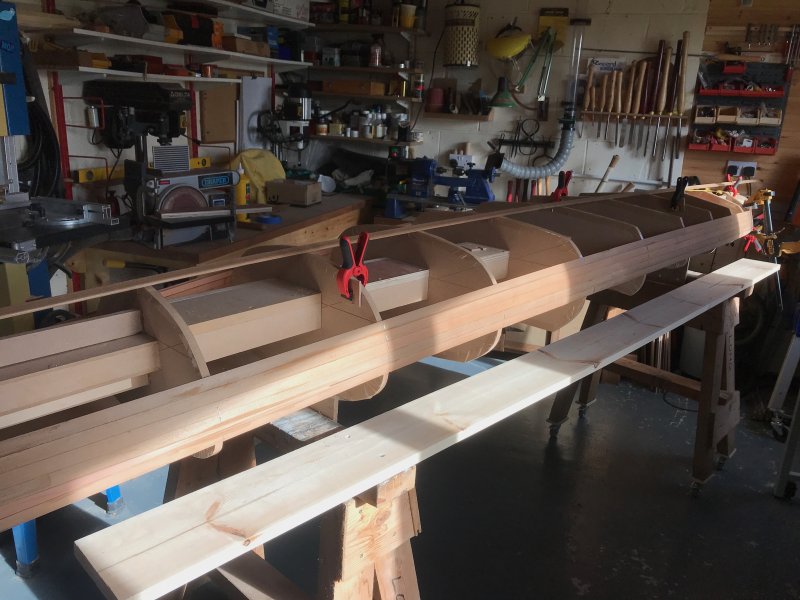
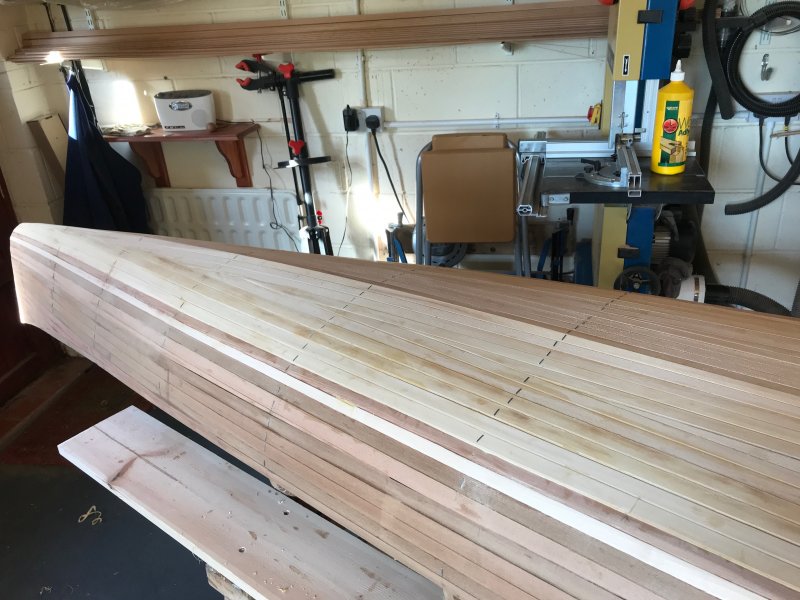
After protecting all the forms with tape, I added the stem and stern pieces, cut out on band saw and shaped, then started on the cedar strip. the first one (Sheer line) was tricky, using cove and bead I worked with the cove upwards on both sides, so the sheer strip required the bead to be cut and angled, plus there is quite a sharp bend at each end up to the bow / stern, heating the strip with a hot air gun helped but even so I broke one or two pieces before I got it right. My strips were about 3m long so each one had to be scarfed. I mounted a block of wood on my disc sander so each piece was sanded exactly the same, joining with wood glue worked well so long as each join was staggered using the cove on the last strip to act as a guide to keep the joint strips in line, glued and held tight with tape it worked well. I should mention also that I bought a pair of cove and bead cutters which I set up on a router table so that any pieces with long tapers could be accurately re-coved or beaded, again this system worked well.
Offline
#8 22 May 2020 3:28 pm
- Longshot
- Member
- From: Knutsford
- Registered: 3 Jun 2019
- Posts: 15
Re: Petrel Play Build
Here's the cove and bead cutters I used, bought from Axminster and well worth it, made the job much neater and easier.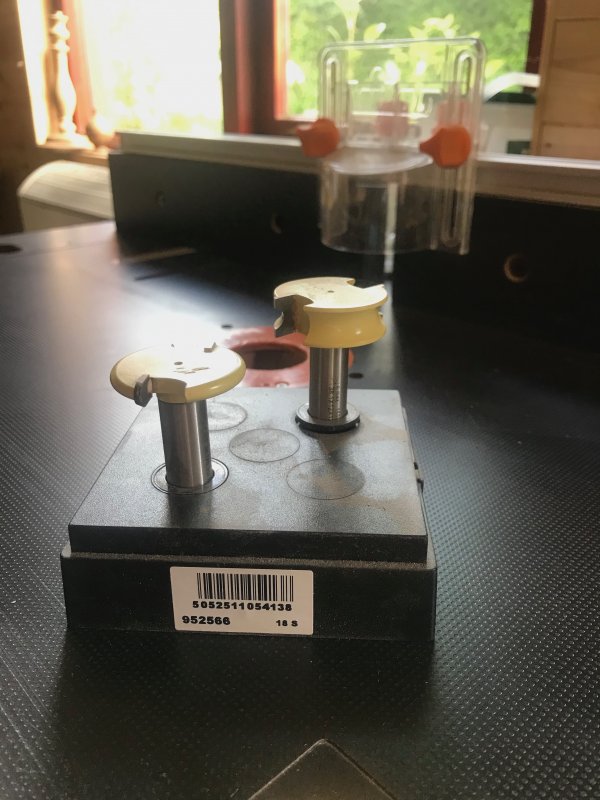
Offline
#9 22 May 2020 3:45 pm
- Longshot
- Member
- From: Knutsford
- Registered: 3 Jun 2019
- Posts: 15
Re: Petrel Play Build
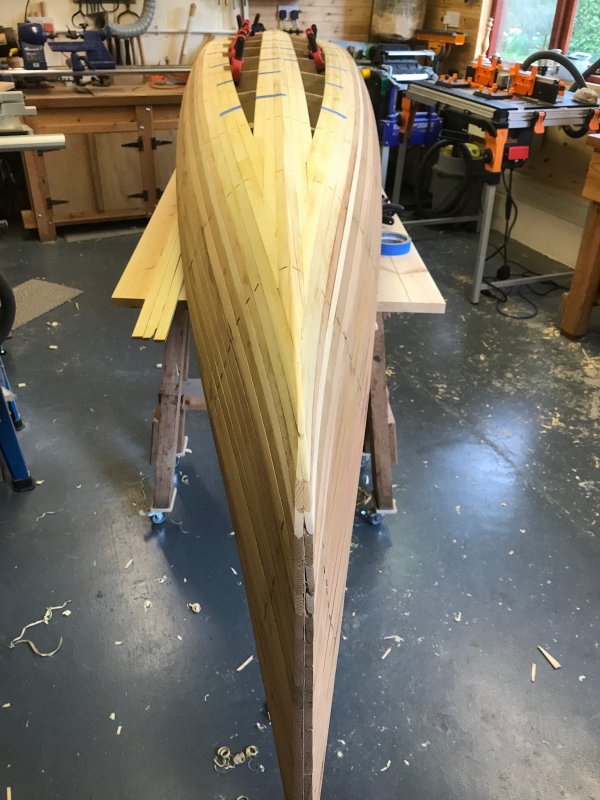
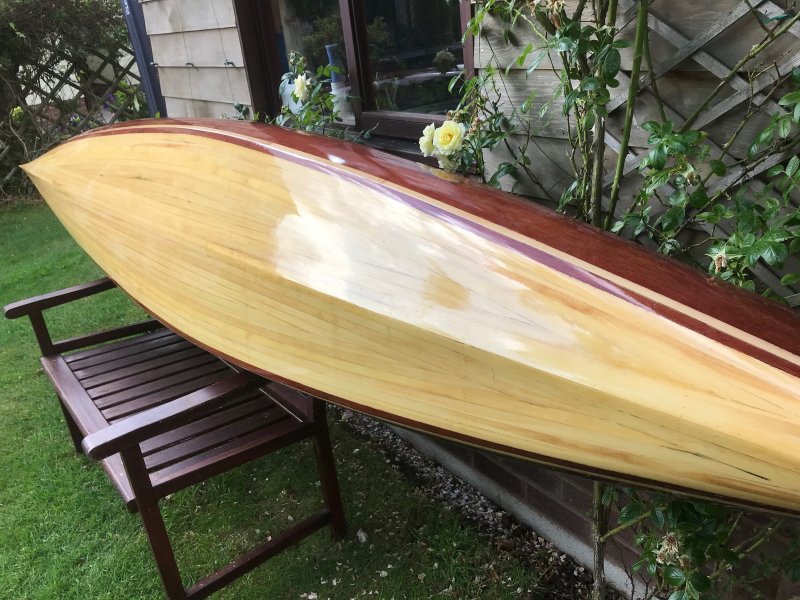
One of the issues I confronted when I received the kit was the difference in shade of the strips, I bought Western Red Cedar plus Yellow Cedar for the bottom of the hull ¾ to ¼ respectively in quantity. I sorted all the light WRC from the dark using the Dark for the hull, plus the Yellow. keeping the light WRC for the deck. In retrospect this was an error as I then had to stain the deck which was at the root of many of my finishing problems, more of that later.
I also bought some maple for making hi-light strips for the water line, plus lots of thin strips for the detailing on the deck, I also used the maple to make the stem and stern.
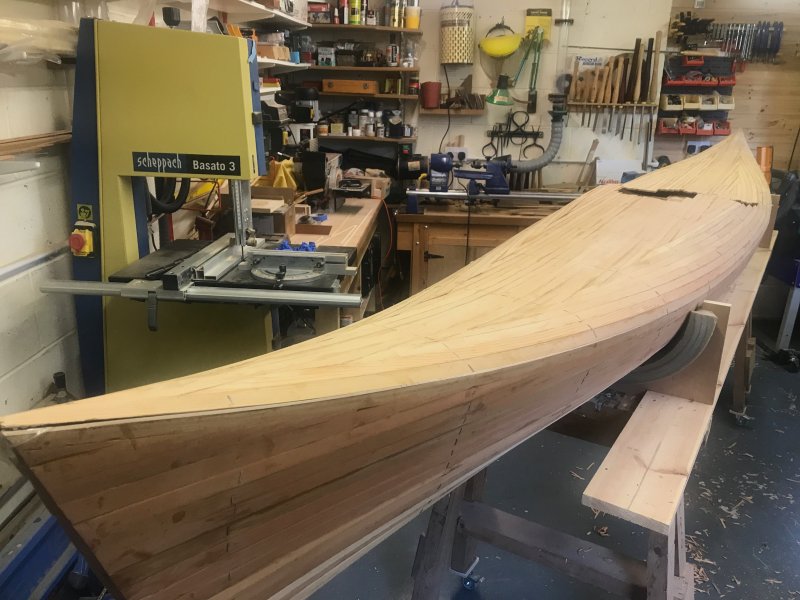
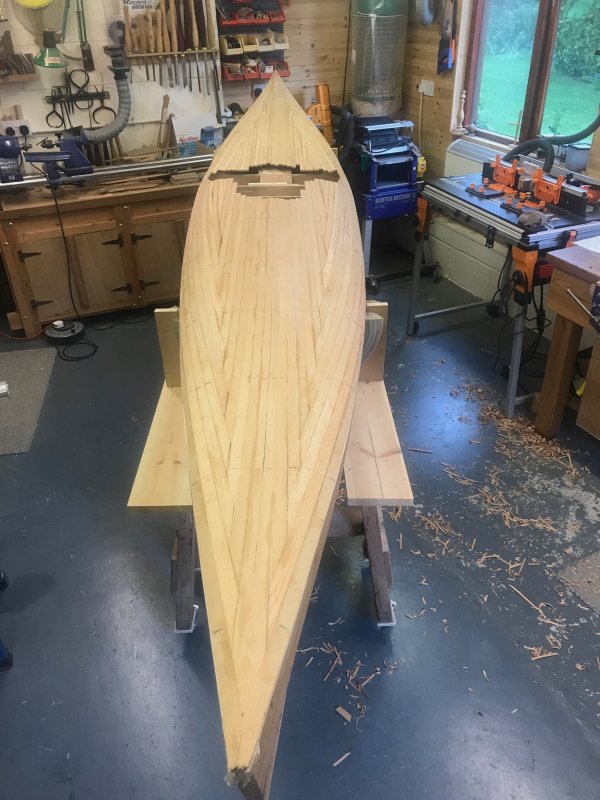
Most of the hull went well. When I reached the point of closing the final gap, I had to cut the pieces in half to get them in. With cove and bead each tapered piece slots into the next by around ¼" so cutting the infils in half was the only way I could get them in. Now it's all sanded you cannot see the join.

Offline
#10 22 May 2020 3:49 pm
- Longshot
- Member
- From: Knutsford
- Registered: 3 Jun 2019
- Posts: 15
Re: Petrel Play Build
One or two further thoughts from the last post, Staples work well and now that its sanded and varnished you can hardly see where they were, on close inspection they can be seen but at least it proves to be hand built! The other thought is tape, I used loads of it so it's well worth buying in bulk, I went though about 10 rolls of the blue stuff, two rolls of 25mm and two of 36mm green Frog tape plus the strong nylon reinforced packaging tape two rolls.
Offline
#11 22 May 2020 4:05 pm
- Longshot
- Member
- From: Knutsford
- Registered: 3 Jun 2019
- Posts: 15
Re: Petrel Play Build
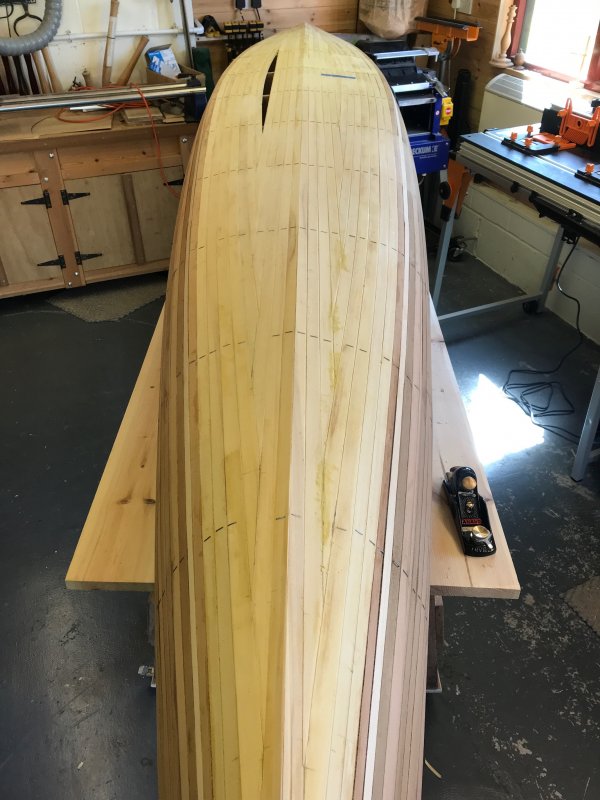
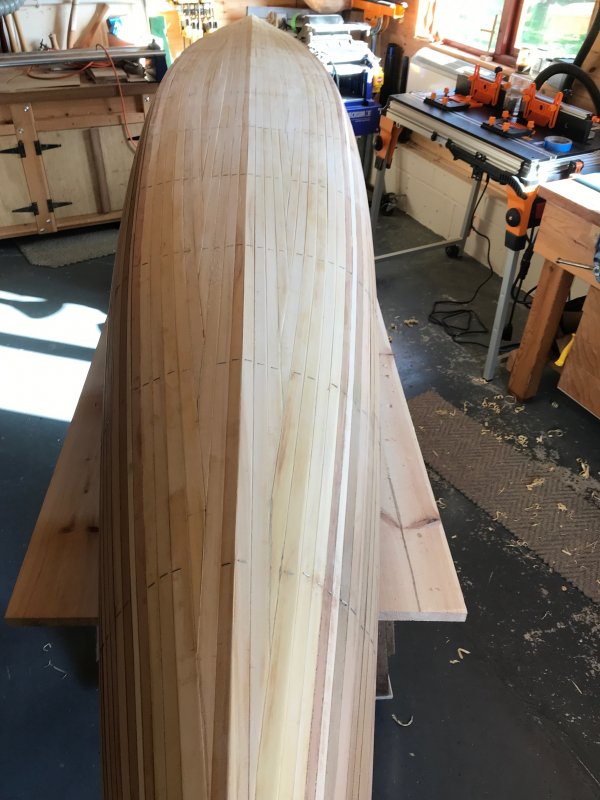
The Deck
Once I had completed the hull, I thought the deck would be easy, mistake. The deck is harder and needs to be done with great care as it's the bit everyone will look at and was probably my nemesis on this build! The first challenge was running the sheer line so that it matched the hull and joined neatly at the bow and stern, mine was reasonable but I made a bit of a mess of the bow and stern joins requiring me to repair with inserts of cedar, I've actually got away with it, but in retrospect I should have started again rather than carrying on, the evils of a 'must get it done' nature! the other point here is to make sure you build in enough strips around the cockpit area, I cut them short after running four strips, mistake, I needed small inserts of wood to fill gaps when I constructed the cockpit area, again I got away with it but it would have been so much better to simply run another strip though to begin with.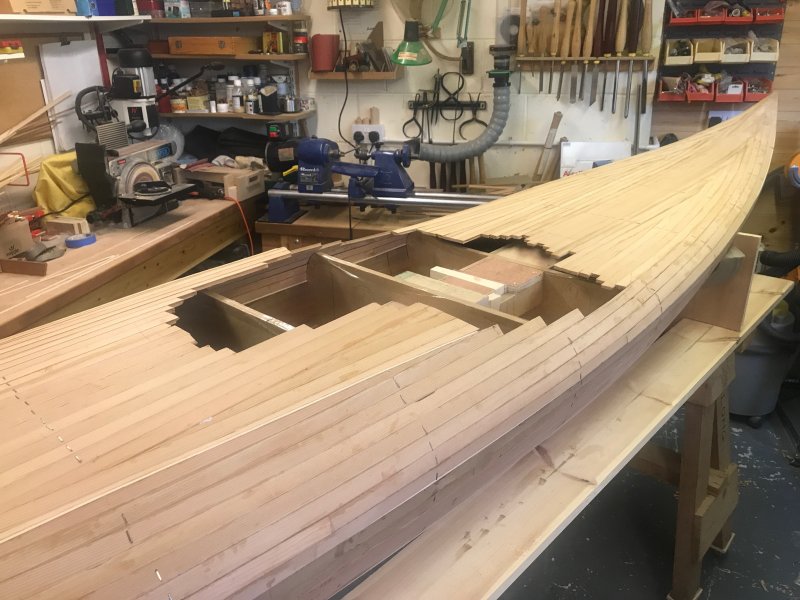
Offline
#12 22 May 2020 4:11 pm
- Longshot
- Member
- From: Knutsford
- Registered: 3 Jun 2019
- Posts: 15
Re: Petrel Play Build
Another point to mention, you will see the use of clamps to both hold the strips in place at the bow and also to clamp the strips tightly together, I would say that this is essential to ensure tight joints although Nick Shade in his videos (which are invaluable and brilliant), doesn't seem to need them. I think he is such a skilled and practised operator which makes everything look very easy when in fact for a first time builder it's really a very interesting challenge!
Offline
#13 22 May 2020 4:22 pm
- Longshot
- Member
- From: Knutsford
- Registered: 3 Jun 2019
- Posts: 15
Re: Petrel Play Build
Next I fitted the cockpit surround, this a slow and laborious job to get it to fit perfectly. It assembles well using Super glue to fix the shape, cutting it into the deck is more difficult and I would not give myself full marks having to use some filler at points where I didn't get it quite right, although I did add a maple high-lite which looks great.
It's a real test of skill and patience! In this picture the deck is hung up whilst I glass the hull. Unfortunately it's the only shot I took with the deck at this stage.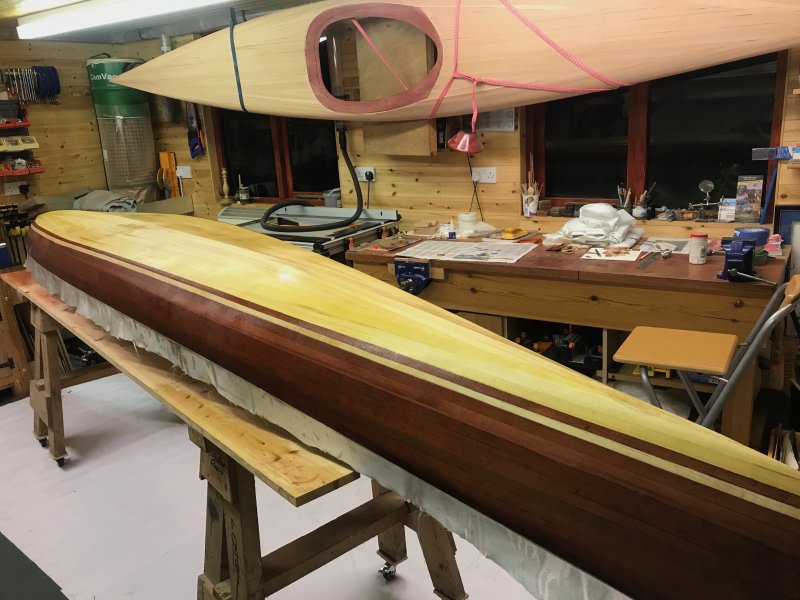
Offline
#14 22 May 2020 5:56 pm
- Ian
- Employee
- Registered: 24 Nov 2014
- Posts: 103
Re: Petrel Play Build
I think when you glass the boat and the dull, greyish wood suddenly pops out in bright colours, it always makes all the effort seem worth it. Looking forward to seeing more!
What you said about Nick is so true - he makes everything look easy. His videos are great, you just have to remember he's done it a thousand times before!
Offline
#15 3 Jun 2020 9:23 pm
- Longshot
- Member
- From: Knutsford
- Registered: 3 Jun 2019
- Posts: 15
Re: Petrel Play Build
Thoughts on MDF. Before moving on, a point about the MDF strong-back and formers. When shaping the strips around the formers especially when bends and twists are involved the end grain mdf does not hold staples well and they easily pull out when under stress, I have already mentioned that the strong-back wasn't really strong enough to carry all the formers and remain stiff and straight so it had to be supported until several strips were in place. I don't know what the extra cost of ⅜" ply would be but I certainly think it would be worth considering.
Offline
#16 3 Jun 2020 9:34 pm
- Longshot
- Member
- From: Knutsford
- Registered: 3 Jun 2019
- Posts: 15
Re: Petrel Play Build
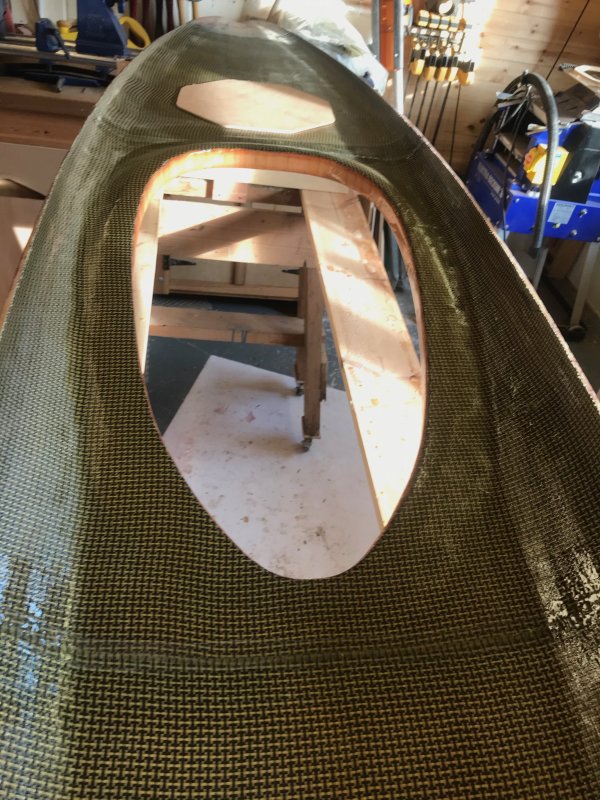
Glassing the hull, after watching Nick Shades methodology and following it religiously this actually went very well and the hull to the end looks great. The main issues involve when to add the fill coat. It's important to do this the same day when the first application has gone off sufficiently so it is no longer wet but is still tacky. I left the deck over night and despite going over lightly with sand paper the fill coat wasn't good introducing thousands of tiny air bubbles which where almost impossible to eliminate.
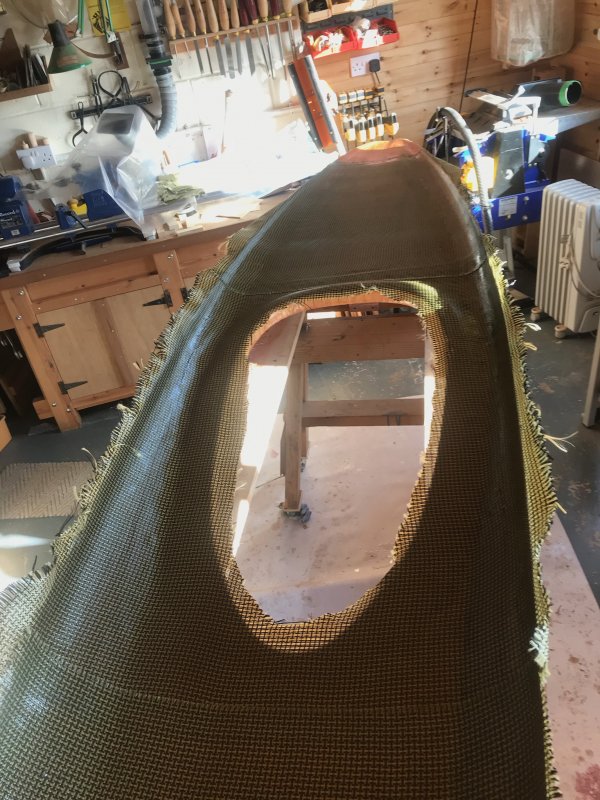
I bought carbon / Kevlar cloth for the interior area which take the most stress getting in and out and carrying. the best technique with this is to apply a coat of resin on first, apply the cloth then go over it before applying a second 'fill' coat as normal.
Other hints, keep your workshop warm and ensure absolutely no damp gets near the wet resin. Fibreglass seems to be a black art and despite getting the hull looking very good I then went on to have difficulties with the deck, I'm still not sure exactly why although leaving the second fill coat too long was part of it.
Offline
#17 3 Jun 2020 9:49 pm
- Longshot
- Member
- From: Knutsford
- Registered: 3 Jun 2019
- Posts: 15
Re: Petrel Play Build
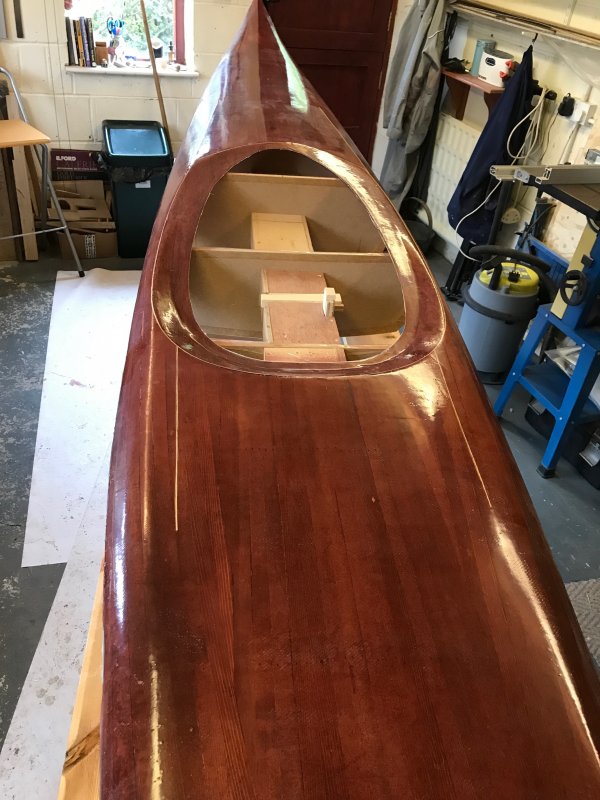
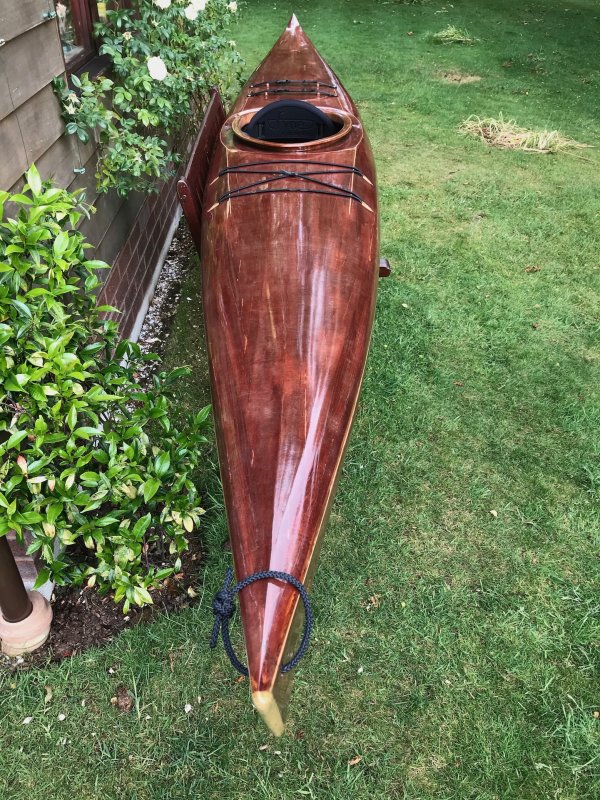
These pictures show the various stages in applying the fibreglass including the Carbon / kevlar cloth (which actually looks very smart). I should also discuss the staining of both the hull and deck. Because I had sorted out the light WRC (deck) from the dark (Hull), I then had a problem getting the deck to the same colour as the hull. I used Rustans spirit stain, a blend of Red and Brown to get this colour but it wasn't easy. several test trips were done and at one stage I had to completely re-send the deck to take the colour off as I wasn't happy. The hull had two coats and the deck three. The other difficulty was when I joined the two halves together involving a fair amount of sanding which took stain off along the join, forcing patch work to repair, I will try and highlight it in later photos, but beware, staining is not easy and causes a lot of extra work depending on your expertise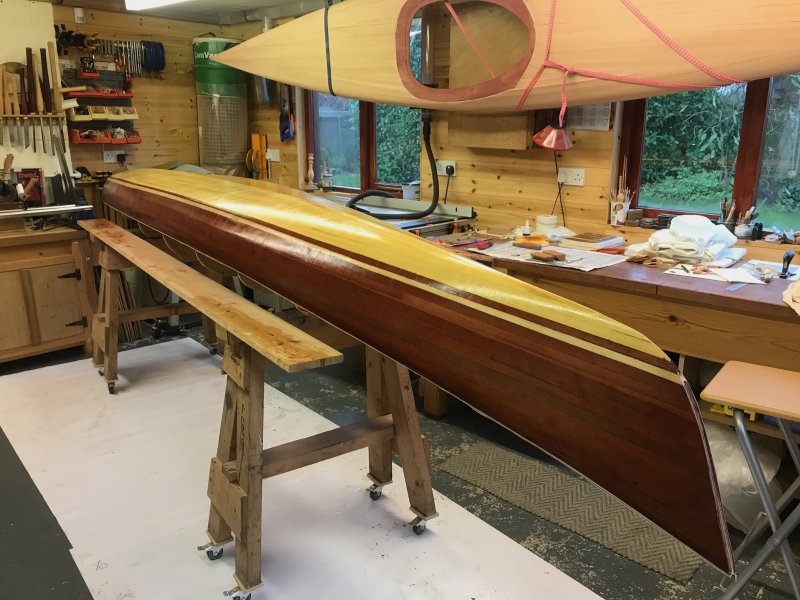
Offline
#18 18 Jun 2020 8:57 pm
- Longshot
- Member
- From: Knutsford
- Registered: 3 Jun 2019
- Posts: 15
Re: Petrel Play Build
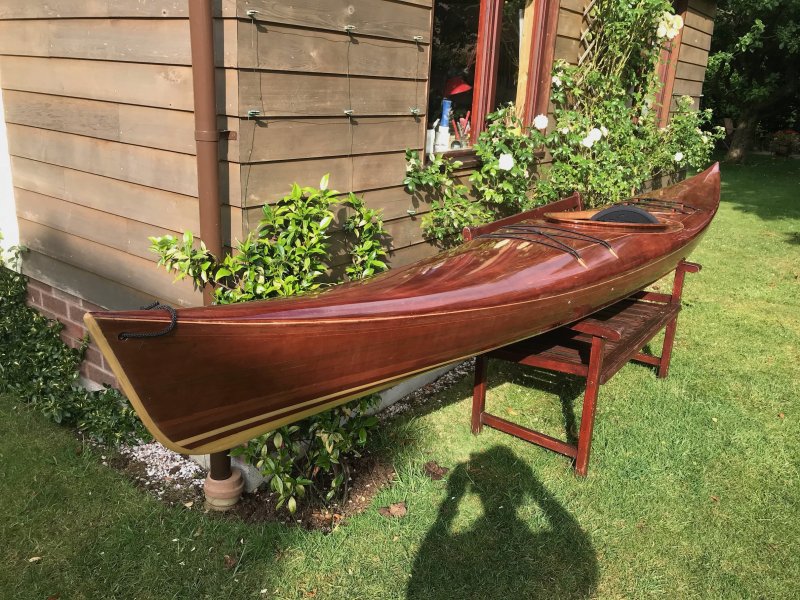
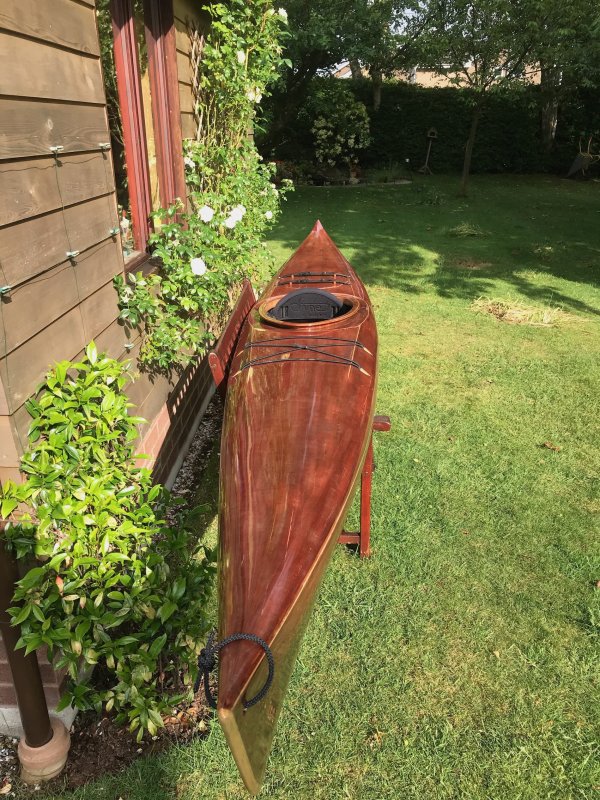
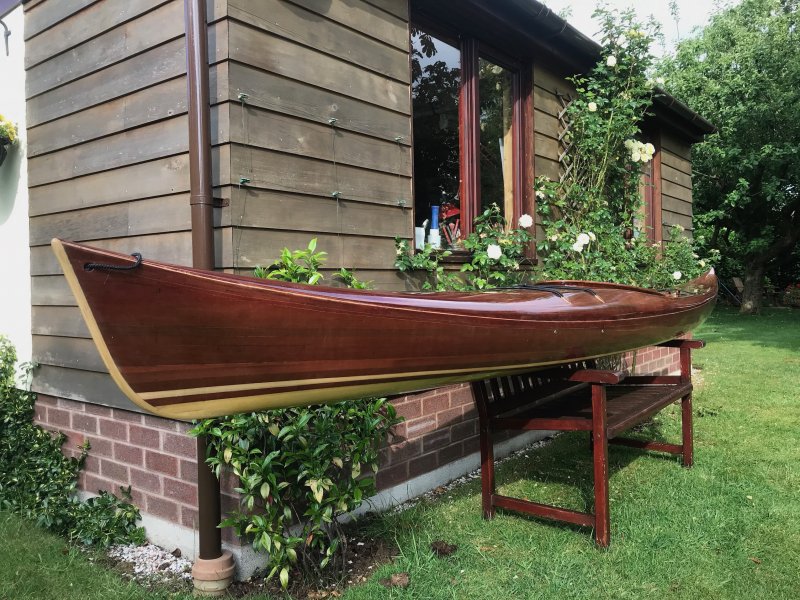

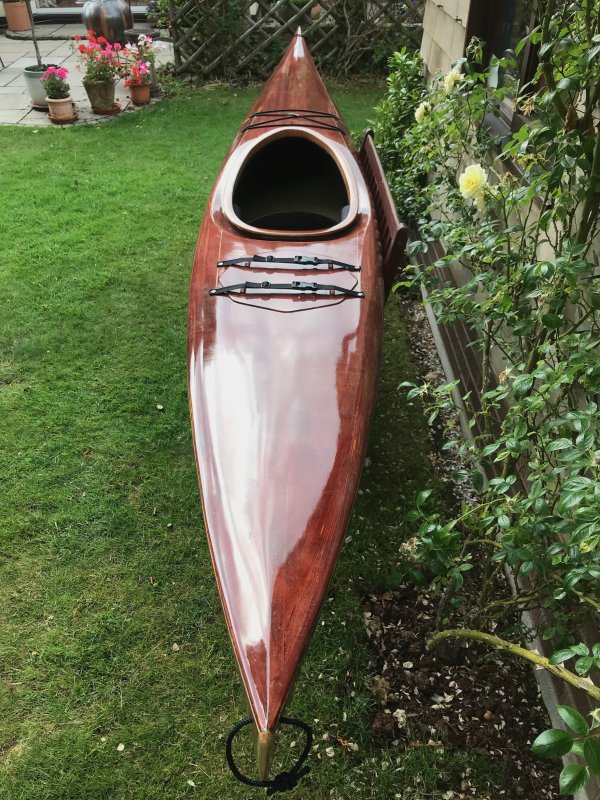
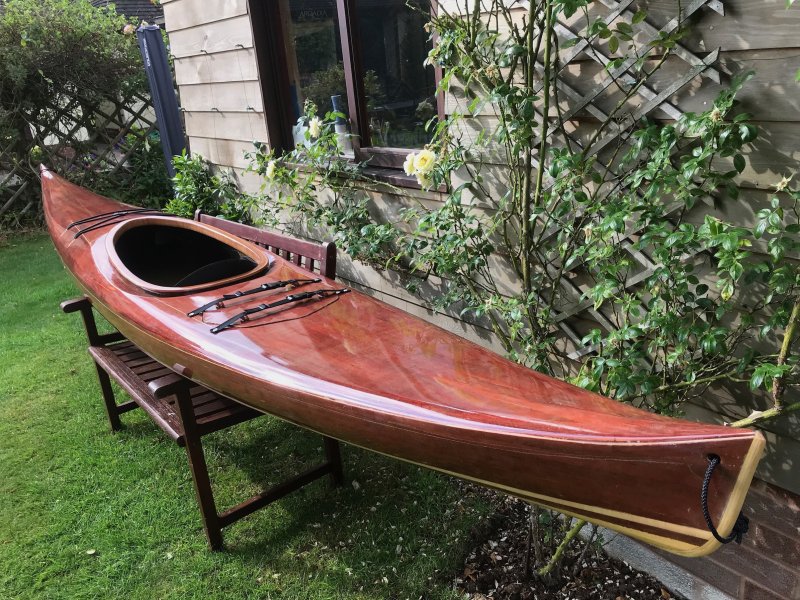
Well after all my doubts, now that I have spent hours sanding, fill coats and varnishing, 6 coats it looks really good. It's not perfect and there are flaws which are annoying but no one who looks at it seems to notice what I do. If I build another I don't think I will stain it, that was the root of many of my finishing problems. I've learned a lot about Glass cloth and resin application and finishing and I'm now the proud owner of a Festool orbital sander (brilliant) so I'm hoping to sell this one and start another in the Autumn.
Do let me know if you have any questions. By the way, I applied two layers of cloth to the hull and the total weight of the boat is exactly 20kg which I think is quite good.
Offline
Pages: 1