A forum for discussing wooden boats and boat building
You are not logged in.
- Topics: Active | Unanswered
#176 25 Apr 2020 1:50 am
- spclark
- Member
- From: "Driftless" Wisconsin USA
- Registered: 19 Mar 2020
- Posts: 478
Re: Waterlust sailing canoe in Norway
Apologies for not checking in here for awhile... been busy at work (again, finally) and at home as the weather's warmed up a bit.
Here's an image sent up from Texas of another builder's method for securing the deck during bonding:
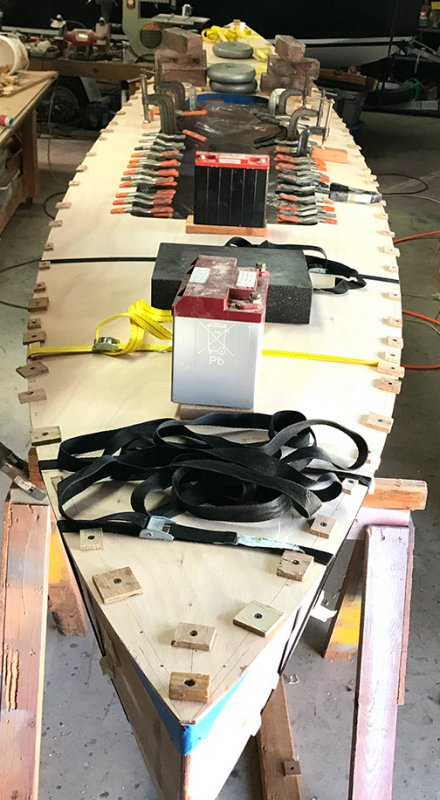
He used what we know here as drywall screws. Sharp-point, hardened steel flathead Phillips-drive with a black phosphate coating, set into tabs of ply to prevent damage to the deck plywood and to help even out the force from the head being driven almost flush.
I'm nowhere as far along as you Guy, no progress beyond getting storage and drive well port & starboard compartments well-primed several days ago. That's fully hard now so I'll be sanding tomorrow, then a couple of coats of Brightsides white to finish them off. Priming & painting cockpit will be next.
But I believe 100% in being properly prepared for what's to come! After all it's often said that 99% of the effort put into proper preparation is 100% of what goes into a job well-done.
With that in mind when the time comes and my deck's bottom-side's been 'glassed & trimmed I'll be doing a lot of dry-fitting to work out exactly how it'll be held in place once epoxy's next up in the sequence.
Here's another image from Texas showing how he masked off the interior before bonding his deck:
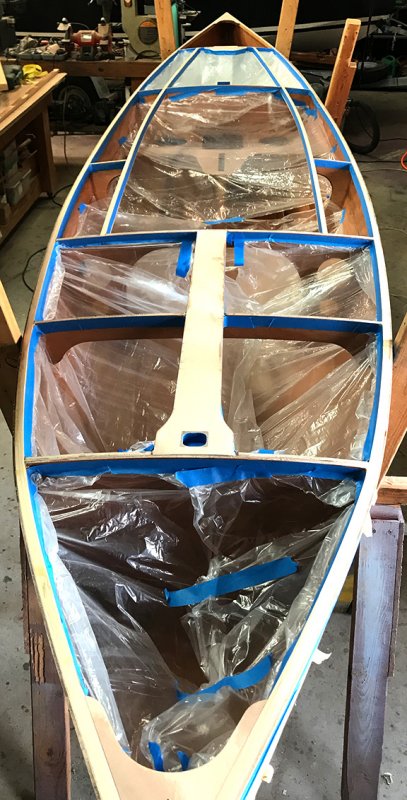
Makes for a far less laborious process should any significant amount of drippage occur, yes it does!
Keep up the good works fellows, and pics you can post! I very much want to see you both post images from your first launches!
Offline
#177 25 Apr 2020 1:57 am
- spclark
- Member
- From: "Driftless" Wisconsin USA
- Registered: 19 Mar 2020
- Posts: 478
Re: Waterlust sailing canoe in Norway
I imagine I will try to trim the cloth a little large and try and wrap it round the edge. I don't know if that will work very well or not, as its a super tight radius.
I'd not bother with that Guy. Remember the cockpit's coaming goes down on top of the 'glassed deck, in a manner similar to how the skeg gets bonded to the previously 'glassed bottom, then filleted in to reinforce the joint.
Whatever you're left with after you make the coaming follow the edge of the cockpit cut-out during bonding can be filled / filed / sanded smooth later on. That coaming's done with large radius edges on both inside and outer corners, the bottom edges are left square as supplied.
Offline
#178 25 Apr 2020 5:32 pm
- MartinC
- Member
- Registered: 3 Apr 2020
- Posts: 353
Re: Waterlust sailing canoe in Norway
One question please chaps. It has been drummed into me that epoxy will only form a 'chemical' bond if applied on an epoxy coating less than 24 hours old, and after that you have to sand the last coat of epoxy to get a 'mechanical' bond. I glassed my deck underside some weeks ago. Does this mean I have to sand all the mating surfaces?
Offline
#179 25 Apr 2020 8:43 pm
- spclark
- Member
- From: "Driftless" Wisconsin USA
- Registered: 19 Mar 2020
- Posts: 478
Re: Waterlust sailing canoe in Norway
My (admittedly) limited experience suggests that yes, sanding your well-cured epoxy underdeck is strongly recommended.
That the CLC build manual for this kit puts assembling and fiberglassing the deck underside near the beginning, while actual bonding of the deck to the completed hull is several pages - and days (if not MONTHS!) farther along - certainly leaves this open to question.
I've had epoxy drippage land on previously coated and fully cured but un-sanded surfaces. When I've gone to remove them, a few have popped off taking some of the underlying epoxy along with.
So I'm not 100% certain there isn't some kind of chemical bond taking place, yet I'm unwilling to take any chances with assemblies that could affect my assembled kit's structural integrity (or MY well-being once hundreds of yards from shore!) so I've been diligent in following the SAND before COATING AGAIN mantra.
Only instance I know of where cured epoxy ought not need be sanded is when what's called PeelPly is used on top of the epoxy that's been laid down, then allowed to cure.
Once PeelPly's removed the epoxy surface underneath is left with a uniform texture that's supposed to be quite suited for further coating with no additional action. That link I've included will take you to a USA supplier of all kinds of stuff for fabricating in epoxy and other resins. Lots of information there if you're inclined to take on a larger project!
PeelPly isn't included in the kit components though so if you're going to take this path you'll need to source yours locally somehow. And it's not cheap either, but does help to shorten labor hours spent prepping surfaces where it can be usefully employed.
My plans for getting my deck prepped prior to bonding is to use PeelPly so as to avoid just the question you've asked here.
If you're looking for UK sources for similar products I'd look to Fyne Boats first or simply Googlesearch PeelPly! Here's one supplier I found that way:
https://www.ecfibreglasssupplies.co.uk/ … y/peel-ply
- and there may very well be more!
Last edited by spclark (25 Apr 2020 8:44 pm)
Offline
#180 26 Apr 2020 10:48 am
- MartinC
- Member
- Registered: 3 Apr 2020
- Posts: 353
Re: Waterlust sailing canoe in Norway
Here is the additional frame I mentioned. (If I work the picture posting process correctly!)
Offline
#181 26 Apr 2020 12:54 pm
- Bergen_Guy
- Member
- Registered: 6 Feb 2020
- Posts: 353
Re: Waterlust sailing canoe in Norway
Today’s plan has been reduced to head scratching, as it appears that I am about a meter and a half of glass cloth short. That’s a bit of a shame as I had planned to glass the deck today. I do have some offcuts from the previous jobs, but that’s going to leave me with a bit of a patchwork somewhere. No idea if I can get that to look neat or not. Anyone got experience with ‘patchwork’ glass cloth application, or should I really wait and get some more cloth?
Offline
#182 26 Apr 2020 2:15 pm
- MartinC
- Member
- Registered: 3 Apr 2020
- Posts: 353
Re: Waterlust sailing canoe in Norway
Exactly the same problem as me! FBK told me I should have worked it out before I started and used offcuts for the interior.
I am not confident enough in my glassing skills to join pieces invisibly, so I am going to have to buy another 17' shortly.
By the way, what is the secret to not getting tiny bubbles when glassing? I haven't managed one yet without bubbles, but as all previous areas are largely hidden, it didn't matter too much. I am keen to get the deck as bubble free as possible.
Offline
#183 26 Apr 2020 4:00 pm
- MartinG
- Member
- Registered: 29 Mar 2020
- Posts: 6
Re: Waterlust sailing canoe in Norway
There's a good downloadable book called "Epoxy Basics" by Russell Brown. Not sure how to put a link but you can google it.
Edit: I just googled it myself and it was a ridiculous price on ebay so go to ptwatercraft.com and download it for $5.99.
I use peelply whenever I can and get it from Matrix Composites here in UK, mainly because several of the staff there are boatbuilders and sailors.
If not using peelply then yes; you do need to sand.
Not sure about the bubbles - try not to agitate too much when mixing - the bubbles are obviously caused by air in the mix. And I use a bristle roller on the cloth once the resin is applied which seems to help.
Cheers
Martin
Last edited by MartinG (27 Apr 2020 8:00 am)
Offline
#184 26 Apr 2020 4:38 pm
- Bergen_Guy
- Member
- Registered: 6 Feb 2020
- Posts: 353
Re: Waterlust sailing canoe in Norway
Good post there folks! So it looks like there are as many ways of attaching the deck as there are builders! I guess they all work. I must admit I didn’t tough up the glass on the deck before glueing it down. Hopefully it was rough enough to have a good enough key. It feels pretty solid, but I guess I only find out when I am out in heavy weather or the boat gets a bit of rough treatment.
I have gone over the side of the hull where the glass overlaps from deck to hull though. I did do a bit of thinking and managed to find a way of covering the deck with minimum joins between the panels of glass cloth. I cut the big piece in two and used that for the fore and aft decks, and did the side decks with the offcuts, it will be ok. I did find out that you have to go easy with the squeegee at the end of the cut panels of cloth, one started coming apart as I was putting resin on, and had to take the soaked cloth off, and re-cut it. That was a bit of a sticky fiddly operation!
Back in there this evening to trim the excess glass before the resin sets. It got cold again here, so no big rush.
Offline
#185 26 Apr 2020 4:57 pm
- spclark
- Member
- From: "Driftless" Wisconsin USA
- Registered: 19 Mar 2020
- Posts: 478
Re: Waterlust sailing canoe in Norway
One of the drawbacks I see in bonding the deck to the hull structure is the lack of access that otherwise would allow for placing fillets where the deck joins the hull structure underneath. You can get to quite a lot of these junctions but not everywhere, particularly at the ends.
That's why I'd advocate being as meticulous in preparing the deck underside as possible, to be as confident that any bond created is 100% of what's possible. Without the addition of fillets any bond along frame tops is all that holds the deck in place. Doublers -
where present - help, and of course the sheer clamp is there for exactly that reason also.
But then I tend to overbuild most anything I take on.... I have to put faith in CLC's experience in designing these watercraft.
I have 'some' PeelPly left from a roll I bought before I started assembly. Gained a lot of respect for it on some of the component fabrication operations I've done while the hull sits in the garage.
My plan for dealing with the deck holds an image of it (after being 'glassed) being positioned on the hull in a way that allows me to outline all the contact-point edges underneath, so once it's flipped back over I can mask off where epoxy will bond it to the hull structure.
I want to paint the compartment areas that will otherwise be inaccessible once the deck's been bonded down. If I use PeelPly strips to prepare the areas where the deck will eventually be bonded, masking those areas off before painting will aid in that endeavor.
It's all about planning for what needs to be done a few steps ahead of what's actually being done at present.
Last edited by spclark (26 Apr 2020 5:10 pm)
Offline
#186 26 Apr 2020 6:26 pm
- Bergen_Guy
- Member
- Registered: 6 Feb 2020
- Posts: 353
Re: Waterlust sailing canoe in Norway
I think you really hit on something key there SP - thinking a few steps ahead, and planning how you are going to do something that is a few ‘moves’ away!
Offline
#187 26 Apr 2020 7:09 pm
- Bergen_Guy
- Member
- Registered: 6 Feb 2020
- Posts: 353
Re: Waterlust sailing canoe in Norway
Martin C - in thinking about your question re air bubbles under the glass. Not sure. Some of mine have worked really well, with very few spots that don’t stick and others not so well. Not sure what I have done differently on those that worked well. I think that warmer epoxy has given better results and things are more likely to go wrong as the epoxy cools a bit. The other trick I have found is that just as things are starting to tack - go round again and press the bubbles flat (with a gloved meths finger / rag with meths on) , in many cases the glass fibre the sticks to the wood. I do have a few small bubbles on the deck, and I am not yet sure what I will do with them. I had a big one inside the hull. For that one I sanded / abraided the glass away and used a small offcuts of glass to put a new piece in that area. Looked ok once everything is done. Just went to look at my deck again, and I can see the seams between the pieces of glass, so waiting for some new glass sheet is probably a good plan. It would have been nice to have had a note with the kit saying it didn’t include quite enough fibreglass to do a neat job, so get thinking...
Last edited by Bergen_Guy (26 Apr 2020 7:39 pm)
Offline
#188 26 Apr 2020 11:42 pm
- spclark
- Member
- From: "Driftless" Wisconsin USA
- Registered: 19 Mar 2020
- Posts: 478
Re: Waterlust sailing canoe in Norway
I think you really hit on something key there SP - thinking a few steps ahead, and planning how you are going to do something that is a few ‘moves’ away!
Well, CLC deserves the credit I think when they set about making kits available that bear their new Pro label. These typically appeal to a smaller market so the investment necessary to produce a 200+ page manual just isn’t there.
So it’s left up to each builder who’s taken on the challenge of figuring how best to approach the operations that aren’t well-outlined in the accompanying, rather scant documentation.
Folks who’ve built an epoxy & plywood S&G kit before have experience that a raw ‘newbie’ lacks. Forums like this one and the ones hosted by CLC are of help yet no real substitute for hands-on learning. I’m indebted to the Waterlust builder here in Texas for making himself and his experience accessible to me. I now have his entire project’s photo documentation to refer to. He’d built a Pocketship previously and it appears he’s also a skilled machinist as well as a private charter pilot!
Offline
#189 27 Apr 2020 6:31 am
- MartinC
- Member
- Registered: 3 Apr 2020
- Posts: 353
Re: Waterlust sailing canoe in Norway
Thanks everyone for advice. Yes SDP, forums like this are invaluable for people like me. Keep the posting coming!
I have a week of sanding/varnishing the inside ahead so nothing too technical - just hard graft.
Offline
#190 27 Apr 2020 8:59 am
- Bergen_Guy
- Member
- Registered: 6 Feb 2020
- Posts: 353
Re: Waterlust sailing canoe in Norway
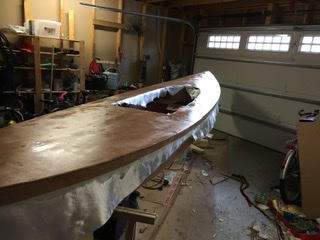
One coat of epoxy this morning, hopefully second one later today. It’s not the most beautiful glass job I have done - the underside of the hull was better, still, I am sure it will work.
Offline
#191 27 Apr 2020 11:20 am
- Ian
- Employee

- Registered: 24 Nov 2014
- Posts: 103
Re: Waterlust sailing canoe in Norway
Guy, if you sand/scrape the overlap of the glass patches till it's smooth and flat and give it a fill coat, the join should disappear completely.
As others have said, epoxy that has been left for more than 24 hours should be sanded before applying more epoxy. It doesn't take much to key it in. For the underside of the deck, I would just spend a few minutes gently scuffing round the edges with some coarse sandpaper, say 80-grit, by hand. For something more visible, I might use 120-grit, though the epoxy will fill the scratches anyway.
MartinC, as for bubbles under the glass, it may be that you whisked a lot of air into the epoxy while mixing (this is better than not mixing it enough!), or worked air into it when squeezing it into the glass because it was cold (it starts to look cloudy when you overwork it). Make sure the epoxy is warm before you begin (ideally 20C) and try to let it soak into one small area of the glass before spreading the excess to the next bit.
The bubbles may also be coming out of the plywood: tiny air bubbles in the wood expand as it warms up and bubble out under the glass (usually after you've left it looking perfect; you come back to find bubbles have appeared). Warming the wood beforehand, then letting it cool slightly as the epoxy sets, ensures that the air is contracting rather than expanding -- or, do the job later in the day, when it is starting to cool down. For the most important areas, i.e. the deck, you could also start by applying a very thin coat of epoxy to seal the bare wood and let it cure before applying the glass over the top.
Overlapping patches of glass are particularly prone to bubbles, when applying them simultaneously. Fold the edge of the top layer back to wet out the layer underneath, then fold it back over and wet it out too. If you have the time and don't feel like taking any risks, you could simply let the first piece cure and sand the edge smooth before applying the overlapping piece.
I'm enjoying reading this thread. Keep up the good work, all of you!
Offline
#192 27 Apr 2020 11:23 am
- Bergen_Guy
- Member
- Registered: 6 Feb 2020
- Posts: 353
Re: Waterlust sailing canoe in Norway
Thanks for the tips and encouragement Ian, great stuff. Looks like I have more sanding on the menu this week!
Offline
#193 27 Apr 2020 12:51 pm
- MartinC
- Member
- Registered: 3 Apr 2020
- Posts: 353
Re: Waterlust sailing canoe in Norway
That's really helpful Ian. Thanks.
From what you have written, I think my problem is air bubbles coming out of the plywood (as it looks fine just after I have finished). As well as warming the epoxy, I shall put a heater near the boat for a short while before doing the deck. I will also put a thin coat of epoxy on first, as you suggest.
As for the fitting of the deck, I was wondering if the secret to the best possible bond for me, will be to sand the whole of the underside of the deck and apply a thin epoxy coat to it and then fit it to the hull after it has cured but within 12 hours. In this way I will get all the cross beams to mate with 'green' epoxy as well as the perimeter. I would guess that a second coat of epoxy on the deck underside will not stiffen it too much?
Offline
#194 27 Apr 2020 3:42 pm
- Bergen_Guy
- Member
- Registered: 6 Feb 2020
- Posts: 353
Re: Waterlust sailing canoe in Norway
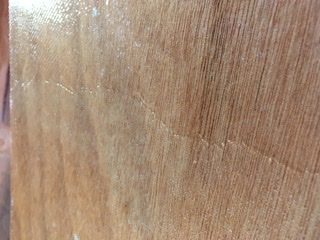
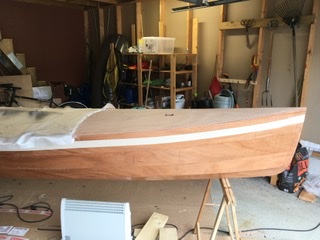
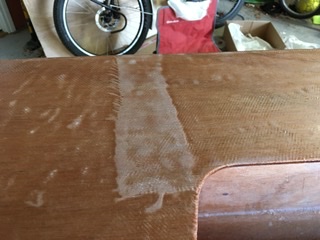
Here is a seam, this is with two fill coats and it’s already disappearing. Next I will do a sanding job all over before one or two more Epoxy layers.
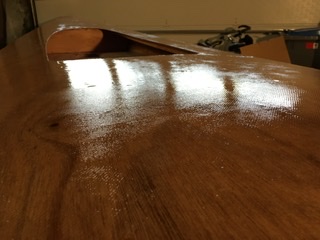
Her you can see there is still some weave visible, but it’s amazing how it disappears.
Offline
#195 27 Apr 2020 5:47 pm
- Ian
- Employee
- Registered: 24 Nov 2014
- Posts: 103
Re: Waterlust sailing canoe in Norway
As for the fitting of the deck, I was wondering if the secret to the best possible bond for me, will be to sand the whole of the underside of the deck and apply a thin epoxy coat to it and then fit it to the hull after it has cured but within 12 hours. In this way I will get all the cross beams to mate with 'green' epoxy as well as the perimeter. I would guess that a second coat of epoxy on the deck underside will not stiffen it too much?
You only really need to key-in the areas that will be in contact: most importantly, where it contacts the sheerclamps and major frames. But, a second coat of epoxy won't do any harm.
It won't create a stronger bond than just sanding though: the epoxy on the frames may be chemically bonded to the second coat of epoxy on the deck, but the second coat still isn't chemically bonded to the first coat. The difference in strength between a chemical bond and a keyed-in bond isn't significant anyway. Even if you don't key it in, it will probably never matter in this case, but it's prudent to do so.
Offline
#196 27 Apr 2020 6:53 pm
- Bergen_Guy
- Member
- Registered: 6 Feb 2020
- Posts: 353
Re: Waterlust sailing canoe in Norway
Just a quick update, passing on info in a mail I got from Dillon. I was doing a bit of planning ahead, and thinking my way through the hatch construction. You will notice on page 20 of the manual is says in one place to use the sill spacer as the template for cutting the hatch, and in another to use the hatch sill. It is the sill spacer that should be used as the template for cutting!
Last edited by Bergen_Guy (27 Apr 2020 6:54 pm)
Offline
#197 28 Apr 2020 4:12 am
- spclark
- Member
- From: "Driftless" Wisconsin USA
- Registered: 19 Mar 2020
- Posts: 478
Re: Waterlust sailing canoe in Norway
Ian thanks for joining us here! That comment re: chemical vs. mechanical’s golden! There’s a lot of angst in newcomers (like myself) about whether successive coats of epoxy will somehow fail to bond, mayhap lead to later failure. Same w/ whether to sand or plane raw wood meant for scarfing, or whether pre-coating surface that eventually will get ‘glassed is less likely to work as well as raw surfaces ‘glassed with first coat to wet out.
I did my cockpit floor and hull bottom with the wet-out first coat, followed quickly with more epoxy only to suffer many teensy but inconsequential bubbles. As I intend to paint most everything bubbles really are more an annoyance.
For the deck operations to come I’m using PeelPly for the bottom coating, may try pre-coat on deck top then lightly sand before laying ‘glass & epoxy to finish off. Seems even with constant or slowly declining temps that first coat just invites bubbles to form.
Offline
#198 28 Apr 2020 2:57 pm
- Bergen_Guy
- Member
- Registered: 6 Feb 2020
- Posts: 353
Re: Waterlust sailing canoe in Norway
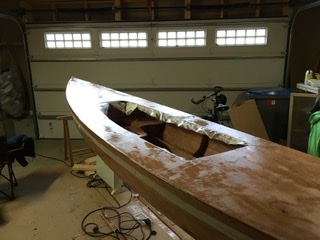
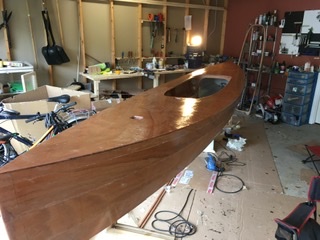
Once the resin was hard enough, I set to with the random orbital sander, and afterwards by hand, and have smoothed things over. I will put one more coat of resin on this evening and see how it’s looking.
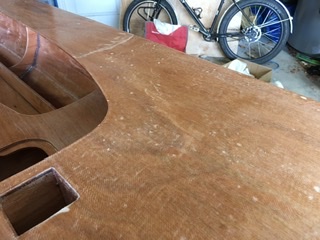
Going round with the sander has revealed all sorts of imperfections! Bubbles, high spots, everything you could imagine. I am now wondering if a bright finish is going to work. I will wait till the next coat of resin has cured before making a call there. The deck has got a nice grain, so I might just rely on the 10 foot rule... the good parts on the deck do seem to be where I first poured resin on, and the worst are the places I finished a batch.
Offline
#199 28 Apr 2020 3:07 pm
- spclark
- Member
- From: "Driftless" Wisconsin USA
- Registered: 19 Mar 2020
- Posts: 478
Re: Waterlust sailing canoe in Norway
"...the good parts on the deck do seem to be where I first poured resin on, and the worst are the places I finished a batch."
Interesting that observation. Wonder what's going on that would cause that difference?
"I am now wondering if a bright finish is going to work."
I've noticed how much a fresh coat of epoxy changes my appreciation for what looked awful after sanding the last one.
Even before starting my build last November I'd decided I was going to end with a 100% painted finish. Horror stories I'd read about the trials and trepidations of finishing bright, then the ongoing maintenance require to keep it looking presentable - put me off any expectation I could achieve what I then could live with later on.
I'm not a perfectionist but I do like a 'craftsmanlike' look once I'm done with a project! This current one's a boat after all, not furniture. Or a museum exhibit.
Right now I'm waiting for the Brightsides white I put over a well-dried then sanded couple of coats of a hardware store oil-based white primer to dry in that storage compartment ahead of frame #2, and the buoyancy compartments either side of the drive well. I guess with oil-based paint (haven't used it for decades!) one has to take the dry-time recommendations somewhat flexibly? It's been 62°F in the garage overnight but quite a bit of the paint is still wet to the touch after 12 hours. I've turned on an overhead fan and turned the heat up to 72°F thinking the coolish temp and lack of air movement inhibited drying in what is essentially a bowl-shaped space - paint's solvents aren't evaporating as fast as they might when more air movement is happening and at an elevated temp.
Last edited by spclark (28 Apr 2020 3:13 pm)
Offline
#200 28 Apr 2020 3:13 pm
- Bergen_Guy
- Member
- Registered: 6 Feb 2020
- Posts: 353
Re: Waterlust sailing canoe in Norway
I suspect the difference might be how much resin was being poured on, at the start of a batch there isn't a temptation to try and get the job done without mixing another batch. The other thing in my garage is temperature. I did try to keep the resin warm, but it always cools down a bit over the few minutes it takes from when I start applying a batch to when I finish.
On another note, what are people thinking of using for rudder fittings, and how are folks going about attaching the tiller to the rudder yoke?
Offline