You are not logged in.
- Topics: Active | Unanswered
#1 1 Apr 2016 9:03 am
- randomrichard
- Member
- Registered: 1 Apr 2016
- Posts: 5
Passagemaker dinghy project build from plans
Hi
Can't work out how to upload images. Anyway, I am assembling a Passagemaker dinghy built from your plans and have found that the stem ends of the planks slope the wrong way, creating a sawtooth appearance when stitched. This will shorten the boat a few inches when the forward transom is attached. I appear to have rebated the wrong sides. Please include a diagram for thicko's like me. I STILL can't see where I went wrong. Or correct the plans. Otherwise all going well, and I hope soon to be sailing the K&A canal near here in Devizes. Richard
Last edited by randomrichard (1 Apr 2016 9:04 am)
Offline
#2 1 Apr 2016 3:27 pm
- Fyne Boat Kits
- Administrator

- From: Cumbria, UK
- Registered: 22 May 2011
- Posts: 156
- Website
Re: Passagemaker dinghy project build from plans
Information about uploading pictures can be seen in the Suggestions section or by clicking on this link:
Offline
#3 7 Apr 2016 8:57 pm
- randomrichard
- Member
- Registered: 1 Apr 2016
- Posts: 5
Re: Passagemaker dinghy project build from plans
I have encountered another, substantial difficulty with my passagemaker. The instructions say that the transoms should be installed first, before the bulkheads, and then permanently glued to the hull planks. But if this is done BEFORE the bulkheads are attached to the planks it may be impossible to attach them afterwards. This is because if they are not pulled up to the final shape against the bulkheads before transom attachment and glueing, the planks inevitably buckle because the glued transoms have grabbed more of the planks than they should. It looks like I shall have to break planks 2, 3, and 4 at either or both the transoms to botch a fit. Good thing it's only a canal boat.
Offline
#4 7 Apr 2016 10:02 pm
- DerekD
- Member
- Registered: 12 Aug 2013
- Posts: 33
Re: Passagemaker dinghy project build from plans
I'm not familiar with the passagemaker but when building my Lutra Laker which also has a transom it was essential to install that first and take great care to ensure that it was absolutely square and central to the strongback.
If the transom is not set properly it will throw off the rest of the build
Offline
#5 8 Apr 2016 8:21 am
- Paul
- Employee

- From: Gatebeck Cumbria
- Registered: 4 Aug 2011
- Posts: 134
Re: Passagemaker dinghy project build from plans
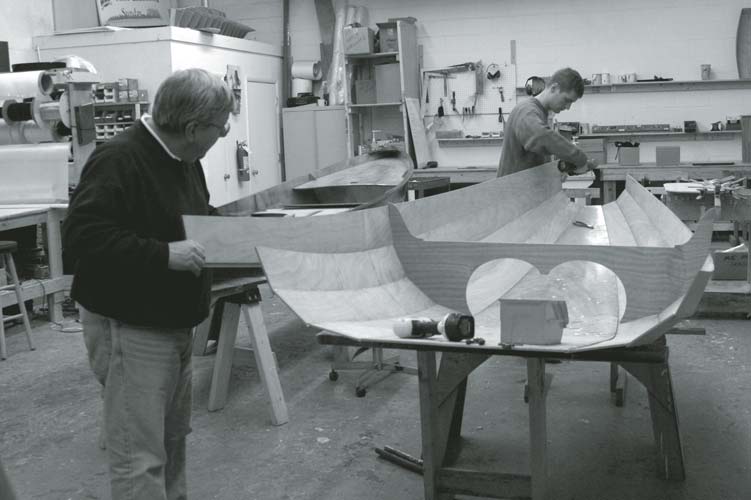
I am sorry about the vagueness in the manual which we had not noticed before. From the last section the central frame should be in its approximate place to prevent the side panels collapsing inwards. It is not intended that the frame should be removed before the transom is glued. I apologise that this is not clear.
Below is a picture from the previous section of the manual where the panels are wired together.
Offline
#6 12 Apr 2016 11:21 am
- randomrichard
- Member
- Registered: 1 Apr 2016
- Posts: 5
Re: Passagemaker dinghy project build from plans
Thanks for the reply. I am dismantling the dinghy and intend to rebuild with new planks. Or I may just throw it away if I cannot recover the transoms, having epoxied them. This is my 6th self-build boat and the first failure. I'm pretty sure the shape of planks 3 and 4 ON THE PLANS, not the kit maybe, is wrong - they were carefully cut to within a couple of millimeters tolerance but twist and bow out impossibly flat when fitting to the bulkheads (see first photo; twist). I have also attached a photo of the front after wiring the planks to show that THE PLANS, not the kit maybe, have them sloping opposite to the front tilt of the transom, thus losing several inches of length overall. I would appreciate a refund but maybe Loch Fyne will obtain error-free plans for me instead so that I can rebuild with planks having the correct shape- I am sure other plan builders would like them too.
I have followed your picture upload instructions for 30+ minutes without success. The pics go into the uploads window but don't get transferred to the post by the upload button in the upload window. I give up.
Edit by Fyne Boat Kits: added the photos you uploaded.


Last edited by Fyne Boat Kits (12 Apr 2016 2:08 pm)
Offline
#7 12 Apr 2016 2:51 pm
- Paul
- Employee

- From: Gatebeck Cumbria
- Registered: 4 Aug 2011
- Posts: 134
Re: Passagemaker dinghy project build from plans
Richard,
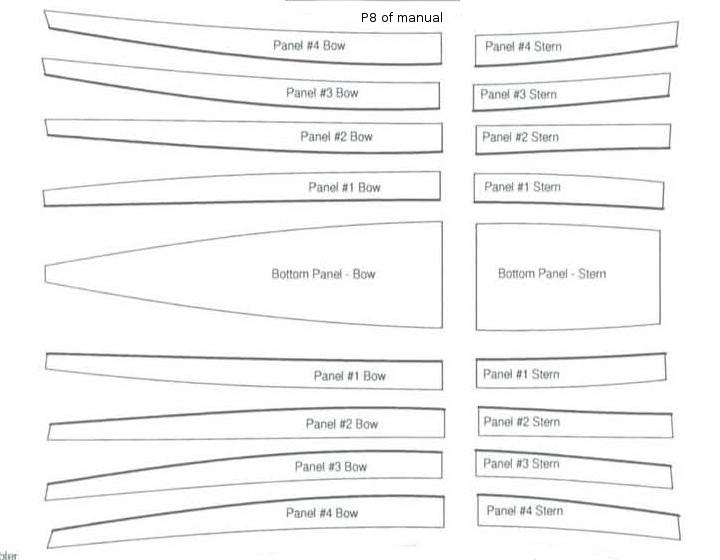
Now that they have put the pictures up I think that I can see what you have done. In the photograph of the panels lying side by side before rebating you have the starboard panels 2 to 4 on the port side and the port ones on the starboard side. I suspect that this is the source of your problems since you probably picked up the panels one at a time from the layout and made the rebates. If you look at the plans the slope of the panels at the bow is in the other direction. That is, the shorter edge is the one with the rebate rather than the longer one.
The panels are correctly laid out on page 8 of the manual and also on page 2 of the full sized plans they are correctly oriented. I will try to obtain some pictures of the plans and post them when I can.
I am sorry that you are having problems but several hundred of this boat have been made and I am sure that they are the best and clearest boat plans available. They have been proved to be perfectly adequate to allow a first time builder to complete the boat. As part of the package when you purchase plans or a kit, we offer email and telephone advice and re-assurance: if you had sent the above photograph to us we would have been able to let you know immediately. We shall try to work out a plan of action.
Offline
#8 12 Apr 2016 3:06 pm
- randomrichard
- Member
- Registered: 1 Apr 2016
- Posts: 5
Re: Passagemaker dinghy project build from plans
Paul
Thank you so much for pointing out where I went wrong. I forgot about the rebating lines on Fig. 2 when I laid out the planks for the photo and to identify them. It never occurred to me that the rebate and join could be on the outside of the curve so I just assumed that they would all be on the inside curve as I marked them up then and there. Anyway, I still have all the other parts for assembly and will quickly build some new planks to finish the boat. I will also NOT epoxy the planks until after assembly so that they are more flexible. And I would like to apologize for suggesting that my error was in any way the fault of the plans!
Richard
Offline
#9 30 Jun 2016 2:23 pm
- randomrichard
- Member
- Registered: 1 Apr 2016
- Posts: 5
Re: Passagemaker dinghy project build from plans
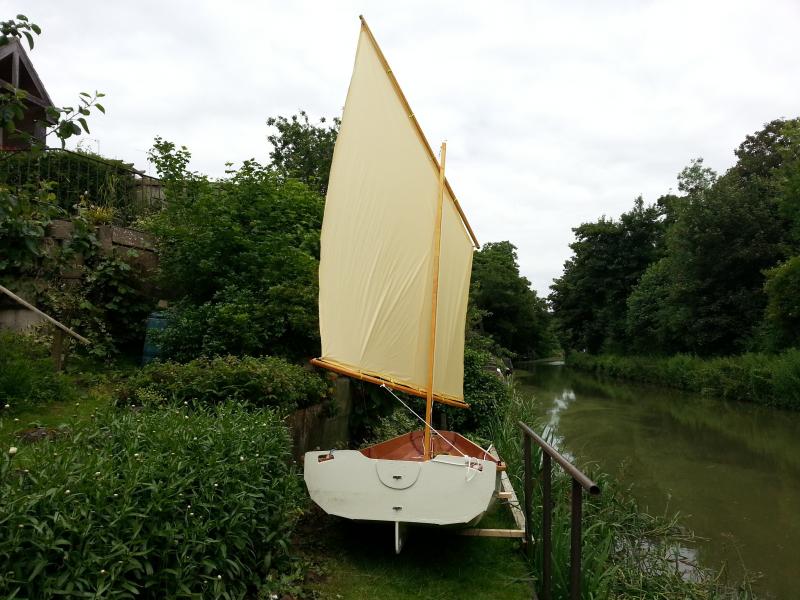
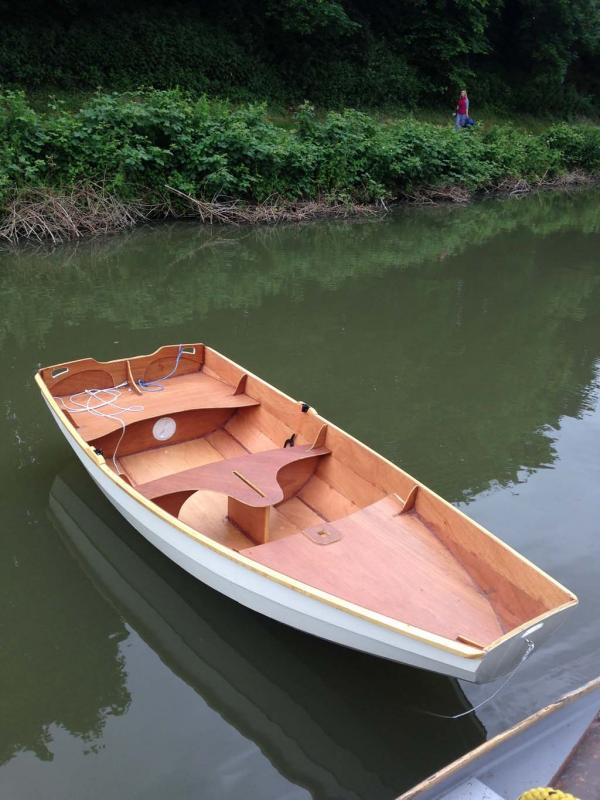
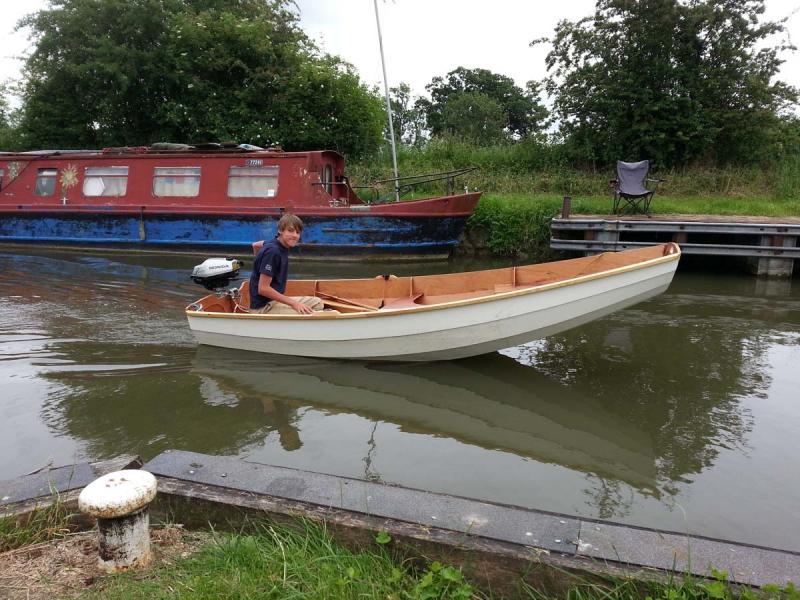
Here is the finished boat; the hull floating and the new lug sail fitted this afternoon but still awaiting a couple of mainsheet blocks. It has proved very popular especially with the little Honda 4stroke fitted. With the motor it can carry six adults a dog and a child ON THE CANAL ONLY!
Offline
