A forum for discussing wooden boats and boat building
You are not logged in.
- Topics: Active | Unanswered
#1 24 Nov 2014 5:23 pm
- Ian
- Employee

- Registered: 24 Nov 2014
- Posts: 103
Petrel stitch-and-glue kayak
I started building my Petrel kayak a few weeks ago. I work for Fyne Boat Kits, but this is the first boat I have built since I was 13. The boat will be my own, but you'll be able to see it at shows and paddle it at our in-water demos.
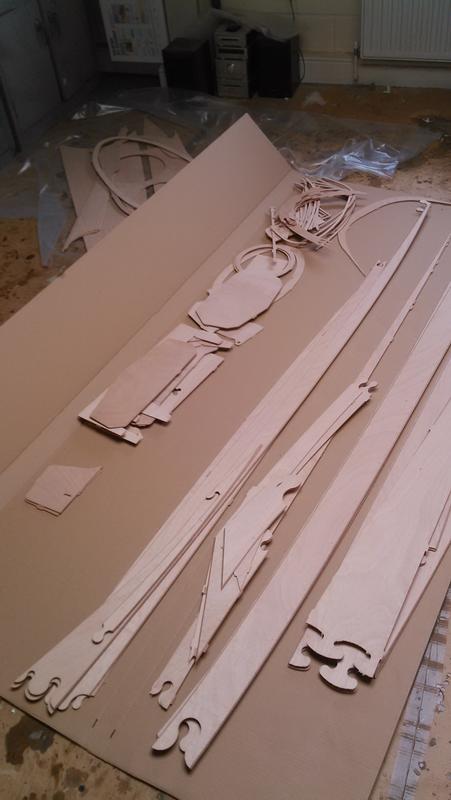
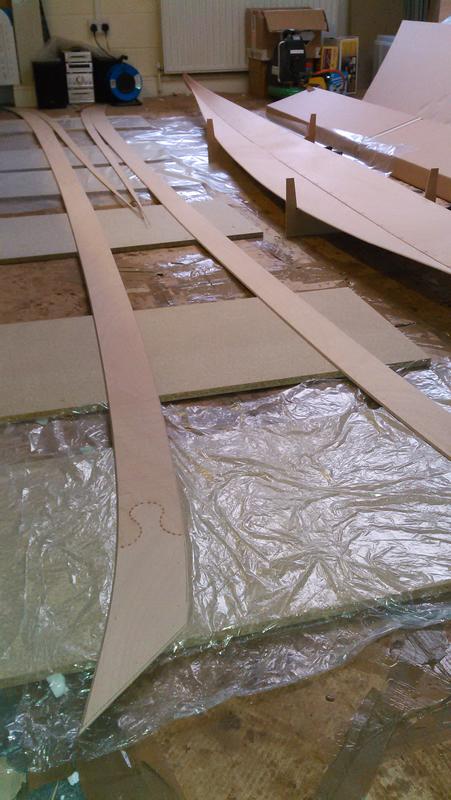
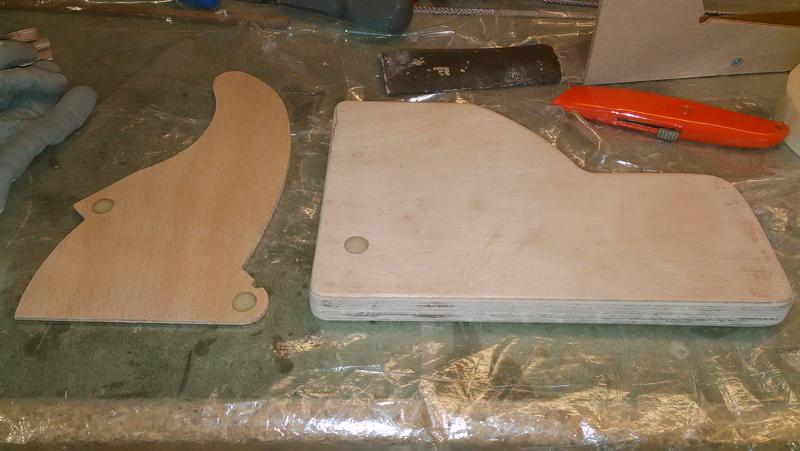
Here are the wooden panels as they come in the kit. I am building the boat in a corner of our workshop in the evenings after work. Space is limited, but it's a slender kayak so there's just enough room to work.
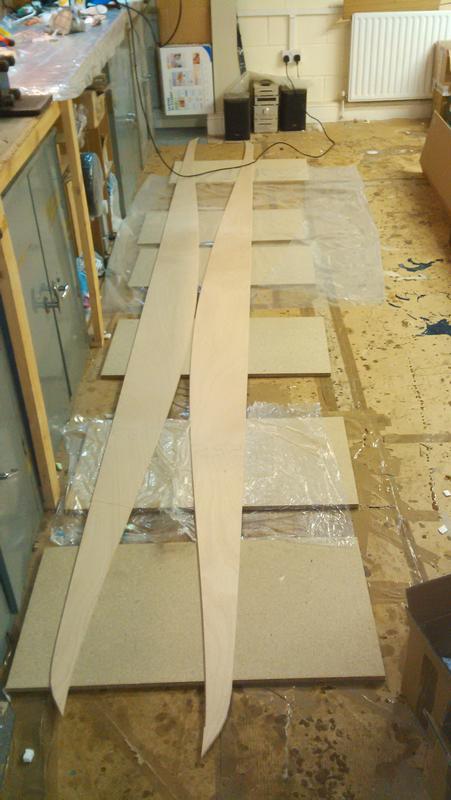
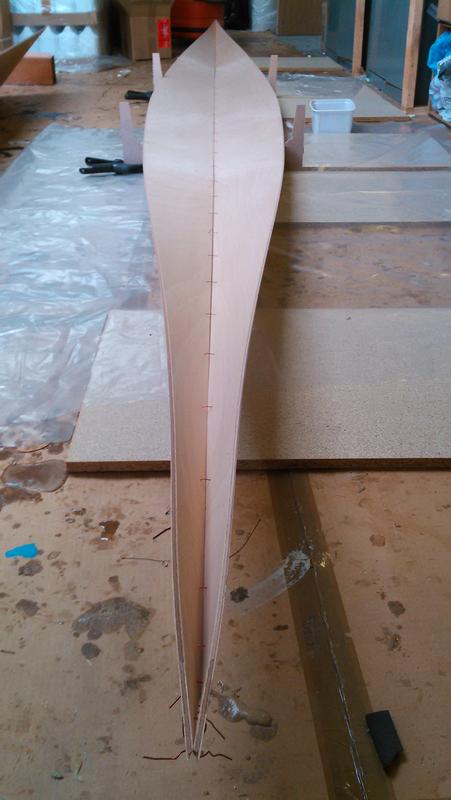
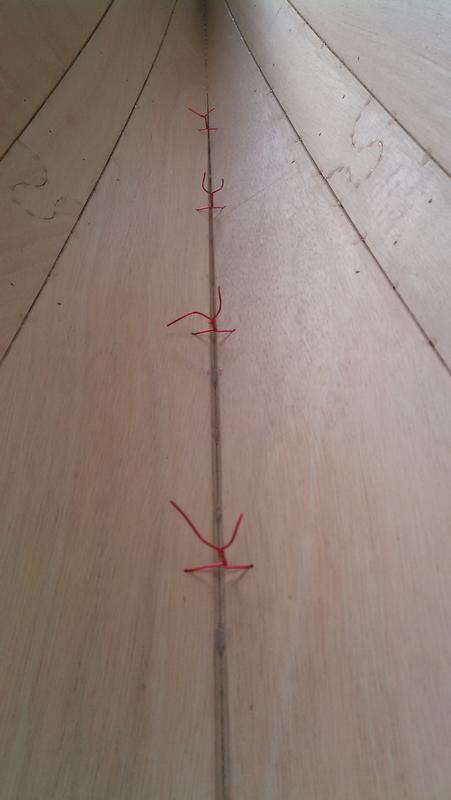
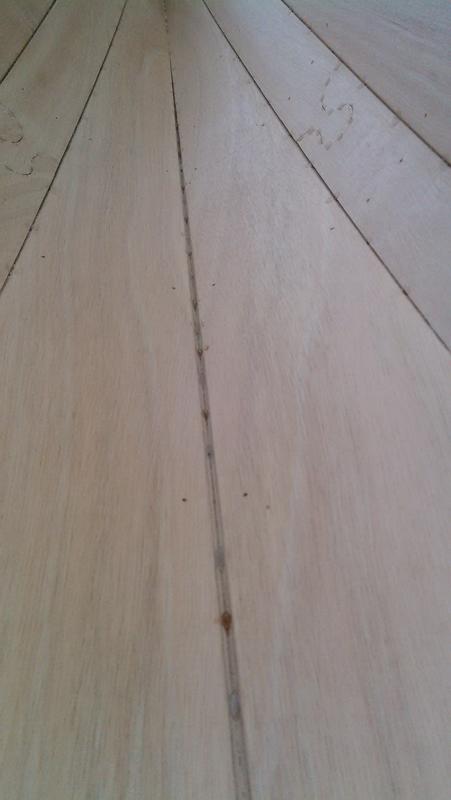
The puzzle joints are joined with superglue and the bottom panels of the hull are stitched along the keel before opening them out like a book and wiring them into a set of temporary forms.
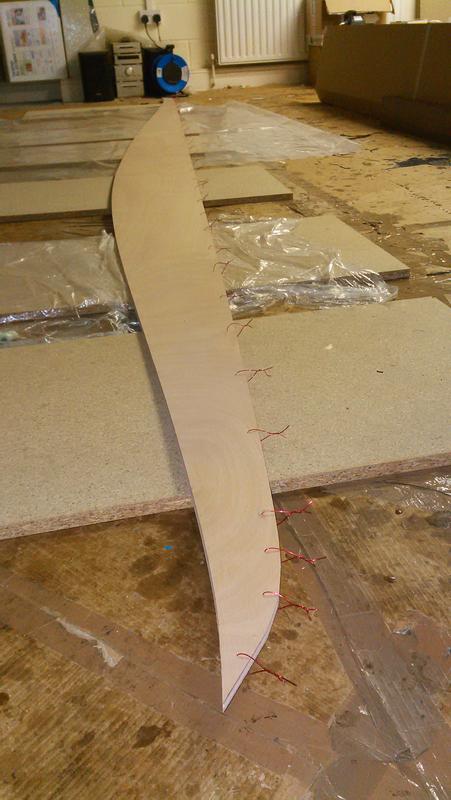
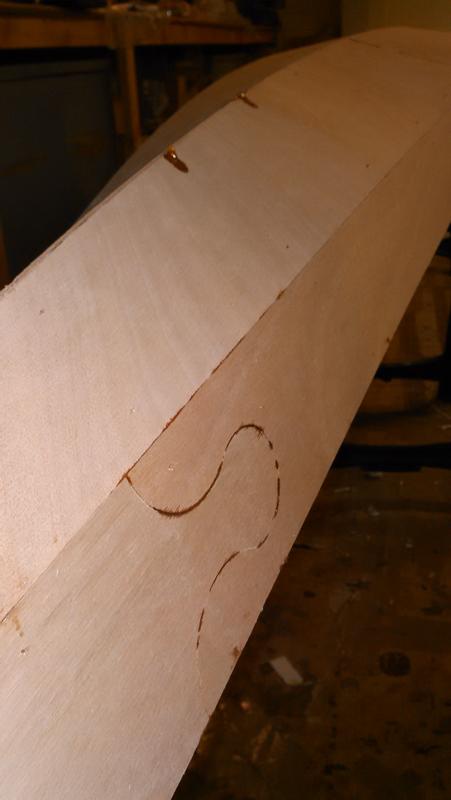
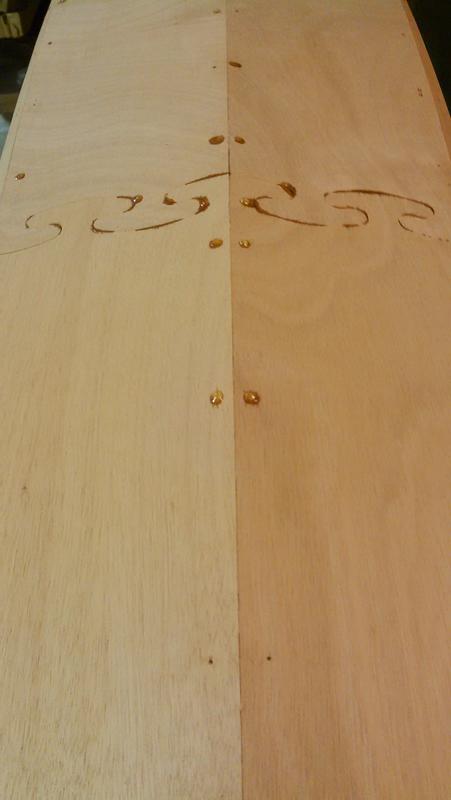
The side panels each have a delicate intermediate piece at the bow that tapers to nothing along the side of the boat. This makes the cross-section of the hull more rounded (multi-chine) at the front than it is at the back. You can see them in the background of this photo and you can see the glue drops holding together the stern puzzle-joint in the foreground.
Last edited by Ian (24 Nov 2014 6:40 pm)
Offline
#2 24 Nov 2014 5:41 pm
- Ian
- Employee
- Registered: 24 Nov 2014
- Posts: 103
Re: Petrel stitch-and-glue kayak
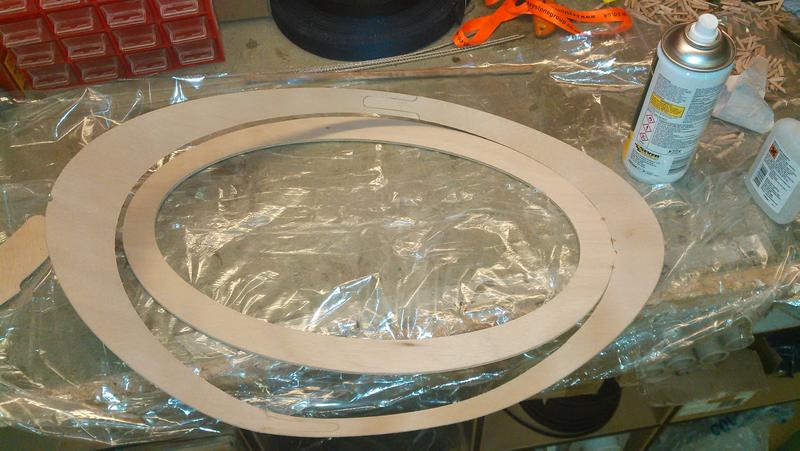
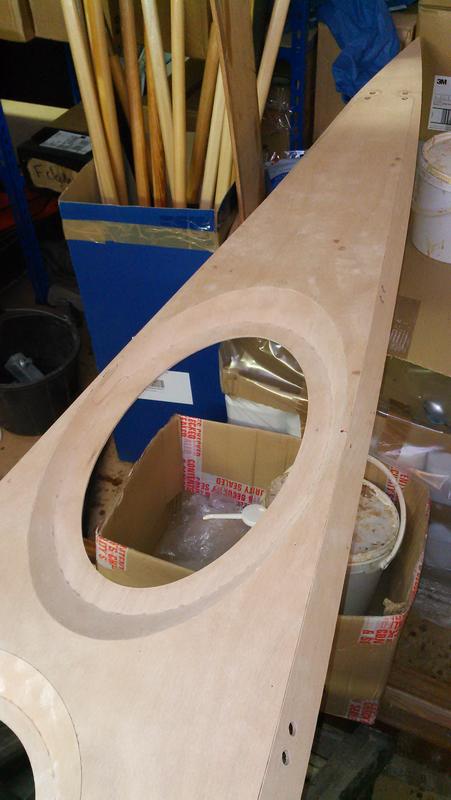
We cut the hatch recesses from 1.5 mm plywood so it bends easily into shape. The manual, written assuming thicker ply is used, shows you how to bend it around the hatch rim bit by bit using reinforced tape, but the thin ply makes it possible to join the recess into a ring and glue it straight onto the rim.
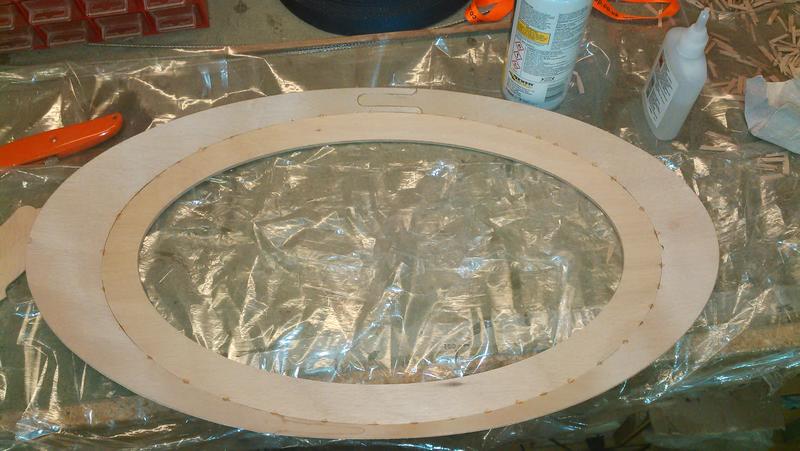
I put a few drops of glue at one end, then at the other end, making sure it was properly aligned so that the sides were equally tight. Then I put more glue drops halfway between the ends, then halfway between those drops, etc. until the whole ring was glued to the rim.
There are three recessed hatches in the Petrel: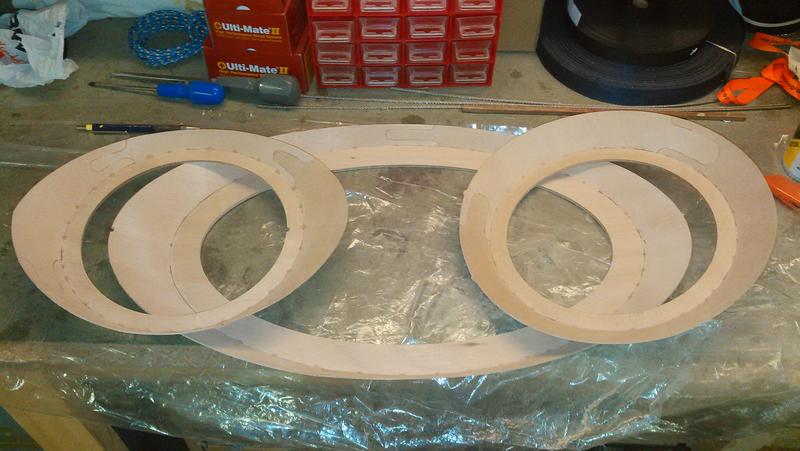
Offline
#3 24 Nov 2014 5:49 pm
- Ian
- Employee
- Registered: 24 Nov 2014
- Posts: 103
Re: Petrel stitch-and-glue kayak
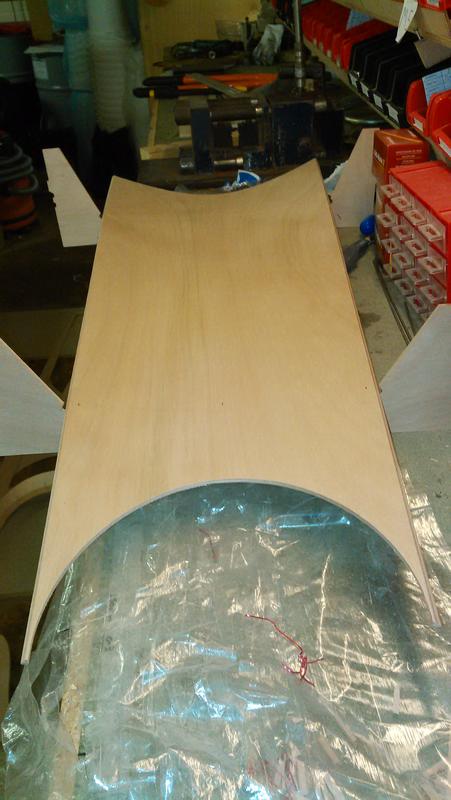
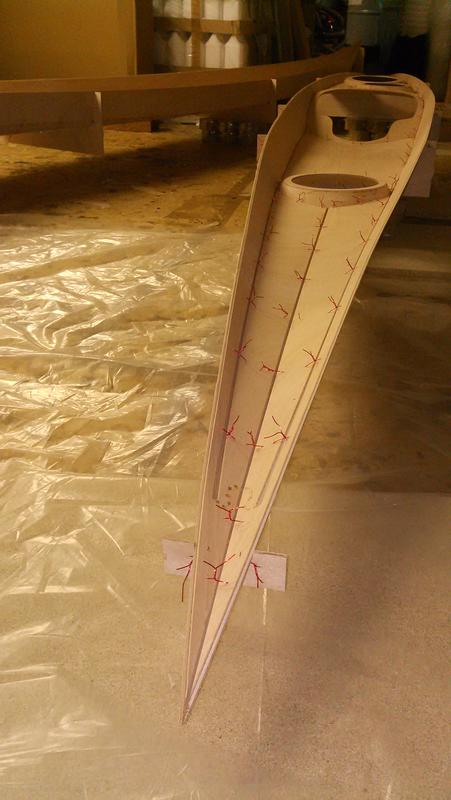
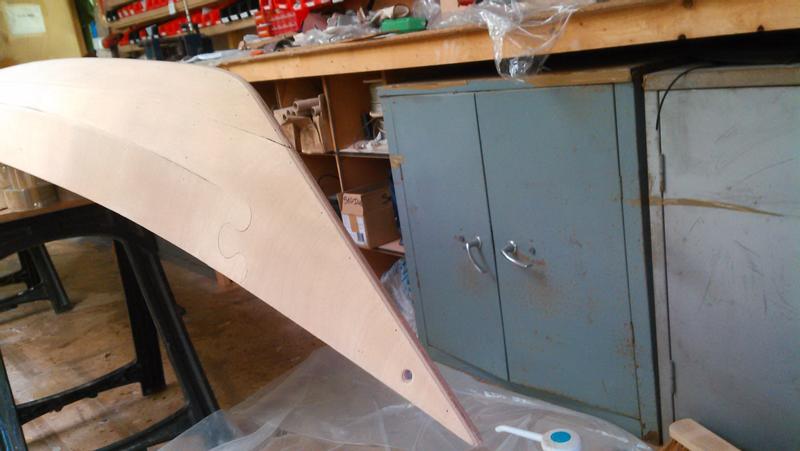
The front deck is pressed into a pair of curved forms and wired in. The forms want to skew and break, so I turned it the other way up and bent the deck around the edge of the workbench, so I could hold the forms straight while I tightened the wires.
Offline
#4 24 Nov 2014 5:58 pm
- Ian
- Employee
- Registered: 24 Nov 2014
- Posts: 103
Re: Petrel stitch-and-glue kayak
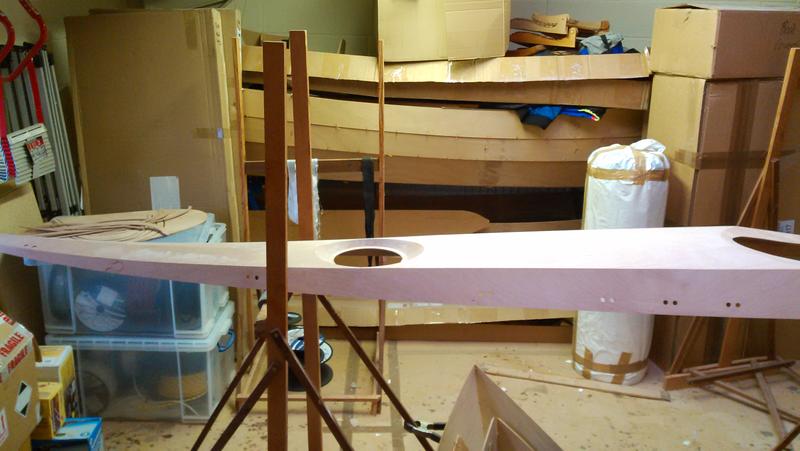
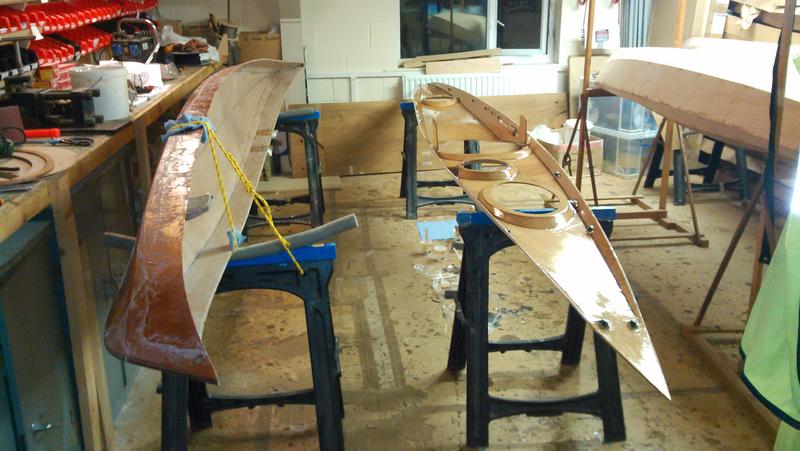
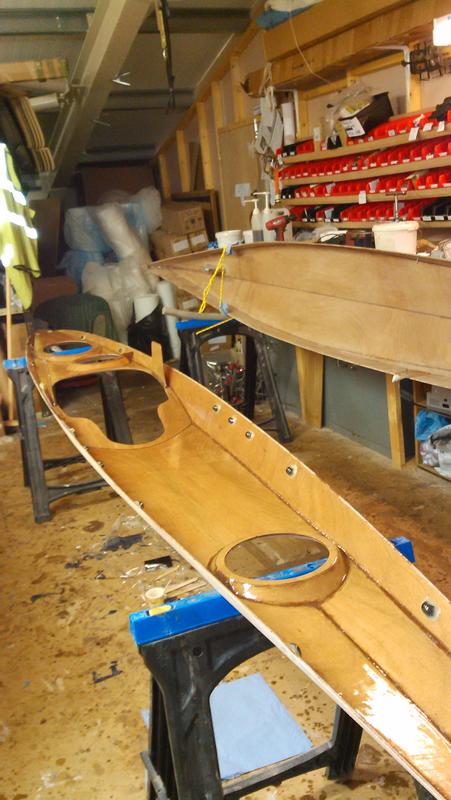
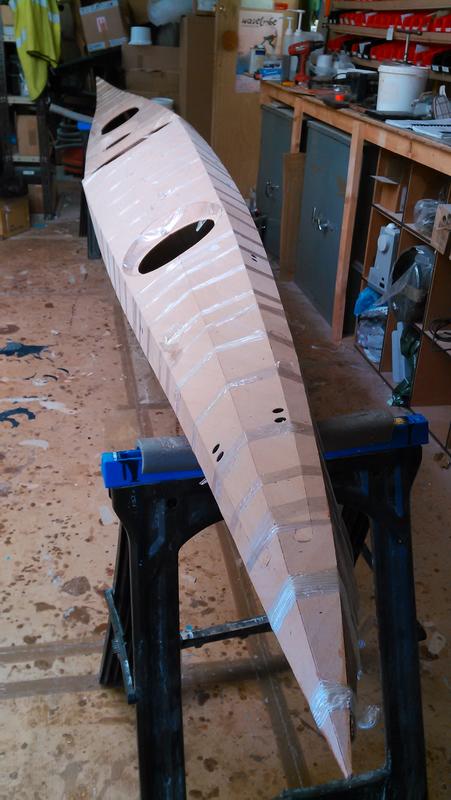
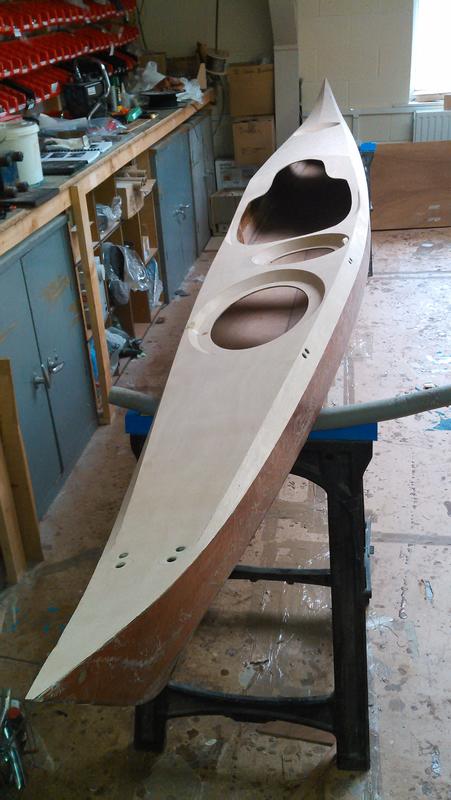
The deck panels laid out to see how they fit together. The photo is taken from the stern of the boat.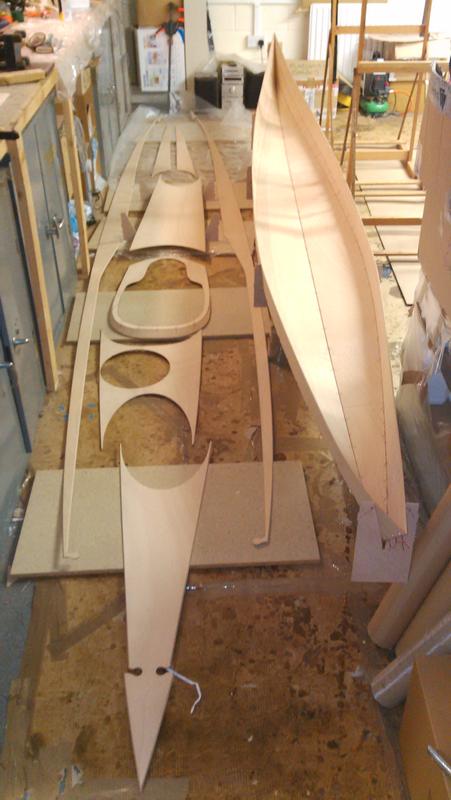
Wiring the cockpit in: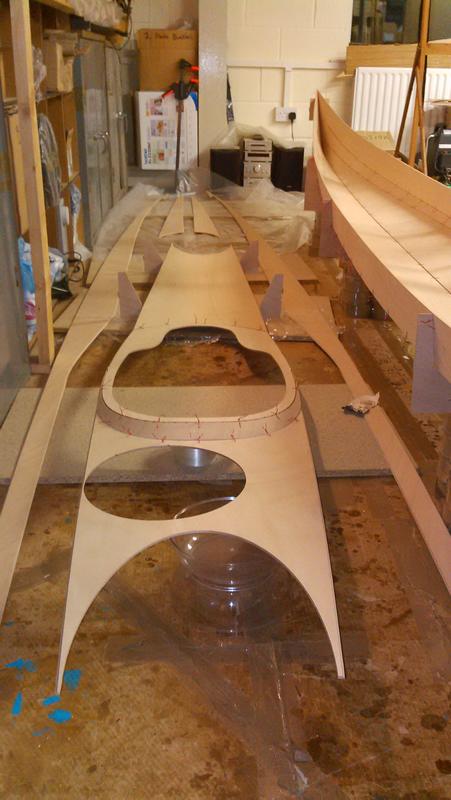
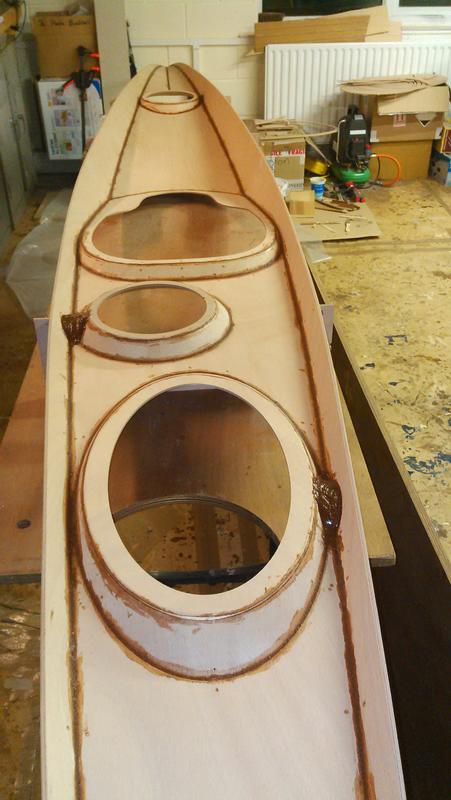
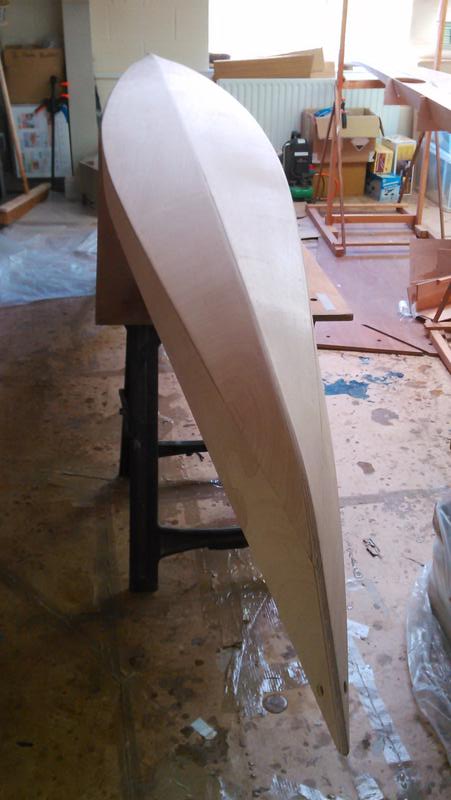
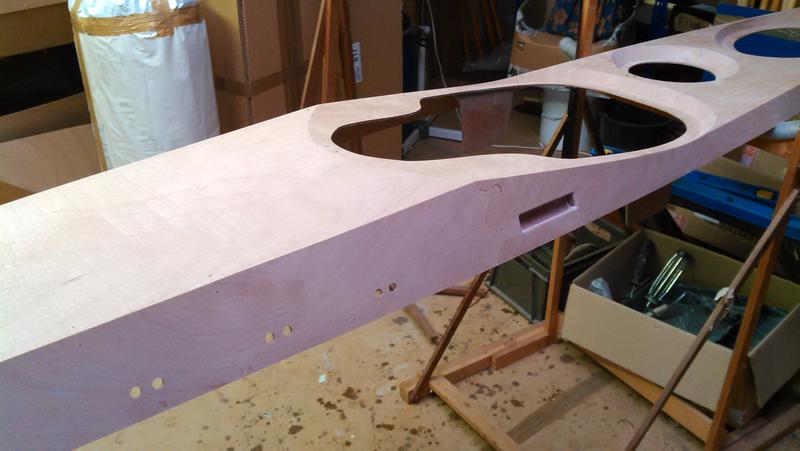
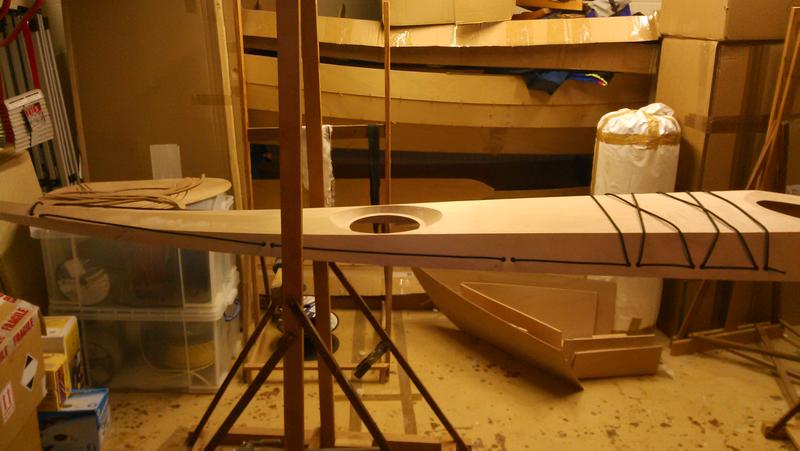
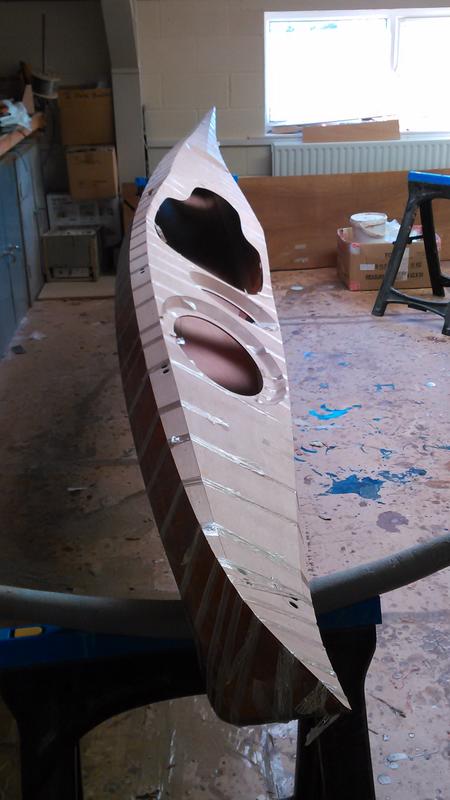
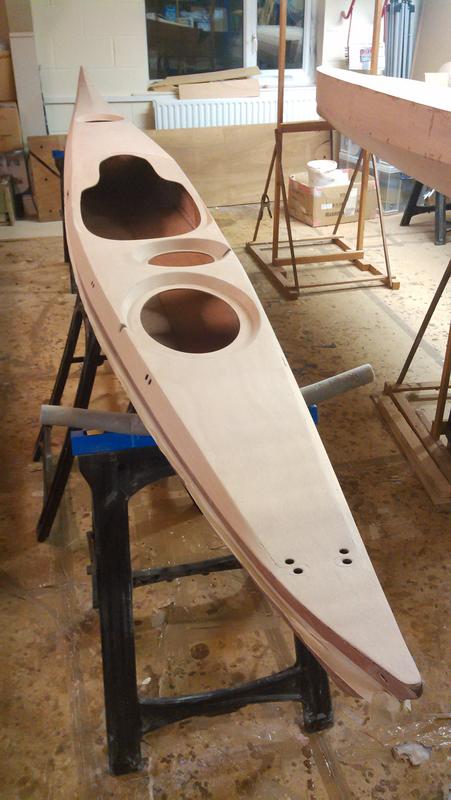
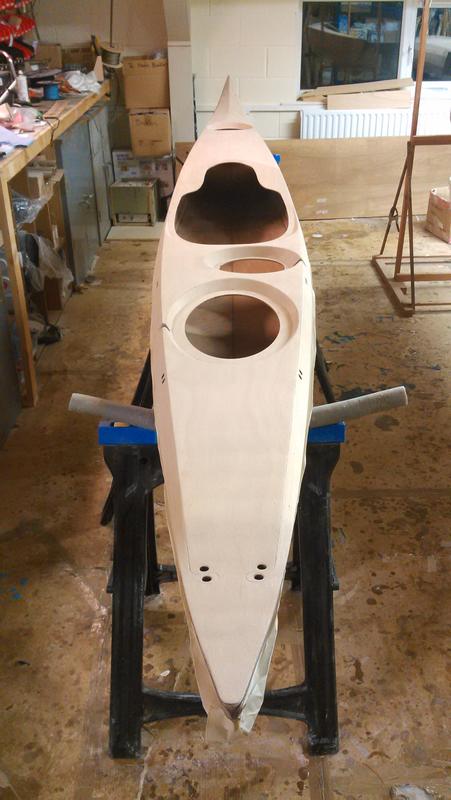
The stern completed. The hatch recesses will go in those large holes in the deck.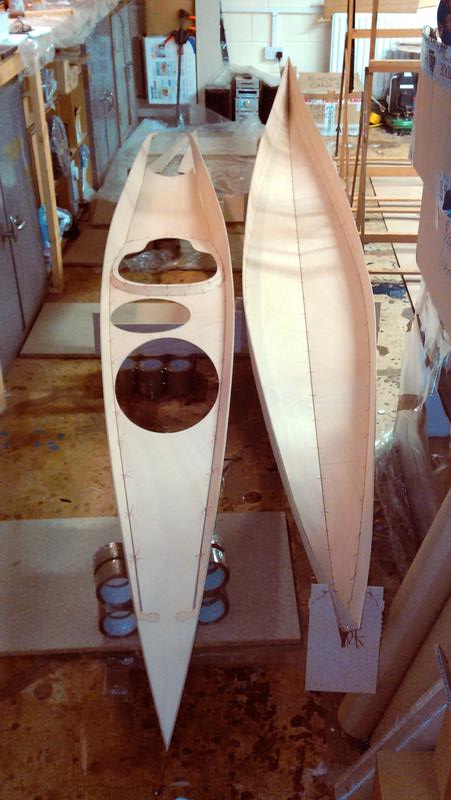
All stitched up. You can see the hatch recesses are now in place.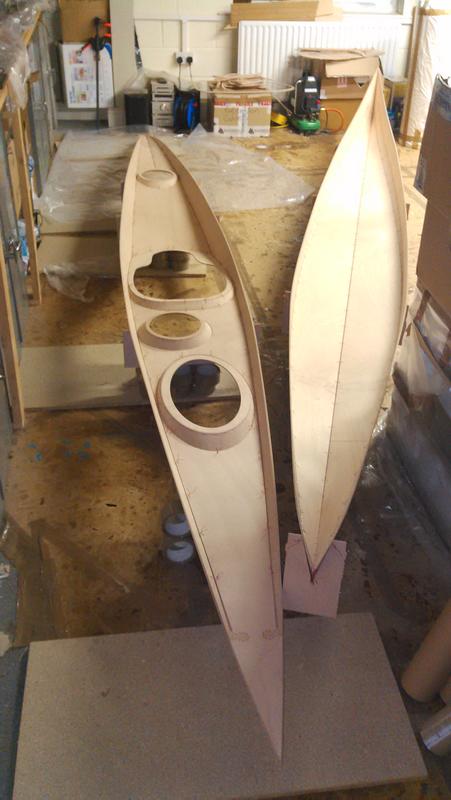
Offline
#5 24 Nov 2014 6:09 pm
- Ian
- Employee
- Registered: 24 Nov 2014
- Posts: 103
Re: Petrel stitch-and-glue kayak
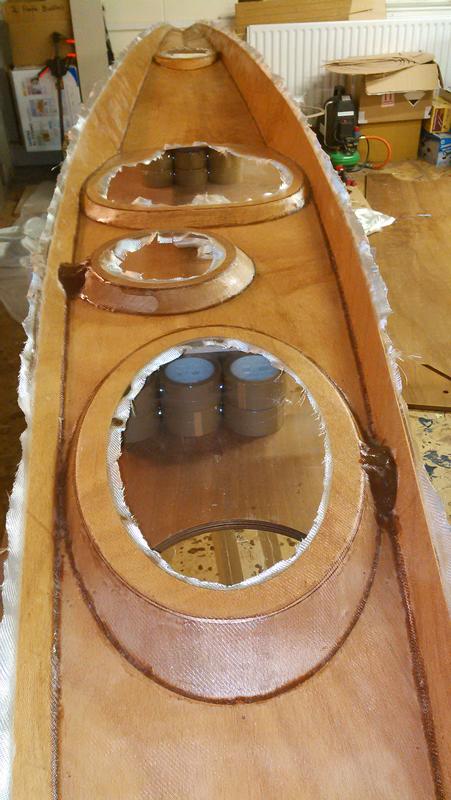
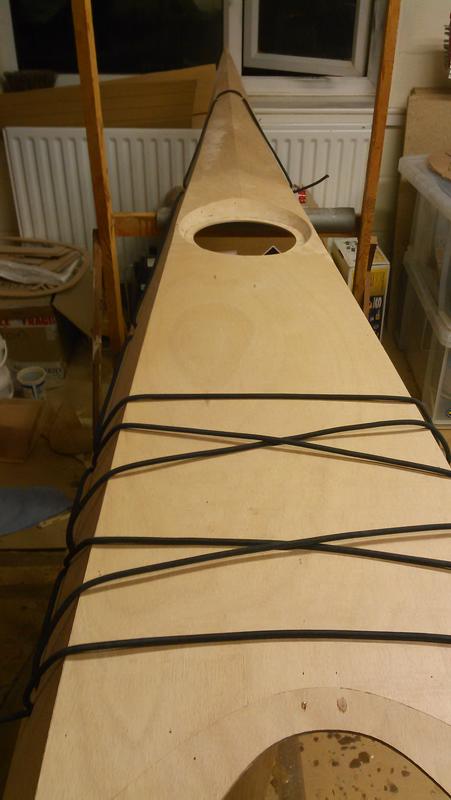
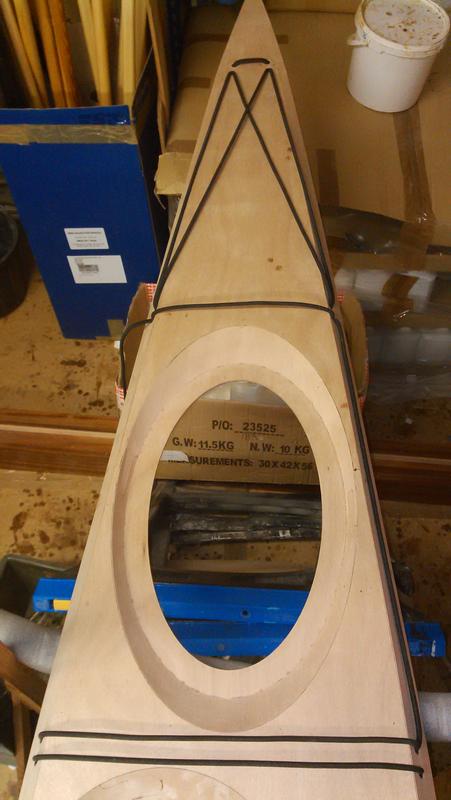
After sticking the deck panels together with dots of glue, I snipped all those wires out. I did the same for the hull.
I found the dish I was using to collect the broken wires fitted conveniently in the circular hatch rings. There are a few wires in there.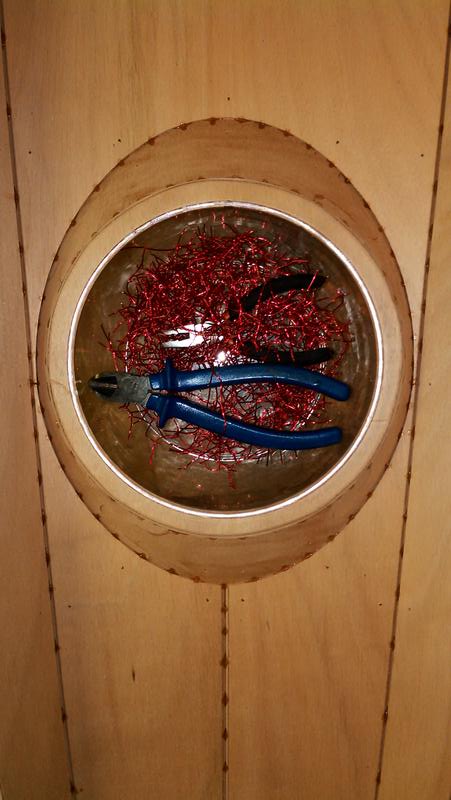
Offline
#6 24 Nov 2014 6:17 pm
- Ian
- Employee
- Registered: 24 Nov 2014
- Posts: 103
Re: Petrel stitch-and-glue kayak
I performed a stress test on the glue drops holding the hull panels together. OK, I dropped it.
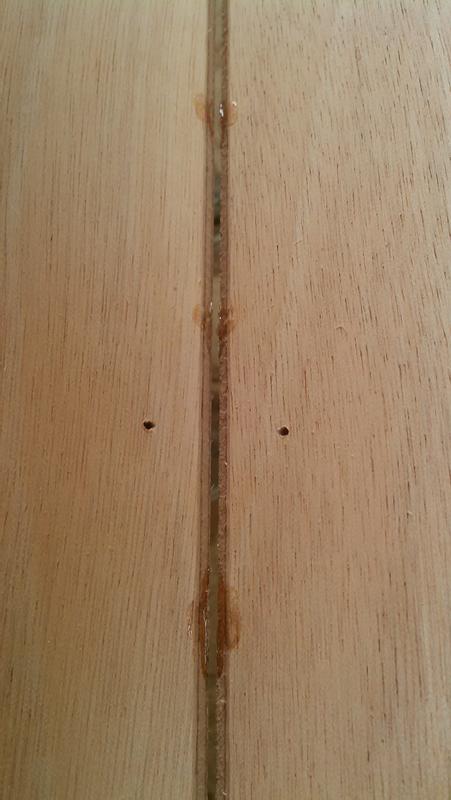
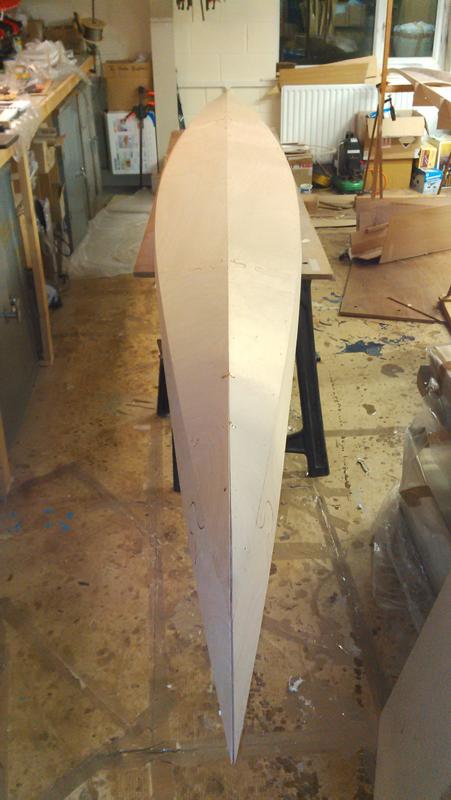
I was sanding off some excess glue and the boat slipped off the supports I was using, landing on the keel, which popped open along a couple of feet. The forms are a bit wobbly once you remove the central wires. It only dropped a few inches onto the support.
I wired the gap back together and re-glued it. No harm done.
Offline
#7 25 Nov 2014 1:36 pm
- Ian
- Employee
- Registered: 24 Nov 2014
- Posts: 103
Re: Petrel stitch-and-glue kayak
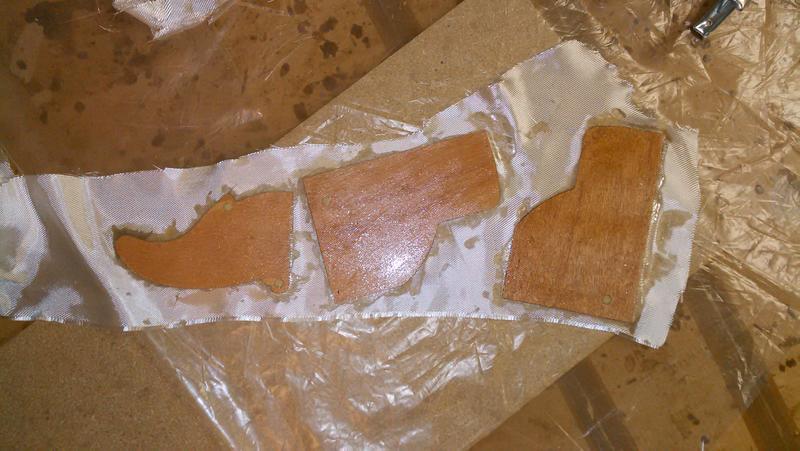
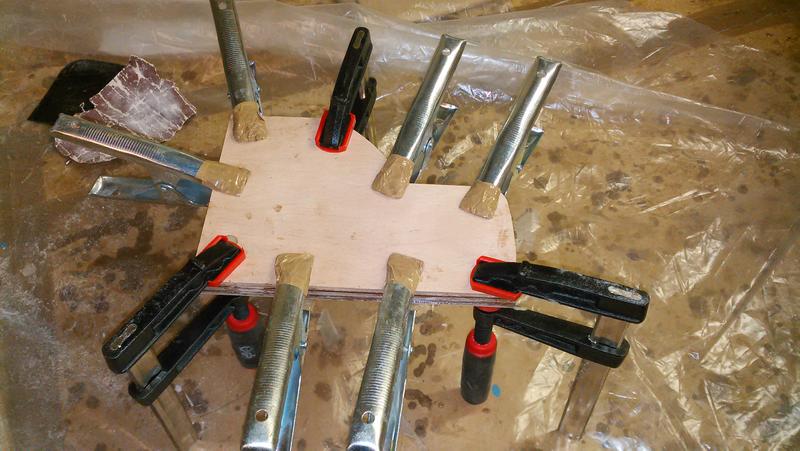
There are lots of little jobs to be done for the Petrel, especially for the retractable skeg. Here, the skeg box spacers are laminated, the sides of the box are glassed on the inside and then the spacers are sandwiched between the sides.

The bulkheads need glassing too: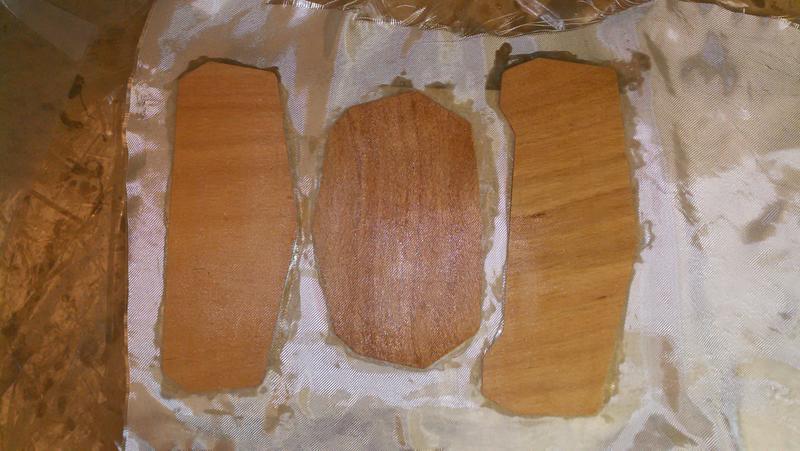
Offline
#8 25 Nov 2014 1:43 pm
- Ian
- Employee
- Registered: 24 Nov 2014
- Posts: 103
Re: Petrel stitch-and-glue kayak
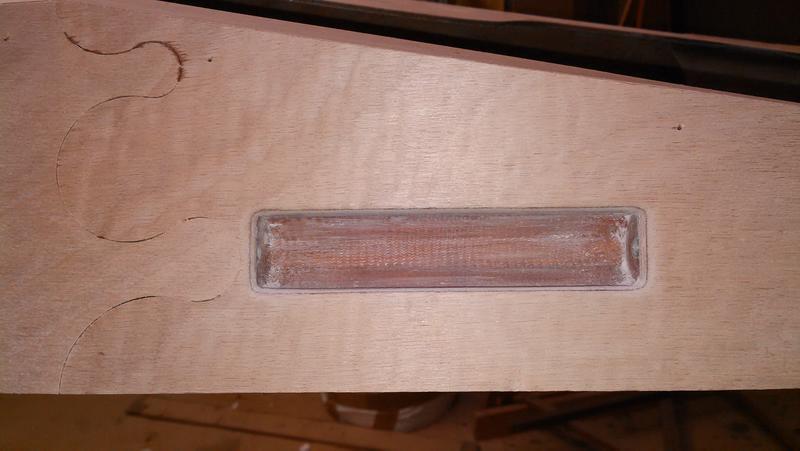
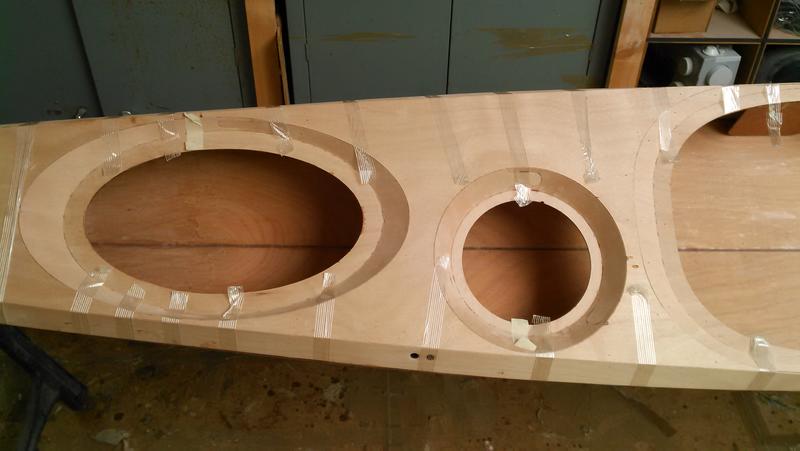
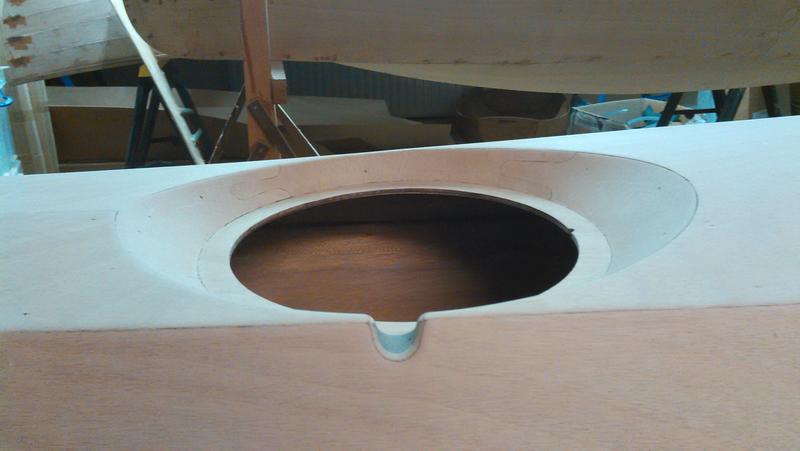
The deck is filleted. Those big lumps of epoxy beside each hatch recess will be hollowed out to make scuppers for drainage, so the recesses don't fill with water.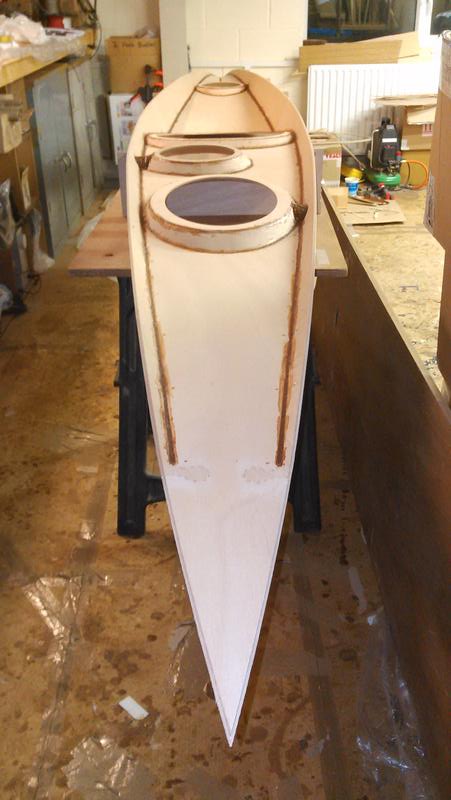
And then the deck is glassed: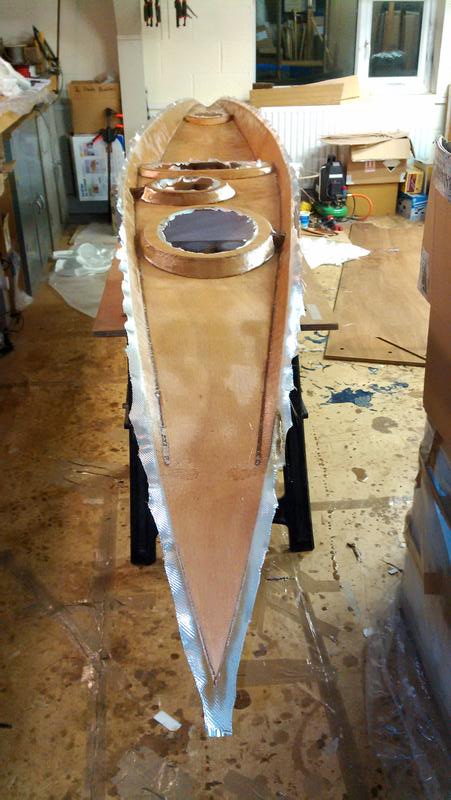
Offline
#9 25 Nov 2014 1:52 pm
- Ian
- Employee
- Registered: 24 Nov 2014
- Posts: 103
Re: Petrel stitch-and-glue kayak
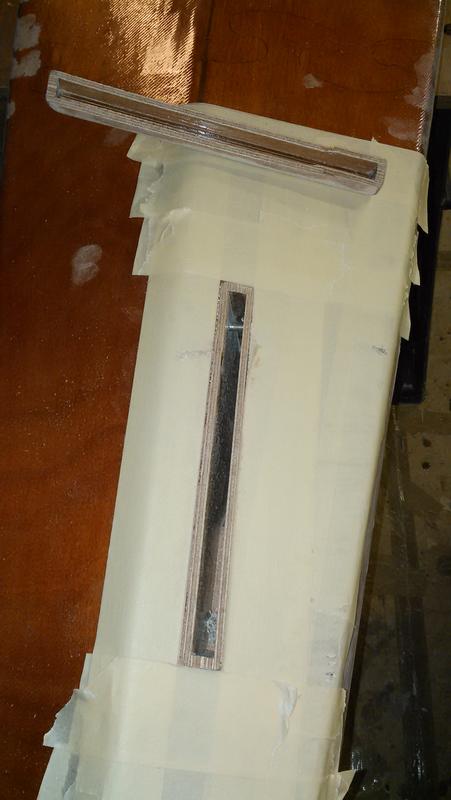
The retractable skeg box is glassed on the outside. Those clamps will leave marks in the epoxy, but they are holding the box below the line where the bottom will be cut off to open a slot.
A steel rod is fixed in the hole at the bottom-right of the box. That's the pivot for the skeg fin.
Offline
#10 27 Nov 2014 12:39 pm
- Ian
- Employee
- Registered: 24 Nov 2014
- Posts: 103
Re: Petrel stitch-and-glue kayak
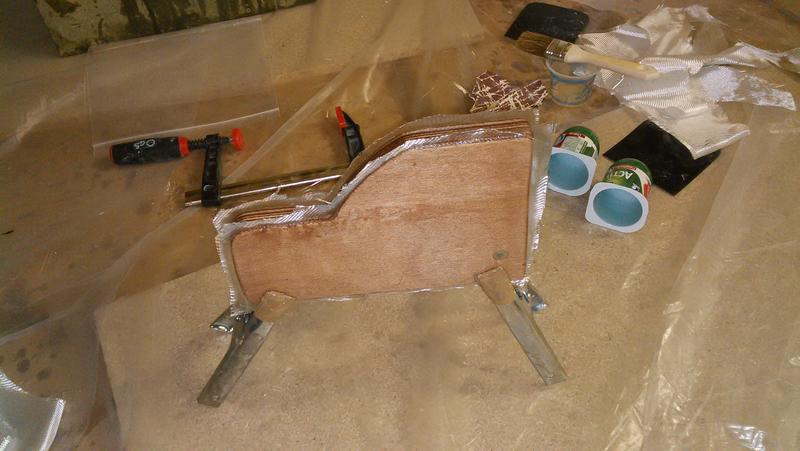
This is the skeg control box, which will hold a sliding knob to raise and lower the skeg. The joints are filled on the outside and it is glassed on the inside.
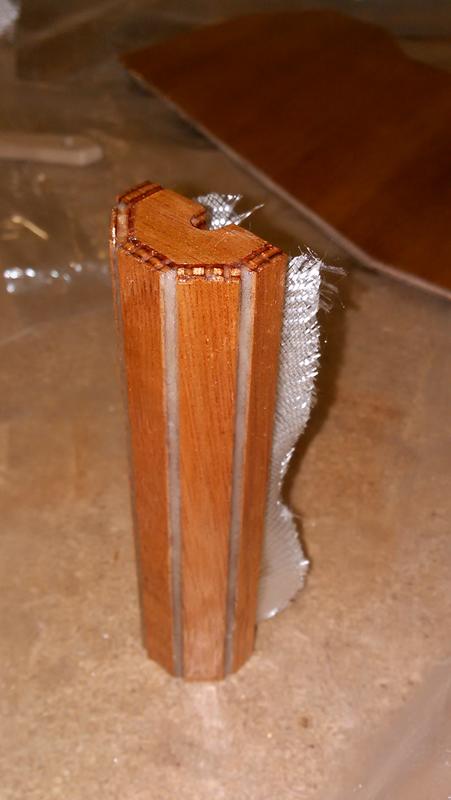
I rounded all the corners, ready to take fibreglass on the outside.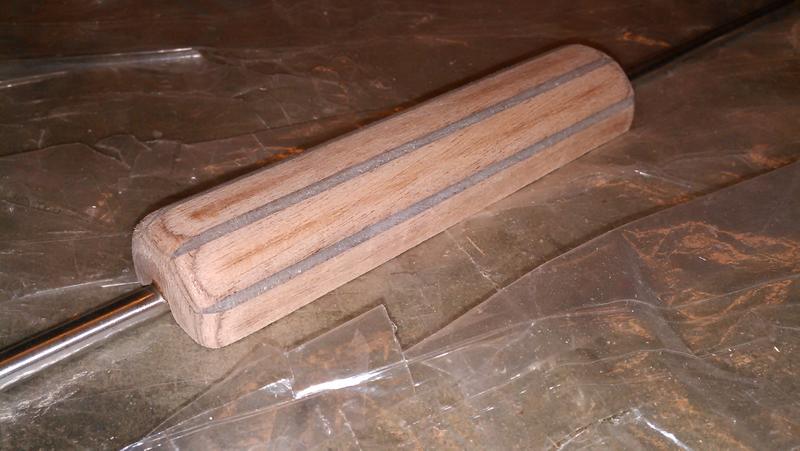
A small steel tube slides inside two slightly larger ones, which are glued into the ends of the control box.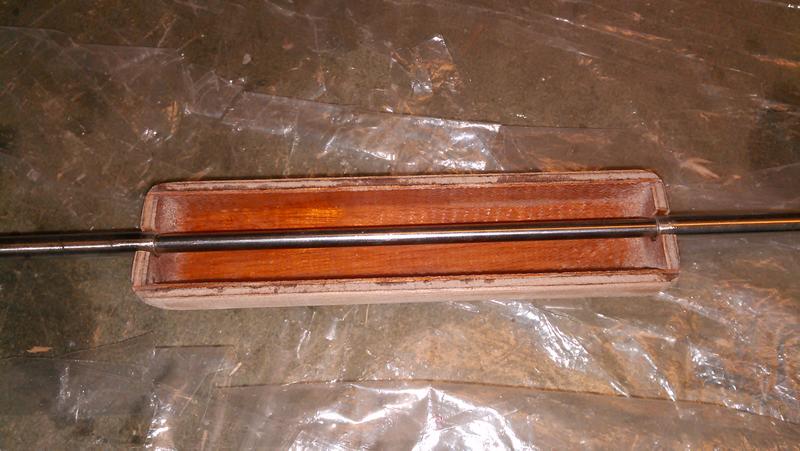
Here, the skeg control box and the cheek plates are filleted and glassed in beside the cockpit.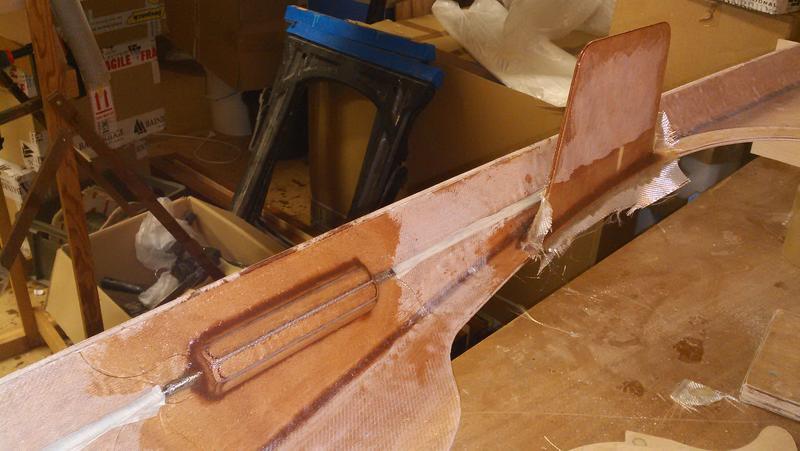
Offline
#11 2 Dec 2014 11:49 am
- Ian
- Employee
- Registered: 24 Nov 2014
- Posts: 103
Re: Petrel stitch-and-glue kayak
I put an extra layer of glass over the underside of the hatch recesses to reinforce them. This makes up for them being made of thinner plywood.
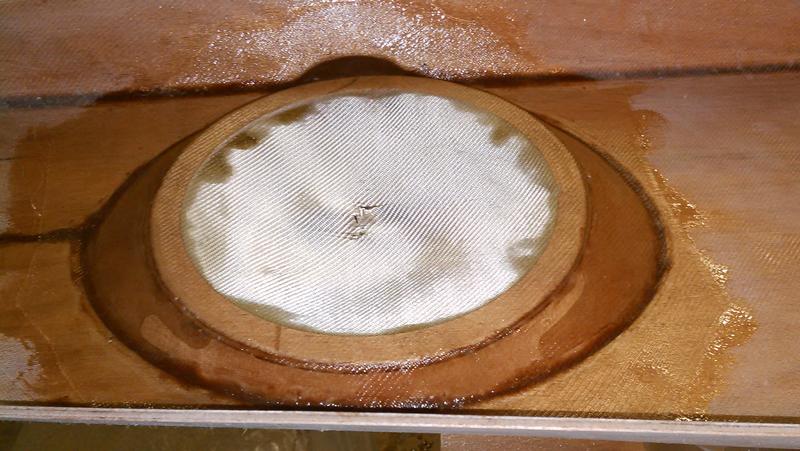
I also made the lump of epoxy for the day hatch scupper a bit taller, because it had slumped a little.
Offline
#12 11 Dec 2014 10:12 am
- Richard
- Member
- From: East Sussex
- Registered: 7 Jun 2011
- Posts: 75
Re: Petrel stitch-and-glue kayak
Is the the thinner ply on the rims standard in the kit.
A great log.
Canoe & Kayak Owner
Offline
#13 11 Dec 2014 4:55 pm
- Ian
- Employee
- Registered: 24 Nov 2014
- Posts: 103
Re: Petrel stitch-and-glue kayak
Is the the thinner ply on the rims standard in the kit.
Yes, I'm building the boat from a standard kit.
Offline
#14 11 Dec 2014 5:01 pm
- Ian
- Employee
- Registered: 24 Nov 2014
- Posts: 103
Re: Petrel stitch-and-glue kayak
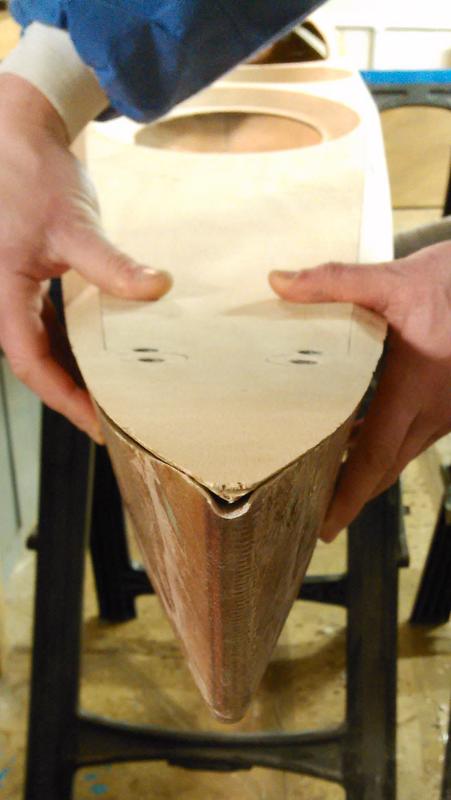
I made the end-pours in the hull using dams made of cardboard covered in plastic packing tape.
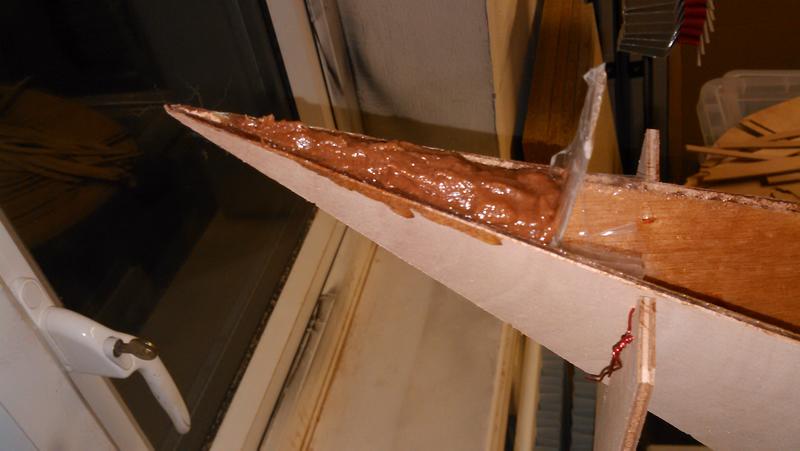
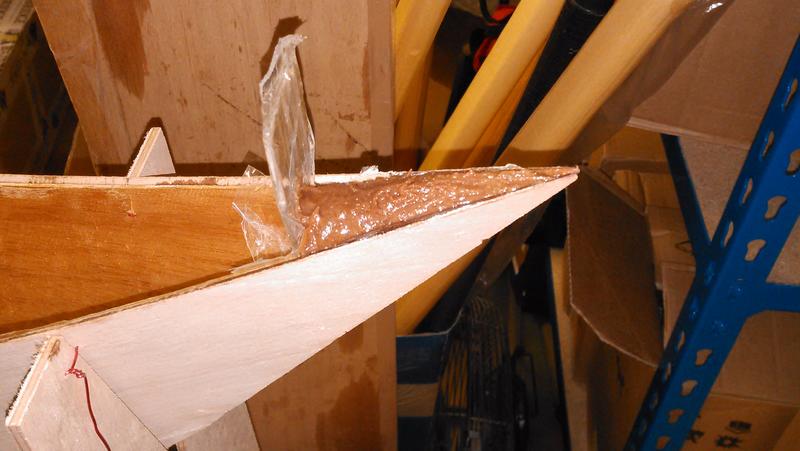
On the bottom of the hull there are some drips of epoxy that came through the stitch-holes and puzzle joints when I fibreglassed the inside. I'll have to sand those off.
Offline
#15 15 Dec 2014 6:26 pm
- Ian
- Employee
- Registered: 24 Nov 2014
- Posts: 103
Re: Petrel stitch-and-glue kayak
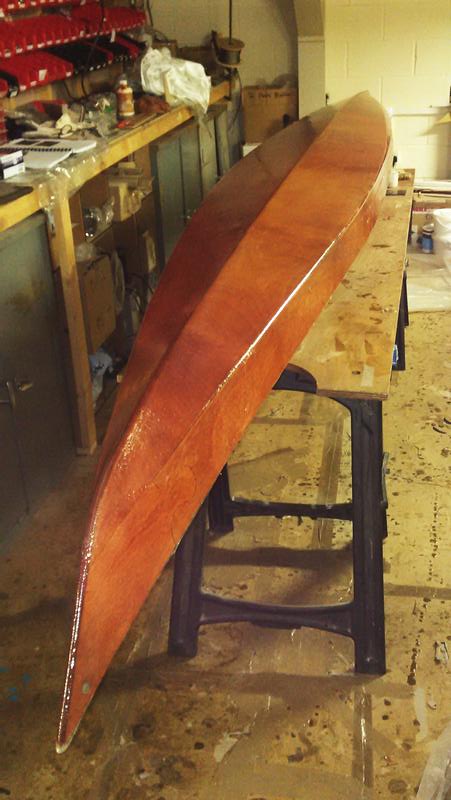
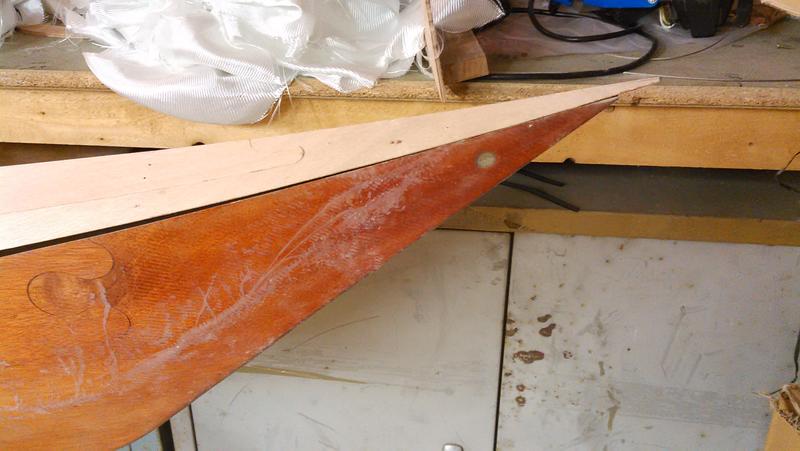
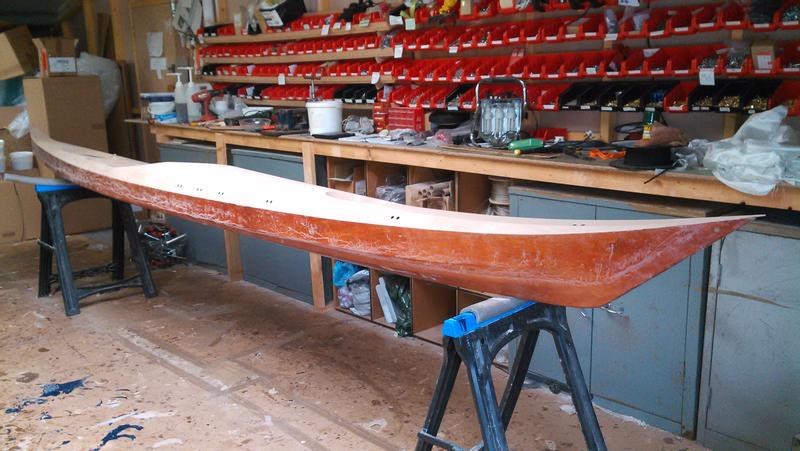
Over the weekend, I drilled holes in the end pours for carry loops. I also sanded the epoxy drips off the outside of the hull and rounded over all the chines ready for applying fibreglass.
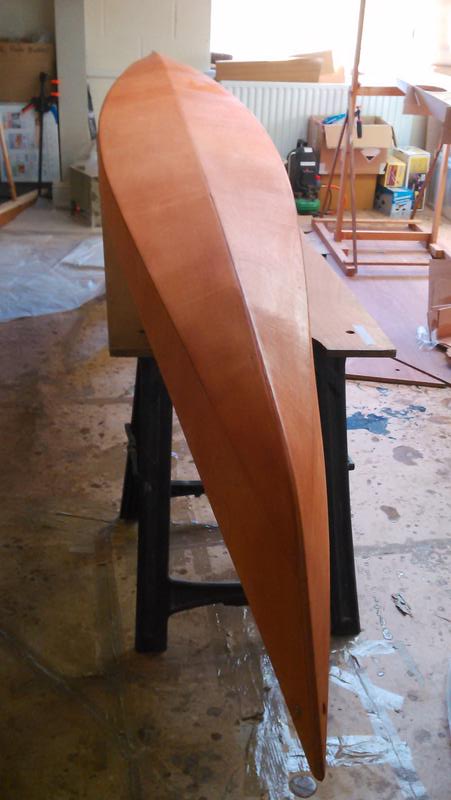
This morning I stained the outside of the hull and I put on the first layer of glass after lunch.
Offline
#16 16 Dec 2014 6:12 pm
- Ian
- Employee
- Registered: 24 Nov 2014
- Posts: 103
Re: Petrel stitch-and-glue kayak
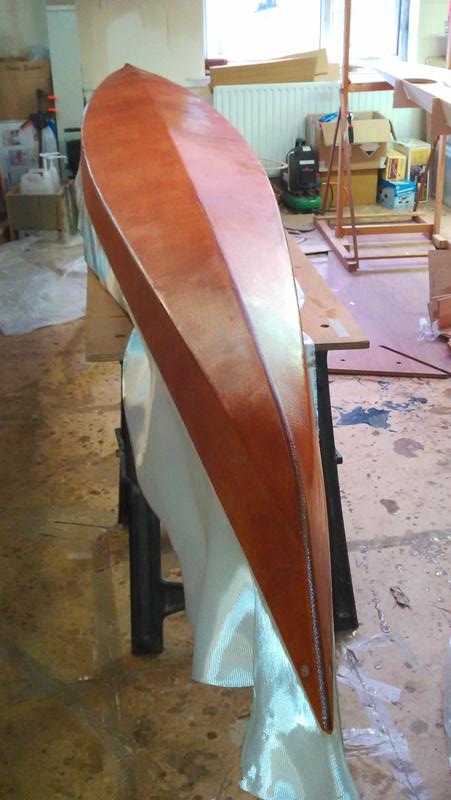
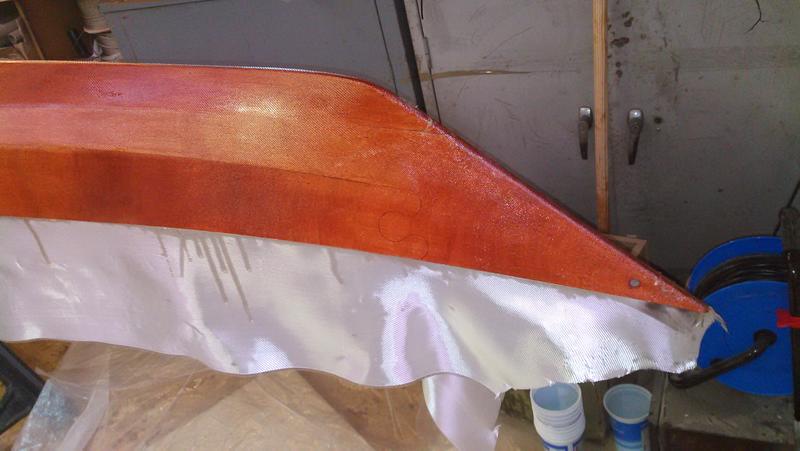
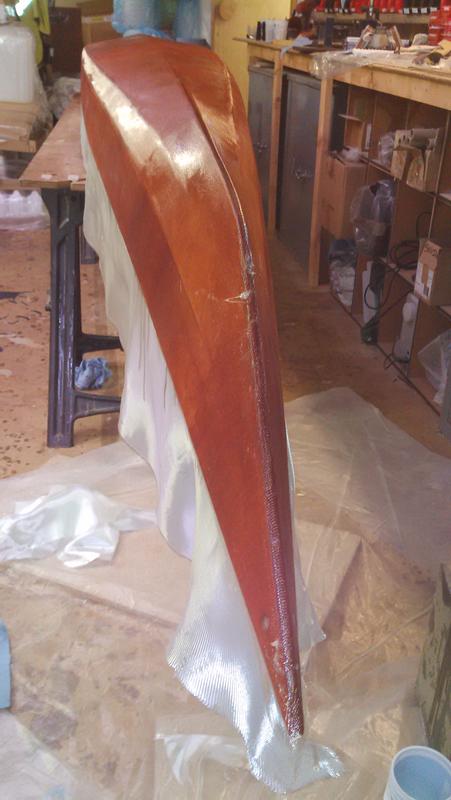
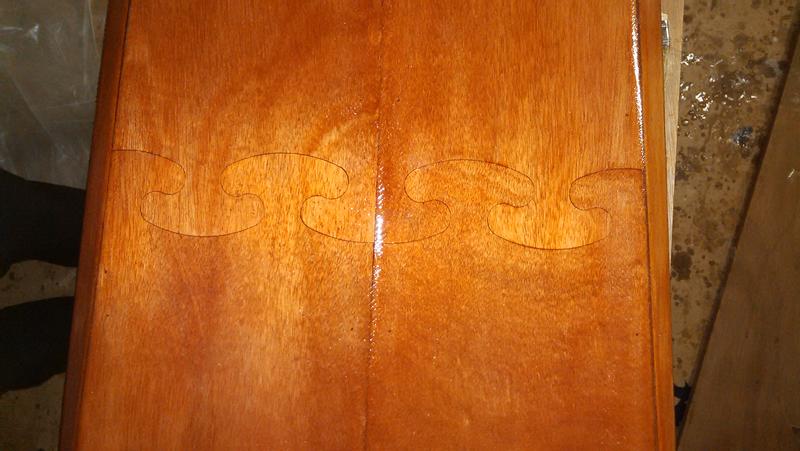
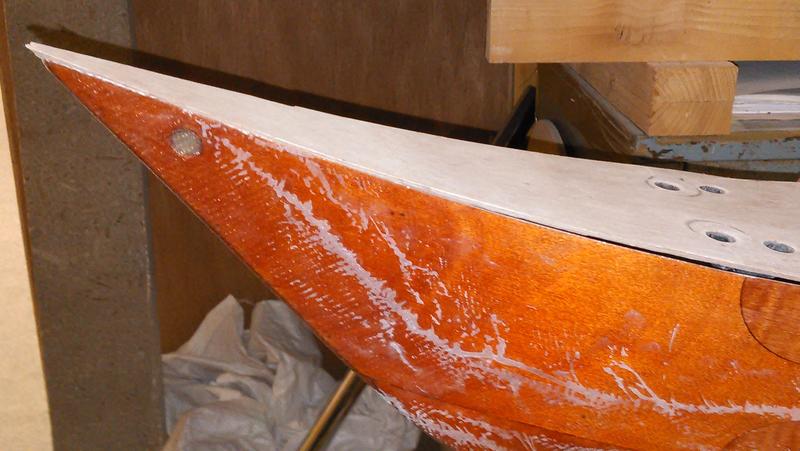
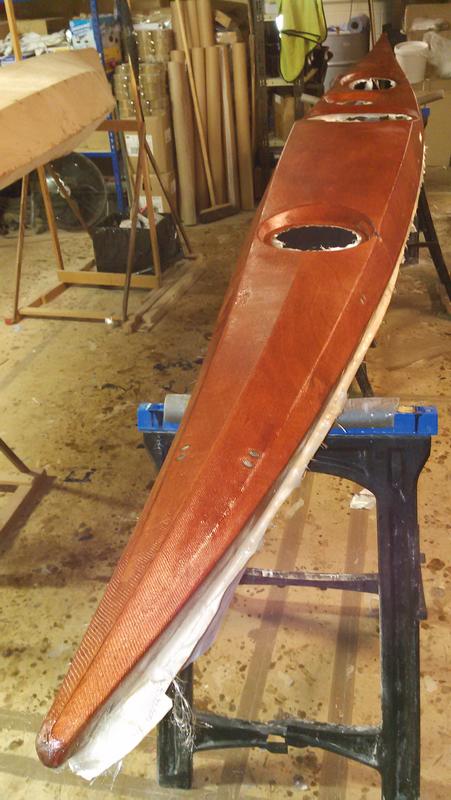
Last night I added two more layers of fibreglass on the bottom panels of the hull. This is one more layer than included in the kit; I want this boat to have a little extra protection from scratches because it will be used as a demo boat.
I'll scrape off the frayed edges when the epoxy has cured and I'll sand them smooth later on.
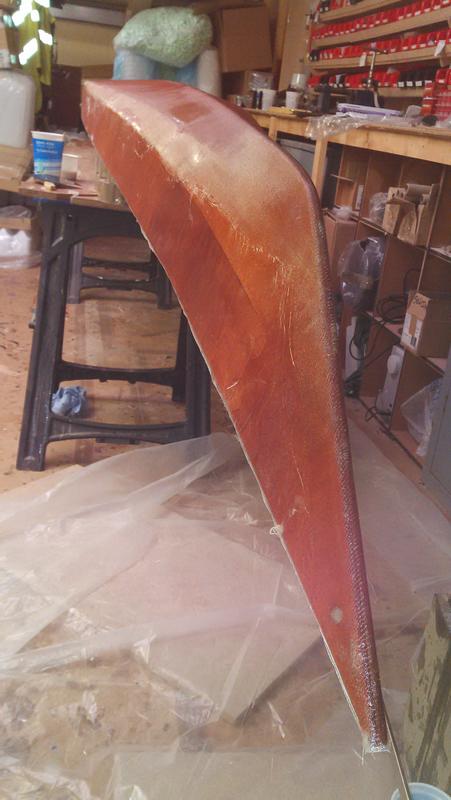
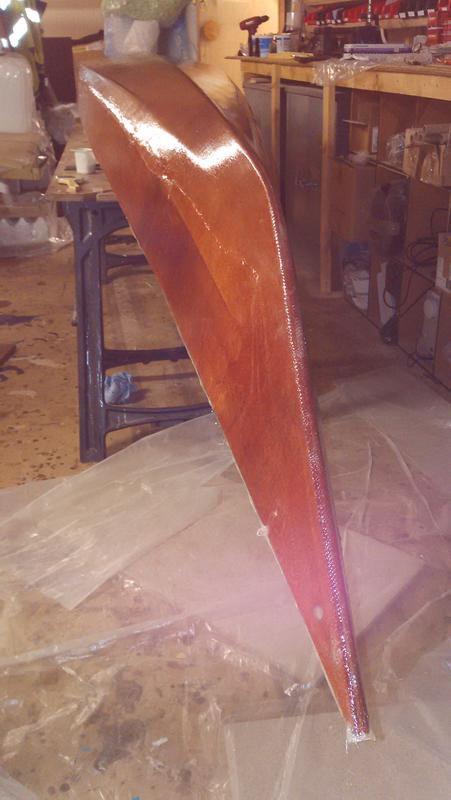
I'm quite pleased with the colour of the hull. Those puzzle joints look good too.
Offline
#17 9 Jan 2015 2:00 pm
- Ian
- Employee
- Registered: 24 Nov 2014
- Posts: 103
Re: Petrel stitch-and-glue kayak
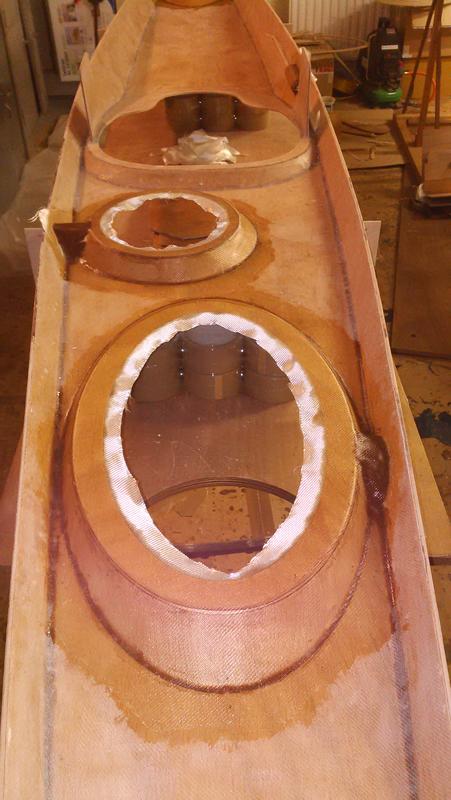
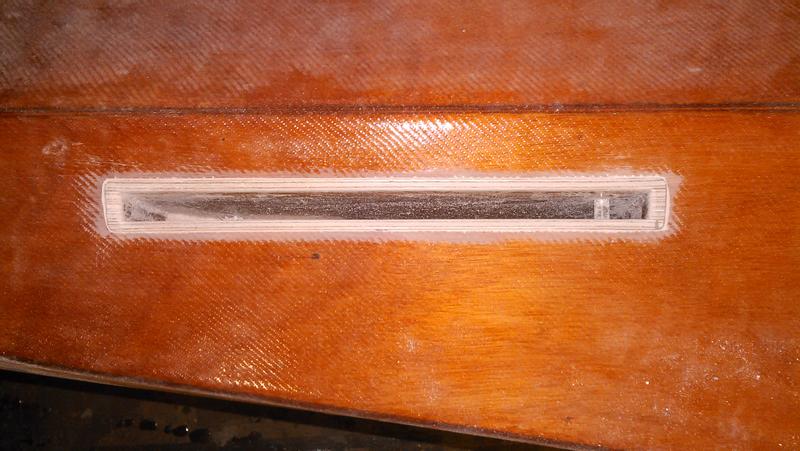
I started the new year by making lots of holes in my boat -- 38, to be precise. The first was for installing the skeg box. The skeg box has been a separate piece of work till now and it is good to see it in place at last. I cut the bottom off it very carefully, using several layers of masking tape to protect the hull.
Opening the skeg control box was a little bit tricky. I managed to drill an opening without damaging the inside of the box, but put a couple of scratches inside when I was sawing it open. I don't think they will show after sanding and a fill coat of epoxy, but if I was doing this again I think I would make an undersized opening before gluing the control box in.
I used a chisel to trim the edges flush, then rounded them over with sandpaper.
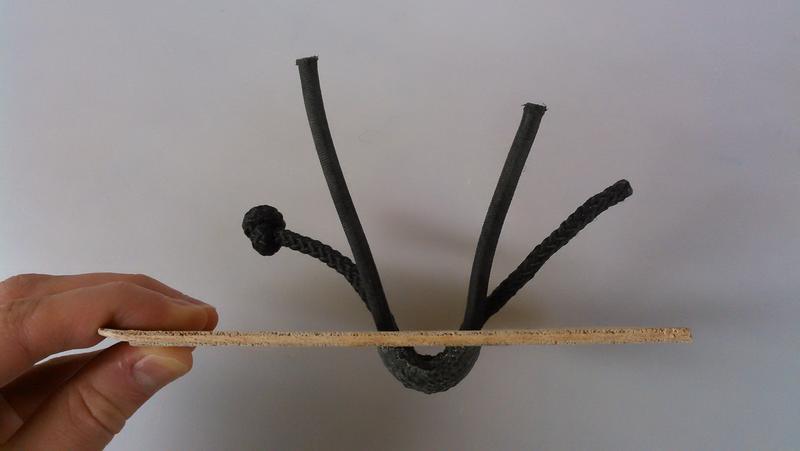
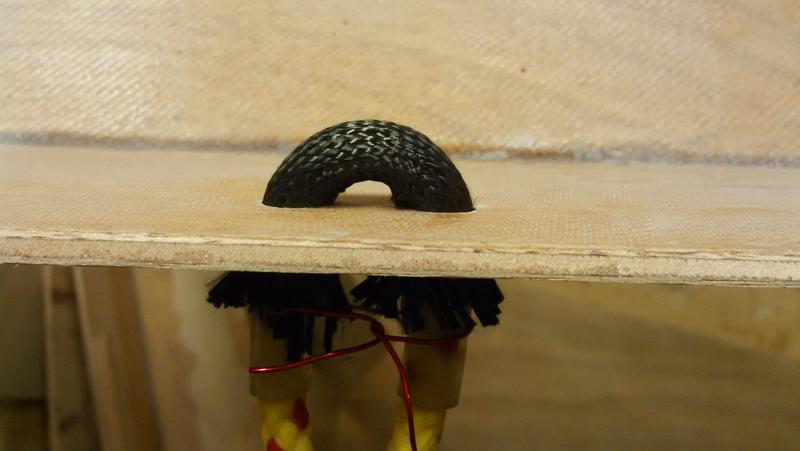
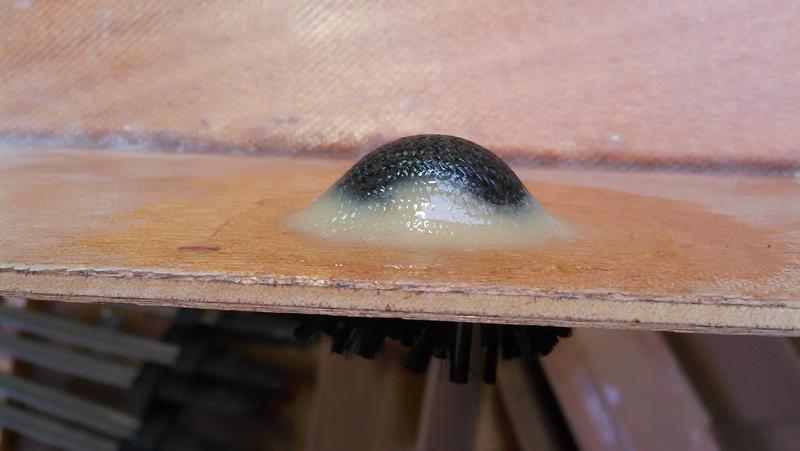
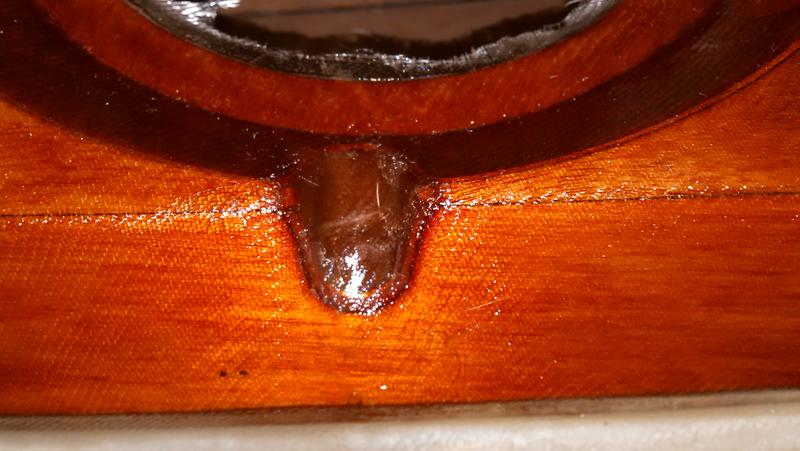
I decided to have a go at making recessed 'Maroske' deck fittings, inspired by Joey Schott's Petrel Play. Following Joey's instructions and with a bit of trial and error, I made a test piece. Here it is with a piece of 6 mm rope (for perimeter line) and 6 mm shock cord in the same fitting:
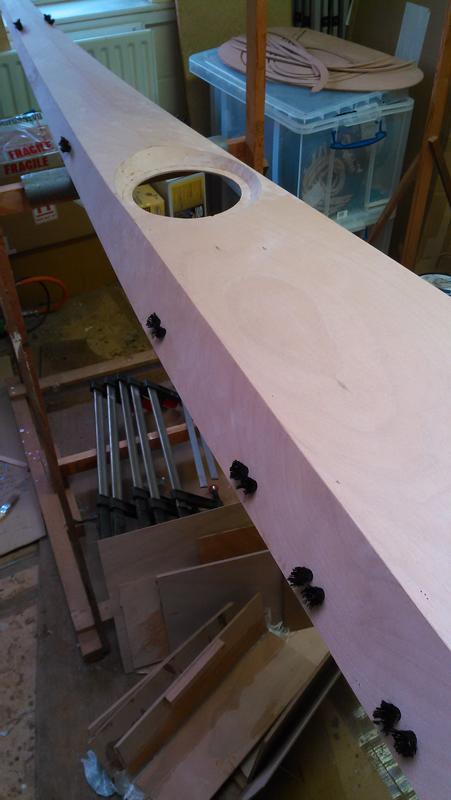
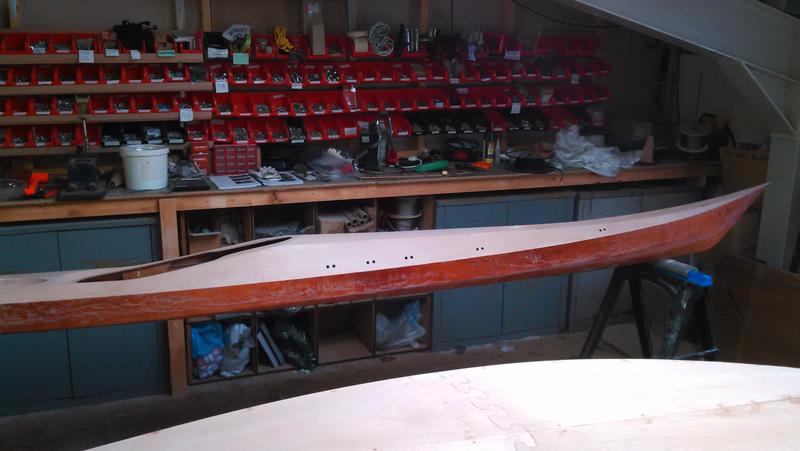
I spent a couple of evenings planning the layout for my deck rigging, looking at photos of other boats and deciding what layout I wanted. I need to install the deck fittings before I join the deck to the hull, otherwise it would be very difficult to install these recessed fittings from the underside of the deck.
Being a perfectionist, I wanted the deck fittings to be aligned to a regular grid. I spent some time with a tape measure stretched along the boat until I found a grid spacing that fits with my planned rigging layout. Then I carefully marked all the holes, following the curve of the edge of the deck.
Last night, I drilled all those pairs of holes. I'll start making the fittings this evening.
Last edited by Ian (9 Jan 2015 2:04 pm)
Offline
#18 9 Jan 2015 8:33 pm
- jbmerv
- Member
- Registered: 25 Mar 2014
- Posts: 24
Re: Petrel stitch-and-glue kayak
I'm greatly enjoying your build log, please keep it coming!
What size holes and tubing did you use for the Maroskes, and what is the spacing?
Offline
#19 13 Jan 2015 1:27 pm
- Ian
- Employee
- Registered: 24 Nov 2014
- Posts: 103
Re: Petrel stitch-and-glue kayak
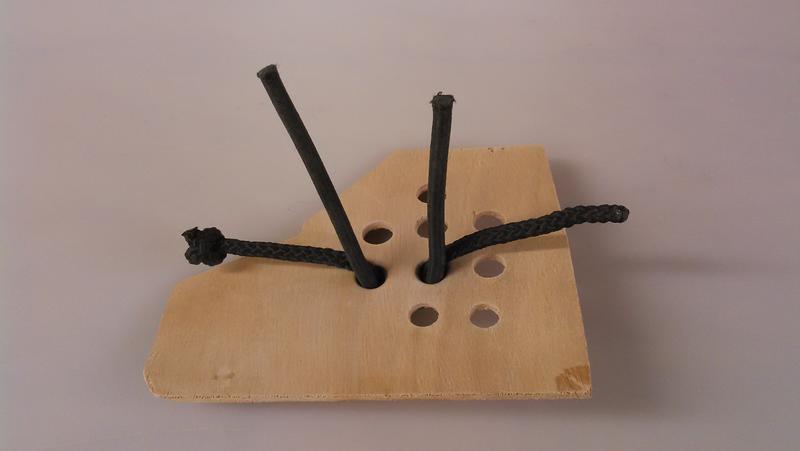
The polythene tube I'm using has a 10 mm external diameter and the carbon sleeve should also be 10 mm. I'm actually stretching some larger sleeve to shrink its diameter; it would be easier if it was the right size to begin with, but I'm using what I have.
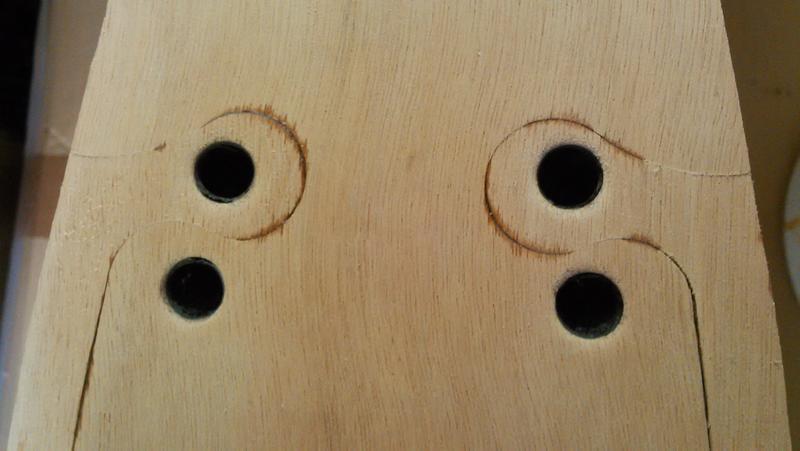
I tried using holes of a few different sizes (you can see them in my test piece) and I found 12 mm gave me a tight fit that I could still get the tube through with the sleeve around it and some masking tape to hold the sleeve. You may need to use a different hole size if you are using different sleeve though -- it's worth trying a few to find the size that works best, before you start to drill holes in the deck.
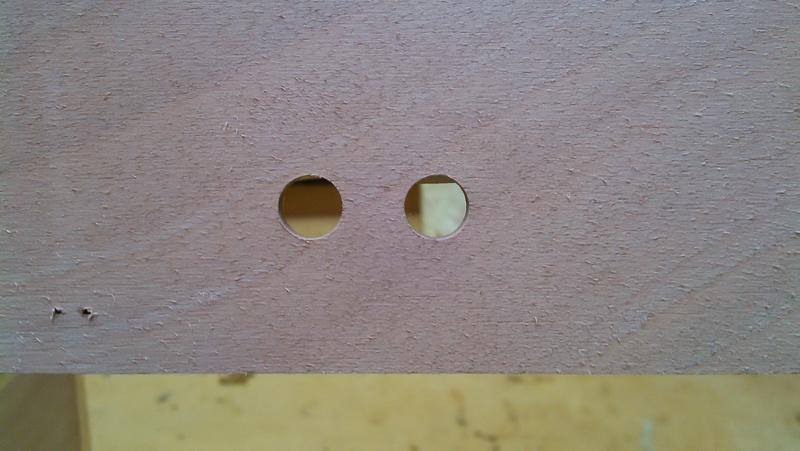
I drilled the centres of the holes 24 mm apart, so there would be a 12 mm gap between the pair. I had to use a forstner bit to drill the holes cleanly.

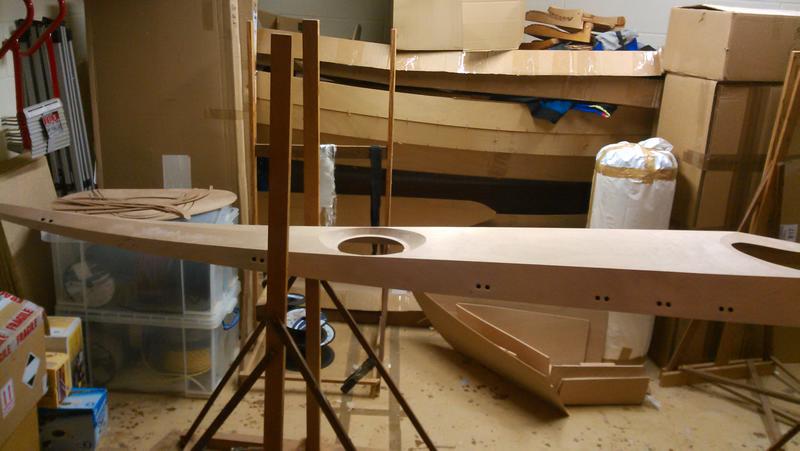
Some of the holes aren't very visible in the photos. The grid spacing is 64 cm, measured starting from a line of shock cord I'm putting across the deck between the day hatch and the large oval hatch. This centres the large oval hatch between the fittings and the forward hatch is also halfway between fittings, which I think looks good. If I was putting shock cord between the forward hatch and the bow this would limit the size of it, but I don't want to carry anything there anyway -- it's the narrowest part of the boat and the deck isn't flat there.
There are two extra fittings for shock cord in front of the cockpit at 16 cm intervals (a quarter of the usual 64 cm spacing) on each side of the deck.
This grid only works for the Petrel SG of course, but something similar could probably be worked out for other kayaks. You just have to make sure the fittings are close enough to make the perimeter line follow the curve of the deck and that the fittings don't interfere with other features of the boat, e.g. the scuppers for recessed hatches. I had to shorten one of the guide tubes for my skeg control box because it was in the way (I should have done this before I glued the control box in; it's hard to wield a hacksaw inside the boat). I'm also going to have to cut holes in the bulkhead between the day hatch and the oval hatch because I've chosen to put my fittings right on top of it. I'll fill the holes when I fillet around the bulkhead.
Offline
#20 13 Jan 2015 1:48 pm
- Ian
- Employee
- Registered: 24 Nov 2014
- Posts: 103
Re: Petrel stitch-and-glue kayak
I installed the last of my fittings last night. I did them in three batches, but I should have done one side of the boat then the other, with the boat tipped on its side to prevent epoxy runs.
I put a small epoxy fillet all around the fittings after squeezing some under the loop until it came out the other side, then I put some bias-cut fibreglass over the top. I had waxed the tube and the rope before installing them, so they pulled out without any trouble the following morning.
I've trimmed and rounded over a few of the holes and they look pretty good. Some of them need a bit of epoxy round the edges -- I'll sort them out when I glass the deck.
Offline
#21 14 Jan 2015 4:53 pm
- Ian
- Employee
- Registered: 24 Nov 2014
- Posts: 103
Re: Petrel stitch-and-glue kayak
All the fittings are now trimmed and rounded over.
I ran a spare piece of shock cord through the fittings to check that everything worked. It looks almost like a real boat!
Offline
#22 3 Feb 2015 3:02 pm
- Ian
- Employee
- Registered: 24 Nov 2014
- Posts: 103
Re: Petrel stitch-and-glue kayak
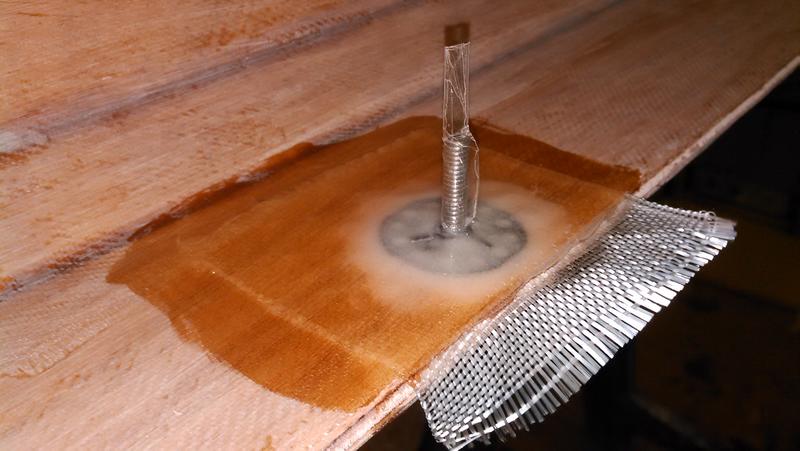
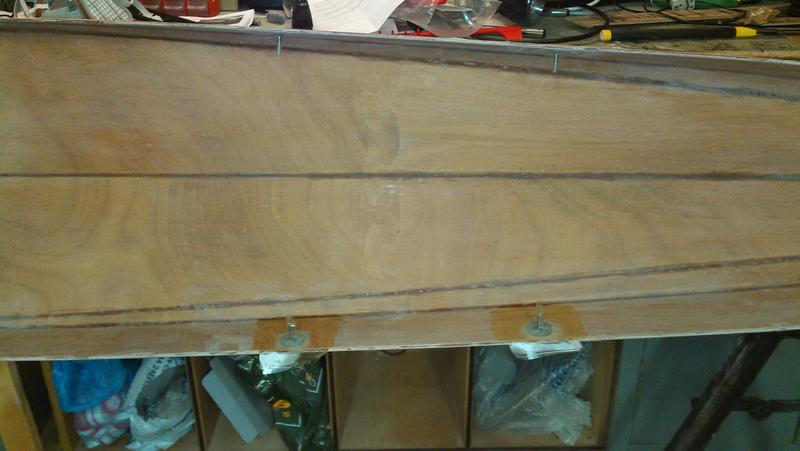
At the weekend, I applied a fill coat of epoxy to the underside of the deck and glued in some studs for mounting footbraces. The footbrace studs are not part of the kit; most people just bolt through the hull, but I didn't want the boltheads to show.
The studs are glued in with thickened epoxy and glassed over, one side at a time so that they don't move.
Offline
#23 3 Feb 2015 4:16 pm
- Ian
- Employee
- Registered: 24 Nov 2014
- Posts: 103
Re: Petrel stitch-and-glue kayak
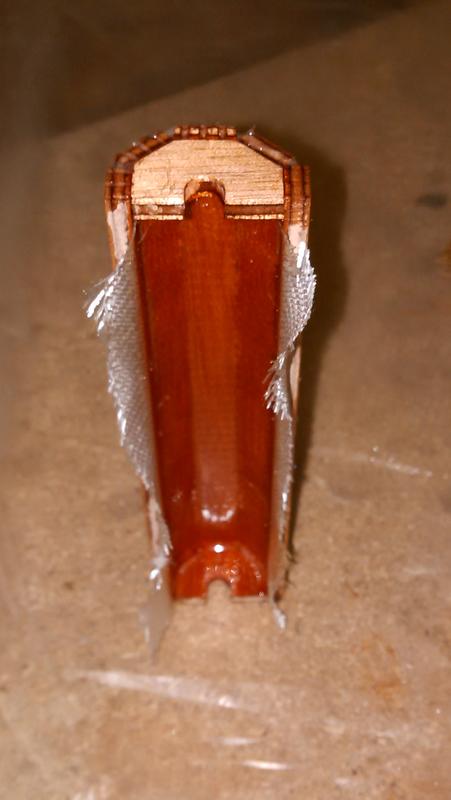
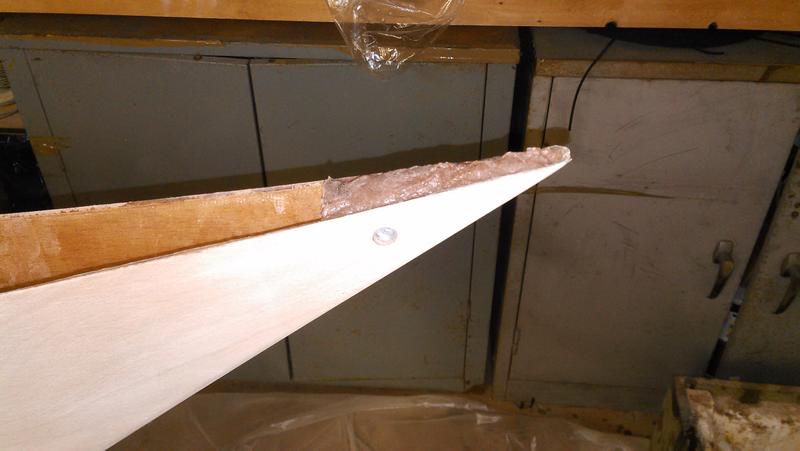
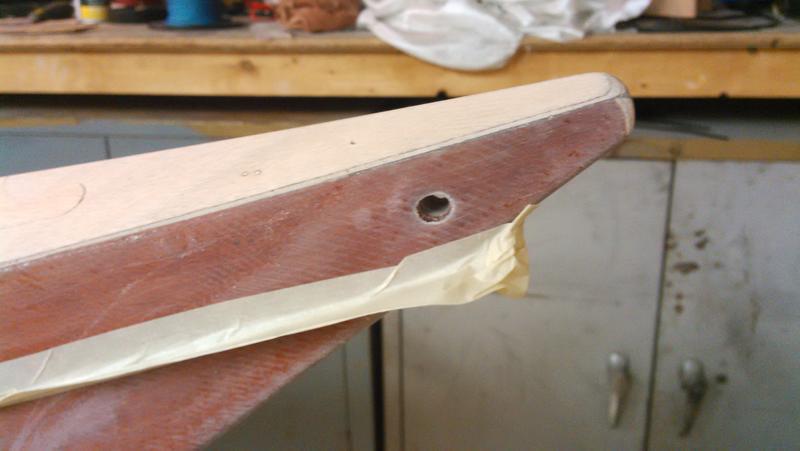
I shaped the end-pours so that the deck fits tightly on the hull. I cut a small slot through the tips so that the ends of the deck could protrude rather than rest on the high point, which would leave a gap between the edge of the hull and the edge of the deck. The sharp tips of the bow and stern will be sawn off and rounded over later.
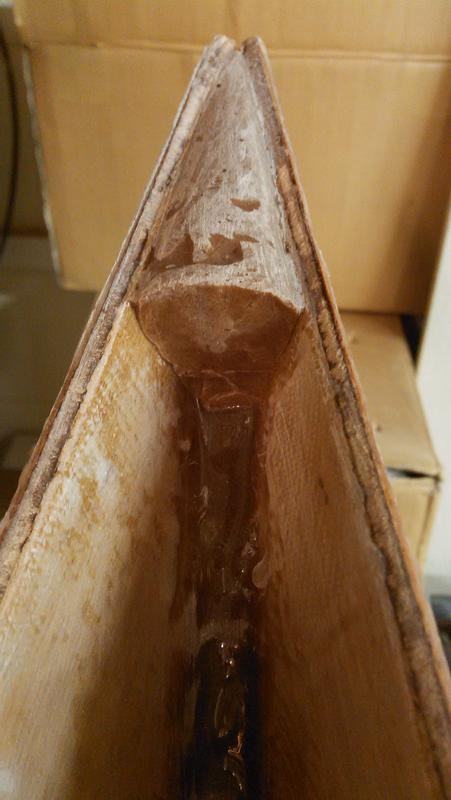
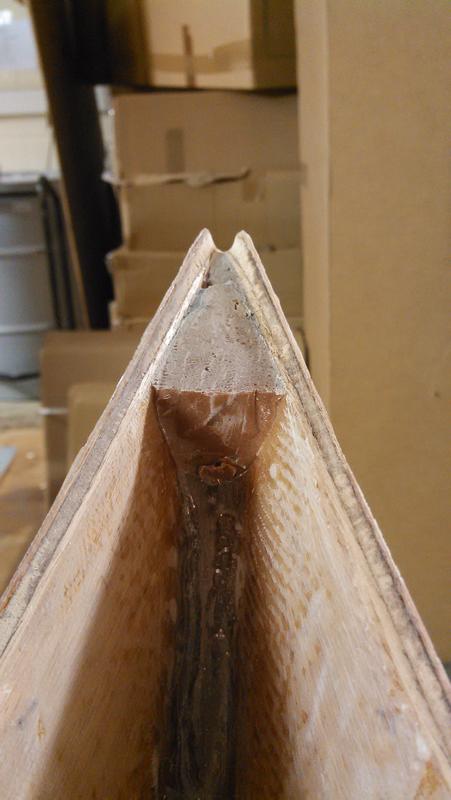
I'll put some thickened epoxy on top of the end pours before I squash the deck down, to fill the slight gap between them.
Offline
#24 9 Feb 2015 12:23 pm
- Ian
- Employee
- Registered: 24 Nov 2014
- Posts: 103
Re: Petrel stitch-and-glue kayak
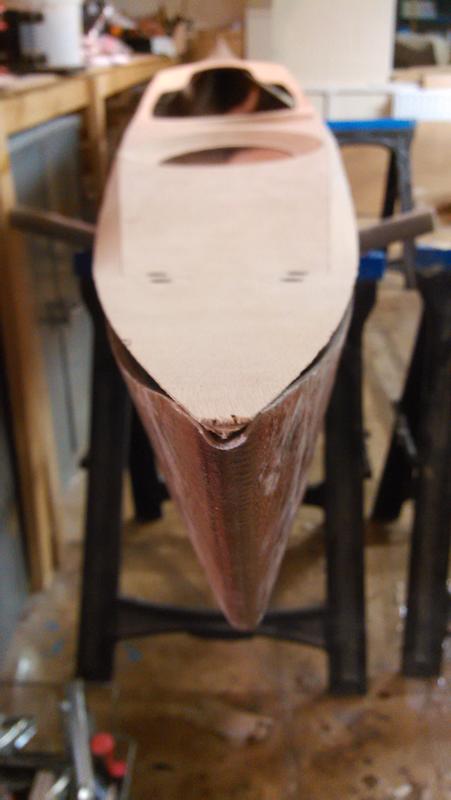
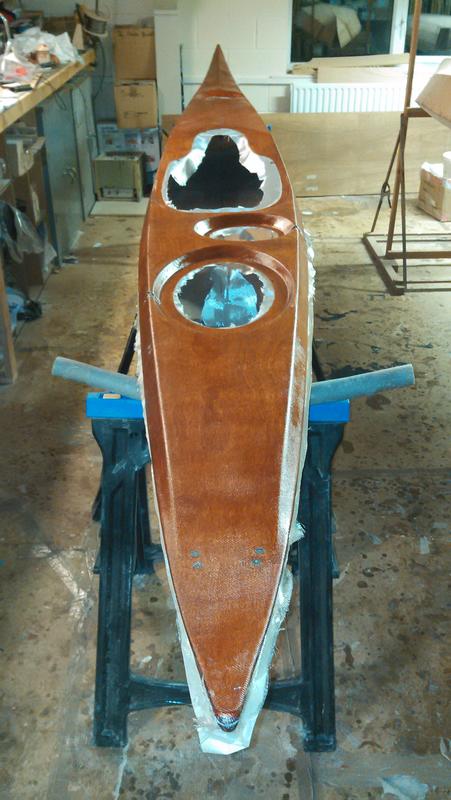
Last week, I was finally ready to join the deck to the hull. They had to be carefully aligned by pushing the edges in or out while fixing them in place with reinforced tape. I had to wedge some sticks in to spread the sides of the hull to the right shape at the stern; the rest was easily done by hand, though it helped to have someone to hold it in place while I taped it. I put dots of glue between the pieces of tape, to make sure nothing would move.
I covered the seam with masking tape on the outside, then made a small fillet along the inside as far as I could reach into the ends. I unrolled pre-saturated glass tape along the joint, pushing it into the ends with a long-handled brush, which is not as tricky as it sounds.
I removed all the temporary tape yesterday and started sanding the drips of epoxy off the deck. They all need removing before I can stain it to match the colour of the hull.
Offline
#25 19 Feb 2015 6:46 pm
- Ian
- Employee
- Registered: 24 Nov 2014
- Posts: 103
Re: Petrel stitch-and-glue kayak
I rounded over all the sharp edges on the deck and blunted the sharp points of the bow and stern for safety.
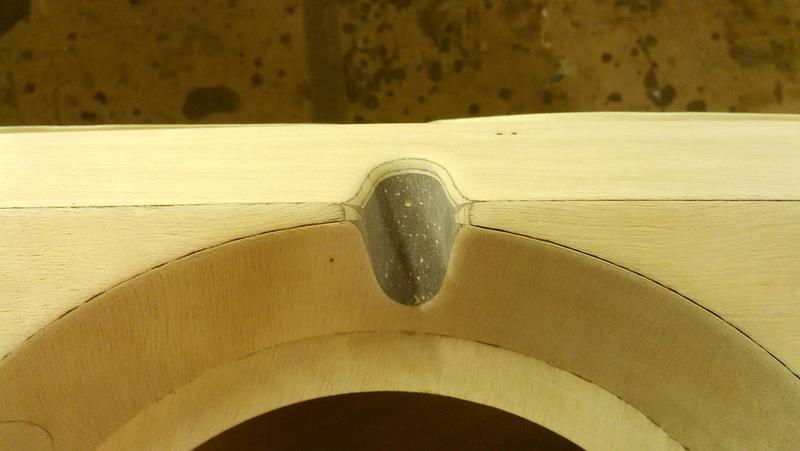
I used a rasp to make the scuppers (drainage channels) for each of the hatch recesses.
I sanded the whole deck ready for coating with fibreglass.
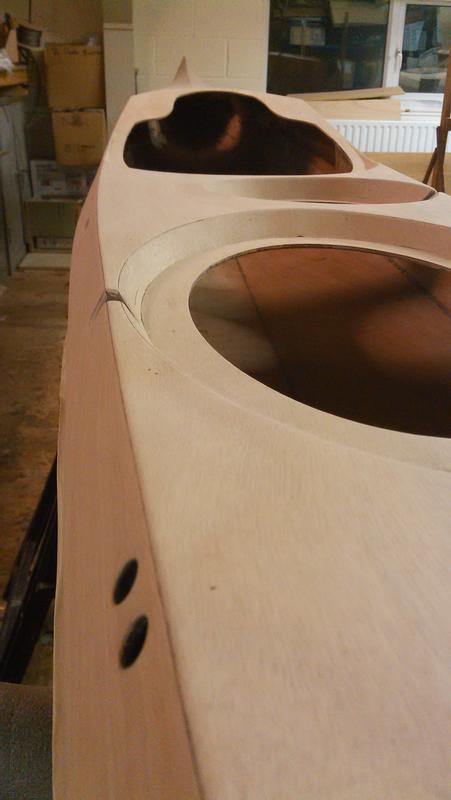
Just before starting to glass the deck, I stained it the same colour as the hull. I spread a seal coat of epoxy over it with a roller to help spread the stain evenly, then laid the glass fabric over the top and applied more epoxy to wet out the glass. The stained deck didn't seem to be the same colour as the hull, but now it is glassed the colour matches very well.
The hatch recesses were a bit tricky to apply fibreglass to. The glass wouldn't conform to the shape of the scuppers, so I will cut the glass out and patch the scuppers separately.
I was careful not to put on too much epoxy near the fittings -- it wouldn't be easy to remove any drips from inside those holes.

Offline