A forum for discussing wooden boats and boat building
You are not logged in.
- Topics: Active | Unanswered
Pages: 1
#1 21 Dec 2022 1:12 pm
- Captain Seapig
- Member
- Registered: 21 Dec 2022
- Posts: 17
Nesting Spindrift 11
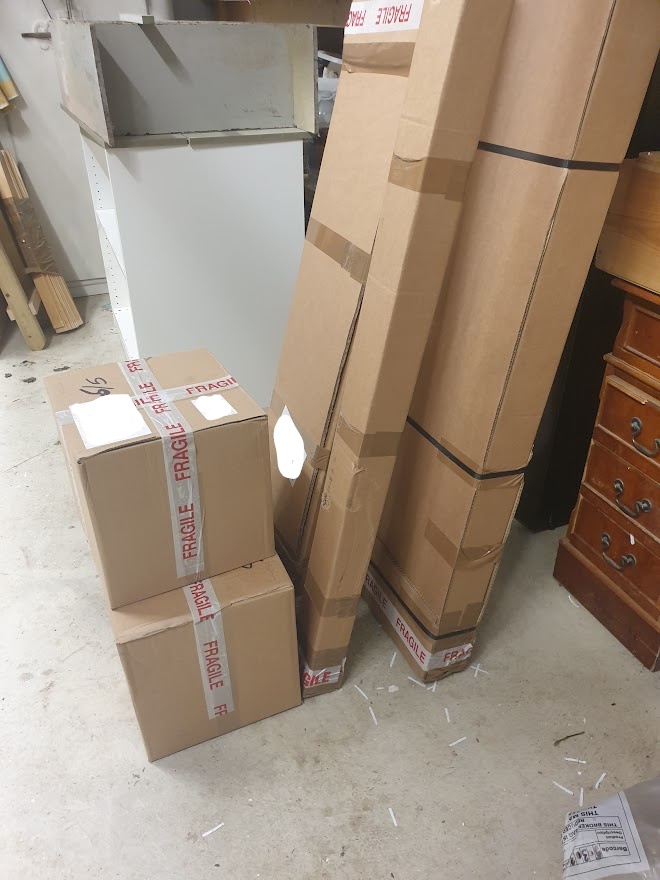
I am about to embark on my first build....wish me luck
Last edited by Captain Seapig (16 Apr 2023 9:26 pm)
Offline
#2 23 Dec 2022 3:27 pm
- Ian
- Employee

- Registered: 24 Nov 2014
- Posts: 97
Re: Nesting Spindrift 11
Welcome to the forum! I'm sure you won't need luck, but do ask if you need any help or advice. We're about to close till the new year, but you may still find help on the forum if you're working on the boat over the holidays.
Enjoy your new project, and have a good Christmas!
Offline
#3 23 Dec 2022 5:36 pm
- Captain Seapig
- Member
- Registered: 21 Dec 2022
- Posts: 17
Re: Nesting Spindrift 11
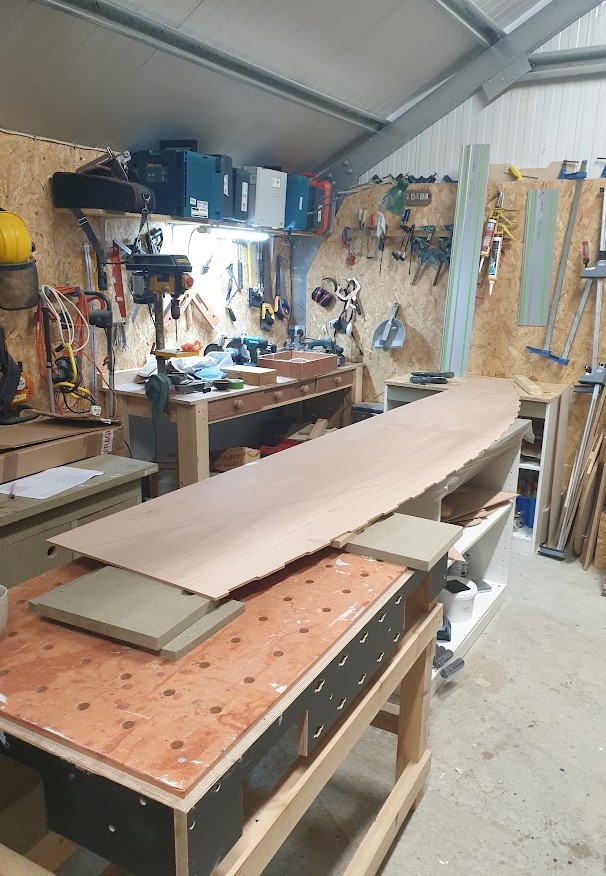
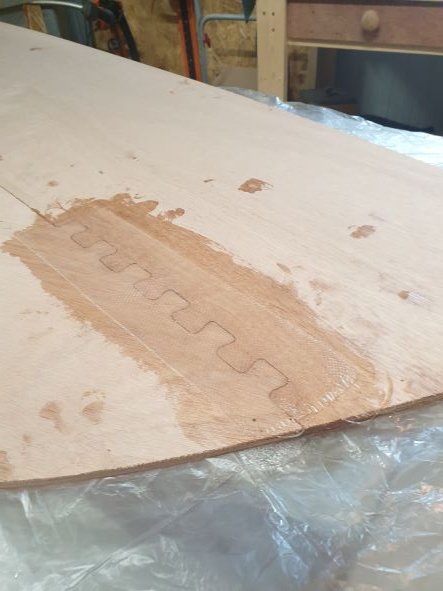
Thanks very much Ian -Progress so far has been pretty good, and am really enjoying it.
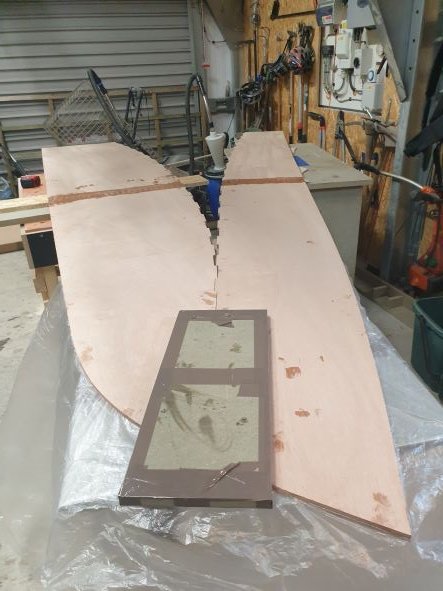
I found doing both sets of planks at the same time worked well as I was able to ensure they are exactly the same and I still appear to have achieved a uniform join.
Took me a bit of a while to work out how to join the hull planks together, but whilst it is spelt out how to do it if you haven't done it before I found it took a leap of faith that it would work out!
Will see how successful this has been tomorrow.....
Last edited by Captain Seapig (24 Dec 2022 3:03 pm)
Offline
#4 16 Feb 2023 3:27 pm
- Captain Seapig
- Member
- Registered: 21 Dec 2022
- Posts: 17
Re: Nesting Spindrift 11
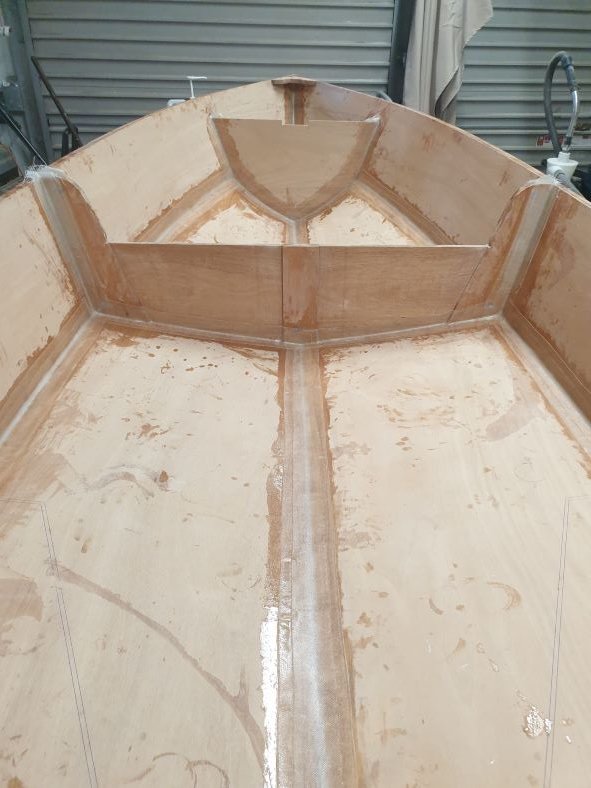
Bit more progress since my last post
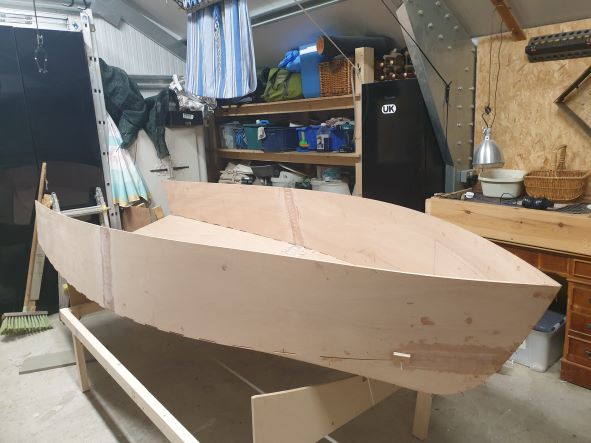
and then some more
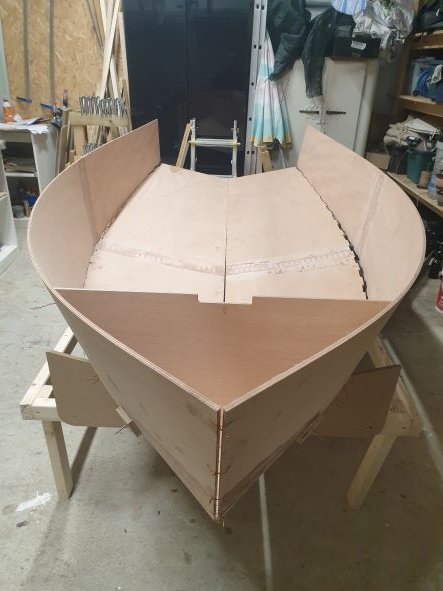
forward bulkhead helped create a good shape
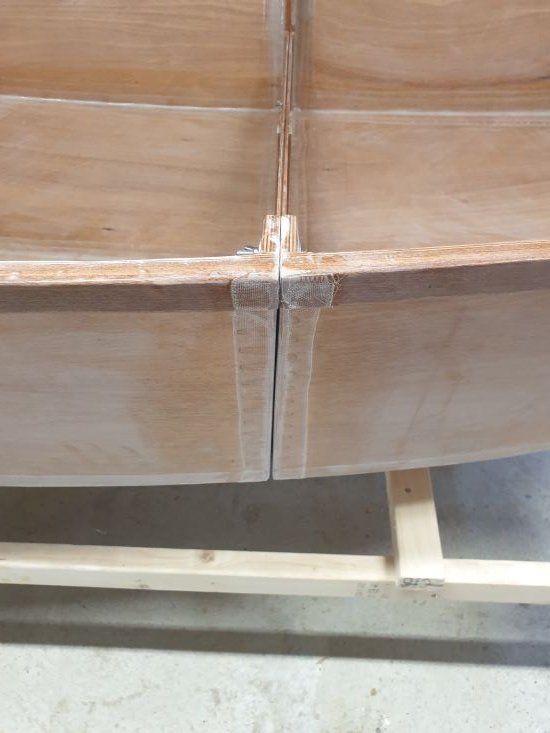
transom and nesting bulkheads in place. I made a mistake with one of the centreline doublers on the nesting bulkhead so had the holes lined up incorrectly. Fortunately, epoxy is very forgiving, so filled the holes and drilled another....
quite pleased with how it has all lined up, took a bit of fettling, but those gaps that remain will soon go I imagine...
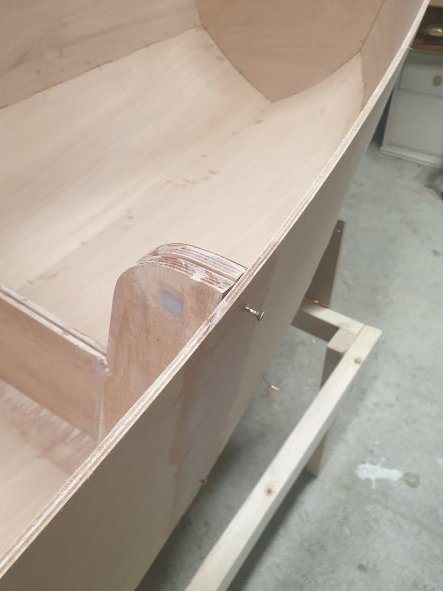
I have used screws to hold the nesting bulkhead. I have a laser level and used this to great effect to line everything up just right. Possibly a bit over the top, but it reassured me nonetheless.
slight gap here on the forward bulkhead. I am going to fill with epoxy I think.
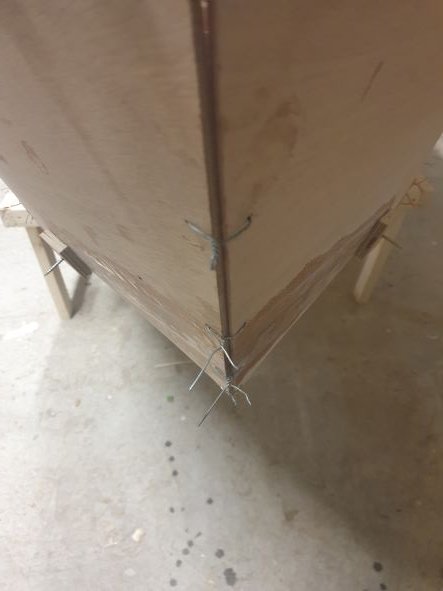
I found the copper wire not able to hold the pieces together. In the end I used some steel gardening wire in some places. I will be sure to remove it.
Last edited by Captain Seapig (16 Feb 2023 3:28 pm)
Offline
#5 17 Feb 2023 10:57 am
- Captain Seapig
- Member
- Registered: 21 Dec 2022
- Posts: 17
Re: Nesting Spindrift 11
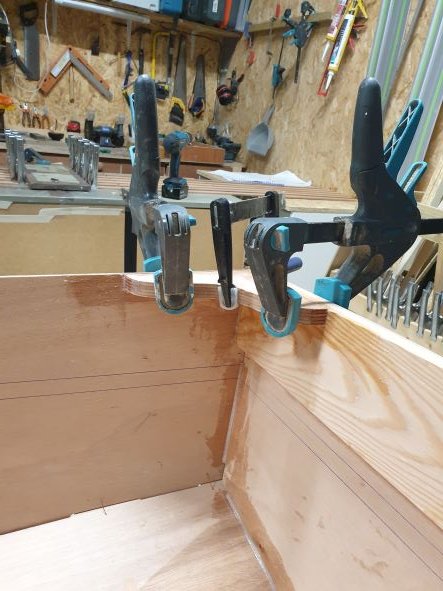
Next job was to glue up the scarf joints to create the gunwales. I created a jig in which to slide the two ends together so as to be sure of an accurate join
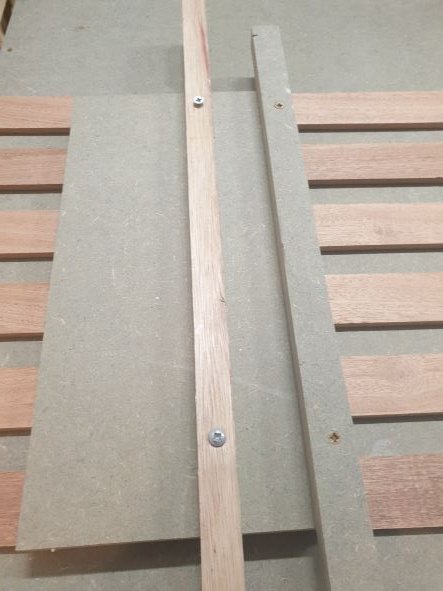
Next I dry fitted them all by using the jig to align the pieces whilst then screwing them to the surface of my plastic covered worktop.
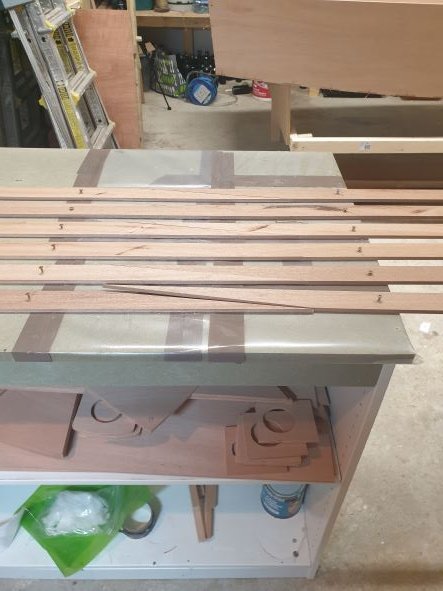
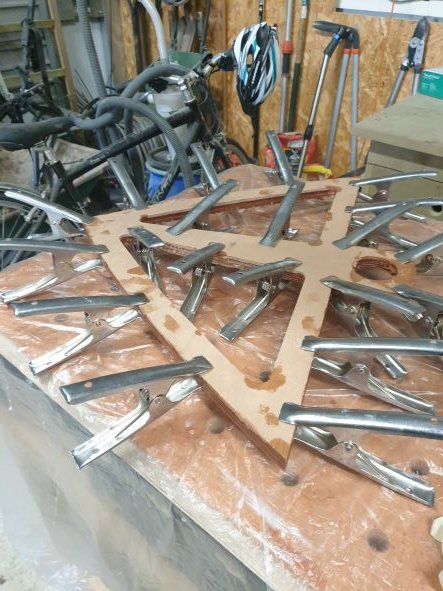
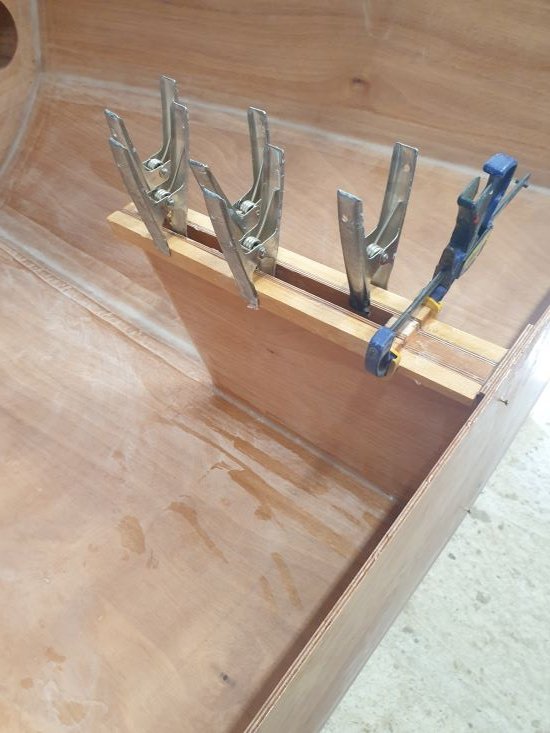
then I worked out the clamp arrangements, below is the completed dry fit set up:
Then there was a very helpful conversation with Phil at Fyne Boats as the B&B plans call for brass screws to fit knees and the breasthook and those supplied were smaller. It is worth noting that FB's version uses marine ply for these and the brass screws approach is not necessary so the screws supplied are more to hold it in place from the outside in. They can be left in place, but I will be taking them out. Having used clamps, I am not sure they were that important to achieving a good fit. The pieces did not slide around, maybe because the bevel holds them in place.
I am still mixing too much epoxy for each job. With what was left over I made a start on some of the seams.
Offline
#6 25 Feb 2023 12:33 pm
- Captain Seapig
- Member
- Registered: 21 Dec 2022
- Posts: 17
Re: Nesting Spindrift 11
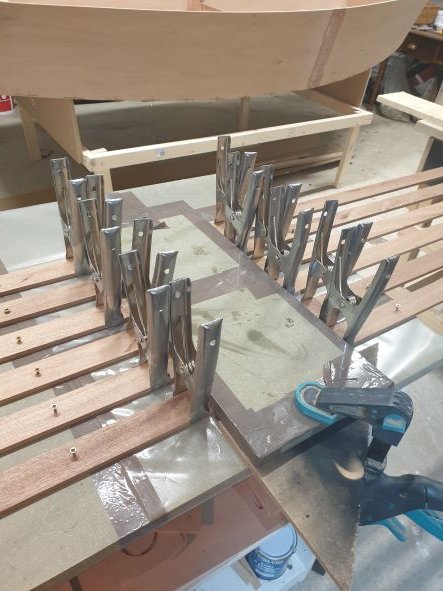
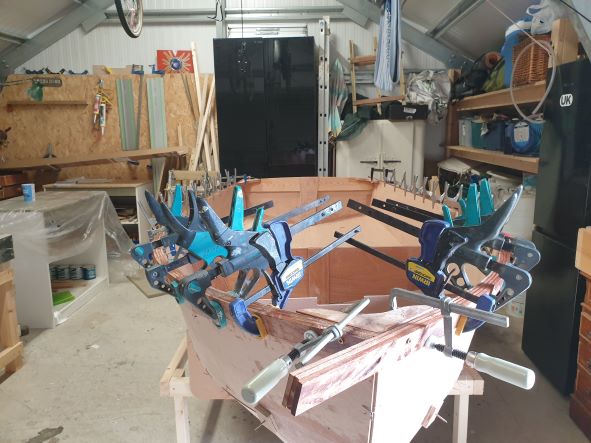
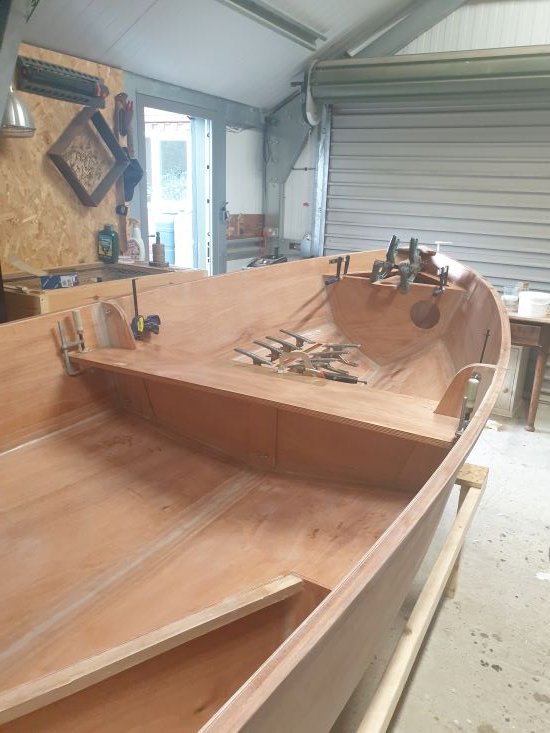
So, being a complete novice at boat building and this particular approach to building, I was quite nervous about installing the gunwales.
As I understood it this step is pretty key in determining the shape. I have to say I am really pleased with the result and that as long as you take your time it is fine. I almost entirely did it on my own, apart from my 11 year old son helping hold the aft ends when I screwed the forward ends in. Could probably have done it on my own, but this was helpful.
These are the things that I learnt along:
1) Dry fit is absolutely critical, impossible to do it without it and this needs to include working out your clamps etc.
2) Screws are very helpful in guiding the position, although I have taken them out now the epoxy has cured
3) I had in a previous step used up some spare epoxy on the transom and the forward bulkhead. I actually removed it from the forward bulkhead in the end, but left the transom. If I had my time again, I would have stuck to the instructions and not done it, but this is a minor detail and it has worked out fine.
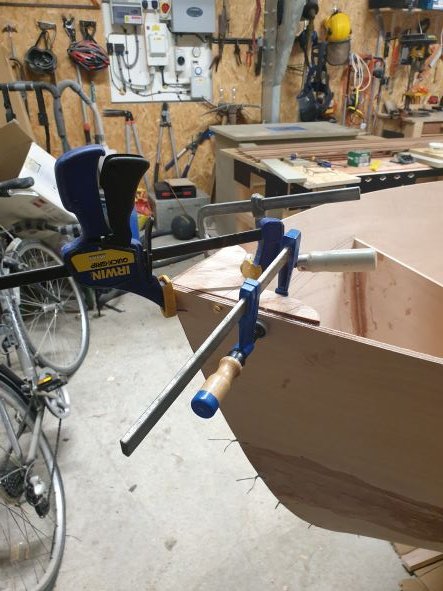
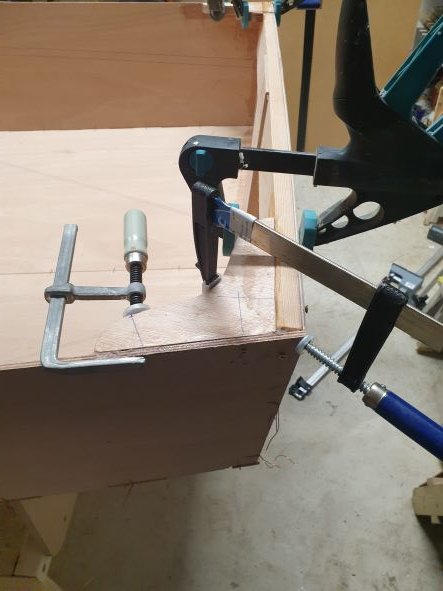
4) I love the spring clamps I purchase from FBK but I used some others I had previously. The vice clamps in particular (you can see them in the picture) were really helpful in creating the right shape at the bow as it is quite a complex sweep. As you can see the spring clamps worked well towards the aft and mid sections though. In all I used 40 clamps - and still proved the old adage that you never have enough, but frankly I am probably being a bit over the top.
5) It really is important to put a good layer of soup thickened epoxy to get a uniform squeeze out. Didn't quite achieve this in a couple of spots, but again I think it is good enough and will be able to address it anyway
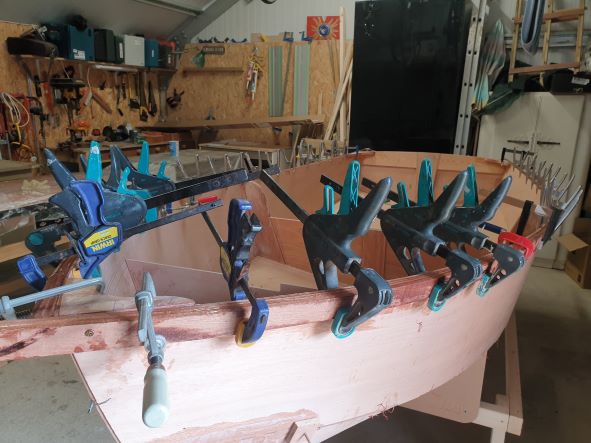

you will see I tied a bit of string weighed down with a heavy stone to bring the very ends together! worked pretty well.
Offline
#7 12 Mar 2023 10:53 am
- Captain Seapig
- Member
- Registered: 21 Dec 2022
- Posts: 17
Re: Nesting Spindrift 11
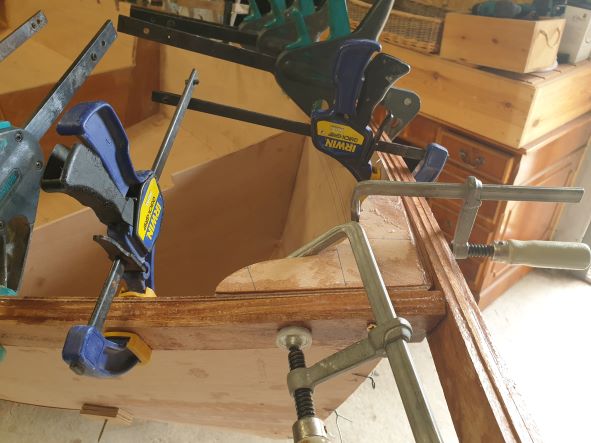
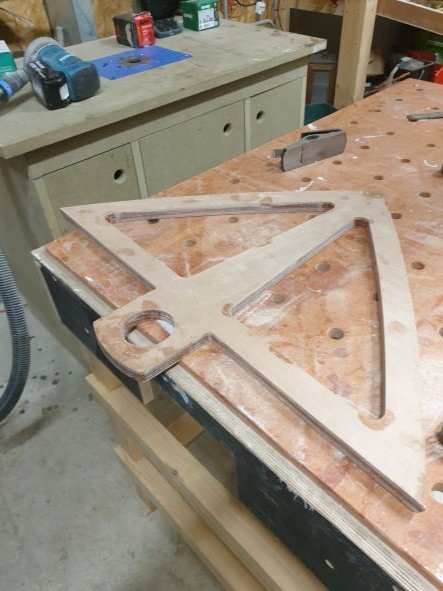
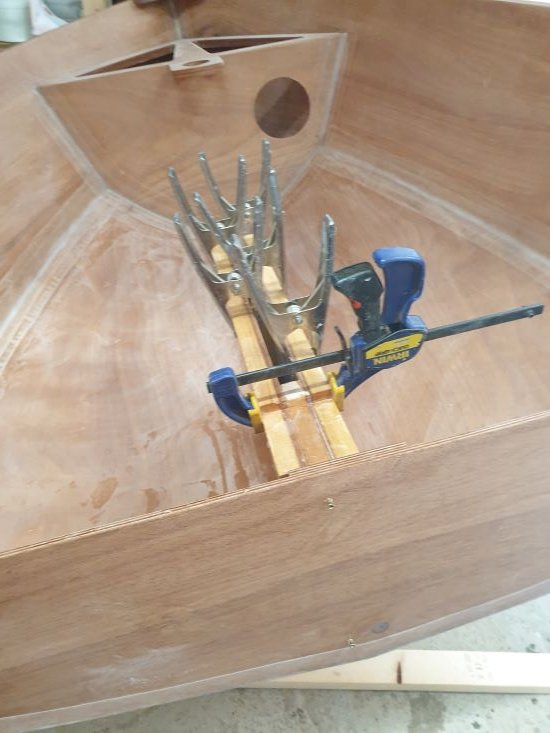
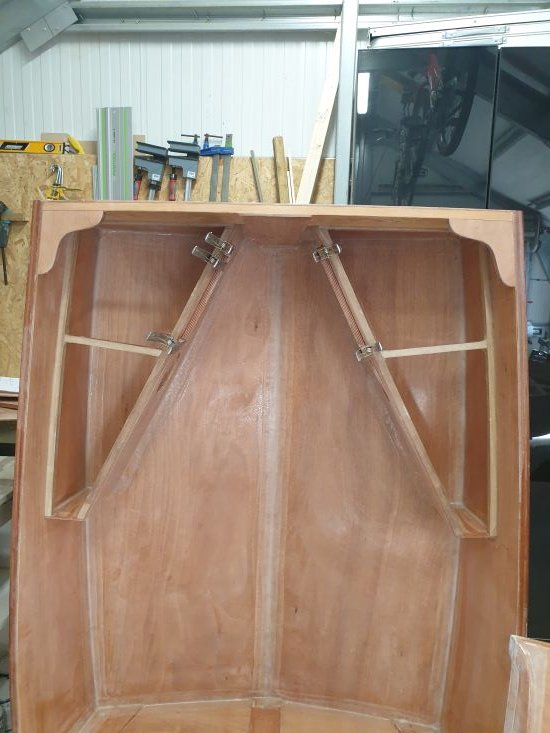
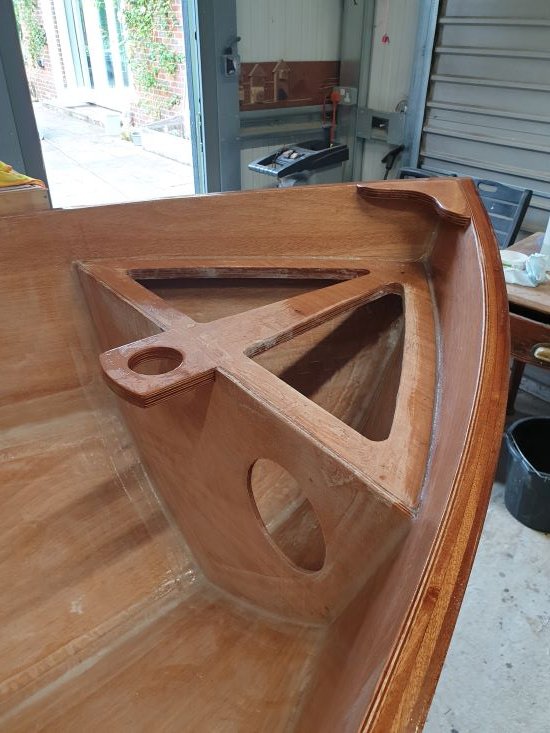
Having completed the gunwales it was time to make the forepeak frame which sits under the forepeak. As I have the kit it is formed from gluing 3 pieces together, effectively making a 3 play laminate. Went a bit crazy with the clamps, but hey I had them so why not?
A bit of tidying up later and the frame is formed:
next a dry fit and repositioning of the forward bulkhead
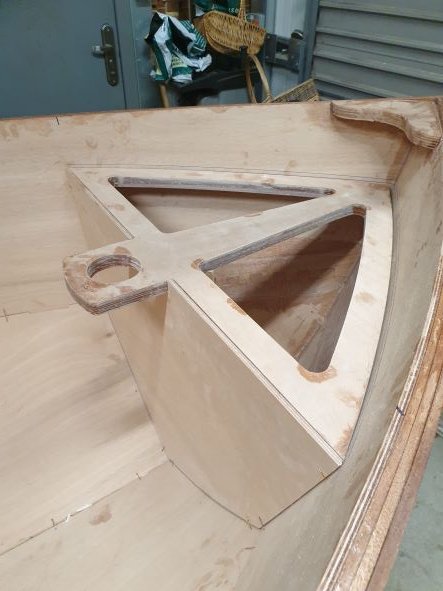
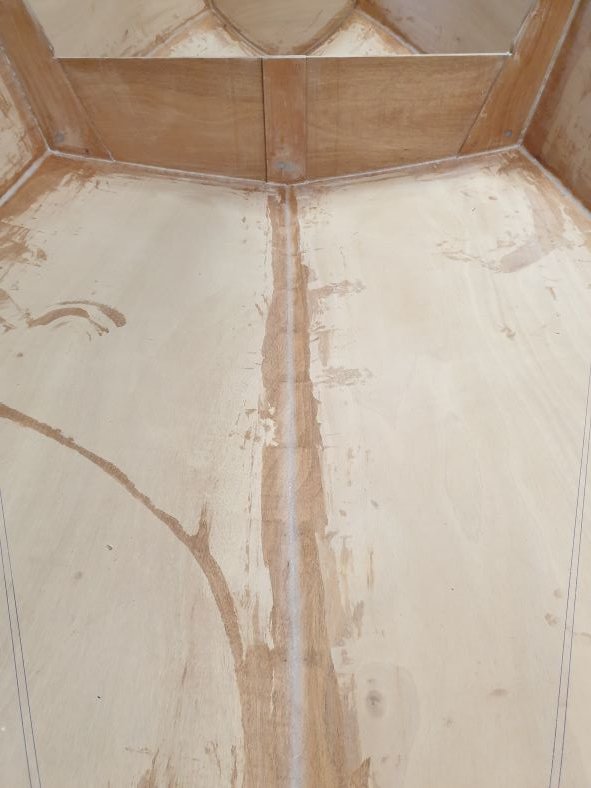
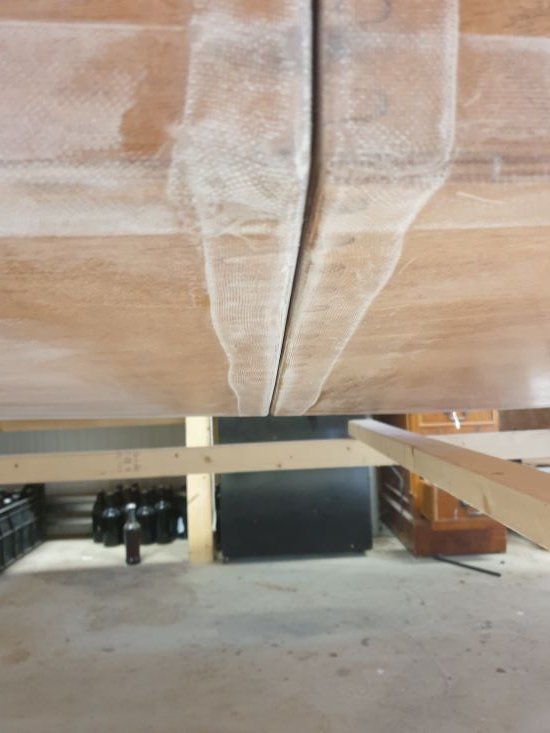
So having satisfied myself with the dry fit and checked for twist it was time to start the glue up for the seams and the bulkheads.
A key lesson I will take from this is that my shed is not heated and whilst I have been keeping the epoxy and hardener inside the house to keep it warm, I had not realised quite how cold the recent cold snap had made everything. In the end whilst I got the air temp up to 11c, I am guessing that I was mixing close to 14c, and the boat itself was around 8c ish.
A very nervous 24 hours ensued, but I can happily report a really good result and the glue is rock solid. Having read around I think the epoxy system FBK have chosen is a bit more resilient
Another reflection/question (may prompt another call to Phil and colleagues) is whilst I shaped the filet with the stick, I was struck by how in some places there is not as much glue as I anticipated there would be. That said it does look very solid even at this stage and once I have filled in the gaps where the wires were and placed the glass tape over it, and glued the external side I can see how this is an extremely strong structure.
removing the ties was pretty easy. If there were any that got stuck I drilled them out, there is only one piece left in the transom, but I do not anticipate any issue with this.
Offline
#8 11 Apr 2023 1:09 pm
- Captain Seapig
- Member
- Registered: 21 Dec 2022
- Posts: 17
Re: Nesting Spindrift 11
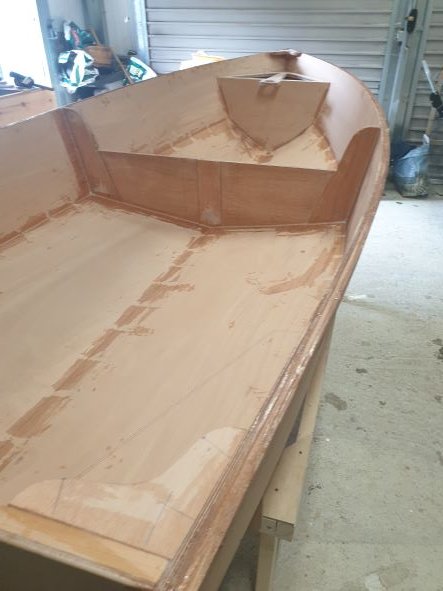
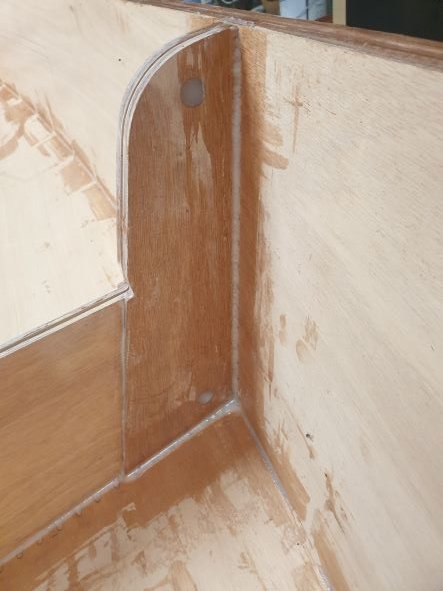
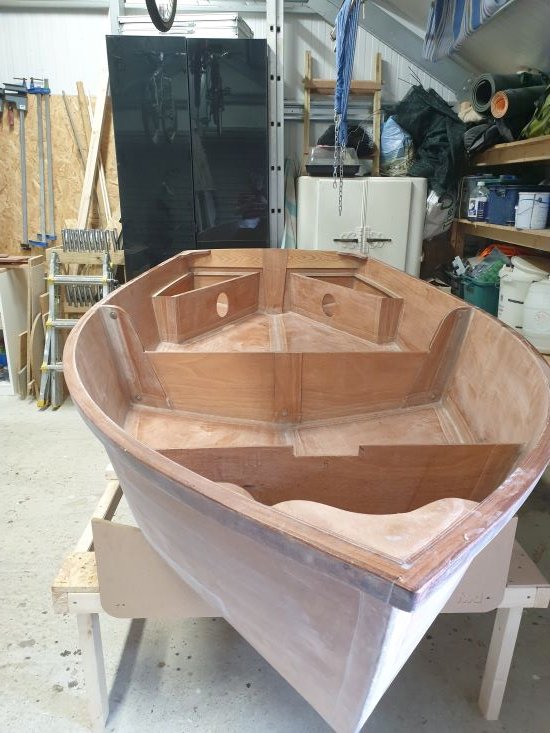
Quite busy recently hence the delay. Since my last post I finished the fileting. I went back over them all to give a larger filet
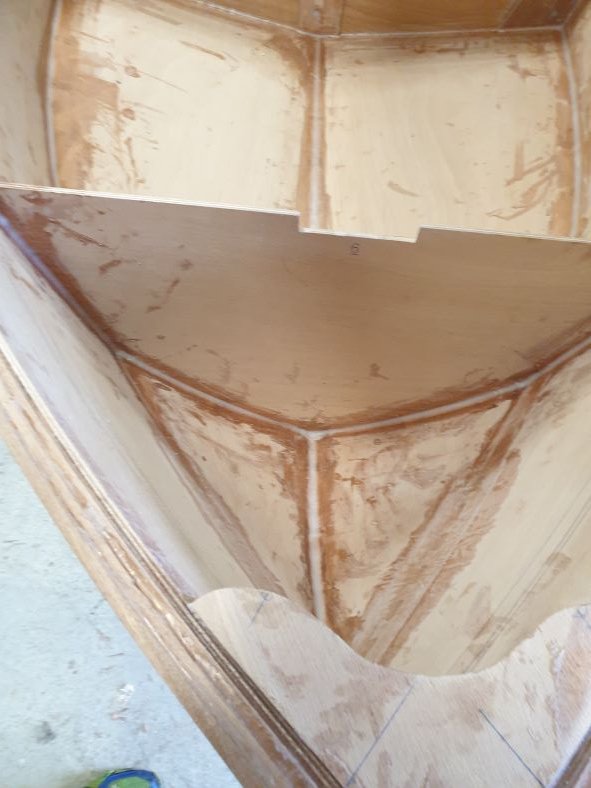
I didn't have the time (or confidence perhaps) to apply the glass tape whilst the filets were curing. This is what the manual seems to preference, the alternative is to do them in separate stages sanding before applying the tape. In the end I sanded them all down. This took a while, but was not too onerous. There were certainly advantages for me to do it this way in terms of practicality, I am not sure if I would have got a better finish, but can certainly see the advantage of doing the tape whilst the filet cures. If I were to do another boat, I might try that method, but do it in smaller sections.
Either way I am happy with the result. There are just a couple of patches to tidy up and only in a few places have I not quite got the tape down.
Offline
#9 16 Apr 2023 9:17 pm
- Captain Seapig
- Member
- Registered: 21 Dec 2022
- Posts: 17
Re: Nesting Spindrift 11
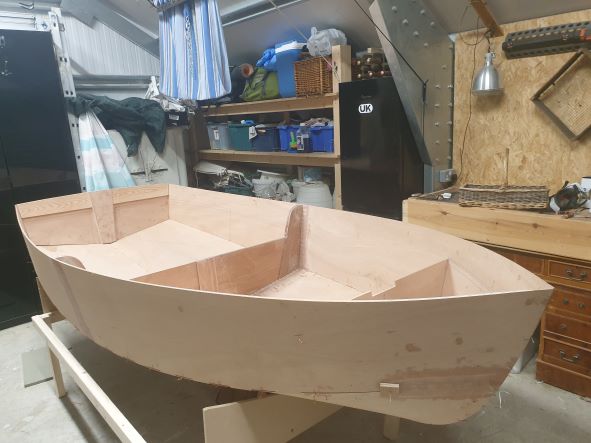
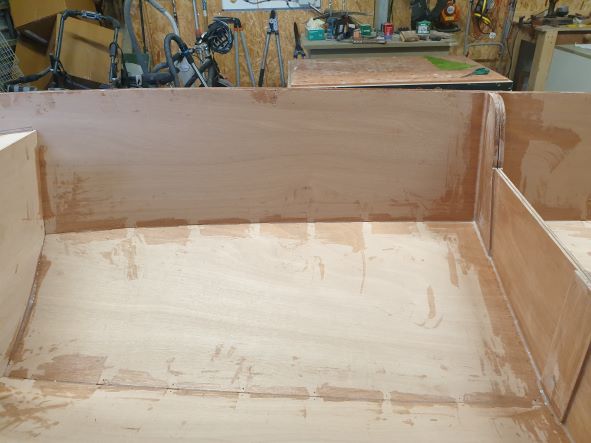
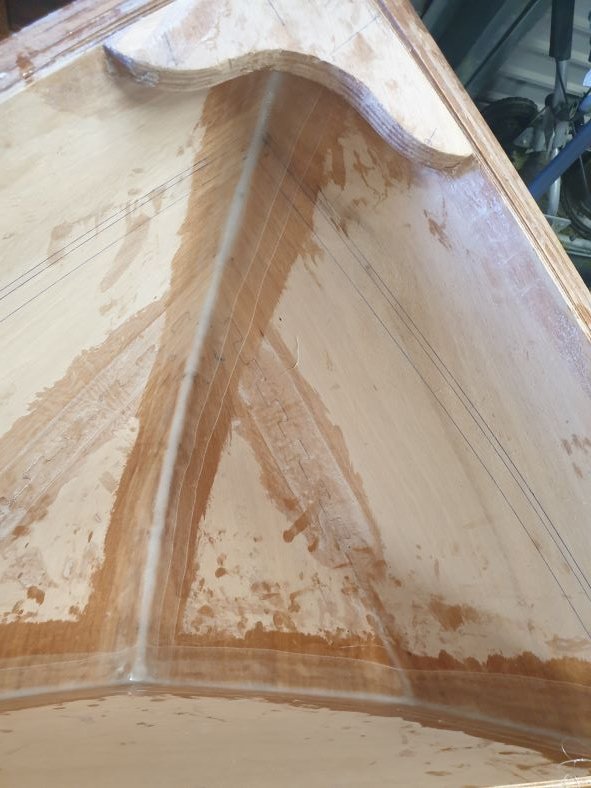
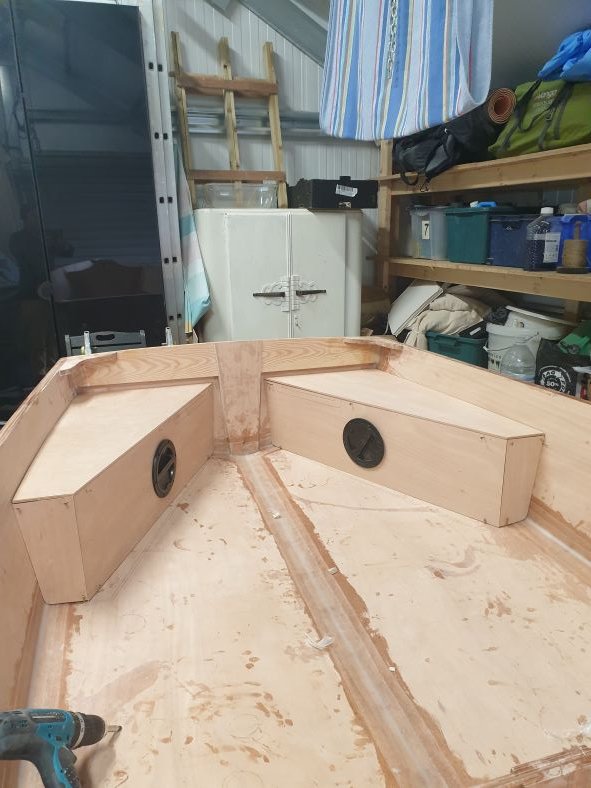
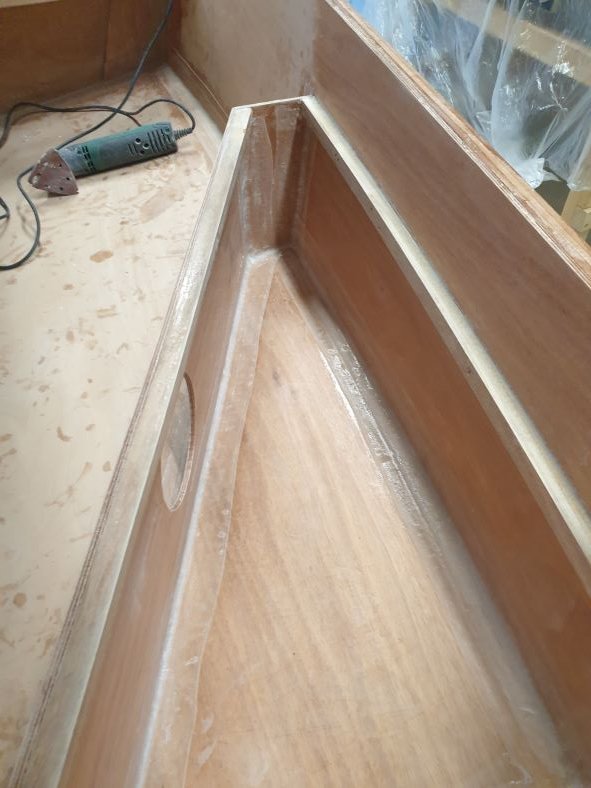
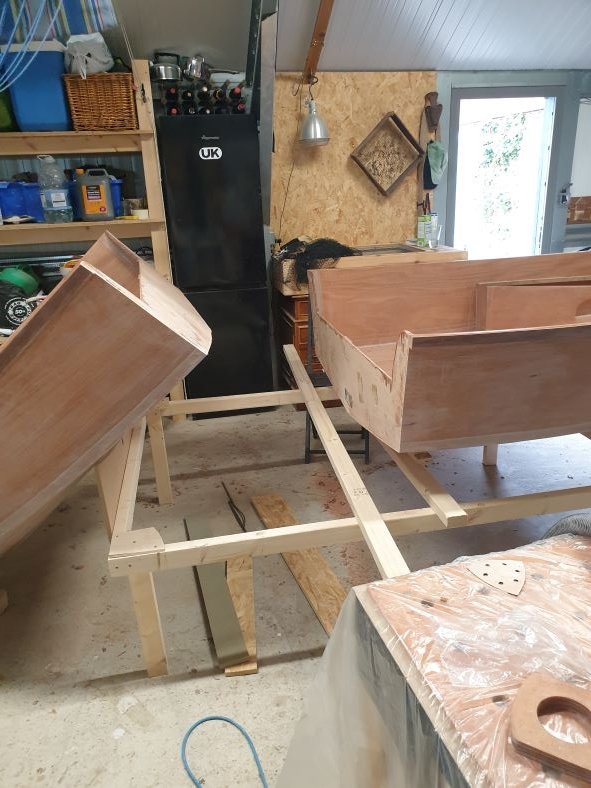
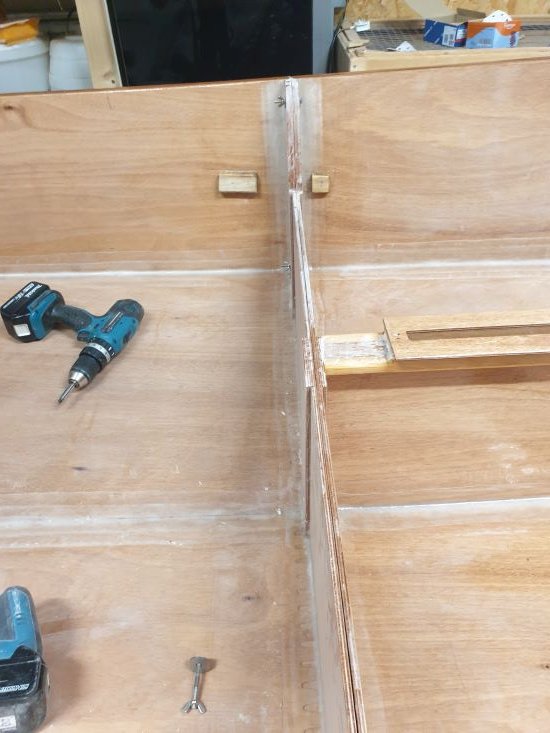
Was pleased to have found the time to start on the rear seats. Which I dry fitted by starting on the cleats and shaping them to fit the outboard. The panels then were quite straightforward to shape. I did not opt for the glue gun in the end and used screws to hold the pieces in place.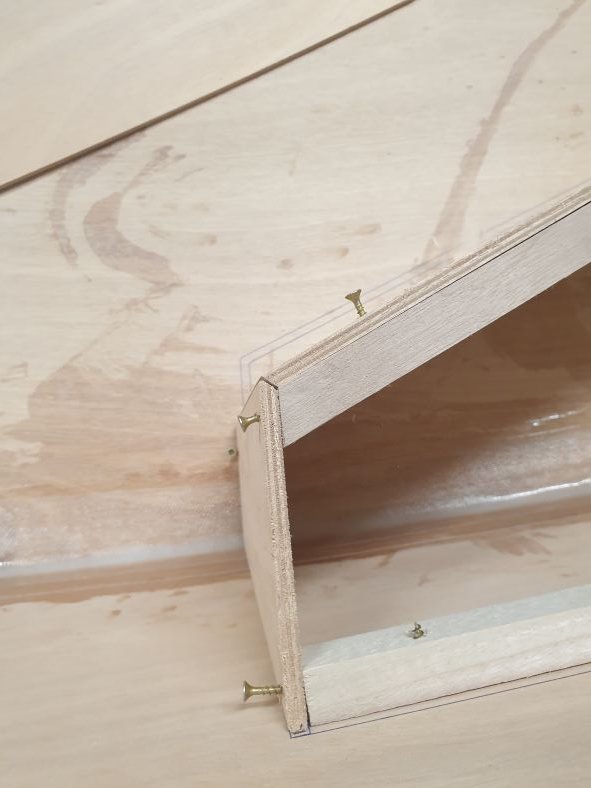
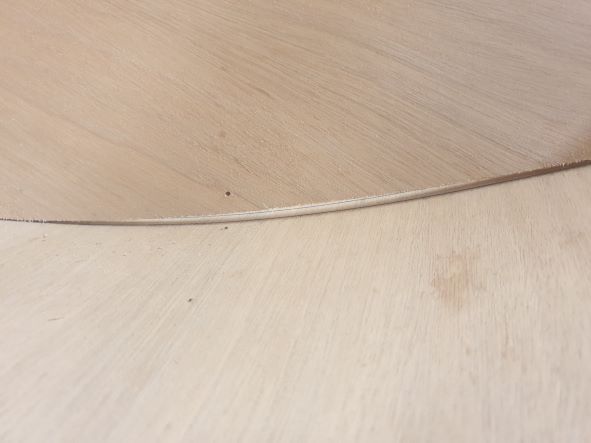
Noticed the lines on the bottom panels were off. I checked the measurements on plans and the parts were cut correctly and fitted with only a very slight amount of shaping.
I have opted to put a hatch in each seat so I have somewhere to store my sandwiches....
Offline
#10 21 May 2023 11:49 am
- Captain Seapig
- Member
- Registered: 21 Dec 2022
- Posts: 17
Re: Nesting Spindrift 11
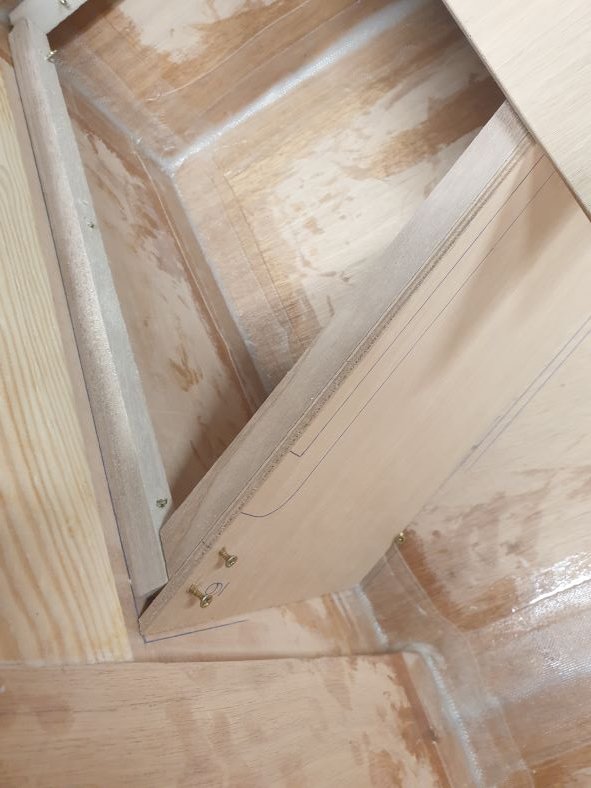
Been very busy at work recently, but have made a little more progress.
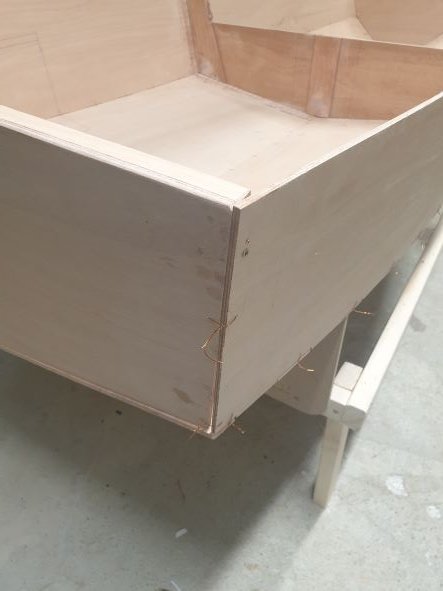
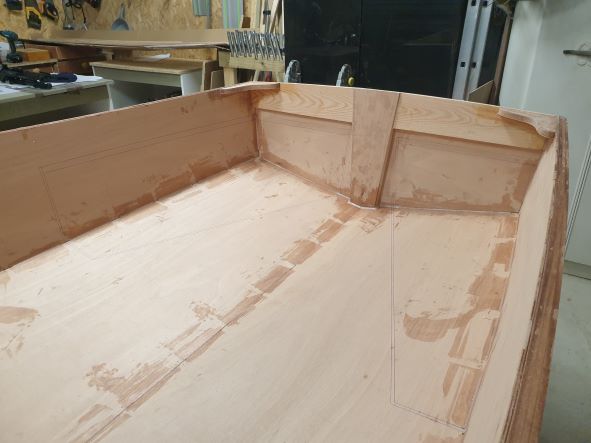
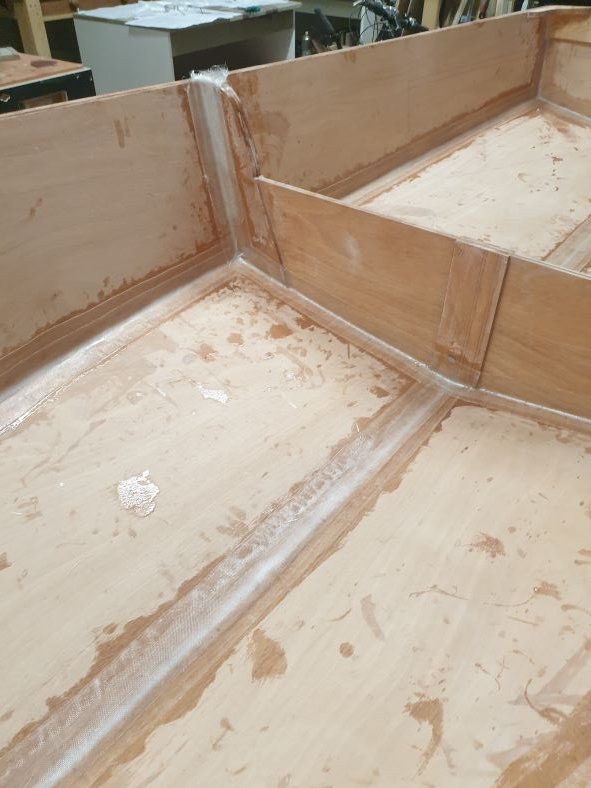
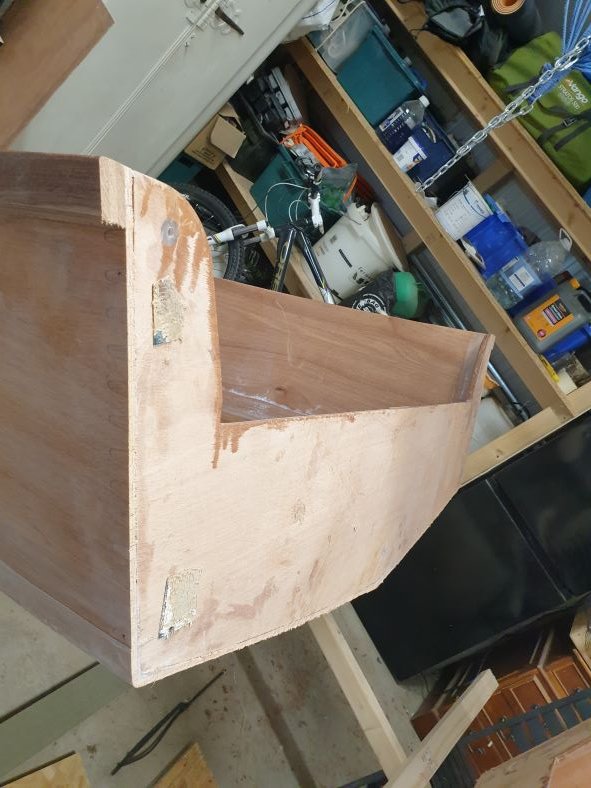
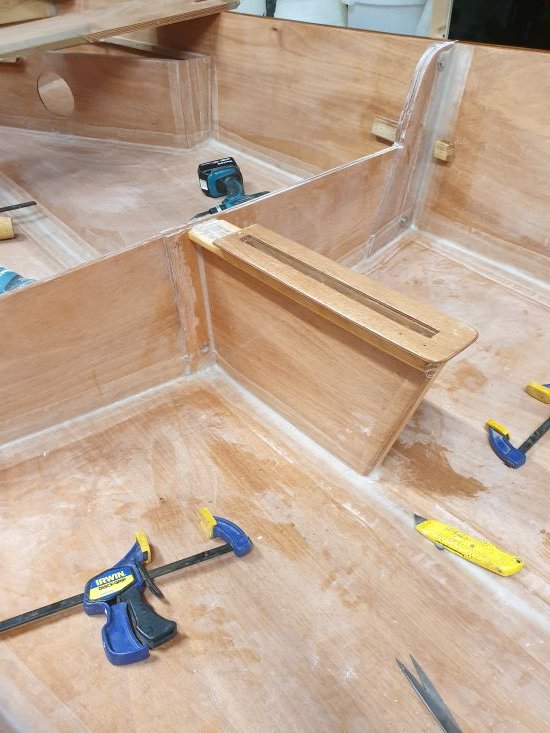
Have glued the walls of the seats in place. I used screws and a length of wood to get the pieces into position.
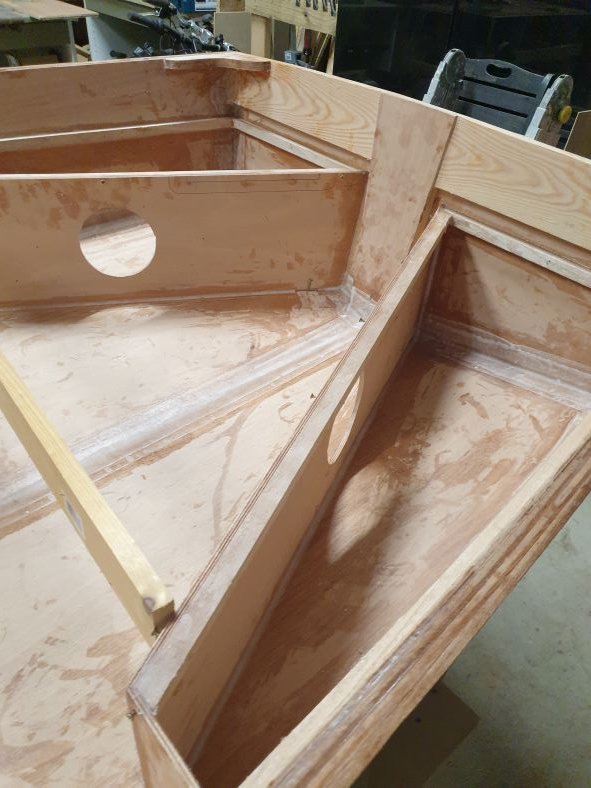
Seemed to work very well and was left with something very solid. Note the lines on the hull sections are different to where the walls have lined up. The pieces supplied are correct according to the plans though...
I was then able to glass the structure in place. Really is quite remarkable how strong it all is.
Offline
#11 31 Jul 2023 7:18 pm
- Captain Seapig
- Member
- Registered: 21 Dec 2022
- Posts: 17
Re: Nesting Spindrift 11
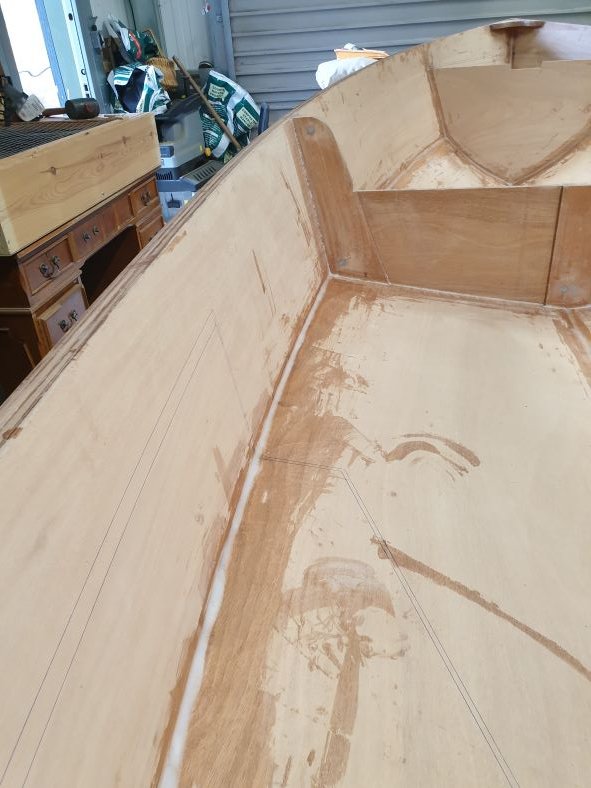
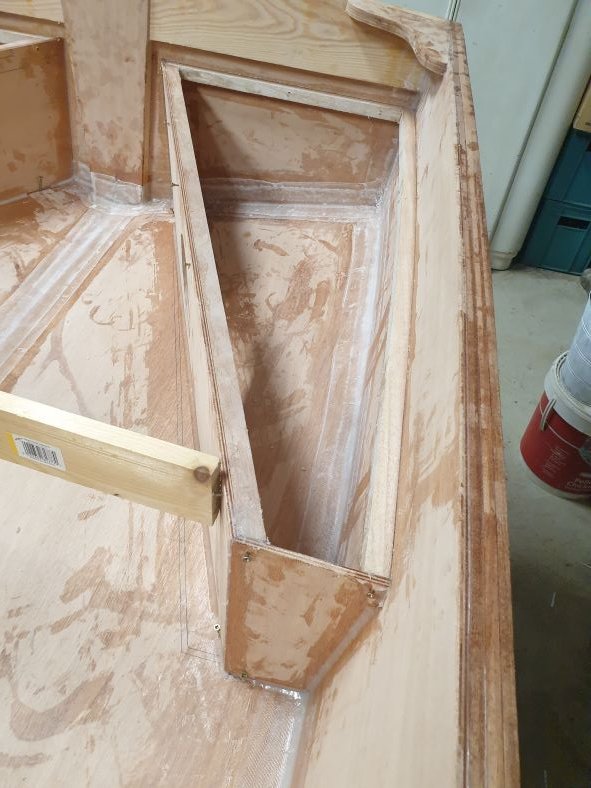
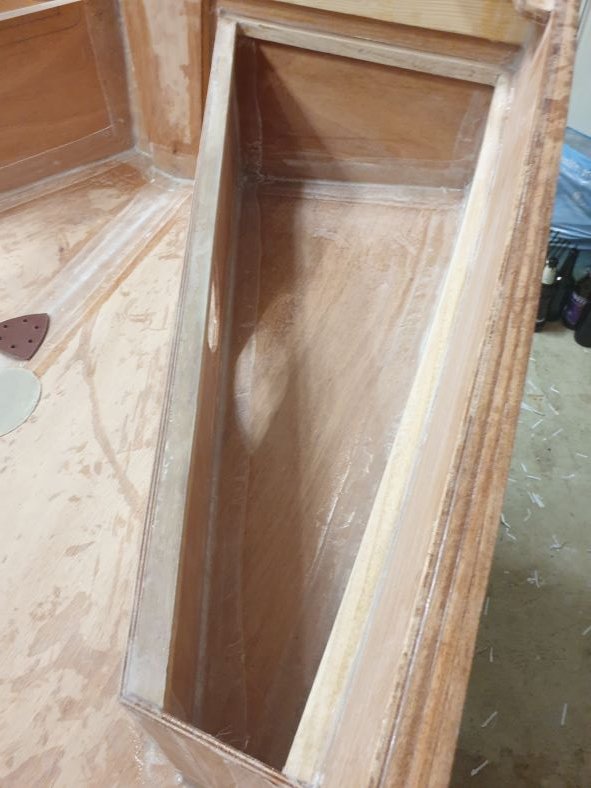
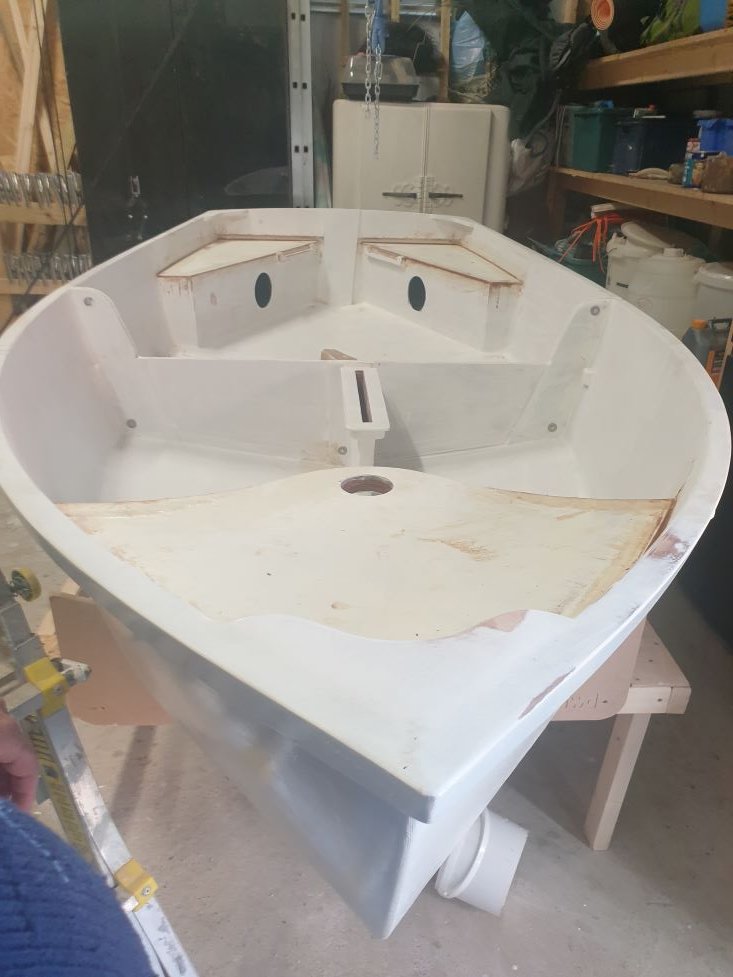
Been majorly distracted by my new job, so the boat has been on the back burner a bit. Hoping to rectify that during August. Been doing a few bits and bobs getting the seats/buoyancy tanks prepared for glue up. Have also managed to get the first coat of epoxy on all the insides and sanded that back to 80 grit.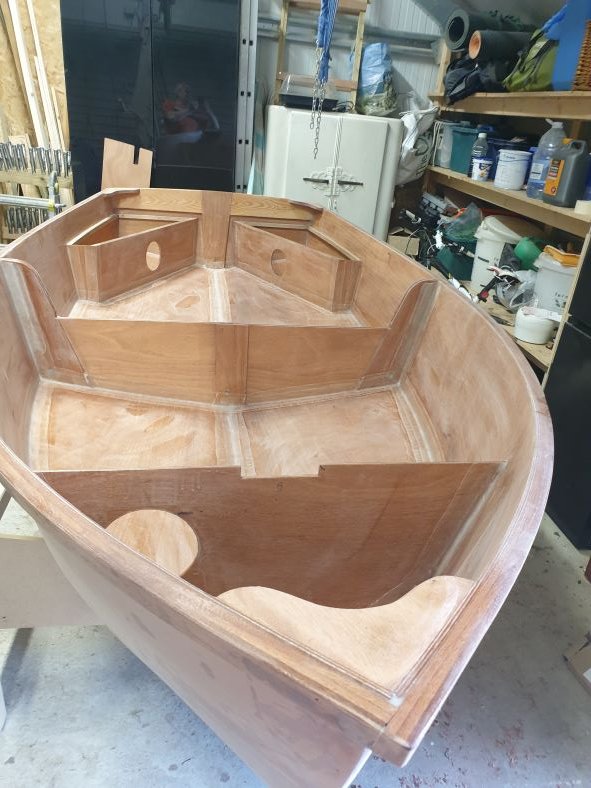
Have to say it is looking really good even like this. Also started to work on the hull in preparation for seams and its first coat of epoxy. I really like the shape and feel of it as it develops.
Made a quick call to Phil today to run through a couple of bits and bobs. As ever he is extremely helpful
Offline
#12 2 Aug 2023 5:57 pm
- B&B Yacht Designs
- New Member
- Registered: 2 Aug 2023
- Posts: 1
Re: Nesting Spindrift 11
Seapig,
Thanks for posting these great photos of the Spindrift kit!
We are working with Fyne to correct the pen lines you noticed. This was due to a correction in the stern seats a while back as they were located a bit too close to the bow section of the hull when the boat was nested.
Looking great!
-Alan and Graham in NC, USA
Last edited by B&B Yacht Designs (2 Aug 2023 5:57 pm)
Offline
#13 19 Aug 2023 9:30 am
- Captain Seapig
- Member
- Registered: 21 Dec 2022
- Posts: 17
Re: Nesting Spindrift 11
Thanks to Alan, Graham and Phil. The issue has been resolved and as these photos next show there were no subsequent problems and all is going smoothly. Really grateful for such responsiveness and aftercare.
Had a bit of time recently so moved things on a bit.
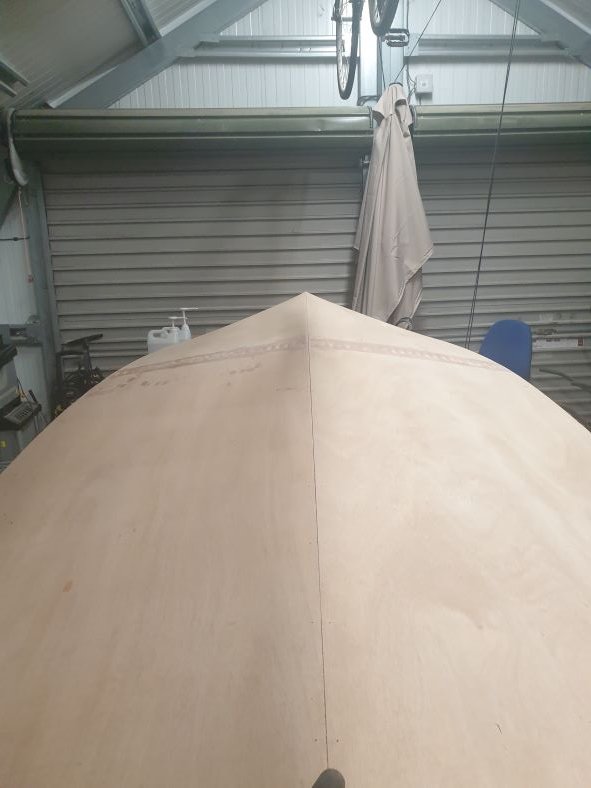
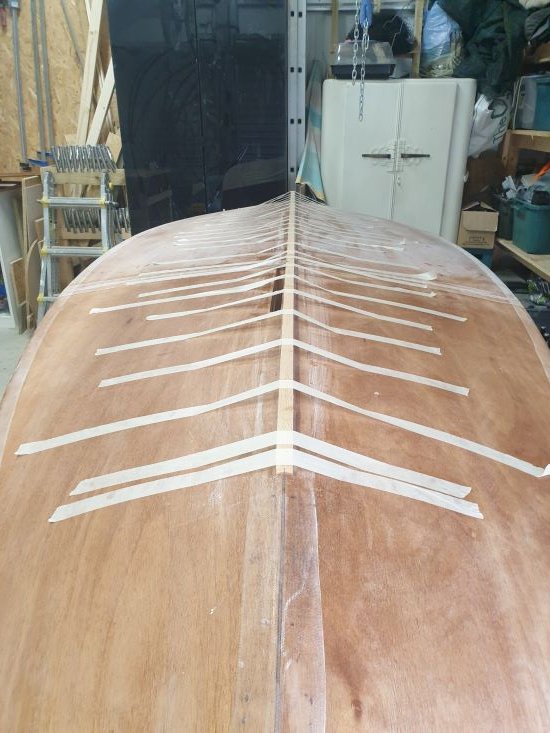
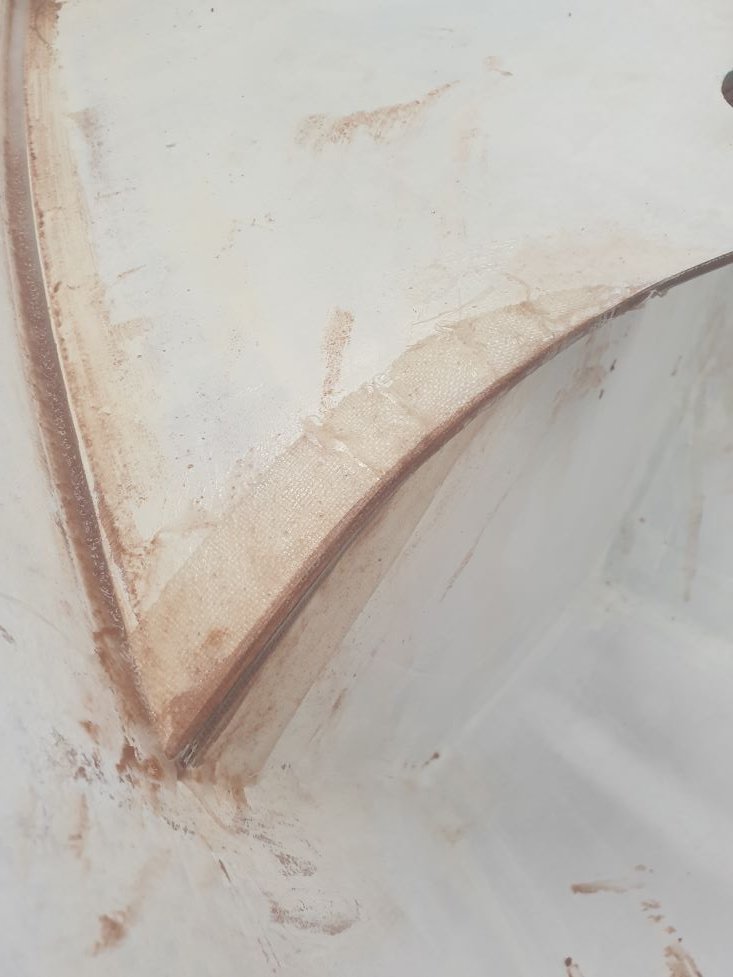
Sanded back and prepared hull for glass tape: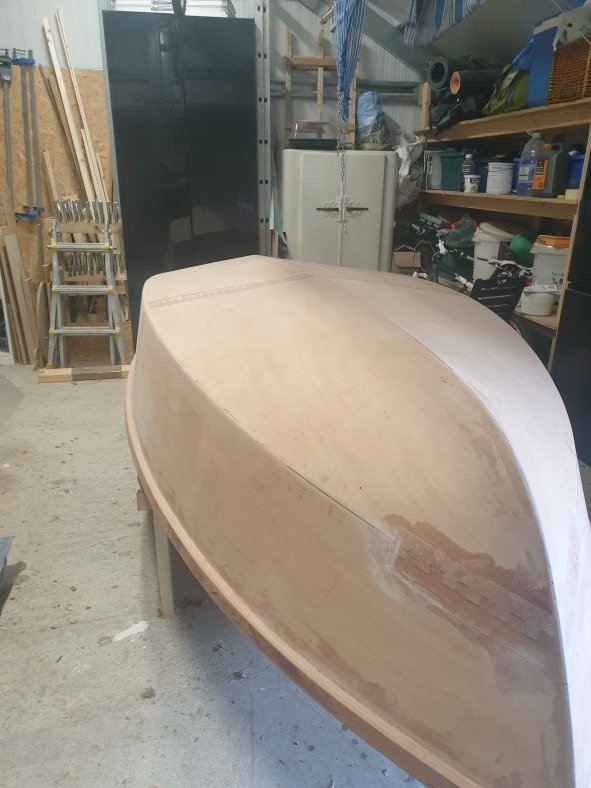
Have put thickened epoxy in any of the gaps in the seams, then taped them and put a coat of epoxy across the lot.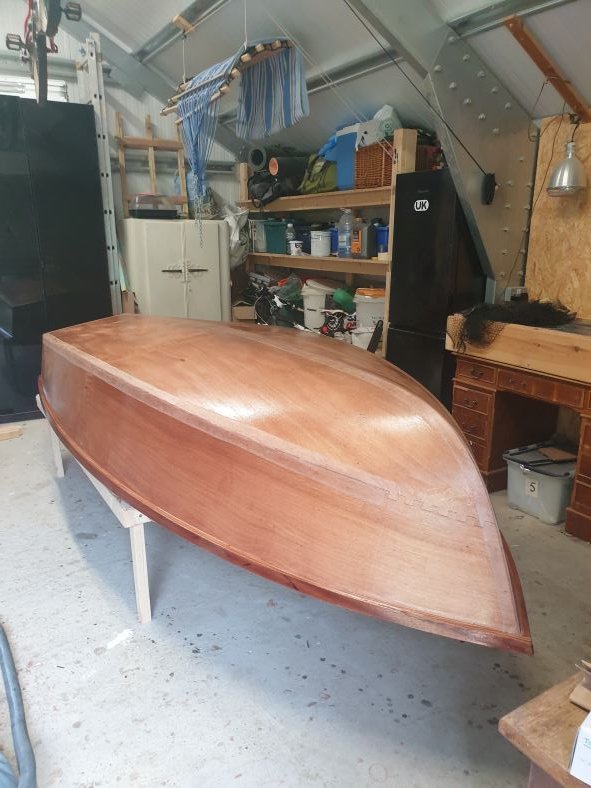
knocked back with 80 grit on the panels and 240 on the corners of the seams in preparation for one boat to become two!
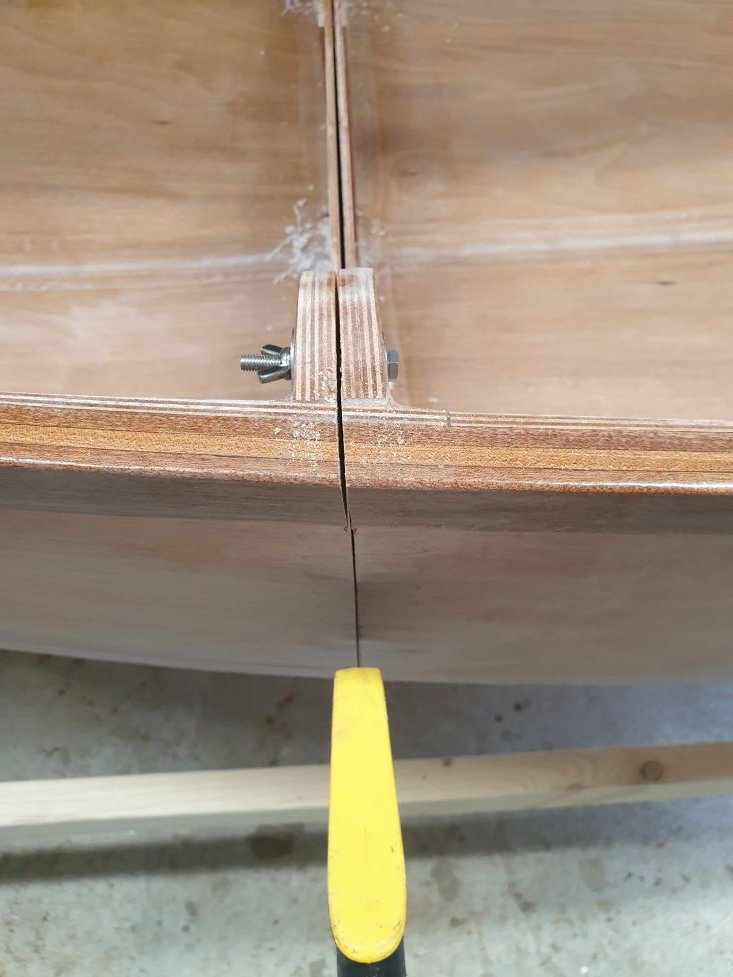
Defninitely a freaky process! However - they nest! - Perfectly.....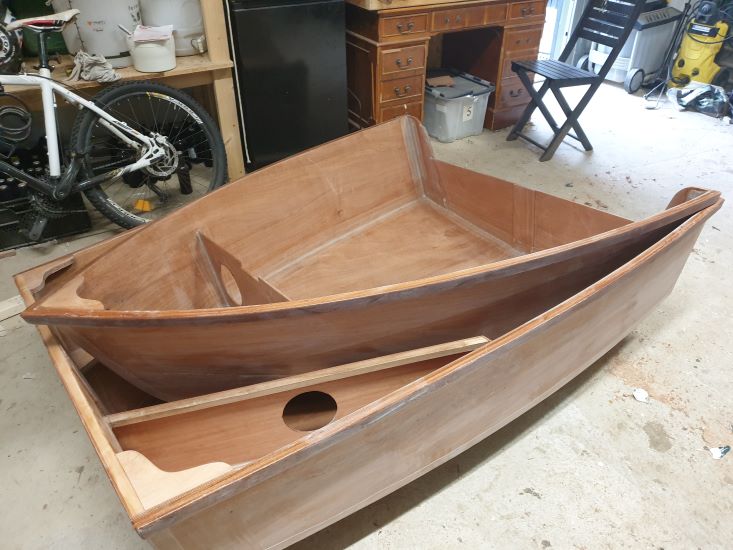
I can just about handle the sections on my own now. I imagine there will be a bit of a technique to develop here
Offline
#14 3 Sep 2023 10:52 am
- Captain Seapig
- Member
- Registered: 21 Dec 2022
- Posts: 17
Re: Nesting Spindrift 11
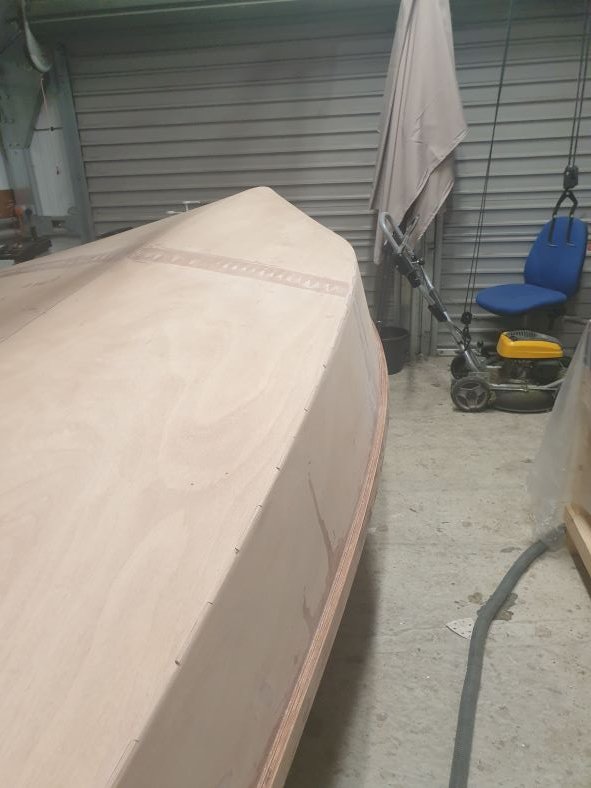
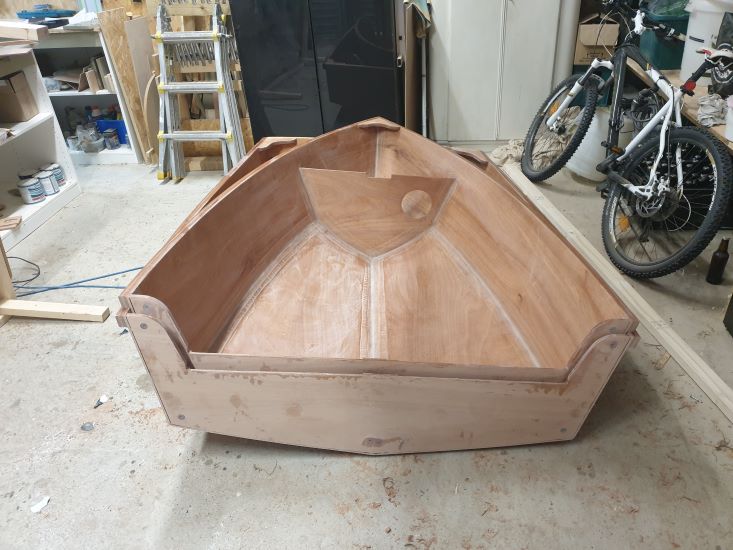
Having cut the boat in half, I have now been able to glass the edges of each section. Having done so, the sections are sitting comfortably and the overall line and I am really happy with the shape of the boat.
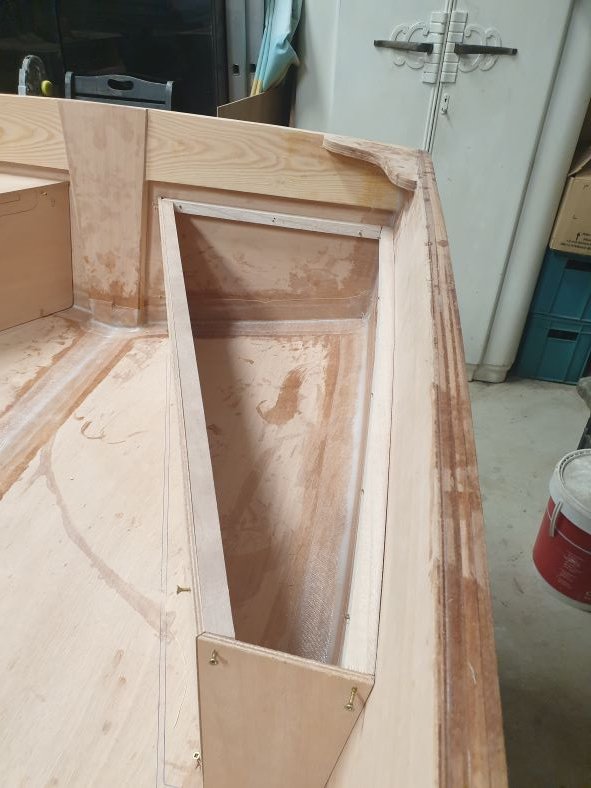
Decided to do the dagger board trunk next as I am planning on routing out the whole in the hull. I figured that if I install the keel next then this would make it much more difficult. As you can see i used screws to fix it in place. I should have done the glass at the same time, but just didn't have my act together to do it!
Having watched https://www.youtube.com/@essenceofsailing/videos who has a great youtube vlog of his build, I have put a little batten on the back seats as I thought this a good idea.
Offline
#15 9 Sep 2023 4:54 pm
- Captain Seapig
- Member
- Registered: 21 Dec 2022
- Posts: 17
Re: Nesting Spindrift 11
Have now cut out the dagger board trunk in the hull. Quite a satisfying job with the router. Although the forward end is slightly off the centre line. This is more an irritant to my perfectionism than anything else as it is only slight. I am glad though that I have put the keel on afterwards though.
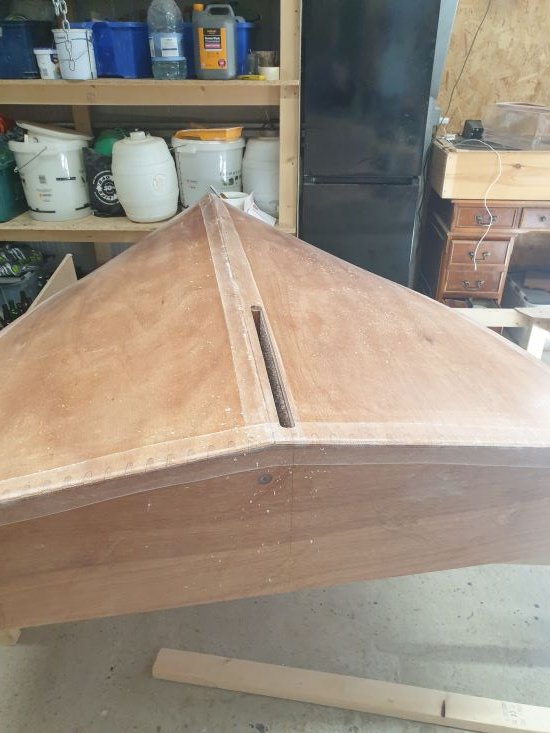
Am now research fairing compounds...
Offline
#16 17 Sep 2023 9:44 am
- Captain Seapig
- Member
- Registered: 21 Dec 2022
- Posts: 17
Re: Nesting Spindrift 11
Seat thwarts, finishing off the dagger board trunk and forepeak supports have been the latest jobs. Had to redo one of the seat thwarts as probably did a bit too much in one go and so was a bit sloppy. Have tidied it all up and now glassed in the dagger board trunk. In the end I put a seam down where it meets the hull and one on the leading edge. Am not far off the first coat of primer...

Offline
#17 22 Oct 2023 1:00 pm
- Captain Seapig
- Member
- Registered: 21 Dec 2022
- Posts: 17
Re: Nesting Spindrift 11
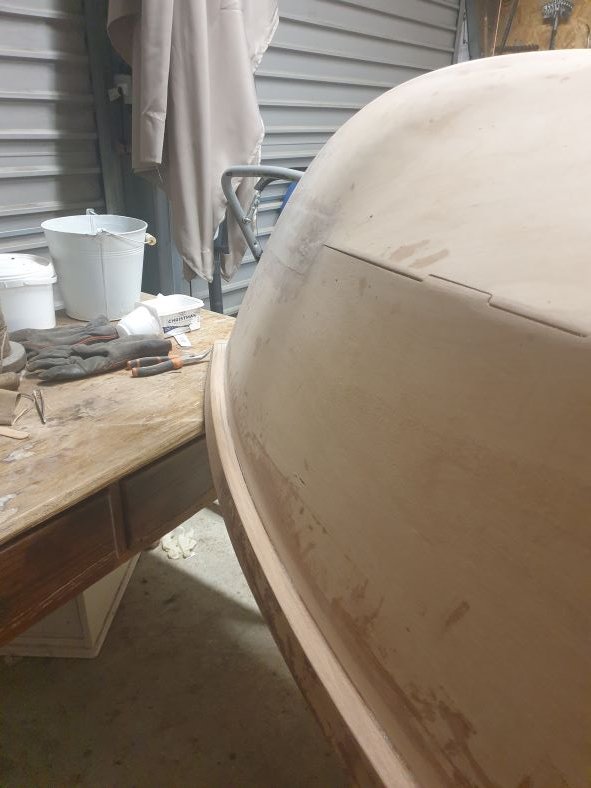
Have been fairing and painting. Following Phil's at FBK advice I have gone for U Pol car body filler as it is quick to dry and reasonably priced. I bought far to much though so could do several boats. I have decided not to go completely obsessive about it the fairing and just aimed to take the worst out of the glass strips and various dinks I have made. Paint scheme is ivory white on the hull outside and grey on the inside so as to avoid glare.
Having got the first coat of primer and ivory white on the hull I have turned her over again to finish off the aft seats and the forward chamber. Not being entirely comfortable with the seal I also decided to glass tape the edges as it is meant to be airtight. I am quite pleased with the result, but it will require further fairing...
Offline
#18 4 Jan 2024 10:41 am
- Captain Seapig
- Member
- Registered: 21 Dec 2022
- Posts: 17
Re: Nesting Spindrift 11
So finally got a chance to work on the boat over Christmas.
Have spent a bit of time on the filling and sanding. The U Pol car body filler has worked pretty well. I have only gone for filling the really big bumps. I think seeking perfection would be pretty pointless and probably drive me insane.
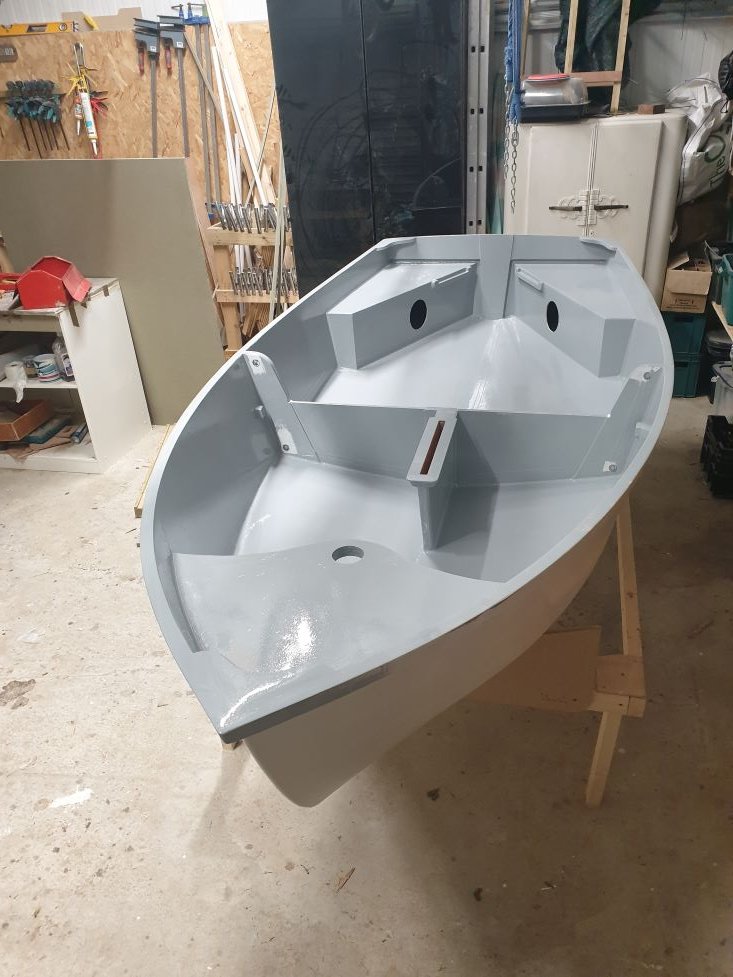
Have just put the first coat of grey on and there is a little more filling I want to do, but shaping up nicely I think
Offline
#19 4 Apr 2024 6:37 pm
- Captain Seapig
- Member
- Registered: 21 Dec 2022
- Posts: 17
Re: Nesting Spindrift 11
Been able to spend a bit of time on the boat recently.
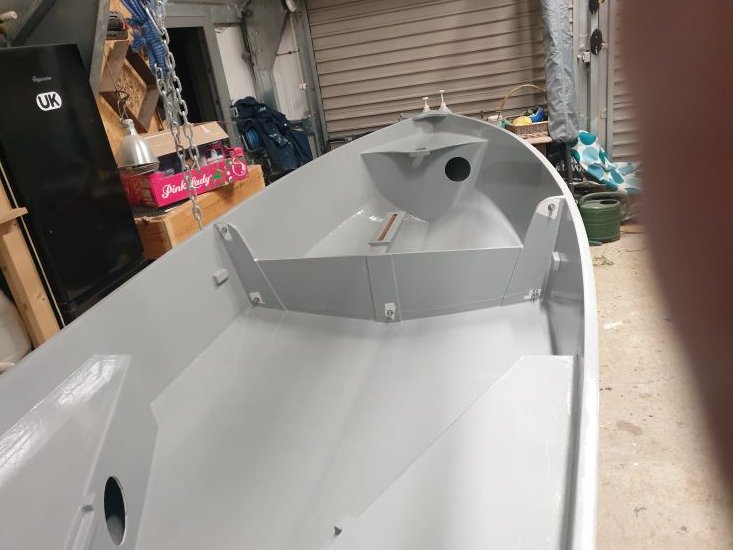
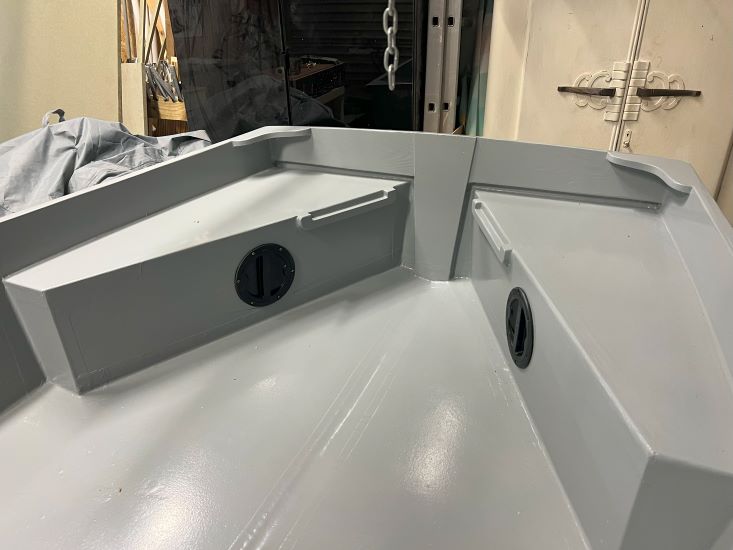
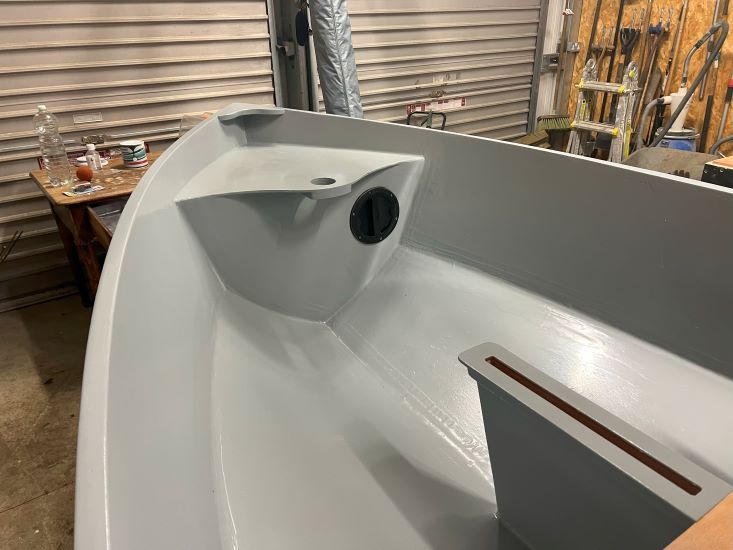
Painting has been completed and I have put the hatches. Used sealant to bed them in.
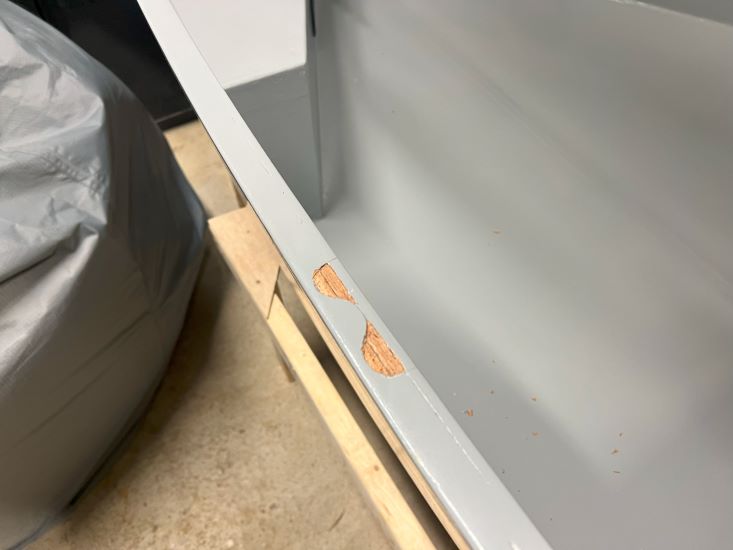
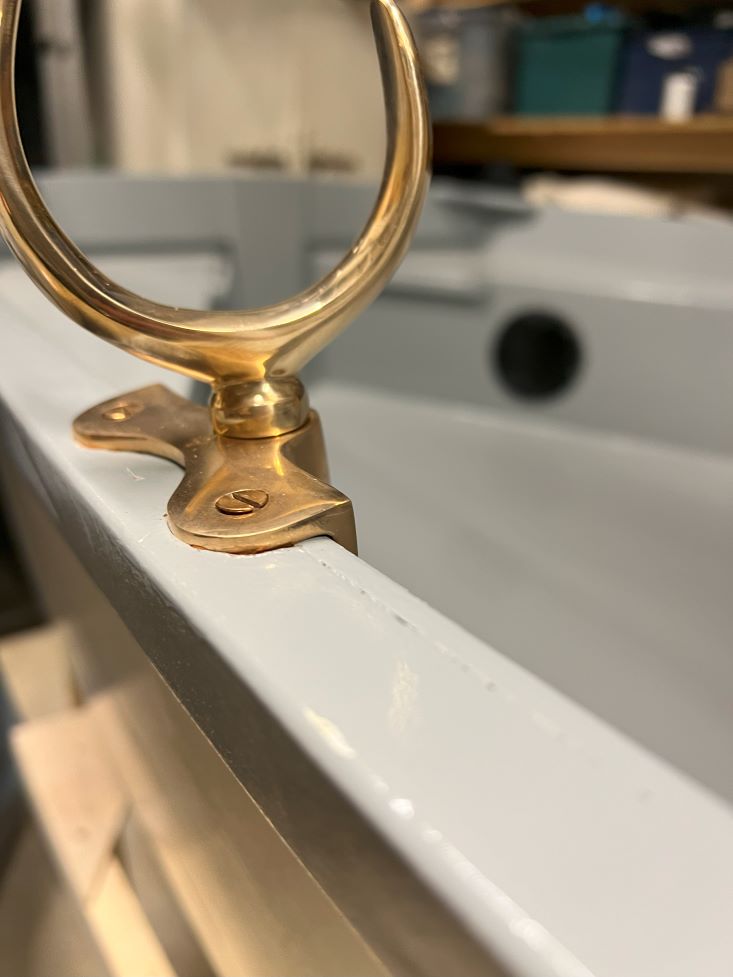
Have dry fitted the rowlocks. I needed to chisel out a recess which was quite enjoyable. Will epoxy and then assume I will use the same sealant to bed them in. Already looking pretty smart.
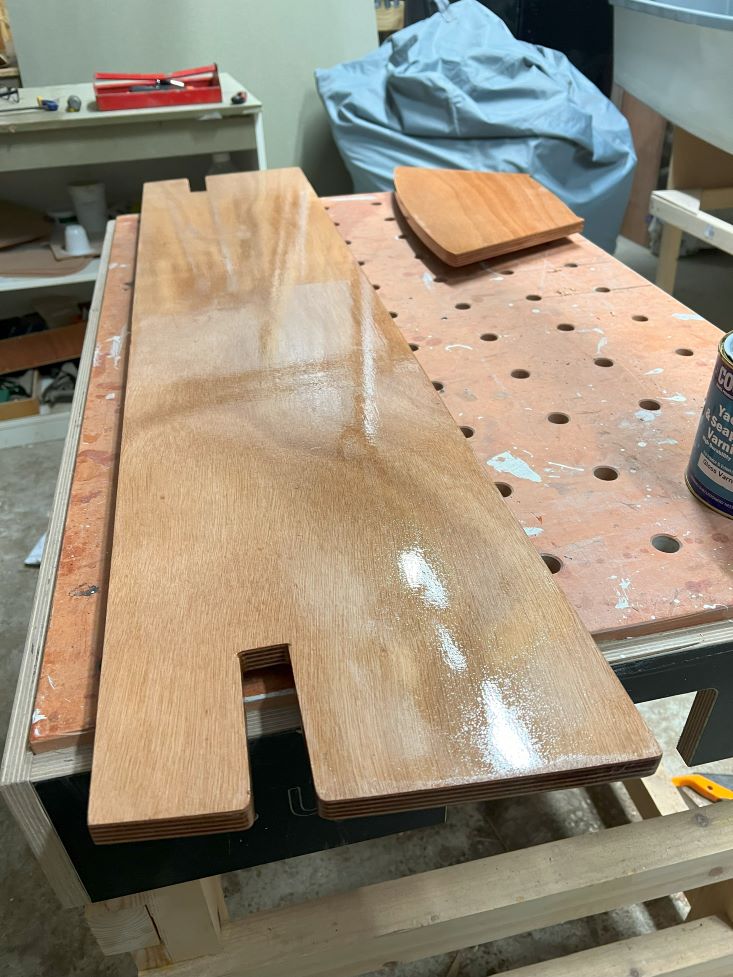
Have also put the first coat of varnish on the seats. Coming up nicely
So I will soon have a boat fit for the water. Am going to take it rowing at first and then later in the summer I intend to get the sailing kit.
Am really pleased with how it has shaped up.
Offline
Pages: 1