A forum for discussing wooden boats and boat building
You are not logged in.
- Topics: Active | Unanswered
#26 25 Nov 2011 10:26 am
- fairplay
- Member
- Registered: 16 Jun 2011
- Posts: 109
Re: Wood Duck 12
...Navin, may i ask whom you're building the Wood Duck 12 for? - in terms of 'what size, age and/or wheight' will the paddler have...
...i am just in the final stages to decide between the Wood Duck 10 and the Wood Duck 12 to be paddled by children between 6 and 15 years...
...as i have not seen the boats in 'real life' yet i'd be grateful for some further input ![]() ...
...
'...so, how many kayaks do you really need?...' - '...one more!...'
Offline
#27 28 Nov 2011 12:22 pm
- Navin
- Member
- Registered: 25 Aug 2011
- Posts: 39
Re: Wood Duck 12
Hi Fairplay,
it's for me and I'm 90kg and 1.7m tall - so short and stocky is the polite description.
I'm not an experienced paddler so I wanted a boat that is stable and easy to paddle and all the reviews I read indicated that this would fit the bill.
Sub-zero temperatures and an unheated workshop have slowed the progress of my build, I've got a final coat of epoxy and then painting/varnishing to do.
cheers
Offline
#28 13 Mar 2012 12:20 pm
- Navin
- Member
- Registered: 25 Aug 2011
- Posts: 39
Re: Wood Duck 12
Temperatures are rising so I got back to work on the duck at the weekend; I applied a final coat of epoxy to the deck and built up the coaming.
Next job will be to fit the coaming then prepare for finishing, I've ordered paint and varnish from Fyne and I'm going for white hull and varnished deck.
Offline
#29 19 Mar 2012 6:57 pm
- Navin
- Member
- Registered: 25 Aug 2011
- Posts: 39
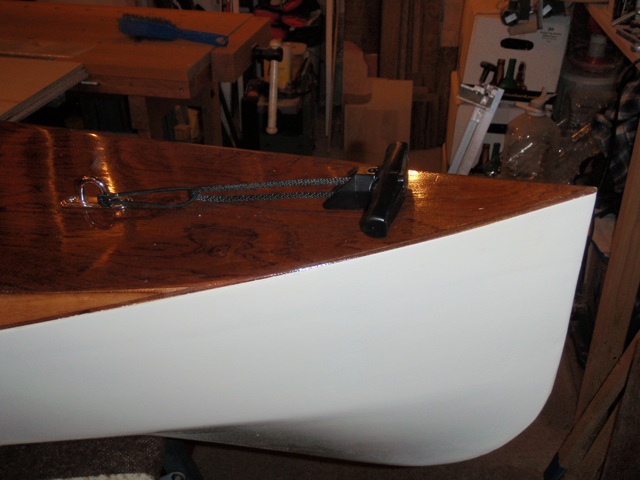
Re: Wood Duck 12
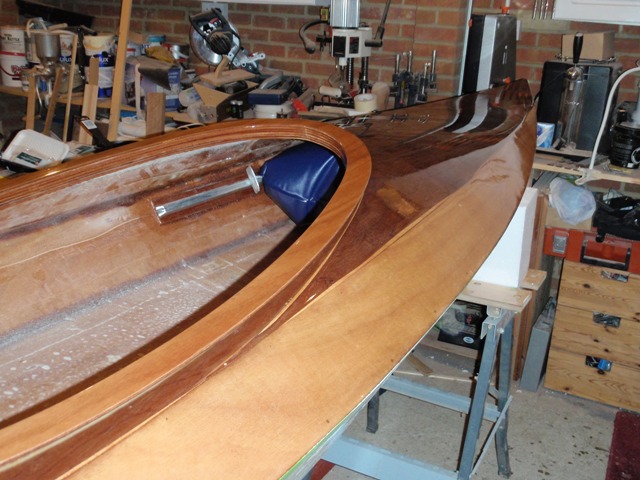
coaming fitted

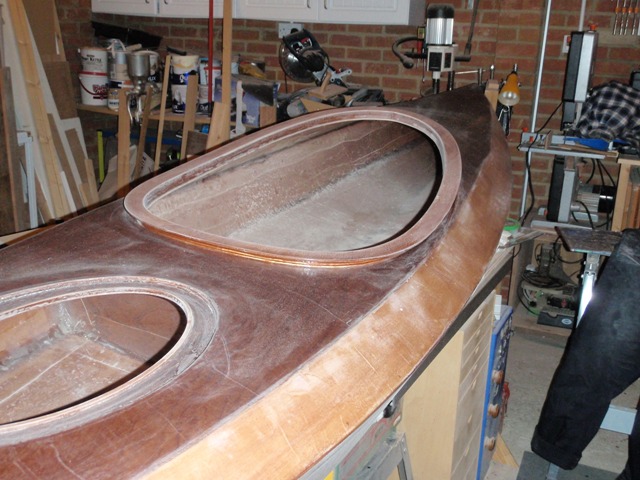
I have rounded over all the edges and sanded it flush where it joins the deck.
The masking tape was used to lay out the positions of the deck rigging lines so I could drill the holes for the bolts and back fill with epoxy to seal the plywood.
I ordered paint and varnish but unfortunately the varnish was crushed in transit.
Offline
#30 26 Mar 2012 11:16 am
- Navin
- Member
- Registered: 25 Aug 2011
- Posts: 39
Re: Wood Duck 12
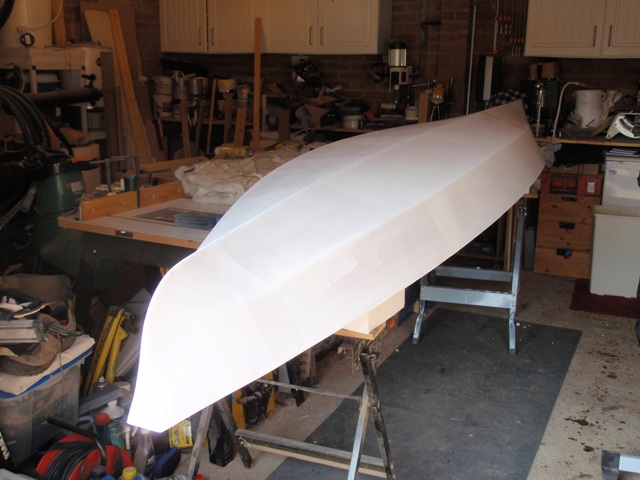
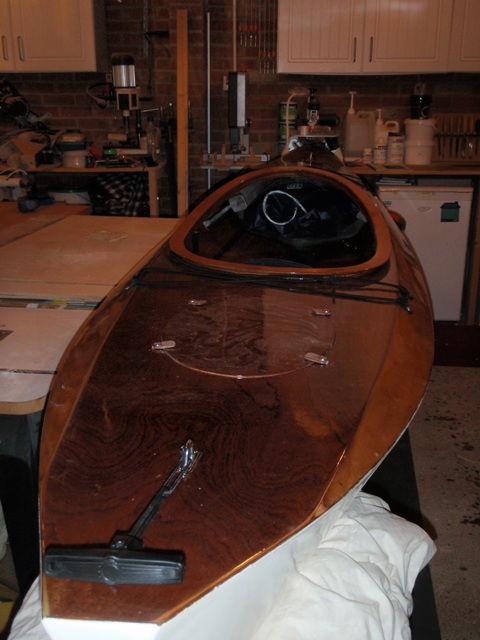
Made good progress this weekend; undercoated hull, made footbrace mounts and installed them, first coat of paint.
hull sanded and undercoated

footbrace fixed to a scrap piece of plywood from the forms in the kit (precoated with epoxy)
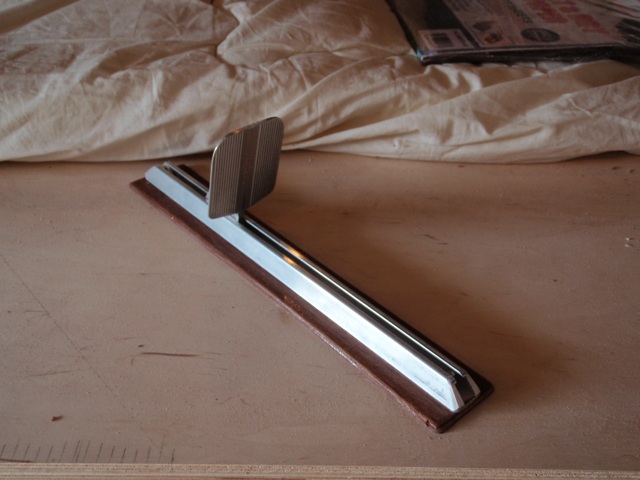
footbrace assembly
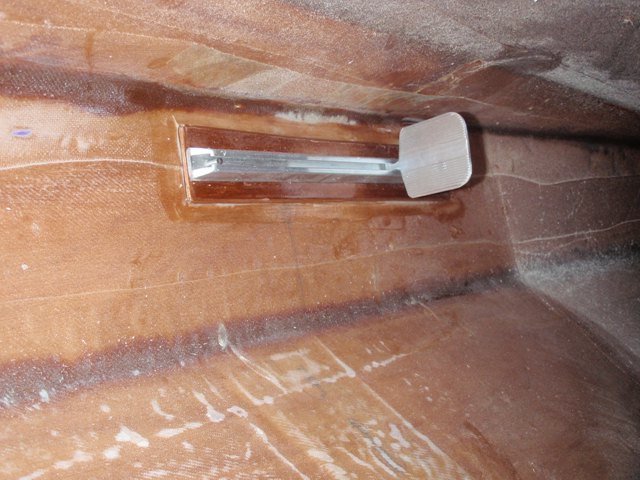
fittted to hull with thickened epoxy, this will be reinforced with strips of tape (pcture highlights my poor glassing technique when I glassed cockpit floor)
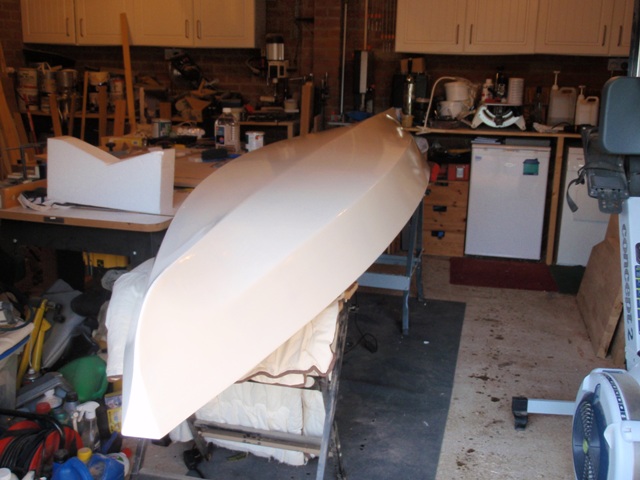
first coat of gloss
Offline
#31 26 Mar 2012 9:57 pm
- beaker
- Member
- Registered: 9 Oct 2011
- Posts: 81
Re: Wood Duck 12
Lovely looking lines with the paint there. I'm thinking of doing mine in an ivory colour - which paint did you use?
I'll copy that footbrace mount style, it looks neater than I had in mind.
Offline
#32 27 Mar 2012 10:37 am
- Navin
- Member
- Registered: 25 Aug 2011
- Posts: 39
Re: Wood Duck 12
Hi Beaker,
as the holes in the footbraces are threaded the braces are now permanently fixed i.e. I cannot remove them. In hindsight I should have drilled the rails out so that the threaded screws push through the rails then added a nut to hold the rails on if you get my drift.
CLC in the US do a set of threaded studs which can be simply epoxied to the inside of the hull which is probably a more elegant solution.
The paint I have used is Ivory white from Fyne, it is more white than ivory which is what I wanted. It went on well with a foam brush and the finish is pretty good even with just the first coat.
Navin
Offline
#33 27 Mar 2012 11:31 pm
- beaker
- Member
- Registered: 9 Oct 2011
- Posts: 81
Re: Wood Duck 12
Hi Navin, thanks for the tip. Looking for the clc style bolts, I found Hall-fast do them. Then I found a pic of a nut embedded in thickened epoxy, and thought there must be a real engineering solution here. Now, I've just found these
http://www.hall-fast.com/bighead_products.asp?CAT=1
Female threaded collars could slip through a drilled out hole, then take a 316 Allen bolt for a really trick finish. It's probably over engineered for a footbrace, but then if we just wanted a thing that floats we wouldn't build our own!
They also have a range of fancy quick release fasteners, which sets me off thinking about hatch holdown methods. I should probably stop before I buy a bagfull of gold anodised qr goodies and accidentally turn a beautiful boat into a 1997 BMX...
Offline
#34 28 Mar 2012 7:54 am
- Navin
- Member
- Registered: 25 Aug 2011
- Posts: 39
Re: Wood Duck 12
Beaker
thanks for the link. I've been considering the options for the hatch lid, I am not that keen on the ply toggles (although I have been epoxying and sanding them in preparation) and I've been looking at the internal bungee arrangement. Most recently I've been considering small neodymium magnets.
Navin
Offline
#35 2 Apr 2012 11:00 am
- Navin
- Member
- Registered: 25 Aug 2011
- Posts: 39
Re: Wood Duck 12
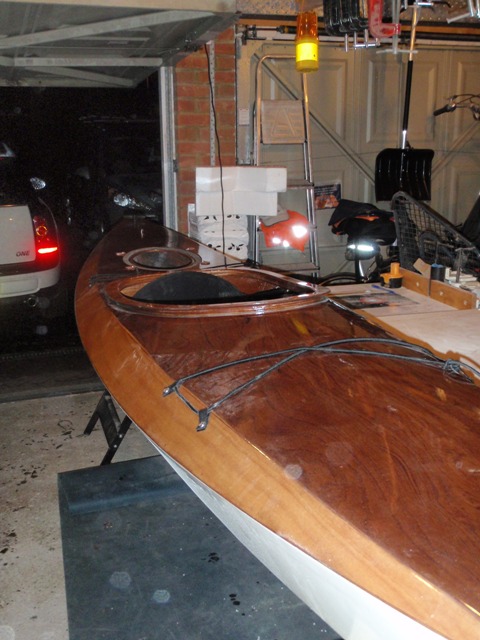
Busy weekend;
Friday, sand, second coat of paint
Saturday, sand third coat of paint on the hull

Sunday, sanded the deck to 400 grit, masked the hull (in case of drips or runs) and got the first coat of varnish on.
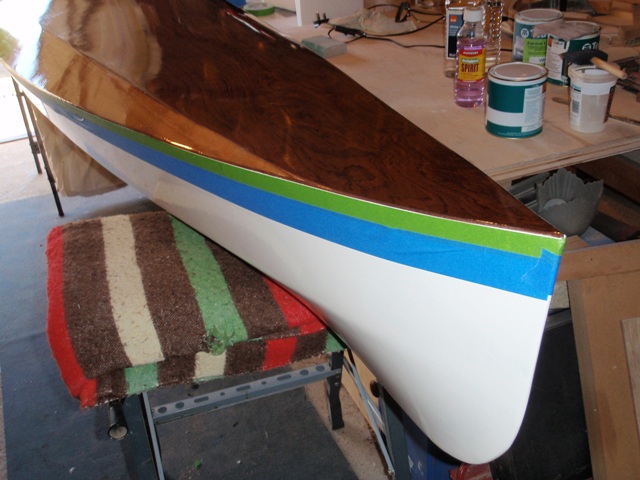
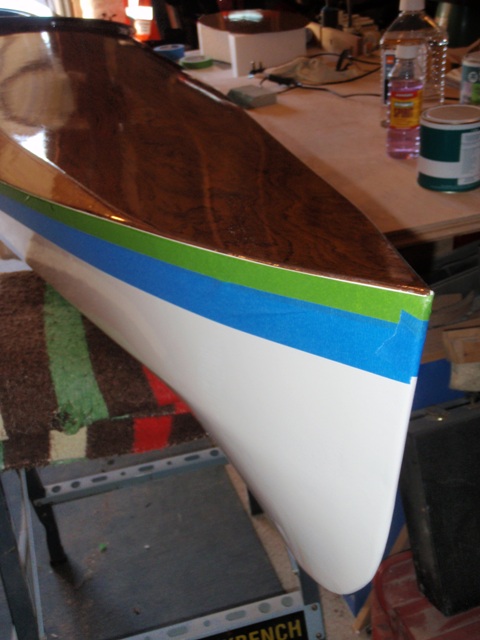
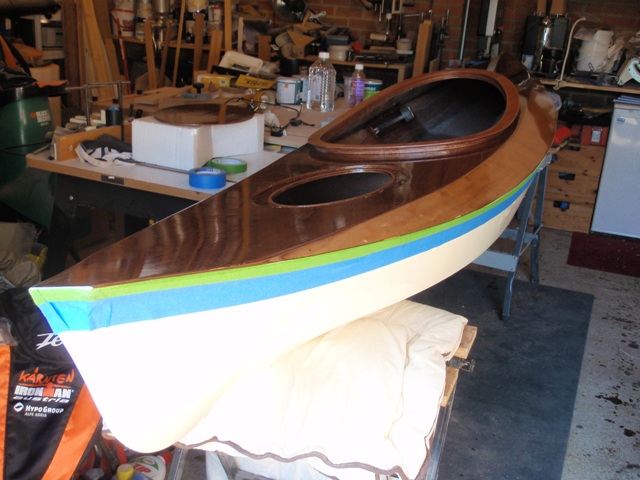
I actually like the Blue/green stripe
Offline
#36 2 Apr 2012 7:02 pm
- Phil
- Employee

- Registered: 8 Jun 2011
- Posts: 74
Re: Wood Duck 12
Wow! It's looking really good. I hope you have found the varnish easy to use, as that's why we supply it. Great finish and is relatively easy to use and no agressive solvents in it.
I also think your footbraces will be fine. They are adjustable, and if you ever wanted to remove them, you can relatively easily by cutting the block out with a multi-tool or similar.
What have you decided for the hatches? The internal bungee works ok, but can be awkward getting your fingers underneath to unhook them. Also, don't forget the bouyancy bag for the bow just in case ![]() .
.
Offline
#37 4 Apr 2012 7:29 am
- Navin
- Member
- Registered: 25 Aug 2011
- Posts: 39
Re: Wood Duck 12
Thanks for the comments.
The varnish is very easy to use and goes on smoothly with a faom brush, no sags or runs.
I am still considering hatch fixings.
Buoyancy bag on order.
Offline
#38 4 Apr 2012 7:51 am
- Richard
- Member
- From: East Sussex
- Registered: 7 Jun 2011
- Posts: 75
Re: Wood Duck 12
If you have any tips for getting a varnished finish like that I would love to hear them. I use a two hand method suggested by fyne but I am not sure finish is as good as yours.
Beautiful
Canoe & Kayak Owner
Offline
#39 4 Apr 2012 10:50 pm
- beaker
- Member
- Registered: 9 Oct 2011
- Posts: 81
Re: Wood Duck 12
The white against the varnish looks really good. Great finish!
Offline
#40 5 Apr 2012 4:22 pm
- Dinky Doris
- Member
- From: Wales
- Registered: 25 Aug 2011
- Posts: 23
Re: Wood Duck 12
... I use a two hand method suggested by fyne but I am not sure finish is as good as yours.
What is this?
DD
Offline
#41 10 Apr 2012 11:26 am
- Navin
- Member
- Registered: 25 Aug 2011
- Posts: 39
Re: Wood Duck 12
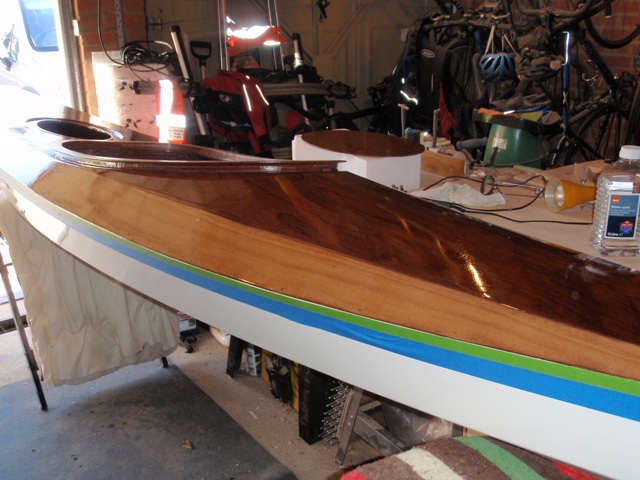
Nearly there, five coats of varnish on the deck;
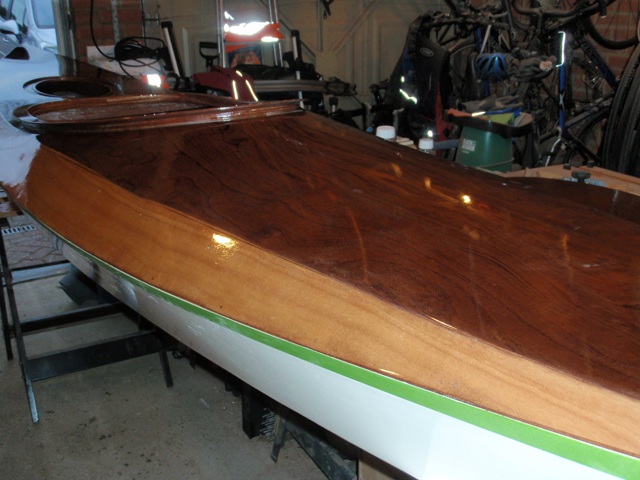
so that's three coats of paint on the hull and five coats of varnish on the deck.
The method I used for varnishing was
sand to 150 grit with regular sandpaper on random orbit sander
hand sand to 180 with abranet
hand sand to 240 with abranet
handsand to 320 with abranet
hand sand to 400 with abranet
apply varnish with 3" foam brush
first accross the deck two brush widths (6" wide) then tip off along the deck from dry to wet maintaining a wet edge
then next 6" across tip off along maintaining wet edge. This process is illustrated on the US CLC site in the "tips for boatbuilders" section
repeat until I reached the other end (I started at the bow and ended at the stern)
I let each coat dry for 24 hours then sanded with 400 grit, dusted off then tack cloth before the next coat.
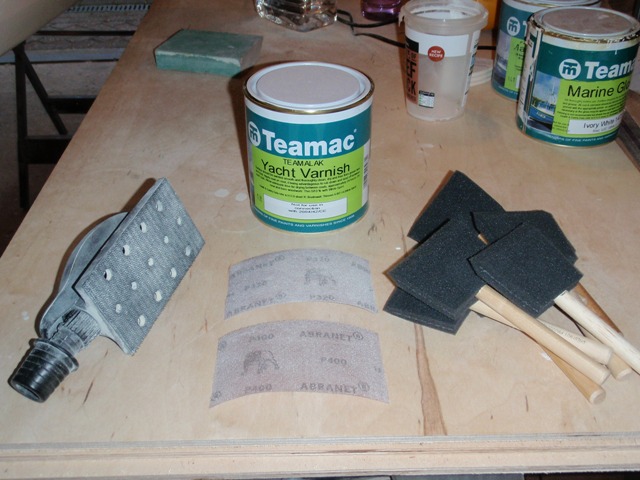
Varnish from Fyne
Foam brushes from tool shop
Abranet also from tool shop. Abranet is a net-based abrasive, it has velcro on the back side. It stays sharp longer than regular sandpaper. As it is a net it doesn't clog so fast and also it is great for sanding pads with dust extraction. It comes in rectangles and discs (for power sanders)
I used the abranet discs on my ROS to sand the epoxy dusring the build as well.
This weekend I will be outfitting the seat, back band, deck lines and toggles the hopefully be ready to launch.
Offline
#42 10 Apr 2012 1:24 pm
- fairplay
- Member
- Registered: 16 Jun 2011
- Posts: 109
Re: Wood Duck 12
This weekend I will be outfitting the seat, back band, deck lines and toggles the hopefully be ready to launch.
...good luck for your plans to launch this weekend!...
...will you do any painting/varnishing on the inside also?...didnt you have any problems with dust and stuff? - just asking because it looks like the place you did the paintjob in is open and used for other activities also...
...she looks really nice!...
'...so, how many kayaks do you really need?...' - '...one more!...'
Offline
#43 10 Apr 2012 1:45 pm
- Navin
- Member
- Registered: 25 Aug 2011
- Posts: 39
Re: Wood Duck 12
Hi Fairplay,
I plan to sand the cockpit interior and varnish. The inside is full of dust at the moment and it really shows in the photographs.
Also the cockpit area was my first ever attempt at using epoxy/glass cloth and it shows! Hopefully it will look better after a clean up and varnish.
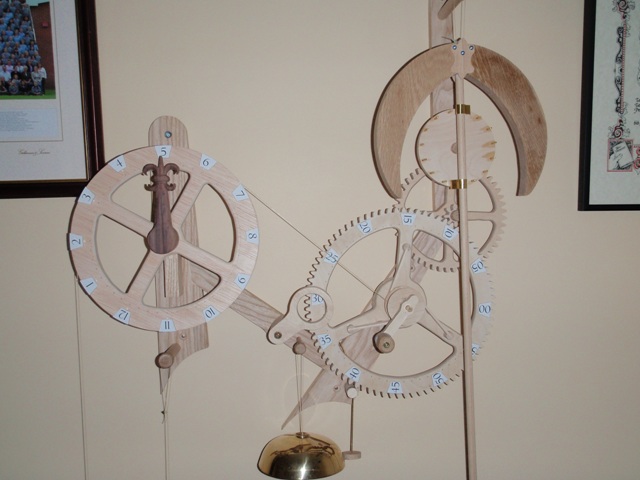
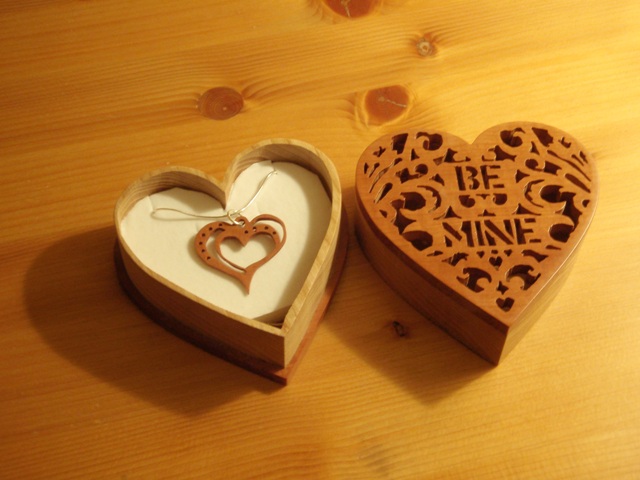
You are right about the garage space, it is a store for my bikes and associated triathlon paraphenalia, and is used as a workshop for other wood projects. When the temperature dropped around October the Duck was hung from the rafters and I moved onto some other projects that weren't as temperature sensitive such as an odd clock and something for Valentine's day (to keep my other half on board)
I left some time between sanding and varnishing and used a tack cloth, I didn't have a noticeable dust problem on the finish.
Offline
#44 16 Apr 2012 10:36 am
- Navin
- Member
- Registered: 25 Aug 2011
- Posts: 39
Re: Wood Duck 12
Almost done, started fitting out.
drill-fill-drill for all holes. I have made a start fitting the deck lines, backband and toggles. I am using turnbuttons for the hatch hold down as I don't have enough thickness in the hatch for the magnets I was going to use, I will use these in a future build.
Offline
#45 13 May 2012 10:35 pm
- Navin
- Member
- Registered: 25 Aug 2011
- Posts: 39
Re: Wood Duck 12
Finished and launched!
finally got some good weather, loaded onto the car

in the water
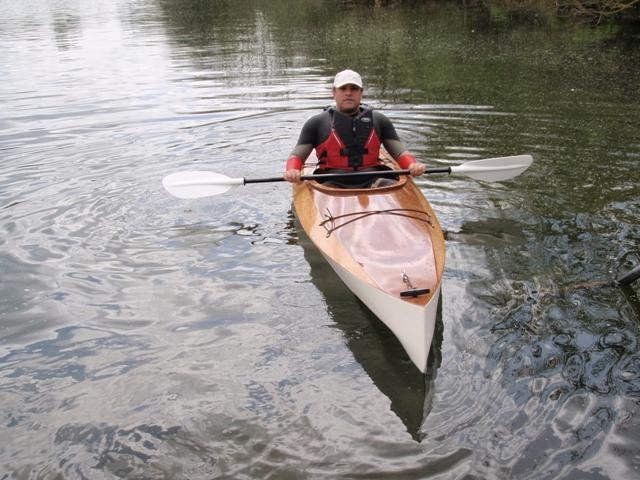
Leybourne Lake, Kent
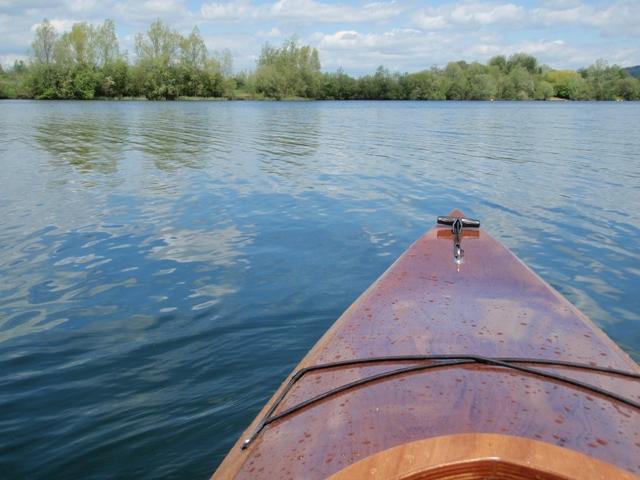
Sits well in the water
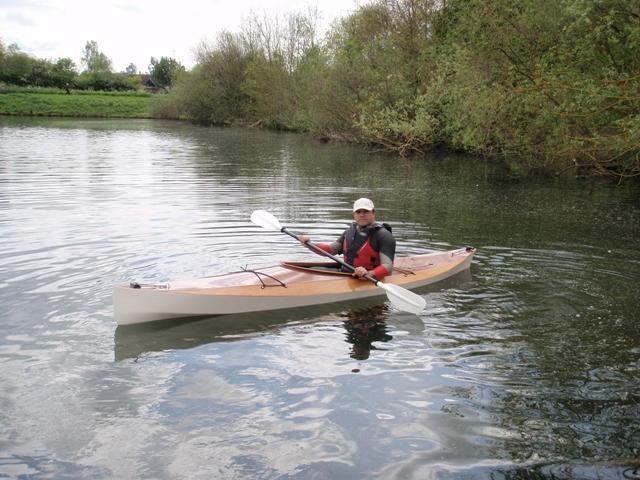
Looks like I might need longer paddles, time to craft some in wood I think.
Offline
#46 13 May 2012 10:38 pm
- fairplay
- Member
- Registered: 16 Jun 2011
- Posts: 109
Re: Wood Duck 12
...congratulations!...
'...so, how many kayaks do you really need?...' - '...one more!...'
Offline
#47 14 May 2012 10:01 pm
- Phil
- Employee
- Registered: 8 Jun 2011
- Posts: 74
Re: Wood Duck 12
Navin, really great job and well done! It's a great little kayak and I hope you like the feel of it? They perform miles better than you would expect for a 12' boat and they cruise really nicely. Well done and enjoy.
Offline
#48 15 May 2012 7:23 pm
- beaker
- Member
- Registered: 9 Oct 2011
- Posts: 81
Re: Wood Duck 12
Very nice. I like the pic of the water on the varnished deck.
Offline